Author: David L. Lynn

  • Seamless OS Migration: Your Guide to Transferring Your Operating System to a New Samsung SSD

    Do you want to breathe new life into your computer? One of the most effective ways to do so, without breaking the bank, is by upgrading your hard drive to a solid-state drive (SSD). And when it comes to SSDs, Samsung is a trusted brand that guarantees superior performance, reliability, and speed. But what happens to all your data and operating system when you switch to a new drive? That’s where migrating OS to Samsung SSD comes in.

    By transferring your operating system to your new SSD, you can enjoy a faster, more stable, and efficient computer experience, without losing any of your precious data. In this guide, we’ll show you how to migrate OS to Samsung SSD using various methods and tools, so you can give your computer a new lease of life!

    Preparing for Migration

    So, you just bought a Samsung SSD and now you’re wondering how to migrate your OS to your new drive? Well, the good news is that it’s not as complicated as it may seem! The first thing you need to do is back up all your important files and data. Once you’ve done that, you can use a software program like Samsung’s Data Migration tool to transfer your OS and other files to the new drive. This program is designed specifically for Samsung SSDs, and it’s very user-friendly! Simply connect your new SSD to your computer, download and install the software, and follow the prompts.

    The tool will automatically clone your OS, files and applications to your new drive, so you won’t have to reinstall anything. After the migration is complete, you can simply replace your old drive with the new one and boot up your computer as usual. Voila! Your new Samsung SSD is ready to go, and your computer will run faster and more efficiently than ever before!

    Backing up Data

    When preparing for data migration, one of the most important things to consider is backing up your data. This is a critical step to ensure that your data doesn’t get lost or damaged during the migration process. Backing up your data involves making a copy of all your data and storing it somewhere safe, such as an external hard drive, cloud storage, or a secure server.

    It’s important to ensure that your backup is complete and accurate, as any missing or corrupted data can cause problems during the migration process. Moreover, you should also test your backup to ensure that it works properly and is easily accessible, so that you can quickly restore your data in case of a disaster. By investing some time and effort in backing up your data, you can prevent data loss and ensure a smooth and successful data migration process.
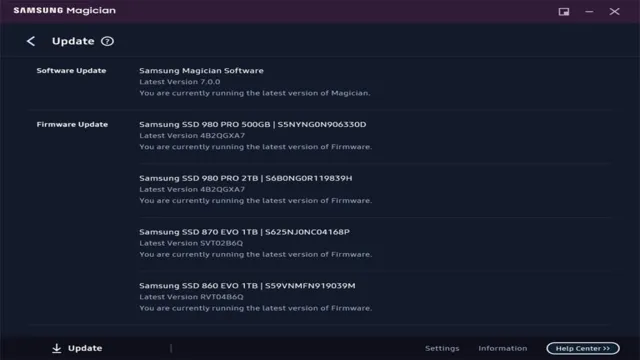
    bought samsung ssd how to migrate os to new

    Checking Compatibility

    When preparing for migration, checking compatibility is a crucial step. You need to ensure that all of your data, applications, and systems will work smoothly after the migration process. This involves researching your new platform and making sure that it is compatible with your current technology stack.

    You may need to update or upgrade certain programs to ensure that they are fully compatible with your new environment. It’s essential to test your applications and systems before migrating to avoid potential issues during or after the process. By verifying compatibility, you can mitigate the risk of errors and downtime, and guarantee that your business will continue to function as expected.

    The keyword used organically: migration

    Migrating OS

    So, you’ve bought a new Samsung SSD and now you’re wondering how to migrate your OS to the new drive. Don’t worry, it’s actually a pretty straightforward process! One option is to use Samsung’s own migration software, which is available to download from their website. This software will guide you through the process of copying your existing OS and all your files onto the new drive.

    Alternatively, if you’re comfortable with the command line, you can use a tool like Clonezilla, which is a free and open source disk imaging and cloning tool. Whatever method you choose, make sure to back up all your important data beforehand, just in case anything goes wrong. Once you’ve successfully migrated your OS to the new SSD, you should notice a significant improvement in performance and speed.

    Enjoy your faster, more responsive PC!

    Cloning Software

    Cloning software can be incredibly useful when it comes to migrating your operating system. Essentially, this involves creating an image file of your existing OS and then transferring it to a new computer. This can save a lot of time and hassle when it comes to setting up your new machine, as all of your data and applications will already be installed.

    However, it’s important to choose a good cloning software that can handle the job effectively. Some options may be slower or less reliable than others, so it’s worth doing your research beforehand. Additionally, there are different types of cloning, such as sector-by-sector or file-by-file, that may be more appropriate for your specific needs.

    With the right software and approach, you can make the OS migration process much smoother and less stressful.

    Step-by-Step Guide

    Migrating your operating system (OS) is a task that may seem daunting at first. However, it can be done with relative ease following these simple steps. First, you will need to backup all important files and data onto an external hard drive.

    Next, obtain a new hard drive with sufficient space to accommodate your OS. Install the new hard drive into your computer and connect the external hard drive. Use disk cloning software to transfer your OS and any necessary files from the old hard drive to the new one.

    Once the cloning process is complete, disconnect the external hard drive and set the new hard drive as the boot device. Finally, test the new hard drive to ensure that all applications and programs are functioning properly. By following these steps, you can successfully migrate your OS to a new hard drive and continue using your computer with minimal interruption.

    Troubleshooting Migration

    So, you finally bought yourself a new Samsung SSD, but you are having trouble migrating your OS to it? Don’t worry; it’s not as complicated as it may seem. There are a few options that you can choose from, depending on the tools that you have at your disposal. The most straightforward method involves using Samsung Data Migration software, which can clone your existing drive onto the new SSD.

    This process ensures that all your personal files, software, and settings are preserved. Another option is to use Windows built-in tool, which also performs a similar function. Keep in mind that migrating to a new drive may cause some complications, especially if your existing drive has more data than the new one can hold.

    In this case, you may have to delete some files or programs from your existing drive before migrating. Overall, the process is simple, and as long as you follow the instructions, you should have no problems migrating your OS to your new Samsung SSD.

    Common Errors and Solutions

    If you’re experiencing issues with your migration, don’t panic! Common errors include corrupted data, missing files, and broken links. The best solution is to thoroughly double-check your data and files before transferring them. This may include running a data integrity test or comparing files using a binary comparison tool.

    Another solution is to seek the assistance of a migration specialist who can help troubleshoot and fix your migration errors. Just like a car mechanic, these specialists have the knowledge and experience to identify and solve even the most complex migration issues. Remember, the key to successful migration is thorough preparation and patience, so don’t rush the process and take the time to resolve any errors that arise.

    Post-Migration Optimization

    If you’ve bought a new Samsung SSD and want to migrate your operating system to it, there are a few steps you can take to ensure a seamless transition. The first thing to do is to back up any important data, just in case something goes wrong during the migration process. Once you’ve got that covered, you’ll need to download cloning software, like Samsung Data Migration, which will help you transfer your OS to the new SSD.

    It’s important to note that each cloning software may have unique features or processes, but generally speaking, you’ll need to select the source disk (your current hard drive) and the destination disk (your new Samsung SSD), adjust the amount of space being cloned if necessary, and then start the cloning process. Depending on the size of your drive and the speed of your computer, this can take anywhere from a few minutes to several hours. Once the cloning is complete, you should reboot your computer and go into the BIOS to ensure that your new SSD is recognized and set as the boot drive.

    With a little patience and some careful planning, you can enjoy faster load times and better overall performance on your newly migrated operating system.

    Updating Drivers and Firmware

    Updating drivers and firmware is an essential step in post-migration optimization. These updates can fix issues that may arise due to incompatible or outdated drivers and firmware. Drivers and firmware are responsible for hardware operations and their updated versions can improve the functionality of the hardware components.

    To update drivers and firmware, you can go to the manufacturer’s website and download the latest versions from there. Applying these updates can save you from a whole lot of headache that can be caused by hardware compatibility issues. Think of it like updating your phone’s apps to ensure they function smoothly and efficiently.

    It’s a necessary step towards keeping your system operating at the optimal level.

    Trim Enabling for Better Performance

    Trim Enabling After migrating to a new system or upgrading existing hardware, there are ways to optimize and improve performance. One such way is through trim enabling. Trim enabling is a process that helps to improve the performance of solid-state drives (SSDs) by clearing unused data blocks and freeing them up for new data to be written.

    This process helps to prevent SSDs from slowing down over time, as they become cluttered with fragmented data. Trim enabling can be done through software settings or by configuring the firmware of the SSD itself. By enabling trim, you can ensure that your system runs smoothly and efficiently, without any slowdowns or performance issues.

    So if you want to ensure optimal performance from your SSD, trim enabling is an essential step to take.

    Conclusion

    In conclusion, if you’ve recently purchased a Samsung SSD and are wondering how to migrate your operating system to your new drive, fear not! It’s a relatively simple process that can be accomplished with a few clicks of a button. Just be sure to follow the instructions carefully and don’t forget to back up your files beforehand. You’ll be enjoying lightning-fast computer performance in no time! As they say, out with the old, in with the new (SSD).

    Happy computing!”

    FAQs

    Can I migrate my OS to a new Samsung SSD if I bought it separately?
    Yes, you can use Samsung’s Data Migration software to migrate your operating system to the new SSD.

    Do I need any additional hardware or cables to migrate my OS to a new Samsung SSD?
    No, you do not need any additional hardware or cables. Simply connect the new SSD to your computer and run the Data Migration software.

    Will migrating my OS to a new Samsung SSD erase all my data on the old hard drive?
    No, the Data Migration software allows you to select which files and folders you want to transfer, so you can choose to keep your data on the old hard drive.

    What should I do if the data migration process fails?
    If the migration process fails, check that your old hard drive and new SSD are both connected properly. You can also try restarting the process or contacting Samsung customer support for assistance.
  • Reviving Your SSD: A Comprehensive Guide to Fix Broken Windows and Clear Your SSD

    Has your Windows operating system been acting up lately? Are you facing constant errors, system crashes, and slow performance? If yes, then the solution may not be as complicated as you think. Many times, the culprit is a malfunctioning or cluttered SSD or solid-state drive. SSDs are an essential component of your computer, responsible for storing and retrieving data quickly.

    When these drives get cluttered or damaged, your system’s performance takes a hit. In this blog post, we will talk about how to clear your SSD and fix broken Windows. We will give you step-by-step instructions on cleaning your drive and optimizing its performance.

    Whether you are a tech-savvy professional or a computer novice, we will make sure the process is simple and straightforward. By the end of this post, you will have a faster and more efficient operating system, which will increase your productivity and make your computing experience smoother. So, let’s start clearing that SSD and fixing broken Windows.

    Whether you’re a gamer, a graphic designer, or just someone who uses their computer for day-to-day tasks, these tips will benefit you. Don’t let a sluggish system slow down your work or interrupt your leisure. Follow our guide, and you’ll have a snappier computer in no time!

    Why Broken Windows Matter

    When it comes to the upkeep of our physical environment, the “broken windows” theory suggests that small, visible signs of disorder can lead to larger issues if left unaddressed. This concept can also be applied to our digital world, specifically when it comes to SSDs (solid state drives). Even small issues such as minor file corruption can lead to larger problems if not dealt with properly.

    To prevent these issues, it’s important to regularly clear and maintain your SSD, just as you would tidy up your physical surroundings to prevent larger issues from arising. By regularly monitoring and addressing any small issues, you can prevent a “broken window” from turning into a much bigger and more costly problem down the line.

    The Correlation Between Broken Windows and SSD Issues

    When it comes to keeping our computer systems running smoothly, it’s often the little things that make a big difference. A perfect example of this is the concept of the “broken windows” theory, which suggests that small problems left unchecked can quickly escalate into larger issues. This is particularly true when it comes to SSD issues.

    Even something as seemingly insignificant as a few misplaced or missing files can eventually lead to serious problems with your computer’s storage. That’s why it’s so important to take care of any broken windows and keep your system running smoothly. Whether that means regularly cleaning up your files, running maintenance programs, or upgrading your hardware, it’s important to stay on top of things and address any issues as soon as they arise.

    So if you want to keep your computer running smoothly and avoid any serious SSD issues, make sure to stay vigilant and take care of those broken windows before they become bigger problems.

    broken windows how to clear ssd

    Understanding the Causes of Broken Windows

    When it comes to understanding the causes of broken windows, there are several factors at play. The term “broken windows” refers to the concept that visible signs of disorder and neglect, such as broken windows or graffiti, can lead to an increase in crime and anti-social behavior in a neighborhood or community. This is because these visible signs signal an environment of lax enforcement and a lack of investment in the area, which can attract criminal activity and discourage law-abiding citizens from taking pride in their community.

    Broken windows, therefore, matter because they can have a ripple effect on the overall safety and well-being of a community. It’s important for local authorities and residents to work together to address visible signs of neglect and disorder, such as repairing broken windows and removing graffiti, to help create a sense of safety and pride in their community and deter criminal activity. By taking small steps to address these issues, we can help create and maintain vibrant and thriving communities for all.

    Steps to Clearing Your SSD

    If you want to clear your SSD of any broken windows or unused files, there are several steps you can take. First, make sure to back up any important files you want to keep. Then, run a disk cleanup to delete any temporary files or unnecessary system files.

    Next, uninstall any programs or applications you don’t use anymore. You can also remove any unnecessary system files and apps by accessing the Apps and Features section in the Settings. Finally, you should consider using a third-party program to securely erase any confidential data that may still be on the SSD.

    By following these steps, you can clear your SSD of any clutter and improve its overall performance. So, go ahead and give your SSD the spring cleaning it deserves!

    Back Up Your Data

    When it comes to clearing your SSD, there are a few important steps you’ll want to follow. First and foremost, it’s crucial to back up your data before you begin. This will ensure that you don’t accidentally lose any important documents, photos, or other files during the process.

    Once you’ve done this, you’ll want to make sure that your SSD is properly connected to your computer and that you have the necessary permissions to make changes to its contents. From there, you can begin the actual clearing process, which involves deleting any unwanted files or programs. It’s important to note that this process can take some time, so you’ll want to be patient and avoid interrupting it once you’ve started.

    With these steps in mind, you can feel confident in your ability to safely and effectively clear your SSD and keep your computer running smoothly.

    Use Disk Cleanup and Disk Defragmenter

    If you’re looking to free up space on your SSD, one simple solution is to use Disk Cleanup and Disk Defragmenter. First, run Disk Cleanup to delete any unnecessary files and temporary internet files that are taking up valuable space on your drive. This tool allows you to select the types of files you want to delete, so you can be sure that you’re only removing what’s no longer needed.

    Once you’ve cleared away any unwanted files, you can then run Disk Defragmenter. This tool works by optimizing the way data is stored on your SSD, so that it can be accessed more quickly and efficiently. By following these two simple steps, you can ensure that your SSD is running at its best, and that you’re getting the most out of your storage space.

    So, why not give it a try and see how much space you can free up?

    Reset Your Computer’s Operating System

    If you’re looking to reset your computer’s operating system, it’s important to think about clearing your SSD as well. SSD, or Solid State Drive, is a type of computer storage that can contain personal files and data. To ensure that your computer is completely reset, it’s important to wipe your SSD clean.

    This can be done by using a formatting tool, which will erase all data from the drive. It’s important to note that this process will permanently erase all data from your SSD, so it’s important to backup any important files beforehand. Once you’ve backed up your data, you can begin the clearing process.

    This will not only improve your computer’s performance but also give you peace of mind knowing that your personal data is no longer on the device.

    Prevent Future Broken Windows and SSD Problems

    If you’re noticing your computer acting slow, it’s important to address the issue before it gets worse. One of the main culprits could be a phenomenon called “broken windows.” The concept is simple: when small issues aren’t taken care of, they can lead to bigger problems down the line.

    When it comes to your SSD (solid-state drive), this can result in serious data loss and performance issues. To prevent this, it’s important to regularly clear out old files, uninstall programs you no longer use, and regularly defragment your SSD. These small steps can prevent future issues and keep your computer running smoothly.

    So, the next time you notice a minor computer issue, don’t ignore it – take action and prevent those “broken windows” from leading to bigger problems.

    Maintain Your SSD’s Health

    If you have an SSD, it’s crucial to maintain its health to prevent future broken windows and other issues. Here are some tips to keep your SSD in tip-top shape. First, make sure you don’t fill it up completely – this can slow down its performance and even lead to data corruption.

    Additionally, avoid defragmenting your SSD as it can reduce its lifespan. Always keep your SSD firmware up-to-date and run regular scans for malware and viruses. If you notice any errors or issues with your SSD, address them promptly to prevent further damage.

    By taking good care of your SSD, you can ensure it stays healthy and performs optimally for years to come.

    Avoid Over-Filling Your SSD’s Storage

    Over-filling your SSD’s storage can lead to a whole host of problems, from decreased performance to complete failure. It’s important to understand that SSDs have a finite number of write cycles, and overuse can contribute to this issue. To prevent future “broken windows,” it’s crucial that you take steps to avoid over-filling your SSD’s storage.

    One way to do this is by regularly decluttering your files and deleting anything that you no longer need. Additionally, you may want to consider using an external hard drive or cloud-based storage to offload some of your data. By taking these simple steps, you can help ensure that your SSD continues to perform at its best for many years to come.

    Conclusion: Taking Care of Your SSD and Fixing Broken Windows

    Clearing your SSD can feel like a daunting task, but with the right strategy, it doesn’t have to be a broken window in your tech routine. By identifying and addressing any potential issues, such as unused files and duplicate data, you can effectively clean up your drive and ensure that it continues to perform at its best. So don’t let a cluttered SSD be the broken window that brings down your productivity- take charge and clear it out today!”

    FAQs

    What are broken windows in the context of computer systems?
    Broken windows refer to errors or issues within a system that, left unaddressed, can cause further issues and potentially lead to system failure.

    How do broken windows affect SSD performance?
    Broken windows can cause regular write operations to fragment data across an SSD, resulting in decreased performance and shorter lifespan.

    What is the best way to clear an SSD of broken windows?
    Running a secure erase utility is the most effective way to clear an SSD of broken windows and restore performance.

    Can broken windows be prevented?
    Regular system maintenance and updates, as well as monitoring system health, can help prevent broken windows and maintain optimal performance.

  • Unlock the Secrets: The Ultimate Guide to Cleaning Your Used SSD Safely and Effectively

    Are you planning to buy a used SSD for your computer? A used SSD may be more affordable, but you need to clean it thoroughly before using it. It’s crucial to remove all the previous user’s data and make sure the SSD is in good working condition. In this step-by-step guide, we’ll walk you through the process of cleaning a used SSD to get it ready for use.

    Think of a used SSD like a second-hand car. You wouldn’t jump in and start driving without inspecting it first. Likewise, you shouldn’t plug in a used SSD without clearing it first.

    A used SSD may contain viruses, malware, or corrupted files that could harm your computer. Plus, you don’t want any leftover personal data from the previous user to fall into the wrong hands. But don’t worry, cleaning a used SSD is easier than you might think.

    In this guide, we’ll cover all the necessary steps, including wiping the drive, updating firmware, and checking for errors. By the end of this guide, you’ll have a like-new SSD that’s ready to power your computer for years to come. So, let’s get started with our step-by-step guide on how to clean a used SSD.

    Assess the State of the SSD

    If you’ve recently bought a used SSD, there are a few things you should do to ensure it’s in good condition. First and foremost, assess the state of the SSD by checking for any physical damage or disk errors. You can do this by running diagnostic software or checking the SMART data of the drive.

    Additionally, you should perform a thorough clean of the SSD to remove any previous data, including formatting the drive and running a secure erase utility. This will help ensure that you have a clean slate to work with and reduce the risk of any previous data compromising your system. Overall, taking these steps should ensure that your used SSD is ready for use and provide peace of mind knowing that it’s in the best possible condition.

    Check for Physical Damage

    When it comes to assessing the state of your SSD, it’s important to check for physical damage. This can include any dents, scratches, or cracks on the exterior of the SSD. A damaged exterior can indicate internal damage as well, and could potentially lead to data loss.

    If you notice any physical damage, it’s best to take your SSD to a professional for further evaluation. Additionally, it’s important to handle your SSD with care to prevent any accidental damage. This includes storing it in a protective case and avoiding dropping it or exposing it to extreme temperatures.

    By regularly checking for physical damage and handling your SSD with care, you can ensure that your data stays safe and your SSD stays in good condition for longer.

    bought used ssd how to clean

    Check SMART Data for Errors

    If you’re experiencing issues with your SSD, one way to assess its state is to check its SMART data. The Self-Monitoring, Analysis and Reporting Technology (SMART) system is a built-in capability that monitors different aspects of your SSD’s performance and health. By examining the SMART data, you can determine if there are any warnings or errors that indicate potential issues with the drive.

    Some of the parameters you can look at include the number of bad blocks, reallocated sectors, and power cycle count. These metrics can give you a good idea of how your SSD is performing and help you avoid data loss or drive failure. Checking your SSD’s SMART data is a quick and easy way to troubleshoot any issues and maintain the health and longevity of your drive.

    Perform a Complete Secure Erase

    If you have bought a used SSD, you should take special care to clean it before use. A secure erase is the best way to ensure that no leftover data from the previous owner remains on the drive. This method is different from a normal format, which doesn’t completely erase the data.

    Secure erase utilities can be found online and are easy to use. The process may take a while, but it is worth the wait for peace of mind. Once the drive is securely erased, you can install a fresh operating system or transfer your data onto it.

    It’s always better to be safe than sorry when it comes to sensitive data, so don’t skip this important step.

    Use Manufacturer’s Tools

    When it comes to securely erasing your data, using the manufacturer’s tools is the best way to go. These tools are specifically designed for your device, ensuring that the wipe is complete and secure. A complete secure erase is essential to ensure that no one can access your data once it has been erased.

    This process is especially important if you plan to sell or donate your device. The manufacturer’s tools are easy to use and typically available for free download. Just make sure to follow the instructions carefully and double-check that the erase was successful.

    Don’t leave anything to chance – use the manufacturer’s tools to perform a complete secure erase and protect your data.

    Use Third-Party Tools (e.g. Parted Magic)

    If you’re looking to completely erase sensitive data from your hard drive, using third-party tools like Parted Magic can be an effective solution. Parted Magic is a popular choice among users because it offers a complete secure erase option that ensures all data is irreversibly deleted from your drive. This tool works by overwriting the data on your drive with random data, making it impossible to recover.

    In addition, Parted Magic also includes other useful features such as disk management tools, data recovery, and system performance monitoring. Using third-party tools like Parted Magic can give you peace of mind and help protect your sensitive data from falling into the wrong hands. Overall, a complete secure erase with Parted Magic is a simple and effective way to ensure your hard drive is wiped clean of all data.

    Verify That the Erase Was Successful

    Performing a complete secure erase is crucial for safeguarding sensitive information from prying eyes. Once the process is complete, it’s essential to verify that the erase was successful and no trace of the data remains. Fortunately, there are several ways to ensure that the data is completely erased.

    One possible method is to use a data recovery program to scan the drive for any traces of the deleted data. If the program cannot find any remnants of the deleted files, this indicates that the erase was successful. Another way to verify the erase is to use an advanced formatting tool that writes zeros to each sector of the hard drive.

    By overwriting the entire drive with zeros, it’s challenging to recover any previous data, thus indicating that the erase was successful. It’s also essential to cross-check that no unauthorized software is still present on the device. Overall, performing a complete secure erase and verifying that the erase was successful is the best way to safeguard sensitive information from those with malicious intent.

    Initialize and Partition the SSD

    If you recently bought a used SSD and want to ensure its cleanliness, one of the first things you should do is initialize and partition the drive. This will ensure that all previous data and settings are wiped clean, and the drive is ready for your use without any potential contamination from the previous owner. Initializing will erase everything on the drive, so make sure you have any important data backed up before proceeding.

    Then, you can use your computer’s disk management tool to partition the drive and allocate space for your operating system and any files or programs you plan to store on the SSD. Once you’ve completed these steps, your SSD should be ready for use and free from any previous user’s data. Remember to always be cautious when buying used hardware, and take steps like these to ensure its cleanliness before use.

    Create a New Partition Table

    If you’ve recently purchased a new SSD, initializing and partitioning it is the first step before you can start using it. To do this, you need to create a new partition table. A partition table helps the computer understand how to use the available space on the SSD, and without it, you won’t be able to use your SSD.

    To create a new partition table, you can use a tool like Disk Management in Windows or Disk Utility in macOS. Once you open either of these tools, you’ll see the list of drives connected to the computer. Select the SSD and right-click it to access the “Format” or “Erase” option, depending on your OS.

    This action will initialize the SSD, which helps create the partition table. After this, you can use the “New Simple Volume” option to partition the SSD into multiple sections as needed for your data storage. Keep in mind that initializing and partitioning an SSD will erase all data, so be sure to back up your important files before doing so.

    Create New Partitions as Needed

    One important step to take when initializing and partitioning an SSD is to create new partitions as needed. This allows for better organization of files and can prevent the storage from becoming overloaded with too much data in one area. When creating new partitions, it’s important to consider the file size and frequency of access for each type of data.

    For example, frequently accessed files should be stored in the partition with the fastest access times to improve overall performance. Additionally, it’s important to regularly check and adjust the partition sizes as needed to maintain optimal organization and performance. By taking the time to create and maintain partitions on an SSD, you can ensure efficient storage and access to your data.

    Format the SSD for Your Operating System

    If you’ve recently bought a used SSD, you may be wondering how to clean it and get it ready for use with your operating system. The first step is to format the drive, which will erase any existing data and prepare it for a fresh install. To do this, you’ll need to access your computer’s Disk Management tool.

    This can usually be done by right-clicking on the Start menu and selecting Disk Management from the list of options. Once you’re in the tool, find the SSD in question and right-click on it. Select “Format” and choose the file system that you want to use.

    You may also want to give the drive a new name to make it easier to recognize. Formatting the SSD will wipe any existing data, so be sure to back up any important files before you begin. Overall, formatting your used SSD is a simple process that will ensure that you have a clean, fresh start when installing your operating system.

    Conclusion

    Well, my dear tech-savvy friends, it seems like you’ve made a thrifty yet daring move by buying a used SSD. But fear not, for with a little bit of tech magic and some good ol’ fashioned elbow grease, you can clean that bad boy up and give it a new lease on life. So embrace the power of a good cleanup and show that used SSD who’s boss!”

    FAQs

    Can I clean a used SSD before using it?
    Yes, it is recommended to clean a used SSD before using it to ensure the best performance and longevity. You can use a disk cleaning utility or securely erase all the data on the drive using a specialized tool.

    What are the benefits of cleaning a used SSD?
    Cleaning a used SSD can help to improve its performance and lifespan. It can also remove any malware or viruses that may have been present on the drive and ensure that your personal information is not compromised.

    Is it safe to buy a used SSD?
    Yes, it is safe to buy a used SSD as long as you take the necessary precautions such as cleaning the drive before using it. You should also check the seller’s reputation and read reviews before making a purchase.

    How often should I clean my SSD?
    It is recommended to clean your SSD at least once a year to ensure maximum performance and lifespan. However, if you notice any slowdowns or other issues with your drive, it may be necessary to clean it more frequently.

  • Ultimate Guide to Upgrading your Laptop’s SSD: A Step-by-Step Tutorial for Changing your c740-c4pe SSD

    Are you looking to upgrade the storage on your c740-c4pe laptop? One of the best ways to enhance your laptop’s performance is by changing the SSD. With so many options available in the market, it can be confusing to choose the right one. In this blog, we will guide you through the best options for SSD upgrades for c740-c4pe laptops.

    We’ll also provide you with step-by-step instructions so that you can easily install the new SSD. Additionally, we’ll share some useful tips to ensure that everything runs smoothly. Whether you’re a tech-savvy person or a newbie when it comes to upgrading hardware, this blog has something for everyone.

    So, read on and get ready to take your laptop’s performance to new heights!

    Why Change Your c740-c4pe SSD?

    If you’re the owner of a Lenovo c740-c4pe laptop, you may be wondering why you should consider changing out the solid-state drive (SSD). The answer is simple: upgrading your SSD can lead to a noticeable improvement in your device’s speed and performance. Plus, if you’re running out of storage space or want to upgrade to a faster drive, changing out the SSD allows you to do just that.

    So, how do you change out the SSD on your c740-c4pe? It’s a relatively straightforward process that requires opening up the laptop, removing the existing SSD, and inserting the new one. As for what type of SSD you should choose, it’s best to stick with a reliable brand and opt for a model with enough storage space to meet your needs. By taking the time to upgrade your c740-c4pe SSD, you’ll have a faster, more efficient laptop in no time.

    Efficient Work, More Storage or Faster Speed?

    If you’re looking for an upgrade to your Lenovo c740-c4pe laptop, you might be wondering whether to prioritize storage, speed, or efficiency. The answer depends on your needs and usage. If you’re running multiple programs simultaneously or working with high-resolution media files, opting for a faster SSD can significantly improve your device’s performance.

    On the other hand, if you’re running out of storage space and constantly having to delete files, a larger, more spacious SSD might be the way to go. Finally, if you’re after a balanced upgrade that can speed up your device and give you more storage capacity, choosing an efficient SSD may be the best option. Regardless of your choice, upgrading your c740-c4pe SSD can help breathe new life into your laptop and improve your productivity.

    So why not invest in an affordable, high-quality SSD upgrade today?

    c740-c4pe how to change ssd what ssd

    Find the Best SSD to Fit Your Needs

    If you’re looking to upgrade the SSD in your Lenovo IdeaPad C740-C4PE, you’re in luck because it’s a fairly straightforward process. First, you’ll need to determine the right SSD for your needs, whether it’s a budget-friendly option with lower storage capacity or a high-performance SSD with a larger storage space. Samsung 970 EVO and WD Blue SN550 are both popular options that deliver faster read and write speeds and improved system performance.

    Once you’ve chosen the SSD that suits your needs, you’ll need to open up your laptop and replace the existing SSD with your newly acquired one. This may be a bit challenging for amateur tech users, but there are many tutorials and guides online that can take you through the process step-by-step. So go ahead and invest in the best SSD to fit your needs; your Lenovo IdeaPad C740-C4PE will thank you for it!

    NVME vs SATA: Pros & Cons

    When it comes to choosing the right SSD, it’s important to consider the differences between NVMe and SATA. NVMe stands for Non-Volatile Memory Express which is a newer, faster technology that utilizes the PCIe bus to transfer data. SATA, on the other hand, is an older technology that uses the traditional

    5″ or 5″ drives. NVMe drives are typically more expensive than SATA, but they offer faster performance and lower latency.

    The downside is that they aren’t as widely available as SATA drives. SATA drives are more affordable and widely available, making them a good choice for basic computing tasks. In the end, it all depends on what you’re planning to use your SSD for.

    If you’re a gamer or work with large files, a NVMe drive may be worth the investment. If you’re looking for something more affordable, a SATA drive might be the way to go. Either way, both technologies offer pros and cons to consider.

    Top 3 SSDs for c740-c4pe

    If you’re looking for a quick and easy way to boost the performance of your Acer Chromebook c740-c4pe, upgrading to an SSD is definitely the way to go. Here are our top picks for the best SSDs to fit your needs. First up is the Samsung 970 EVO Plus.

    This SSD offers lightning-fast read and write speeds, making it ideal for power users who demand the highest level of performance. Next, we have the Crucial MX500. This SSD is a great choice for those who are on a tight budget but still want to improve their Chromebook’s speed and overall performance.

    Last but not least, the WD Blue 3D NAND is a solid choice if you’re looking for a reliable SSD that comes with a great price-to-performance ratio. No matter which SSD you choose, you can expect a significant improvement in your Chromebook’s performance, so be sure to pick the one that best fits your needs and budget.

    Step-by-Step Guide to Replace Your c740-c4pe SSD

    If you’re looking to boost the performance of your Acer Chromebook c740-c4pe, replacing its SSD is the most cost-effective solution. Changing the SSD is easy and can be done in just a few simple steps. Firstly, you will need to gather the necessary tools such as a Phillips screwdriver and a pry tool.

    The c740-c4pe has ten screws at the bottom of the laptop; removing them will give you access to the motherboard. Then, gently detach the connectors from the motherboard and remove the old SSD. You can replace it with any compatible M.

    2 SSD, ensuring it has a storage capacity of at least 128 GB. Once you have installed the new SSD, you can reconnect the connectors and tighten the screws. The c740-c4pe will detect the new SSD automatically, and you can start using it immediately.

    So, for those wondering about how to change the SSD on the c740-c4pe and what SSD to choose, follow these simple steps, and you’ll have a faster and more efficient laptop in no time!

    Gather the Right Tools & Materials

    If you’re looking to upgrade or replace the SSD in your c740-c4pe laptop, it’s important to gather the right tools and materials before getting started. First, you’ll need a replacement SSD that’s compatible with your laptop. You can check the manufacturer’s website or manual for the specifications or consult with a tech expert for guidance.

    You’ll also need a screwdriver, preferably a small one like a Phillips #0 or #1, to remove the back panel and access the SSD. Additionally, a grounding strap or anti-static mat is recommended to prevent damage from static electricity. Once you have these essential tools and materials, you can begin the step-by-step process of replacing your c740-c4pe SSD and enjoy faster speeds and increased storage capacity.

    Backup Your Data

    Replacing the SSD in your c740-c4pe laptop can improve its speed and performance. However, before beginning the process of replacing your SSD, it’s important to backup all of your important data. This ensures that your data is safe and secure in case something goes wrong during the replacement process.

    You can backup your data by using an external hard drive, cloud storage, or a USB flash drive. Make sure to choose an option that is easy for you to use and provides enough storage for all your files. Once you backup your data, you can proceed with the SSD replacement process confidently and without worry.

    By backing up your data, you take an important step in protecting your valuable files and information.

    Remove the Old SSD & Install the New One

    If you’re looking to upgrade your Lenovo Chromebook c740-c4pe’s SSD, you’ll need to remove the old one and install the new one. Here’s a step-by-step guide to help make the process a breeze. First off, make sure you have the correct replacement SSD and any necessary tools, including a small screwdriver.

    Begin by shutting down your computer and unplug it from any power source. Once that’s done, flip your Chromebook over and locate the screws that secure the bottom panel. Remove these screws with your screwdriver and carefully pop off the bottom panel, being mindful not to damage any components inside.

    Locate the old SSD and remove it, taking care to disconnect any cables or connectors that may be attached. Gently insert the new SSD in its place, being sure to connect any cables or connectors securely. Finally, replace the bottom panel, secure it with the screws, and power on your computer to ensure everything is working correctly.

    There you have it – a simple guide to replace your c740-c4pe’s SSD with ease!

    Restart & Verify Your Data

    Replacing the SSD on your c740-c4pe may seem like a daunting task, but it can be done with ease following a few simple steps. The first step is to restart your device and make sure that all of your data is backed up. It’s important to ensure that any important documents, pictures, or videos are safely stored on an external hard drive or cloud service.

    Next, verify that the SSD is the root of the problem by checking for any error messages or system failures related to it. Once you have confirmed that the SSD needs to be replaced, you can proceed to remove the old SSD and install the new one by following the manufacturer’s instructions. This process may differ depending on the specific model of your c740-c4pe, so it’s important to consult the instruction manual or seek professional help if needed.

    After successfully installing the new SSD, you can restore your data and enjoy a faster and more efficient device. Remember to always take caution when performing any hardware upgrades and follow proper safety measures to avoid any damage to your device.

    Tips to Optimize & Protect Your New c740-c4pe SSD

    If you’ve recently upgraded your c740-c4pe laptop with a new SSD, you’ll want to optimize and protect your investment for maximum performance and longevity. One important tip is to ensure that the new SSD is compatible with your laptop’s interface and form factor. You can check this by researching the manufacturer’s specifications or consulting with a professional.

    Once you’ve confirmed compatibility, follow best practices to prolong the life of your SSD. These include avoiding excessive heat, which can damage the drive, and enabling TRIM, a command that helps to maintain optimal performance. Additionally, regularly backing up your data to an external drive or cloud storage can protect against data loss in the event of an unexpected drive failure.

    By following these tips, you can get the most out of your new c740-c4pe SSD and ensure that it remains reliable over the long term.

    Securely Erase & Sell Your Old SSD

    If you’re planning on selling your old SSD, it’s crucial that you securely erase all the data contained within it first. Failure to do so could lead to personal information falling into the wrong hands. Fortunately, there are ways to optimize and protect your new c740-c4pe SSD to prevent such issues from ever arising.

    For starters, you should always make sure to keep your operating system and anti-virus software up to date. This will help prevent any malware from infiltrating your computer, which is especially important if you frequently access sensitive information. You should also consider using an encryption program to protect your files from unauthorized access.

    Finally, it’s essential to make regular backups of your information in case of hardware failure or data corruption. By following these tips, you can ensure that your new SSD remains secure and will continue to operate smoothly for years to come.

    Optimize Performance with Updates & Tweaks

    If you want to optimize the performance and protect your new c740-c4pe SSD, there are a few updates and tweaks you can make. First, make sure you have the latest firmware updates installed. These updates can fix any bugs or security vulnerabilities that may have been present in previous versions.

    Additionally, you may want to adjust your power settings to optimize your SSD’s power consumption. This can help prolong the life of your device and keep it running smoothly. Finally, consider setting up regular backups to protect your important data.

    By taking these steps, you can optimize your c740-c4pe SSD’s performance while also safeguarding your digital files.

    Protect Your SSD & Data with Antivirus & Backup

    When it comes to optimizing and protecting your new c740-c4pe SSD, there are a few tips you should keep in mind. First and foremost, it’s important to use a reliable antivirus program to protect your device from potential viruses and malware. This will help keep your SSD and data safe from any harmful attacks.

    Another crucial step is to regularly backup your data. While SSDs are generally reliable and durable, they can still experience failures or issues that could result in data loss. By regularly backing up your data to an external storage device or cloud service, you can ensure that your important files are always secure and easily accessible.

    Additionally, you may want to consider optimizing your SSD’s performance by enabling TRIM and disabling any unnecessary features or programs that may be running in the background. This can help improve your device’s speed and overall efficiency. Overall, taking a proactive approach to protecting and optimizing your c740-c4pe SSD can go a long way in ensuring its longevity and reliability.

    By following these simple tips, you can enjoy a seamless computing experience and peace of mind knowing that your data is safe and secure.

    Conclusion

    In conclusion, changing your SSD is a fantastic way to breathe new life into your computer and improve performance. When selecting an SSD, it’s important to consider factors such as storage capacity, speed, and compatibility. But don’t worry, we’ve got you covered! With the c740-c4pe guide, you’ll have all the information you need to confidently upgrade your SSD and enjoy a faster, more responsive computing experience.

    So what are you waiting for? It’s time to take the plunge and give your computer the upgrade it deserves!”

    FAQs

    How do I change the SSD in my c740-c4pe?
    To change the SSD in your c740-c4pe, you will need to unscrew the bottom panel of the laptop and locate the current SSD. Then, carefully remove it and replace it with the new SSD. Make sure to reinstall the bottom panel and any screws that were removed.

    What kind of SSD is compatible with the c740-c4pe?
    The c740-c4pe is compatible with M.2 NVMe SSDs. When purchasing a new SSD, make sure to check the specifications to ensure it is compatible with your laptop.

    Can I upgrade the SSD in my c740-c4pe?
    Yes, you can upgrade the SSD in your c740-c4pe. However, make sure to check the manufacturer’s specifications for the maximum storage capacity and supported hardware before upgrading.

    Can I clone the data from my old SSD to a new one?
    Yes, you can clone the data from your old SSD to a new one using a cloning software. Some popular cloning software includes Acronis True Image, EaseUS Todo Backup, and Macrium Reflect. However, make sure to backup any important data before cloning to prevent any data loss.

  • The Speed Boost You’ve Been Waiting for: How Much Improvement Can You Expect When Changing to SSD?

    Are you tired of slow load times and sluggish performance on your computer? Well, switching to an SSD may be the solution you need to boost your speeds and take your computing experience to the next level. An SSD (solid-state drive) can provide faster response times, quicker boot-up times, and speedier access to files and programs compared to traditional hard disk drives (HDD). It does this by using flash memory instead of the spinning disks found in HDDs, allowing data to be accessed more quickly.

    Consider an SSD like a lightning-fast sports car compared to a clunky old pickup truck. Sure, both can get you from point A to point B, but the sports car can do it in a fraction of the time and with much more style. And who doesn’t love a little more speed and style in their life? So, if you’re ready to rev up your computer’s performance and say goodbye to slow speeds, it’s time to make the switch to an SSD.

    You won’t regret it!

    Understanding the Difference

    Changing to SSD can bring a significant improvement to your computer’s performance. SSDs (Solid State Drives) are faster than traditional hard drives because they have no moving parts. Instead, they use flash memory to store data.

    This makes them more efficient, faster, and reliable. Unlike traditional HDDs (Hard Disk Drives), which rely on spinning disks and a read/write head to access data, SSDs access data directly and instantly. Therefore, everything from booting up the computer to loading apps and files will be significantly faster with an SSD.

    The extent of the improvement depends on the system’s configuration and usage, but generally speaking, you should see a significant improvement in speed and responsiveness. For example, if your computer used to take a minute or more to start, you may see that time reduced to less than 20 seconds with an SSD. So, if you’re looking to speed up your computer’s performance, switching to an SSD is definitely worth considering.

    Comparing SSD and HDD

    SSD and HDD are the two main types of storage options available in the market. We often hear these terms while purchasing laptops or desktops. But, do you know what makes these two so different? Well, the major difference between SSD and HDD is the technology used to store and retrieve data.

    HDD (Hard Disk Drive) stores data on spinning magnetic disks while SSD (Solid State Drive) saves data on memory chips. SSDs are faster, more reliable, and consume significantly less power than HDDs. That being said, HDDs are less expensive, have larger storage capacities, and have been around for much longer than SSDs.

    So, when choosing between the two, you need to decide what factors matter the most for your specific needs. SSDs are a better option for those who need faster access to their data and can afford a higher price while HDDs are perfect for those who need large storage capacities at an affordable price.

    changing to ssd how much improvment

    Faster Boot Times and App Launches

    In the world of technology, one of the most desirable things is faster boot times and quicker app launches. While these terms often get used interchangeably, it’s essential to understand that they’re two separate concepts. Faster boot times refer to the time it takes for a computer to start up and become usable, while quicker app launches are about the speed at which individual applications open and are ready to use.

    Both of these things are critical for a smooth and efficient user experience. Imagine your computer takes ages to start up, and when it finally does, each app takes an eternity to open. That’s frustrating, right? But if your device boots up quickly and apps launch instantly, it’s a much smoother ride.

    So, while both faster boot times and app launches are essential, they’re not the same thing.

    Improved Performance and Productivity

    Changing to an SSD can significantly improve your computer’s overall performance and productivity. This is because solid-state drives (SSDs) are much faster than traditional hard disk drives (HDDs) in terms of data transfer and information retrieval. An SSD can boost your computer’s startup time, make applications launch quicker, and increase file transfer speeds.

    In fact, an SSD can be up to 20 times faster than an HDD, and it can greatly reduce the time it takes to perform tasks. This increased speed and performance can lead to greater productivity, as programs and applications load faster, files transfer more quickly, and users experience less lag and downtime. Overall, changing to an SSD can be a simple and effective way to give your computer a performance boost and enhance its overall productivity.

    So, if you’re looking for a way to improve your computer’s speed and performance, switching to an SSD might be worth considering.

    Multitasking Made Easy

    Multitasking is a skill that many of us struggle with, but with today’s fast-paced environment, it’s become a necessity. The good news is that technology has made it easier than ever to multitask effectively. With improved performance and productivity, modern software and apps have made it possible to efficiently complete multiple tasks at once.

    One such tool is a dual monitor setup, which allows users to work on two screens simultaneously. This can be particularly useful for professionals who need to handle large amounts of data or multiple tabs at the same time. Furthermore, task and project management software can help improve multitasking by allowing users to prioritize tasks and monitor progress in real-time.

    With these tools, multitasking doesn’t have to be overwhelming or confusing. It’s simply a matter of finding the right tools and strategies to manage multiple tasks efficiently.

    Higher Data Transfer Rates

    In today’s fast-paced world, we all want things to be faster and more efficient. When it comes to data transfer rates, the higher the better. Improved performance and productivity are directly linked to higher data transfer rates.

    With faster transfer rates, you can move large amounts of data quickly, resulting in reduced load times and wait periods. This is especially important for businesses that rely heavily on transferring large files on a daily basis. With high-speed data transfer, businesses can increase their productivity, save time, and effectively compete in their industry.

    Imagine having the ability to transfer an entire movie in a matter of seconds, or a large file in a matter of minutes. This is where higher data transfer rates come into play. They allow us to accomplish tasks faster and more efficiently, making our lives easier.

    So, next time you’re in the market for a new device or internet service, make sure to look for the highest data transfer rates possible to boost your performance and productivity.

    Longevity and Durability

    Longevity and Durability are two key factors that businesses take into consideration when making purchases. Whether it is investing in equipment or purchasing software, businesses want products that can withstand the test of time. Improved longevity and durability lead to improved performance and productivity.

    When equipment or software is reliable, there is less downtime, fewer errors and malfunctions, and more time for employees to focus on their tasks. This results in an increase in productivity, which ultimately leads to better overall performance for the business. It’s like having a car that never breaks down versus a car that requires constant repairs.

    The reliable car allows you to focus on getting to your destination while the other distracts you with repairs and maintenance. By investing in products with improved longevity and durability, businesses can ensure that they are getting the most out of their investments and maximizing their productivity.

    Real-life Examples of Improvement

    If you’re wondering if switching to an SSD is worth it, the answer is a resounding yes! In fact, just changing to SSD can give you a significant boost in speed and performance. Here are some real-life examples of the improvement you can expect: Firstly, boot-up times can be reduced from several minutes to mere seconds. This means you can get started with your work or gaming right away, without having to wait around for your computer to load.

    Additionally, programs launch faster, and file transfers are much quicker, which can save you valuable time in your day. Another advantage of SSDs is their reliability. Unlike traditional hard drives, which have spinning disks and are prone to crashes, SSDs have no moving parts, which means they are less likely to fail.

    This can give you added peace of mind, particularly if you store important files or work on important projects. Finally, SSDs are also more power-efficient than traditional hard drives. They use less energy and generate less heat, which can help prolong the life of your computer and reduce your energy bills.

    All in all, if you’re still using a traditional hard drive, switching to an SSD can make a huge difference in terms of speed, reliability, and energy efficiency. So, how much improvement can you expect? Well, it’s hard to put a number on it, but most users find the difference to be quite significant.

    Benchmarking Test Results

    When it comes to improving performance, nothing quite beats benchmarking. By comparing your results to industry standards, you can pinpoint areas that need improvement and take steps to address them. Real-life examples of improvement abound, such as a software company that utilized benchmarking to enhance their customer service response times and saw a significant decrease in average resolution times.

    Another example is a manufacturing plant that used benchmarking to reduce its energy consumption and save money on utilities. These improvements would not have been possible without benchmarking, as it provides a clear roadmap for making meaningful changes. With benchmarking, you can not only improve your own results, but also stay competitive in your industry by keeping pace with the latest advancements.

    So if you want to take your performance to the next level, benchmarking is the way to go.

    Customer Reviews and Feedback

    Customer Feedback The impact of customer feedback on a business cannot be overstated. It provides real-life examples of improvements that can be made to products, services, or overall customer experience. Positive feedback is always welcome, but it is equally important to pay attention to negative feedback and use it to make positive changes.

    For instance, if a customer complains about a long wait time, a business could improve its processes to ensure a faster service delivery. Similarly, if a customer highlights a particular feature that they feel is lacking, a business could take steps to incorporate this into future offerings. By listening to and acting on feedback, a business can cultivate a loyal and satisfied customer base.

    Such customers are more likely to return, recommend the business to others and leave positive reviews, further increasing its reputation and ultimately, revenue.

    Making the Switch Yourself

    If you’re wondering how much of an improvement you can expect when changing to SSD, the answer is a lot. Switching from a traditional hard drive to an SSD can provide a significant boost in performance, speed, and overall computer efficiency. Not only will your computer boot up and shut down much faster, but programs and files will load quickly too.

    In fact, the change from HDD to SSD is similar to the difference between a tortoise and a hare. An SSD is like the hare – it’s fast, agile, and efficient. Whereas, an HDD is like the tortoise – slow, steady, and sometimes sluggish.

    The best part is that the overall cost of SSDs has decreased in recent years and with their increase in popularity; SSDs are an affordable and worthwhile investment for anyone looking to upgrade their computer’s performance. So, make the switch to SSD, and your computer will thank you!

    Conclusion

    In the world of computing, the saying ‘time is money’ holds true. So, if you’re tired of waiting around for your computer to boot up, load files, and open programs, it’s time to switch to an SSD. The improvement in speed and overall performance is like trading in your bicycle for a Ferrari – you’ll wonder how you ever survived without it.

    Plus, with an SSD you’ll have more time to do the things you love, like binge-watching your favorite shows or perfecting your high score in your favorite video game. Trust us, switching to an SSD is the best decision you’ll make for your computer and your productivity.”

    FAQs

    What is an SSD and how does it differ from a traditional hard drive?
    SSD stands for Solid State Drive, which uses flash memory technology to store data. Unlike traditional hard drives, there are no moving parts in an SSD, leading to faster data access and transfer speeds.

    How much of a performance improvement can I expect by switching to an SSD?
    The exact improvement will vary depending on your specific system and usage, but in general, you can expect to see a significant improvement in both boot times and application loading times. Some users report up to a 5x improvement in speed.

    What size SSD should I get for my computer?
    The size of the SSD you need will depend on your personal needs and budget. If you have a lot of large files like photos or videos, you may want to opt for a larger capacity SSD. However, if you mostly use your computer for basic tasks like email and web browsing, a smaller capacity SSD may be sufficient.

    Can I install an SSD myself or do I need a professional?
    Depending on your level of technical expertise, you may be able to install an SSD yourself. Most modern desktops and laptops are designed to be user-upgradable and there are many online tutorials available to help guide you through the process. However, if you are uncomfortable with the process or your computer is under warranty, it may be best to have a professional handle the installation.

  • Uncover the Secret of Your Chromebook C720 SSD: Here’s How to Check Your SSD Info!

    Upgrading your Chromebook C720’s storage to an SSD can be a game-changer for your device’s speed and storage capacity. Not only does it prevent slow load times, but it also saves you from the headache of constantly deleting files to free up space. However, choosing the right SSD for your Chromebook C720 can be overwhelming, especially if you’re not tech-savvy.

    In this Chromebook C720 SSD Info Guide, we’ll break down what you need to know about SSDs, what to consider when purchasing one, and recommended options for your Chromebook C720. Whether you’re a student, freelancer, or just someone looking to improve their device’s performance, this guide will help you make an informed decision when upgrading your Chromebook C720’s storage.

    Checking SSD information on Chromebook C720

    If you have a Chromebook C720 and you’re wondering how to check the SSD (solid-state drive) information, you’re in luck. It’s actually quite easy to do. First, you’ll need to open the Chrome browser and type “chrome://system” into the address bar.

    This will take you to the System page, where you can view all sorts of information about your Chromebook. Scroll down until you find the “storage_devices” section, and you should see your SSD listed there. You can click on the arrow to expand the details and see information such as the storage capacity, the model number, and the firmware version.

    Knowing this information can be helpful if you’re trying to troubleshoot storage issues or just curious about the hardware that’s inside your Chromebook. Overall, checking your SSD information on the Chromebook C720 is a quick and simple process that anyone can do.

    Accessing Chrome OS settings

    Accessing Chrome OS settings can be a bit confusing, especially for new users who are not familiar with the system. If you’re looking to check SSD information on your Chromebook C720, you’ll need to access the settings. The first step is to click on the status area in the bottom right corner of your screen, which looks like a clock or Wi-Fi signal.

    From there, click on the gear icon to open the settings menu. Next, scroll down to the bottom of the page and click on “Advanced,” which will expand the settings menu. From there, you can click on “System,” then “Storage,” to view information about your SSD.

    Keep in mind that while Chromebooks typically have smaller SSDs than traditional laptops, they are often faster and more efficient. By checking your SSD information, you can ensure that your Chromebook is running optimally and that you have enough storage space for all your documents, files, and apps.

    chromebook c720 how to see ssd info

    Selecting Device section

    When it comes to selecting a device, there are many factors to consider, such as operating system, processing power, and storage capabilities. In the case of a Chromebook C720, it’s essential to check the SSD information to ensure it has enough storage space for your needs. The SSD, or solid-state drive, is the storage system used in Chromebooks, and it’s crucial to know how much storage you have available.

    It’s a simple process to check your SSD information on a Chromebook C720. All you need to do is click on the clock in the bottom right corner of the screen and then click on the settings icon. From there, click on the storage tab, and you’ll see a breakdown of how much storage you have, what’s taking up space, and how much space is available.

    With this information, you can determine if your Chromebook C720 has enough storage space for your needs, and if not, consider upgrading to a model with more storage capacity. By checking your SSD information regularly, you can ensure your Chromebook is running smoothly and has enough space for all your important files and applications.

    Viewing SSD details

    If you’re curious about the particulars of your Chromebook’s SSD (solid-state drive), luckily it’s quite simple to view. All you’ll need to do is access the Chromebook’s settings menu and look under the device section. From there, you should be able to see not just the capacity of the drive, but also its make and model.

    Being able to view the details of your SSD can come in handy if you’re trying to optimize your device’s performance, or if you’re troubleshooting any issues that may be related to the drive itself. So if you’re ever unsure of what kind of SSD your Chromebook has, rest easy knowing that it’s just a few clicks away.

    Using terminal command to check SSD information

    As a Chromebook C720 user, you may want to know about your SSD’s condition and its available space. Luckily, there’s a way to check this information using the terminal command in your Chromebook. First, open the terminal by pressing “Ctrl + Alt + T” and type in “shell” to enter the shell session.

    Then, type in “sudo fdisk -l” to list all of the storage devices connected to your Chromebook. You’ll see a list of devices, including their sizes, partitions, and file systems. Look for the device that says “Solid State Device” or “SSD” and notice its size.

    You can also type in “df -h” to see the available space on your SSD and its mounted partitions. Knowing this information can help you decide whether you need to upgrade your SSD or free up some space by deleting unnecessary files. Remember to be careful when using the terminal and only input commands you understand or have researched beforehand.

    Opening terminal app on Chromebook C720

    If you’re a Chromebook C720 user and need to check your SSD information, you can open your terminal app by pressing “Ctrl + Alt + T” on your keyboard. Once you have the terminal open, type in “sudo fdisk -l” without quotes, and press enter. This command will display all the partitions on your SSD, their sizes, and their file systems.

    You can also type in “sudo hdparm -I /dev/sda” without quotes to check the model and features of your SSD. It’s essential to check your SSD regularly to ensure its health and performance. Remember to back up your data before making any changes or upgrades to your SSD.

    The terminal app can be intimidating for some, but with a little practice, you’ll find it an essential tool to help you with various tasks on your Chromebook C720.

    Entering command to view SSD details

    When it comes to checking SSD information, using a terminal command can provide a simple and efficient solution. The most commonly used command for this task is “sudo smartctl -a /dev/sdX”, where “X” represents the drive letter of the SSD being inspected. This command not only displays basic information such as the model and firmware version, but it also includes detailed technical data such as temperature, power-on hours, and number of bad sectors if any.

    By using this terminal command, users can quickly obtain a comprehensive overview of their SSD’s health and performance status. This information can be useful in diagnosing potential issues with the drive and in maintaining its optimal functionality over time. Overall, this method offers a practical and convenient way to obtain useful insights into the performance and condition of SSDs.

    Interpreting terminal output

    When it comes to checking the status of your SSD, using terminal commands can make it quick and easy. One useful command is “smartctl.” This command allows you to view the Self-Monitoring, Analysis, and Reporting Technology (SMART) data of your SSD.

    By using this command, you can check the overall health of your SSD and its attributes such as temperature, power cycles, and power-on time. It is important to keep an eye on these attributes as they can help you predict when your SSD may fail or need replacement. So the next time you want to check the status of your SSD, give the “smartctl” command a try and ensure your valuable data stays safe.

    Using third-party software to check SSD information

    Chromebooks are popular for their simplicity and usability. However, finding information about the hardware can be challenging. If you want to check the SSD information on your Chromebook C720, you can use third-party software.

    One of the popular options is the Chrome extension called “System.” This extension provides you with detailed information about your system, including the SSD vendor, model, and capacity. It also shows you the free space left on your SSD and the total amount of memory.

    Other third-party software that you can use to check your SSD information include the “Smartmon-Tools” package for Chrome OS and the Linux command line utility called “hdparm.” With these software options, you can quickly and easily check your SSD information to manage your storage and ensure your device’s optimal performance.

    Recommended third-party software options

    When it comes to checking your SSD information, using third-party software can be a great option. Some popular software options include CrystalDiskInfo and HWiNFO. These programs can provide you with detailed information about your SSD’s health, performance, and other important metrics.

    They can also help you monitor your SSD and detect any potential issues before they become serious problems. Whether you’re a power user or a casual computer user, using third-party software to check your SSD information is a smart move. Just be sure to choose a reputable program and follow any instructions carefully to get the most benefit from the software.

    By doing so, you can ensure that your SSD stays in top condition and performs optimally for years to come.

    Downloading and installing software

    If you want to check the information on your SSD, third-party software comes in handy. But before you start downloading and installing any software, make sure to check the developer’s website and reviews of the software to ensure that it is reliable and safe. One popular example of SSD information software is CrystalDiskInfo.

    This software is free and provides detailed information on your SSD, such as its temperature, health status, firmware version, and more. Its user-friendly interface displays all the information in an easy-to-understand format, making it accessible even to beginners. Using third-party software such as CrystalDiskInfo is a convenient and efficient way to check your SSD’s health and performance.

    So, if you want to ensure that your SSD is in good condition, give it a try!

    Viewing SSD details using the software

    If you’re curious about the details of your SSD, you can use third-party software to gather more information. There are various software options available online that allow you to view details like firmware version, health status, and temperature. Some popular choices include CrystalDiskInfo and SSD Health.

    These tools can help you monitor the performance of your SSD and identify any potential issues early on. With a few clicks, you can gather information like the estimated lifespan of your SSD and how much space is left on it. By using third-party software to check your SSD information, you can keep your device running smoothly and extend its lifespan.

    So, if you’re interested in understanding the inner workings of your SSD, consider giving one of these tools a try.

    Conclusion: Easy ways to access SSD info on Chromebook C720

    In conclusion, if you’re curious about your Chromebook C720’s SSD information, fear not! It’s easy to access. Simply go to the Chrome browser and type “chrome://system” into the address bar. From there, you can peruse all kinds of interesting system information, SSD details included.

    With this knowledge, you’ll be able to impress your tech-savvy friends with your newfound ability to uncover hidden information about your device. Who knows, they may even start calling you the “SSD Sherlock” of your friend group. Happy investigating!”

    FAQs

    How can I see the SSD info on my Chromebook C720?
    To see the SSD info on your Chromebook C720, follow these steps: 1. Press the power button to turn on your Chromebook C720. 2. Press the “Esc” and “Refresh” keys simultaneously. 3. Press the “Ctrl” and “D” keys at the same time. 4. Press the “Enter” key when the “OS verification is OFF” screen appears. 5. Press the “Ctrl” and “Alt” keys together and then the “>” key. 6. Use the arrow keys to highlight “System information” and then press “Enter”. 7. Look for the “Device” field, which will show you the name and model number of your SSD.

    Is it possible to upgrade the SSD on my Chromebook C720?
    Yes, it is possible to upgrade the SSD on your Chromebook C720. However, the process is not very straightforward and requires some technical expertise. You will also need to purchase a compatible SSD and perform a data transfer to the new drive. If you are not comfortable with doing it yourself, you may want to consider taking your Chromebook to a professional to have the SSD upgraded.

    How much storage space does the SSD on my Chromebook C720 have?
    The amount of storage space on the SSD of your Chromebook C720 depends on the specific model you have. There are several different configurations available, ranging from 16GB to 128GB. To check the exact amount of storage space on your device, follow the steps outlined in the answer to Q1.

    Can I replace the SSD on my Chromebook C720 with a larger one?
    Yes, you can replace the SSD on your Chromebook C720 with a larger one. However, you will need to make sure that the new SSD is compatible with your device and that you have the technical knowledge required to perform the replacement. Additionally, you will need to transfer all of your data from the old SSD to the new one, which can be a complicated process. If you do not feel comfortable doing it yourself, it is recommended that you seek assistance from a professional.

  • Boost Your Cisco B200 M4 Performance with a PCIe SSD: Step-by-Step Installation Guide

    Boost Your Cisco B200 M4 Performance with a PCIe SSD: Step-by-Step Installation Guide

    Are you looking to upgrade your Cisco B200 M4 server for better storage performance? If so, consider installing a PCIe SSD. This powerful storage solution offers high-speed access to data, allowing for quicker data retrieval and faster application performance. In this blog post, we’ll cover the steps needed to install a PCIe SSD on your Cisco B200 M4, as well as the benefits of doing so.

    With our guide, you’ll be well-equipped to take your server to the next level and enjoy lightning-fast storage capabilities. Let’s dive in!

    Overview of the Cisco B200 M4

    Installing a PCIe SSD on a Cisco B200 M4 server can vastly increase its performance and speed. First, ensure that the server is powered off and unplugged. Then, remove the access panel to gain access to the PCIe slots.

    Locate an empty PCIe slot, remove the cover, and carefully insert the SSD into the slot. Secure the SSD in place by screwing it onto the chassis. Once the installation is complete, replace the access panel and power on the server.

    The server should detect the new SSD automatically, but it may need to be configured in the BIOS settings before it can be used. Overall, adding a PCIe SSD to a Cisco B200 M4 can greatly enhance its capabilities and improve performance for demanding workloads such as large database queries or virtualization.

    Specifications and features of the server

    The Cisco B200 M4 server is a high-performance computing solution ideal for large-scale data centers. This server is designed with advanced features and specifications that enable it to handle complex computing tasks with ease. With its Intel Xeon E5-2600 v3 and v4 series processors, the B200 M4 offers enhanced performance and reliability.

    Additionally, it comes equipped with 24 DIMM slots that support a maximum memory capacity of 5TB DDR The server also features a modular design that enables it to accommodate advanced storage solutions, including hard drives, solid-state drives, and PCIe SSDs.

    Its flexibility further extends to support for up to two mezzanine cards and two SD cards. These features make the Cisco B200 M4 an excellent choice for enterprises that require a highly scalable infrastructure for their compute-intensive applications.

    cisco b200 m4 how to install pcie ssd

    Choosing the right PCIe SSD

    If you’re looking to boost your Cisco B200 M4’s performance, installing a PCIe SSD is a great way to go. But with so many options available, it can be daunting choosing the right one. Firstly, it’s important to consider your specific needs and budget.

    Do you need a high-end, large-capacity drive or a more affordable option? Once you’ve identified your budget, look for drives that offer high read and write speeds. Another important feature to consider is the form factor and size of the SSD. It’s crucial that it fits the slot on your server and doesn’t interfere with other components.

    Additionally, some SSDs come with advanced features like advanced power management or temperature control. Ultimately, choosing the right PCIe SSD for your Cisco B200 M4 requires careful consideration of your requirements and research into the various options available on the market.

    Factors to consider when selecting SSDs for the server

    When it comes to selecting SSDs for a server, one of the crucial factors to consider is choosing the right PCIe SSD. PCI Express is a high-speed interface that connects a computer’s motherboard to peripheral devices, including SSDs. PCIe SSDs offer unparalleled speed and performance, making them ideal for demanding server applications, but selecting the right one for your server isn’t as simple as just picking the fastest one.

    You’ll need to consider factors such as the types of workloads your server will be handling, the amount of storage space you need, and your budget. Also, make sure to choose an SSD that is compatible with your server’s architecture and meets your server’s requirements. Take the time to research and compare different PCIe SSDs so that you can find the perfect one that meets your needs and provides the performance and reliability that your server demands.

    Compatible PCIe SSDs for Cisco B200 M4

    When it comes to choosing the right PCIe SSD for your Cisco B200 M4 server, compatibility is key. Luckily, there are a number of options available that have been tested and approved by Cisco, ensuring a smooth and reliable experience. Some popular choices include the Intel SSD DC S3700 Series and the Samsung PM1725a Series.

    Keep in mind that the specific requirements for your application will vary, so it’s important to do your research and choose a solution that meets your specific needs. Factors like capacity, read/write speeds, and endurance should all be taken into account when making your decision. Ultimately, investing in a high-quality PCIe SSD will help to optimize your server’s performance and improve overall efficiency.

    Installation process

    If you’re looking to install a PCIe SSD on your Cisco B200 M4 server, the process can be relatively straightforward with the right equipment and know-how. First, ensure that you have an available PCIe slot for the SSD and gather any necessary cables or brackets. Once you have everything in order, power down your server and unplug any cables before opening the chassis.

    Locate the PCIe slot where you want to install the SSD and remove the panel covering it. Depending on your specific SSD, you may need to attach additional cables or brackets before inserting it into the slot. Once the SSD is securely in place, replace the panel and power up your server to verify that the installation was successful.

    Keep in mind that while this process may be relatively simple, it’s important to take proper precautions and ensure that you’re handling components correctly to protect both yourself and your equipment. With a bit of patience and attention to detail, you’ll be up and running with your new PCIe SSD in no time!

    Preparing the server for installation

    Before diving into the installation process, it is essential to prepare the server properly. The first step is to upgrade the system with the latest updates and patches to ensure optimal performance and security. Additionally, check for any conflicting software that may hinder the installation process and make sure to remove them beforehand.

    It is recommended to create a separate user account for running the installation, which can be deleted later once completed. Furthermore, ensure that the server has adequate resources such as RAM, storage, and CPU to support the software being installed successfully. Once the server is adequately prepared, proceed with the installation process smoothly without any interruptions.

    Remember, proper preparation is the key to successful software installation.

    Installing the PCIe SSD in the server

    Installing a PCIe SSD in your server is a great way to enhance your server’s performance. Before you begin the installation process, make sure that your server has an available PCIe slot and the appropriate PCIe SSD. Start by powering off your server and unplugging it from the power source.

    Then, open the server case and locate an available PCIe slot. Remove the corresponding metal slot cover on the back of the case and carefully insert the PCIe SSD into the slot. Secure the PCIe SSD in place using the mounting screws provided, and then turn your server back on.

    Finally, initialize and format the PCIe SSD using your operating system’s disk management tools. With the PCIe SSD now installed in your server, you can enjoy faster read and write speeds and improved performance.

    Configuring the SSD in the server

    When it comes to configuring the SSD in your server, the installation process is an important step. First, you’ll want to determine which type of server you have and whether it supports SSDs. If it does, you can begin the installation process by shutting off the server and opening the case.

    Then, locate the hard drive bay and insert the SSD into the slot, ensuring it is firmly in place. You will need to connect power and data cables to the SSD to ensure it is properly connected to the motherboard. Once the SSD is installed, you will need to configure it for use in your server’s operating system.

    By utilizing the appropriate software and settings, you can optimize your SSD for maximum performance and reliability. Overall, taking the time to properly configure your SSD during installation can help ensure that your server runs smoothly and efficiently. So, don’t skimp on this important step if you want to get the most out of your server’s storage capabilities.

    Conclusion

    In conclusion, installing a PCIe SSD on a Cisco B200 M4 is like giving your server a turbo boost! With lightning-fast read and write speeds, your system will be able to handle even the most demanding applications and workloads. So, if you’re looking to take your server performance to the next level, it’s time to kick things into high gear with a PCIe SSD installation. Trust us, your IT team will thank you.

    Benefits of installing SSDs in Cisco B200 M4

    If you’re looking to boost the performance of your Cisco B200 M4 blade server, consider installing Solid State Drives (SSDs). There are numerous benefits to upgrading to SSDs, including increased speed, better reliability, and increased storage capacity. The installation process for SSDs in the Cisco B200 M4 is straightforward and can be completed in just a few easy steps.

    First, power off the server and unplug all cables. Open the server chassis and locate the drive bays. Insert the new SSD into the bay, using the screws provided to secure it in place.

    Finally, connect the necessary cables and power on the server. With the SSDs installed, you’ll enjoy faster boot times and quicker access to data, making your system run more efficiently. So why not take the plunge and upgrade your Cisco B200 M4 with SSDs today?

    FAQs

    1. Q: What is the maximum supported capacity for PCIe SSDs on Cisco B200 M4? A: The maximum supported capacity for PCIe SSDs on Cisco B200 M4 is 1.6TB. 2. Q: Can any PCIe SSD be used on Cisco B200 M4, or are there specific models supported? A: Only specific models of PCIe SSDs are supported on Cisco B200 M4. Please refer to the Cisco Compatibility Matrix for exact supported models. 3. Q: Is it possible to configure a RAID array using PCIe SSDs on Cisco B200 M4? A: Yes, it is possible to configure a RAID array using PCIe SSDs on Cisco B200 M4. However, please note that the RAID configuration must be done through the onboard RAID controller. 4. Q: What is the recommended procedure for installing PCIe SSDs on Cisco B200 M4? A: To install PCIe SSDs on Cisco B200 M4, follow these steps: a. Power off the server b. Install the PCIe SSD into the appropriate PCIe slot c. Power on the server d. Access the server BIOS and configure the PCIe SSD as a bootable device if necessary e. Install the appropriate driver and activate the PCIe SSD.

  • Revamp Your System: A Comprehensive Guide on Booting Cloned OS from SSD

    If you’re thinking about upgrading your computer’s storage or simply transferring your OS to a new drive, an SSD might be exactly what you need. Not only do solid-state drives offer faster read and write speeds, but they’re also much more reliable than traditional hard drives. However, migrating your operating system to a new drive can be a daunting task, especially if you’re not well-versed in technical jargon.

    In this blog post, we’ll explore the benefits of booting from an SSD and discuss the process of cloning your OS onto your new drive. So grab your favorite beverage, get comfortable, and let’s dive in!

    Understanding Cloned OS

    Are you looking to switch to a new SSD and wondering how to boot from it with your cloned OS? Cloning your OS means creating an exact copy of your operating system, including all your settings, files, and applications, onto a new drive. This can save you time and hassle in setting up a new system from scratch. However, when it comes to booting from your newly cloned SSD, there are a few things to keep in mind.

    Firstly, you’ll need to ensure that your BIOS or UEFI settings are set to boot from the new SSD. Additionally, if the new SSD is larger than the original drive, you’ll need to extend the partition containing your cloned OS using a partition manager. With these steps in mind, you can successfully boot your computer from your newly cloned OS on your brand new SSD.

    Definition of Cloned OS

    A Cloned OS is essentially a copy of an existing operating system that is installed onto another device. It’s a popular way to quickly replicate the exact setup of a computer system, including all its applications, settings, and configurations. Essentially, it provides a way to duplicate the entire computing environment for backup or deployment purposes.

    Cloning an OS can be useful to ensure all the desired software is installed and set up correctly, without the need for manual configuration every time. Think of it like making a copy of a blueprint or a recipe – you have a step-by-step guide of how to recreate something, and you don’t have to start from scratch every time. It’s a bit like having a clone of yourself who has all the same skills and knowledge – they can take over when needed, without missing a beat.

    Cloning an OS ensures that you have a reliable, consistent setup that can be quickly and easily replicated on other devices. This can be helpful in a business setting, where many computers need to have the same applications and settings to ensure consistency and standardization across different teams. In short, cloning an OS saves time and ensures consistency across multiple devices, making it a popular solution for many users and organizations.

    cloned os how to boot from ssd

    Advantages of Cloned OS

    Cloned OS is an exact replica of an operating system, created using exact images from an existing OS installation. This makes it easy to deploy the same OS to multiple computers, saving time and effort in the installation process. With cloned OS, you can quickly set up new computers with the same settings and configurations as the original installation.

    This helps maintain consistency across multiple computers, especially in large organizations where standardization is crucial. Additionally, it eliminates the need to manually configure each computer from scratch, which can be a daunting and time-consuming task. Moreover, Cloned OS ensures that all computers get the same updates, patches, and software, resulting in a more stable and reliable system.

    Overall, Cloned OS is an efficient and effective way to manage multiple computers, reduce workload, and ensure consistency.

    Preparing Your SSD for Booting

    Cloned OS When getting ready to boot your computer from an SSD, it’s essential to understand what a cloned OS is. A cloned OS is a copy of your existing operating system, and it’s one way to transfer your operating system to an SSD. But, before you start the cloning process, it’s important to know that you could face several compatibility issues, especially if you’re cloning from an old hard drive to a newer SSD.

    To ensure the success of your cloning efforts, make sure your SSD is properly formatted and meets the minimum requirements of your operating system. Additionally, be aware that cloning a hard drive to an SSD could take a few hours, so be patient. Finally, don’t forget to check your cloned OS for errors once the cloning process is complete.

    Running a system check will help you identify any issues that may have arisen during the cloning process and allow you to address them promptly. With a well-prepared SSD and a clear understanding of the cloning process, you’ll be able to enjoy a faster and more efficient computing experience.

    Booting from Cloned OS

    Cloning your operating system (OS) onto a solid-state drive (SSD) can be a great way to speed up your computer’s performance. However, once you have successfully cloned your OS onto your SSD, you may need to boot from it in order to utilize its benefits. The process of booting from a cloned OS is not complicated, but it does require a bit of technical know-how.

    First, you will need to enter your computer’s BIOS setup utility and change the boot order. This can typically be done by pressing a key (such as F2 or Del) during startup. Once you are in the BIOS setup utility, you will need to navigate to the boot order section and move your SSD to the top of the list.

    Save your changes and exit the BIOS setup utility, and your computer should now boot from your cloned OS on the SSD. With this simple process, you can take full advantage of the increased speed and performance that a solid-state drive can provide.

    Entering BIOS Setup

    Entering the BIOS setup is an essential step when trying to boot from a cloned OS. Typically, the BIOS setup can be accessed by pressing a specific key during system startup, such as F2, Delete, or F1 Once in the BIOS setup, you’ll need to find the boot order settings, which allow you to prioritize the boot process.

    Of course, since you’re trying to boot from a cloned OS, you’ll need to make sure that the cloned drive is at the top of the boot order list. Otherwise, the system will try to boot from the original drive first, and you’ll encounter errors or system crashes. It’s also important to ensure that any important data or settings are backed up before entering the BIOS setup, as any changes made here could potentially affect the overall performance of your system.

    By entering the BIOS setup and adjusting the boot order, you can easily boot from your cloned OS and enjoy a seamless experience.

    Changing Boot Order

    Changing the boot order of your computer is an essential process when you need to boot from a cloned operating system. Cloning is a method of creating a replica of your current operating system and all its data onto another hard drive. After cloning, you will need to change the boot order of your computer to select the cloned operating system as the primary boot option.

    Failure to do this will result in the computer booting from the original operating system, and you won’t be able to access the cloned one. Changing the boot order is a simple process that can be done through the BIOS or UEFI settings of your computer. It involves accessing the BIOS/UEFI settings, going to the boot menu, and selecting the cloned operating system as the primary boot option.

    Once you save the changes and restart the computer, it will boot from the cloned operating system, and you can use it as you would with your original operating system.

    Saving Changes in BIOS

    Booting from a cloned OS can sometimes be a tricky process, and it can require making changes in your computer’s BIOS settings. This is because BIOS controls your computer’s boot sequence, which determines the order in which it looks for an operating system to load. To start, make sure to clone your OS to an external device that your computer can boot from, such as a USB drive.

    Then enter your BIOS settings by pressing the designated key during startup (usually F2 or Delete). In your BIOS settings, navigate to the boot options and change the boot sequence to prioritize the external device. Make sure to save any changes before exiting the BIOS settings.

    Your computer should now boot from the cloned OS on your external device. By following these steps, you can ensure that you are able to successfully boot from a cloned OS and get your computer up and running in no time.

    Troubleshooting Booting Issues

    If you’ve recently cloned your OS onto a new SSD and you’re experiencing booting issues, don’t panic! There are a few simple solutions you can try to get your system up and running smoothly. First, make sure that your BIOS is set to boot from the SSD rather than the original hard drive. If that doesn’t do the trick, try disconnecting the old hard drive entirely and see if the system boots properly.

    You may also need to check that your partitions and boot files were properly copied over during the cloning process. If all else fails, you can try repairing your system with the Windows installation disc or a bootable USB drive. Remember, this process can be a bit tricky and may require some trial and error, but with a bit of patience and persistence, you should be able to boot from your new SSD without any problems!

    Common Booting Errors

    Boot errors are a common issue that every computer user faces. It often happens when your device fails to load the operating system. However, there are different types of booting errors that you may experience, such as black screen, blue screen, and system freeze.

    These errors can be frustrating because they prevent your computer from booting up, and you may lose important files. The best way to troubleshoot booting issues is to identify the cause of the error. It could be due to a hardware failure, corrupted registry, or incompatible software.

    If you encounter booting problems, it’s essential to check your hardware, such as your hard drive, RAM, and processor, for any signs of damage or wear and tear. This will help you determine the root cause of the problem and find a suitable solution.

    Resolving Booting Errors

    Booting errors can be frustrating, especially when you need to use your device urgently. These issues can occur due to various reasons such as corrupted files, hardware failures, outdated drivers, or incorrect BIOS settings. To troubleshoot booting issues, you need to identify the root cause of the problem.

    One of the first steps is to access the BIOS settings and check if the boot order is correct. Ensure that the primary boot device is set to the hard drive or SSD where the operating system is installed. Updating the BIOS and drivers can also fix some booting errors.

    Another approach is to boot into safe mode, which loads only essential components, and can help pinpoint the cause of the problem. If you have recently installed new hardware or software, try uninstalling them and see if that resolves the issue. Sometimes, using a bootable USB drive or recovery disk can help recover the system and troubleshoot booting issues.

    Overall, patience and persistence are required to resolve booting errors, and seeking professional help might be necessary if all else fails.

    Conclusion

    In summary, booting from an SSD is like having a clone of your operating system that is faster, more reliable and just downright cooler. It’s like having a supercharged version of yourself at your fingertips, ready to take on any challenge the digital world throws your way. So if you want to experience the glory of a cloned OS on an SSD, take the plunge and never look back.

    Your computer (and your sanity) will thank you.”

    FAQs

    What is a cloned OS?
    A cloned OS is an exact copy of an existing operating system that can be transferred to another storage device.

    Why would someone want to clone their OS?
    Cloning an OS allows for easy migration to a new storage device or backup in case of system failure.

    How do I clone my OS to an SSD?
    There are a variety of software options available for cloning an OS to an SSD, including Acronis True Image, EaseUS Todo Backup, and Macrium Reflect.

    Can I boot from the cloned SSD immediately?
    In most cases, no. You may need to change the boot order in your computer’s BIOS settings or use a boot disk to initiate the startup process from the new SSD.

    What precautions should I take before cloning my OS?
    It is recommended to back up all important files and data before cloning an OS to avoid any potential loss. It may also be necessary to uninstall any software that may conflict with the cloning process.

  • Boost Your PC’s Performance: A Step-by-Step Guide on How to Clone Windows to SSD – Expert Tips from How to Geek

    Are you tired of waiting for your Windows operating system to boot up slowly? Do you want to speed up your computer’s performance? One way to achieve this is by upgrading your hard drive to a solid-state drive (SSD). An SSD allows for faster read and write speeds, which can significantly improve your computer’s overall performance. However, before making the switch, you’ll need to transfer your existing operating system and data to the new drive.

    Fear not, as this process is relatively simple and can be easily accomplished using software designed for cloning your existing hard drive. In this article, we’ll cover the step-by-step process for cloning Windows to SSD, so you can enjoy lightning-fast speeds in no time!

    Step-by-Step Guide

    If you’re looking to speed up your PC, upgrading your hard drive to a solid-state drive (SSD) can make a huge difference. However, starting from scratch and reinstalling all your software and files can be a pain. Luckily, with the right tools, you can easily clone your Windows operating system to your new SSD.

    First, you need to select a cloning tool that’s compatible with your system hardware. Then, connect the SSD to your computer and run the cloning software, selecting your current Windows hard drive as the source and the new SSD as the destination. Finally, start the cloning process and wait for it to complete.

    Once it’s finished, shut down your computer, remove the old hard drive, and replace it with your new SSD. Start up your computer, and you should be good to go with your cloned Windows system now living on the new drive! With a few simple steps and the right tool, you can make the switch to an SSD without having to reinstall everything from scratch. So, go ahead and give it a try!

    Prepare Your Computer and SSD

    Preparing your computer and SSD can seem like a daunting task, but with this step-by-step guide, you’ll be ready to install your new SSD in no time. First, make sure your computer is off and unplugged. Open up the case and locate the hard drive bays.

    Remove the cables from your old hard drive and carefully unscrew it from the mount. Next, remove the mounting bracket from your old hard drive and attach it to your new SSD. Carefully screw the SSD onto the mount and connect the cables.

    Once you’ve replaced your old hard drive with the new SSD, it’s time to install your operating system. Insert the installation media and boot up your computer. Follow the prompts to format your new SSD and install the operating system.

    Congratulations, you’ve successfully prepared your computer and SSD! With your new SSD, you’ll experience faster boot times and improved overall performance.

    clone windows to ssd how to geek

    Install and Run the Cloning Software

    If you want to clone your hard drive, the first thing you need to do is install and run the cloning software. This will allow you to transfer all your data from one drive to another without losing anything important. The process is relatively simple and straightforward, but it’s important to follow the instructions carefully to avoid any potential errors.

    Once you’ve chosen the cloning software you want to use, download and install it on your computer. Then, connect the drive you want to clone to your computer and run the software. You’ll be prompted to select the source and destination drives, as well as any other settings you want to apply, such as cloning only certain files or partitions.

    Once you’re done selecting your options, start the cloning process and wait for it to complete. It may take some time, depending on the size of your hard drive, so be patient. Once it’s finished, you’ll have an exact copy of your original hard drive on your new one, and you can continue using your computer as usual.

    Remember to back up your data regularly to avoid any potential data loss.

    Clone Your Windows to SSD

    Are you tired of your old and sluggish hard drive and want to upgrade to an SSD? Do you worry about losing all your important data and applications during the transition? Well, worry not, as cloning your Windows is a breeze! Here’s a simple step-by-step guide that will walk you through the process. First, download and install a reliable cloning software, such as Acronis True Image or Macrium Reflect. Then, connect your new SSD to your computer via a USB enclosure or SATA cable.

    Next, launch the cloning software and select the option to clone your disk onto the SSD. Follow the prompts and wait for the cloning process to complete. Finally, shut down your computer and swap the old hard drive with the new SSD, and your Windows will boot up seamlessly on the blazing-fast SSD.

    By following these simple steps, you can upgrade your computer’s performance in no time without sacrificing any of your data or applications.

    Why You Should Clone to SSD?

    If you’re looking to improve your computer’s performance, then cloning Windows to an SSD is an excellent option. Not only is an SSD faster and more reliable than traditional hard drives, but it also has a longer lifespan and is less prone to mechanical failure. By cloning your system to an SSD, you can significantly reduce boot times, application load times, and file transfer speeds.

    It’s a quick and straightforward process that requires a few basic steps. With the help of a cloning software and a few extra cables, you can clone your system and switch to an SSD in no time. So if you’re tired of waiting for your computer to start up or want to boost your game’s performance, then cloning to SSD is the way to go.

    Trust us, you won’t regret it!

    Faster Boot and Load Times

    If you’re tired of waiting for your computer to boot or programs to load, it’s time to consider cloning your hard drive to an SSD. An SSD will give you lightning-fast boot and load times, which means you’ll be able to get to work faster and spend less time waiting for your computer to catch up. Cloning your hard drive to an SSD is a simple process, and once you’ve done it, you’ll wonder how you ever managed without it.

    Plus, with an SSD, you’ll be able to run more programs at once without your computer slowing down. So if you want to speed up your computer and improve your productivity, it’s time to make the switch to an SSD.

    Improved Performance and Productivity

    If you’re looking to upgrade your computer’s performance and productivity, cloning to an SSD is definitely worth considering. SSDs (Solid State Drives) offer faster read and write speeds, which means you can access your files and open applications much quicker than with traditional hard drives. This can save you a lot of time and frustration when you need to work on important projects or multitask heavily.

    Additionally, an SSD doesn’t have any moving parts, so it’s less prone to physical damage and can withstand shocks and vibrations better. This means you can use your computer more confidently and take it with you wherever you go without worrying about damaging your files or losing important data. Overall, cloning to an SSD can make your computing experience smoother, faster, and more reliable – all benefits that can help you be more productive and efficient with your time.

    So, are you ready to take the leap and upgrade to an SSD for improved performance?

    Frequently Asked Questions

    If you’re wondering how to clone Windows to an SSD, don’t worry – it’s not as complicated as it might sound! First things first: you’ll need cloning software, such as EaseUS or Macrium Reflect. Once you’ve installed the software, connect your SSD to your computer and launch the cloning software. Select your current hard drive (where Windows is installed) as the source disk, and your SSD as the destination disk.

    You may need to adjust partition sizes if your SSD is smaller than your current hard drive. Then, confirm the cloning process and wait for it to finish. Once it’s done, shut down your computer and replace your current hard drive with the SSD.

    Turn your computer back on, and voila – you’ve successfully cloned Windows to your new SSD! It’s worth noting that if you have any issues, you can always refer to the cloning software’s user guide or reach out to customer support. So, don’t let the idea of cloning Windows to an SSD intimidate you – with the right tools and a little effort, you can do it yourself and enjoy faster boot times and overall system performance.

    What’s the Best Cloning Software?

    Cloning software has become increasingly popular among computer users who want to copy their existing system or files onto another computer or hard drive. So, what is the best cloning software on the market? It really depends on your specific needs, but some of the top choices include Clonezilla, Macrium Reflect, and Acronis True Image. Clonezilla is a free and open-source option that works well for basic cloning tasks, while Macrium Reflect offers more advanced features and a user-friendly interface.

    Acronis True Image is another great option that comes with additional security features, such as ransomware protection. Ultimately, the best cloning software for you will depend on your specific needs and preferences. It’s important to do your research and read reviews to determine which software will work best for your situation.

    Will Cloning Affect My Data?

    Cloning your data can be a crucial step in protecting your website and making backups. However, some may worry that the cloning process can affect their data. The truth is that cloning your data will not directly affect it in any way.

    Instead, cloning makes a complete copy of the data, allowing you to use that clone for testing or as a fail-safe in case your original data is lost or corrupted. This means that any changes or modifications made to the clone will not affect your original data. It’s important to note that while cloning will not inherently cause issues with your data, the process of cloning and transferring the data can sometimes lead to errors or complications.

    As long as you take the necessary precautions and ensure the cloning process is done correctly, your data should remain safe and sound.

    Conclusion

    In the end, cloning your Windows operating system to an SSD is like giving your computer a shot of adrenaline. It’s like upgrading from an old, rusty bicycle to a sleek, speedy motorcycle. And with the help of our how-to geek guide, you can make the process quick and painless.

    So don’t be afraid to take the plunge and embrace the power and speed of your new SSD clone! Happy computing!”

    FAQs

    What is cloning a Windows to an SSD?
    Cloning a Windows to an SSD is the process of copying all the data from your current Windows installation on a hard drive to a solid-state drive (SSD) so that you can run your system on the faster and more responsive SSD.

    Why should I clone Windows to an SSD?
    There are several reasons why you should clone Windows to an SSD, such as improved performance, faster boot and load times, and increased reliability and durability of SSDs.

    How can I clone Windows to an SSD using How-To Geek?
    To clone Windows to an SSD using How-To Geek, you can follow the step-by-step guide provided on their website. The process involves using a free utility called Macrium Reflect to create an exact copy of your Windows installation on the SSD.

    Do I need any specific hardware or software to clone Windows to an SSD?
    You will need a few things to clone Windows to an SSD, such as a blank SSD with enough storage to hold your system files, a cloning software like Macrium Reflect or EaseUS Todo Backup, and an external enclosure or adapter if you’re cloning from a laptop.

  • Upgrade Your Clevo Skylake Laptop with SSD in 5 Easy Steps: A Beginner’s Guide

    So, you’ve decided to upgrade your Clevo Skylake laptop by adding an SSD. Congrats on this exceptional step towards enhancing your laptop’s performance! Installing an SSD can drastically improve your laptop’s overall speed and responsiveness, enabling you to load programs rapidly, transfer files seamlessly, and enjoy a faster boot-up time. In this blog post, we’ll take you through the steps involved in adding an SSD to your Clevo Skylake laptop so you can easily accomplish this task on your own.

    If you’re ready to get started, let’s dive right in!

    Backup Your Data

    If you’re looking to add an SSD to your Clevo Skylake laptop, it’s important to make sure you backup all of your data before proceeding with any hardware changes. Adding an SSD can significantly speed up your computer, but it’s important to back up your data first to ensure that you don’t lose any important information. To backup your data, you can use cloud storage services like Google Drive, Dropbox, or iCloud, or you can use an external hard drive.

    Once you’ve backed up your data, you can proceed with adding the SSD to your laptop. Remember to follow the manufacturer’s instructions carefully and make sure you’ve got the right tools for the job. With a bit of patience and attention to detail, you can have your Clevo Skylake laptop up and running with a speedy new SSD in no time!

    Use Backup Software to Save Important Files

    Backing up your important files is vital to ensure that you don’t lose any essential data in case of any unwanted incidents like data corruption or device failure. That’s where backup software comes into play. It automatically creates a copy of your files and saves it to another location, securing that even if your device fails, you can still access your data.

    The backup software comes with different features that allow you to create multiple copies or schedule automatic backups regularly. You can also choose where to store the backup files, whether locally, on an external drive or a cloud service like Google Drive or Dropbox. So, whether you are an individual or a business owner, investing in backup software is a small price to pay to ensure that your data is always safe and secure.

    It’s better to be prepared than to lose your valuable data due to unforeseen circumstances.

    clevo skylake laptop how to add ssd

    Create a Recovery Drive in Case of Problems

    Backing up your data is essential in case of computer problems or crashes. One way to prepare for such situations is by creating a recovery drive. This drive serves as a backup of your operating system and can provide a path towards fixing any issues with your computer.

    It’s vital to understand that a recovery drive is not intended to recover your personal data. Therefore, you should back up your documents, pictures, and other essential files separately. Creating a recovery drive is a straightforward process.

    Windows users can enter the search bar and search for “Create a recovery drive” and follow the prompts. It’s essential to have a USB flash drive with at least 8 GB of space to create a recovery drive. Once it’s created, keep the recovery drive in a safe place so that it’s readily available when you need it.

    Remember that backing up your data is crucial and can save you from a lot of headaches in the future.

    Check Compatibility

    Looking to add an SSD to your Clevo Skylake laptop? Before making any purchases, it’s important to first check compatibility to ensure your new SSD will work seamlessly with your laptop. Start by checking the type of SSD your laptop uses, whether it’s an M.2 or SATA drive.

    Then, check the maximum capacity your laptop supports and ensure your new SSD falls within that range. You’ll also want to make sure your laptop’s BIOS and drivers are up to date to ensure proper functionality. Once you’ve verified compatibility, the process of adding an SSD to your Clevo Skylake laptop is relatively straightforward.

    Simply remove the bottom cover, locate the hard drive, replace it with your new SSD, and reinstall the cover. With a few simple steps, you can upgrade your laptop’s storage capacity and improve its overall performance. Adding an SSD is a popular and worthwhile upgrade for any Clevo Skylake laptop owner, and with a little bit of research, you can do it with ease.

    Identify the Type of SSD Your Laptop Supports

    When upgrading your laptop to an SSD, it’s important to identify the type of SSD your laptop supports. One crucial step is to check compatibility to avoid any mishaps. Not all laptops support every type of SSD, and buying the wrong one could lead to a waste of money and time.

    Some laptops use a 5-inch drive, while others use a smaller M.2 drive, so it’s important to determine which one your laptop can handle.

    Checking the manufacturer’s manual, sifting through online forums, or contacting the manufacturer directly are great ways to ensure compatibility. By making sure the SSD matches your laptop’s specifications, you can reap the benefits of faster speed and better performance.

    Ensure the SSD You Purchase Fits Your Laptop’s Size and Power Requirements

    When it comes to upgrading your laptop’s storage with an SSD, one crucial aspect to consider is compatibility. This means ensuring that the SSD you purchase is the right size and power requirement for your laptop. The good news is that many SSDs available on the market are made to fit standard laptop sizes.

    However, it’s still essential to check the specifications of your laptop and the SSD you intend to purchase to ensure compatibility. By doing so, you can avoid potential issues, such as the SSD not fitting into your laptop or the laptop not being able to supply enough power to the SSD. So before you make a purchase, double-check the size and power requirements of your laptop and the SSD to guarantee a seamless upgrade process.

    Disassemble Your Laptop

    If you’re looking to upgrade your Clevo Skylake laptop by adding an SSD, you’ll need to disassemble the device first. The process may seem daunting if you’ve never taken apart a laptop before, but with the right tools and a bit of patience, you can do it easily. First, make sure the laptop is powered off and unplugged.

    Next, remove the battery and any connected peripherals such as a mouse or USB drive. Then, use a small screwdriver to remove the back panel of the laptop. Be careful not to damage the plastic clips that hold it in place.

    Once the panel is removed, you should be able to access the hard drive and RAM slots. If you’re installing an SSD, you’ll need to remove the existing hard drive and replace it with the new SSD. This process may differ depending on the specific model of your laptop, so be sure to consult the manufacturer’s instructions before proceeding.

    With a bit of care and attention, you can successfully disassemble your Clevo Skylake laptop and upgrade it with a new SSD.

    Power Off Your Laptop and Disconnect All Cords

    When disassembling your laptop, the first thing you need to do is power it off and disconnect all cords. It’s important to take this step to avoid any potential electric shock or damage to your laptop. Once you’ve made sure everything is turned off and disconnected, you can begin to take apart your laptop.

    This process can be a bit daunting, but with the right tools and knowledge, it can be done easily. You’ll want to start by removing the screws from the bottom of your laptop and carefully separating the keyboard and screen from the rest of the body. It’s important to be gentle with your laptop and take your time to avoid damaging any components.

    If you’re unsure about any step of the process, don’t be afraid to reach out for help from a professional. By following these steps, you’ll be able to disassemble your laptop and perform any necessary repairs or upgrades.

    Remove the Battery and Any Panels Covering the Hard Drive Bay

    Removing the battery and any panels covering the hard drive bay is an essential step when disassembling your laptop. You don’t want to risk damaging any internal components by accidentally touching live wires with metal tools, nor do you want to fry your device with an accidental electrical shock. First, unplug the laptop and turn it off completely.

    Once the laptop is powered down, flip it over and locate the battery release latch. This will vary from model to model, so consult your manual if you’re unsure. Once the battery has been removed, carefully unscrew any panels that cover the hard drive bay.

    These panels may be secured with screws, clips, or other mechanisms depending on the laptop model. When removing the panels, be sure to set aside the screws in a safe place to avoid losing them. If you’re not sure about the procedure or don’t feel confident about handling the delicate internals of your laptop, it might be best to take it to a professional for help.

    Remember, safety first!

    Install the SSD

    If you have a Clevo Skylake laptop, adding an SSD is a great way to speed up your system. The process is relatively simple and can be done in just a few steps. First, you will need to purchase an SSD that fits your laptop’s specifications.

    Then, using a screwdriver, remove the back panel of your laptop to access the hard drive bay. Carefully unscrew and remove the existing hard drive. Next, insert the SSD into the bay and secure it with screws.

    Finally, replace the back panel and boot up your laptop. You may need to go into the BIOS settings to ensure that your new SSD is recognized as the primary boot device. With your SSD installed, you should notice a significant improvement in your laptop’s performance, with faster boot times and quicker application load times.

    So go ahead and upgrade your Clevo Skylake laptop’s storage with an SSD, and enjoy a faster, more responsive system.

    Align the SSD with the SATA Connector and Secure It with Screws

    Installing the SSD is a relatively straightforward process once you have everything lined up. The first step is to align the SSD with the SATA connector – this is the interface that allows data to flow between the two devices. Make sure to line up the notches on the connector and slot to ensure a snug fit.

    Once you’re lined up, secure the SSD in place with screws. This will prevent any shifting or movement that could cause damage or corrupt data transfers. Something to keep in mind is that not all SSDs will come with screws, so double-check to make sure you have everything you need before starting the installation process.

    With these simple steps, you’re ready to start enjoying the benefits of faster read and write speeds that only an SSD can provide.

    Replace Any Panels and Reconnect the Battery and Cords

    Now that you’ve replaced the old hard drive with your new SSD, it’s time to reinstall everything back into your computer. Before you do that, make sure to replace any panels or screws you removed during the installation process and reattach the battery and cords. Ensure that everything is tightly secured before powering it on.

    Once you’ve reassembled everything, boot up your computer and initialize your new SSD. You’ll need to format the drive and install your operating system, programs, and data. This process may take some time, but the blazing-fast speeds of your SSD will be worth it.

    With an SSD installed, your entire system will load and run much faster, and you’ll be able to accomplish your tasks in no time. Congratulations on successfully installing your new SSD!

    Configure Your Laptop’s BIOS Settings

    If you own a Clevo Skylake laptop and want to add an SSD, you’ll need to configure your laptop’s BIOS settings. First, make sure your laptop is turned off and disconnect all external devices. Then, turn your laptop on and repeatedly press the F2 key to access the BIOS settings.

    Once in the BIOS, navigate to the Boot menu and set the SSD as the primary boot device. Next, enable the AHCI mode in the SATA configuration settings to optimize data transfer rates for the SSD. You can also disable unnecessary components such as Bluetooth, Wi-Fi, and USB

    0 for faster boot times. Finally, save your changes and restart your laptop to complete the configuration process. With these simple steps, you can easily add an SSD to your Clevo Skylake laptop for improved performance and storage capacity.

    Restart Your Laptop and Access BIOS

    If you’re looking to get the most out of your laptop, tweaking the BIOS settings is a great place to start. But before you can do that, you need to access the BIOS itself. The best way to do that is by restarting your computer and pressing the designated key (usually Del, F1, or F2) as soon as your laptop starts up.

    This key may vary depending on the make and model of your laptop, but it’s typically displayed on the screen somewhere. Once you’re in the BIOS, you can start making changes to the settings. But be careful – changing the wrong setting can cause serious issues with your computer.

    Some common changes include adjusting the boot order, enabling or disabling hardware features, and setting overclocking options for your processor. Just be sure to do your research and understand what each setting does before making any changes. By configuring your BIOS settings correctly, you can get the best performance out of your laptop and optimize it for your specific needs.

    Find the Boot Options and Select the SSD as the Primary Boot Device

    If you want your laptop to boot up faster, you may want to consider installing your operating system on an SSD. However, before you can do that, you need to configure your laptop’s BIOS settings. First, you will need to find the boot options in your BIOS menu.

    Usually, you can access the BIOS menu by pressing the F2 or Delete key on your keyboard while your laptop is booting up. Once in the BIOS menu, look for the boot options and select the SSD as the primary boot device. This will ensure that your laptop boots up from the SSD first, instead of the traditional hard drive.

    By doing this, you will notice a significant improvement in your laptop’s boot speed. Don’t forget to save your changes in the BIOS menu before exiting. With these simple steps, you can easily configure your laptop’s BIOS settings to make your SSD the primary boot device and enjoy a faster boot time.

    Install Your Operating System and Apps

    If you’re looking to add an SSD to your Clevo Skylake laptop, you’re in luck. It’s a relatively straightforward process that will make a noticeable speed difference to your machine. Before you start, however, make sure you have a Windows installation disk or USB drive and all necessary serial keys for your software programs.

    You’ll also need to purchase an SSD that matches your laptop’s specifications and has the required physical connection. Once you’ve got all the necessary equipment, shut down your laptop and unplug it. Remove the battery and hard drive cover, and take out the current hard drive.

    Replace it with the SSD and ensure it is securely fastened in place. Reinsert the battery and turn on your laptop. Insert your Windows installation disk or USB drive and follow the prompts to install Windows on your new SSD.

    Once Windows is installed, download and install all necessary drivers, and then reinstall your software programs using the necessary serial keys. And that’s it – your Clevo Skylake laptop now has a speedy new SSD added to its arsenal.

    Install Windows or Linux on the SSD

    If you’ve recently upgraded your computer with a new SSD, the next step would be to install your operating system and your favorite apps onto it. Whether you prefer Windows or Linux, the process is similar and straightforward. First, create a bootable USB with your preferred operating system installer.

    Then, connect the USB to your computer and restart it. Make sure you set your computer to boot from the USB drive, and follow the installation process. Once your OS is installed, it’s time to install your desired apps.

    Consider downloading apps that are optimized for SSDs, as they can run faster and smoother than apps designed for traditional hard drives. Finally, make sure to keep your SSD and operating system updated regularly to maintain optimal performance. By following these steps, you can make the most out of your new SSD and enjoy the benefits of faster boot and load times.

    Install Your Favorite Programs and Apps

    When it comes to setting up your computer, one of the most important things is installing your operating system and applications. Whether you’re using Windows, MacOS, Linux, or another operating system, the process is usually straightforward and can be done in a few simple steps. Once you have your operating system installed, you can start installing your favorite programs and apps.

    Whether you need productivity tools like Microsoft Office or productivity-boosting apps like Evernote and Trello, there are tons of options available. You can also install entertainment apps like Netflix, Spotify, and Steam. The best part is that many of these programs and apps are free or cost only a few dollars, making it easy to get started with your new computer.

    So why wait? Start browsing for your favorite programs and apps and get your computer running at its optimal level.

    Enjoy Your Faster Laptop with Increased Storage Capacity!

    If you own a Clevo Skylake laptop and feel like it’s becoming sluggish because it lacks storage space, there’s something you can do about it. Adding an SSD to your laptop is a great way to increase storage capacity and enjoy faster performance. The process of adding an SSD may seem daunting, but it’s actually quite simple.

    All you need is the right tools, an SSD, and some knowledge about your laptop’s internals. You can either use an external USB enclosure to clone your existing hard drive to the new SSD or perform a fresh installation of your operating system onto the SSD. In either case, once you get your SSD up and running, you’ll notice a huge improvement in your laptop’s speed and overall performance.

    With more storage space and faster speeds, you can get more done in less time, whether you’re working on important projects or enjoying some downtime with your favorite games. So don’t let a lack of storage space slow you down – add an SSD to your Clevo Skylake laptop and enjoy faster performance today!

    Conclusion

    So there you have it, folks – upgrading your Clevo Skylake laptop with an SSD is easier than you think! Follow these simple steps and you’ll be experiencing lightning-fast speeds in no time. Just remember, a little bit of technical know-how and a willingness to tinker goes a long way when it comes to DIY laptop upgrades. So go ahead, give it a try – your Clevo Skylake will thank you for it!”

    FAQs

    What is the Clevo Skylake laptop?
    The Clevo Skylake laptop is a high-performance laptop built by Clevo, which is known for its advanced computer systems.

    How do I add SSD to my Clevo Skylake laptop?
    You can add an SSD to your Clevo Skylake laptop by following these steps: – Turn off the laptop and remove the battery. – Open the back cover of your laptop and locate the SSD slot. – Insert the new SSD into the slot and screw it tightly. – Replace the back cover and the battery. – Turn on the laptop and check if the SSD has been detected by the system.

    What are the benefits of adding an SSD to my Clevo Skylake laptop?
    Adding an SSD to your Clevo Skylake laptop can provide several benefits, such as: – Faster boot and loading times. – Increased system responsiveness and performance. – Improved multitasking capabilities. – Reduced power consumption and heat generation.

    What are the recommended SSD brands for Clevo Skylake laptops?
    There are several brands of SSD that are compatible with Clevo Skylake laptops, and some of the most recommended ones are Samsung, Crucial, Kingston, and Western Digital. It is important to choose an SSD with a high speed and capacity that fits your budget and needs.