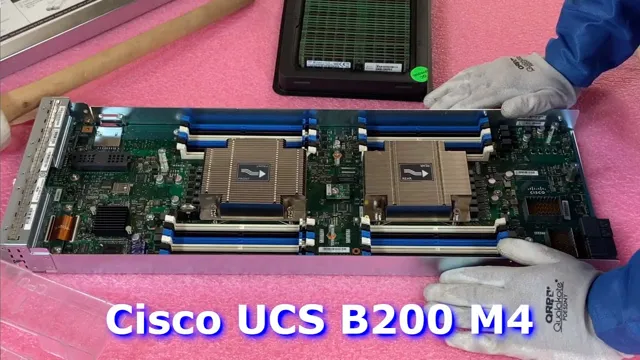
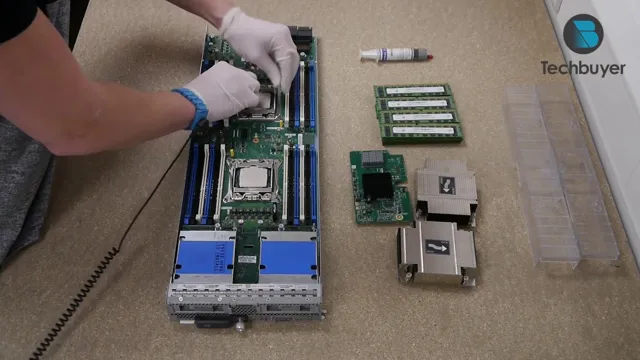
Are you looking to upgrade your Cisco B200 M4 server for better storage performance? If so, consider installing a PCIe SSD. This powerful storage solution offers high-speed access to data, allowing for quicker data retrieval and faster application performance. In this blog post, we’ll cover the steps needed to install a PCIe SSD on your Cisco B200 M4, as well as the benefits of doing so.
With our guide, you’ll be well-equipped to take your server to the next level and enjoy lightning-fast storage capabilities. Let’s dive in!
Overview of the Cisco B200 M4
Installing a PCIe SSD on a Cisco B200 M4 server can vastly increase its performance and speed. First, ensure that the server is powered off and unplugged. Then, remove the access panel to gain access to the PCIe slots.
Locate an empty PCIe slot, remove the cover, and carefully insert the SSD into the slot. Secure the SSD in place by screwing it onto the chassis. Once the installation is complete, replace the access panel and power on the server.
The server should detect the new SSD automatically, but it may need to be configured in the BIOS settings before it can be used. Overall, adding a PCIe SSD to a Cisco B200 M4 can greatly enhance its capabilities and improve performance for demanding workloads such as large database queries or virtualization.
Specifications and features of the server
The Cisco B200 M4 server is a high-performance computing solution ideal for large-scale data centers. This server is designed with advanced features and specifications that enable it to handle complex computing tasks with ease. With its Intel Xeon E5-2600 v3 and v4 series processors, the B200 M4 offers enhanced performance and reliability.
Additionally, it comes equipped with 24 DIMM slots that support a maximum memory capacity of 5TB DDR The server also features a modular design that enables it to accommodate advanced storage solutions, including hard drives, solid-state drives, and PCIe SSDs.
Its flexibility further extends to support for up to two mezzanine cards and two SD cards. These features make the Cisco B200 M4 an excellent choice for enterprises that require a highly scalable infrastructure for their compute-intensive applications.

Choosing the right PCIe SSD
If you’re looking to boost your Cisco B200 M4’s performance, installing a PCIe SSD is a great way to go. But with so many options available, it can be daunting choosing the right one. Firstly, it’s important to consider your specific needs and budget.
Do you need a high-end, large-capacity drive or a more affordable option? Once you’ve identified your budget, look for drives that offer high read and write speeds. Another important feature to consider is the form factor and size of the SSD. It’s crucial that it fits the slot on your server and doesn’t interfere with other components.
Additionally, some SSDs come with advanced features like advanced power management or temperature control. Ultimately, choosing the right PCIe SSD for your Cisco B200 M4 requires careful consideration of your requirements and research into the various options available on the market.
Factors to consider when selecting SSDs for the server
When it comes to selecting SSDs for a server, one of the crucial factors to consider is choosing the right PCIe SSD. PCI Express is a high-speed interface that connects a computer’s motherboard to peripheral devices, including SSDs. PCIe SSDs offer unparalleled speed and performance, making them ideal for demanding server applications, but selecting the right one for your server isn’t as simple as just picking the fastest one.
You’ll need to consider factors such as the types of workloads your server will be handling, the amount of storage space you need, and your budget. Also, make sure to choose an SSD that is compatible with your server’s architecture and meets your server’s requirements. Take the time to research and compare different PCIe SSDs so that you can find the perfect one that meets your needs and provides the performance and reliability that your server demands.
Compatible PCIe SSDs for Cisco B200 M4
When it comes to choosing the right PCIe SSD for your Cisco B200 M4 server, compatibility is key. Luckily, there are a number of options available that have been tested and approved by Cisco, ensuring a smooth and reliable experience. Some popular choices include the Intel SSD DC S3700 Series and the Samsung PM1725a Series.
Keep in mind that the specific requirements for your application will vary, so it’s important to do your research and choose a solution that meets your specific needs. Factors like capacity, read/write speeds, and endurance should all be taken into account when making your decision. Ultimately, investing in a high-quality PCIe SSD will help to optimize your server’s performance and improve overall efficiency.
Installation process
If you’re looking to install a PCIe SSD on your Cisco B200 M4 server, the process can be relatively straightforward with the right equipment and know-how. First, ensure that you have an available PCIe slot for the SSD and gather any necessary cables or brackets. Once you have everything in order, power down your server and unplug any cables before opening the chassis.
Locate the PCIe slot where you want to install the SSD and remove the panel covering it. Depending on your specific SSD, you may need to attach additional cables or brackets before inserting it into the slot. Once the SSD is securely in place, replace the panel and power up your server to verify that the installation was successful.
Keep in mind that while this process may be relatively simple, it’s important to take proper precautions and ensure that you’re handling components correctly to protect both yourself and your equipment. With a bit of patience and attention to detail, you’ll be up and running with your new PCIe SSD in no time!
Preparing the server for installation
Before diving into the installation process, it is essential to prepare the server properly. The first step is to upgrade the system with the latest updates and patches to ensure optimal performance and security. Additionally, check for any conflicting software that may hinder the installation process and make sure to remove them beforehand.
It is recommended to create a separate user account for running the installation, which can be deleted later once completed. Furthermore, ensure that the server has adequate resources such as RAM, storage, and CPU to support the software being installed successfully. Once the server is adequately prepared, proceed with the installation process smoothly without any interruptions.
Remember, proper preparation is the key to successful software installation.
Installing the PCIe SSD in the server
Installing a PCIe SSD in your server is a great way to enhance your server’s performance. Before you begin the installation process, make sure that your server has an available PCIe slot and the appropriate PCIe SSD. Start by powering off your server and unplugging it from the power source.
Then, open the server case and locate an available PCIe slot. Remove the corresponding metal slot cover on the back of the case and carefully insert the PCIe SSD into the slot. Secure the PCIe SSD in place using the mounting screws provided, and then turn your server back on.
Finally, initialize and format the PCIe SSD using your operating system’s disk management tools. With the PCIe SSD now installed in your server, you can enjoy faster read and write speeds and improved performance.
Configuring the SSD in the server
When it comes to configuring the SSD in your server, the installation process is an important step. First, you’ll want to determine which type of server you have and whether it supports SSDs. If it does, you can begin the installation process by shutting off the server and opening the case.
Then, locate the hard drive bay and insert the SSD into the slot, ensuring it is firmly in place. You will need to connect power and data cables to the SSD to ensure it is properly connected to the motherboard. Once the SSD is installed, you will need to configure it for use in your server’s operating system.
By utilizing the appropriate software and settings, you can optimize your SSD for maximum performance and reliability. Overall, taking the time to properly configure your SSD during installation can help ensure that your server runs smoothly and efficiently. So, don’t skimp on this important step if you want to get the most out of your server’s storage capabilities.
Conclusion
In conclusion, installing a PCIe SSD on a Cisco B200 M4 is like giving your server a turbo boost! With lightning-fast read and write speeds, your system will be able to handle even the most demanding applications and workloads. So, if you’re looking to take your server performance to the next level, it’s time to kick things into high gear with a PCIe SSD installation. Trust us, your IT team will thank you.
“
Benefits of installing SSDs in Cisco B200 M4
If you’re looking to boost the performance of your Cisco B200 M4 blade server, consider installing Solid State Drives (SSDs). There are numerous benefits to upgrading to SSDs, including increased speed, better reliability, and increased storage capacity. The installation process for SSDs in the Cisco B200 M4 is straightforward and can be completed in just a few easy steps.
First, power off the server and unplug all cables. Open the server chassis and locate the drive bays. Insert the new SSD into the bay, using the screws provided to secure it in place.
Finally, connect the necessary cables and power on the server. With the SSDs installed, you’ll enjoy faster boot times and quicker access to data, making your system run more efficiently. So why not take the plunge and upgrade your Cisco B200 M4 with SSDs today?
FAQs
1. Q: What is the maximum supported capacity for PCIe SSDs on Cisco B200 M4? A: The maximum supported capacity for PCIe SSDs on Cisco B200 M4 is 1.6TB. 2. Q: Can any PCIe SSD be used on Cisco B200 M4, or are there specific models supported? A: Only specific models of PCIe SSDs are supported on Cisco B200 M4. Please refer to the Cisco Compatibility Matrix for exact supported models. 3. Q: Is it possible to configure a RAID array using PCIe SSDs on Cisco B200 M4? A: Yes, it is possible to configure a RAID array using PCIe SSDs on Cisco B200 M4. However, please note that the RAID configuration must be done through the onboard RAID controller. 4. Q: What is the recommended procedure for installing PCIe SSDs on Cisco B200 M4? A: To install PCIe SSDs on Cisco B200 M4, follow these steps: a. Power off the server b. Install the PCIe SSD into the appropriate PCIe slot c. Power on the server d. Access the server BIOS and configure the PCIe SSD as a bootable device if necessary e. Install the appropriate driver and activate the PCIe SSD.
