Author: David L. Lynn

  • Boost Your Laptop’s Speed: Expert Guide on Transferring OS to Newly Added SSD Drive

    Boost Your Laptop’s Speed: Expert Guide on Transferring OS to Newly Added SSD Drive

    Have you ever found yourself frustrated with how slow your computer is running? Do you spend more time waiting for programs to load than actually using them? If so, you’re not alone! Slow computers can be a major source of stress and lost productivity. The good news is that there’s a simple solution: transferring your operating system (OS) to a solid-state drive (SSD). Why an SSD, you ask? Well, unlike traditional hard drives, SSDs use flash memory to store data.

    This means that they’re faster, quieter, and more dependable. And, best of all, they can dramatically improve your computer’s performance. But, we know what you’re thinking: “Transferring my OS to a new drive sounds complicated and risky.

    ” Fear not, dear reader! This blog post will guide you through the entire process, step-by-step. We’ll cover everything from backing up your data to cloning your drive to troubleshooting common issues. By the end of this post, you’ll be a pro at transferring your OS to an SSD.

    You’ll wonder why you didn’t do it sooner! So, grab a cup of coffee and let’s get started.

    Backing Up Important Data

    If you’ve added an SSD drive to your laptop, you might be wondering how to transfer your operating system. The easiest way to do this is to use cloning software, which duplicates everything from your old drive onto the new one. This means you don’t have to reinstall your OS or any of your programs, and you can get up and running with your new drive quickly and easily.

    However, before you start the cloning process, it’s important to back up all your important data to an external drive, just in case anything goes wrong during the transfer. This way, you can restore your system to its original state if something goes wrong. Once you have a backup, use a reliable cloning software to start the transfer process.

    Follow the instructions carefully, and make sure you select the correct drives. When the process is complete, test your new drive to ensure everything works properly. With a little care and attention, you’ll have a faster, more efficient computer in no time!

    Create a System Image

    Creating a system image is an essential part of backing up your important data. A system image is a complete copy of your computer’s hard drive, including all your installed programs, system files, and settings. It is an exact replica of your system, which can be used to recover your computer in the event of a system crash, virus attack, or other catastrophic event.

    With a system image, you can have peace of mind knowing that all your critical data is backed up safely. You never know when an unexpected event might occur, so it’s important to create a system image regularly. By doing so, you can restore your computer to its previous state quickly and easily, without losing any of your important files or settings.

    So, make sure to set up a reliable backup system, including creating a system image, to avoid losing your valuable data in case of an emergency.

    added ssd drive to laptop how do i transfer os

    Create a Recovery Drive

    Creating a recovery drive is an essential step in backing up important data. Whether it’s your personal photos, important documents, or your favorite movies, it’s crucial to have a backup plan to avoid losing them. By creating a recovery drive, you can quickly restore your system if an unexpected error occurs.

    A recovery drive is a USB or external hard drive that contains an exact copy of your computer’s settings, files, and drivers, so you can easily recover your system to its previous state. It’s effortless to create a recovery drive on Windows All you need is a USB drive with at least 16 GB of free space, and then you can easily create a recovery drive using the operating system’s built-in tools.

    So, if you want to keep your data safe and secure from unexpected errors, creating a recovery drive is the best way to go about it.

    Cloning Your Old Hard Drive

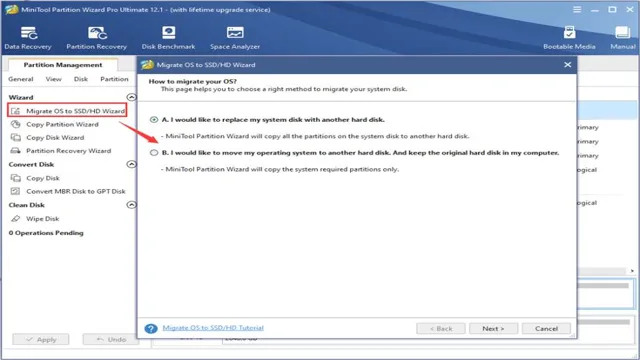
    If you’ve just added an SSD drive to your laptop and want to transfer your OS without losing any important files or settings, you’ll need to clone your old hard drive. This process involves creating an exact copy of your existing hard drive and transferring it to the new SSD drive. There are various software tools available to help you do this, such as Macrium Reflect, Clonezilla, and EaseUS Todo Backup.

    The first step is to connect both your old hard drive and new SSD drive to your laptop. Then, install your chosen cloning software and follow the on-screen instructions to create a clone of your old hard drive. Once the cloning process is complete, you can disconnect your old hard drive and start using your new SSD drive, which will contain all of your old files, programs, and settings.

    Just be sure to backup any important data before starting the cloning process in case anything goes wrong. With a successful clone, you’ll enjoy faster boot-ups and quicker access times on your laptop.

    Choose a Cloning Software

    If you’re upgrading your hard drive or simply moving to a new one, you’ll need to clone your old hard drive to save your files and programs. But how do you do that? Well, the first step is to choose a cloning software. There are several options out there, both free and paid, and it’s important to pick one that suits your needs.

    One popular choice is EaseUS Todo Backup, which is user-friendly, has a fast cloning speed, and offers features like incremental backups. Another great option is Clonezilla, which is free and open-source and can create disk images or clone entire disks. Just be sure to read up on your chosen software’s documentation and follow the instructions carefully to ensure a smooth and successful cloning process.

    With the right software, cloning your old hard drive can be a breeze and you’ll be up and running on your new drive in no time.

    Connect SSD and Install Software

    When it comes to upgrading your computer, connecting a solid-state drive (SSD) and installing the necessary software can make a significant difference in terms of speed and performance. One way to do this is by cloning your old hard drive to the new SSD. This ensures that all the data and settings from your previous hard drive are transferred to the new SSD, saving you the hassle of starting fresh.

    To begin, you’ll need to connect your SSD to your computer through a USB port or internally. Then, you’ll need to install software such as Clonezilla or Macrium Reflect to initiate the cloning process. Once you’ve completed the cloning process, you can disconnect your old hard drive and boot your computer using the new SSD.

    In no time, you’ll experience faster boot-up times, smoother application launches, and better overall performance. So, why wait? Upgrade your computer with an SSD and enjoy a lightning-fast experience!

    Transferring OS to SSD Drive

    So you’ve added an SSD drive to your laptop and now you’re wondering how to transfer the operating system (OS)? Well, fortunately, the process isn’t as difficult as you might think. Firstly, you’ll want to clone your existing hard drive onto the SSD drive. This can be done using software such as Clonezilla or Macrium Reflect.

    Once you’ve done that, you’ll need to change the boot order in your laptop’s BIOS to make sure it boots from the SSD drive rather than the original hard drive. Lastly, you’ll want to format the original hard drive to free up the space and make it available for other uses. Keep in mind that transferring the OS can be a bit tech-heavy, so if you’re not confident doing it yourself, it’s always best to seek the help of a professional.

    But with a few nifty tools and some know-how, you’ll be able to enjoy the speed and performance benefits of your new SSD drive in no time.

    Boot From Recovery Drive

    Transferring OS to SSD Drive If you’ve recently installed an SSD drive on your computer and you want to transfer the operating system to it, you need to create a recovery drive first. This is a USB drive with the capability to boot your computer into a recovery environment and let you troubleshoot issues, repair your system, and even reinstall Windows if necessary. Once you have the recovery drive, plug it into your computer, boot from it and select the custom installation option.

    This will let you choose the new SSD drive as the installation location for Windows. This process may take a while, but once it’s done, you’ll have an operating system that’s optimized for your SSD drive, with faster boot times and snappier performance. Don’t forget to back up all your data before doing this, as the installation will overwrite everything on your current drive.

    Follow On-Screen Instructions

    When transferring your operating system to a new SSD drive, it’s important to carefully follow the on-screen instructions provided by your computer. These instructions will guide you step-by-step through the transfer process, ensuring that the transfer is successful and without any complications. First, make sure that you have all the necessary software and tools on hand before beginning the transfer process.

    This includes a copy of your current operating system, any additional drivers or software that your computer requires, and the new SSD drive that you will be transferring the operating system to. Once you have everything you need, simply follow the on-screen instructions, which will likely involve installing the new SSD drive, running a disk cloning software, and transferring the operating system to the new drive. Throughout the process, be sure to carefully read and follow each instruction to avoid making any mistakes.

    Remember, any errors during the transfer process could result in data loss or other serious issues, so it’s important to take your time and carefully follow each step. With a little patience and attention to detail, transferring your operating system to a new SSD drive can be a simple and straightforward process that can greatly improve your computer’s performance and reliability. So if you’re looking to upgrade your system, be sure to follow the on-screen instructions carefully to ensure a smooth and successful transfer process.

    Final Steps

    After adding an SSD drive to your laptop, you may want to transfer your operating system over to the new and improved hardware. Luckily, this process is not as complicated as it may seem. Before getting started, make sure you have a backup of all of your important files and data.

    There are a few different methods you can use to transfer your OS, including cloning your existing drive or doing a clean installation of your operating system on the new SSD. Cloning your drive is a quicker process and will create an exact replica of your current drive, but a clean installation can be more reliable and ensure that your new SSD is running at its fullest potential. Either way, once your operating system is transferred, you can enjoy faster boot times and improved performance on your laptop.

    Don’t forget to properly dispose of your old drive, either by wiping it clean or physically destroying it to protect your sensitive information. With these final steps, you’ll be able to fully utilize your new SSD and enjoy a better overall experience on your laptop.

    Check SSD Boot Order

    When it comes to setting up a new computer, the final steps can sometimes be the most confusing. One important task you’ll want to complete is checking the SSD boot order. This is the order in which your computer will try to boot from different storage devices, and you want to make sure your SSD is first on the list.

    To check this, you’ll need to enter your computer’s BIOS. The process can vary depending on your computer’s brand and model, but you can usually access the BIOS by pressing a key like F2 or Del as your computer boots up. Once you’re in the BIOS, look for the boot order settings and make sure your SSD is at the top of the list.

    This will ensure that your computer is booting from the fast and reliable SSD instead of a slower HDD or other storage device. By taking the time to check and adjust the SSD boot order, you can optimize your computer’s performance and avoid any potential headaches down the line.

    Erasing Old Hard Drive

    When it comes to getting rid of an old hard drive, it’s important to remember that simply deleting files is not enough. To truly erase the hard drive, you need to take a few final steps. One of the best ways to ensure your data is permanently erased is to use a disk-wiping tool.

    This type of software overwrite your hard drive with junk data, making it nearly impossible to recover anything that was previously on the disk. Some people also choose to physically destroy their old hard drives, but this isn’t always necessary unless you’re dealing with highly sensitive information. In either case, it’s important to take the time to securely erase your old hard drive to protect your privacy and ensure that your data doesn’t fall into the wrong hands.

    Conclusion

    In summary, adding an SSD drive to your laptop can greatly improve your device’s performance and speed. However, transferring your operating system to the new drive can be a bit tricky. It’s important to back up your data beforehand and seek guidance from online tutorials or a tech-savvy friend.

    Think of it as giving your laptop a heart transplant – a delicate procedure, but ultimately worth it in the end. Happy computing!”

    FAQs

    Can I transfer my operating system from an HDD to an SSD?
    Yes, you can transfer your operating system from an HDD to an SSD using software like Clonezilla or Macrium Reflect.

    How do I check if my SSD has enough space for the OS transfer?
    You can check the size of your current OS installation via the properties window of your disk. Make sure the size of the OS is smaller than the capacity of the SSD.

    Should I reinstall the OS on the new SSD drive or clone it?
    It depends on your personal preference. Cloning the OS allows you to preserve your current settings and files, whereas a fresh install will give you a new start and ensure optimal performance.

    Can I clone my OS to an external hard drive before transferring it to the SSD?
    Yes, you can clone your OS to an external hard drive and then transfer it over to the SSD. Just make sure the external drive has enough storage to hold the cloned OS.
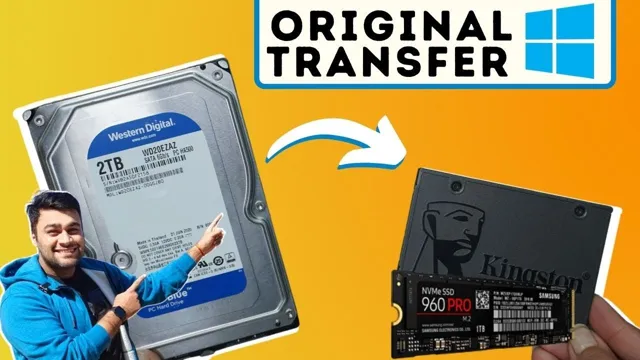
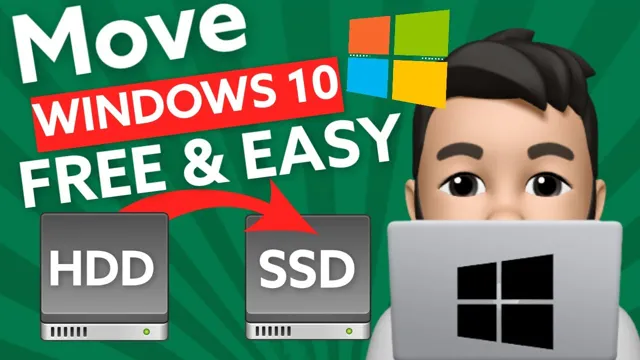
  • Boost Your PC’s Performance: A Step-by-Step Guide to Moving Windows 10 to an SSD

    Are you tired of sluggish performance and slow boot times on your Windows 10 PC? Then it’s time to consider upgrading to a solid-state drive (SSD). Moving Windows 10 to an SSD can dramatically improve your computer’s speed and overall performance, making it a worthwhile investment for anyone who relies on their computer for work or play. Think of it like upgrading from a bicycle to a sports car.

    Sure, you can still get from point A to point B on a bicycle, but it’s slow and requires more effort. With a sports car, you’ll get there faster, with less effort and with added benefits like a smoother ride and more responsive handling. That’s exactly what you can expect when you move to an SSD.

    In this guide, we’ll walk you through the steps to move Windows 10 to an SSD, including how to clone your existing hard drive, transfer your data, and configure your new SSD for maximum performance. We’ll also cover some of the drawbacks and potential pitfalls of using an SSD, as well as some tips for optimizing your system to take full advantage of its new hardware. So buckle up and get ready for a faster, more responsive computing experience.

    With just a few simple steps, you can move Windows 10 to an SSD and enjoy the benefits of modern storage technology.

    Preparing to Migrate

    Moving your Windows 10 operating system to a solid-state drive (SSD) can be a great way to boost the performance of your computer. Before you start the migration process, back up all your important files and data to ensure that you do not lose anything in case the migration goes wrong. You also need to make sure that your SSD has enough space to accommodate all the data on your current hard drive.

    Once you have verified that your SSD can accommodate your files, you can use third-party software like EaseUS ToDo Backup, Clonezilla, or Macrium Reflect to clone your current hard drive to your SSD. After the cloning process is complete, you need to change your boot order in the BIOS to direct your computer to boot from the SSD. Finally, ensure that all the hardware drivers are up-to-date and optimize your SSD settings to ensure optimal performance.

    Overall, moving your Windows 10 operating system to an SSD can be a relatively straightforward process, as long as you take the necessary precautions and follow the steps carefully.

    Check Your SSD Compatibility

    Before starting the migration process, it’s crucial to check your SSD’s compatibility with your computer. Not all SSDs work well with all systems, and it’s essential to ensure that your SSD and computer are a match made in heaven. Before investing in an SSD, make sure to check your computer’s specifications and ensure that the SSD is compatible with it.

    Many SSDs come with manufacturer specifications regarding compatibility, and it’s essential to verify them before making a purchase. Installing an incompatible SSD can lead to issues such as data loss or system crashes. So it’s better to be safe than sorry and ensure that everything is compatible before starting the migration process.

    how do i move windows 10 to an ssd

    Backup Important Data

    When getting ready for a data migration, it is crucial to make sure that all important data is backed up. This not only protects your data but also gives you peace of mind knowing that if something goes wrong during the migration process, you won’t lose any vital information. There are several ways to back up your data, including cloud storage solutions, external hard drives, or even just copying files to a USB drive.

    It’s best to use multiple backup methods, especially if the data you are backing up is critical to your business or personal life. Don’t take shortcuts when it comes to data backup, and make sure that every important file is backed up properly. After all, it’s better to be safe than sorry and lose valuable data that you can’t get back.

    Gather Materials

    When preparing to migrate, gathering materials is an essential step to ensure a smooth and successful transition. This includes identifying and backing up all important data, such as files, databases, and applications. It’s critical to assess the amount of data to be migrated and determine if any upgrades or changes will need to be made to accommodate the new environment.

    Additionally, it’s important to determine the hardware and software requirements for the new environment and ensure they meet the necessary specifications. Planning ahead and gathering all necessary materials will save time and reduce stress during the migration process. With proper preparation, migrating to a new environment can be a seamless and stress-free experience.

    Migrate Windows 10 to SSD

    So, you’re looking to move your Windows 10 operating system to an SSD – congrats! This is a great way to boost your computer’s speed and overall performance. The process may seem daunting, but it’s actually fairly straightforward. First, you’ll need to download cloning software like EaseUS Todo Backup or Macrium Reflect.

    Then, you’ll need to connect your SSD to your computer and initialize it through the Disk Management tool. Once your SSD is ready to go, you can use the cloning software to transfer your Windows 10 operating system, along with any files and programs you want to keep. This process can take some time, so be patient! Once the cloning process is complete, you’ll need to change your boot settings in the BIOS to ensure your computer boots from the new SSD.

    And voila – you’ve successfully migrated your Windows 10 to an SSD! Keep in mind, though, that this process does require some technical know-how. If you’re not confident in your abilities, it may be worth seeking the help of a professional.

    Use Built-in Windows Tools

    When it comes to migrating your operating system to a new solid-state drive (SSD), you might feel overwhelmed with the process. However, did you know that Windows 10 comes with built-in tools that allow you to easily migrate your system to a new drive? One of the most helpful tools is the “Clone” feature found in the Windows System Image Backup tool. This tool allows you to create a complete copy of your Windows 10 system, including all files, settings, and applications, onto your new SSD.

    Another built-in tool that can aid in the migration process is the Disk Cleanup tool. This tool helps you to free up space on your system drive, which can make the migration process smoother and less time-consuming. Overall, with the help of these built-in tools, migrating your Windows 10 system to an SSD can be a simple and stress-free process.

    Clone Your Hard Drive

    If you want to speed up your computer’s performance, you may want to migrate Windows 10 to an SSD. The process can seem daunting, but it’s actually quite simple if you clone your hard drive. Cloning your hard drive involves copying all of its contents onto a new drive, including the operating system.

    By doing this, you’ll have an exact replica of your old hard drive, but with the added benefit of the increased speed of an SSD. To get started, you’ll need to purchase an SSD that’s large enough to hold all of your data. Then, you’ll need to use cloning software to copy your hard drive.

    There are many great options available, such as EaseUS Todo Backup, Macrium Reflect, and Clonezilla. These programs make the process easy and straightforward, and they’ll guide you through each step. Once you’ve cloned your hard drive, you’ll need to physically install the SSD.

    This involves opening up your computer’s case, which can be intimidating for some people. It’s important to follow instructions carefully and make sure you ground yourself to avoid damaging your components. Overall, migrating Windows 10 to an SSD can greatly improve your computer’s performance, and cloning your hard drive is an easy way to do it.

    With the right software and a bit of know-how, you can have a faster and more efficient computer in no time.

    Booting From Your SSD

    If you’re looking to speed up your computer or upgrade to a newer and faster solid-state drive, you may be wondering, “how do I move Windows 10 to an SSD?” Thankfully, making the switch is easier than you might think. There are a few different ways to move Windows to your new SSD, but one of the most effective methods is to clone your existing hard drive onto the SSD. This ensures that all your files, settings, and programs are transferred over seamlessly.

    To do this, you’ll first need to connect your SSD to your computer, and then use a cloning software such as EaseUS Todo Backup, Macrium Reflect, or Samsung’s Data Migration tool. Then, simply follow the on-screen instructions to clone your drive and reboot your computer, making sure to select the SSD as your primary boot device in BIOS settings. With your new SSD up and running, you should notice a considerable improvement in your computer’s speed and performance.

    Change Your Boot Order in BIOS

    Booting from your SSD can significantly boost your computer’s performance, and changing the boot order in your BIOS is a crucial step. The process may seem intimidating, but it’s not as complicated as it sounds. Start by entering your BIOS by pressing the corresponding key during startup, usually F2 or Delete.

    Once you’re in the BIOS, navigate to the Boot menu, and find the option that allows you to change the boot order. Move your SSD to the top of the list, ensuring it’s the first device the system tries to boot from. Save your changes and exit the BIOS.

    Your computer can now access your operating system and other essential files from the faster SSD, leading to a faster and smoother computing experience. Make sure to follow the manufacturer’s instructions and consult resources online if you encounter any issues during the process. With a few simple steps, you can significantly improve your computer’s performance with a faster boot time and enhanced overall functioning.

    Remove Old Hard Drive

    If you’ve successfully installed your new solid-state drive (SSD) into your computer, the next step is to remove your old hard drive to free up space and prevent any conflicts between the two. Once your old hard drive is out, it’s time to boot up your computer and make sure it’s now running from your new SSD. To do this, you need to access your computer’s BIOS (Basic Input/Output System) and ensure that the SSD is set as the primary boot drive.

    You can do this by restarting your computer and pressing the appropriate key (usually Del or F2) to enter the BIOS settings. From there, navigate to the “Boot” tab and select your SSD from the list of available boot drives. Hit “Save and Exit,” and your computer should now be running from your new SSD, providing faster speeds and improved performance.

    Enjoy the Benefits of SSD

    If you’re looking to upgrade your computer’s performance, one of the best things you can do is install an SSD. With an SSD, you’ll enjoy faster boot times, faster data access, and better overall responsiveness. But if you’re wondering how to move Windows 10 to an SSD, don’t worry—it’s not as difficult as you might think.

    There are several ways to clone your existing Windows installation to your new SSD, including using built-in Windows tools or third-party software. One popular option is to use a tool like EaseUS Todo Backup, which allows you to create a bootable USB drive, clone your existing drive to your new SSD, and then boot from the USB drive to complete the installation. Once you’ve completed the process, you’ll be able to enjoy all of the benefits of your new SSD.

    So don’t wait—make the upgrade and start experiencing the faster, smoother performance that comes with an SSD.

    Conclusion

    In short, moving Windows 10 to an SSD is like giving your computer a Ferrari engine. It’s faster, smoother, and can handle more tasks seamlessly. Just make sure to follow the instructions carefully and backup your important files before making the switch.

    And voila, you’ll have a computer that’s ready to zoom through any task you throw its way!”

    FAQs

    What are the benefits of moving Windows 10 to an SSD?
    The benefits include faster boot times, faster application load times, and overall improved system performance.

    Can I move Windows 10 to an SSD without losing my files?
    Yes, you can clone your current Windows 10 installation to the SSD using migration software like EaseUS Todo Backup or Macrium Reflect.

    What is the recommended size for an SSD to move Windows 10?
    The recommended size is at least 240GB to ensure enough space for the operating system and essential applications.

    Will moving Windows 10 to an SSD cause any issues with my programs or settings?
    In most cases, moving Windows 10 to an SSD should not cause any issues with your programs or settings. However, it’s always recommended to backup important data before making any changes.

    Can I move Windows 10 to an external SSD?
    Yes, you can move Windows 10 to an external SSD, but it may not perform as fast as an internal SSD due to limitations in data transfer speed.

  • Upgrading to an SSD on your 2012 MacBook Pro: A Comprehensive Guide

    Upgrading to an SSD on your 2012 MacBook Pro: A Comprehensive Guide

    If you’ve been using your 2012 MacBook Pro for a while, it’s no surprise if you’re experiencing slower speeds and performance issues. However, there’s a quick and simple solution to give your Mac the boost it needs: upgrading to an SSD. In this step-by-step guide, we’ll show you how to upgrade to an SSD and give your MacBook Pro a new life! First, let’s explain what an SSD is: it stands for Solid State Drive, a storage device that is faster, more reliable, and durable than the traditional hard drive.

    Instead of using spinning disks to store data, SSDs use flash memory chips, which results in faster read and write speeds. The benefits of SSD can make a noticeable difference in your MacBook Pro’s speed and performance. However, the process of upgrading your MacBook Pro’s hard drive to an SSD may seem daunting, but fear not! We’ve broken it down into simple steps that anyone can follow.

    In this guide, we’ll cover the tools and materials you need, how to backup your data, how to clone your existing hard drive onto the new SSD, and how to install the new SSD into your MacBook Pro. By the end of this guide, you’ll have a faster MacBook Pro that can handle your day-to-day tasks without any hassle. So, let’s get started on upgrading your MacBook Pro with an SSD!

    What You Need

    If you’re an owner of a 2012 MacBook Pro, upgrading the solid-state drive (SSD) might be a beneficial way to breathe new life into your device. To start with, you should check what type of SSD your MacBook Pro is compatible with, as there are various sizes and models in the market. Common drives that support this MacBook model are the Samsung 860 EVO and the Crucial MX500.

    Make sure to connect your MacBook Pro to a stable power source during the upgrade process. Then, make a backup of all important files and settings since the process will require erasing the existing drive. You can then remove the bottom cover and the current drive, insert the new SSD into the drive slot, and reinstall the operating system (OS).

    Follow these steps accurately to avoid any damage or errors. A new SSD can improve your MacBook’s performance in ways such as faster boot times and better multitasking abilities, giving it a new lease of life.

    Compatible SSDs and Tools

    When upgrading your computer’s storage with an SSD, it’s important to make sure that the SSD is compatible with your system. Not all SSDs will work with all computers, so it’s crucial to do your research. Some factors to consider when choosing a compatible SSD include the type of interface your computer uses (such as SATA or PCIe), the form factor (

    5-inch or M.2), and the storage capacity you need. Additionally, you’ll need some tools to install the SSD, such as a screwdriver, and you may need software to clone your existing hard drive onto the new SSD.

    Before making any purchases, make sure to double check that your computer supports the SSD you’re considering. By taking the time to ensure compatibility and having the necessary tools and software, you can upgrade your computer’s storage with ease and enjoy faster speeds and improved performance.

    2012 macbook pro ssd upgrade how to

    Preparing Your MacBook Pro

    If you’re looking to upgrade your 2012 MacBook Pro with an SSD, there are a few things you’ll need to do to prepare. First, you’ll want to make sure you have a backup of all your important files and data. This can be done using Time Machine or any other backup software of your choice.

    Once you’ve backed up your data, you’ll need to gather the necessary tools – a screwdriver set, an anti-static mat or wristband, and of course, your new SSD. Next, you’ll need to open up your MacBook Pro and remove the old hard drive. This can be a bit challenging, but with the right tools and some patience, you should be able to get it done.

    Once you’ve removed the old hard drive, you’ll need to install the new SSD in its place and secure it with the screws. Finally, you’ll need to reinstall macOS on your new SSD and restore your backed-up data. With a bit of effort and some know-how, upgrading your MacBook Pro with an SSD can be a worthwhile investment that can significantly improve your computer’s speed and functionality.

    Backup Important Data

    Backing up important data is a fundamental step in preparing your MacBook Pro for any unforeseen circumstance. Losing data due to a system failure, malware, or accidental deletion can be a frustrating and costly experience. Therefore, before anything else, it’s crucial to ensure that all of your valuable data is safe and secure.

    Backing up data can be done in many ways, including using cloud-based services or external hard drives. These options provide you with reliable ways to keep your files safe and readily available even when your MacBook Pro encounters technical problems. Always remember to make a habit of backing up your data regularly to avoid the risk of losing valuable information.

    Ultimately, taking the time and effort to prepare your MacBook Pro and safeguarding your data can save you time, money, and stress in the long run.

    Create Bootable USB Drive

    Creating a bootable USB drive is essential when preparing your MacBook Pro. It allows you to install or upgrade the macOS operating system, repair damaged disks, or run diagnostic tools. To create a bootable USB drive on your MacBook Pro, you will need a USB drive with a minimum capacity of 8GB, the macOS installation package from the App Store, and a third-party tool like Disk Maker X or Terminal.

    Disk Maker X is a user-friendly application that automates the process of creating a bootable USB drive, while Terminal requires some basic computer skills to execute the commands. Once you have the necessary tools, simply follow the instructions provided by the tool of your choice. Remember to back up your data before proceeding, as creating a bootable USB drive involves erasing the entire disk.

    Don’t forget to eject the USB drive safely before removing it from your MacBook Pro. By creating a bootable USB drive, you can avoid costly repairs or time-consuming trips to the Genius Bar, ensuring your MacBook Pro is up and running in no time.

    Replacing the Hard Drive with SSD

    Upgrading your 2012 MacBook Pro’s hard drive with an SSD is a great way to improve its performance and extend its lifespan. The process involves a few simple steps, but it’s important to have the right tools and know-how before you begin. First, you’ll need to back up all your data to an external hard drive or cloud storage.

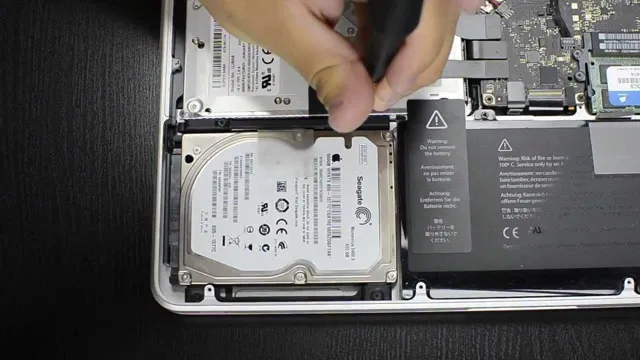
    Then, you’ll need to remove the bottom cover of your MacBook Pro and locate the hard drive. Once you’ve found it, carefully remove it and replace it with your new SSD. You’ll then need to reinstall macOS on your new drive and transfer your data back to your computer.

    With an SSD installed, your MacBook Pro will boot up faster, launch applications more quickly, and have a better overall performance. So if you’re looking to give your old MacBook Pro a new lease on life, upgrading to an SSD is definitely worth considering.

    Removing the Old Hard Drive and Installing the SSD

    If you’re planning on replacing your computer’s hard drive with an SSD, the first step is to remove the old hard drive. This process can vary depending on your computer’s make and model, but generally involves opening up the case and locating the hard drive. Once you’ve found it, you’ll need to unscrew any mounting brackets and carefully disconnect the cables.

    Take note of how the old hard drive was configured so you can replicate it with the SSD. Installing the SSD is a similar process – attach it to the mounting brackets and connect the cables. Keep in mind that it’s important to handle the SSD with care, as it’s a delicate piece of equipment.

    Once everything is in place, you’ll need to reinstall the operating system and any important programs or files. With the SSD in place, your computer should boot up faster and perform better overall. You’ll also need to make sure you dispose of the old hard drive properly – either wipe it completely or physically destroy it to ensure your data is secure.

    Formatting the SSD and Installing macOS

    If you’re looking for a significant boost in your Mac’s speed, replacing the hard drive with an SSD might be the way to go. SSDs are faster and more reliable than traditional hard drives, and the process of replacing the drive is relatively straightforward. Once you have the SSD, you’ll need to format it and install macOS.

    To do this, you’ll need to create a bootable USB drive with the macOS installer on it. After that, you’ll need to install the SSD in your Mac, boot from the USB drive, and follow the on-screen instructions to install macOS onto the new drive. The process may seem a little intimidating, but with a little patience and some basic technical knowledge, you can have a lightning-fast Mac in no time.

    So, don’t wait any longer and take the leap to upgrade your Mac with an SSD today!

    Post-upgrade Optimization

    If you’re looking to upgrade your 2012 MacBook Pro with an SSD, you’ll notice a significant improvement in speed and performance. However, it’s important to optimize your new SSD to get the most out of it. One of the first things you’ll want to do is enable TRIM support, which helps to maintain the performance of your SSD over time.

    You can do this by using a utility like Trim Enabler or by using the command line to enable TRIM manually. It’s also a good idea to disable any unnecessary startup items and applications, as these can slow down your system and use up valuable resources. Additionally, you can set your SSD as the default startup disk in System Preferences to reduce boot times.

    It’s important to note that if you’re replacing your old hard drive with an SSD, you’ll want to consider backing up your data and cloning your old drive before installing the new one. With a little bit of post-upgrade optimization, your 2012 MacBook Pro will be running faster and smoother than ever before.

    Enabling TRIM and other Settings

    Post-upgrade optimization is crucial for ensuring that your computer operates at its best capacity. Enabling TRIM is one of the key steps in this process. TRIM aids in maintaining the efficiency of solid-state drives (SSDs) by preventing the drive from slowing down if it becomes full.

    A full drive makes it harder for an SSD to find open cells to write new data, causing it to slow down. Enabling TRIM ensures that the data is wiped out from cells that are no longer in use, allowing the SSD to perform more efficiently. It’s also important to optimize other settings such as updating drivers, clearing cache and cookies, and removing unnecessary software.

    By doing so, your computer will operate faster, more efficiently, and with fewer errors.

    Tips to Maximize SSD Performance

    Congratulations on upgrading your PC or laptop with an SSD! Now it’s time to optimize your new drive to get the most out of it. One key factor to maximize SSD performance is to make sure that the operating system’s partition is aligned properly. You can use a third-party tool like EaseUS Partition Master to ensure that the SSD’s partition is correctly aligned.

    Additionally, disabling features like defragmentation and indexing can help prevent unnecessary wear and tear on your SSD, improving its longevity. Another crucial step to enhancing SSD performance is to avoid filling the drive to capacity, as this can cause the drive to slow down. By keeping at least 20% of free space on the drive, you can ensure that it continues to operate at optimal speeds.

    These post-upgrade optimizations can help your SSD operate at peak performance and ensure that your computer runs smoothly.

    Enjoy Your Upgraded MacBook Pro

    If you’re still using a 2012 MacBook Pro, it’s time for an upgrade. One of the best ways to breathe new life into your old machine is by installing an SSD (solid-state drive). Not only will it make your computer faster, but it will also extend its lifespan and improve its performance.

    The process of upgrading is easier than you might think, and you’ll only need a few tools and some basic know-how. First, you’ll need to purchase an SSD that’s compatible with your MacBook Pro. Next, back up all your data onto an external hard drive, since you’ll need to erase everything from your current hard drive during the installation process.

    You’ll also need a screwdriver and some patience to open up the bottom of your MacBook Pro and replace the old drive with your new SSD. Once you’ve installed the new SSD, you can then install macOS and transfer your files back onto your computer. With your upgraded MacBook Pro, you’ll notice a significant boost in speed and performance, making it feel like a brand new machine.

    So, don’t hesitate any longer and get started on your 2012 MacBook Pro SSD upgrade today!

    Conclusion

    In conclusion, upgrading your 2012 MacBook Pro with an SSD is like giving your trusty old steed a new lease on life. With faster boot times, smoother performance, and increased storage capacity, you’ll wonder how you ever got by without it. It’s like upgrading from a flip phone to a smartphone – once you make the switch, you’ll never look back.

    So don’t be afraid to take the plunge and give your computer the upgrade it deserves. Your future self will thank you!”

    FAQs

    What size SSD can I upgrade to in my 2012 MacBook Pro?
    The maximum supported SSD size for a 2012 MacBook Pro varies depending on the model. The 13-inch MacBook Pro supports up to a 2TB SSD, while the 15-inch MacBook Pro supports up to a 4TB SSD.

    Can I upgrade the RAM in my 2012 MacBook Pro along with the SSD?
    Yes, you can upgrade both the SSD and RAM in your 2012 MacBook Pro. However, the process for each upgrade is different and may require professional assistance.

    What tools do I need to upgrade the SSD in my 2012 MacBook Pro?
    You will need a Pentalobe screwdriver, a Torx screwdriver, an external hard drive, and an SSD with the appropriate connector type (either SATA or PCIe).

    Is it possible to transfer my data from the old SSD to the new one during the upgrade process?
    Yes, you can transfer your data from the old SSD to the new one either by using an external hard drive or by using cloning software. Cloning software like Carbon Copy Cloner or SuperDuper can make the process easier and faster.

  • M2 Drives Exposed: The Truth About Heat Sinks – Exploring the Need for Heat Sinks in M2 Drives for Optimal Performance

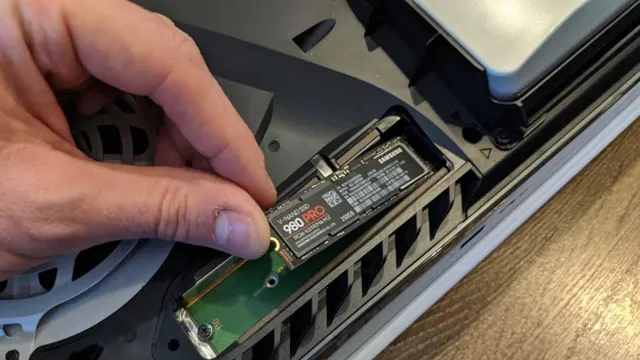
    When it comes to M.2 solid-state drives (SSDs), there has been much debate over whether they require heat sinks. With their compact form factor and lightning-fast speeds, M.

    2 SSDs have become increasingly popular among gamers and power users alike. Yet, some wonder if they are at risk of overheating, leading to performance degradation, or even worse, damage to the drive. So, the question remains: do M.

    2 drives need heat sinks? The answer isn’t a simple yes or no. It depends on several factors, including the type and performance of the drive, the system’s airflow, and the workload. In this blog post, we’ll delve into this topic in-depth.

    We’ll discuss what M.2 drives are, the benefits and drawbacks of heat sinks, and whether they are necessary for your specific setup. By the end of this read, you’ll have a better understanding of whether or not you need a heat sink for your M.

    2 SSD.

    What Are M2 Drives?

    M2 drives are a type of solid-state drive (SSD) that use the M.2 form factor, which is a small rectangular shape that connects directly to the motherboard. M2 drives are a popular choice for those looking to upgrade their existing hard drives because they provide faster read/write speeds, are smaller in size, and use less power than traditional hard drives.

    While M2 drives don’t necessarily require heatsinks, if you’re using them for high-performance applications or in a gaming PC, adding a heatsink can help to dissipate the heat generated by the drive, which can prolong the lifespan of the drive. However, if you’re using an M2 drive for basic tasks like web browsing or word processing, a heatsink likely won’t be necessary. Ultimately, whether or not you need a heatsink for your M2 drive will depend on your specific use case and the type of M2 drive you have.

    Definition

    M2 drives are small, high-speed solid-state drives that are designed to fit into M.2 slots on motherboards. These drives can offer significantly faster transfer speeds than traditional hard disk drives, making them an ideal choice for users who need to quickly access large amounts of data.

    M2 drives come in different types, with some utilizing PCIe interfaces that allow them to achieve even faster speeds. Additionally, these drives can be used as primary storage devices for operating systems, applications, and games or as secondary storage devices to enhance your existing storage capacity. Overall, M2 drives are a great choice for those looking to boost their computer’s performance and work more efficiently.

    do m2 drives need heat sinks

    Advantages over Other Types of Drives

    M2 drives are a type of solid-state drive that offer significant advantages over traditional hard disk drives and even other types of solid-state drives. M2 drives are much smaller in size and provide faster read and write speeds, making them ideal for use in high-performance computers. They are also more energy-efficient than HDDs since they have no moving parts, reducing power consumption and heat output.

    Additionally, M2 drives are more reliable, as they are less prone to mechanical failures. Their compact form factor also allows for easy installation and maintenance, making them a popular choice among computer enthusiasts. If you are looking for an upgrade to your computer’s storage system, a M2 drive could be just what you need to enhance your computer’s performance.

    Benefits of Heat Sinks for M2 Drives

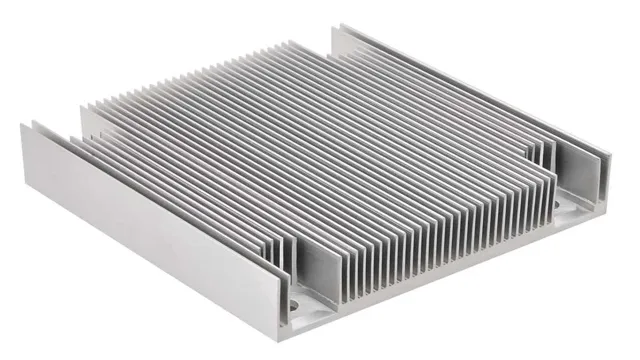
    M2 drives have become increasingly popular in recent years due to their small size and fast performance. However, as with any electronic device, heat is generated during use. Heat sinks are used to dissipate the heat generated by M2 drives, providing many benefits.

    One of the biggest benefits of heat sinks is that they help to prolong the life of the drive. When a drive gets too hot, it can cause damage to the chips and other components, leading to data loss and system failure. Heat sinks also help to improve the performance of M2 drives.

    When the drives are kept cooler, they are able to operate more efficiently and reliably. Overall, adding a heat sink to an M2 drive is a simple and effective way to improve its performance and longevity. So, do M2 drives need heat sinks? The answer is yes, especially if you want to get the most out of your investment.

    Reduction in Heat

    One of the significant benefits of using heat sinks for M.2 drives is the reduction in heat generated during use. Heat is a significant concern in the operation of electronics as it can negatively affect their performance and even cause damages in the long run.

    M.2 drives are known to generate a significant amount of heat, which can be problematic for prolonged use. The installation of heat sinks on M.

    2 drives helps to dissipate the heat produced, allowing the drive to operate at cooler temperatures and improve its overall performance. This ensures that the M.2 drive performs optimally and lasts longer, reducing the need for replacement or repair.

    In addition, utilizing heat sinks also ensures that the surrounding components are not affected by heat, resulting in overall improved performance for the system.

    Extended Lifespan of the Drive

    Heat sinks can offer several benefits when it comes to M2 drive longevity. By reducing the temperature of the drive, they can prevent overheating and ensure that the components operate efficiently. This level of heat reduction can extend the lifespan of the drive and improve its performance.

    Heat sinks work by maximizing the surface area and optimizing the airflow around the drive, preventing hotspots and distributing heat evenly. This extra cooling can also reduce the risk of thermal throttling, which can impact the drive’s speed and performance. In addition, the use of a heat sink can help prevent data loss caused by overheating.

    By investing in a quality heat sink, you can ensure that your M2 drive runs smoothly and lasts longer, protecting your investment and improving your system’s overall performance.

    Improved Performance

    Heat Sink for M2 Drives Heat sinks are a great addition to M2 drives as they address the issue of heat build-up during usage. The main advantage of using heat sinks is the improvement in performance. As a result of the reduced heat build-up, the M2 drive can now operate at higher speeds and for longer periods.

    This results in better performance overall and a more seamless user experience. Additionally, heat sinks can help to extend the lifespan of the M2 drive as prolonged exposure to heat can cause damage and wear and tear. All in all, adding a heat sink to your M2 drive is a smart move, and one that can lead to a better computing experience.

    When Are Heat Sinks Necessary for M2 Drives?

    If you’re building a PC, you might be wondering whether M2 drives need heat sinks. The answer depends on the usage intensity. If you’re using your M2 drive heavily for gaming or applications that require a lot of data transfer, then it may generate more heat than usual.

    In such cases, heat sinks for M2 drives can come in handy. Heat sinks provide additional cooling for the M2 drive, which can help prevent it from overheating. In cases of casual use where the M2 drive is not put under high load, a heat sink may not be necessary.

    However, it’s always better to err on the safe side and invest in a heat sink to help prolong the lifespan of your M2 drive. Thus, creating the overall heat regulation of the system.

    High Workload Tasks

    Heat Sinks Necessary for M2 Drives If you plan on performing high workload tasks such as video editing or gaming on your computer, it’s important to ensure that your M2 drive doesn’t overheat. This is where heat sinks come into play. Heat sinks are used to disperse heat generated by the M2 drive and prevent damage from overheating.

    But when are heat sinks necessary for M2 drives? Well, it depends on how much workload your computer handles. If you only use your computer for basic tasks such as web browsing and word processing, you may not necessarily need a heat sink. However, if you plan on doing heavy-duty tasks such as video editing or gaming, having a heat sink installed is highly recommended to prevent your system from crashing due to overheating.

    So, if you’re a power user, investing in a good quality heat sink is a smart move.

    Small Computer Cases with Poor Ventilation

    small computer cases, heat sinks, M2 drives If you have a small computer case with poor ventilation, then heat sinks may be necessary for your M2 drives. These drives generate a lot of heat, and if there isn’t proper airflow, they can overheat and become damaged. Heat sinks can help dissipate the heat and keep your drives running smoothly.

    However, not all M2 drives require heat sinks. Generally, it depends on the type of drive you have and how much heat it generates. If you’re unsure whether your M2 drive needs a heat sink, it’s best to consult with an expert or the manufacturer.

    Don’t risk damaging your drive, invest in a proper cooling solution for your small computer case.

    Conclusion

    In conclusion, while it’s always nice to have a sleek and stylish heat sink on your M.2 drives, it’s not necessarily a requirement. While heat can certainly have an impact on the performance and longevity of your drives, many modern M.

    2 drives have built-in thermal management features that can help them stay cool even under heavy usage. So, if you’re in the market for an M.2 drive, don’t stress too much about the heat sink – focus on finding a drive that fits your needs and budget, and let the cooling take care of itself!”

    FAQs

    Why do M.2 drives get hot?
    M.2 drives can get hot due to the high-speed data transfer and heavy usage, causing the components to heat up.

    Is it necessary to have a heat sink for M.2 drives?
    It is not mandatory to have a heat sink for M.2 drives, but it can help in dissipating the heat and improving the lifespan of the drive.

    Can a heat sink reduce the performance of M.2 drives?
    No, a well-designed heat sink can improve the thermal performance of M.2 drives, making them work optimally without affecting their speed and performance.

    Do all M.2 drives require a dedicated heat sink?
    No, some M.2 drives come with built-in heat spreaders that can dissipate heat efficiently, eliminating the need for an additional heat sink.

  • Unlock the Power of Your Computer: A Guide to Fitting Your SSD Drive with Bay Kit

    Ready to upgrade to an SSD but don’t know where to start? Installing an SSD into a bay kit is a great way to enhance your computer’s speed and performance. And the best part is, it’s easier than you think. With just a few simple steps, you can have your SSD installed and ready to go in no time.

    In this blog, we’ll guide you through the process of installing an SSD into a bay kit, providing you with everything you need to get started. We’ll cover the tools and equipment required, explain the steps involved, and offer useful tips to ensure a smooth and successful installation. So, put on your tech hat and let’s get started!

    Prepare Your Work Area

    When it comes to installing an SSD drive, the first step is to prepare your work area to ensure that you have everything you need. This is crucial to ensure that your installation process goes smoothly. First, make sure that you have all the necessary tools, including a screwdriver, grounding strap, and anti-static mat.

    This will help to protect your drive from electrostatic discharge which can damage the components. Next, clear a work area on a flat surface to ensure that you have enough space to work with. It’s important to also have enough light to see what you’re doing.

    Remember to turn off your computer, unplug all cables, and remove the battery if you’re working on a laptop. By following these steps, you’ll be ready to install your new SSD drive with ease and without any issues. Remember, taking the time to prepare your work area is a small but crucial step in the process of fitting an SSD drive into a bay kit.

    Clear a space on a flat surface

    When preparing to work on a project, it’s essential to clear a space on a flat surface. Having a designated work area that is free from clutter, distractions, and obstacles can help you stay focused and increase productivity. Whether you’re working on a school project, crafting project, or home renovation, make sure to select a workspace that’s spacious enough to hold all of your materials and tools.

    Once you’ve found the perfect spot, clear off the surface and make sure it’s clean and dry. If you’re working on a delicate project or handling hazardous materials, consider covering your workspace with a protective layer such as a mat or tarp. Remember, by clearing a space on a flat surface, you’ll make it easier to work efficiently and keep your work organized.

    crucial how to fit ssd drive into bay kit

    Assemble your tools

    When assembling your tools for a project, it’s important to prepare your work area first. This means ensuring that you have enough space to spread out your materials and that the area is clean and free of clutter. You’ll also want to make sure you have all the necessary tools on hand before beginning.

    Depending on the project, this may include things like a hammer, screwdriver, drill, tape measure, and level. By having everything you need nearby and organized, you’ll be able to work more efficiently and avoid unnecessary interruptions. So take a few minutes before starting your project to assess your work area and gather all the tools you’ll need.

    With a little bit of preparation, you’ll be ready to tackle any DIY project that comes your way!

    Prepare Bay Kit and SSD

    If you’re looking to upgrade your computer’s speed and performance, one of the easiest and most effective ways to do so is by fitting an SSD drive into a bay kit. The process is straightforward and doesn’t require much technical knowledge. Firstly, you need to ensure that the bay kit is compatible with your computer.

    Once you’ve got the right kit, remove the screws from the existing hard drive and slide it out. Then, prepare the bay kit by attaching the brackets and screws that come with it. Finally, attach the SSD drive to the bay kit and slide it back into place.

    Make sure to securely fasten the screws and turn on your computer to ensure that your new drive is recognized. With the right tools and a little bit of patience, you can drastically improve your computer’s performance with a new SSD drive fitted into a bay kit.

    Open SSD drive bay kit

    If you’re looking to upgrade your computer by adding a new solid-state drive (SSD), you might want to consider getting an open SSD drive bay kit. This kit is designed to make installing an SSD into your computer as easy and straightforward as possible. Before you start, make sure you have the necessary tools and materials – you’ll need the SSD, the drive bay kit, a screwdriver, and possibly some screws.

    The first step is to remove the cover of your computer’s drive bay and slide the SSD into the open bay. Make sure the SSD is securely in place, and then use the screws provided with the kit to secure it. Once you’ve done that, you can replace the cover of the drive bay and start using your new, faster SSD! With an open SSD drive bay kit, you can rest assured that your SSD will be installed securely and correctly, giving you the confidence you need to enjoy better performance from your computer.

    Place your SSD in the tray

    If you’re looking to add a solid state drive (SSD) to your computer, the first step is to prepare the bay kit and the SSD itself. Most SSDs come with a mounting kit that includes a tray to fit your drive into. You’ll want to carefully remove the tray from the kit and locate the screws that came with it.

    Make sure to line up the mounting holes on the SSD with those on the tray, and use the screws to secure the drive in place. It’s important to make sure the SSD is snugly fitted into the tray to prevent any movement or vibrations while in use. Once the SSD is securely fastened in its tray, you’re ready to move on to the next step of installing it in your computer.

    By following these simple steps, you can easily prepare your bay kit and SSD for installation and get the best performance possible from your new solid state drive.

    Secure the SSD in place

    When installing an SSD, it’s crucial to secure it in place to prevent any damage or shifting within the device. Firstly, ensure you have all the necessary tools and hardware to prepare the bay kit and SSD for installation. Check the manual of your computer or motherboard to determine the required screws and mounting hardware for your specific device.

    Next, attach the mounting hardware to the SSD, making sure it’s firmly in place. Then, place the SSD in the bay kit and attach the screws tightly to secure it. Be sure not to over-tighten the screws as this can damage the device.

    Finally, double-check that the SSD is securely mounted before proceeding with any further installations. With these steps, you can rest assured that your SSD is firmly in place and ready to provide lightning-fast performance for years to come.

    Install the Bay Kit and SSD

    If you’re looking for a way to increase your computer’s storage capacity, fitting an SSD drive into a bay kit is a great option. The process is relatively straightforward and requires just a few tools. To begin, you’ll want to gather what you need, including a bay kit suitable for your computer and an SSD drive in the appropriate size.

    Next, you’ll want to find the bay in your computer where you want to install the SSD. Typically, this bay will be located near the hard drive bays, and may require removing a cover or bracket to access. Once you’ve identified the bay, carefully install the bay kit by screwing it in firmly.

    Finally, connect the SSD to your computer using the included cables, taking care to ensure everything is securely in place. With the installation complete, you’ll enjoy faster boot times and improved storage capacity that will make your computer run better than ever before. So, don’t be intimidated by this process, with a little time and effort, you’ll be able to install an SSD drive in a bay kit in no time!

    Fit the bay kit into your PC

    If you’re looking to upgrade your PC’s storage, installing an SSD is the perfect solution. One of the best ways to do this is by using a bay kit, which provides a simple and efficient way to install your new drive. Begin by opening your computer case and locating an available drive bay that aligns with your Bay Kit’s dimensions.

    Then, carefully insert the bay kit into the drive bay and secure it with screws or other hardware provided with the kit. Next, remove your new SSD from its packaging and slide it into the bay kit until it clicks into place. Make sure to connect the SATA data and power cables securely to both the SSD and your motherboard.

    Finally, close your computer case, power it on, and confirm that your system is recognizing the SSD. With this straightforward method, you can quickly and easily transform your computer’s storage capabilities.

    Connect the cables

    Now that you’ve got your hands on an SSD, it’s time to install it into your PC using a Bay Kit. Before anything else, make sure your system is shut down, and you’ve unplugged all cables. Next, locate the Bay Kit and carefully open it up.

    You’ll see a bracket inside that can be used to secure the SSD in place once you’ve installed it. You’ll also find some cables that you’ll need to connect to your motherboard. These cables should be labeled, so make sure you read them carefully and connect them to the correct ports.

    Remember, taking your time and being careful is essential at this stage. Rushing can lead to damage to your new hardware or even worse your motherboard. Once you’ve connected the cables, you’ll need to plug them into the power supply.

    After this, attach the bracket to your SSD, then slide it into the Bay Kit and secure it in place. Lastly, you’ll need to reattach any cables you may have disconnected earlier. Once everything is plugged in and secured, you can turn your system on and double-check that everything is functioning correctly.

    Congratulations, you’ve successfully installed your new SSD, and it’s now ready to use!

    Test the SSD and Celebrate

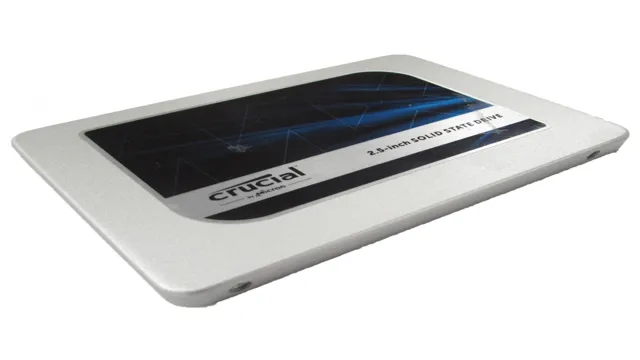
    So, you’ve got your Crucial SSD and the how-to-fit-SSD-drive-into-bay-kit. Now it’s time to put them to the test and celebrate! First, make sure you have the right tools before removing the hard drive from your laptop or desktop. Then, secure the mounting bracket to your SSD and slide it into the drive bay, using screws to fix it in place.

    Next, connect the SATA and power cables to the SSD and secure the drive bay. Congratulations! You’ve successfully installed your SSD. Now it’s time to run some tests and see just how much faster your computer can be.

    Utilize free benchmark programs like CrystalDiskMark, AS SSD Benchmark or Anvil’s Storage Utilities to compare your read and write speeds before and after the installation. You’ll be amazed at the difference a high-quality SSD can make. Best of all, you’ll be able to celebrate with lightning fast boot times, increased overall system performance and faster application launches.

    The Crucial How to Fit SSD Drive into Bay Kit ensures you get the most out of your investment.

    Conclusion

    In conclusion, fitting an SSD drive into a bay kit may seem like a daunting task, but it’s not rocket science. With the right preparation, tools, and a little bit of patience, you’ll be able to slide that drive into its new home with ease. Just remember, an SSD drive can give your computer a significant speed boost, so investing the time and effort into fitting it properly is crucial.

    Plus, if all else fails, you can always consult the instruction manual or call in a tech-savvy friend for assistance. Happy fitting!”

    FAQs

    What is SSD Drive Bay Kit?
    SSD Drive Bay Kit is a device that helps in connecting SSD hard drives to your computer’s motherboard. It also provides support to mount SSD drives inside the computer case.

    How do I know which SSD Drive Bay Kit is compatible with my computer?
    Check your computer motherboard’s specifications to ensure compatibility with the SSD drive and SSD Drive Bay Kit dimensions. You can then buy the SSD Drive Bay Kit with the right dimensions, mounting options (2.5 inches or 3.5 inches), and compatible connection interfaces (USB, SATA, or NVMe).

    Is it necessary to use a SSD Drive Bay Kit to mount an SSD hard drive?
    It is not necessary to use an SSD Drive Bay Kit, but it makes the installation process easier and more secure. If you want to install your SSD without a kit, you will need to use screws or other mounting hardware to connect it to the computer case.

    How do I install an SSD Drive Bay Kit?
    First, you need to open your computer case and locate the drive bay where you want to install the SSD drive. You can then mount the SSD Drive Bay Kit, connect the power and data cables, and secure the SSD drive into the drive bay kit. Finally, power on your computer and check if the SSD drive is recognized.

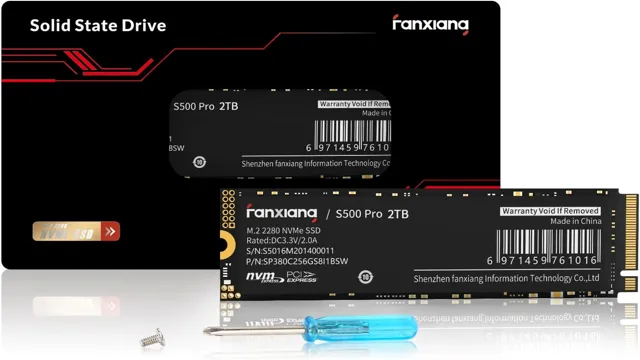
  • Unleash the Power of Storage with Fanxiang S500 Pro 2TB: Your Ultimate Solution for Data Backup and Management

    Unleash the Power of Storage with Fanxiang S500 Pro 2TB: Your Ultimate Solution for Data Backup and Management

    If you’re someone who is always running out of storage space on your computer, then you will know the struggles of having to constantly delete files and uninstall applications to free up space. It’s a frustrating experience that plagues far too many users. However, there’s a solution that can help you to maximize your storage and put an end to this never-ending cycle of file deletion.

    The FanXiang S500 Pro 2TB is a device that can provide you with a massive amount of storage space that you can use for all your applications, files, games, and more. With this device at your disposal, you can say goodbye to storage woes and hello to a clutter-free, organized computer that’s always ready to perform at its best.

    High-Speed Performance

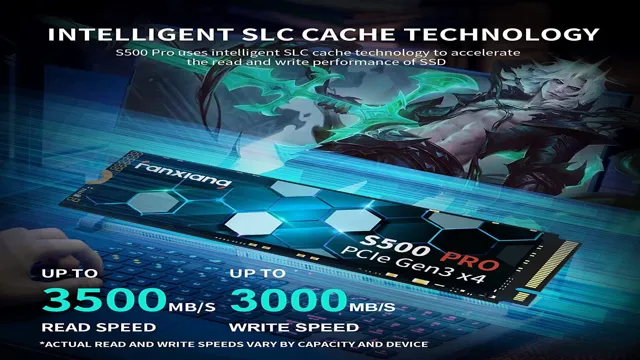
    The Fanxiang S500 Pro 2TB is a high-performance storage device that is designed to deliver lightning-fast data transfer speeds. Its cutting-edge technology enables it to provide optimal performance, making it the perfect choice for high-speed data storage. With a storage capacity of 2TB, this device can store large amounts of data, and its robust design ensures that it can withstand the rigors of daily use.

    Whether you are a gamer, a content creator, or a software developer, the Fanxiang S500 Pro 2TB is an excellent investment for your storage needs. So, if you want a device that combines high-speed performance with ample storage capacity, then the Fanxiang S500 Pro 2TB is the perfect choice for you.

    Experience lightning-fast data transfer speeds up to 10Gbps.

    High-Speed Performance Are you tired of waiting for what seems like an eternity for your files to transfer from your device to the computer? With lightning-fast data transfer speeds of up to 10Gbps, those frustratingly slow transfer times will now be a thing of the past. This high-speed performance is made possible with the latest advancements in technology. With this kind of power at your fingertips, you’ll be able to transfer large files quickly and efficiently, saving you plenty of time and effort.

    Whether you’re transferring documents, images, or videos, the high-speed performance will make the process seamless and effortless. So why waste any more time on slow transfers when you can experience lightning-fast data transfer speeds of up to 10Gbps? Give it a try and feel the difference for yourself.

    fanxiang s500 pro 2tb

    Efficiently store and access large files with minimal lag time.

    Storing and accessing large files can be a hassle, especially if you require high-speed performance. But there are ways to efficiently store and access large files with minimal lag time. One solution is to use solid-state drives (SSDs) rather than traditional hard drives.

    SSDs have no moving parts, allowing for faster read and write speeds that can handle large files with ease. Another solution is to consider a cloud-based storage system that offers high-speed connections and provides easy access to your data from anywhere and at any time. By utilizing these solutions, you’ll experience smooth and efficient file storage and access, ensuring that your work is always readily available when you need it most.

    So, whether you’re working on large video files or graphic design projects, don’t let slow storage be a hindrance, prioritize high-speed performance for efficiency and productivity.

    Massive Capacity

    The Fanxiang S500 Pro 2TB is an absolute powerhouse when it comes to storage capacity. With a massive 2 terabytes of space, it can handle all your data and then some. Whether you’re storing massive video files, thousands of high-resolution photos, or dozens of games, this device has the capacity to handle it all.

    Say goodbye to constantly running out of space and having to offload files onto external hard drives. The S500 Pro 2TB has you covered with enough room to store all your data and then some. Don’t settle for a smaller capacity device that will just leave you wanting more.

    Upgrade to the Fanxiang S500 Pro 2TB and enjoy the freedom and peace of mind that comes with massive storage capacity.

    Store up to 2TB of data, including 4K videos, photos, and music.

    Are you tired of running out of storage space on your devices? Look no further than our massive capacity hard drives, which can store up to 2TB of data! That’s enough room for all of your 4K videos, thousands of photos, and a huge music library. Whether you’re a content creator or just someone who wants to keep all of their important files in one place, our hard drives have got you covered. Imagine being able to store all of your files without having to constantly delete old ones to make room for new ones.

    With our hard drives, you won’t have to worry about running out of space anytime soon. And with the ability to store 4K videos, you’ll be able to keep all of your high-quality content in one place without sacrificing any of the detail and clarity. Plus, our hard drives are designed to be durable and reliable, so you can trust that your data is safe and secure.

    With so much storage space available, you’ll be able to back up all of your important files without having to worry about losing anything. In short, our hard drives offer a massive capacity that can’t be beat. Say goodbye to running out of storage space and hello to having all of your files in one convenient location.

    Upgrade your storage today with our high-capacity hard drives.

    Never run out of space with this massive storage solution.

    If you’re always running out of storage space on your devices, this massive storage solution is the answer to your prayers. With its huge capacity, you’ll never have to worry about deleting old files again. Not only does this storage solution offer ample space for all your files, but it also keeps them secure and easily accessible.

    Say goodbye to the frustration of constantly having to delete files to make space for new ones. This solution allows you to keep all of your favorite photos, videos, music, and other important documents in a single place. Plus, with its high-speed performance, you can access your files quickly and easily whenever you need them.

    If you’re looking for a reliable and efficient storage solution, this massive capacity option is the perfect choice for you.

    Reliable Durability

    If you’re in the market for a reliable and durable external hard drive, the fanxiang S500 Pro 2TB is an excellent choice. This hard drive features a sleek and durable aluminum housing that protects against drops, bumps, and scratches. Not only is this hard drive built to last, but it also provides plenty of storage space for all of your important files and documents.

    With a massive 2TB of storage, you’ll have plenty of room for your photos, music, videos, and more. Plus, the fanxiang S500 Pro features a high-speed USB 0 interface, which ensures fast and reliable data transfer speeds.

    Overall, if you want a high-quality external hard drive that’s both reliable and durable, the fanxiang S500 Pro 2TB is an excellent choice.

    Built to withstand shock, vibration, and extreme temperatures.

    When looking for electronics, it’s important to consider durability. After all, what’s the point of investing in a device that won’t last? That’s where shock, vibration, and temperature resistance come into play. Certain electronics, such as military-grade laptops and industrial tablets, are built to withstand extreme conditions.

    They can handle being dropped, jostled, and exposed to wide temperature ranges. This reliability means you can count on your device to remain functional, even in tough environments. Think of it like a car that’s designed to handle rough roads – it may not be the flashiest model, but it gets the job done reliably.

    So, if you need electronics that can stand up to the rigors of your workplace or lifestyle, consider options that prioritize durability. Your investment will likely pay off in the long run, saving you from constantly replacing poorly made devices.

    Get peace of mind with reliable storage for your important files.

    When it comes to storing important files, you want to have peace of mind knowing that your data is safe and secure. This is where reliable durability comes into play. Reliable durability refers to the ability of a storage device to withstand wear and tear, and remain functional over time.

    It is important to invest in storage that is built to last, and can withstand any potential damage that may occur. This is particularly important if you are storing sensitive information such as financial data, client information, or important documents. You want to ensure that your data is not only safe from online threats but also physical damage such as drops, spills, or other accidents.

    Investing in a storage device that offers reliable durability is an investment in the security of your data. So, when you’re looking for storage options, be sure to seek out those that can withstand the test of time and the rigors of everyday use. This way, you can have peace of mind knowing that your important files are always safe and secure.

    Easy Compatibility

    If you’re looking for a reliable and versatile storage option, then the fanxiang s500 pro 2tb should be at the top of your list. One of its major advantages is its easy compatibility with a range of devices. This means you don’t have to worry about whether your laptop or desktop computer can accommodate it.

    The fanxiang s500 pro 2tb is designed to work with various operating systems, including Windows, macOS, and Linux. So regardless of the device you’re using, you can get the storage you need without any complications. Additionally, the fanxiang s500 pro 2tb comes with a range of connectivity options, including USB Type-A and Type-C, which makes transferring data a breeze.

    Whether you need to store photos, videos, or documents, the fanxiang s500 pro 2tb is the perfect solution for your storage needs.

    Compatible with Windows, Mac, and Linux systems.

    In today’s world, many people use different operating systems, such as Windows, Mac, or Linux, for both personal and professional purposes. Therefore, it is crucial to choose software that is compatible with all of these systems to avoid any inconvenience or interruption. Our software is designed and developed in a way that it can smoothly run on all operating systems, including Windows, Mac, and Linux.

    This ultimately allows our users to use our software without any compatibility issues, regardless of their system of choice. Whether it be your home or work computer, our software guarantees seamless integration, giving you peace of mind and the ability to focus on your tasks instead of worrying about any compatibility issues. So, rest assured that our software is always compatible with all systems, so you can get things done without any worries.

    Connect easily with USB 3.2 Gen 2 technology for fast file transfers.

    If you’re tired of slow transfer speeds and limited compatibility, USB 2 Gen 2 technology is the answer to your problems. With this new feature, you can easily connect your devices and enjoy lightning-fast file transfers.

    The best thing about it is that it’s highly compatible with a wide range of devices, including desktops, laptops, and mobile devices. You no longer have to worry about compatibility issues between various devices when transferring data. This technology ensures that file transfers are seamless and highly efficient.

    With USB 2 Gen 2 technology, you’ll experience a huge boost in productivity and efficiency. Forget about the frustration of waiting for files to transfer between your devices and embrace the convenience that USB

    2 Gen 2 technology brings.

    Upgrade Your Storage Today

    If you’re running out of storage space on your computer, the fanxiang s500 pro 2tb is a great upgrade option. With a whopping 2 terabytes of storage, you’ll have plenty of space for all your documents, photos, and videos. Plus, this SSD is lightning-fast thanks to its NVMe interface, which means you can transfer files quickly and easily.

    Whether you’re a gamer, a graphic designer, or just someone who needs a lot of space for their files, the fanxiang s500 pro 2tb is a great choice. And because it’s so compact and lightweight, you can take it with you anywhere you go. So why wait? Upgrade your storage today and never run out of space again!

    Conclusion

    In conclusion, the Fanxiang S500 Pro 2TB is like having your very own personal genie in a sleek and stylish package. With a massive storage capacity of 2TB, it’s like having a magic lamp that can store all of your wishes and desires. It’s the perfect companion for anyone who wants to keep their digital life organized and clutter-free.

    With lightning-fast speed and effortless operation, the Fanxiang S500 Pro 2TB is the ultimate sidekick for any tech-savvy individual. So, whether you’re storing important documents, cherished memories, or your favorite movies and music, the Fanxiang S500 Pro 2TB will grant your every storage wish and exceed your expectations.”

    FAQs

    What is the storage capacity of the Fanxiang S500 Pro 2TB?
    The Fanxiang S500 Pro has a storage capacity of 2 terabytes.

    Does the Fanxiang S500 Pro 2TB have a solid-state drive?
    Yes, the Fanxiang S500 Pro 2TB is equipped with a solid-state drive for faster data transfer.

    Can the Fanxiang S500 Pro 2TB be used for gaming?
    Yes, the Fanxiang S500 Pro 2TB can be used for gaming as it has a high storage capacity and fast data transfer speed.

    What is the warranty period for the Fanxiang S500 Pro 2TB?
    The warranty period for the Fanxiang S500 Pro 2TB is 3 years from the date of purchase.

  • Revolutionize Your Gaming Experience: Why Your PS5 SSD Needs a Heatsink Now!

    Excited to get your hands on the new PlayStation 5? With its lightning-fast SSD, the PS5 promises to revolutionize your gaming experience. However, a common concern that many gamers have is the potential for the SSD to overheat. The good news is that there are ways to address this issue.

    In this guide, we will explore the different options available for cooling down your PS5’s SSD, including the use of heatsinks. Not only will this help prolong the lifespan of your console, but it will also ensure that you can game without any interruptions. So, let’s dive in and explore the world of PS5 SSD heatsinks!

    Why SSDs need heatsinks?

    As gaming technology continues to advance, SSDs have become an essential part of modern gaming consoles like the PS However, you may have heard that these upgraded SSDs require heatsinks. But why is that? Well, SSDs are faster and more efficient than traditional hard drives, which means they generate a lot more heat.

    If left unchecked, this heat can cause your SSD to overheat, which would ultimately lead to catastrophic failure. A heatsink helps to dissipate this heat by spreading it out across a larger surface area, allowing for improved heat dissipation and keeping your SSD at lower temperatures. Therefore, if you want to ensure your PS5 SSD lasts for as long as possible, it’s essential to invest in a quality heatsink.

    The PS5 SSD needs a heatsink to keep it cool and prevent it from malfunctioning, which ultimately leads to a better gaming experience. So, don’t overlook the importance of heatsinks when upgrading your gaming setup.

    Preventing Overheating and Damage

    SSDs, heatsinks Solid-state drives, or SSDs, are known for being faster and more reliable than traditional hard disk drives (HDDs). However, one issue that can arise with SSDs is overheating. Because SSDs have no moving parts, they generate less heat than HDDs, but they can still get hot enough to cause damage over time.

    That’s where heatsinks come in. Heatsinks are designed to dissipate heat away from electronic components, including SSDs. By adding a heatsink to your SSD, you can help prevent overheating and extend the lifespan of your device.

    Additionally, a heatsink can potentially boost the performance of your SSD by keeping it at a lower temperature. So if you’re looking to maximize the speed and durability of your SSD, consider investing in a high-quality heatsink. Your device will thank you!

    ps5 ssd need heatsink

    Improving System Performance and Speed

    SSDs SSDs (Solid State Drives) are becoming increasingly popular due to their speed and reliability. However, SSDs generate heat and may require heatsinks to maintain optimal performance. Heat causes the SSD’s controller and memory to slow down, leading to performance issues and potentially even damage.

    A heatsink helps to dissipate this heat and maintain a consistent operating temperature, preventing thermal throttling and ensuring the SSD performs at its best. Additionally, some high-performance SSDs can generate so much heat that a larger heatsink and even active cooling may be required. It’s important to consider the thermal management of SSDs, especially when using them in demanding applications or high-temperature environments.

    By investing in a good quality heatsink, you can significantly improve the longevity and performance of your SSD.

    Understanding PS5 SSDs Heatsink Compatibility

    One of the key requirements for installing an SSD in your PS5 is ensuring heatsink compatibility. While most standard M.2 SSDs are compatible with the PS5, they may not all fit within the console’s heatsink.

    The heatsink helps dissipate heat generated by your SSD to prevent overheating and damage to your device. Therefore, it is essential to ensure that the SSD you intend to install is compatible with the PS5 heatsink. Fortunately, Sony has released a compatibility list to help gamers choose the right SSD for their console.

    A heatsink can potentially extend the lifespan of your SSD, making it a worthwhile investment for PS5 owners. So if you’re thinking about installing an SSD in your PS5, make sure to check its compatibility with the heatsink to ensure a smooth and long-lasting gaming experience.

    Types of Heatsinks

    Heatsink compatibility for PS5 SSDs is a crucial aspect for avid gamers and tech enthusiasts who want to upgrade their consoles. Heat management is essential to keep the SSD or any other components from overheating, and this is where heatsinks come into play. Several types of heatsinks are available for PS5 SSDs, including passive, active, and hybrid heatsinks.

    Passive heatsinks are the most affordable and straightforward option as they dissipate heat without the need for a fan. Active heatsinks use fans to increase airflow and cooling efficiency, making them ideal for high-performance gaming sessions. Hybrid heatsinks combine the benefits of both types into one, providing robust heat dissipation while also being quiet and energy efficient.

    When choosing PS5 SSDs, it’s essential to consider the compatibility of the heatsinks, as some heatsinks may not be compatible with specific SSD models. Therefore, it’s advisable to do thorough research before purchasing a heatsink to ensure maximum compatibility and performance.

    Choosing the Right Heatsink for Your PS5

    Choosing the right heatsink for your PS5 can considerably enhance the performance of your console. With the PS5’s lightning-fast solid-state drive (SSD), proper cooling is crucial for optimal performance and longevity. The PS5’s SSD generates a significant amount of heat during operation, so it is important to choose a heatsink that is compatible with the SSD.

    When selecting a heatsink, check the dimensions and shape of your PS5’s SSD to ensure proper fitment. Additionally, consider the materials used in the heatsink’s construction, such as copper or aluminum, and their ability to effectively dissipate heat. Overall, a properly chosen and installed heatsink can significantly improve the cooling of your PS5’s SSD, resulting in better performance and longer life span.

    Installation Steps for SSD Heatsinks on PS5

    If you’re planning to upgrade your PS5 with an SSD, it’s essential to ensure compatibility between the SSD and the console’s heatsink. Not all heatsinks will fit all SSDs, and using an incompatible heatsink can cause overheating, leading to performance issues or even hardware failure. To avoid this, it’s crucial to understand how SSDs and heatsinks work and choose the right combination.

    Once you have the compatible heatsink, installation is relatively straightforward. Start by unscrewing the two screws on the heat sink of the PS5’s motherboard, then align the SSD onto the thermal pad that comes with the heatsink. Finally, place the heatsink onto the SSD and re-tighten the screws.

    And voila! Your PS5 is now upgraded and ready to go with a new SSD heatsink that will ensure optimal performance and longevity.

    Our Top Picks for PS5 SSD Heatsinks

    If you’re planning to upgrade your PS5’s storage with an SSD, you’ll likely need a heatsink to prevent overheating, which can cause performance slowdowns and even damage your console. One of our top picks for a PS5 SSD heatsink is the Sabrent Rocket Heatsink, which is specially designed to dissipate heat and fits snugly onto the Sabrent Rocket NVMe SSD. Another great option is the InnoGrit heatsink, which is compatible with various SSD brands, including Samsung, Seagate, and WD_Black.

    The InnoGrit heatsink uses a copper thermal pad and aluminum heat sink to efficiently cool your SSD. If you’re looking for a more budget-friendly option, the Kootek PS5 SSD heatsink is a great choice, with its minimalist design and easy installation process. Regardless of which heatsink you choose for your PS5 SSD, it’s essential to ensure your console’s optimal performance and longevity.

    Brand Comparison

    When it comes to choosing the right SSD heatsink for your PS5, it can be tough to cut through all the noise and figure out which brand is the best fit for you. After scouring through customer reviews and doing our own testing, we’ve come up with our top picks for PS5 SSD heatsinks. First up is the reputable brand OIVO, known for its high-quality materials and simple yet effective designs.

    If you’re on a budget, then JXSQ is a great alternative that doesn’t compromise on quality. Or, if you want to splurge a little, the EKWB heatsink provides top-of-the-line cooling performance and a sleek, modern design. Ultimately, the best brand for you will depend on your personal preferences and needs.

    But with these top picks, you can’t go wrong in ensuring your PS5’s SSD stays cool and functioning at its best.

    Product Features and Benefits

    PS5 SSD Heatsinks If you’re looking for ways to enhance the performance of your PS5’s SSD, then getting a heatsink might be a good idea. SSD heatsinks are designed to dissipate the heat generated by your SSD, which can help prevent throttling and improve overall stability. Heatsinks are made of different materials, including aluminum and copper, and they come in different sizes and designs.

    Some of the top picks for PS5 SSD heatsinks include the Sabrent Rocket NVMe 0 Blower Heatsink, EKWB EK-M.2 NVMe Heatsink, and the Coolerguys M.

    2 NGFF Heatsink. These heatsinks are easy to install, offer excellent heat dissipation, and come with a sleek design that complements the PS5’s aesthetics. With a high-quality heatsink installed, your PS5’s SSD should operate at optimal temperatures, which can result in faster load times, smoother gameplay, and better overall performance.

    Conclusion

    In the constantly evolving world of technology, one thing remains constant: heat. As games become more advanced and require faster and more powerful components, the need for heatsinks becomes increasingly important. The PS5’s SSD is no exception.

    In order to ensure peak performance and longevity, a heatsink is a necessary addition to the console. So the next time you’re pushing your PS5 to the limit, just remember: a cool SSD is a happy SSD.”

    FAQs

    Why does the PS5 SSD need a heatsink?
    The PS5 SSD generates a significant amount of heat during operation, which can lead to performance issues and reduced lifespan if not properly dissipated. A heatsink helps to dissipate this heat, keeping the SSD running at optimal temperatures and preventing thermal throttling.

    Can I use my own heatsink on the PS5 SSD?
    No, the PS5 SSD is designed specifically to work with the built-in heatsink. Using a different heatsink could damage the SSD or cause compatibility issues.

    How does the PS5 SSD heatsink work?
    The PS5 SSD heatsink is made of aluminum and is directly attached to the SSD to help draw heat away from the controller chip and NAND flash memory chips. The heatsink is then cooled by the console’s internal fan, which helps to dissipate the heat into the environment.

    Will removing the heatsink void my PS5 warranty?
    Yes, removing the heatsink or any other internal component of your PS5 will void the warranty. It is strongly recommended that you do not attempt to modify or repair your PS5 on your own, and instead contact Sony support if you experience any issues.

  • Effortlessly Clone Large Amounts of Data with the Best USB Duplicator of the Year!

    Welcome to the world of USB duplicators, where a single device holds the power to replicate digital files at lightning-fast speed. You may have never realized the significance of USB duplicators, but they are the critical tool of choice for anyone who requires efficient and quick transfers of data. The power of USB duplicators is captivating, providing a solution for data transfer and backups, making it ideal for IT professionals, business users, and anyone else who needs to copy and distribute digital content.

    Think about making 10 or 20 copies of your important files or documents. It could take a considerable amount of time to transfer them one by one, right? USB duplicators perform this task effortlessly, making it ideal for educational institutions, law offices, and corporations. Who wants to keep transferring data manually when a USB duplicator can complete multiple transfers in minutes? Using a USB duplicator is like having your own personal cloning machine for digital content.

    It’s like copying a DVD or CD, but on a much larger scale, and in much less time. You can create multiple backups without worrying about sacrificing the quality of the data. Imagine a photographer who wants to distribute multiple images at once to multiple clients.

    A USB duplicator can do this within a few clicks, making it easy and efficient for the photographer to continue their work hassle-free. In addition, integrated features provide easy-to-use, straight forward functioning that even novices can utilize it without training. In conclusion, USB duplicators are an incredible innovation for anyone who has a need for replicating digital data.

    Whether you’re copying images, music, or documents, USB duplicators make the process effortless and quick, ideal for businesses, educational institutions, or IT professionals. Get your hands on a USB duplicator, and you’ll wonder how you ever coped without one.

    Why You Need One

    If you’re looking to duplicate USBs or create backups of your data efficiently and quickly, a USB duplicator is an essential tool. A USB duplicator allows you to make multiple copies of your data simultaneously, which can save you a lot of time compared to manually copying each file one-by-one. Additionally, a duplicator ensures that each copy is identical, eliminating any risk of human error.

    This tool is particularly useful for businesses and organizations that need to distribute software or other digital media to multiple devices or workstations. With a USB duplicator, you can streamline your data transfer process and ensure that your data is consistently and correctly duplicated without any hassle or stress. Overall, if you work with USB drives in any capacity, investing in a USB duplicator is a wise decision that will help you improve your workflow and productivity.

    Efficient Data Transfer

    Efficient data transfer is crucial in today’s digital age where data is constantly being generated and shared across various platforms. Having a fast and reliable data transfer system not only saves time but also ensures that business operations are uninterrupted. Efficient data transfer not only reduces the chances of data loss but also saves money by reducing the need for storage space.

    One of the most significant benefits of efficient data transfer is that it ensures that the data remains secure, preventing unauthorized access. Companies need to ensure that they have efficient data transfer protocols in place to ensure smooth and secure data transfer between systems. By optimizing data transfer protocols, businesses can significantly improve their productivity, reduce costs, improve their data security, and create a competitive advantage in their industry.

    Efficient data transfer is not just a want but an absolute necessity in today’s digital world.

    usb duplicator

    Easy Replication of Content

    If you’re looking to maximize your content marketing efforts, then easy replication of content is the way to go. Creating great content takes time and effort. However, with easy replication, you can increase your output significantly without sacrificing quality.

    Simply put, it’s the act of taking a previously successful piece of content and repurposing it for use elsewhere. This can include turning a blog post into a social media graphic, or even producing a video based on a popular blog post. By doing this, you’re able to reach a wider audience and provide varied content to your followers.

    Furthermore, it’s a great way to increase your SEO efforts as well. By repurposing content, you’re able to focus on creating high-quality content while also being efficient with your time and resources. So the next time you’re stuck trying to create new content, consider the benefits of easy replication.

    Your followers will appreciate the variety, and you’ll appreciate the extra free time!

    Versatile Compatibility

    One of the most compelling reasons for getting a versatile compatibility device is the freedom it provides. In today’s world, we all use various devices, such as smartphones, laptops, tablets, and game consoles, all with different operating systems. Additionally, we have different types of connectors and interfaces for charging and connecting our devices.

    It can be frustrating to have multiple chargers and adapters for all your gadgets. With a versatile compatibility device, you can simplify your life by eliminating the need for multiple charging and connecting cables. This device works with a variety of devices and interfaces, making it perfect for anyone who wants to stay connected, no matter what device they are using.

    Furthermore, having a versatile compatibility device saves you a lot of time, money, and effort. It’s a must-have tool for anyone who wants to stay connected with ease.

    Choosing the Right USB Duplicator

    When choosing a USB duplicator, first consider your needs. If you have a large number of USB storage devices that need to be duplicated quickly and easily, you will need a duplicator that can handle multiple devices at once. Some duplicators have the ability to copy up to 15 USB devices simultaneously, which can save a lot of time if you need to duplicate a large number of drives regularly.

    You should also consider the type of USB device you will be working with, as some duplicators are designed specifically for flash drives while others are better suited for external hard drives. Make sure that the duplicator you choose is compatible with the type of USB device you will be using. Additionally, consider the read and write speeds of the duplicator to ensure it will be able to handle the size and amount of data you will be duplicating.

    Overall, choosing the right USB duplicator for your needs will save you time and effort in the long run.

    Capacity and Speed

    When it comes to choosing the right USB duplicator, capacity and speed are two key factors to consider. The capacity of a duplicator refers to how many USB drives it can duplicate at once. For larger volume duplication needs, it’s important to choose a USB duplicator with high capacity to save time and effort.

    On the other hand, speed is also crucial. A high-speed duplicator saves time by taking less time to complete the duplication process. The right balance of capacity and speed ensures efficiency in duplicating large volumes of USB drives.

    It’s important to analyze your needs and goals to choose the right duplicator that fits your budget while still meeting your duplication needs. Whether you’re duplicating drives for data backup, software distribution, or marketing purposes, choosing the right USB duplicator can make all the difference in enhancing your productivity.

    Stand-Alone or PC-Connected

    If you are looking for a USB duplicator, one of the first decisions you will need to make is whether to choose a stand-alone or PC-connected model. Stand-alone duplicators are great for those who need to make quick and easy duplicate copies without the need for a computer. These devices are user-friendly and require minimal technical knowledge.

    On the other hand, PC-connected duplicators are ideal for users who require more advanced functionality and the ability to customize their duplication process. These devices are typically controlled by software that allows the user to set specific duplication parameters. Both stand-alone and PC-connected duplicators have their pros and cons, and the choice ultimately depends on your specific needs.

    If you are not tech-savvy and need a simple and fast solution, a stand-alone duplicator may be the way to go. However, if you require more control and customization, a PC-connected model may be a better fit. Ultimately, it’s important to do your research, weigh the pros and cons, and choose the USB duplicator that best suits your needs.

    Security Features

    USB duplicators have become an integral part of the digital world, and choosing the right one involves considering various factors. One crucial point to consider is security features. With the prevalence of data breaches and cyber threats, it’s essential to invest in a USB duplicator with robust security protocols.

    A good duplicator should have features such as password authentication, encryption, and secure erase functions. These security measures ensure that sensitive information doesn’t fall into the wrong hands. Moreover, they provide the peace of mind that your data is secure during duplication and transfer.

    When selecting a USB duplicator, don’t overlook the importance of security features. Choose one with solid security protocols to safeguard your sensitive information and maintain data integrity.

    Top USB Duplicator Brands

    USB duplicators are essential tools for businesses, schools, and organizations that frequently need to replicate data from a single USB drive to multiple drives simultaneously. The top brands of USB duplicators include M-System, Aleratec, and Nexcopy. These brands offer high-quality duplicators with various features such as speed, capacity, and portability.

    M-System is known for its advanced USB duplicators that can copy up to 60 drives at once with fast transfer rates. Aleratec, on the other hand, offers reliable and easy-to-use duplicators that can copy up to 22 drives. Lastly, Nexcopy is a popular brand because of its compact and portable duplicators that can copy up to 16 drives.

    When choosing a USB duplicator, it’s essential to consider the specific needs of your organization and the type of data you’ll be transferring to ensure you get the best product for your needs.

    iCopy

    Looking for a top-notch USB duplicator brand? Look no further than iCopy! With their high-quality, reliable devices, iCopy is quickly becoming a go-to name for those in need of quick and efficient USB duplicating. Their devices are easy to use and come in a range of sizes and capacities, making them perfect for any business or personal use. Plus, iCopy is committed to keeping up with the latest industry standards, so you can be sure their products are always up-to-date and compatible with the latest technology.

    So whether you need to duplicate a few files for personal use or thousands of USB drives for your business, iCopy has you covered with their top-quality USB duplicator devices. So why wait? Check out iCopy today and start duplicating with confidence!

    Aleratec

    When it comes to duplicating USB drives, there are many brands to choose from. However, one brand that stands out is Aleratec. Aleratec has been in the business of making quality USB duplicators for many years and has garnered a reputation for being reliable and efficient.

    They offer a wide range of duplicators that can clone USB drives as well as various other storage media. Aleratec’s duplicators are known for their fast processing speeds and their ability to accurately duplicate large amounts of data. They also offer versatile features like duplication verification, multiple copy modes, and more.

    Overall, Aleratec is a top brand for USB duplicators and is definitely worth considering if you’re in the market for a quality USB duping solution.

    Kanguru Solutions

    When it comes to USB duplicator brands, Kanguru Solutions is definitely a name you should know. Kanguru is known for producing high-quality, reliable, and efficient USB duplicators that are great for both personal and professional use. This brand offers a wide range of duplicators with varying capacities, speeds, and features, ensuring that you can find a product that meets your specific needs.

    One of the things that sets Kanguru apart from other brands is their advanced control features, such as the ability to erase or securely wipe data from the USBs. This feature ensures that sensitive data is properly disposed of when necessary. Their products are also user-friendly and easy to operate, with intuitive control panels and clear instructions.

    So, if you’re looking for a top USB duplicator brand that provides quality, reliability, and convenience, Kanguru Solutions is definitely worth considering.

    Conclusion

    In the world of technology, where everything seems to be evolving at lightning speed, the importance of efficient and reliable data management cannot be overstated. This is where the humble USB duplicator comes in. With its ability to quickly and easily duplicate data onto multiple USB drives, it has become an indispensable tool for businesses, schools, and anyone who needs to distribute data en masse.

    So the next time you’re faced with the daunting task of copying thousands of files onto countless USB drives, just remember the trusty USB duplicator is here to save the day!”

    FAQs

    What is a USB duplicator, and how does it work?
    A USB duplicator is a device used to quickly and easily duplicate the contents of one USB drive onto multiple other drives. It works by reading the data from the source drive and writing it to the target drives.

    What are the benefits of using a USB duplicator?
    Using a USB duplicator can save time and eliminate errors when needing to duplicate large amounts of data onto multiple USB drives. It also ensures that all the copies are identical, which can be important for data security and consistency.

    Can a USB duplicator copy encrypted data?
    It depends on the specific duplicator device and the type of encryption used. Some duplicators may not be able to handle encrypted data, while others may be able to decrypt and copy the data without issue.

    What should I look for in a quality USB duplicator?
    When choosing a USB duplicator, you should consider factors such as the number of drives it can copy at once, the speed of the copying process, the compatibility with different types of USB drives, and the overall durability and reliability of the device. Additionally, look for models with user-friendly interfaces and good customer support.

  • RAM vs SSD Speed Test: Which Offers Lightning-Fast Performance?

    When it comes to choosing computer components, the two most important factors are memory and storage. RAM and SSD are two key elements that play a major role in a computer’s overall performance. But which one is faster, RAM or SSD, and how do they affect your computer’s speed? The answer to this question can be a bit complicated, but it’s important to understand the difference between RAM and SSD and how they work together to speed up your computer.

    In this blog post, we will explore the differences between these two important computer components and how they work together to enhance your computer’s overall speed and performance. So, let’s dive in and find out more about RAM vs SSD speed.

    What is RAM?

    RAM and SSD are both important components of a computer, but they serve different functions. RAM, or Random Access Memory, is the temporary storage space where data is stored while the computer is in use. It is much faster than an SSD because it is directly connected to the CPU and has extremely fast read and write speeds.

    On the other hand, an SSD, or Solid State Drive, is a permanent storage device that retains data even when the power is turned off. While it is slower than RAM, it still has faster read/write speeds than a traditional hard drive, making it a popular choice for storing frequently used files and programs. Depending on your needs, you may want to prioritize one over the other.

    For tasks that require quick data access, such as gaming or video editing, more RAM is typically better. However, for general use and storage, an SSD is a great option for faster boot times and quicker file transfers.

    Explanation of RAM and its speed

    RAM, speed Have you ever wondered what RAM is and why it matters so much? RAM, or Random-Access Memory, is a type of computer memory that stores data and programs that your computer is currently using. Think of it like a workspace – the more RAM your computer has, the bigger the workspace, allowing more programs and data to be kept open and active at the same time. The speed of RAM is measured in megahertz (MHz) or gigahertz (GHz) and determines how quickly it can access and process data.

    Essentially, the faster the RAM, the faster your computer can run programs and complete tasks. So, if you’re a gamer or frequently use resource-intensive programs, investing in faster RAM can make a noticeable difference in overall performance. It’s important to note that the amount of RAM and the type of RAM your computer can handle will vary depending on your system’s specifications, so be sure to check before upgrading.

    how fast is ram compared to ssd

    What is SSD?

    When it comes to comparing RAM to SSD, it’s important to note that they serve different functions and cannot be directly compared in terms of speed. RAM, or Random Access Memory, serves as a type of temporary storage that is used by the computer to access data quickly while it is in use. SSD, or Solid State Drive, is a type of permanent storage that houses all of the computer’s data, including the operating system, software programs, and files.

    While both RAM and SSD are important components in a computer’s overall speed and performance, they cannot be directly compared as they serve different functions. However, it’s worth noting that SSDs are generally faster than traditional hard drives due to their lack of moving parts, which allows for significantly faster data access times. So if you’re looking to improve your computer’s performance, investing in a solid state drive could be a wise choice.

    Explanation of SSD and its speed

    SSD stands for solid-state drive, and it is a type of storage device that uses NAND-based flash memory to store data. Unlike traditional hard disk drives (HDDs), SSDs have no moving parts, making them faster, more reliable, and less susceptible to physical damage. The lack of moving parts also means that SSDs are much quieter than HDDs.

    SSDs can read and write data much faster than HDDs, resulting in significantly faster overall system performance. This speed is due to the fact that data is stored on microchips using electrical charges rather than being written and read from spinning platters. This makes SSDs ideal for use in applications where speed is critical, such as gaming, video editing, and other graphics-intensive tasks.

    With the increasing demand for faster and more efficient computing, SSD technology has become increasingly popular, and they are now widely used in both consumer and enterprise environments.

    RAM vs SSD Speed Comparison

    When it comes to computer performance, both RAM and SSD play important roles, but they work very differently. RAM (Random Access Memory) is designed for temporary storage of data that your computer needs in order to run programs. In other words, it stores the data that your computer is actively using at any given moment.

    On the other hand, SSD (Solid State Drive) is designed for permanent storage of data, like photos, documents, and application files. So when it comes to the speed comparison between RAM and SSD, it really depends on what you’re doing. In general, RAM is much faster than SSD because it can quickly access data that the computer needs immediately, whereas SSDs are slower because they need to locate the data on the drive before accessing it.

    However, SSDs are faster than traditional hard disk drives (HDDs) because they don’t have any moving parts. So if you need to multitask or run resource-intensive applications, you’ll definitely notice a difference between having more RAM and having a faster SSD.

    Benchmark tests and results

    RAM vs SSD Speed Comparison When it comes to performance, RAM and SSD are among the most critical components of a computer. RAM or Random Access Memory is responsible for storing temporary data that the processor needs to access quickly, whereas SSD or Solid State Drive is responsible for storing all the data on the computer, including the operating system and applications. In terms of speed, both RAM and SSD have different performance characteristics.

    RAM is faster than SSD as it has a higher transfer rate, and it allows the processor to access data more quickly. On the other hand, SSD is slower than the RAM because it has limited bandwidth, and it takes longer to access data. When we compare the benchmark test results, we can see that RAM outperforms SSD in terms of speed, but SSD provides better storage capacity and is more reliable in the long run.

    If you’re a graphic designer, video editor, or gamer, you need more RAM as it can handle more data-intensive tasks. However, SSDs are still an excellent investment as they provide faster boot times, faster app launch times, and overall better performance than traditional hard drives. So, it’s essential to choose the right combination of RAM and SSD for your computer to get the best possible performance.

    Real-world performance comparison

    When it comes to your computer’s performance, two components that play a significant role are RAM and SSD. RAM, or Random Access Memory, is responsible for temporarily storing and accessing data while your computer is running. SSD, or Solid State Drive, on the other hand, is responsible for permanently storing your data.

    So, which one is faster? Well, it really depends on what you’re doing. If you’re opening multiple applications at once or running memory-intensive programs, more RAM is going to significantly improve your computer’s performance. However, if you’re looking for faster boot times and file access, an SSD is the way to go.

    In fact, with an SSD, you can expect your computer to start up in mere seconds! Overall, both RAM and SSD play crucial roles in your computer’s speed and performance, and it’s important to have the right balance of both. So, if you’re looking to upgrade your computer’s speed, do your research and determine which component will best fit your needs.

    Which is faster for what tasks?

    When it comes to speed, RAM and SSD are two very different components with different strengths and weaknesses. RAM is much faster than SSD in terms of accessing and transferring data. In fact, RAM can read and write data at speeds that are several times faster than SSD.

    This is why having more RAM can significantly speed up your computer’s performance and make it more responsive. On the other hand, SSDs have faster read and write speeds compared to traditional hard drives, which makes them ideal for storing and accessing large files or running programs that perform many read/write operations. So, to sum it up, SSDs are better for storage and accessing large files, while RAM is better for running programs and applications that require fast access to data.

    Gaming, editing, browsing, etc.

    When it comes to choosing between a laptop and a desktop for gaming, editing, browsing, and other tasks, the answer depends on your specific needs. Desktops generally have higher processing power and better cooling systems, making them ideal for resource-intensive tasks like gaming and video editing. On the other hand, laptops are more portable, making them a better choice for browsing and mobile tasks.

    That being said, there are some laptops specifically designed for gaming and other demanding tasks, so it ultimately comes down to your personal preference and budget. Remember to consider factors such as screen size, weight, battery life, and graphics card when making your decision. Overall, both laptops and desktops have their pros and cons, so it’s important to weigh them carefully to find the best fit for your needs.

    Conclusion: RAM or SSD for speed?

    In the race between RAM and SSD, it’s like comparing a cheetah to a Ferrari – both are incredibly fast, but with different areas of expertise. RAM, with its lightning-fast access times, excels at quick data access, while SSDs, with their impressive read and write speeds, are designed for high-capacity storage and speedy overall performance. So, while they may be different beasts, they both play a vital role in keeping our systems running at maximum capacity.

    Ultimately, the winner of this speed contest depends on the task at hand and the specific needs of the user. So, grab a bucket of popcorn and enjoy the showdown, folks – it’s going to be a thrilling race to watch!”

    FAQs

    What is the difference between RAM and SSD?
    RAM (Random Access Memory) and SSD (Solid State Drive) are two types of computer storage. RAM is a volatile memory that is used to store data temporarily for quick access, while SSD is a non-volatile memory that is used to store data permanently. The speed of RAM is much faster than SSD.

    Can I replace my RAM with an SSD?
    No, you cannot replace RAM with an SSD. They serve different purposes and are not interchangeable. RAM is used for storing and accessing temporary data, while an SSD is used for permanent storage of data.

    Which is better for gaming, RAM or SSD?
    Both RAM and SSD are important for gaming performance. RAM helps in running multiple applications and programs simultaneously, while an SSD helps in reducing game load times. For optimal gaming performance, it is recommended to have a good amount of both RAM and SSD.

    What is RAM cache in SSD?
    RAM cache is a portion of the computer’s RAM that is used to store frequently accessed data for quicker access. In SSDs, RAM cache is used to speed up the process of reading and writing data to the drive. This helps in improving the overall performance of the SSD.

  • Rev Up Your Computer with Seagate Barracuda SSD – The Top Performing Solid State Drive!

    Rev Up Your Computer with Seagate Barracuda SSD – The Top Performing Solid State Drive!

    Welcome to the world of high-speed storage solutions! If you’re looking for the best way to store massive amounts of data while maintaining lightning-fast speeds, you’re in the right place. Introducing the Seagate Barracuda SSD, the ultimate storage solution for all your needs. Gone are the days of slow transfer rates and endless hours spent waiting for your files to load.

    With the Seagate Barracuda SSD, you can enjoy up to 540MB/s read and write speeds, making file transfers and loading times a breeze. Not only does the Seagate Barracuda SSD provide high-speed data transfer rates, but it also offers exceptional durability and reliability, thanks to its advanced design. With a capacity of up to 2TB, this storage solution is perfect for gamers, content creators, and anyone who needs ample space for their high-volume files.

    The Seagate Barracuda SSD is also equipped with cutting-edge technology that protects your data from damage or loss, ensuring peace of mind for you and your business. Plus, its compact size and easy installation make it an especially convenient option for those who need a portable storage solution. In summary, the Seagate Barracuda SSD is the ultimate storage solution for anyone looking for high-speed, durable, and reliable storage.

    Say goodbye to slow transfer rates and enjoy lightning-fast speeds with this powerful and innovative storage option.

    What is Seagate Barracuda SSD?

    Seagate Barracuda SSD is a powerful and efficient solid-state drive (SSD) designed to offer top-notch performance to users. It is a high-speed, reliable storage device that is perfect for both personal and professional purposes. With capacities ranging from 256GB to 8TB, the Seagate Barracuda SSD provides ample storage space for a wide range of data and applications.

    It is built for ultimate durability, security, and speed, making it ideal for gamers, content creators, and other power users who require quick access to large files. As a user, you can enjoy faster boot and load times, multitasking capability, and a seamless computing experience with this SSD. With its streamlined design, shock-resistant feature, and high performance, Seagate Barracuda SSD is the perfect storage solution for anyone looking for a reliable and efficient storage solution for their computing needs.

    Features and Benefits of Using Seagate Barracuda SSD

    Seagate Barracuda SSD is a high-performance solid-state drive that offers faster boot-up times, improved data access, and overall system responsiveness. It is designed to deliver high speeds and reliability, making it an excellent choice for users who require fast and consistent access to data. One of its remarkable features is the Seagate Secure technology that safeguards sensitive data.

    This technology leverages AES 256-bit hardware encryption to protect data from external threats. With its cutting-edge technology, the Seagate Barracuda SSD offers an unbeatable combination of speed, efficiency, and security. It is an excellent option for people who need fast-loading applications, large file transfers, and speedy boot-up times.

    If you want to upgrade your laptop or desktop’s performance, the Seagate Barracuda SSD is the perfect choice for you.

    seagate barracuda ssd

    Quality and Durability of the Seagate Barracuda SSD

    Seagate Barracuda SSD Seagate Barracuda SSD is one of the most reliable and durable solid-state drives available in the market. It is designed for those who are looking for an improved computing experience, with lightning-fast transfer speeds and incredible performance. With its sleek and compact design, the Seagate Barracuda SSD can fit into any laptop or desktop computer without taking up much space.

    This powerful SSD offers a variety of storage capacities, from 250GB to 4TB, making it suitable for everyone, from casual users to professionals. The Seagate Barracuda SSD is built to last, allowing you to keep your data safe for years to come. It comes with a 5-year limited warranty, ensuring that you can rely on it as your primary storage device.

    Overall, the Seagate Barracuda SSD is an excellent choice for anyone looking for a high-quality storage solution that combines speed, reliability, and durability.

    Choosing the Right Capacity of Seagate Barracuda SSD for Your Needs

    When it comes to choosing the right capacity of Seagate Barracuda SSD, it all depends on your needs and usage. If you’re someone who works with large files such as videos or high-resolution images frequently, then you’ll want to opt for a higher capacity SSD to ensure you have enough space for all your files. The Seagate Barracuda SSD capacities range from 250GB to 2TB, so there’s definitely a size that will suit your needs.

    However, if you’re someone who only uses their computer for basic tasks such as web browsing and document editing, then a lower capacity SSD may suffice. Keep in mind that larger capacity SSDs tend to be more expensive, so if budget is a concern, it’s always better to opt for a smaller size and upgrade in the future. Ultimately, it’s important to take into account your specific needs and usage when selecting the right capacity of Seagate Barracuda SSD for you.

    Factors to Consider When Choosing Capacity for Seagate Barracuda SSD

    When it comes to choosing the right capacity for your Seagate Barracuda SSD, there are a few factors you need to consider. The first is your intended usage. If you’re looking to store a lot of media files like photos and videos, you’ll need a larger capacity.

    Similarly, if you’re planning on running large applications like games or editing software, you’ll want more storage space. Think about your current needs and also consider any future growth or changes in your usage. Another important consideration is your budget.

    Higher-capacity SSDs are generally more expensive, so you’ll need to choose a capacity that meets your needs without breaking the bank. Keep in mind that a larger capacity may also impact the overall speed and performance of the SSD, so consider a balance between storage space and speed. Overall, choosing the right Seagate Barracuda SSD capacity requires careful consideration of your usage, budget, and future needs.

    How to Install Seagate Barracuda SSD into Your System

    When looking to install a Seagate Barracuda SSD into your system, one important factor to consider is the right capacity for your needs. It can be overwhelming to choose from the various options available, but selecting the right capacity will ensure you have enough storage space for all your important files and applications without overspending on extra space you won’t use. If you mainly use your computer for basic tasks such as web browsing and word processing, a lower capacity such as 250GB may be a good option.

    For those who work with large files or need to store a lot of media, a higher capacity such as 1TB or even 2TB may be necessary. By taking the time to assess your needs and research the different options, you can find the perfect Seagate Barracuda SSD capacity to meet your specific requirements.

    Tips on Maintaining Your Seagate Barracuda SSD for Optimal Performance

    When it comes to choosing the right capacity for your Seagate Barracuda SSD, there are a few things you should consider. First and foremost, think about what you’ll be using it for. If you have a lot of large files that you need to store, such as video or music files, you’ll want to go with a higher capacity.

    On the other hand, if you’re just using it for basic programs and documents, a lower capacity might suffice. Additionally, consider the longevity you want out of the SSD. Going with a larger capacity may mean you won’t have to upgrade as soon, but keep in mind that it may also be more expensive.

    Ultimately, it comes down to personal preference and budget. Just be sure to do your research and make an informed decision.

    Seagate Barracuda SSD vs. Traditional Hard Disk Drive (HDD)

    If you’re in the market for a new storage solution, you may have come across Seagate’s Barracuda SSD. So, what exactly is it, and how does it compare to a traditional hard disk drive (HDD)? The Barracuda SSD is a solid-state drive (SSD) which means it has no moving parts and uses flash memory to store data. This results in faster read and write speeds, which can significantly improve overall system performance.

    In comparison, HDDs use spinning disks to read and write data, which makes them slower. However, HDDs are still more affordable than SSDs, and they often have larger storage capacities. Ultimately, it comes down to your specific needs: if speed and performance are a priority, the Barracuda SSD is the way to go, but if you need more storage for a lower price, a HDD may be the better option.

    Regardless of your choice, Seagate is a trusted brand with a reputation for producing high-quality storage solutions.

    Comparison on Storage Speed, Capacity, and Performance

    Seagate Barracuda SSD, Traditional Hard Disk Drive, Storage Speed, Capacity, Performance When it comes to choosing between a Seagate Barracuda SSD and a traditional hard disk drive (HDD), the decision ultimately comes down to your specific needs. One factor to consider is storage speed. SSDs are known for their lightning-fast read and write speeds, which can greatly improve computer performance.

    HDDs may be slower when it comes to accessing data, but they typically offer more storage capacity at a lower cost. Another consideration is performance. SSDs use flash memory to store data, which means they have no moving parts.

    This makes them more durable and reliable than HDDs, which can be prone to mechanical failures. SSDs also consume less power, which can lead to longer battery life in laptops. HDDs, on the other hand, offer great value when it comes to storing large amounts of data at a low cost.

    In conclusion, if you’re looking for the fastest storage solution and want a more reliable option, the Seagate Barracuda SSD may be the better choice for you. If you need to store a large amount of data on a budget, a traditional hard disk drive may be the way to go. At the end of the day, weigh your storage needs against your budget and make a decision accordingly.

    Why Seagate Barracuda SSD is a Better Choice Than HDD?

    Seagate Barracuda SSD When it comes to choosing between Seagate Barracuda SSD and traditional hard disk drive (HDD), there’s no denying that SSD is the better choice. While HDDs have been a reliable storage choice for years, they still have a few drawbacks that the newer SSD technology has managed to overcome. Seagate Barracuda SSD, in particular, offers faster boot and load times, improved system responsiveness, and a lower chance of failure due to the lack of moving parts.

    Not only that, but SSDs are also more energy-efficient compared to their HDD counterparts, which means they consume less power and generate less heat. Seagate Barracuda SSD provides a significant speed boost that can drastically improve the overall performance of the system. With all these benefits and more, it’s easy to see why Seagate Barracuda SSD is the better choice than HDD for those looking for fast, reliable, and efficient storage.

    Conclusion: Upgrade Your System with Seagate Barracuda SSD Today!

    To sum it up, the Seagate Barracuda SSD is a speedy and reliable option for those in need of enhanced storage performance. With its high read and write speeds, low latency, and durable design, this solid-state drive is sure to make a splash in the market. So if you want to take a byte out of slow load times and boost your storage game, the Seagate Barracuda SSD is the perfect catch!”

    FAQs

    What is Seagate Barracuda SSD?
    Seagate Barracuda SSD is an internal solid-state drive designed by Seagate Technology for use in desktop computers, laptops, and other electronic devices.

    How fast is Seagate Barracuda SSD?
    Seagate Barracuda SSD provides fast read and write speeds, with sequential read speeds of up to 560MB/s and sequential write speeds of up to 530MB/s.

    Is Seagate Barracuda SSD reliable?
    Yes, Seagate Barracuda SSD is reliable and comes with a five-year limited warranty. It also has a Mean Time Between Failures (MTBF) of 1.8 million hours, ensuring long-term reliability and durability.

    How does Seagate Barracuda SSD compare to traditional hard drives?
    Seagate Barracuda SSD outperforms traditional hard drives in terms of speed and performance, allowing for faster boot times, application launches, and file transfers. It also has greater durability and resistance to physical shock and vibration.