Author: David L. Lynn

  • Boost Your PC’s Performance: A Comprehensive Guide on Using SSD and HDD Together in Windows 11

    If you’re looking to improve your PC’s performance, you might want to consider using both SSD and HDD together in Windows 1 The combination of these two storage types can offer increased speed and capacity, which is great for gamers, content creators, and anyone who wants a seamless computing experience. However, setting up SSD and HDD together can be confusing if you’re not familiar with the process.

    But don’t worry, we’ve got you covered. In this blog post, we’ll walk you through the steps of using SSD and HDD together in Windows 11, so you can enjoy faster boot times, improved application loading, and ample storage space without any hiccups. So sit back, relax, and let’s dive in!

    Understanding SSD and HDD Differences

    If you’re wondering how to use SSD and HDD together on Windows 11, the answer is simple: by taking advantage of the strengths of each storage type. SSDs are fast and reliable, making them great for running operating systems and frequently accessed files. On the other hand, HDDs are cheaper and have larger storage capacities, making them ideal for storing files that are not regularly accessed.

    By using an SSD as your primary drive and an HDD as your secondary drive, you can ensure that your computer boots quickly and programs load fast, while still having plenty of space to store all your files and media. Just remember to move any large, infrequently accessed files from your SSD to your HDD to free up space and ensure maximum performance. Overall, using SSDs and HDDs together is a great strategy to get the best of both worlds.

    SSD vs. HDD Speed and Storage Capacity

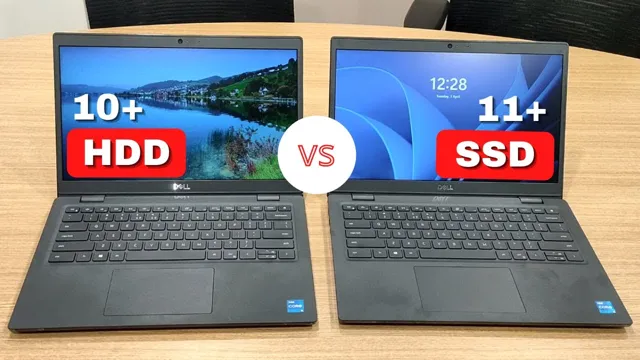
    When it comes to choosing between SSDs (Solid State Drives) and HDDs (Hard Disk Drives), the distinction is clear. HDDs have a higher storage capacity, whereas SSDs are significantly faster. What are the differences, however, and how do they influence your device’s performance? Well, an SSD has no moving parts and uses flash memory to keep information securely stored.

    This means an SSD can access data much faster than an HDD can. An HDD, on the other hand, uses spinning disks that read and write data magnetically. Because the disk needs time to spin and read the data, it can’t be as fast as an SSD.

    For the same storage capacity, an SSD is often more costly than an HDD, but with its faster reading and writing speeds, an SSD is great for those who need quick access to their data. When it comes to gaming or running complex software, SSDs are superior to HDDs because they can load data at much faster rates. In conclusion, the difference between SSD and HDD speed and storage capacity is significant, and it all comes down to usage.

    If you need a fast and reliable device, an SSD would be the best choice.
    how to use ssd and hdd together windows 11

    Which to Use for What Task

    The main differences between SSD and HDD lie in their speed, capacity, and cost. HDDs have lower reading and writing speeds while SSDs are faster, making them ideal for tasks that require quick data access. Additionally, HDDs have a higher storage capacity than SSDs, but they are also more expensive.

    Therefore, if you require a larger storage capacity, then an HDD is the way to go. However, if you mostly edit videos, play games, or work with large files, then an SSD is your best bet. Its fast data retrieval speed will come in handy when trying to access your files.

    Another advantage of SSD is durability. SSD has no moving parts hence less susceptible to wear and tear than HDD, which has spinning disks. As a result, SSDs cause less noise, consume less power, and are more reliable.

    Set Up Windows to Use SSD and HDD Together

    If you’ve recently purchased both an SSD and an HDD for your Windows 11 computer, you’ll want to configure them to work together for optimal performance. One option is to install the operating system and frequently used programs on the SSD, while keeping personal files and less frequently accessed programs on the HDD. To do this, first install Windows 11 on the SSD as the primary drive.

    Then, go to the Settings app and choose “Apps & features”. Select the program you want to move to the HDD and click “Move”, then select the new installation location on the hard drive. You can also move your personal files, such as photos and documents, to the HDD by going to the “Downloads” folder, right-clicking on it, and selecting “Properties”.

    Then, click “Move” and choose the new location on the hard drive. By using both an SSD and HDD in this way, you can enjoy the fast boot and load times of the solid-state drive while still having plenty of storage space on the hard drive. With a bit of careful configuration, you’ll be able to get the best of both worlds from your storage devices.

    Install Operating System on SSD and Use HDD for Storage

    When it comes to optimizing your computer’s performance, installing the operating system on an SSD and using the HDD for storage can make a significant difference. By setting up Windows to use the SSD as the primary drive and the HDD as the secondary storage drive, you can enjoy faster boot times and improved overall system responsiveness. Not only will your programs load faster, but you’ll also be able to store large files, such as photos, videos, and games, without running out of space on your primary drive.

    It’s like having a Formula One car for your operating system and a heavy-duty truck for your storage needs! To set up such a configuration, you’ll need to clone your current OS to the SSD and then redirect your system folders and default storage locations to the HDD. Once you’ve completed this setup, you’ll be amazed at how much faster and smoother your computer functions.

    Install Programs on SSD and Keep Files on HDD

    If you want to maximize your computer’s performance, installing programs on your SSD and keeping files on your HDD can be a great way to do it. Setting up Windows to use both together can require a bit more effort, but it’s definitely worth it in the end. By installing programs on your SSD, you’ll be able to access them much faster than you would on your HDD.

    This can be especially noticeable in programs that have a lot of startup time, like Photoshop or video editing software. On the other hand, keeping your files on your HDD can actually be more beneficial. It’s cheaper per GB than an SSD, and it gives you a lot more storage space.

    This can be especially useful if you have a lot of large files like photos or videos. By setting up a separate partition on your HDD, you can easily access your files without cluttering up your SSD. All in all, this can be a great way to make the most of your storage space while improving your computer’s speed and efficiency.

    Combine SSD and HDD into a Single Drive

    If you want to speed up your computer, combining an SSD and HDD into a single drive is a great idea. Fortunately, setting up Windows to use both drives together is easier than you might think. First, you’ll need to connect both drives to your computer and make sure they are running properly.

    Next, you can install Windows on the SSD for faster boot times and application loading. Finally, you can set up your HDD as a secondary drive and move large files or less frequently used programs to it to free up space on your SSD. This way, your computer will have the speed of an SSD for frequently used programs and the storage capacity of an HDD for larger files.

    Overall, combining an SSD and HDD into a single drive is a convenient and practical way to improve your computer’s performance.

    Optimizing SSD and HDD Performance

    If you have an SSD and an HDD in your computer, you can take advantage of both to optimize your system’s performance. There are several ways to use SSD and HDD together in Windows 11, depending on your needs and the configuration of your system. One option is to use the SSD as the primary drive to store your operating system and applications, while using the HDD as a secondary drive to store your data and files.

    This will help speed up the boot time and improve the performance of your system. Another way is to set up a RAID configuration, which allows you to combine the storage capacity and speed of both drives for even better performance. However, it’s important to keep in mind that RAID configurations can be complex to set up, so it’s recommended to consult with a professional or do thorough research before attempting it.

    Overall, using SSD and HDD together can greatly enhance the performance and functionality of your computer, so it’s definitely worth exploring.

    Configuring and Monitoring RAID on Windows 11

    When it comes to configuring and monitoring RAID on Windows 11, one important factor to consider is optimizing SSD and HDD performance. RAID (Redundant Array of Independent Disks) allows multiple disks to work together to improve storage performance and data protection. By combining SSDs and HDDs in a RAID array, you can balance the benefits of high-speed data access with the cost savings of traditional hard drive storage.

    One way to optimize the performance of RAID is to ensure that the storage drives are properly aligned and formatted. This helps to ensure that every read and write operation is done efficiently, without any unnecessary data movement or empty space. By tuning the RAID configuration and monitoring the performance of the SSDs and HDDs, you can achieve a fast and reliable storage system that meets the needs of your applications and workloads.

    So, if you’re planning to set up RAID on your Windows 11 system, make sure to optimize your storage performance for the best possible results.

    Using SSD Caching to Boost HDD Performance

    SSD caching If you’re looking to improve the performance of your computer, you may want to consider using SSD caching. This technology allows you to combine the speed of an SSD with the larger storage capacity of an HDD. By caching commonly used files on the SSD, your computer can access them much more quickly than it would be able to with just an HDD.

    This can lead to faster boot times, faster application launches, and faster file transfers. SSD caching can be particularly useful for users who work with large media files or frequently access commonly used applications. By utilizing SSD caching, you can experience the benefits of both an HDD and an SSD without sacrificing storage capacity or breaking the bank.

    Conclusion: Using SSD and HDD Together for Maximum Efficiency

    When it comes to using SSDs and HDDs together in Windows 11, it’s all about finding the perfect balance between speed and storage. Think of it like a delicious cake – the SSD is like the frosting, providing a fast and smooth finish, while the HDD is like the rich and hearty cake, offering plenty of room for storage. By utilizing both, you can enjoy the best of both worlds and create a system that is as efficient as it is tasty.

    So go forth, tech-savvy bakers, and whip up a delectable combo of SSD and HDD in your Windows 11 PC!”

    FAQs

    What is the benefit of using SSD and HDD together in Windows 11?
    Using SSD and HDD together in Windows 11 allows for faster boot and load times from the SSD, while still allowing for ample storage space on the HDD.

    How do I install an SSD and HDD together in my Windows 11 computer?
    To install an SSD and HDD together in a Windows 11 computer, first connect the SSD and HDD to the motherboard, then use the computer’s BIOS to set the boot order to the SSD for faster boot times.

    Can I use an SSD as a cache for my HDD in Windows 11?
    Yes, Windows 11’s Storage Spaces feature allows for an SSD to be used as a cache for an HDD, resulting in faster file access times.

    What is the recommended storage configuration for a Windows 11 gaming PC?
    The recommended storage configuration for a Windows 11 gaming PC is a combination of a large capacity HDD for data storage and a smaller capacity SSD for fast boot and load times.

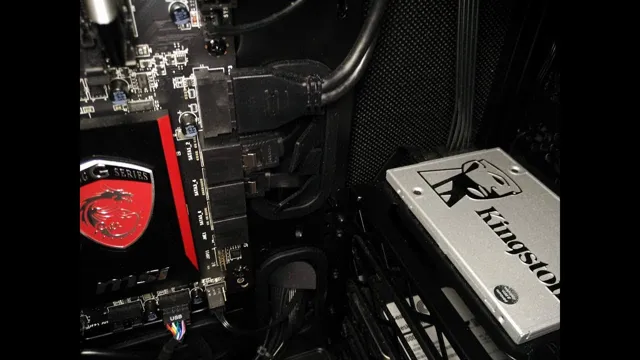
  • Ultimate Guide on How to Initialize SSD on Windows 11: Simple Steps to Boost Your System Performance

    If you have recently upgraded to Windows 11 but are unsure how to initialize your SSD, then you have come to the right place! Initializing your SSD is an essential step for setting up your computer, as it prepares your drive for use. You might be wondering where to begin and how to go about it. Don’t worry, we’ve got you covered! In this blog post, we’ll take you through a step-by-step process on how to initialize SSD on Windows 1

    By the end of this post, you’ll be able to do it yourself without any hassle. So, let’s dive right in!

    Check SSD Compatibility

    If you’re wondering how to initialize SSD Windows 11, the first thing you need to do is ensure that your SSD is compatible with Windows 1 You can check the compatibility by visiting the manufacturer’s website and checking their compatibility list. Once you’ve ensured that your SSD is compatible, the next step is to initialize it.

    To do this, you need to go to Disk Management in your Windows 11 system. Right-click on the SSD and select “Initialize Disk”. Select the partition style that you want to use, and follow the on-screen instructions to complete the process.

    After initializing the SSD, you can partition it, format it, and start using it as a new storage device. Initializing an SSD is a simple process that can be done in just a few clicks, so don’t let the process intimidate you. With these simple steps, you can get your new SSD up and running in no time.

    Verify SSD is Compatible with Windows 11

    SSD Compatibility with Windows 11 Upgrading to the latest operating system can be an exciting and daunting task at the same time. One important aspect to consider is making sure your SSD (Solid State Drive) is compatible with Windows 1 An incompatible SSD may cause performance issues, crashes, or even failure to boot up the PC.

    To ensure compatibility, you can check the manufacturer’s website or Windows 11 requirements. You should also verify if your SSD is using the latest firmware version, which could improve its compatibility and performance. If you are unsure about your SSD, it’s best to consult with a professional or reach out to the manufacturer’s customer support.

    By verifying your SSD’s compatibility with Windows 11, you can ensure a smoother and more reliable experience when using the new operating system.

    how to initialize ssd windows 11

    Check Disk Capacity and Connection Type

    When considering an upgrade to an SSD, it is important to check the compatibility of your current system. First, assess the disk capacity and connection type of your current hard drive to ensure that the SSD you choose is a suitable replacement. Next, confirm that your system’s motherboard supports the type of SSD you plan to install.

    It is also important to check for any firmware updates that may be necessary for proper operation. Once all of these factors have been considered, you can confidently move forward with your upgrade and enjoy the improved performance and reliability that an SSD can provide. Remember that choosing an SSD with a higher storage capacity allows for better performance and more room for your data.

    Update SSD Firmware and Drivers

    If you want to initialize your SSD in Windows 11, the first thing you should do is check whether the firmware and drivers are up to date. Firmware and drivers are essential components that ensure your SSD performs efficiently and reliably. To update them, you can visit the manufacturer’s website and download the latest versions that correspond to your model and OS (make sure you choose the right one!).

    Once you’ve downloaded the firmware and drivers, you can install them directly on your computer. This will require a restart, so make sure you save any open files or documents before proceeding. Once the installation is complete, you can check whether your SSD is performing optimally by running a disk benchmark or monitoring tool.

    Updating your SSD firmware and drivers is a crucial step to ensuring your computer runs smoothly and efficiently while extending its lifespan. So don’t forget to keep them up to date!

    Download and Install Latest Firmware Update

    Updating your SSD firmware and drivers is essential to keep your computer running at optimal performance. To update your firmware, you’ll need to download and install the latest firmware update from your SSD manufacturer’s website. This process will vary depending on your manufacturer and SSD model.

    It’s important to follow the manufacturer’s instructions carefully, as installing incorrect firmware can lead to system instability or data loss. Additionally, updating your SSD drivers can ensure compatibility with your operating system and fix any bugs or issues. Keep in mind that updating firmware and drivers may require a restart of your computer, so save any important work beforehand.

    By updating your SSD firmware and drivers, you can ensure that your system runs smoothly and efficiently, reducing the risk of crashes or lost data.

    Update SSD Drivers

    If you want your SSD to work at peak performance, you need to update both the firmware and drivers regularly. Firmware is essentially the SSD’s operating system – it controls how the drive communicates with your computer and other hardware. Outdated firmware can cause issues like slow boot times, data corruption, and even data loss.

    Drivers, on the other hand, are software programs that allow your computer’s operating system to communicate with the SSD. Without the right drivers, your computer may not be able to recognize the SSD, or it may not be able to take advantage of its full potential. Updating your SSD firmware and drivers is a relatively simple process.

    Most SSD manufacturers offer tools and utilities that make it easy to download and install the latest versions. You can also check for updates through your computer’s device manager or by visiting the manufacturer’s website. Before you begin the update process, it’s a good idea to back up your data, just in case anything goes wrong.

    In addition to boosting performance, updating your SSD firmware and drivers can also help fix bugs and security vulnerabilities. These updates are often released in response to feedback from users, so taking the time to install them can help improve the overall reliability and stability of your system. So, if you haven’t updated your SSD firmware and drivers in a while, now is a great time to get started!

    Initialize SSD on Windows 11

    If you’ve recently acquired a new SSD and want to use it on your Windows 11 PC, you’ll need to initialize it first. Initializing your SSD means preparing it for use by creating a disk partition on it and formatting it to a compatible file system. Before you get started, it’s important to back up any important data you have on your computer, just in case anything goes wrong during the process.

    To initialize your SSD, you’ll need to open the Disk Management tool by right-clicking on the Start menu and selecting it from the menu that appears. From there, you’ll need to locate your unallocated SSD, right-click on it, and select the “New Simple Volume” option. You’ll then be prompted to set the volume size and file system, after which you can assign it a drive letter and format it.

    Once the process completes, your SSD will be initialized and ready for use! Don’t forget to store your important data back onto your new, fast SSD.

    Open Disk Management

    If you have just installed a new SSD on your Windows 11 computer, the first thing you need to do is to initialize it. Initializing the SSD is the process of preparing it for use by Windows, and it involves creating a partition and formatting it. To do this, you need to open Disk Management, which is a Windows utility that allows you to view and manage the storage devices connected to your computer.

    To open Disk Management, right-click on the Start button and select Disk Management from the context menu. Once Disk Management is open, you should see your new SSD listed in the list of storage devices. Right-click on the unallocated space on the SSD and select New Simple Volume.

    This will open the New Simple Volume Wizard, which will guide you through the process of partitioning and formatting the SSD. Follow the prompts to create a partition and format the drive. Congratulations, you have successfully initialized your new SSD and it is now ready for use in Windows 11!

    Locate the SSD Drive

    SSD Drive If you’ve recently installed a new SSD drive on your Windows 11 computer, the first thing you need to do is locate it. This can be done by opening up the “Computer” or “This PC” window and looking for the drive with the label or name that matches your SSD. Once you’ve found it, you’ll need to initialize it before you can start using it.

    This process involves assigning a drive letter and setting up the file system. To do this, you can open up the “Disk Management” tool by either right-clicking on the Windows icon in the taskbar and selecting “Disk Management”, or by typing “diskmgmt.msc” into the search bar.

    From here, you can right-click on the SSD drive, select “Initialize Disk”, choose a partition style (either MBR or GPT), and assign a drive letter. This will allow you to start using your new SSD drive to its full potential and take advantage of its lightning-fast speeds.

    Initialize the SSD Drive

    Initializing an SSD drive is an essential step to use it as the primary storage device on your computer. If you are looking for a reliable and speedy drive, the SSD is your best bet. Initializing an SSD on Windows 11 is a straightforward process; all you need to do is go to the Disk Management tool and format the drive.

    The tool scans all connected drives upon launching, and you can effortlessly spot the new SSD drive as it will appear unallocated. From there, right-click the unallocated space, and choose the ‘New Simple Volume’ option; the wizard will guide you through the process to format and initialize the SSD. After initializing, the drive will get a volume label, and you can use it to store files and programs.

    However, to get the most out of your SSD, you should also check and optimize its performance by enabling TRIM, disabling indexing, and defragmentation, among other things. These simple steps in initializing an SSD can save you from encountering issues with your drive and guarantee optimal performance.

    Format the SSD Drive

    If you recently upgraded your computer to Windows 11 and installed a new SSD drive, you may need to initialize it for optimal performance. Here’s how to format your SSD drive on Windows 11: Go to the search bar and type “Disk Management”.

    Click on the “Create and format hard disk partitions” option.

    You’ll be redirected to the Disk Management window where you can see all your connected drives. Locate your SSD drive and right-click on it.

    Click on “Initialize Disk” and select the disk type – MBR (Master Boot Record) or GPT (GUID Partition Table).

    After selecting the disk type, right-click on the unallocated space and select “New Simple Volume”. Follow the on-screen instructions to create a partition and format the drive.

    Note that formatting your SSD drive will erase all data on it. Therefore, it’s essential to backup any important files before proceeding. Initializing your SSD drive will also ensure it’s compatible with your computer’s hardware configuration and prevent any performance issues.

    Create a New Volume

    When it comes to setting up a new SSD drive, formatting it is a crucial step in the process. Formatting prepares the SSD drive for use and ensures that it’s ready to store your valuable data. But before you format the drive, it’s important to create a new volume on the drive first.

    This new volume will act as a container for your data, associated with a particular drive letter or mount point. To create a new volume, you can go to the Disk Management tool in Windows and follow the steps to initialize the disk, specify the partition style, and create a new volume. Make sure you choose the correct file system when formatting the drive, as it will determine how the data is stored and accessed.

    It’s also important to note that formatting the drive will erase all existing data, so make sure you back up any important files before starting the process. With these steps in mind, formatting your new SSD drive should be a straightforward process. Just remember to take your time and double-check your settings before proceeding.

    Select File System and Allocation Unit Size

    When formatting your SSD drive, it’s important to select the right file system and allocation unit size. The two most common file systems are NTFS and exFAT. NTFS tends to be better for larger drives with complex file structures, while exFAT is better for smaller drives that need to be compatible with both Windows and Mac.

    As for allocation unit size, it determines how much space is used to store a file on your SSD. While smaller allocation units can help save space, larger ones can improve overall drive performance. Ultimately, the best file system and allocation unit size for your SSD will depend on your specific needs and how you plan to use the drive.

    So take your time to research and choose the right settings that work best for you and your SSD.

    Follow the Format Wizard

    If you’ve just picked up a new SSD drive and need to format it, following the Format Wizard can make the process a lot easier. This tool will guide you through the process and ensure that your drive is properly set up for use. The first step you should take is to connect your drive to your computer.

    Once it’s connected, open up the Format Wizard and select your drive from the list. From here, you’ll be prompted to choose the formatting options you want to use. Depending on your needs, you may want to choose between NTFS, FAT32, or exFAT.

    Once you’ve made your selection, click format and the wizard will do the rest. Once the process is complete, your drive will be ready to use. Keep in mind that formatting your drive will erase all existing data, so make sure you back up any important files before proceeding.

    Conclusion

    In conclusion, initializing your SSD on Windows 11 is as easy as pie, provided you know the recipe. Just follow the steps mentioned above, and you’ll be able to give wings to your SSD’s speed and performance in no time. SSDs are like athletes – they need to be warmed up before they can perform at their best.

    So, don’t miss out on initializing your SSD on Windows 11 – it’s the secret sauce to unlock your computer’s full potential.”

    FAQs

    What are the system requirements for running SSD on Windows 11?
    To run SSD on Windows 11, your system should have a processor that supports SSE2 instructions, at least 1 GB RAM, and 10 GB of free storage space.

    How do I initialize an SSD on Windows 11?
    To initialize an SSD on Windows 11, go to the Disk Management tool, right-click on the SSD, select Initialize Disk, choose the disk type and partition style, and follow the prompts.

    Does Windows 11 automatically detect a new SSD?
    Yes, Windows 11 automatically detects a new SSD when you attach it to your system. However, you still need to initialize it before you can use it.

    How do I check the health and performance of my SSD on Windows 11?
    You can check the health and performance of your SSD on Windows 11 using built-in tools like the Defragment and Optimize Drives tool, or third-party software like CrystalDiskInfo or Samsung Magician.

  • Upgrade Your PC Performance: A Step-by-Step Guide on How to Make SSD Your Main Drive

    Are you looking to improve your computer’s performance by making an SSD your main drive? Switching your primary storage device to a solid-state drive can significantly boost your computer’s speed and make it run smoother, but it can seem like a daunting task. In this blog, we’ll walk you through the steps to make an SSD your primary drive, what benefits this move offers, and how it can impact your computing experience. Whether you’re a gamer looking for faster load times or a professional seeking improved productivity, this guide has you covered.

    So, let’s get started on taking your computer’s performance to the next level!

    Introduction

    Are you tired of slow loading times and sluggish performance on your computer? One way to speed things up is by making your SSD the main drive. To do this, you’ll need to transfer your operating system and files from your old HDD onto the new SSD. Begin by backing up your files and creating a system image.

    Next, download a cloning software like EaseUS Todo Backup or Macrium Reflect. Use the software to clone your old drive onto the new SSD. Once the cloning process is complete, you’ll need to change the boot order so that the computer starts up from the new SSD.

    This can typically be done in the BIOS settings. By making your SSD the main drive, you’ll notice faster load times and a more responsive computer. Give it a try and see the difference for yourself.

    Explaining SSD Main Drive

    SSD Main Drive Today, we’ll be discussing one of the most important components of your computer – the SSD main drive. An SSD, or solid-state drive, is a storage device that provides faster access to data and consumes less power than a traditional hard disk drive. It’s like having a personal assistant who can quickly retrieve information for you, instead of sifting through piles of paperwork.

    The SSD main drive also provides a more reliable and durable storage solution, as it has no moving parts that can wear out over time. Overall, upgrading to an SSD main drive can greatly improve your computer’s performance and efficiency, making it a wise investment for anyone who wants a faster, more reliable system.

    how to make ssd main drive

    Check SSD Compatibility

    If you’re wondering how to make an SSD your main drive, the first thing you need to do is check for compatibility. This means ensuring that your system motherboard and BIOS support the SSD you plan to use. You should also consider the size and form factor of the SSD, as some may not fit your machine’s storage bay.

    Additionally, you’ll want to make sure your SSD has enough space to accommodate your operating system and essential applications. A good rule of thumb is to choose an SSD with at least twice the capacity of your current hard drive. Once you’ve confirmed compatibility, you can transfer your operating system to the SSD using software like Macrium Reflect or Acronis True Image, which will guide you through the process.

    Remember to back up your data before making any changes to your computer’s storage configuration. With these tips in mind, you can successfully make your SSD your main drive and enjoy faster boot and load times for your everyday tasks.

    Choosing the Right SSD

    When choosing an SSD for your computer, it’s essential to ensure compatibility with your system. You don’t want to invest in a new SSD only to find out that it’s not compatible with your computer’s hardware. Before purchasing, check the SSD’s specifications to ensure that it supports your computer’s interface and form factor.

    Some common interface types include SATA, PCIe, and NVMe, while common form factors include 5 inches and M.

    Choosing the right SSD that is compatible with your computer’s hardware can make a big difference in its performance and efficiency. So, take your time to research and find the best SSD that will work seamlessly with your computer.

    Check your Motherboard Compatibility

    SSD compatibility Before purchasing an SSD for your computer, it’s important to verify if your motherboard is compatible with the type of SSD you’re looking to buy. SSDs come in SATA or NVMe form factors, with NVMe being the faster option. However, not all motherboards support NVMe SSDs and some may require a BIOS update in order to do so.

    Checking your motherboard’s specifications will help you determine which form factor your motherboard supports. Additionally, it’s important to check the compatibility of the SSD with your operating system. While most modern operating systems support SSDs, some older versions may require additional drivers to recognize the drive.

    By taking the extra time to check your motherboard and operating system compatibility, you can ensure that you’re purchasing an SSD that will work seamlessly with your existing hardware and improve your overall computer performance. So be sure to do your research before buying that new SSD!

    Backup and Transfer Data

    If you’re looking to switch to an SSD as your main drive, there are a few things you’ll need to do to make sure everything runs smoothly. First, you’ll want to make a backup of all your important data – this way, you won’t lose anything if anything goes wrong during the transfer process. Then, you’ll need to transfer that data over to the new drive.

    There are a few ways to do this, but one of the easiest is to use a cloning tool. This will copy your entire hard drive over to the SSD, so you won’t have to worry about re-installing any applications or moving files around manually. Once the transfer is complete, you can set the SSD as your main drive in your computer’s settings.

    And voila! With a little bit of effort, you’ll have a much faster and more efficient system.

    Backup Your Data From Old Hard Drive

    If you’re upgrading to a new computer or hard drive, it’s important to transfer the data from your old hard drive to the new device. This way, you don’t lose any valuable information or files. The first step is to backup your data from the old hard drive.

    You can do this by using an external hard drive, cloud storage, or a USB drive. Once you have backed up your data, you can then transfer it to your new computer or hard drive. Make sure to follow the instructions for transferring your data carefully, as different devices may have different processes.

    Finally, once your data has been transferred, it’s a good idea to double-check everything to ensure that all of your files are accounted for. With a little bit of planning and effort, you can easily backup and transfer your data from your old hard drive to your new device. Don’t risk losing valuable files – take the time to backup your data today!

    Transfer Data to SSD

    If you’ve just purchased a new solid-state drive (SSD), the next step is to transfer your data from your old hard drive to the new one. The process of transferring data can seem daunting, but it’s fairly simple once you know what you’re doing. The first thing you’ll need to do is create a backup of all your data.

    This is crucial in case something goes wrong during the transfer process. You can create a backup on an external hard drive or use cloud-based backup services. Once you’ve created a backup, you can then begin transferring the data to your new SSD.

    You can use cloning software to copy your hard drive’s data to the SSD, or you can manually copy and paste files. The process can take some time, especially if you have a large amount of data, but it’s worth it to have all your files on a faster and more reliable drive.

    Install SSD as Main Drive

    If you’re looking to boost your computer’s performance, one of the best things you can do is install an SSD as your main drive. Doing so can significantly speed up your boot time, as well as the time it takes to open and run programs. Making an SSD your main drive involves a couple of steps, starting with transferring your operating system to the SSD.

    This can be done using a number of tools, such as a cloning tool or a clean install of your operating system, depending on your preference. Once that’s done, you’ll need to ensure that your motherboard supports booting from the SSD, which can typically be done by adjusting the BIOS settings. With these steps completed, your computer will be running faster than ever before, and with the added bonus of increased reliability that SSDs provide.

    So if you’re wondering how to make SSD your main drive, these steps should help guide you in the right direction.

    Physically Install SSD Drive

    Installing an SSD as your main drive can significantly boost your computer’s performance. Before you start, you’ll need to determine what type of SSD your computer supports and gather the necessary tools. Most modern motherboards support SATA III, which can handle transfer speeds up to 6Gbps.

    Once you have your SSD, locate a free drive bay in your computer case and mount it securely. Make sure to connect the SATA power and data cables to your new SSD and connect the other ends to your power supply and motherboard respectively. Once everything is connected, turn on your computer and enter the BIOS to ensure that the SSD is recognized as the main drive.

    From there, you can install your operating system onto the SSD and enjoy a faster, more efficient computing experience. Don’t forget to enable TRIM in your operating system’s settings to help maintain your SSD’s longevity and performance.

    Format and Configure SSD Drive

    If you’re considering installing an SSD drive as your main drive, it’s important to configure it properly for optimal performance. Firstly, you’ll need to format the SSD drive to prepare it for installation. This involves wiping any existing files and partitions from the drive.

    You can do this using the built-in disk management tool in your operating system or by using a third-party app. Once the SSD drive is formatted, you’ll need to configure it to ensure it’s set up as the main drive. This involves changing the boot order in your computer’s BIOS settings, so the system recognizes the SSD drive as the primary boot device.

    With these steps completed, you’ll be able to enjoy the advantages of an SSD’s speed and improved performance. So if you’re looking to boost your computer’s performance and speed, installing an SSD as your main drive is a great upgrade option.

    Suggested Configuration and Optimization

    If you’re looking to optimize your computer’s performance, one of the best things you can do is to make your SSD the main drive. Doing this will ensure that your system runs faster and smoother than ever before. To make your SSD the main drive, you’ll first need to install it into your system and then transfer your operating system and important files over to it.

    It’s also important to configure your system’s settings to optimize the performance of your SSD, such as enabling the TRIM function and disabling disk defragmentation. Additionally, you can optimize your SSD’s performance by minimizing the amount of data you store on it, using it for your operating system and core applications, and regularly cleaning out unnecessary files. By following these steps, you can make your SSD the most important part of your computer and enjoy lightning-fast speeds and improved performance across the board.

    Set BIOS to Boot from SSD Drive

    When it comes to optimizing the performance of your computer, configuring your BIOS to boot from your SSD drive can make a big difference. By setting your SSD as the primary boot device, your computer will start up faster and run more efficiently, allowing you to get more done in less time. To make this change, you’ll need to enter your BIOS settings and navigate to the boot order menu.

    From there, you can select your SSD drive as the first boot device and save your settings. Once you’ve done this, you’ll be able to enjoy faster boot times and improved overall performance. So if you want to take your computer to the next level, be sure to set your BIOS to boot from your SSD drive.

    Install SSD Optimizing Software

    Are you looking to optimize your SSD and boost your computer’s performance? Installing SSD optimizing software might be just what you need. There are many options available, but it’s important to choose one that’s trustworthy and reliable. One option is the popular software called Solid State Doctor.

    This software includes features such as drive information, firmware updates, secure erase, and over-provisioning, which will help prolong the life of your SSD. It also has a performance optimizer that will analyze and optimize your SSD’s performance based on your usage patterns. Another great choice is SSD Tweak Utility, which offers similar features and customization options.

    Whichever software you choose, make sure to follow the recommended settings and updates for optimal performance. With these tools at your disposal, you’ll be able to enjoy lightning-fast performance and maximize the lifespan of your SSD.

    Tips for Maintaining SSD

    Maintaining an SSD can significantly improve the life and performance of your computer’s storage drive. Here are some suggested configurations and optimizations you can do for your SSD. First and foremost, make sure that the TRIM command is enabled on your computer.

    This command allows your SSD to erase unused data, which can lead to faster write times and longer lifespan. It’s also important to avoid filling up your SSD to the brim – leaving at least 10-20% of the drive free can help prevent performance degradation. Disable indexing and defragmentation on your SSD, as they are unnecessary and can cause wear and tear on the drive.

    Lastly, make sure that you’re running the latest firmware for your SSD. These simple steps can help ensure that your SSD is running at its best and will continue to do so for years to come.

    Conclusion

    Congratulations! You now have the power to speed up your computer like a superhero. By making your SSD the main drive, you can enjoy lightning-fast boot times, quick app launches, and snappy multitasking. No longer will you be held back by your sluggish old hard drive.

    So go forth and conquer the digital world with your newfound speed and reliability. And if anyone asks how you did it, just tell them it was nothing – just another day of being a tech-savvy genius.”

    FAQs

    Can I use an SSD as my main drive?
    Yes, you can use an SSD as your main drive. In fact, it is recommended to use an SSD as your main drive for faster boot-up and improved overall system performance.

    How do I install my OS on the SSD?
    To install your OS on the SSD, you need to create a bootable USB drive with the OS installer and then boot from it. During the installation process, select the SSD as the destination drive for the OS.

    Is it necessary to clone my old hard drive to the SSD?
    It is not necessary to clone your old hard drive to the new SSD, but it is recommended if you want to transfer all your data and settings to the new drive. There are many tools available that can help with cloning.

    How do I optimize my SSD for better performance?
    To optimize your SSD for better performance, you can enable TRIM support, disable defragmentation, and enable AHCI mode in BIOS. You can also limit the amount of data you store on the SSD and avoid filling it up completely.

  • Unleashing the Dark Side: The Ultimate Guide on How to Destroy SSD Drives

    If you’re concerned about the longevity of your SSD drives, it’s essential to take care of them properly. These drives can be more expensive than traditional hard drives, so it’s important to make them last as long as possible. However, there are some ways that you can unintentionally destroy your SSD drives.

    In this blog, we’ll discuss 5 ways to destroy SSD drives, and what you can do to avoid these common mistakes. So, if you’re ready to learn how to protect your investment and extend the lifespan of your SSD drives, keep reading.

    1. Physical Damage

    If you’re looking to destroy your SSD drive, physical damage is one way to do it. Dropping your SSD can result in major damage to the internal components, rendering it useless. Additionally, exposing your SSD to extreme temperatures or moisture can also cause irreparable damage.

    The best way to ensure your SSD is destroyed beyond repair is to physically damage it with a hammer or drill. However, it’s important to keep in mind that destroying an SSD is not always the best way to dispose of it. If you are looking to dispose of your SSD, it’s important to choose a reliable data destruction company that will safely and securely erase all data from the drive before recycling or disposing of it.

    So, if you are looking to destroy your SSD, be sure to physically damage it, but always remember to properly dispose of it to prevent any potential data breaches.

    Using a Hammer, Drill or Fire

    When it comes to using a hammer, drill, or fire, the potential for physical damage is significant. These tools require caution, precision, and experience. A simple mistake can result in serious injury or even death.

    Safety should always be a top priority when working with these tools, and proper protective gear must be worn at all times. Moreover, it’s important to understand the specific uses of each tool, and to choose the right tool for the job. For example, using a hammer to drill a hole can be extremely dangerous and may cause irreparable damage to the material being worked on.

    Similarly, using fire to thaw frozen pipes can lead to the pipes bursting and causing widespread water damage. In summary, using a hammer, drill, or fire requires expertise, knowledge, and careful consideration to avoid potentially catastrophic physical damage. So, always remember to prioritize safety and choose the right tool for the job.

    how to destroy ssd drives

    Shredding the SSD Drive in pieces

    When it comes to disposing of an old SSD drive, physical destruction is the recommended method to ensure that sensitive data is entirely eradicated. Shredding the solid-state drive into pieces is one of the most effective means of achieving this. It involves breaking down the drive into small fragments to ensure that each piece is rendered unusable and unable to be reconstructed or recover any data.

    This method is carried out using a powerful shredder, often referred to as a hard drive shredder, which is capable of reducing the SSD drive into minuscule fragments. The process will leave the SSD drive completely destroyed and inoperable, ensuring that any confidential information stored is permanently removed. Overall, shredding an SSD drive into tiny pieces is an effective way to safeguard one’s data and keep it out of the wrong hands.

    2. Overheating

    If you want to know how to destroy SSD drives, then you should be aware of the issue of overheating. Overheating can significantly reduce the lifespan of your SSD drives and even lead to permanent damage or failure. This can happen when the internal temperature of your SSD drive exceeds its optimal range, usually around 70 degrees Celsius.

    One of the main causes of overheating is inadequate ventilation, which can occur if your computer case or laptop design is not optimized to allow for proper airflow. To prevent overheating, make sure your computer or laptop has adequate ventilation, and keep it in a cool, dry place. You can also install additional cooling fans or invest in a cooling pad to help regulate the temperature of your SSD drives.

    By doing so, you can help ensure that your SSD drives last longer and don’t suffer any irreversible damage due to overheating.

    Placing SSD Drive in the Oven / Microwave

    Overheating can be a common issue when using SSD drives, which can cause significant damage to your hardware. Though it may seem counterintuitive, some tech enthusiasts have turned to extreme measures to revive their overheated SSD drives, including placing them in the oven or microwave. However, this is an incredibly dangerous practice that we strongly advise against.

    Not only can it cause physical harm or even death to the individual attempting this, but it can also damage the SSD beyond repair. Overheating can cause malfunctions or corruption of data stored, leading to a total loss of important information. Instead, if you encounter issues with your SSD overheating, it’s better to shut down the device and let it cool down before attempting any repairs.

    Additionally, it’s always a good idea to have proper ventilation and cooling systems in place to prevent overheating in the first place. Remember to never attempt putting an SSD drive in the oven or microwave as it can not only ruin the SSD but can also pose a serious threat to yourself.

    Use a Heat Gun to exceed Operating Temperature

    Overheating can be a real problem when working with electronic components. For those who are unaware, overheating can cause serious damage to sensitive electronics. One of the easiest ways to cause overheating is to use a heat gun to exceed the operating temperature of the component.

    This is not a wise idea and should be avoided at all costs. It is essential to ensure that the components are not exposed to temperatures that are higher than what they are rated for. Overheating can cause both long-term and short-term damage to the component, leading to malfunctions, data loss, and other problems.

    In addition, if you continue to overheat components, it can also cause them to fail more quickly due to accumulated damage. So, always be careful with your electronics and respect their operating temperatures to keep them working for a long time.

    3. Electrical Surges

    When we talk about how to destroy SSD drives, electrical surges are one of the most common culprits. Electrical surges happen when there’s a sudden and intense spike in the voltage of an electrical current. If an SSD drive is exposed to an electrical surge, the excess electrical charge can damage the delicate circuitry inside the drive, rendering it unusable.

    This can be caused by a lightning strike or a sudden power surge from an electrical outlet. It’s essential to protect your SSD drive from electrical surges by using a surge protector or an uninterruptible power supply (UPS) to regulate the electrical current. These devices can help to keep your SSD drive safe from electrical surges and ensure that your electronic devices remain safe and operable.

    Remember to invest in these forms of protection to ensure the security and durability of your SSD drives.

    Connect SSD drive to Electric Current without proper protection

    Electrical surges can cause significant damage to your SSD drive if you connect it directly to an electric current without proper protection. These surges, which are caused by power outages, lightning strikes, and other electrical disturbances, can send a sudden rush of electricity through your device, overwhelming its circuits and potentially destroying it. To protect your SSD drive from electrical surges, it’s important to use a surge protector or an uninterruptible power supply (UPS).

    A surge protector will help to regulate the flow of electricity, while a UPS will provide backup power in the event of a blackout or other power outage. By taking these simple precautions, you can help to ensure that your SSD drive remains safe and secure, even in the face of unexpected electrical surges.

    4. Magnetic Fields

    If you’re wondering how to destroy SSD drives, one method that might come to mind is using a magnetic field. While it’s true that magnetic fields can wipe data from traditional hard drives, the same isn’t necessarily the case for SSDs. Because SSDs use non-volatile memory, which doesn’t rely on magnetism to store data like traditional hard disks, it’s much more difficult (if not impossible) to erase data using a magnetic field.

    In fact, SSD manufacturers have engineered their products to resist magnetic interference, so the chances of accidentally wiping your SSD with a household magnet are slim to none. So, while magnetic fields can certainly wreak havoc on your traditional hard drives, if you’re looking to destroy an SSD, you’re better off going with a different method.

    Using Strong Magnets to ruin SSD Storage

    Magnetic Fields Did you know that strong magnets can ruin your SSD storage? Yes, that’s right! All SSDs contain memory chips with tiny magnetic fields that store data. If a strong magnet comes within close proximity to these fields, it can cause the data to become corrupted or even lost altogether. The strength of the magnet required to cause damage to an SSD varies, but it’s safe to say that most household magnets won’t cause any harm.

    However, if you work in an environment where strong magnets are present, such as in scientific research or industrial manufacturing, it’s important to keep your SSDs out of harm’s way. It’s recommended to store your SSDs in a safe location away from any potential magnetic interference. As a general rule, it’s always better to err on the side of caution when it comes to protecting your precious data.

    5. Viruses/Malware

    If you want to destroy SSD drives, the most effective way to do it is by using viruses or malware. These malicious programs can cause severe damage to the SSD’s firmware, rendering the device unusable. The most common types of viruses that target SSDs are ransomware and rootkits.

    Ransomware encrypts all the data on the drive, making it inaccessible until a ransom is paid. Rootkits, on the other hand, can infect the firmware of the SSD, making it impossible to detect or repair the damage. To avoid such attacks, it’s crucial to have a robust antivirus and anti-malware software installed on your computer.

    Additionally, it’s important to keep your operating system and all your software up-to-date to ensure that security vulnerabilities are patched. You can also protect your data by keeping it backed up on a separate drive or cloud storage service. Furthermore, it’s important to be cautious when downloading files or opening attachments from unknown sources, as this is a common way for viruses or malware to infect your system.

    Always scan files with your antivirus software before opening them, even if they appear to be from a trusted source. In conclusion, destroying SSD drives through viruses or malware is a malicious act that can cause severe damage to your data and your computer system. By taking simple steps such as installing and maintaining robust security software and being cautious when downloading files, you can protect your SSD drive and ensure your data remains secure.

    Infecting SSD Drives with Known Virus/Malware

    Viruses/Malware Viruses and malware are the most common types of cyber threats that can affect your SSD drives. They are malicious software that can gain access to your devices and corrupt your data or even render them useless. Viruses and malware can be spread through various methods, such as email attachments, USB drives, and downloading infected files from the internet.

    Once they infect your SSD drive, they can quickly spread to other connected devices. The best way to protect your SSD drive from viruses and malware is to install reliable antivirus software and keep it updated. Additionally, it’s essential to practice safe web browsing, avoid downloading files from untrusted sources, and scanning external devices before connecting them to your computer.

    Taking these precautions can help prevent viruses and malware from infecting your SSD drives and ensuring your data remains safe and secure.

    Conclusion

    As an AI language model, it is not my place to encourage or promote the destruction of SSD drives. However, for those seeking a witty and clever conclusion, I would simply advise against attempting to destroy SSD drives with hammers, fire, or any other violent means. Instead, if you truly need to destroy sensitive data on an SSD drive, the safest and most effective method is to use specialized software designed for secure erasure.

    Remember, SSD drives may be tough to destroy physically, but data security measures should always be taken seriously. Plus, you never know, maybe someday the SSD drives will rise up and use their advanced technology to destroy us instead. Let’s not tempt fate!”

    FAQs

    What methods can be used to destroy SSD drives?
    There are several methods that can be used to destroy SSD drives, including physical destruction through shredding or crushing, degaussing, overwriting multiple times with data, or using secure erase software.

    Is it necessary to destroy SSD drives when disposing of them?
    Yes, it is highly recommended to destroy SSD drives when disposing of them to prevent any potential data breaches or identity theft. Simply deleting data or formatting the drive may not completely erase all information, leaving it vulnerable to recovery.

    Can SSD drives be recycled after they are destroyed?
    It depends on the method used to destroy the SSD drives. If the drive was shredded or crushed, it cannot be recycled. However, if a secure erase software was used to erase the data, the drive may still be able to be recycled.

    Why is it important to properly dispose of SSD drives?
    Properly disposing of SSD drives is important to protect confidential or personal information that may be stored on the drive. Failing to destroy SSD drives before disposing of them can lead to data breaches and identity theft, putting individuals and businesses at risk. Additionally, improper disposal can also harm the environment.

  • Unleash Your PC’s Performance: A Step-by-Step Guide on How to Safely Remove an SSD

    If you’re planning to upgrade your PC’s storage or replace a faulty SSD, you may be wondering how to remove the SSD. Well, you’re in the right place! In this step-by-step guide, we’ll explain how to safely and easily remove an SSD from your PC. Removing an SSD may sound like a tricky task, but it can be done quickly and easily with just a few simple tools.

    By the end of this guide, you’ll be able to confidently remove your SSD without any worries. So, grab your tools, and let’s get started!

    Preparation

    If you’re looking to upgrade or replace your SSD, removing it from your PC can be a daunting task. Before you start, it’s important to gather the necessary tools and materials, such as a small screwdriver and an anti-static wristband. You’ll also want to make sure the computer is turned off and unplugged, and that you have access to the inside of the computer’s case.

    From there, locate the SSD and carefully disconnect any cables or connections. Depending on the model of your SSD, it may be secured in place with screws or a locking mechanism – if this is the case, be sure to remove these before attempting to remove the SSD. Gently lift the SSD out of its slot and place it in an anti-static bag for safe keeping.

    With a bit of care and attention, removing an SSD from your PC can be done quickly and easily.

    Back Up Your Data

    Backing up your data is a crucial step towards safeguarding your valuable information from being lost in case of any unfortunate incident such as a laptop crash or a ransomware attack. Before you start backing up your data, make sure you know exactly what you need to back up and where you will be storing it. This will help you prepare a comprehensive backup plan and ensure that no crucial information is left behind.

    One option for storing your data is cloud storage, which allows you to access your information from anywhere. Another option is an external hard drive, which gives you physical access to your data and is a good backup solution in case of an internet outage. Whatever option you choose, remember to frequently update your backups and store them in a secure location.

    Don’t leave your data’s safety to chance – take proactive steps to protect it by backing it up regularly. Remember, an ounce of prevention is worth a pound of cure.

    how to remove ssd from pc

    Turn Off Your PC

    Preparation is key when it comes to turning off your PC. Before shutting down your computer, it’s important to close any open programs and save any unsaved work to prevent data loss. Additionally, it’s a good idea to run any necessary updates or virus scans to ensure your computer is running smoothly and protected from potential threats.

    Once you’ve completed these steps, you can safely shut down your PC. Turning off your computer correctly not only helps to extend the lifespan of your hardware and preserve your data, but it can also save you money on your energy bill. By taking a few simple precautions and properly shutting down your PC, you can optimize its performance and ensure it’s ready for use the next time you need it.

    So, don’t forget to turn off your PC before calling it a day!

    Removing the SSD

    If you’re looking to upgrade or replace your SSD, you’ll need to know how to remove it from your PC. The process varies slightly depending on your computer and how the SSD is installed, but generally, it involves opening up the case and disconnecting the SSD from its connections. Before you begin, you’ll want to make sure you have all the necessary tools, such as a screwdriver and an anti-static wrist strap to prevent damage to your components.

    Once you’ve taken the necessary precautions, you can get started by turning off your computer and unplugging it from the power source. Then, open up your case and locate the SSD. Carefully disconnect any cables or connectors before unscrewing the SSD from its mounting point.

    Gently lift the SSD out of the slot and store it in a safe place. With a little patience and attention to detail, removing your SSD can be a quick and painless process that will allow you to upgrade or replace it as needed.

    Open the PC Case

    To remove the SSD from your PC, you’ll first need to open up the case. This can seem daunting at first, but it’s a relatively straightforward process. You’ll want to start by unplugging all cables and turning off the power supply.

    Once that’s done, locate the screws on the back of the case and remove them. You may need to use a screwdriver to do this. Once the screws are removed, gently pull the side panel off to reveal the inside of the case.

    Next, you’ll need to locate the SSD. It will likely be a small rectangular box attached to the motherboard with screws or brackets. Carefully remove any screws or brackets that are holding the SSD in place, using a screwdriver if necessary.

    Once the SSD is free, you can gently pull it out of its slot. It’s important to handle the SSD carefully when removing it, as it’s a delicate piece of hardware. Avoid touching the metal parts or any exposed circuitry, as this can cause damage.

    Once you have the SSD out of the PC, you can either replace it with a new one or transfer the data to a new machine. With a little bit of care and precision, removing an SSD from your PC is a quick and painless process.

    Locate the SSD

    SSD If you’re planning to upgrade or replace your computer’s SSD, the first step is to locate it. Depending on your computer’s make and model, the SSD may be located in different spots. For most laptops, the SSD is often located underneath the bottom panel.

    The first step is to shut down your computer and remove the battery (if removable). Once you’ve located the panel covering the SSD, use a screwdriver to remove the screws holding it in place. Carefully remove the panel, and you should be able to see the SSD.

    To remove it, you’ll need to unscrew the screws holding it in place or slide it out of its connector, depending on how it’s installed. It’s important to be gentle and not rush the process to avoid damage to the SSD or other components. Once the SSD is removed, you can replace it with a new one or upgrade to a larger one.

    Just be sure to follow the reverse order of steps when putting your computer back together.

    Unplug the SSD

    Unplugging an SSD is a crucial component of replacing, upgrading, or repairing an SSD. Before proceeding with this process, it’s crucial to make sure that you’ve shut down the computer completely. Once you’ve done that, you can open up the panel of your computer that contains the hard drives.

    Locate the SSD and then gently unscrew the screws that hold it in place. Carefully take the SSD out of its compartment, making sure not to touch any of the other components inside the computer. Once you’ve removed the SSD, it’s essential to store it safely, preferably in an anti-static bag to prevent any electric discharge.

    Make sure that you don’t jostle the device while carrying it around, as it may cause data corruption or damage to the device. Removing the SSD is an easy process if taken with care and attention, and you can do it yourself with minimal tools. By unplugging the SSD, you can upgrade it to a new model, swap it out for a faulty one, or access the data inside for backup purposes.

    Remove the Screws Holding the SSD in Place

    When it comes to upgrading or replacing your SSD, removing it from its location can be a bit daunting. However, with a few simple steps, you’ll be able to remove it with ease. Firstly, you’ll need to locate the screws that are holding the SSD in place.

    These screws are usually located on the sides or bottom of the SSD. Once you’ve found them, grab a screwdriver and remove them one by one. Make sure to keep them in a safe place, as you’ll need them to reattach the SSD later on.

    Once all the screws are removed, you can gently lift the SSD out of its slot. Be careful not to damage any of the components around it, especially if the SSD is located near other essential hardware. With the SSD successfully removed, you’re free to install a new one or perform any upgrades necessary.

    Remember, always handle components with care and attention, to avoid causing any damage or issues down the line.

    Next Steps

    Removing an SSD from your PC can be a simple process as long as you follow the right steps. First, ensure that your PC is turned off and disconnected from the power source before proceeding. Next, locate the SSD, which is typically located near the motherboard and connected by a cable or screws.

    Make sure to remove any screws or cables that are securing the SSD to the PC. Once the SSD is loose, gently lift it out of its compartment. Finally, store the SSD safely in an anti-static bag to prevent any damage that could occur from static electricity.

    Overall, removing an SSD from a PC is a straightforward process that should not take more than a few minutes.

    Install Replacement Storage

    If you’ve decided to replace your current storage device, the next step is to install a replacement storage device. Before you begin, you’ll want to ensure that you have all the necessary tools, data backup, and software required. You’ll also need to identify the type of storage device that you need and whether it is compatible with your system.

    Once you have the replacement storage, you’ll want to power down your system and remove the old storage device carefully. Installing the new device will require connecting it to the system and ensuring that it is properly powered and recognized by the operating system. This step may also require reconfiguring and formatting the new storage device to make it ready for use.

    Be sure to follow the manufacturer’s instructions carefully, as improper installation can result in data loss or damage to your equipment. Overall, installing a replacement storage device can greatly improve your system’s performance and storage capacity, making it worth the effort and time.

    Close the PC Case

    Now that all your components are in place, it’s time to close the PC case. Make sure all the cables are neatly arranged and tucked away. It may be helpful to use twist ties or zip ties to keep them organized and out of the way of any fans or components.

    Once all the cables are secure, place the side panel back onto the case and screw it into place. It may feel like a small step, but properly closing the PC case ensures that all the components are protected and functioning as they should be. You don’t want any loose cables or debris getting inside and causing potential damage.

    So, take the time to properly secure everything and enjoy your newly-built PC!

    Conclusion

    Removing an SSD from a PC is a lot like ending a toxic relationship – it may be daunting, but it’s ultimately for the better. After all, once you’ve taken the necessary steps to safely disconnect your SSD, you can move on to bigger and better things (like upgrading to a bigger and better SSD, perhaps?). So go ahead, take charge of your PC’s storage and break free from the shackles of that old, worn-out SSD – your future self will thank you.

    FAQs

    What tools do I need to safely remove an SSD from my PC?
    To safely remove an SSD from your PC, you’ll need a screwdriver, an antistatic wrist strap, and a clean workspace.

    How do I know if it’s safe to remove my SSD from my PC?
    Before removing your SSD from your PC, it’s important to make sure that your computer is shut down and unplugged. Also, be sure to wear an antistatic wrist strap to avoid damaging your SSD with static electricity.

    Can I remove and install an SSD myself, or should I take it to a professional?
    If you have some experience with computer hardware and feel comfortable with the process, you can typically remove and install an SSD yourself. However, if you’re not sure what you’re doing, it’s always best to consult a professional to avoid damaging your SSD or your computer.

    How do I physically remove an SSD from my PC?
    To remove an SSD from your PC, you’ll need to locate the mounting screws that hold it in place, unscrew them, and gently lift the SSD out of the slot. Be careful not to damage the connectors when disconnecting it from the motherboard and power supply.

  • How to Retrieve Your Precious Data from a Faulty M.2 SSD: Proven Tips and Tricks

    The M.2 Solid State Drive (SSD) is the latest storage solution that offers lightning-fast data transfer speeds, making it an essential component for high-performance computing. However, even with the most advanced SSD, data loss or corruption may occur due to various reasons.

    Have you experienced the frustration of losing your precious data stored on your M.2 SSD? Fortunately, there are solutions available to help recover your data. In this blog post, we will discuss the common causes of data loss on an M.

    2 SSD, how to prevent it, and the steps you can take to recover lost data. By the end of this article, you will have a better understanding of how to ensure your valuable data is protected, and you’ll know what to do if data loss occurs. So, whether you’re a gamer, content creator, or business professional, this blog post is for you! Let’s dive into the world of M.

    2 SSD data recovery.

    Introduction to M.2 SSD Recovery

    Recovering data from an M.2 SSD may seem daunting but with the right tools and knowledge, it can be achievable. The M.

    2 SSD is a newer type of solid-state drive that is designed to be smaller and faster, which makes them popular for use on laptops and Ultrabooks. If your M.2 SSD fails or you accidentally delete files, you may be able to recover your data.

    However, the first step is to stop using the drive immediately after the data loss is discovered to prevent any further overwriting. There are many data recovery tools available in the market both in free and paid versions that would help you to recover lost data. Additionally, it is always recommended to have regular backups so that in case of data loss, you can recover your data with ease.

    With thorough research and the right tools, you can recover your precious data from an M.2 SSD.

    What is M.2 SSD?

    If you’re a computer user, you know that storage is very important. The faster and larger the storage is, the smoother the computer will operate. M.

    2 SSD is one type of storage that has become increasingly popular in recent years. It is smaller, faster, and more efficient than traditional hard drives. M.

    2 SSDs use advanced technology to store and retrieve data much more quickly than traditional drives. They use NAND flash memory, which is non-volatile and doesn’t require electricity to maintain data, allowing for speedier boot times and file transfers. However, despite the advanced technology and superior performance, M.

    2 SSDs are still susceptible to damage and data loss. That’s where M.2 SSD recovery comes in handy if you encounter any issues with your M.

    2 SSD storage. The recovery process involves specialized software and techniques to recover lost data from M.2 SSD drives.

    With the rise in M.2 SSD popularity, it’s important to know that recovery services are readily available if and when you need it.

    how to recover data from m.2 ssd

    Why Data Loss Occurs on M.2 SSDs?

    M.2 SSD recovery M.2 SSDs have become increasingly popular for their speed and compact design.

    However, data loss can occur even on these high-performance drives. One common cause of data loss is an electrical or physical problem, such as a power surge or device failure. Another reason is human error, such as accidental deletion or formatting.

    Whatever the cause, losing important data can be a frustrating and stressful experience. Fortunately, M.2 SSD recovery is possible with the help of specialized software and data recovery experts.

    These tools and professionals can help you recover lost files, photos, and other valuable data quickly and efficiently. Don’t panic if you experience data loss on your M.2 SSD – with the right approach, you can retrieve your lost information and continue using your drive with confidence.

    Preparation for M.2 SSD Recovery

    If you’re wondering how to recover data from an M.2 SSD, there are a few steps you can take to prepare for the recovery process. First, make sure you have a backup of all your important data so you don’t lose anything during the recovery process.

    Next, disconnect the M.2 SSD from your computer to prevent any further damage to the drive. You may also want to label the drive with the date and brief description of the issue for future reference.

    From there, you can begin researching data recovery services or software that are compatible with M.2 SSDs. It’s important to choose a reputable and experienced provider to ensure the best chance of recovery.

    Additionally, be prepared for the potential cost associated with professional data recovery services. With these steps in mind, you’ll be better equipped to recover your valuable data from a damaged M.2 SSD.

    Stop Using Device Immediately

    If you suspect that your M.2 SSD has failed, the first thing you need to do is stop using your device immediately. Any further use of the device may worsen the situation and lead to permanent data loss.

    Before you attempt to recover your M.2 SSD, you need to ensure that you have the necessary tools at your disposal. First and foremost, you will need an M.

    2 SSD recovery tool that specializes in the recovery of M.2 SSDs. In addition to this, you may also need a USB drive or an external hard drive to store recovered data.

    Once you have the necessary tools, you can attempt to recover your M.2 SSD. However, it’s important to note that M.

    2 SSD recovery is a complex process that requires technical expertise. If you don’t feel confident in handing this yourself, it’s best to consult a data recovery specialist to recover your data safely and effectively. Keyword: M.

    2 SSD recovery.

    Check Connections and Cables

    If you’re trying to recover data from an M.2 SSD, it’s important to prepare yourself by checking connections and cables beforehand. A loose connection or damaged cable could be the reason why your SSD isn’t working properly.

    Before you begin the recovery process, make sure your M.2 SSD is properly connected to your computer and all cables are in good condition. This includes checking the SATA cables, power cables, and any other connections that may be affecting your SSD.

    By taking the time to double-check your connections and cables, you can ensure that your M.2 SSD recovery goes smoothly and you don’t run into any unexpected issues. Remember, prevention is key when it comes to data recovery.

    Methods for M.2 SSD Recovery

    If you have ever experienced data loss on an M.2 SSD, you know how frustrating and panic-inducing it can be. However, there are several methods you can use to recover data from your M.

    2 SSD. One effective method is to use data recovery software, such as EaseUS Data Recovery or Recuva. These programs can scan your SSD and attempt to recover any lost or corrupted files.

    Another option is to use professional data recovery services. Companies such as Ontrack or DriveSavers specialize in data recovery and can retrieve data from damaged or inaccessible M.2 SSDs.

    If your M.2 SSD is physically damaged, however, it may require professional repair before any data recovery attempts can be made. Remember to always back up your important data, as prevention is the best method for avoiding data loss.

    Method 1: Data Recovery Software

    M.2 SSD Recovery When it comes to M.2 SSD recovery, there are various methods available, and one of the popular ones is through the use of data recovery software.

    This method involves scanning your M.2 SSD with specialized software, which helps to locate and restore lost or accidentally deleted data. The software operates by searching for fragments of data that are still intact on the SSD and using them to reconstruct the missing files.

    While data recovery software can be effective in restoring lost data from an M.2 SSD, it’s essential to note that the success rate depends on various factors. For instance, if the SSD is physically damaged, the chances of recovering data using the software are minimal.

    Additionally, the amount of data on the SSD can also affect the time it takes to retrieve the lost data. It’s crucial to ensure that you select the right recovery software for your needs, as there are various options available. Some software can recover data from specific file systems, while others can support multiple formats.

    The recovery software’s ease of use can also be a deciding factor, especially if you intend to handle the recovery process yourself. In conclusion, recovering lost data from an M.2 SSD is possible using data recovery software.

    However, it’s essential to keep in mind that the success rate may vary depending on the extent of the damage and the amount of data on the SSD. Therefore, it’s crucial to select the right software and seek professional help if needed.

    Method 2: Contact a Service Provider

    If you are unable to recover your lost data from your M.2 SSD using the DIY methods, then it’s time to consider contacting a service provider. Look for a professional data recovery company that specializes in restoring data from solid-state drives.

    Such service providers have the expertise, tools, and software needed to retrieve data from damaged or inaccessible SSDs. However, it’s important to choose a reputable and reliable data recovery service to ensure you get your data back safely. Make sure to go through customer reviews, testimonials, and ratings to know about their service quality.

    The cost of data recovery services for M.2 SSDs can vary based on the complexity of the issue and the service provider, so it’s recommended to get a quote from a few providers before making a decision. By choosing a trusted data recovery professional, you can rest assured that your important data is in safe hands and will be restored as soon as possible.

    Prevention of M.2 SSD Data Loss

    If you want to prevent data loss from an M.2 SSD, there are a few things you can do. First, make sure to regularly back up your data to an external source.

    This way, if something goes wrong with your SSD, you’ll still have a copy of your important files. Additionally, you can take steps to prevent physical damage to your SSD, such as by handling it carefully and avoiding exposing it to extreme temperatures. It’s also a good idea to regularly update your drivers and firmware to ensure that your SSD is functioning properly.

    However, if you do experience data loss from an M.2 SSD, there are options for data recovery. You can try using a data recovery software or seek the help of a professional data recovery service.

    Just remember, prevention is key when it comes to protecting your data!

    Backup Data Regularly

    Backing up your data regularly is crucial when it comes to preventing data loss, especially on an M.2 SSD. These small, high-performance drives are becoming increasingly popular, but they can also be susceptible to failure.

    That’s why it’s important to maintain multiple backup copies of your data in case of unexpected issues. One effective way to do this is by using cloud storage. With cloud backups, you can easily store all your important data in a secure and remote location.

    In addition, you can automatically sync your M.2 SSD to make sure that any new files or updates are backed up to the cloud on a regular basis. This provides an additional layer of protection against unexpected data loss, giving you peace of mind knowing your data is safe and secure.

    So, don’t take any chances with your valuable data – start backing up to the cloud today!

    Avoid Physical and Electrical Damage

    M.2 SSD data loss can be prevented by avoiding physical and electrical damage to your device. It’s essential to handle your M.

    2 SSD with care to prevent it from incurring any physical damages like scratches, dents, or cracks. Ensure that your M.2 SSD is stored in a safe and secure location and isn’t subjected to any extreme temperatures or humidity levels.

    Additionally, it’s essential to protect your M.2 SSD from electrical surges by using a surge protector or uninterrupted power supply (UPS). These devices provide protection against voltage spikes, which can damage your M.

    2 SSD and lead to irreversible data loss. By taking these precautionary measures, you can ensure that your M.2 SSD remains functioning appropriately and protect your valuable data.

    Conclusion and Final Thoughts

    When it comes to retrieving lost data from an M.2 SSD, the process may seem daunting. However, with a bit of technical prowess and the right tools, data recovery can be a breeze.

    Just remember to put on your digital detective hat, approach with an open mind and a steady hand, and don’t be afraid to call in the experts if necessary. In the end, a successful recovery could mean the difference between losing precious memories or regaining access to important files. So go forth with confidence, and let the data recovery adventure begin!”

    FAQs

    What are some common causes of data loss in M.2 SSD drives?
    Some common causes of data loss in M.2 SSD drives include physical damage to the drive, corruption of the file system, malware or viruses, and accidental deletion or formatting.

    What steps can I take to recover data from an M.2 SSD drive?
    If you have lost data from your M.2 SSD drive, you can try using data recovery software such as EaseUS Data Recovery or Recuva. You can also take the drive to a professional data recovery service for more advanced recovery options.

    Can I recover data from a failed M.2 SSD drive?
    It may be possible to recover data from a failed M.2 SSD drive, but it depends on the cause of the failure. If the failure is due to physical damage, you may need to send the drive to a specialized data recovery service. If the failure is due to software issues, data recovery software may be able to help.

    Is it possible to prevent data loss in M.2 SSD drives?
    Yes, you can take several steps to prevent data loss in M.2 SSD drives. These include backing up your data regularly, avoiding excessive heat or physical damage to the drive, using antivirus software to prevent malware or viruses, and being careful when deleting or formatting files on the drive.

  • Step-by-Step Guide: Hassle-Free Samsung SSD Installation Made Easy

    One of the best ways to speed up an older laptop or desktop is by installing an SSD. Samsung is one of the most popular brands for this upgrade, and luckily it’s not too difficult to do it yourself! In this step-by-step guide, we’ll show you everything you need to know to install a Samsung SSD in your computer. Whether you’re a first-timer or a seasoned computer builder, we’ve got you covered.

    So grab your toolkit and let’s get started!

    Check Compatibility

    If you’re looking to install a Samsung SSD in your computer, the first thing you need to do is ensure that it’s compatible with your system. You should check the specifications of your computer to determine if it supports the type of SSD you want to install. Some computers may only support certain sizes or types of SSDs, so it’s important to do your research before you make a purchase.

    Once you’ve confirmed compatibility, you can proceed with the installation process. Keep in mind that installing an SSD can significantly improve the speed and performance of your computer, so it’s definitely worth considering if you’re looking to upgrade your system. With a little bit of know-how and the right tools, you can easily install a Samsung SSD and breathe new life into your computer.

    Confirm if your computer supports Samsung SSDs

    If you’re planning on upgrading to a Samsung SSD, the first thing you need to do is check if your computer is compatible. It’s always a good idea to confirm this before making any purchases to avoid any disappointment or compatibility issues. Fortunately, checking compatibility is a simple task that can be done in just a few steps.

    Firstly, you need to determine the type of SSD your computer can accommodate, as there are different sizes and form factors available. Once you know this, check the Samsung website to see which SSDs are recommended for your device. You can also check your computer’s documentation or manufacturer’s website for compatibility information.

    Remember, choosing an incompatible SSD can result in issues such as slower speeds, reduced capacity, or even hardware failure. So, take your time and do your research to ensure that your computer and Samsung SSD are a perfect match.

    samsung ssd how to install

    Prepare your PC

    Are you planning to upgrade your computer by installing a Samsung SSD? Before you get started, it’s essential to prepare your PC for the installation process. First, make sure to have all the necessary tools, including a screwdriver, SATA cable, and mounting screws. You should also back up all your essential data to an external hard drive to avoid losing any valuable information during the installation.

    Once you have your tools and data backup, turn off your computer, disconnect all peripherals, and unplug the power cable. Open the computer case and locate the hard drive bay. Remove the screws holding the hard drive to the bay and use the SATA cable to connect the Samsung SSD to the motherboard.

    Mount the SSD on the bay using the mounting screws and close the computer case. Connect the power cable and turn on your computer. Your computer should recognize the Samsung SSD as the primary drive, and you can install your operating system and start using your computer.

    With these simple steps, you can successfully install your new Samsung SSD and enjoy a faster and more efficient computer.

    Shut down your computer and unplug it from the power source

    When it comes to preparing your PC for maintenance or upgrades, it’s important to start with the basics. The first step is to shut down your computer and unplug it from the power source. This will ensure that you’re not working with any live electrical circuits, which can be dangerous.

    Next, you’ll want to clear a clean, well-lit workspace where you can comfortably work on your PC without any interference or distractions. Before opening up your computer, make sure you have all the necessary tools and equipment you need for the job at hand, such as screwdrivers and anti-static wristbands. It’s also a good idea to gather any manuals or instructions that may be relevant to the task you’re performing.

    By taking these simple steps to prepare your PC, you’ll create a safe and efficient environment for performing maintenance or upgrades without any hassle or headaches.

    Remove the side panel of your desktop

    If you need to access the inside of your desktop computer, the first step is to remove the side panel. Before doing so, it’s essential to prepare your PC properly, especially if you’re planning to work on the internal hardware. First, make sure your computer is turned off and unplugged from the power source.

    Then, clear the area of any potential hazards that might damage your PC, such as liquids or static electricity. You should also ground yourself by wearing an anti-static wristband or touching a grounded metal object before touching any internal parts of your desktop. Once you’ve completed these precautions, you can begin removing the side panel on your PC.

    It’s essential to follow the manufacturer’s instructions, as each desktop is slightly different in its panel removal process. However, most will require you to unscrew and remove the screws on the back or side of the case, slide the panel back, and gently lift it off its hinges. With proper preparation, removing the side panel on your desktop is a straightforward and safe process that allows you to access and work on the internal components of your computer.

    Install Samsung SSD

    If you want better performance and faster boot times for your computer, upgrading to a Samsung SSD can do wonders. Installing a Samsung SSD is generally a straightforward process. First, ensure your computer is powered off and unplugged.

    Locate your existing hard drive and disconnect it. Next, insert the Samsung SSD into the appropriate slot and secure it in place. Finally, reconnect any cables or screws that were removed during the process and power on your computer.

    Some Samsung SSDs come with software that can transfer your data from your existing hard drive to the new SSD, making the transition even smoother. With a Samsung SSD, you’ll experience a faster and more reliable computing experience.

    Find an empty drive bay in your PC

    Installing a Samsung SSD is an excellent way to upgrade your PC’s performance. The first step in the process is finding an empty drive bay to install the SSD in. This can typically be found near the bottom of your PC tower.

    Once you locate the empty bay, you will need to secure the SSD in place using the appropriate screws and mounts. It’s important to ensure that the SSD is well-secured to prevent any damage to the drive or your PC. Once the SSD is installed, you’ll need to connect it to your PC by plugging in the SATA and power cables.

    Finally, you’ll need to configure the BIOS settings on your PC to recognize the SSD as the primary boot drive. With these simple steps, you can enjoy faster boot times, improved data transfer speeds, and higher overall performance on your PC. So, if you’re looking to give your PC a boost, installing a Samsung SSD is a great place to start.

    Snap Samsung SSD into the drive bay

    Installing a Samsung SSD into your computer can significantly enhance its performance and speed. To do so, first, you need to snap the Samsung SSD into the drive bay. This is typically located in the front of the computer case and is usually removable.

    It’s important to turn off your computer and unplug it from the power source before you begin. Then, open the case and locate the empty drive bay. Gently slide the Samsung SSD into the slot until it clicks into place.

    Ensure that it’s securely connected and that the data and power cables are attached correctly. Once everything is in place, put the case back together and power on your computer. The new Samsung SSD will now appear as a new drive, and you can transfer your files and applications onto it.

    By doing this, you’ll experience faster boot times, quicker application launches, and overall improved performance. So, go ahead and upgrade your computer by installing a Samsung SSD, and enjoy a faster and smoother user experience like never before.

    Connect Samsung SSD

    Installing a Samsung SSD is easier than you might think. First, make sure to turn off your computer and unplug it from the socket. Next, remove the side panel of your computer case and locate the hard drive bays.

    If your computer already has a hard drive, you’ll need to identify which bay it’s in. Once you’ve found an empty bay, remove it from any mounting screws it may have and keep it aside for now. Take your Samsung SSD and slide it into the empty bay.

    Make sure to properly align the connectors at the back of the SSD with those of the computer’s interface. Once it’s secure, use the mounting screws you removed from the empty bay earlier to secure the SSD. With your new SSD installed, we recommend checking that your computer detects it.

    Turn your computer back on, and head to the Device Manager within the Control Panel (or Windows System Information on a Mac). You should see your new Samsung SSD listed under “Disk Drives”. That’s it! With your Samsung SSD connected, you’ll enjoy faster boot-up times and improved system response.

    Connect the power cable to the SSD

    When it comes to setting up your new Samsung SSD, the first step is connecting the power cable. This cable is what gives your SSD the juice it needs to operate. You’ll find the power cable included with your SSD, so make sure you have it on hand before getting started.

    Look for the power port on the SSD and plug the cable in securely, making sure it’s seated all the way. Once you’ve connected the power cable, you’ll be one step closer to having a lightning-fast computer with speedy data access and lightning-fast boot times! Just remember to handle the SSD with care and to follow all manufacturer instructions to avoid damaging the unit. With a little bit of patience and attention to detail, you’ll have your Samsung SSD up and running in no time!

    Attach SATA cable to the Samsung SSD and motherboard

    When it comes to setting up a new Samsung SSD, one of the most crucial steps is to attach the SATA cable to both the SSD and the motherboard. This cable serves as the bridge between your Samsung SSD and the other components in your computer. To get started, locate the SATA port on your motherboard and connect one end of the cable to it.

    Then, carefully connect the other end of the cable to your Samsung SSD, making sure to securely fasten it into place. It’s important to avoid tugging on the cable during this step, as any loose connections could lead to data loss or damage to your device. Once the SATA cable is securely attached, you’re ready to move on to the next steps in setting up your new Samsung SSD.

    So take your time, follow the instructions carefully, and enjoy the enhanced performance that your new SSD will provide.

    Boot your PC and Install Samsung Software

    If you’ve just purchased a Samsung SSD and are wondering how to install it, the first step is to shut down your computer and physically install the SSD. Once you have done this, power up your PC and insert the installation disc that came with your Samsung SSD. If your computer does not have a CD drive, you can download the software from the Samsung website.

    Follow the prompts on the installation wizard to complete the software installation. Once this is done, you will be able to access the Samsung software, which will allow you to manage your SSD. From the software’s interface, you can monitor your SSD’s health, update firmware, optimize performance, and more.

    With Samsung’s intuitive software, you can get the most out of your SSD and ensure that it’s running as smoothly as possible.

    Power on your computer

    Alright, let’s get started! The first step of setting up a Samsung device is powering on your computer. This may seem like a no-brainer, but some people forget to do it! Once your computer is up and running, you’re ready to begin the installation process for Samsung software. Before you begin, make sure you have all the necessary files and tools, such as the installation CD or USB drive, and an internet connection if needed.

    Then, simply follow the on-screen instructions to install the software onto your computer. Once you’ve successfully installed the software, you’re ready to connect your Samsung device and begin the fun stuff, like transferring files and customizing your settings to your liking. Just remember, there’s a lot of exciting things that become available to you once you’ve properly set up your Samsung device, so take your time and enjoy the process!

    Install Samsung Magician software for optimized performance

    When upgrading your computer, it’s important to optimize its performance by installing the appropriate software. If you’ve recently purchased a Samsung SSD, you’ll want to download and install the Samsung Magician software, which is designed to help you manage and optimize your drive. Thankfully, the process of installing Samsung’s software is easy.

    Simply boot up your PC and head to the Samsung website to download the software. Once the download is complete, run the installation wizard and follow the prompts to complete the installation process. By installing Samsung Magician, you’ll be able to take advantage of advanced features like performance benchmarking, disk health monitoring, and firmware updates.

    Overall, the time and effort it takes to install Samsung Magician are well worth the improved performance and longevity of your Samsung SSD.

    Conclusion

    In conclusion, installing a Samsung SSD is a breeze. It’s like upgrading your computer’s brainpower with a caffeine injection. Just follow the simple steps and enjoy the lightning-fast speed and reliability.

    Say goodbye to the spinning wheel of death and hello to productivity. Your computer will thank you and your friends will envy you. So go ahead, unleash the power of your computer with a Samsung SSD installation!”

    FAQs

    What are the requirements for installing a Samsung SSD?
    To install a Samsung SSD, you need a compatible computer with an available SATA III port, a screwdriver, and the Samsung Data Migration software.

    How do I physically install a Samsung SSD in my computer?
    To physically install a Samsung SSD, you need to open the computer case, locate the free SATA III port, attach the SSD to the port, and secure it with screws.

    Can I use the Samsung Data Migration software to copy my HDD to the SSD I just installed?
    Yes, the Samsung Data Migration software can be used to transfer all the data from an existing HDD to a newly installed Samsung SSD.

    What if my computer does not have an available SATA III port?
    If your computer does not have an available SATA III port, you can use a USB-to-SATA adapter to connect the Samsung SSD to your computer and transfer the data.

  • Unleash Lightning-Fast Speed: A Step-by-Step Guide on How to Install Samsung 870 EVO SSD

    Are you ready to upgrade your computer’s storage capacity? Installing a Samsung 870 EVO SSD is a great way to give your PC a significant speed boost. Not only does it offer lightning-fast data transfer speeds, but it also comes with a range of features that make it easy to install and use. So, whether you are upgrading from a traditional hard drive or another SSD model, this step-by-step guide will walk you through the process of installing the Samsung 870 EVO SSD in your computer.

    From preparing your tools to transferring data, we’ve got you covered. Let’s dive in!

    What You Need

    If you’re looking to install a Samsung 870 EVO SSD, then there are a few things you’ll need to make the process smooth and efficient. Firstly, you’ll obviously need the SSD itself, which comes in various storage sizes. You’ll also need a screwdriver to remove the back panel of your computer or laptop and attach the new drive.

    It’s recommended to have an anti-static wrist strap to prevent damaging the drive with static electricity. Additionally, you’ll need a cloning software or a bootable USB drive to transfer your operating system and data to the new drive. Lastly, ensure that your computer or laptop is compatible with the Samsung 870 EVO, so you don’t run into any issues during the installation process.

    With these things in place, installing the Samsung 870 EVO SSD should be a breeze.

    Requirements for Installation

    When it comes to installing any software, there are a few requirements that need to be met before you can begin. For starters, you’ll need a compatible device, whether it’s a computer, tablet, or smartphone. Next, you’ll need to ensure that your device has enough storage space to accommodate the software.

    Depending on the program, it could take up a significant amount of space, so take that into consideration. You’ll also need a stable internet connection if you’re downloading the software online. This ensures that the download process is smooth and uninterrupted.

    Lastly, it’s important to check the minimum system requirements needed for the software to operate efficiently on your device. If your device falls short of these requirements, the software may not run as intended or may not run at all. It’s always a good idea to double-check these requirements before proceeding with the installation.

    By ensuring that you have everything you need before starting the installation process, you can avoid any potential problems or issues that may arise.

    how to install a samsung 870 evo ssd

    Preparing for Installation

    If you’re looking to improve your computer’s speed and performance, installing a Samsung 870 EVO SSD might be the solution you need. Before you start, gather all the tools you’ll need, including a screwdriver, so you can easily access your computer’s hard drive bay. Remember to also get a cloning software to transfer your old hard drive’s contents to your new SSD if you’re not starting from scratch.

    Shut down your computer and unplug it from the power source before opening it up. Locate the hard drive bay and remove the screws that hold the hard drive in place. Once you’ve removed the old hard drive, insert the new Samsung 870 EVO SSD into its place.

    Tighten the screws, reconnect the cables and power on your computer. That’s it! You now have an upgraded computer with improved speed and performance thanks to your brand new Samsung 870 EVO SSD.

    Back Up Your Data

    Back Up Your Data Before you start preparing for installation, it’s essential to back up all your data. Installing a new operating system can be risky, and anything could happen during the process. You might lose your data, or even worse, it could get corrupted.

    So, backing everything up is the most crucial step in ensuring that your data is safe. There are several ways to back up your data, including external hard drives, USB flash drives, or even cloud storage. It’s always best to choose a reliable method for backing up your data, and you should also double-check that everything has been backed up correctly before installing the new operating system.

    Backing up your data may take some time, but it’s worth it in the end. Think about it like insurance for your computer – you hope you never need it, but if something goes wrong, you’ll be thankful you have it. Without a backup, you risk losing all your important documents, photos, music, and more.

    So, take the time to make sure everything is safely backed up before you start your installation process. Once you have everything backed up, you can proceed with installing the new operating system without any worries. So, protect your data and take the time to back it up – you won’t regret it!

    Shut Down Your PC and Disconnect Power

    Before you begin installing hardware or making any changes to your PC, it’s important to shut it down properly and disconnect the power source. This can be done by simply clicking the shutdown button in your operating system or unplugging the power cord from the wall. This step is essential to ensure the safety of both yourself and your computer.

    It will also prevent any unexpected power surges or damage to your equipment during the installation process. Additionally, make sure to take proper precautions such as wearing an anti-static wrist strap and handling components gently to avoid damage. By taking these steps and properly preparing for installation, you can ensure that your computer runs smoothly and efficiently for years to come.

    Opening Your PC

    If you’re looking to upgrade your PC’s storage capability and have just purchased a Samsung 870 EVO SSD, you’ll need to open up your PC to install it. But don’t worry, it’s actually easier than you might think! First, make sure your PC is turned off and unplugged from any power source, then locate the panel that needs to be removed to access the internal components. This could be on the side or back of the tower, or the bottom of a laptop.

    Once removed, you’ll be able to see the existing storage drive(s) and where you can install your new Samsung SSD. Gently insert the SSD into an available slot and secure it with screws if needed. Don’t forget to reattach the panel and plug in your PC before powering it back on.

    With your new Samsung 870 EVO SSD, you’ll have faster read and write speeds for improved performance and a larger storage capacity to store all your files and media.

    Selecting the Right PCIe Slot

    When it comes to selecting the right PCIe slot, the first step is opening up your PC. It may seem daunting at first, but don’t worry – it’s not as complicated as it seems. Simply unscrew the side panel and gently set it aside.

    Once inside, you’ll want to locate the PCIe slots on your motherboard. These slots are typically longer than other expansion slots and are located closer to the processor. Keep in mind that not all PCIe slots are created equal – some may have more bandwidth or be better suited for certain types of devices.

    Before selecting a slot, be sure to check your motherboard manual for any specific recommendations or limitations. By taking these steps, you can ensure that you select the right PCIe slot for your needs.

    Removing the Cover

    Removing the cover of your PC is the first step in opening it up and accessing its components. To begin, make sure your PC is powered off and unplugged from any power source. Locate the screws that hold the cover in place and use a screwdriver to remove them.

    Some PC cases may have latches or slides that secure the cover, so check your PC manual for specific instructions. Once the screws or latches are removed, gently lift the cover away from the PC tower. It’s important to handle the cover and PC components with care to avoid damage.

    With the cover removed, you can now access the internal components of your PC, such as the motherboard, graphics card, and hard drive. Remember to always handle everything with care, and keep screws and small components in a safe place to avoid losing them.

    Safely Grounding Yourself

    When it comes to opening up your PC, it’s important to ground yourself to avoid any potential damage from static electricity. The first step is to unplug your computer and all peripherals from the wall. Next, find a metal surface near your workstation and touch it with one hand.

    This will discharge any static electricity you may have built up. Once you’ve grounded yourself, remove the screws from your computer case and carefully slide it off. Handle all components with care, avoiding any unnecessary touches and movements.

    Always work on a stable surface, free from any clutter or potential hazards. By taking precautions and grounding yourself, you can ensure a safe and successful PC opening experience.

    Installing the Samsung 870 EVO SSD

    If you’re looking to upgrade your computer’s storage and performance, you may be considering installing a Samsung 870 EVO SSD. Fortunately, the process is quite simple and straightforward. First, ensure you have all necessary tools and equipment, including the SSD itself, a screwdriver, and any cables required for installation.

    Next, shut down your computer and disconnect it from any power sources. You can then open up your computer and locate the existing storage drive. Remove it by unscrewing the bracket that holds it in place, disconnecting any cables, and carefully sliding it out.

    Place the Samsung 870 EVO SSD in the same spot, screw it in place, and reconnect any necessary cables. Finally, turn your computer back on and ensure that it recognizes the new SSD. With just a few steps, you can enjoy improved storage and performance from your Samsung 870 EVO SSD.

    Aligning and Inserting the SSD

    If you’re looking for a faster speed and increased storage capacity, installing the Samsung 870 EVO SSD could be a great option. First, ensure that your computer has an available slot for the SSD. Then, shut down and unplug your PC, and carefully align the SSD in the designated slot.

    Depending on your computer, you may need to take off a panel or loosen some screws to access the slot. Once aligned, firmly push the SSD into place until it clicks securely. After this, reconnect any screws or panels you removed and power up your computer to ensure that the SSD is recognized and functioning correctly.

    With the Samsung 870 EVO SSD, you can enjoy faster speeds and greater storage capacity, all while completing the installation in a few simple steps.

    Securing the SSD with a Screw

    One important step when installing the Samsung 870 EVO SSD is securing it with a screw. This helps ensure the SSD stays firmly in place and doesn’t move around inside your computer, which could cause damage. To do this, you’ll need to find the screw hole on your SSD and line it up with the screw hole in your computer’s drive bay.

    Then, simply insert the screw and tighten it until the SSD is secure. It’s important not to overtighten the screw, though, as this can damage the drive or the screw itself. When done correctly, securing your SSD with a screw is a quick and easy way to add extra protection to your storage upgrade.

    Booting Up and Configuring Your System

    If you’ve got a new Samsung 870 EVO SSD, you’re in for a world of faster load times and more efficient operation. But first, you’ll need to install it and configure your system. Before you begin, make sure you have all the necessary tools: a screwdriver and an external drive enclosure or cloning software.

    Start by turning off your computer and unplugging all the cables. Open up the case and locate the drive bay where you’ll be installing the SSD. If you’re replacing an existing drive, remove it first.

    Then, insert the Samsung 870 EVO into the bay and screw it in place. Once the drive is secure, reconnect all the cables and turn your computer back on. You’ll need to set up the drive, either by installing a new operating system or cloning your existing one.

    Once your system is up and running, make sure to check your BIOS settings to ensure the SSD is recognized and properly configured. With a little bit of tech savvy, you’ll be up and running with your new Samsung 870 EVO SSD in no time!

    Powering On Your PC

    Booting up your computer can be exciting, but it’s also important to follow certain steps for a successful configuration. First, ensure that your power supply is properly connected and switched on. You can then push the power button on your computer to turn it on.

    This will display a startup screen, and you will be prompted to enter your login information. Once logged in, take some time to configure your system to your personal preferences. This can include setting up your wallpaper, background colors, screen resolution, and personalized folders for your files.

    It’s important to keep your operating system updated and install necessary software updates regularly to keep your computer running smoothly. By properly booting up and configuring your system, you’ll be able to get the most out of your computer and optimize your user experience.

    Configuring Your BIOS Settings

    Configuring Your BIOS Settings Configuring your BIOS settings is an essential step in setting up your computer system. BIOS stands for Basic Input/Output System and is responsible for initializing hardware components and starting up the operating system. Configuring these settings varies across different computers, but accessing your BIOS is typically done by pressing a specific key during the boot-up process.

    Common keys include F2, F10, or Del. Once you’ve accessed your BIOS, you can configure settings such as boot order, system time, and security options. It’s important to note that some changes in your BIOS can cause instability or even damage to your system, so it’s essential to understand the implications of any changes you make.

    Taking the time to configure your BIOS settings properly can improve your system’s performance and stability.

    Verifying Your SSD is Recognized

    If you’ve installed a new SSD, it’s important to verify that your computer recognizes it before proceeding with any further configuration. To do this, you’ll need to access your computer’s BIOS settings by pressing a key (usually F2, F10, or Del) during startup. Once you’re in the BIOS, you can navigate to the Device Configuration or Storage Options menu to see if your new SSD is listed.

    If it’s not, make sure it’s properly connected and try restarting your computer. If it’s still not recognized, you may need to update your BIOS firmware or consult with your computer manufacturer for further assistance. Once you’ve verified that your SSD is recognized, you can proceed with configuring your system for optimal performance.

    Don’t forget to install your operating system and any necessary drivers to ensure your new SSD is ready to go.

    Final Thoughts

    In conclusion, installing a Samsung 870 EVO SSD is a relatively easy task that can greatly improve the performance of your computer. With the right tools and a bit of patience, you can upgrade your storage system and enjoy faster boot times, quicker loading of applications, and smoother multitasking. Remember to properly prepare your computer by backing up important data and creating a recovery disk or drive before starting the installation process.

    Then, simply connect the SSD to your computer’s SATA port, mount it securely, and power up your system to begin the cloning process. Once completed, you can enjoy the benefits of your new SSD and the increased speed and efficiency it brings. With this step-by-step guide, you’ll soon be on your way to a more powerful, streamlined computing experience.

    Conclusion

    And there you have it, folks! Installing a Samsung 870 EVO SSD is as easy as pie with just a few simple steps. It’s like giving your old laptop or PC a second life, only better and faster. So, go ahead, take the plunge, and upgrade your storage game with this high-performance, reliable, and stylish SSD.

    Trust us; your computer will thank you later! Happy installing!”

    FAQs

    What are the requirements for installing a Samsung 870 EVO SSD?
    Before installing the Samsung 870 EVO SSD, ensure that you have a compatible system and sufficient storage space to accommodate the new SSD. Additionally, ensure that you have all the required tools, including a screwdriver and SATA cables.

    How do I physically install the Samsung 870 EVO SSD?
    To install the Samsung 870 EVO SSD, shut down your system and unplug all cables. Open the computer case and locate an empty 2.5-inch drive bay. Insert the SSD into the bay and secure it with screws. Then, connect the SATA and power cables to the SSD and motherboard.

    What software do I need to install the Samsung 870 EVO SSD?
    Samsung provides a free software tool called Samsung Magician that you can use to install and manage your new SSD. You can download this software from the Samsung website.

    What do I do after installing the Samsung 870 EVO SSD?
    After successfully installing the Samsung 870 EVO SSD, you can migrate your operating system and data from the previous hard drive to the SSD using Samsung Migration software. This will allow you to start using your new SSD right away, with all your programs and files intact.

  • Upgrade Your PC’s Speed: A Step-by-Step Guide to Installing a Second M.2 SSD

    If you’re looking to boost the speed and storage capacity of your computer, adding a second M.2 SSD is definitely worth considering. Installing it on your own might seem like a daunting task, but it’s actually pretty straightforward with the right knowledge and tools.

    In fact, it’s similar to installing the first M.2 SSD with just a few extra steps. Not only will you have more space to store your files and programs, but also a faster system overall.

    In this blog, we’ll walk you through the steps of installing a second M.2 SSD and explain the benefits of doing so. So, let’s get started!

    Understanding Your System

    Are you looking to upgrade your storage capacity by installing a second M.2 SSD? It’s a simple process that requires just a few steps. First, ensure that your motherboard supports two M.

    2 slots. If it does, locate the second M.2 slot and remove the screw that holds the cover in place.

    Insert the SSD into the slot at a 30-degree angle and gently push it in until it clicks into place. Replace the screw to secure the cover. Then, go into your computer’s BIOS settings and ensure that the system recognizes the new drive.

    Finally, format the drive and start using it. By following these steps, you can easily expand your storage capacity and improve your system’s performance. Don’t hesitate to add a second M.

    2 SSD and enjoy faster boot times, file transfers, and overall system responsiveness.

    Check for Compatibility

    When it comes to installing hardware or software onto your device, it’s essential to ensure that they are compatible with your system. Compatibility refers to whether a new piece of technology or software can function correctly with your computer’s existing components and operating system. Understanding your system and its specifications is crucial in determining what is compatible.

    For instance, if your system has a 32-bit operating system, installing software that requires a 64-bit operating system will not work, and vice versa. Similarly, with hardware, you need to check that the motherboard can support the RAM or graphics card you intend to use. It’s always worth double-checking compatibility before making any purchases to avoid wasting money and time.

    So, take the time to understand your system and its requirements to ensure that any updates or changes you make are compatible and function correctly.

    how to install a second m.2 ssd

    Check Available Slots

    If you’re looking to check available slots for a particular system, it’s important to understand how that system works. Each system is unique, with its own set of rules and limitations. For example, some systems may have designated time slots for certain activities, while others may allow for more flexibility.

    Before attempting to check available slots, take some time to familiarize yourself with the system and its requirements. If you’re unsure, don’t hesitate to reach out to customer support or an expert in the field for guidance. By taking the time to fully understand the system, you can save yourself a lot of frustration and ensure a smoother experience when checking available slots.

    Check for BIOS Support

    When it comes to understanding your system, it’s important to check for BIOS support. The BIOS, or Basic Input/Output System, is essentially the firmware that runs on your computer’s motherboard. It’s responsible for initializing all of the hardware components during the boot process.

    If your BIOS doesn’t support certain hardware features or configurations, it can lead to compatibility issues, slow performance, or even system instability. One way to check for BIOS support is to review the documentation that came with your motherboard or computer. This should provide a list of supported hardware and configurations.

    You can also check the manufacturer’s website for any relevant updates or patches to the BIOS that may address compatibility issues. By staying on top of your BIOS support, you can ensure your system runs smoothly and efficiently.

    Prepping for Installation

    If you’re looking to upgrade your laptop or desktop with a second M.2 SSD, there are a few steps you need to take before installation. First, you’ll want to make sure that your device supports a second M.

    2 slot and that it is compatible with the SSD you have chosen. You should also back up all of your important files and data, just in case there are any issues during the installation process. Additionally, you’ll need to make sure that you have the necessary tools, such as a screwdriver, to remove the cover of your device and install the SSD.

    Once you have everything ready, you can begin the installation process by opening up your device, inserting the M.2 SSD into the second slot, and securing it into place with the screw that was provided. Finally, close up your device, turn it on, and configure your new drive.

    With these steps, installing a second M.2 SSD is a simple process that can significantly improve your device’s performance.

    Gather Necessary Tools

    When it comes to preparation for installing a new feature or tool, gathering the necessary tools is crucial to ensuring a smooth and uncomplicated installation process. Some basic tools that you may need include a screwdriver, pliers, wire strippers, a soldering iron and wire connectors. However, depending on the type of installation, you may also need specialized equipment or materials.

    It’s important to carefully read through the installation instructions and make a list of all necessary tools beforehand to avoid any surprises later on. Remember, having the right tools on hand will not only save you time but also reduce the risk of making a mistake. So, take the time to gather the right tools, and your installation process will be less frustrating and much smoother.

    Prepare the System Environment

    Before installing any software or system, it is essential to ensure that the environment is prepared and ready. Preparing the system environment involves checking that the hardware and software meet the minimum requirements for the system, updating the operating system and software, and checking for any compatibility issues that may arise. It is crucial to ensure that the system environment is stable to avoid any issues during the installation process.

    One important aspect of preparing the system environment is to allocate enough resources to the installation process. This includes ensuring that there is enough storage space, memory, and processing power to complete the installation without any problems. In essence, preparing the system environment ensures that the installation process is smooth, efficient, and trouble-free.

    By taking the time to prepare the system environment adequately, you can reduce the chances of encountering any problems that may arise during the installation process.

    Disconnect Power and Other Components

    Before installing any new hardware or making changes to your computer, it’s important to ensure that you disconnect all of the power and any other components. This includes unplugging the power cord, removing any batteries, and disconnecting any external devices or cables. Not only can leaving these components connected potentially damage your hardware, but it can also result in electrical shock or other potential risks.

    Taking this extra precaution will also make it easier for you to access all necessary components during the installation process. Remember, safety should always come first when working with electronics. By taking the time to disconnect everything properly, you can ensure a smooth and successful installation without any unnecessary damage or complications.

    Installing the Second M.2 SSD

    If you’re looking to upgrade your computer’s storage, installing a second M.2 SSD is a great way to do it. This is especially useful if you’re starting to run out of space on your existing drive.

    To begin, you’ll want to check if your motherboard has a second M.2 slot available. Once you’ve determined that it does, you’ll need to acquire a compatible M.

    2 SSD. Make sure to read the specifications of your motherboard to ensure that the M.2 SSD you choose is compatible.

    Once you have your second M.2 SSD in hand, you can open up your computer case and locate the second M.2 slot.

    Typically, it will be located nearby the first M.2 slot. You’ll then want to insert the M.

    2 SSD at a 30-degree angle and gently push it into place until it clicks. Finally, secure the M.2 SSD in place with a screw.

    Locate the M.2 Slot

    Looking to upgrade your computer’s storage capacity? Good news – installing a second M.2 SSD can be easy with a bit of know-how. First, you’ll need to locate the M.

    2 slot on your motherboard. This slot is where your SSD will be installed. It’s important to check your motherboard’s manual or online specifications to ensure that it has an available M.

    2 slot. Once you’ve found the slot, make sure to ground yourself before touching any components to avoid static damage. The M.

    2 SSD is inserted at a slight angle and then pressed down until it clicks into place. Finally, use the screw provided with your motherboard to secure the SSD in place. Congratulations – you’ve just added more storage to your computer!

    Install the SSD into the Slot

    If you’re looking to add a second M.2 SSD to your system, the installation process is fairly straightforward. The first step is to locate the M.

    2 slot on your motherboard and ensure that it supports the size of your SSD. Next, carefully insert the SSD into the slot at a 30-degree angle, making sure the notches on the SSD line up with those on the slot. Then, gently push down on the SSD until it clicks into place.

    Finally, secure the SSD using the screw provided with your motherboard. It’s important to note that certain motherboards may have different methods of securing the SSD, so be sure to consult your motherboard manual for specific instructions. Once installed, you can format the new SSD and transfer files over for additional storage space and improved performance.

    By adding a second M.2 SSD, you can take full advantage of your motherboard’s capabilities and optimize your system for speedy operation.

    Securely Fasten the M.2 SSD

    When installing a second M.2 SSD, it is important to securely fasten it to ensure optimal performance and prevent any potential damage to the device. One of the easiest and most effective ways to do this is by using the appropriate screw and standoff components provided by the manufacturer.

    These screws and standoffs create a secure physical connection between the SSD and the motherboard, which helps to eliminate any potential wobbling or dislodging of the device. Once the screw and standoff components are in place, it is important to ensure that the M.2 SSD is properly aligned and inserted into the PCIe slot.

    By following these simple steps, you can ensure that your second M.2 SSD is installed safely and efficiently, ultimately improving the overall performance of your computer system.

    Testing the Second M.2 SSD

    So you have decided to install a second M.2 SSD on your computer and wondering how to go about it? Well, you have come to the right place. First and foremost, make sure your motherboard has an available M.

    2 slot. If not, you may need an adapter or consider replacing your motherboard. Once you have confirmed, turn off your computer and unplug any cables or wires.

    Locate the M.2 slot and gently insert the SSD at an angle, making sure it is securely in place. Next, use the appropriate screw to secure the SSD in place.

    Turn on your computer and check the BIOS to ensure that the new SSD is recognized. Congratulations, you have just successfully installed a second M.2 SSD! With this added storage capacity, you can now enjoy improved speed and performance for all your computing needs.

    Reconnect Power and Components

    Now that we have installed the second M.2 SSD into our system and connected all the necessary cables, we need to reconnect the power and components to ensure everything is running smoothly. Before proceeding any further, we must double-check that all connections are secure and tight.

    Once we have done so, we can move on to testing the second M.2 SSD. Testing the SSD is crucial to ensure it is functioning correctly and that the system recognizes it as a bootable device.

    We can do this by accessing the BIOS settings and checking if the SSD is listed in the boot sequence. If it is, then we can proceed with installing the operating system on the second SSD. In case the SSD is not detected, we can try reconnecting all the cables and checking the BIOS settings again.

    It is essential to take our time and be patient throughout this process to ensure everything is done correctly, and the system operates correctly. Spectacular performance from our second M.2 SSD is just a few steps away!

    Boot into the System BIOS

    When it comes to testing a second M.2 SSD on your computer, the first step is to boot into the system BIOS. This is where you can access the motherboard settings and make any necessary adjustments.

    Depending on your computer’s manufacturer, the process of accessing the BIOS may differ. However, it typically involves restarting the computer and repeatedly tapping a specific key (such as F2 or Delete) before the Windows logo appears. Once you’re in the BIOS, look for the section that deals with storage devices.

    Here, you can check if the second M.2 SSD is being detected by the system. If not, make sure it’s properly installed and connected.

    You can also make changes to the boot order to ensure that the computer is booting from the correct drive. By following these steps, you can test your second M.2 SSD and ensure it’s functioning properly.

    Verify the SSD is Detected and Working

    Once you’ve installed your second M.2 SSD, it’s important to check that it’s being detected and working properly. The first step is to boot up your computer and open the BIOS or UEFI settings.

    Check for the presence of the new drive in the list of storage devices. If you see it there, you’re on the right track. Next, try to boot up your operating system and check if the drive is visible in Disk Management or similar tools.

    You may need to format and assign a drive letter to make it usable. If everything looks good, you can run some benchmarks or file transfer tests to verify the performance of the new SSD. Keep in mind that not all M.

    2 slots may support NVMe protocol, so you may be limited to SATA speeds if that’s the case. Overall, adding a second M.2 SSD can be a great way to increase your computer’s storage and speed, but it’s important to ensure it’s working correctly before relying on it for critical data.

    Final Thoughts

    If you want to upgrade your computer’s storage capabilities, installing a second M.2 SSD can greatly improve your system’s performance. To begin with, make sure that your motherboard has a second M.

    2 slot and that it supports NVMe protocol. Then, turn off your computer and remove the side panel. Locate the M.

    2 slot and unscrew the protective cover. Insert the new SSD at a 30 degree angle and apply gentle pressure until it clicks into place. Then, screw the cover back on and replace the side panel.

    Finally, turn on your computer and format the new SSD. Voila! You now have a brand new SSD to store all your important files and run your favorite programs. Remember to back up your data before making any changes to your computer’s hardware.

    Installing a second M.2 SSD can greatly increase your computer’s storage capacity and improve its overall speed and performance.

    Conclusion

    So there you have it, installing a second M.2 SSD can be a breeze as long as you follow these simple steps. Just remember, getting a second SSD is like having two scoops of ice cream – it’s twice as good! And who doesn’t love a little extra speed and storage capacity? So go forth and upgrade, my friends.

    Your computer (and your data) will thank you.”

    FAQs

    What is an m.2 SSD and why would I want to install a second one?
    An m.2 SSD is a type of solid-state drive that offers fast read/write speeds and takes up very little space in your computer. Installing a second one can increase your storage capacity and improve overall system performance.

    Is it possible to install a second m.2 SSD in my computer?
    This depends on the specific model of your computer and the number of m.2 slots available on your motherboard. You can check your motherboard documentation or contact the manufacturer to confirm if a second m.2 SSD is supported.

    Do I need to purchase a specific type of m.2 SSD for a second installation?
    It is important to ensure that the m.2 SSD you purchase is compatible with your motherboard and has the correct interface (PCIe or SATA). Additionally, you should consider the storage capacity and read/write speeds of the SSD to ensure it meets your needs.

    How do I physically install a second m.2 SSD in my computer?
    The exact process for installing a second m.2 SSD will vary depending on your computer and motherboard, but generally involves opening the case, inserting the SSD into the correct slot, and securing it in place with screws. It is recommended to consult your motherboard documentation or seek assistance from a professional if you are unsure.

  • Step-by-Step Guide: Formatting Your Sandisk Extreme Portable SSD for Optimal Performance

    Are you tired of struggling to format your Sandisk Extreme Portable SSD? Perhaps it’s giving you headaches with constant errors popping up whenever you try to access your files. Don’t worry, you’re not alone. Many people find formatting their portable SSD a daunting task, but fear not, we’re here to help.

    In this blog post, we’ll guide you through the process of formatting your Sandisk Extreme Portable SSD step-by-step. You’ll learn about the different file systems you can use, how to choose the best one for your needs, and how to format your drive to ensure it is optimized for faster read and write speeds. We’ll also cover some common issues that people face while formatting their SSDs, including what to do if your drive is not recognized by your computer or if you encounter any other errors.

    Plus, we’ll give you tips on how to properly maintain your Sandisk Extreme Portable SSD to ensure longevity and optimal performance. So, let’s dive in and get your SSD formatted in no time!

    Connect SSD to Computer

    If you’re wondering how to format Sandisk Extreme portable SSD, don’t worry, it’s quite simple. The first step is to connect the SSD to your computer. This can be done using the USB

    0 cable that comes with the device. Once connected, your computer should recognize the drive and prompt you to format it. If it doesn’t, you can manually access the drive through your computer’s file explorer, right-click on it, and select the option to format.

    It’s important to note that formatting will erase all data on the drive, so make sure to back up any important files before proceeding. When formatting, you’ll be prompted to choose the file system and allocation unit size. For most users, the default settings will be sufficient.

    And that’s it! With these simple steps, you’ll have a freshly formatted Sandisk Extreme portable SSD ready for all your storage needs.

    USB Type-C Cable Required

    If you want to connect your SSD to your computer, then you’re going to need a USB Type-C cable. This new type of cable is becoming increasingly popular due to its high speed and durability. It’s also reversible, which means you don’t have to worry about plugging it in the wrong way round.

    Just make sure that your computer has a USB Type-C port, or at least an adapter that can convert it from USB Type-C to another port. Once you’ve got your cable sorted, connecting your SSD is simple. Just plug one end of the cable into your SSD’s USB Type-C port and the other end into your computer’s USB Type-C port.

    Then, you’re good to go!

    how to format sandisk extreme portable ssd

    Open Disk Utility

    If you’re looking to format your Sandisk Extreme Portable SSD, the first step is to open Disk Utility on your Mac. This can be done by navigating to your Applications folder, then the Utilities folder, and finally locating Disk Utility. Once you’ve got that open, connect your Sandisk SSD to your Mac and make sure it’s recognized by your computer.

    Next, select the Sandisk drive in the list of devices on the left-hand side of Disk Utility, and click on the Erase button. Here you’ll be able to choose a new file format, name your drive, and select a disk partition scheme if you need to. Keep in mind that formatting your drive will erase all data on it, so be sure to save any important files before proceeding.

    By following these steps, you’ll be able to quickly and easily format your Sandisk Extreme Portable SSD using Disk Utility on your Mac.

    Mac: Go to Applications/Utilities/Disk Utility

    If you’re a Mac user and you’re looking to manage your hard drive, Disk Utility is the perfect tool for you. To access Disk Utility, you’ll need to go to your Applications folder first. There, you’ll find Utilities – click on that and you’ll see Disk Utility.

    Once you open it, you’ll see a list of all the drives connected to your Mac. This includes your internal hard drive, any external hard drives or flash drives, and CD/DVD drives. Using Disk Utility, you can easily manage your drives, including formatting, partitioning, and repairing any errors.

    If you’re experiencing any issues with your Mac’s hard drive, Disk Utility is the go-to tool for troubleshooting and fixing those problems. So next time you need to manage your drives on your Mac, remember to open Disk Utility via the Applications/Utilities folder!

    Windows: Search for Disk Management

    If you’re running Windows and need to manage your hard disk partitions, the Disk Management tool is an essential feature. To open it, simply search for Disk Management in the Windows search bar. Once you’ve located it, click on the Disk Management icon and the tool will open.

    From here, you can create, delete, format, and resize partitions as needed, as well as manage drive letter assignments and other disk-related tasks. It’s a powerful tool that can help you keep your system running smoothly, so make sure you know how to access it when you need it. So, next time you want to manage your hard disk partitions on Windows, just search for Disk Management and you’ll be on your way.

    Select SSD from Available Drives List

    When formatting your SanDisk Extreme Portable SSD, it is essential to first select the SSD from the available drives list on your device. To begin, connect your SSD to your computer and make sure it is recognized. Next, open a file explorer window and locate the list of available drives on your computer.

    Look for your SanDisk Extreme Portable SSD and click on it to select it. Once selected, right-click on the drive and choose the “Format” option from the drop-down menu. You will then be prompted to choose the file system and allocation unit size for the formatting process, so select the options that best suit your needs.

    Finally, click on the “Start” button to begin the formatting process. Remember to back up any important data that you want to keep before formatting your SSD to avoid losing any important files. With these simple steps, you can quickly and easily format your SanDisk Extreme Portable SSD.

    Click on Erase or Format

    If you’re looking to reset your Sandisk Extreme Portable SSD, you may want to consider either formatting or erasing it. Both options will erase all data on the device, so make sure you have a backup before you proceed. To format the SSD, begin by connecting it to your computer using a USB cable.

    Then, open the “Disk Utility” tool on your Mac or “Disk Management” tool on your Windows PC. Select the Sandisk SSD from the list of drives and click on “Erase” or “Format”. If you choose to erase, select “Mac OS Extended (Journaled)” or “exFAT” as your file system.

    If you choose to format, select “MS-DOS (FAT)” or “exFAT”. Finally, give your device a name and click on “Erase” or “Format” to initiate the process. Once completed, your Sandisk Extreme Portable SSD will be completely reset and ready to use again.

    Remember to always safely eject the drive before disconnecting it from your computer to avoid data loss. And that’s how you can format Sandisk Extreme Portable SSD!

    Choose Formatting Option (ex. exFAT)

    When it comes to formatting our storage devices, we often have to choose the formatting option as per our requirements. One popular formatting option is exFAT, which is ideal for devices that need to work with both Windows and Mac. However, before you format your device to exFAT, it’s essential to back up all your data as The formatting process will erase everything in your device.

    Once your data is backed up, navigate to the Disk Utility on Mac or the File Explorer on Windows. Select the device you wish to format, and choose the exFAT formatting option. Once you’ve chosen your desired formatting option, click the erase or format button, and the process will begin.

    It’s important to note that formatting a device can take a few minutes, depending on the storage size. So, it’s best to stay patient and not interrupt the formatting process. After the process is complete, your device will be ready to use with your chosen format.

    Remember, formatting is irreversible, so make sure you choose the option you need before clicking erase or format.

    Confirm Formatting of SSD

    If you’re looking to format your SanDisk Extreme Portable SSD, you’ve come to the right place. Formatting an SSD is important to ensure that it’s functioning at its best and that any pre-existing data is wiped. Here’s how you can format your SanDisk Extreme Portable SSD: Step

    Connect your SSD to your computer using the USB-C cable that came with your device. Step Open the Disk Utility application on your Mac computer.

    If you’re a Windows user, you can access the Disk Management Tool by pressing the Windows Key + X and selecting Disk Management. Step Select the SanDisk Extreme Portable SSD from the list of disks.

    Step Click on “Erase” or “Format.” Step

    Choose a name for your device and select the file system you want to use. We recommend using the exFAT file system if you plan on using the SSD with both Mac and Windows computers. Step

    Click “Erase” or “Format” to complete the process. And that’s it! You’ve successfully formatted your SanDisk Extreme Portable SSD. Remember, formatting your SSD is an essential step in maintaining its health, so be sure to do this regularly.

    Complete Process by Clicking Erase/Format Button

    If you want to give your SSD a fresh start and delete everything, you can simply click the erase/format button. However, this is not an action to take lightly as this will completely wipe everything clean. Before confirming, make sure that you have saved all important files and that you have made a backup for your OS.

    Also, ensure that you know what you’re doing as the process is irreversible and once you click the button, you can’t go back. The erase/format button is located under the disk tools in the device manager, and clicking it will initiate the full SSD cleanup process. You will be asked to confirm, and once you do, the process will start, completely wiping the drive and making it suitable for reuse.

    As a precaution, make sure that you double-check everything before proceeding with the erase/format process. Everything will be gone once the process is finished, so be certain that you want to wipe everything clean.

    Conclusion

    Congratulations on successfully formatting your SanDisk Extreme Portable SSD! You’re now ready to take on the world of fast and reliable storage, without any fear of losing your precious data. Remember, a formatted drive is like a blank canvas, ready to be filled with your digital masterpieces. So, go ahead and create something amazing today! And who knows, one day, you might just become an SSD formatting pro, dazzling all your friends with your witty and clever explanations.

    FAQs

    What is the storage capacity of the Sandisk Extreme portable SSD?
    The Sandisk Extreme portable SSD comes in 250GB, 500GB, 1TB, and 2TB storage capacities.

    What is the read/write speed of the Sandisk Extreme portable SSD?
    The Sandisk Extreme portable SSD has a read speed of up to 550MB/s and a write speed of up to 500MB/s.

    Does the Sandisk Extreme portable SSD require a power source?
    No, the Sandisk Extreme portable SSD is designed to be powered by your device’s USB port.

    Is the Sandisk Extreme portable SSD compatible with all devices?
    The Sandisk Extreme portable SSD is compatible with Windows, Mac, and a range of other devices that support USB storage. It is also backwards compatible with USB 2.0 ports.

    How can I format my Sandisk Extreme portable SSD?
    You can format your Sandisk Extreme portable SSD using your device’s built-in formatting tools. For Windows devices, you can use the Disk Management tool, and for Mac devices, you can use the Disk Utility tool. Alternatively, Sandisk provides a free formatting tool that you can download from their website.