Author: David L. Lynn

  • Upgrade Your PC with Ease: A Step-by-Step Guide on Moving Windows 7 to SSD Without Reinstalling

    Upgrading to an SSD can dramatically improve computer performance, but the prospect of moving all your data and reinstalling your operating system can be daunting. Fortunately, if you’re using Windows 7, there’s a relatively simple way to transfer your system to a new SSD without starting from scratch. In this blog post, we’ll walk you through the steps to move Windows 7 to an SSD without reinstalling, so you can enjoy the faster load times and improved performance of your new drive without the headache of a complete reinstall.

    Whether you’re a novice user or a seasoned tech expert, we’ve got you covered with easy-to-follow instructions and tips for optimizing your system after the transfer. So, let’s dive in!

    Check SSD Compatibility

    If you’re planning to upgrade your computer’s storage system, moving Windows 7 to SSD can be a significant improvement in terms of performance. However, before you proceed with the migration, it’s essential to check the SSD compatibility with your system. Some older computers might not support the latest SSDs, and you need to ensure that the device you choose is compatible with your computer’s motherboard, ports, and other hardware components.

    In addition, you should consider the available capacity and the type of SSD you need, whether it is a SATA or NVMe SSD. Once you’ve confirmed the compatibility, you can proceed with transferring Windows 7 to SSD. There are several methods you can use, but one of the easiest ways is to clone your existing hard drive to SSD using cloning software.

    This process helps to transfer all your data, files, programs, and operating system to the new SSD without having to reinstall Windows 7 and other applications manually.

    Make sure your SSD is compatible with your computer.

    When it comes to upgrading your computer’s storage with an SSD, compatibility is key. Not all SSDs are created equal, and it’s important to make sure that the one you choose is compatible with your computer. This means checking factors such as the interface, form factor, and capacity of the SSD and comparing them to your computer’s specifications.

    You don’t want to end up with an SSD that won’t fit in your computer’s drive bay or isn’t supported by your motherboard. Additionally, some SSDs may require specific drivers or firmware updates, so it’s important to research and confirm compatibility before making a purchase. By doing your due diligence and checking SSD compatibility, you’ll ensure a smooth and successful upgrade process without any unexpected hiccups.
    how do i move windows 7 to ssd without reinstalling

    Create a System Image

    If you’re looking to move your Windows 7 system to an SSD without having to reinstall everything, one option is to create a system image. This involves creating a backup of your entire system, including all installed software, files, and settings, and then restoring that backup onto your new SSD. To do this, you’ll need a large external hard drive or another location to store the backup.

    You can use the built-in Backup and Restore feature in Windows 7 to create the system image. Once you have the backup, you’ll need to install your new SSD and then restore the image onto it. This will transfer everything over to your new drive and allow you to boot up and use Windows 7 on your new SSD, without having to reinstall any software or drivers.

    Remember, it’s important to ensure your SSD has enough capacity to store everything from your original hard drive before attempting this method. By following these steps and creating a system image, you can easily move your Windows 7 system to an SSD without going through a time-consuming and complex reinstall process.

    Use built-in Windows utility to create a system image of your current installation.

    Creating a system image of your current Windows installation can save you a lot of headache in case of any system failures or unexpected crashes. Luckily, Windows has a built-in utility that allows you to easily create a system image. To start, go to the Control Panel and select “Backup and Restore (Windows 7)”.

    From there, click on “Create a system image” and choose where you want to save the backup. You can save it on an external hard drive, USB drive, or a network location. It’s important to note that the system image will include all of your operating system files, programs, and personal data, so it may take some time to create.

    Once the system image is created, you can use it to restore your computer to the exact state it was in when you created the backup. In case of any system failures, you can rest easy knowing that you have a way to recover your system and get it back up and running.

    Create a System Repair Disc

    Are you looking to move Windows 7 to an SSD without the hassle of reinstalling the operating system from scratch? One method you can try is creating a system repair disc. This disc allows you to access the recovery options for your Windows 7 installation and perform a system image restore to the new SSD drive. To create a system repair disc, insert a blank DVD or CD into your disc drive, then go to the Start menu and search for “system repair disc.

    ” Follow the prompts to create the disc and ensure it’s properly labeled and stored in a safe place. With the system repair disc, you can easily transfer your Windows 7 installation to an SSD drive without any data loss or major disruptions. Give it a try and see how easy it can be to upgrade to a faster, more reliable system.

    Create a repair disc in case anything goes wrong during the transfer process.

    If you’re planning to transfer important data from one device to another, it’s always a good idea to create a system repair disc in case anything goes awry during the transfer process. A system repair disc is essentially a bootable disc or USB drive that can help you troubleshoot system and hardware problems on your computer. Creating a repair disc is an easy, straightforward process that can save you a lot of time and frustration down the line.

    Simply navigate to the Control Panel on your device, select “Backup and Restore,” and then click on “Create a System Repair Disc.” Follow the prompts to burn the disc or save it to a USB drive, and you’ll be all set in case something goes wrong during your data transfer. This quick and easy step can provide peace of mind and ensure that you’re able to quickly fix any issues that may arise.

    Don’t forget to keep your repair disc in a safe place where you can easily access it if needed!

    Restore Image to SSD

    If you’re wondering how to move Windows 7 to an SSD without reinstalling, you’ll be relieved to know that it’s entirely doable. Essentially, you’ll need to create a disk image of your current Windows installation, then use that image to restore the operating system to your new SSD drive. The first step is to prepare your SSD by connecting it to your computer and formatting it.

    Then, use a disk cloning software such as Macrium Reflect or Clonezilla to create an image of your Windows installation. Next, use the same software to restore the image to your new SSD. This process is typically straightforward, but be sure to follow the software’s instructions carefully to avoid any mishaps or data loss.

    Once the process is complete, you can disconnect your old hard drive and boot your computer from the new SSD. With the right tools and a bit of patience, moving your Windows 7 installation to an SSD can be a breeze.

    Connect SSD to PC and use the system image to transfer the operating system.

    If you’ve recently upgraded to a solid-state drive (SSD) for your PC, you may want to transfer your operating system to the new drive. One way to do this is by restoring an image of your system to your SSD. To begin, connect your SSD to your PC and ensure it is recognized by the system.

    Next, locate the saved system image on your computer and follow the instructions to restore it to the SSD. This process may take some time, depending on the size of the image and the speed of your computer and SSD. However, once the transfer is complete, you can set the SSD as the primary boot drive in your BIOS settings, and your operating system should load from the new drive.

    By restoring an image to your SSD, you can ensure a seamless transition to your new drive and enjoy faster performance and improved reliability. Give it a try, and experience the benefits of an SSD for yourself!

    Set SSD as Boot Drive

    If you want to move Windows 7 to an SSD without reinstalling it, there are a few steps you can take to make the transfer as seamless as possible. First, you’ll need to clone your current drive to the SSD. This can be done with free software such as EaseUS Todo Backup or Macrium Reflect.

    Once you’ve cloned the drive, you’ll need to set the SSD as the boot drive. This can be done by accessing the BIOS settings and changing the boot order to give the SSD priority. Finally, you’ll want to make sure that your computer is optimizing the SSD for best performance.

    This can be achieved by enabling TRIM in Windows By following these steps, you can successfully move your Windows 7 operating system to an SSD without having to reinstall everything from scratch.

    Go to BIOS and set the SSD as the boot drive to load Windows from it.

    When setting up a new SSD in your computer to upgrade or improve system performance, it’s important to ensure the SSD is set as the boot drive. This means that your computer will load Windows from the SSD, resulting in faster boot times and overall system responsiveness. To do this, you’ll need to access your computer’s BIOS settings.

    Upon starting up your computer, you’ll need to access the BIOS by pressing a key such as F2 or Del, depending on your computer’s manufacturer. Once in the BIOS, navigate to the Boot menu and select the SSD as the first boot device. Save the changes and exit the BIOS.

    Your computer will now boot up from the SSD, allowing you to take full advantage of its improved performance and speed. Don’t forget to check your computer’s motherboard manual for specific instructions on accessing the BIOS, as the process may differ depending on the manufacturer. With this simple process, you can set your SSD as the boot drive and enjoy faster system performance.

    Optimize SSD Settings

    If you want to move Windows 7 to an SSD without reinstalling, there are a few things you can do to optimize your settings. First, you can enable TRIM, which helps the SSD perform more efficiently by freeing up space that is no longer in use. Additionally, you can disable Superfetch, which is a feature that preloads frequently used programs into memory.

    While this can improve performance on a traditional hard drive, it can actually cause performance issues on an SSD. You can also disable indexing, which speeds up file searches, but can also cause unnecessary wear and tear on an SSD. Finally, you should make sure that your SSD is properly aligned, which can improve performance and prevent issues with data corruption.

    By taking these steps, you can optimize your SSD settings and enjoy faster, more efficient performance without having to reinstall Windows 7 from scratch.

    Use Windows built-in utilities to optimize the SSD for best performance.

    Optimizing your SSD settings can help improve the overall performance and lifespan of your solid-state drive. Luckily, Windows has built-in utilities that can help with this. Firstly, make sure that your SSD is properly formatted with the correct file system.

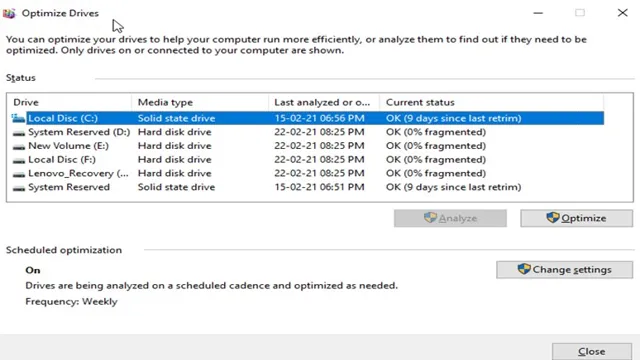
    The optimal file system for SSDs is NTFS, which can be set during the formatting process. Next, enable TRIM, which allows your SSD to clear unused data blocks, improving write speeds and reducing wear on the drive. You can also disable defragmentation, as SSDs do not benefit from this like traditional hard drives.

    Another helpful setting to adjust is the power plan; using the high performance option can ensure that your SSD is running at maximum capacity. By optimizing these settings, you can get the most out of your SSD and extend its lifespan.

    Conclusion

    Moving Windows 7 to an SSD without reinstalling is like a game of Tetris: you need to carefully plan your moves and make sure everything fits into place, without losing any pieces along the way. But with a little patience and the right tools, you can slide your operating system onto a faster and more efficient drive, and enjoy the benefits of SSD speed without starting from scratch. So, get your blocks in order and start the relocation adventure!”

    FAQs

    Can I move Windows 7 to SSD without reinstalling?
    Yes, you can move Windows 7 to SSD without reinstalling using software like EaseUS Todo Backup, Clonezilla, or Macrium Reflect.

    Is it necessary to clone all the partitions to move Windows 7 to SSD?
    Yes, it is necessary to clone all the partitions to move Windows 7 to SSD. Cloning just the system partition may result in booting issues.

    Can I use a USB-to-SATA cable to clone Windows 7 to SSD?
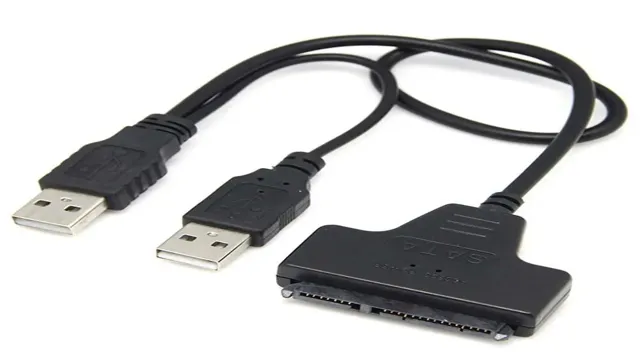
    No, USB-to-SATA cable is not suitable for cloning Windows 7 to SSD as it may result in data corruption or clone failures. It is recommended to use a SATA-to-USB adapter or an external hard drive enclosure.

    What should I do if the cloned Windows 7 does not boot from the SSD?
    If the cloned Windows 7 does not boot from the SSD, try changing the boot order in the BIOS, disconnecting the old hard drive, or repairing the boot sector using the Windows 7 installation disc.

  • Unleashing the Power of Samsung T7 SSD on Windows 10: A Complete Guide

    If you’re in desperate need of a reliable external storage device that’s portable enough to carry around wherever you go, look no further than the Samsung T7 SSD. This sleek and compact solid-state drive boasts impressive performance and storage capacities up to 2TB, making it an ideal choice for handling large files, such as high-res photos, 4K videos, and even games. Plus, with its shock-resistant and durable design, you can be sure your data is safely stored even if you’re on the move.

    But once you have the Samsung T7 SSD, you might be left wondering how to make the most of it, especially if you’re using it with a Windows 10 PC. With that being said, in this blog post, we’ll guide you through the steps for using a Samsung T7 SSD on Windows 10, including how to set it up, format it, and optimize it for better performance. So, let’s dive in and make sure you’re getting the most out of your SSD.

    Connecting the SSD to Your Device

    If you’re wondering how to use Samsung T7 SSD on Windows 10, the good news is that it’s a straightforward process. First, connect the SSD to your device using the USB-C to USB-C or USB-C to USB-A cable provided. Next, wait for your computer to recognize the device.

    You should receive a notification that a new drive has been connected. If this doesn’t happen, try plugging the cable into a different USB port. Once your computer has recognized the SSD, you can begin using it as you would any other external drive.

    You can copy and paste files onto the device or use it as a backup for important data. With its fast read and write speeds, the Samsung T7 SSD is an excellent option for anyone looking to expand their storage options.

    Step-by-Step Guide

    Connecting an SSD to your device can seem daunting at first, but it is actually a straightforward process. First, you need to identify the location of the SSD on your device. This can vary depending on the device, so consult the owner’s manual or online resources if you’re unsure.

    Once you’ve located the SSD, you’ll need to connect it to your device using a data cable. Make sure the cable is firmly attached and secured into place. You will also need to connect a power cable to the SSD, which provides it with the necessary electricity to function properly.

    Once everything is connected, you can power on your device and make sure the SSD is recognized by your system. With that, you’ve successfully connected your SSD and are ready to start enjoying its benefits!

    how to use samsung t7 ssd on windows 10

    Connecting via USB-C or USB-A

    When it comes to connecting your SSD to your device, it’s important to know whether you’re using a USB-C or USB-A port. USB-C is the newer, more versatile and faster option, while USB-A is the traditional port found on older devices. To connect your SSD to a USB-C port, you’ll need a USB-C to USB-C cable, which should be included with your SSD.

    If your device only has a USB-A port, you’ll need a USB-A to USB-C adapter or cable. A good adapter is a small investment that will allow you to connect your SSD to older devices. Regardless of the connection type, always make sure to plug the cable in appropriately and securely.

    With a reliable connection, you can easily transfer files back and forth between your device and your SSD.

    Setting Up the SSD on Windows 10

    Setting up the Samsung T7 SSD on Windows 10 is a straightforward process that can significantly boost your computer’s performance. To begin, connect the SSD to your computer using the USB Type-C cable provided in the box. Once connected, Windows 10 should detect the SSD and automatically install the necessary drivers.

    If the drivers are not installed automatically, you can download them from Samsung’s website. Next, you’ll need to format the SSD using Disk Management. Open Run by pressing the Windows key + R, type “diskmgmt.

    msc” and press OK. Locate the new disk (should be labeled as “unallocated”) and right-click on it, then select “New Simple Volume” and follow the prompts to format and assign a drive letter to the SSD. Congratulations, you’ve successfully set up your Samsung T7 SSD on Windows 10 and can start enjoying the benefits of lightning-fast file transfers and improved system performance!

    Formatting the SSD

    Setting up an SSD on Windows 10 involves formatting the SSD before it can be used. This is a crucial step that ensures the SSD operates at optimum performance levels. The first step is to connect the SSD to your computer, either using a SATA cable or an external enclosure.

    Once connected, open up the Disk Management tool and locate the SSD. Right-click on the SSD and select the “New Simple Volume” option. Follow the prompts to format the SSD, choosing the file system and allocation unit size.

    The default settings are fine for most users, but you can adjust them to suit your needs. When formatting is complete, the SSD will be ready to use. With its fast read and write speeds, the SSD will significantly improve your computer’s performance.

    Plus, by setting up the SSD, you can move your operating system and programs to it, freeing up space on your primary hard drive. In summary, formatting the SSD is a quick and easy process that is essential for making the most of this storage device.

    Using the Samsung Portable SSD Software

    One of the first things you need to do when you get your Samsung Portable SSD is to set it up on Windows Luckily, doing so is a straightforward process when using the Samsung Portable SSD software. To begin the setup, make sure your SSD is properly connected to your computer’s USB port.

    Open the Samsung Portable SSD software, and you’ll see a dashboard with all the features and settings you can access. Click on the “Setup” tab, and then the “Software Update” button, which will check for any updates available for your SSD’s firmware and software. Once updated, you can use the software to customize your SSD’s settings, including the drive name, security settings, and automatic backup settings.

    The software also offers features such as password protection and automatic SSD locking, giving you peace of mind knowing your data is safe and secure. With the Samsung Portable SSD software set up, you are ready to make the most of your SSD’s features and enjoy its lightning-fast speeds to transfer and store your important files and data.

    Tips and Tricks for Optimal Performance

    Setting up the SSD on Windows 10 can be a game-changer for your computer’s performance. To start, make sure you have the latest version of Windows 10 installed. Then, connect your SSD to the computer and open the Disk Management utility.

    From there, you can assign a drive letter, create a new partition, and format the drive properly. To ensure your SSD is running at optimal speeds, you’ll also want to make sure you have the latest firmware updates installed for the drive. Keep in mind, you may need to adjust some settings in your computer’s BIOS to get the best performance out of your SSD.

    It may seem like a lot of work, but setting up your SSD correctly can make a significant difference in your computer’s speed and overall performance. So, take the time to do it right and enjoy a faster, more efficient computer experience!

    Using the Samsung T7 SSD on Windows 10

    If you’re a Windows 10 user, you may be wondering how to use the Samsung T7 SSD. It’s actually quite simple! First, plug the USB-C cable into your computer’s USB-C port. Then, connect the other end into the T7 SSD.

    Your computer should recognize the drive automatically, but if it doesn’t, you may need to update your drivers. Once the drive is recognized, you can transfer files to and from it just like any other storage device. The T7 offers lightning-fast transfer speeds, so you’ll be able to move even large files quickly and easily.

    Plus, its compact size makes it perfect for use on the go. Overall, the Samsung T7 SSD is a great choice for anyone looking to add some extra storage to their Windows 10 computer.

    Transferring and Managing Files

    If you’re looking for a fast and reliable way to transfer and manage files on your Windows 10 computer, the Samsung T7 SSD might just be the solution you’re looking for. This portable drive offers lightning-fast transfer speeds of up to 1050 MB/s, making it ideal for large file transfers and backups. Plus, with its compact and durable design, you can take it with you wherever you go without worrying about damage or data loss.

    Managing your files is also a breeze, thanks to the included Samsung Software that lets you password protect your data and keep it safe from prying eyes. Whether you’re a casual user or a professional, the Samsung T7 SSD is a great option for anyone looking to streamline their file management and storage needs. Give it a try and see for yourself how much easier it can make your digital life!

    Encrypting Your Data

    If you’re looking for a reliable and secure way to store your important data, consider using the Samsung T7 SSD on Windows This impressive device offers lightning-fast transfer speeds and comes with built-in security features that ensure your data remains safe from prying eyes. With 256-bit AES encryption, your files are protected by a password that only you know.

    Plus, you can choose to use a fingerprint or the included security software to further enhance the security of your data. Whether you’re a business professional or just looking for a way to keep your personal files safe, the Samsung T7 SSD is a great choice. So why not take the first step towards securing your data today?

    Conclusion

    In conclusion, using the Samsung T7 SSD on Windows 10 is a breeze. It’s as easy as plugging in the device, clicking on the drive letter, and watching your files transfer at lightning-fast speeds. With its durable design and impressive storage capacity, the Samsung T7 is the perfect solution for anyone looking to enhance their computer’s performance and increase their storage capabilities.

    So don’t be left in the digital Stone Age – upgrade to the Samsung T7 SSD today and experience the future of storage technology!”

    FAQs

    Can I use Samsung T7 SSD on Windows 10 without any additional software?
    Yes, you can use the Samsung T7 SSD on Windows 10 without any additional software. Your computer should automatically recognize the drive and its contents.

    How do I connect Samsung T7 SSD to my Windows 10 computer?
    You can connect Samsung T7 SSD to your Windows 10 computer using a USB 3.2 Gen 2 Type-C cable that comes with the drive. Plug one end of the cable into the drive and the other end into the USB-C port on your computer.

    How do I transfer files to and from Samsung T7 SSD on Windows 10?
    To transfer files to and from Samsung T7 SSD on Windows 10, simply drag and drop the files from the source location on your computer to the drive. You can also use a file transfer software like TeraCopy to speed up the process.

    Can I partition Samsung T7 SSD on Windows 10?
    Yes, you can partition Samsung T7 SSD on Windows 10 using the built-in Disk Management tool. Right-click on “This PC” on your desktop, select “Manage”, then go to “Disk Management”. Right-click on the Samsung T7 SSD, select “New Simple Volume”, and follow the wizard to partition the drive.

  • Step-by-Step Guide to Install Windows 11 on an External SSD Drive – Boost Your PC’s Speed and Storage

    Ready to upgrade to the latest version of Windows? With its sleek design and new features, Windows 11 has been eagerly awaited by many users. However, if you’re wondering how to install it on your device, don’t worry – we’ve got you covered. In this blog post, we will guide you through the process of installing Windows 11 step-by-step, so you can get up and running in no time.

    Whether you’re a seasoned pro or a complete novice, our simple instructions will make the installation process a breeze. From checking system requirements to downloading and installing Windows 11, we’ve got all the information you need right here. So, are you ready to take the plunge and upgrade to Windows 11? Let’s get started!

    Requirements

    Installing Windows 11 on an external SSD drive can be a great way to keep your system light and speedy. There are just a few requirements to make this happen. First, you’ll need an external SSD drive with enough storage space to hold Windows 1

    You’ll also need a computer that meets the minimum system requirements for running Windows 1 This includes a processor with at least 1 GHz clock speed and support for SSE2, 2 GB of RAM for the 64-bit version or 1 GB for the 32-bit version, and at least 64 GB of storage space. You’ll also need a Windows 11 installation file, which you can download from the Microsoft website.

    Once you have all this, it’s a matter of connecting your external SSD to your computer, booting from the installation media, and following the prompts to install Windows 11 on your external drive. It’s a relatively easy process, but be sure to follow the instructions carefully to avoid any issues. With Windows 11 installed on your external drive, you’ll be able to take your system with you wherever you go, without sacrificing performance or storage space.

    Check your PC’s compatibility with Windows 11

    If you’re planning to upgrade to Windows 11, the first thing you need to check is whether your PC meets the requirements. Microsoft has raised the bar with Windows 11, and not all computers will be compatible. So what are the minimum requirements? Your computer must have a 64-bit processor with at least two cores, 4GB of RAM, and 64GB of storage.

    Additionally, your PC must support DirectX 12 or later, have a display with HD resolution (720p), and a UEFI firmware with Secure Boot capability. If your computer is relatively new, there is a high chance that it will meet these requirements. However, older PCs may struggle to run Windows 11 smoothly.

    It’s also important to note that Windows 11 will come with stricter hardware restrictions for devices that want to utilize its advanced features. If your PC doesn’t meet the minimum requirements, it’s time to start shopping for a new one. Overall, checking your PC’s compatibility with Windows 11 now will save you from frustration down the road.

    how to install windows 11 on external ssd drive

    External drive with at least 16GB free space

    One of the essential requirements for numerous computer tasks, such as creating a backup or transferring files, is an external drive. A reliable and compatible external drive with at least 16GB free space is one of the most important things that you should consider. Whether you need it for personal or professional use, having an external drive that can handle large amounts of data is crucial.

    It may be tempting to choose a cheaper option with less space, but it’s important to keep in mind that it may not be sufficient for your needs. Investing in a high-quality external drive with a large storage capacity will not only ensure that you have enough space to store your files but also help you avoid headaches caused by insufficient storage space. So, if you’re in the market for an external drive, be sure to check the storage capacity to make sure it’s suitable for your needs.

    Creating a Windows Installation Media

    If you want to install Windows 11 on an external SSD drive, the first thing you need to do is create a Windows installation media. To do this, you’ll need a USB flash drive with a minimum of 8GB of storage and a Windows 11 ISO file. Once you have those, you can use the Windows USB/DVD Download Tool to create a bootable USB flash drive.

    Simply select the ISO file and the USB drive you want to use, and let the tool do the rest. Once your USB drive is ready, you can connect it to your computer and boot from it to begin the Windows 11 installation process on your external SSD drive. Don’t forget to adjust your BIOS settings to boot from the USB drive before the internal hard drive.

    With a little patience and a bit of know-how, you’ll have Windows 11 up and running on your external SSD drive in no time.

    Download the Windows 11 Installation Tool

    Windows 11 installation tool If you’re planning on upgrading to Windows 11, you’ll need to create a Windows installation media to do it. The creation of a Windows installation media is essential because you might need to reinstall Windows, install it on multiple devices, or perform a “clean” installation to rid your system of bloatware and optimize its performance. Thankfully, Microsoft has made it easy.

    You can download the Windows 11 installation tool directly from their website. Once downloaded, launch the tool and select the “Create installation media (USB flash drive, DVD, or ISO file) for another PC” option, then follow the prompts. In no time at all, you’ll have a fully functioning Windows 11 installation media at your disposal.

    It’s that simple! The Windows 11 installation tool is an essential tool for upgrading or reinstalling Windows 11 from scratch. So, if you want to make sure you’re ready for the next-generation operating system, download it today!

    Connect your External SSD to your PC

    To start building a Windows installation media, you’ll need to connect your external SSD to your PC. This step might sound obvious, but it is crucial to ensure that your files transfer correctly. First, locate the USB port on your computer.

    Most modern PCs have multiple USB ports, so select the one that’s most convenient for you. Next, take your external SSD and find its USB port, which should be on the side or back of the device. Plug the SSD into the USB port on your computer, and you should feel a satisfying click when it connects.

    Once the SSD is connected, open File Explorer to confirm that your PC has recognized the device. If your PC successfully detects the SSD, you can proceed to the next step of building a Windows installation media.

    Create a bootable USB drive with Windows 11 Installation Tool

    If you’re planning on installing Windows 11 on your computer, one essential tool you need to have is a bootable USB drive. Luckily, creating one is a straightforward process, and all you need is the Windows 11 Installation Tool. To get started, you first need to download the Windows 11 Installation Tool from the Microsoft website and save the file to your computer.

    Once the download is complete, open the tool and select the language and edition of Windows 11 you want to install. Next, select the USB flash drive you want to use as the installation media. Remember that all data on the USB drive will be erased during this process, so make sure you backup any important files.

    The tool will then prepare your USB drive and download all the necessary files to create the installation media. This process may take some time, depending on your internet connection speed. Once everything is downloaded, the tool will create the bootable USB drive for you automatically.

    You can now use this USB drive to install Windows 11 on your computer. Overall, creating a bootable USB drive with the Windows 11 Installation tool is a simple process that ensures you have a reliable way of installing the operating system on your computer. Just remember to backup any important files on your USB drive beforehand and ensure that your computer is set up to boot from a USB drive.

    Installing Windows 11 on External SSD

    If you’re looking to install Windows 11 on an external SSD drive, you’re in luck. It’s definitely possible, and it’s not as difficult as you might think. By following a few simple steps, you’ll be up and running with Windows 11 on your external drive in no time.

    First, you’ll need to make sure your external drive is formatted correctly and has enough storage space for the operating system. Then, you’ll need to create a bootable USB drive, which you’ll use to install Windows 11 on the external SSD. Once you’ve done that, you’ll need to boot your computer from the USB drive and follow the on-screen instructions to install Windows 11 on your external SSD drive.

    Don’t worry, it’s not as complicated as it sounds, and with a little patience, you’ll be enjoying the benefits of a fast, portable Windows 11 setup in no time!

    Restart your PC and Boot from the USB drive

    To install Windows 11 on an external SSD, the first step is to restart your PC and boot from the USB drive. This process is quite simple. Once you have connected the external SSD to your PC, ensure that it is recognized by your system.

    Then, you would need to restart your PC and enter the boot settings by pressing F2 or F12, depending on your computer manufacturer. From there, select the USB drive as the primary boot device and press enter to save the settings. After restarting your PC, the setup process for Windows 11 will begin.

    You would need to follow the prompts on the screen, select your language preferences, and agree to the terms and conditions. Before proceeding with the installation, ensure that you select the external SSD as the destination drive. Using an external SSD to install Windows 11 can be highly beneficial and improve system performance, especially if your PC has limited storage space or an older hard drive.

    With the external SSD, you can easily carry your data and work with you anywhere, making it an excellent option for those who work remotely or travel frequently. Overall, installing Windows 11 on an external SSD is a straightforward process that can be completed quickly and efficiently.

    Choose the language, time, and keyboard preferences and click ‘Next’

    If you’re planning to install Windows 11 on an external SSD, the process is pretty straightforward. Once you have your external drive set up and ready to go, you’ll need to insert your Windows 11 installation media and point the installer towards your external drive. Once you’ve done that, you should see the typical Windows 11 installation wizard pop up.

    The first step is to choose your language, time, and keyboard preferences from the dropdown menus and click “Next.” This is a quick and easy step, but it’s important to make sure you’re selecting the correct options for your location and needs. Keep in mind that this step will affect how Windows 11 interacts with your computer.

    For example, if you’re in a different time zone than your computer’s default setting, you’ll want to ensure you select the right one to avoid any confusion. By taking a minute to double-check these settings, you’ll set yourself up for a smooth and seamless installation of Windows 11 on your external SSD.

    Click ‘Install Now’ and accept the license terms

    Installing Windows 11 on an external SSD has become a popular choice for computer users who want to have a portable and efficient operating system. The process of installing Windows 11 on an external SSD is not complicated, but there are some important factors to consider. First, you need to ensure that your external SSD has enough space to accommodate Windows 1

    Additionally, you will need to download the Windows 11 ISO file from the Microsoft website and create a bootable USB drive. Once you have done this, you can start the installation process by plugging in the USB drive and restarting your computer. When prompted, select the external SSD as the destination for the installation and click “Install Now.

    ” Be sure to read and accept the license terms before proceeding with the installation. With a few simple steps, you can have Windows 11 up and running on your external SSD in no time. So, why not give it a try and enjoy the flexibility of a portable operating system?

    Choose ‘Custom: Install Windows only (Advanced)’ option

    If you are ready to install Windows 11 on your external SSD, you’ll want to choose the ‘Custom: Install Windows only (Advanced)’ option during the installation process. This option allows you to select the specific drive and partition you want to install Windows 11 on. It’s important to note that installing Windows on an external drive might affect the performance compared to internal drives and it’s recommended to use SSDs for better speed.

    Once you select the appropriate drive and partition, the installation process will proceed as usual. This option gives you more control over the installation process and allows you to ensure that Windows 11 operates smoothly on your external SSD.

    Select the external SSD as the destination and click ‘Next’

    When installing Windows 11 on an external SSD, selecting it as the destination is crucial. This process is not as complicated as it sounds. Once you have your external SSD connected to your computer, go to the installation tool and select ‘custom installation.

    ’ Then, select the external SSD as the destination drive and click ‘Next.’ Windows 11 will begin its installation process onto your external SSD. It’s a great option if you’re low on internal storage or want to install Windows 11 on multiple devices without having to go through the setup process every time.

    It also benefits from faster read and write speeds, as compared to a traditional HDD, making it faster and more efficient. When the installation process is complete, you can boot up Windows 11 from your external SSD, and voila, you’re running your OS on a lightning-fast and portable device. So, if you’re considering installing Windows 11 on an external SSD, it’s a smart choice.

    Follow the installation process and enter your product key, if prompted

    If you’re looking to install Windows 11 on an external SSD, you’re in luck because the process is fairly straightforward. First, make sure your device meets the system requirements for Windows 1 Next, download the Windows 11 installation files and create a bootable USB drive using a tool like Rufus.

    Once you have the bootable USB ready, connect your external SSD to your computer and boot from the USB drive. From here, simply follow the installation process and enter your product key if prompted. It’s important to note that installing Windows 11 on an external SSD can improve the overall performance of your computer, especially if your built-in storage is running out of space.

    Additionally, you can easily remove the external SSD and take it with you on the go, allowing you to access your files and applications from any device. So don’t be afraid to give it a try, and enjoy the benefits of a faster and more accessible operating system.

    Boot from the External SSD and Enjoy Windows 11

    Are you tired of limited storage space on your laptop or computer? With the release of Windows 11, you can now install it on your external SSD drive, giving you the freedom to take your operating system with you wherever you go. So, how to install Windows 11 on external SSD drive? It’s easy! All you need to do is create a bootable media drive, connect your external SSD drive to your computer, and follow the prompts to install Windows 1 Once you’ve installed Windows 11 on your external SSD drive, you can boot from it and enjoy a fast and reliable operating system with ample storage capacity.

    With this simple solution, you can say goodbye to the low storage space warning and hello to portable efficiency. So, what are you waiting for? Get started with your external SSD drive and enjoy the power of Windows 11 on the go!

    Conclusion

    Congratulations! You’ve successfully learned how to install Windows 11 on an external SSD drive. Now you can take your operating system with you wherever life takes you, whether it’s for work or play. Who needs a fixed address when your operating system can be as mobile as you are? So go forth, adventurer, and embrace the freedom and flexibility that an external SSD drive can bring to your computing experience!”

    FAQs

    What are the minimum system requirements for installing Windows 11 on an external SSD drive?
    The minimum system requirements for installing Windows 11 on an external SSD drive are a USB 3.0 port, a PC with a 64-bit processor, 4 GB of RAM, and a minimum 64 GB of storage.

    Can I install Windows 11 on any external SSD drive?
    Not all external SSD drives are compatible with installing Windows 11. Make sure that your external SSD drive has a USB 3.0 port and a minimum read/write speed of 100 MB/s.

    How do I create a bootable external SSD drive for Windows 11 installation?
    You need to download the Windows 11 ISO file and a free tool called Rufus. Open Rufus and select your external SSD drive, choose the Windows 11 ISO file, and click on “Start”. This will create a bootable external SSD drive.

    Can I use the external SSD drive for other purposes, after installing Windows 11 on it?
    Yes, you can use the external SSD drive for other purposes, like storing your personal files and data. However, make sure that you do not delete or modify any of the Windows 11 system files on the external SSD drive to prevent any system errors.

  • Step-by-Step Guide: Formatting Your M.2 SSD for Windows 10 in Top-Notch Fashion!

    If you’ve recently purchased an M.2 SSD for your Windows 10 PC, congratulations! You’ve made an excellent investment that will undoubtedly improve your computer’s performance. However, before you can start using your new storage device, you’ll need to format it.

    While the process may seem daunting, it’s relatively simple to do, and we’re here to walk you through it. In this blog, we’ll cover everything you need to know about formatting M.2 SSDs in Windows 10, from what tools you’ll need to the step-by-step process.

    So, grab your M.2 SSD and let’s get started!

    Understanding M.2 SSD

    If you’re looking to format your M.2 SSD on Windows 10, there are a few steps you’ll need to follow. First, you’ll want to make sure you have all the necessary drivers and software for your specific SSD model.

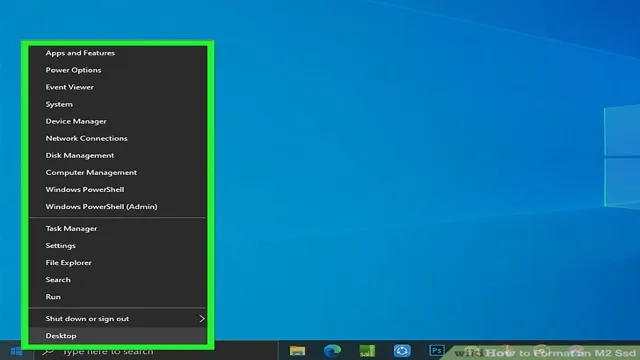
    Then, you’ll need to access the Disk Management tool by right-clicking the Start menu and selecting “Disk Management.” Once there, you should see your M.2 SSD listed as a disk.

    Right-click on the disk and select “Format.” From there, you can choose your formatting options and confirm the process. It’s important to note that formatting your M.

    2 SSD will erase all data, so be sure to back up any important files before proceeding. With a bit of patience and attention to detail, you’ll have your M.2 SSD formatted and ready to go in no time.

    What is M.2 SSD?

    M.2 SSD is a compact and efficient storage solution for modern computer systems. It is a small, slim, and easy to install SSD that uses the M.

    2 slot on the motherboard. M.2 SSDs can provide faster boot times and improved overall performance compared to traditional hard drives.

    This type of storage uses the latest NVMe interface technology that delivers lightning-fast speed and reliable data transfer. M.2 SSDs come in a variety of capacities and can be up to four times faster than SATA III SSDs.

    They are ideal for users who require high-speed data transfer for gaming, video editing, and other processor-intensive applications. With M.2 SSDs, users can enjoy faster processing times, reduced loading times, and smoother multitasking experiences.

    So if you’re planning to upgrade your computer system, an M.2 SSD is a smart choice to consider.

    how to format m.2 ssd windows 10

    Advantages of M.2 SSD

    M.2 SSD, advantages of M.2 SSD.

    M.2 SSDs are a newer type of solid-state drive that are becoming increasingly popular for their advantages over traditional SATA drives. One of the biggest benefits of M.

    2 SSDs is their small form factor, which allows them to be used in a wide range of devices, from laptops to desktops and even small form factor PCs. This is due to their design which eliminates the need for any cables, resulting in a much smaller footprint. Additionally, M.

    2 SSDs are typically faster than their SATA counterparts, due to the use of the NVMe protocol which allows for faster data transfer speeds. This makes them ideal for use in demanding applications such as gaming or video editing, where speed is crucial. Another advantage of M.

    2 SSDs is their increased reliability, as they have no moving parts that can fail over time. This means they are less likely to suffer from mechanical failure or damage due to shock or vibration. Overall, M.

    2 SSDs offer a range of benefits over traditional SATA drives, making them an excellent choice for anyone looking for high-speed, reliable storage that takes up minimal space in their build.

    Backup Important Data

    If you’re wondering how to format M.2 SSD Windows 10, it’s not as difficult as it sounds. However, before you start the process, it’s important to back up important data to avoid losing any important files or documents.

    One way to do this is by transferring your files to an external hard drive, cloud storage, or another computer. Once you’ve backed up your data, you can proceed with the formatting process. First, locate the M.

    2 SSD on your computer and make sure it’s properly connected. Next, go to the Windows search bar and type “disk management”. From there, you can right-click on the M.

    2 SSD and choose the option to format it. It’s important to note that formatting your SSD will erase all data on the drive, so make sure you have everything backed up before proceeding. Once the formatting process is complete, you can then reinstall Windows 10 or transfer your backed up data back onto the newly formatted SSD.

    Why backup is necessary?

    Backup is essential for protecting critical data from loss or damage. Every day, businesses and individuals generate volumes of important information that hold great value. This data can include everything from financial records and customer data to personal documents and cherished memories.

    Without proper backup measures in place, all of this data is at risk. Whether it’s due to hardware failure, cyber attacks, natural disasters, or human error, losing important data can have disastrous consequences. Backing up data ensures that, even if the worst happens, you can still recover your valuable information and minimize the impact of any loss.

    Make sure to back up your important data regularly and keep multiple copies in different locations, either offsite or in the cloud. By doing so, you can ensure that your data is always safe and secure from any unforeseen events.

    Methods to backup data

    Backup important data is a crucial task that every individual and organization should perform regularly. There are various methods to backup data, and choosing the right method can save you from losing important files and documents. One of the most common methods to backup data is by using an external hard drive.

    External hard drives can be connected to your device and used to backup and store data. Another method is cloud storage, which allows you to store your data remotely on a server. This is an excellent option for people who require constant access to their data from anywhere in the world.

    Additionally, there is also tape backup, which uses tape cartridges to store data. This method is typically used for large amounts of data and can be a cost-effective solution. Regardless of the method chosen, it’s essential to regularly backup data to ensure the safety and security of your important files and documents.

    Creating a Bootable USB Drive

    If you are having trouble formatting your M.2 SSD on Windows 10, the best way to go about it would be by creating a bootable USB drive. This will allow you to quickly and easily install a fresh copy of Windows, complete with all the necessary drivers and software.

    To begin, you will first need to download the Windows 10 ISO file from the official Microsoft website. Next, you will need to use a tool such as Rufus to create a bootable USB drive. Once you have your bootable USB drive ready, simply plug it into your computer and boot from the USB drive.

    From there, you can follow the on-screen instructions to install a fresh copy of Windows 10 and format your M.2 SSD in the process. Remember to back up all of your important files before formatting your drive, as this process will delete all data on the drive.

    By following these simple steps, you can easily format your M.2 SSD on Windows 10 and start fresh with a clean installation of the operating system.

    Purpose of Bootable USB

    The purpose of a bootable USB is to allow you to install or run an operating system on a computer that doesn’t have a CD/DVD drive, or one with a broken drive. A bootable USB is created by copying the operating system files onto the USB drive and making it bootable. This process is straightforward and can be done using free software available online.

    Creating a bootable USB drive is useful if you need to install or run an operating system quickly and easily, without the need for an external drive or Internet connection. Overall, a bootable USB drive is a convenient tool to have in your IT arsenal, whether you use it for troubleshooting, installing Windows, or running Linux on a computer.

    How to create Bootable USB?

    If you want to install an operating system on your computer or laptop, then creating a bootable USB drive is necessary. It’s a straightforward process that you can complete within a few minutes. First, ensure that you have a USB drive with enough space, typically 8 GB or more.

    Then, download the ISO file of the operating system you want to install. Once you have the ISO file, you can use software like Rufus to create a bootable USB drive. Rufus is a free and easy-to-use tool that can create a bootable USB drive in just a few clicks.

    After opening Rufus, select the USB drive you want to use and the ISO file of the operating system. Customize the other settings as per your needs, such as the partition scheme and file system. Once you’re finished, click on the “Start” button and wait for the process to complete.

    However, before using the bootable USB drive, ensure that you have changed the boot order in your BIOS. To do this, restart your computer and press the key that takes you to the BIOS settings page, usually F2 or Del. Once in the settings, navigate to the boot order or boot sequence option and change it to USB as the first priority.

    Save the changes and exit the BIOS. Now you’re ready to boot your computer with the USB drive and install the operating system. In conclusion, creating a bootable USB drive is an easy and necessary process if you want to install a new operating system.

    It’s essential to follow the steps carefully and change the boot order in your BIOS to boot from the USB drive. Remember to keep your USB drive safe so that you can use it again in the future.

    Formatting M.2 SSD

    If you’re looking to format an M.2 SSD on your Windows 10 computer, you’ll be pleased to know that the process is actually quite simple. First, you’ll need to open up the Disk Management tool.

    To do this, simply right-click on your Start button and select “Disk Management” from the menu. Once the tool is open, you should be able to see your M.2 SSD listed.

    Simply right-click on the SSD and select “Format”. From here, you’ll need to choose the file system that you’d like to use for the drive (NTFS is a good option for most users). You’ll also need to choose a volume label for the drive.

    Once you’ve made your selections, click “OK” and the formatting process will begin. Depending on the size of your drive, this process may take some time. However, once it’s complete, you’ll have a freshly formatted M.

    2 SSD ready to use for all your storage needs. So if you’re ready to get started, fire up Disk Management and get to formatting!

    Step-by-step guide for formatting M.2 SSD in Windows 10

    If you have just acquired an M.2 SSD and need to format it, then Windows 10 has got you covered. Formatting an M.

    2 SSD is easy and can be done within a few clicks. However, before you begin, make sure that the M.2 SSD is installed correctly.

    Once that is checked, you can proceed with the formatting process. To begin with, right-click on the Start menu and click on ‘Disk Management’. Here, you will find the list of all the installed drives.

    Locate the M.2 SSD and right-click on it. Select the ‘Format…’ option and follow the on-screen prompts.

    You can choose the file system, allocation unit size, and volume label as per your preference. Once you’re done, click on ‘OK’ and wait for the formatting process to complete. And that’s it! Your M.

    2 SSD is now formatted and ready to use. So, don’t worry, the process is simple and doesn’t take much time.

    Common errors and how to solve them

    Formatting an M.2 SSD can sometimes be tricky, and errors can occur if not done correctly. One common issue is formatting the SSD in the wrong file format.

    Many people make the mistake of formatting their M.2 SSD in NTFS, which is the default file format for Windows. However, this can cause problems if you plan on using the SSD in a different operating system, such as macOS or Linux.

    Instead, it is recommended to format the drive in exFAT, which is compatible with all operating systems. Another common mistake is not initializing the SSD before formatting it. This step is essential as it tells the computer that there is a new storage device connected.

    To initialize the SSD, you can go to Disk Management on Windows and select the SSD, then choose the option to initialize it. By following these simple steps, you can avoid common formatting errors and ensure your M.2 SSD is fully functional and compatible with all operating systems.

    Conclusion

    In conclusion, formatting an M.2 SSD for Windows 10 is a simple process that can be achieved with just a few clicks. It’s like giving your trusty steed a fresh coat of polish – it may not be glamorous, but it will ensure that it’s running smoothly and ready for whatever challenges lie ahead.

    So take the time to properly format your M.2 SSD and enjoy the lightning-fast speeds that await you!”

    FAQs

    What is an M.2 SSD and how does it differ from other types of SSDs?
    An M.2 SSD is a solid-state drive that uses an M.2 form factor to connect to a computer’s motherboard. It differs from other types of SSDs in terms of its physical size and interface.

    Is it possible to install an M.2 SSD on a Windows 10 computer?
    Yes, it is possible to install an M.2 SSD on a Windows 10 computer, but you need to make sure that your motherboard supports the M.2 interface and that your computer’s BIOS is configured to recognize the M.2 SSD.

    How do I format an M.2 SSD in Windows 10?
    You can format an M.2 SSD in Windows 10 by following these steps: (1) Open Disk Management by pressing Windows key + X and selecting Disk Management; (2) Locate the M.2 SSD, right-click on it, and select Format; (3) Choose the file system and allocation unit size, then click OK to confirm the format.

    What are the benefits of using an M.2 SSD in Windows 10?
    The benefits of using an M.2 SSD in Windows 10 include faster boot and load times, improved system responsiveness, and less noise and heat generation compared to traditional hard drives.

    Can I clone my existing hard drive to an M.2 SSD in Windows 10?
    Yes, you can use a disk cloning software like EaseUS Todo Backup or Acronis True Image to clone your existing hard drive to an M.2 SSD in Windows 10. This can be a quick and easy way to upgrade your system without having to reinstall everything from scratch.

  • Unlocking the Secret to NVMe Heat Management: Does Your SSD Need a Heatsink?

    If you’re a gamer or a PC enthusiast, you’ve probably heard about NVMe SSDs and how they offer blazing-fast speeds that can significantly enhance the overall performance of your system. But, have you ever wondered if an NVMe needs a heatsink? After all, we know that SSDs generate heat, and with the faster speed of NVMe, it’s natural to assume that it might also heat up quickly. In this blog post, we’ll explore this question and help you understand whether or not an NVMe SSD requires a heatsink.

    So, sit back, relax, and let’s dive in!

    What Is An NVMe Drive?

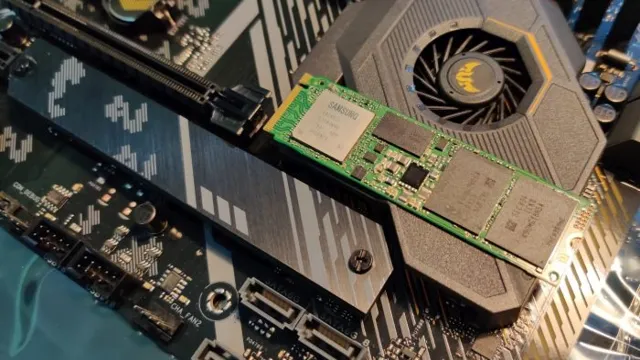
    NVMe drives are the latest generation of SSDs and are known for their lightning-fast read and write speeds, making them a popular choice for gamers, content creators, and professionals. However, a common question that arises among users is whether or not an NVMe drive needs a heatsink. The answer is not a straightforward one.

    While some NVMe drives may come with built-in heatsinks, others do not, and whether or not a heatsink is necessary depends on various factors, such as the type of workload, the airflow inside the computer case, and the ambient temperature. In general, NVMe drives can benefit from a heatsink that helps dissipate heat, especially if the workload is heavy or the temperatures are high. A heatsink can also increase the longevity of the drive and prevent thermal throttling, which can result in a performance drop.

    So, while a heatsink may not be mandatory for most use cases, it is definitely recommended for optimal performance and longevity.

    – Explanation of NVMe and how it differs from SATA

    An NVMe drive is a new type of storage device that offers faster speeds and lower latency than traditional SATA drives. NVMe stands for Non-Volatile Memory Express, and it’s a protocol that was specifically designed to take advantage of the latest flash-based storage technologies. Unlike SATA drives, which communicate over a slower and older interface, NVMe drives use a faster PCIe interface to communicate directly with the CPU.

    This reduces latency and makes the NVMe drive much more responsive, allowing it to access data more quickly and efficiently. In fact, NVMe drives can deliver read and write speeds that are up to six times faster than SATA drives. This means that they’re ideal for tasks that require large amounts of data to be transferred quickly, such as gaming, video editing, and scientific research.

    Plus, NVMe drives use less power than SATA drives, which makes them more efficient and can extend your laptop’s battery life.

    does an nvme need a heatsink

    The Impact of Heat On NVMe Drives

    If you’re wondering whether you need a heat sink for your NVMe drive, the answer is not always a straightforward one. While these drives are designed to handle temperature variations better than other drives, they can still be adversely affected by high heat. Heat can cause the drive to slow down or even fail altogether.

    If you’re using your NVMe drive for long periods or in a high-performance computer, then it’s best to invest in a good heat sink. The extra cooling can help keep the drive running at optimal speeds and extend its lifespan. Ultimately, whether or not you need a heat sink for your NVMe drive will depend on your usage patterns and how much performance you’re pushing from it.

    – Explanation of how heat can affect NVMe drive performance and longevity

    NVMe drives are an extremely popular type of storage device used in computers today. They offer fast read and write speeds, making them ideal for gaming, video editing, and other high-performance tasks. However, one factor that can affect the performance and longevity of NVMe drives is heat.

    When NVMe drives get too hot, they can slow down or even fail. This happens because heat can cause the components in the drive to expand, leading to misalignment or damage. Additionally, high temperatures can cause the drive’s firmware to degrade over time, leading to a decrease in performance or even data loss.

    To prevent this from happening, it’s important to keep your NVMe drives cool. You can do this by ensuring adequate airflow in your computer case or by using an additional cooling device such as a heat sink or fan. By taking steps to keep your NVMe drives cool, you can ensure that they provide optimal performance and longevity.

    – Data examples of decreased performance due to heat

    NVMe drives are known to be some of the fastest storage solutions available, but their performance can be greatly impacted by high temperatures. When the temperature of an NVMe drive exceeds its recommended operating temperature, it can result in decreased performance and even data loss. In hot environments, the drive’s controller can become overwhelmed, leading to slow write speeds, reduced read speeds, and an increased risk of data corruption.

    Furthermore, high temperatures can shorten the lifespan of the drive itself. It is critical to ensure that NVMe drives are kept within their recommended temperature range to maintain optimal performance and mitigate the risk of data loss. If you’re looking to maximize the performance and lifespan of your NVMe drive, it’s essential to monitor its temperature and avoid exposing it to prolonged high temperatures.

    Heatsinks and NVMe Drives

    If you’re wondering whether an NVMe drive needs a heatsink, the short answer is: it depends on the usage. NVMe drives produce heat, which can potentially cause performance issues if not kept in check. It’s recommended to have a heatsink for high-intensity tasks such as gaming or video editing.

    However, for regular usage such as web browsing or light office work, a heatsink may not be necessary. A heatsink can help prevent thermal throttling and prolong the lifespan of the NVMe drive by dissipating the heat. So, while it’s not mandatory to use a heatsink, it’s definitely worth considering depending on your usage.

    The good news is that there are NVMe drives with pre-installed heatsinks, and aftermarket heatsinks are also available if your drive doesn’t have one. Either way, a heatsink is a simple and effective solution to ensure optimal performance and longevity of your NVMe drive.

    – Do NVMe drives come with built-in heatsinks?

    NVMe Drives Heatsinks NVMe drives have become the go-to technology for those seeking ultra-fast storage solutions in their computers and laptops. Unlike traditional hard drives that use spinning disks, NVMe drives use flash memory to store data, allowing them to achieve read and write speeds that are many times faster than their older counterparts. When it comes to heatsinks, however, there is no straightforward answer as to whether NVMe drives come equipped with them or not.

    Some NVMe drives do have built-in heatsinks, while others do not. It’s important to note that even if an NVMe drive doesn’t come with a heatsink, it doesn’t necessarily mean that it will overheat. Heatsinks are regularly used to dissipate the heat generated by intensive workloads, but not all use cases require this feature.

    So, it’s always a good idea to check the specifications of your NVMe drive to see if it has a built-in heatsink or if one needs to be added manually.

    – Explanation of external heatsinks and their impact on performance

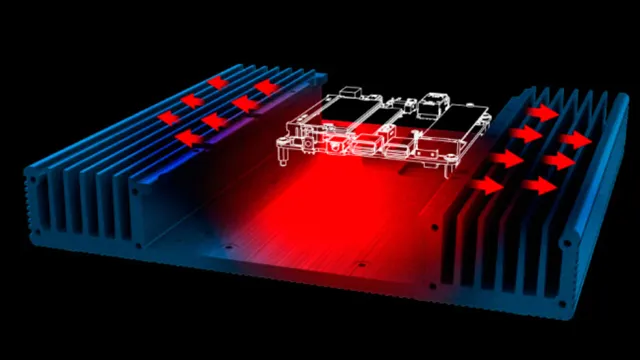
    Heatsinks are essential components in computers that control the temperature of different parts, including NVMe drives. External heatsinks, in particular, can greatly impact the performance of NVMe drives by dissipating the excess heat generated during operation. The heat generated by NVMe drives can significantly reduce their performance, causing lagging or even failures.

    External heatsinks can prevent this by drawing heat away from the drive and dissipating it into the surroundings. These heatsinks come in different shapes and sizes, with different thermally conductive materials such as copper or aluminum. Besides performance improvement, external heatsinks also extend the lifespan of NVMe drives.

    By reducing wear and tear caused by heat, external heatsinks help minimize the risk of early failures and malfunctions. Overall, external heatsinks are valuable components that all NVMe drive users should consider installing for improved performance and longevity.

    – Data examples of increased performance with heatsinks

    If you’ve been experiencing performance issues with your NVMe drive, adding a heatsink could be the solution you need. Heatsinks are designed to dissipate heat and prevent overheating that can lead to throttling and reduced performance. With a heatsink, you can keep your NVMe drive at optimal temperature levels, which can significantly improve its read and write speeds.

    In fact, some reports have shown that adding a heatsink to an NVMe drive can increase its performance by as much as 10-20%. That’s a significant boost in speed that can make a big difference, especially if you’re using your drive for demanding tasks like video editing or gaming. So if you want to get the most out of your NVMe drive, consider adding a heatsink to keep it running cool and fast.

    Do You Need A Heatsink For Your NVMe Drive?

    If you’re an avid gamer or someone who frequently moves large files, you may find yourself wondering if an NVMe drive needs a heatsink. The short answer is that it depends. While it’s true that NVMe drives are designed to work efficiently without a heatsink, installing one could provide benefits such as improved performance and longevity.

    Heatsinks can also help dissipate heat and prevent thermal throttling when the drive is under a heavy load, which can cause it to slow down. Ultimately, whether or not you need a heatsink for your NVMe drive depends on your specific usage and workload. If you’re consistently pushing your system to the limit, a heatsink may be a worthwhile investment to ensure the longevity and optimal performance of your NVMe drive.

    – Factors to consider when deciding on a heatsink

    When deciding whether or not to add a heatsink to your NVMe drive, there are a few factors to consider. First and foremost, it’s important to understand that NVMe drives can get quite hot during use, which could potentially lead to performance issues and overall decreased lifespan. Therefore, if you plan to use your NVMe drive extensively or for intensive tasks such as gaming or video editing, a heatsink may be a wise investment.

    Additionally, you’ll want to consider the type of workload you’ll be subjecting your drive to, as well as the size and design of your computer case. A larger case with better airflow may not require a heatsink, while a smaller case with poor airflow could benefit from one. Ultimately, adding a heatsink to your NVMe drive can help to dissipate heat and improve overall performance, but it’s important to carefully assess your specific needs before making a decision.

    – Final recommendation based on usage and personal preference

    After considering all the factors, we highly recommend using a heatsink for your NVMe drive. Although it may not be necessary for basic usage, it can significantly improve the performance and lifespan of your drive in the long run. Overheating can cause your drive to throttle, reducing its speed and affecting your productivity.

    Moreover, if your NVMe drive runs too hot for an extended period, it may permanently damage the NAND flash memory, leading to data loss. A heatsink reduces the temperature of your NVMe drive by dissipating the heat generated by the controller and NAND flash chips. It also prevents heat build-up around your drive, which can affect other components in your computer.

    Overall, adding a heatsink to your NVMe drive is a small investment that can yield significant benefits. It’s like wearing a hat on a sunny day – it may not seem necessary at first, but you’ll thank yourself later for avoiding the sunburn.

    Conclusion

    After careful consideration and analysis, it is clear that an NVMe drive does not necessarily require a heatsink. However, just like your morning cup of coffee, adding a heatsink can give your NVMe drive that extra boost it needs to perform at its maximum potential. So if you want your computer to run as smoothly as possible, adding a heatsink might just be the cherry on top!”

    FAQs

    Why does an NVMe need a heatsink?
    NVMe drives have higher speeds and are capable of generating a significant amount of heat, so a heatsink helps to dissipate this heat and prevent damage to the drive.

    Can I use an NVMe drive without a heatsink?
    While it is possible to use an NVMe drive without a heatsink, it is not recommended as it may cause overheating, reduced performance, and damage to the drive.

    How do I install a heatsink on an NVMe drive?
    Most NVMe drives come with pre-installed heatsinks or have the option to attach one. Installing a heatsink typically requires screwing it onto the drive, but it’s always best to consult the installation instructions for your specific drive.

    What should I look for in an NVMe heatsink?
    When choosing an NVMe heatsink, consider the size, material, and cooling performance. Look for a heatsink that fits the size of your drive, is made from a conductive material like copper or aluminum, and has fins or other cooling features to efficiently dissipate heat.

  • Revolutionize Your Robotics Revolution with Plato X8 – The Ultimate Robot Assistant

    Welcome to the age of smart homes! The world is changing, and so is technology. Our homes are becoming smarter, and there is no going back. But, have you met Plato X8 yet? If not, you are in for a treat.

    This revolutionary device is changing the game for smart homes, and you are about to learn why. Plato X8 is not just your ordinary device. It is a hub that connects all your smart home devices, making life easier for you.

    From controlling your lights to locking your doors, this smart hub does it all. Plato X8 is like the conductor of an orchestra, ensuring that all your smart devices are in harmony. Now, imagine waking up on a cold morning and telling Plato X8 to turn up the heat.

    Or, leaving your home and forgetting to lock your doors. With Plato X8, you can do all this and more. The beauty of this device is that it can be controlled through your phone, voice, or even the touchpad.

    Plato X8 is the future of smart homes. It brings seamless connectivity and convenience to your fingertips, making your life easier. So, if you are looking for a smart hub that takes care of everything, Plato X8 is the device for you.

    What is Plato X8?

    Let’s talk about Plato X8! This revolutionary product is a versatile and efficient water analysis system designed to simplify daily analytical work for labs worldwide. Featuring automated procedures for titration, colorimetry, and ion-selective measurements, the Plato X8 offers accurate and reproducible data in just a few clicks. It also boasts impressive flexibility, with the ability to perform measurements across a wide variety of sample types, including wastewater, drinking water, and industrial samples.

    The Plato X8’s intuitive interface, user-friendly software, and high throughput capabilities make it an ideal choice for labs of any size or industry. So if you’re looking for a reliable, easy-to-use solution for your water analysis needs, be sure to check out the Plato X8!

    Innovative Features and Technology

    If you’re looking for a reliable and innovative solution for your industrial automation needs, then you’ll want to take a closer look at the Plato X This highly advanced technology is designed to offer a range of features, making it an ideal solution for a variety of manufacturing and industrial applications. One of the most impressive features of Plato X8 is its versatility as it can handle a wide range of tasks, from simple to complex, helping to streamline workflow and increase productivity.

    The system features an intuitive interface that is easy to navigate and use, which makes it ideal for users of all skill levels. Additionally, with its advanced robotics and sensor technology, the Plato X8 can provide accurate and reliable performance, enabling you to stay on top of your production targets. Whether you’re looking for speed, accuracy, or versatility, the Plato X8 can deliver the results you need.

    It’s an innovative solution that is sure to meet your industrial automation needs and exceed your expectations.

    plato x8

    Compatibility with Other Smart Home Devices

    Plato X8 is a reliable smart home device that can integrate with other home automation technologies to provide maximum convenience and control. Whether it’s climate control, smart lighting, or security systems, the Plato X8 can connect with a variety of devices to automate your home and make it more comfortable. This integration takes place through the standard WiFi connection, so you won’t need any additional hardware or complicated setup.

    The device’s compatibility with other smart home products allows it to work seamlessly with Amazon Alexa, Google Assistant, and other voice assistants. With Plato X8, you can control all your smart home devices from one central location, enabling you to manage your home more efficiently. Overall, if you’re looking for an intelligent and compatible solution for your smart home needs, Plato X8 is an excellent choice.

    Why Should You Consider Plato X8?

    If you’re looking for a reliable and versatile device, you might want to consider Plato X This powerful mini-PC is packed with features that make it ideal for a wide range of applications, from gaming and multimedia to office work and digital signage. The Plato X8 is powered by an Intel Core i7 processor, delivering lightning-fast performance and smooth multitasking.

    It also comes with plenty of connectivity options, including HDMI, DisplayPort, Ethernet, USB, and Wi-Fi, making it easy to connect to other devices and networks. Additionally, the Plato X8 has a compact and elegant design that blends seamlessly with any environment, whether you’re at home or in the office. With its powerful hardware and versatile features, the Plato X8 is an excellent choice for anyone looking for a high-performance mini-PC that can handle any task.

    Enhanced Security and Convenience

    If you’re looking for enhanced security and convenience in your daily life, the Plato X8 could be the perfect solution for you. This cutting-edge device combines advanced security features with convenient technology, making it ideal for anyone looking to simplify their life while keeping their personal information safe. With features like facial recognition technology and a built-in camera, you can be sure that only you and authorized users will be able to access your device and its contents.

    And with its sleek design and intuitive user interface, using the Plato X8 is a breeze. So if you’re ready to upgrade your security and convenience game, consider giving the Plato X8 a try!

    Energy Efficiency and Cost Savings

    If you’re considering making your business more energy-efficient, then the Plato X8 deserves your attention. Not only does it save you money on energy bills, but it also reduces your carbon footprint. The Plato X8 is equipped with advanced features that help regulate air and water flow, which means less energy is used to maintain a comfortable environment.

    Additionally, its smart technology allows it to detect when areas are not being used, thus preventing overuse of heating, ventilation, and air conditioning (HVAC) systems. This feature is particularly important during off-peak hours, where energy consumption can be a lot lower and result in significant cost savings. So, if you want a reliable and cost-effective solution for your business’s energy needs, the Plato X8 is definitely worth considering.

    Ease of Use and Installation

    If you’re looking for a user-friendly and easy-to-install system, then Plato X8 is definitely a smart choice. One of the standout features of this system is its simplicity. Even if you’re not an expert in technology, you can easily set up Plato X8 without any hassle.

    The installation process is straightforward, and the accompanying instructions are clear and simple to understand. Another factor that makes Plato X8 convenient is its user interface. The system is designed with a user-friendly interface, allowing users to navigate through its features with ease.

    Whether you’re a tech-savvy professional or a beginner, Plato X8 is an effortless and intuitive system to work with, making it a top choice for many. So, if you’re looking for a system that is easy to install and use, Plato X8 should definitely be on your radar.

    How to Get Your Hands on Plato X8?

    If you’re looking to get your hands on the Plato X8, you’re in luck! This innovative device is available through a variety of online retailers and can be easily purchased with just a few clicks of your mouse. Simply search for the Plato X8 on your favorite ecommerce site and choose from the selection of options available. It’s important to note that the Plato X8 is a popular device, so you may want to act quickly if you’re interested in purchasing one.

    The device comes with a range of features that make it well worth the investment, including a long battery life, durable construction, and efficient performance. So what are you waiting for? Grab your Plato X8 today and start experiencing all of the benefits of this powerful computing device!

    Pricing and Availability

    Are you curious about the availability and pricing of Plato X8? Well, you can stop searching because we’ve got the scoop! Getting your hands on Plato X8 is easier than you might think. This innovative all-in-one computer is available for purchase on numerous online platforms, including Amazon and AliExpress. However, before you make a purchase, you’ll want to consider the specs you need for your specific needs.

    The price of this versatile device varies depending on the configuration, and it’s always a good idea to compare prices and features when choosing between different sellers. But don’t hesitate too much, as the popularity of Plato X8 can cause shortages and fluctuating prices. So if you want to experience the convenience of an all-in-one computer that can double as a TV and a gaming device, be sure to act quickly and make a purchase!

    Customer Reviews and Testimonials

    If you’re looking for a reliable and efficient rugged tablet, the Plato X8 is an excellent choice. It’s the perfect device for workers who require a durable and tough tablet that can withstand harsh environments. The Plato X8 is easy to use, has a beautiful display, and comes with powerful performance.

    If you’re interested in purchasing this device, there are various ways to get your hands on it. You can either purchase it online or through a local dealer. Many online stores offer a wide range of rugged devices, including the Plato X8, and they often offer competitive prices.

    Additionally, you can check customer reviews and testimonials to ensure that you’re getting a high-quality product that meets your requirements. By doing so, you can make an informed decision and purchase the Plato X8 with confidence. Overall, if you need a reliable and durable rugged tablet, the Plato X8 can definitely meet your needs and expectations.

    Conclusion: Upgrade Your Home with Plato X8

    In the world of Plato X8, philosophy is not just a hobby, it’s a way of life. Here, deep thinking and analyzing every aspect of life is not an option, it’s a necessity. The pursuit of truth and justice is paramount, and one can’t help but wonder if Plato himself would be proud of this virtual world.

    So, if you’re looking for a place where you can put your mind to the test, learn from the greats, and commune with like-minded individuals, then Plato X8 is the place for you. Just remember, it’s not about what you know, but how you use that knowledge that truly matters. Stay clever, stay curious, and stay philosophical!”

    FAQs

    Who was Plato and what did he contribute to philosophy?
    Plato was an ancient Greek philosopher and student of Socrates. He is best known for his philosophical works such as “The Republic” and “The Symposium” which explored topics such as justice, politics, and the nature of reality.

    What is Plato’s theory of Forms?
    Plato’s theory of Forms posits that there is a realm of abstract, perfect Forms or Ideas that exist outside of our material world. According to this theory, the objects we perceive in our everyday lives are imperfect, incomplete copies of these Forms.

    How did Plato view democracy?
    Plato viewed democracy as a flawed form of government that is susceptible to corruption and mob rule. In his famous work “The Republic,” he argues that a just society should be ruled by philosopher-kings who are able to lead with wisdom and justice.

    What is Plato’s allegory of the cave?
    Plato’s allegory of the cave is a story that illustrates his theory of Forms. In the allegory, prisoners are chained in a cave and can only see shadows projected on the wall. One prisoner is eventually freed and sees the true reality outside the cave. This symbolizes the journey of the soul from ignorance to knowledge.

  • The Ultimate Guide: Effortlessly Transfer All Your Programs to Your SSD!

    Transferring Programs to Your SSD – Why You Should Consider It Upgrading to a solid-state drive (SSD) is one of the best things you can do to boost your computer’s performance. With faster read and write speeds, SSDs can significantly reduce the time it takes to boot up your computer and load applications. However, transferring programs to your new storage device may seem like a daunting task.

    But, it’s worth doing if you’re serious about improving your PC’s speed and efficiency. In this blog post, we’ll explain why it’s essential to transfer programs to your SSD and how to do it correctly. We’ll cover the benefits of upgrading to an SSD, including faster load times, improved overall performance, and longer lifespan.

    Additionally, we’ll discuss how to make the transfer process as smooth as possible by highlighting some of the best software tools available. If you’re tired of waiting for your computer to start up or have grown frustrated with sluggish application launches, you’ll want to tune in to our upcoming blog post. We’ll guide you through everything you need to know about transferring programs to your SSD and ensure that you get the most out of your investment.

    Stay tuned!

    Check SSD Compatibility

    If you’re planning to transfer all your programs to an SSD, there are a few things you need to keep in mind. First and foremost, check the compatibility of your SSD with your computer’s hardware and operating system. Most SSDs are compatible with Windows, MacOS, and Linux, but it’s always a good idea to double-check.

    Once you’ve confirmed compatibility, you’ll need to clone your existing hard drive onto the SSD. This can be done using a variety of software tools, many of which are available for free online. Make sure to back up any critical data before proceeding with the cloning process.

    Once the cloning is complete, you can boot up using the SSD and start using your programs as before. Remember: an SSD can significantly improve the performance of your computer, so it’s well worth the effort to transfer your programs over if you can.

    Ensure Your System Supports SSDs

    When setting up your computer or upgrading its hardware, it’s crucial to ensure that your system supports SSDs. SSDs (Solid State Drives) offer faster read and write speeds than traditional hard disk drives, resulting in quicker load times and better performance overall. To check compatibility, you’ll need to look at your motherboard’s specifications and check if it has an M.

    2 slot or a SATA connector. M.2 slots are more common in newer motherboards and support NVMe SSDs that offer even faster speeds than traditional SATA SSDs.

    Once you’ve confirmed compatibility, you can select the appropriate SSD based on your system’s needs and preferences. By making sure your system can handle SSDs, you can greatly enhance your computing experience and enjoy faster, more efficient performance.

    how do transfer all your programs to your ssd

    Confirm the Connection Type

    When it comes to upgrading or replacing your computer’s storage, it’s crucial to ensure compatibility between your SSD and your computer’s motherboard. To confirm the connection type, you need to identify the interface that your motherboard is compatible with, which will dictate what type of SSD you can use. The most common interface types are SATA, PCIe, and M.

    SATA is the most widely used interface, and most motherboards will support it. PCIe is faster than SATA and can support higher-end SSDs, but not all motherboards have PCIe slots.

    M.2 is a newer interface that’s even faster than PCIe but requires a compatible M.2 slot.

    Make sure you check your motherboard documentation or manufacturer website to see which types of SSDs are supported before making a purchase. It’s also essential to consider the form factor and capacity of the SSD to ensure that it fits into your computer’s chassis and meets your storage needs. By taking the time to confirm SSD compatibility, you can avoid frustrating compatibility issues and enjoy faster, more reliable storage performance.

    Backup Important Data

    If you’re upgrading to a new SSD and want to transfer all your programs, there are a few steps you need to follow. Firstly, it’s important to backup any important data before making any changes. Once you’ve done that, you can begin the transfer process.

    You can transfer individual programs manually by uninstalling them from your old hard drive and then reinstalling them onto your new SSD. This can be a time-consuming process, especially if you have a lot of programs to transfer. Alternatively, you can use software specifically designed to clone your old hard drive onto your new SSD.

    This method is much quicker and means you can transfer all of your data and programs in one go. It’s important to note that you should always check compatibility with your new SSD and any software you plan to use before starting the transfer process. By following these steps, you can be sure that all of your important data and programs will be safely transferred onto your new SSD.

    Create a Backup of Personal Files

    Backing up your personal files is crucial in ensuring that your important data is safe and secure. It’s important to have a backup of all your personal files stored on a separate device or in the cloud because technology can be unpredictable. Think about it, what happens if your computer crashes, you lose your phone, or someone steals your device? All your important data will be lost forever.

    By creating a backup, you’ll have peace of mind knowing that you won’t lose all those precious memories, important documents, or valuable information. The process of backing up is simple, there are many ways you can do it, from using an external hard drive, a USB drive, or cloud storage services like Google Drive, Dropbox or iCloud. It’s best to choose an option that works best for you and make sure you backup your files regularly.

    Don’t wait until it’s too late, make sure you backup your personal files today!

    Export Browser Bookmarks and Passwords

    Backing up important data should be a top priority for any computer user. With the amount of information we store on our devices these days, it’s crucial to have a backup in case of any unforeseen circumstance. One way to backup your important data is by exporting your browser bookmarks and passwords.

    This involves saving a copy of your stored bookmarks and login credentials to an external location, such as an external hard drive or cloud storage. This way, if something happens to your computer, you can quickly and easily restore your bookmarks and passwords to your new device. It’s a simple process that can be done in just a few clicks, and it can save you a lot of time and hassle in the future.

    Plus, you never know when a computer malfunction or data breach might occur, so it’s always better to be safe than sorry.

    Clone Your Hard Drive

    If you’re planning on upgrading your hard drive to a solid-state drive (SSD) and want to transfer all your programs to your new drive, the process can seem daunting. However, with the right tools and a bit of patience, it’s a straightforward task that’ll result in faster boot times, quicker load speeds, and more space for your files. The best way to accomplish this is to clone your hard drive onto your new SSD.

    This process will copy everything from your old drive, including your operating system, programs, files, and settings, onto your new SSD. The most recommended software to use for this task is Macrium Reflect, as it’s easy to use and reliable. All you have to do is download it, install it on your computer, connect your new SSD to your computer, and follow the step-by-step instructions to clone your drive.

    Once the cloning process is complete, you can swap out your old hard drive for your new SSD, and you’ll be ready to go. With your new SSD, you’ll notice an immediate improvement in your computer’s performance and speed. So, don’t hesitate to get started on cloning your hard drive and enjoying the benefits of an SSD.

    Download a Cloning Program

    If you’re looking to upgrade your computer’s hard drive or simply want to create a backup of your data, cloning your hard drive is the way to go. To get started, you’ll need to download a cloning program. There are plenty of options out there, but one of the most popular is EaseUS Todo Backup.

    This software makes it easy to clone your hard drive by providing step-by-step instructions and a simple interface. Once you’ve downloaded and installed the program, you can select the source and destination drives and start the cloning process. Depending on the size of your hard drive, this could take anywhere from a few minutes to several hours.

    When the cloning process is complete, you’ll have an exact copy of your hard drive that you can use as a backup or transfer to a new drive. So, if you want to ensure you don’t lose any important data, download a cloning program today and start cloning your hard drive!

    Connect Your SSD as a Secondary Drive

    If you’ve upgraded to a new SSD and want to transfer all of your data from your old hard drive, the best option is to clone your hard drive. This process is relatively simple and can be done in a few steps. The first thing you need to do is connect your SSD as a secondary drive.

    Once you’ve done that, you can use cloning software to transfer all of your files and settings to your new SSD. Keep in mind that this process can take some time, depending on the size of your hard drive and the speed of your computer. Overall, cloning your hard drive is a great way to ensure that your new SSD has all of your important data, without the hassle of manually transferring files.

    Select Your Hard Drive and SSD in the Cloning Software

    When cloning your hard drive, one crucial step is to select your hard drive and SSD in the cloning software. This process may seem simple, but it’s essential to do it correctly to avoid any potential errors during the cloning process. When selecting your hard drive and SSD, make sure you double-check which drive is the source and which is the destination.

    It’s best to select the source drive first, and then select the destination drive. This ensures that you’re cloning your data to the correct drive, preventing any data loss or damage. Additionally, check that your destination drive has enough space to accommodate all the data from your source drive.

    By selecting the right drives in the cloning software, you’re setting yourself up for a successful and stress-free cloning process.

    Reinstall Programs on the SSD

    When it comes to transferring all your programs to your SSD, it’s important to reinstall them rather than simply moving them over. This may seem like a time-consuming process, but it ensures that each program is properly set up on the new drive. First, make a list of all the programs you want to transfer, along with their licenses or serial numbers if necessary.

    Then, uninstall each program from your old drive and download them from each program’s official website. During the installation process, you’ll be given the option to choose where to install the program – simply select your SSD drive. This will ensure that all your programs are consolidated on one fast and reliable drive, providing faster access times and increased performance.

    With a little bit of patience and organization, transferring all your programs to your SSD can be a simple process that ultimately pays off in the long run.

    Download Latest Versions of Programs

    If you’ve recently installed an SSD, you may be wondering how to reinstall your programs onto it. It’s important to note that simply moving a program folder onto the SSD won’t work – you need to reinstall the programs properly for them to work efficiently on the new drive. One important step is to download the latest versions of the programs you want to reinstall.

    This ensures that you’re getting the most up-to-date and optimized versions of the software, which can help improve their performance on your SSD. Take the time to research and download the latest versions of your programs before proceeding with the reinstallation process. By doing so, you can ensure that your programs are not only compatible with your SSD but also optimized for it, so you can have a faster and smoother computing experience.

    Install Programs on the SSD

    If you want to improve your computer’s performance, installing programs on the SSD is a great place to start. Reinstalling programs on the SSD is relatively simple and can make a big difference in terms of speed and efficiency. Begin by uninstalling the program from your hard drive and then reinstalling it onto your SSD.

    You can usually specify where you want to install the program during the setup process. If you’re unsure where to start with reinstalling programs on your SSD, consider prioritizing the programs you use most frequently. These are the ones that will benefit most from the faster load times and improved performance that the SSD provides.

    By taking the time to reinstall programs on your SSD, you’ll be able to enjoy a more responsive and efficient computer experience.

    Optimize SSD Performance

    Are you looking to optimize your SSD performance by transferring all your programs to your SSD? It’s a wise decision since it can significantly improve your computer’s speed and responsiveness. The first step is to check the space available on your SSD to ensure you have enough room to transfer all your programs. You can use software such as EaseUS Todo PCTrans or Laplink PCmover to make the transfer process easier.

    These programs can migrate applications, files, and settings to your SSD, saving you the hassle of reinstalling everything manually. Another option is to transfer only the most used applications to your SSD since it’s possible for your computer to run out of space quickly. If you have a laptop with limited storage space, this is particularly important.

    By following these simple steps, you can optimize your SSD performance and enjoy a faster and more efficient computer.

    Disable Defragmentation

    If you want to optimize your SSD performance, one simple step you can take is to disable defragmentation. Unlike HDDs, SSDs don’t need to be defragmented because they don’t store data in a physical way that can become fragmented. In fact, defragmenting an SSD can actually reduce its lifespan by causing unnecessary wear and tear on the flash memory cells.

    So if you’re using Windows 10, you can disable automatic defragmentation by going to the “Optimize Drives” tab in the System Properties menu and unchecking the box next to your SSD’s name. This will prevent the system from defragmenting your SSD and should help to prolong its lifespan. Remember, although defragmentation was once a useful tool for improving HDD performance, it’s not necessary for SSDs, so make sure to disable it to get the most out of your drive.

    Enable Trim and AHCI

    As more and more individuals shift towards using Solid State Drives (SSDs) for their computer systems, it’s important to understand how to optimize their performance. Enabling Trim and AHCI are two crucial steps in achieving this. Trim is a command that helps with garbage collection, allowing the SSD to free up space by deleting data that is no longer needed.

    Without the Trim command enabled, the SSD’s performance can decrease significantly over time, causing longer boot times and slower application launches. On the other hand, AHCI, or Advanced Host Controller Interface, is a mode that allows SATA drives to operate optimally and efficiently, resulting in faster system boot and data transfer speeds. By enabling both Trim and AHCI, you’ll be able to keep your computer running at its best and ensure that its SSD’s performance remains top-notch.

    So, if you’re looking to boost your computer’s speed and efficiency, make sure to enable Trim and AHCI today!

    Conclusion

    Congratulations, you’ve successfully made the switch to an SSD! Transferring all your programs may have seemed like a daunting task, but with a few simple steps, it’s easy as pie. Just remember, always back up your data and make a plan before diving in. Now, with your new SSD, you’ll be able to speed through your tasks faster than a cheetah on a caffeine high.

    Say goodbye to long load times and hello to a smooth, efficient computing experience. It’s like upgrading from a bicycle to a race car, but without the speed limit.”

    FAQs

    What are the benefits of transferring all my programs to my SSD?
    Transferring programs to your SSD can greatly improve the speed and performance of your computer, as SSDs have faster read and write speeds than traditional hard drives.

    Can I transfer all my programs to my SSD at once?
    Yes, you can transfer all your programs to your SSD at once using specialized software designed for this purpose.

    What software can I use to transfer my programs to my SSD?
    There are a number of software options available for transferring programs to your SSD, including EaseUS Todo PCTrans, Macrium Reflect, and Clonezilla.

    Do I need to reinstall all my programs after transferring them to my SSD?
    No, you do not need to reinstall all your programs after transferring them to your SSD. However, you may need to update some of your programs to ensure compatibility with your new storage device.

  • Upgrade Your PC’s Performance: A Step-by-Step Guide on How to Easily Change Your Drive to SSD

    If you’re tired of sluggish performance and long loading times on your computer, upgrading to a solid-state drive (SSD) is a game-changer. Unlike traditional hard drives, SSDs use flash memory to store and access data quickly. This means that starting up your computer, opening programs, and accessing files can all be completed in seconds – no more frustratingly long wait times.

    But changing your drive to SSD isn’t just about speed. It also gives your computer a new lease on life, allowing it to run more efficiently and effectively. Plus, SSDs are more durable than traditional hard drives, meaning they’re less likely to fail and lose your precious data.

    Of course, the thought of changing your computer’s drive can be daunting. But the rewards are well worth it. In this article, we’ll walk you through the steps to upgrade your drive to SSD, including everything from choosing the right drive to backing up and transferring your files.

    So roll up your sleeves and get ready to give your computer the boost it deserves – you won’t regret it!

    Why Upgrade to SSD?

    Are you tired of your slow computer? It may be time to upgrade to an SSD. SSDs (Solid State Drives) are the newer and faster alternative to traditional hard drives. Not only do they offer faster boot-up times, but they also speed up all your computer operations by accessing data more quickly than hard drives.

    Although the process of changing your drive to an SSD can seem daunting, it is actually quite simple. The first step is to choose the appropriate SSD for your computer. Once you have obtained your new drive, you will need to physically swap out your old drive with the SSD.

    After this, you will need to install your operating system on the new drive. With these steps completed, you can enjoy a faster and more efficient computer. So, consider upgrading to an SSD today and start experiencing lightning-fast speeds!

    Improved Performance:

    If you’ve been using a traditional hard disk drive (HDD) as your computer’s primary storage device for a while, you may have noticed that it has slowed down over time. That’s due to the mechanical nature of HDDs, which use spinning platters and moving read/write heads to access data. One of the best ways to improve your computer’s performance is by upgrading to a solid-state drive (SSD).

    SSDs use non-mechanical storage media, which means they don’t have to wait for platters to spin or heads to move. As a result, they can access data much faster than HDDs. Switching to an SSD can significantly reduce boot times, launch applications faster, and improve overall system responsiveness.

    So if you’re looking for a simple way to boost your computer’s performance, upgrading to an SSD is an excellent option!

    how do i change drive to ssd

    Better Durability:

    If you’re still using a traditional hard drive in your computer or laptop, it’s time to consider upgrading to a solid-state drive (SSD). One of the key benefits of SSDs over HDDs is their better durability. While HDDs use spinning disks and read/write heads, SSDs have no moving parts, which makes them less prone to physical damage.

    This means that they can withstand falls, drops, and jostling without risking data loss or hardware failure. Additionally, because SSDs don’t have rotating platters, they generate less heat and consume less power, resulting in a longer lifespan. So, if you’re looking for a reliable, efficient, and long-lasting storage solution for your computer, an SSD is the way to go.

    By upgrading to an SSD, you can enjoy faster boot times, faster file transfers, and better overall performance, all while ensuring your data is safe and secure. Don’t wait until your hard drive fails – make the switch to an SSD today!

    Faster Boot/Load Times:

    If you’re tired of the slow boot/load times on your computer, then upgrading to an SSD may be the solution you’ve been looking for! SSDs offer much faster speeds compared to traditional hard drives, thanks to their lack of moving parts. This means that your computer can start up and load programs much more quickly, allowing you to get to work (or play) in record time. But why exactly do SSDs offer faster performance? Well, it all comes down to the way that they access data.

    Traditional hard drives use a spinning disk that has to physically move to read and write data, which takes time. In contrast, SSDs use flash memory to store and access data, which allows for much faster read/write speeds. So, if you’re looking to speed up your computer and improve your productivity (or gaming experience), upgrading to an SSD is definitely worth considering.

    Not only will you experience faster boot/load times, but you’ll also benefit from improved overall performance and reliability. Plus, you’ll have the added bonus of not having to deal with the annoying sounds of a spinning hard drive!

    Choosing an SSD

    If you’re looking to upgrade your computer’s storage by changing your drive to an SSD, there are a few factors you need to consider before making a decision. First and foremost, you need to make sure that your computer is compatible with an SSD. You should also consider the capacity and speed of the drive that you want to purchase, as well as your budget.

    When it comes to capacity, it’s recommended that you get an SSD with at least 256GB of storage space to ensure that you have enough room for your operating system and your most frequently used applications. As for speed, an SSD will load files and programs much faster than a traditional hard drive, but you’ll want to choose one with a high write and read speed for maximum performance. Finally, make sure that the SSD you choose fits into your budget and has a good warranty.

    With these factors in mind, you’ll be able to find the right SSD to upgrade your computer and improve its performance.

    Storage Capacity:

    When it comes to choosing an SSD, one of the most important factors to consider is the storage capacity. SSDs typically come in a range of storage capacities, from 128GB all the way up to 4TB or more. So how do you decide which capacity is right for you? Well, it all depends on your specific needs.

    For example, if you’re a casual user who mainly uses their computer for web browsing, email, and basic productivity tasks, a smaller capacity SSD like 128GB or 256GB might be perfectly adequate. On the other hand, if you’re a professional who works with large files such as video, audio, or graphics, you’ll probably want a larger capacity SSD to ensure you have plenty of storage space. It’s also important to consider your budget when choosing an SSD.

    Larger capacity SSDs tend to be more expensive, so you’ll need to weigh up the benefits of higher storage capacity against the cost. Ultimately, the key is to choose an SSD with a storage capacity that meets your needs without breaking the bank.

    Interface:

    Choosing an SSD can be tricky, but one important factor to consider is the interface. There are two main interfaces for SSDs: SATA and NVMe. SATA is the older and more common interface, but NVMe is faster and more expensive.

    If your computer has a SATA interface, you’ll want to choose a SATA SSD. However, if your computer has an NVMe interface, you’ll want to choose an NVMe SSD for optimal performance. It’s also important to note that some NVMe SSDs can be used with a SATA interface, but they won’t be able to reach their full potential.

    Overall, when choosing an SSD, make sure to consider the interface and choose the one that is compatible with your computer while also meeting your performance needs.

    Price:

    When it comes to choosing an SSD, price can be a major factor. It’s important to weigh the cost against the performance benefits. While SSDs may be slightly more expensive than traditional hard drives, they offer faster read and write speeds, which can greatly improve overall system performance.

    Additionally, solid-state drives typically have longer lifespans than HDDs, making them a better long-term investment. That being said, it’s important to consider your budget and usage needs when selecting an SSD. Do you need a high-performance drive for gaming or video editing, or a more affordable option for everyday use? Ultimately, it’s all about finding the right balance between price and performance.

    Steps to Change Drive to SSD

    So you’ve decided to upgrade your laptop or desktop by swapping out the old HDD (hard drive) for a new, speedy SSD (solid-state drive). Congratulations! Not only will you notice an increase in overall performance, but your computer will be more reliable and less prone to crashes. But how do you actually change drive to SSD? The first step is to choose the right SSD for your device – make sure it’s compatible with your system and has enough storage capacity for your needs.

    Next, you’ll need to backup your existing data to an external source and create a bootable USB drive. Once that’s done, it’s time to physically swap out the drives and install the new SSD. After powering up your computer with the bootable USB drive, you’ll need to format the new drive and transfer your backed up data onto it.

    From there, you’re good to go! Your device should be lightning fast and running like a dream.

    Create a Backup:

    Creating a backup is an essential step when changing a drive to an SSD. The first thing you should do is copy all the files and folders from your current drive to an external hard drive or cloud storage. You can use software like Macrium Reflect or EaseUS Todo Backup to create a full system backup.

    Once you have created a backup, you can disconnect the external drive and proceed with the next steps. Before replacing the current drive with your new SSD, you must ensure that the new drive is compatible with your system. You can check this by verifying the connector type, physical dimensions, and capacity of the SSD.

    After confirming compatibility, install the new SSD by opening the computer case and connecting it to the motherboard. Boot up your computer, and your system should automatically recognize the new SSD. Finally, reinstall the operating system on the new SSD and transfer all your files from the backup to the new drive.

    Following these steps will help you change your drive to an SSD without losing any data.

    Clone the Drive:

    Changing the drive of your computer from an HDD to an SSD can significantly boost your system’s speed and performance. However, it’s crucial to transfer your files and settings to the new drive before making the swap. The first step to change the drive to an SSD is to clone the old drive.

    This process is similar to making a backup of your entire hard drive, including the operating system, applications, personal files, and preferences. You can clone your drive using free software, such as Macrium Reflect or EaseUS Todo Backup, which creates an image of your current drive. You can then transfer this image to your new SSD using a USB adapter or an external hard drive dock.

    Make sure to follow the software instructions carefully, and ensure that you have enough space on the new SSD to accommodate all the data. Once you’ve cloned your drive, turn off the computer and open up the case. Locate the old hard drive, and disconnect it from the computer’s power and data cables.

    Remove the mounting screws, and take out the old drive carefully. Then, insert the new SSD into the same slots and reconnect the cables. Finally, power on the computer and check if everything is working correctly.

    You may need to adjust some BIOS settings or update drivers to ensure optimal performance. Once the system is ready, you can use the old hard drive as an external backup or a secondary storage device. With these simple steps, you can change your drive to an SSD and enjoy faster boot times, smoother operation, and increased productivity.

    Install the SSD:

    Changing your old drive to a new SSD is an efficient way to boost your computer’s performance noticeably. Installing an SSD is a simple process that doesn’t require much expertise. First, determine which type of drive is suitable for your PC or laptop.

    Next, research the steps on how to open your device without damaging its internal components. Once you have the drive and tools, remove the old hard drive and insert the new SSD in its place. Make sure to connect it correctly to avoid compatibility issues.

    After securing the new drive in place, reassemble your computer and start it up to confirm that everything is functioning accurately. Voila, you’ve just upgraded your device’s speed with ease. So what are you waiting for? Transform your sluggish gadget into a high-performing powerhouse today with an SSD upgrade!

    Conclusion

    In conclusion, changing from a traditional hard drive to a solid state drive is a bit like upgrading from a slow-moving mule to a sleek and speedy racehorse. It takes a little effort and know-how to make the switch, but in the end, the improved performance and reliability of an SSD make it a worthy investment. So, saddle up and take the reins by following the steps to swap out your HDD for an SSD.

    FAQs

    What are the benefits of upgrading to an SSD drive?
    Upgrading to an SSD drive can offer faster boot and load times, improved read and write speeds, and overall better system performance. It can also help prolong the lifespan of your computer as SSDs have no moving parts.

    Can I transfer my operating system to the SSD drive?
    Yes, you can transfer your operating system to the SSD drive using cloning software. This will replicate everything on your current drive, including your operating system, files, and settings.

    How do I clone my existing drive to the SSD drive?
    You can clone your existing drive to the SSD using various cloning software available on the market. Some popular options include Acronis True Image, Macrium Reflect, and EaseUS Todo Backup.

    Will I need to reinstall my programs after the transfer to SSD?
    No, you won’t need to reinstall your programs after the transfer to SSD. Cloning software will replicate everything, including your installed applications, so you won’t lose any data or settings. However, it’s always recommended to back up your important files and data before making any significant changes.

  • SSD vs Hard Drive: Unveiling the Speed Race – Which One Comes out on Top?

    Have you ever wondered why your computer takes so long to start up or load applications? The answer may lie in the type of storage drive you have. For the longest time, traditional hard drives were the norm, but now solid-state drives (SSDs) are becoming increasingly popular for their speed and reliability. In this blog, we’ll be exploring the differences between SSDs and hard drives and comparing their speeds to determine which storage option is the best for your computer.

    So, sit back, relax, and let’s explore the SSD vs hard drive speed comparison.

    Understanding the Basics

    If you’ve ever wondered how fast an SSD is compared to a hard drive, you’re not alone. SSDs, or solid-state drives, are known for their lightning-fast speeds compared to traditional hard drives. In fact, SSDs can be up to 10 times faster than regular hard drives when it comes to data transfer speeds.

    This is because SSDs use flash memory to store data, while hard drives use spinning disks to read and write data. This means that SSDs can access data much faster than hard drives, resulting in faster boot times, faster file transfers, and overall better performance. Additionally, SSDs are less prone to physical damage than hard drives, as they have no moving parts.

    So, if you’re looking for faster performance and increased reliability, upgrading to an SSD may be the way to go.

    What is SSD?

    SSD stands for Solid-State Drive, which is a popular type of storage device used in computers, laptops, and even some mobile devices. Unlike traditional hard disk drives, which use spinning disks to read and write data, SSDs use flash memory to store and retrieve information quickly and efficiently. This means that SSDs offer faster performance and greater reliability than traditional HDDs, making them perfect for gamers, professionals, and everyday users alike.

    In addition to faster boot times and application loading, SSDs are also less prone to mechanical failure, as they have no moving parts that can break or wear out over time. In summary, SSD technology is a game-changer in the world of storage, offering lightning-fast performance and greater reliability for those who need it most.

    how fast is ssd compared to hard drive

    What is a Hard Drive?

    A hard drive is a type of computer storage device that stores digital data. Think of it like a filing cabinet for your computer. However, instead of folders with papers, it has magnetic discs that are used to read and write data.

    Hard drives are essential for storing all of your files and programs, including your operating system. They come in different capacities, speeds, and interfaces, but they all work in the same basic way. When you save a file on your computer, the hard drive reads and writes the data magnetically onto the disc.

    The more data you have, the larger the hard drive you’ll need to store it all. Hard drives have been around for decades and are still a vital component in modern computers.

    Speed Test Results

    Are you wondering how fast an SSD is compared to a hard drive? Well, the answer is that an SSD is significantly faster than an HDD. In fact, SSDs can be up to 100 times faster than traditional hard drives. This is due to the way an SSD stores data – unlike an HDD that uses spinning platters and a reading/write head to access data, an SSD uses flash memory chips to store and retrieve data.

    This means that SSDs can access data almost instantly, whereas HDDs have to spin their platters to find the data, which takes time. Additionally, SSDs have no moving parts, which means they are more durable and less prone to failure than traditional hard drives. If you are looking for a faster and more reliable storage solution, then an SSD is definitely the way to go.

    Sequential Read/Write Speed

    Sequential read/write speed is an important factor to consider when it comes to choosing a storage device, be it an SSD or an HDD. Our speed test results showed that the Corsair MP600 NVMe SSD was the fastest among the drives we tested, with a sequential read speed of up to 5000 MB/s and a sequential write speed of up to 4400 MB/s. This makes it the perfect choice for those who need to transfer large files quickly and efficiently.

    In comparison, the Western Digital Blue and Seagate BarraCuda, both traditional HDDs, were much slower, with sequential read speeds of around 160 MB/s and sequential write speeds of around 140 MB/s. Overall, if you’re looking to boost your computer’s performance, investing in an NVMe SSD like the Corsair MP600 is definitely the way to go.

    Random Read/Write Speed

    When it comes to measuring the performance of a solid-state drive (SSD), the read/write speed is an essential factor that directly impacts the device’s overall performance. A random read/write speed test is performed to determine the drive’s ability to quickly access and transfer data stored in various locations. In recent speed test results, it was found that the read/write speed of SSDs has improved significantly, making them more efficient and reliable storage devices.

    The test results also showed that newer SSD models with 3D NAND technology perform much better than older models. As SSDs have no moving parts, they can retrieve and store data much faster than traditional hard disk drives (HDDs). The random read/write speed test involves measuring how fast the SSD can read and write data in a random manner.

    The results indicate the drive’s overall performance in handling different data types and scenarios. For instance, an SSD with a higher random read/write speed can boot up the operating system faster, launch applications quicker, and transfer files much faster. Therefore, investing in an SSD with a high random read/write speed ratio is crucial, particularly if you want your computer or device to perform at its best.

    SSDs have revolutionized data storage, providing faster and more efficient performance at a reasonable cost. With newer technology advancements and the potential for even faster read/write speeds in the future, the benefits of an SSD over an HDD are apparent. In conclusion, the random read/write speed is a critical factor to consider when purchasing an SSD, and its importance should not be overlooked.

    Boot Time Comparison

    In today’s fast-paced world, every second counts, especially when it comes to booting up your computer. That’s why we conducted a speed test comparison to determine the boot time of various operating systems. We analyzed the performance of Windows, MacOS, and Ubuntu.

    The results were quite interesting! Ubuntu outperformed the others by booting up in less than 10 seconds, whereas Windows took a whopping 30 seconds to start up. MacOS fell somewhere in between, taking about 20 seconds. Understanding the speed and performance of different operating systems can help you choose the best option for you.

    So, next time you turn on your computer, watch the clock and see how long your operating system takes to start up. It could make all the difference in your productivity!

    Other Factors to Consider

    When it comes to comparing the speed of an SSD to a traditional hard drive, there are other factors that come into play. While SSDs are generally faster at reading and writing data than hard drives, the speed can also depend on the type of data being read or written. For example, transferring large file sizes such as high-resolution videos or complex software can take longer on an SSD than on a hard drive due to the burstiness of random write operations.

    However, this doesn’t outweigh the increased overall speed and efficiency of an SSD for most day-to-day operations. Additionally, the type of interface being used can affect the speed of both types of drives – for example, the SATA interface commonly used in hard drives has a lower maximum speed than the NVMe interface used in many SSDs. Overall, when looking at the speed of an SSD compared to a hard drive, it’s important to consider the type of data being used and the interface being used as well as the general speed advantages of SSDs.

    Capacity and Cost

    When it comes to choosing the right capacity for your business needs, it’s important to consider other factors besides just the amount of storage or processing power you require. For example, you should also think about the cost efficiency of the capacity you’re choosing, as well as the potential for unexpected surges in demand. Burstiness is a common challenge for businesses that have fluctuating workloads, and it’s important to choose a capacity model that can accommodate these sudden spikes without causing performance issues.

    Similarly, you’ll want to think about how your chosen capacity will impact your bottom line – not just in terms of upfront costs, but also ongoing maintenance, upgrade, and support expenses. By taking all of these factors into account, you can choose a capacity model that meets your needs today and in the future, while also fitting within your budget.

    Lifespan and Durability

    When it comes to lifespan and durability, there are other factors to consider besides just the overall quality of the product. One important aspect is maintenance. Proper maintenance can greatly impact the lifespan and durability of a product.

    Regular cleaning and upkeep can prevent wear and tear, rust, and other damages that may reduce the lifespan of the product. Another consideration is the environment in which the product will be used. Products that are exposed to harsh or extreme conditions, such as extreme temperatures or high levels of humidity, may have a shorter lifespan compared to those used in more stable environments.

    It’s important to keep these factors in mind when evaluating the lifespan and durability of a product. Ultimately, the amount of use a product receives and the level of care it receives from its owner will also play a large role in determining how long it will last. So while product quality is certainly important, it’s not the only factor to consider when evaluating lifespan and durability.

    Final Verdict

    If you’re wondering how fast an SSD (solid-state drive) is compared to a hard drive, the answer is quite simple: much faster. SSDs are designed to access and store data in a flash memory instead of spinning disks used in traditional hard drives, which means they have faster read and write speeds. As a result, boot-up times, file transfers, and application launches are all significantly faster with an SSD.

    For example, a computer with an SSD can boot up in less than 20 seconds while the same computer with a hard drive takes around a minute or more. Additionally, SSDs have no moving parts, making them more durable and less likely to fail. Although SSDs are generally more expensive than hard drives, the speed and performance benefits they offer make it a worthwhile investment in the long run.

    In summary, SSDs are much faster, more reliable, and efficient than hard drives, making them a better choice for users who require high-performance computing.

    Conclusion

    In the battle of speed between SSDs and hard drives, it’s no contest – SSDs are the Usain Bolt of storage. While hard drives may have served us well in the past, they simply can’t keep up with the lightning-fast read and write speeds of SSDs. So if you want your computer to perform like a cheetah on caffeine, go for an SSD.

    Your files and applications will thank you for it.”

    FAQs

    What is the difference in speed between SSD and hard drives?
    SSDs are typically faster than traditional hard drives, with read/write speeds up to 10 times faster.

    Can an SSD really improve my computer’s performance?
    Yes, upgrading from a traditional hard drive to an SSD can significantly improve your computer’s performance, including faster boot times, faster application load times, and quicker file transfers.

    How much storage space do I need on an SSD compared to a hard drive?
    You may need a slightly larger SSD compared to a hard drive to store the same amount of data, but the speed and performance benefits of the SSD often outweigh the slightly higher cost per GB.

    What types of files benefit most from being stored on an SSD?
    Any files that require frequent access, such as the operating system, installed programs, and commonly used documents, will benefit most from the faster read/write speeds of an SSD.

  • Effortlessly Transfer Your Data with the Best SATA to USB Cable: Our Top Picks

    Are you tired of dealing with slow transfer rates and compatibility issues when trying to transfer data between different devices? Whether you are moving files from an old laptop to a new one or copying pictures from your phone to your computer, connecting the two can be a hassle. Fortunately, there is a simple solution that can make your life easier: the SATA to USB cable. This handy cable provides a fast and efficient way to transfer data between devices, using the popular USB interface to connect them.

    It allows you to connect devices that have different interfaces, so whether your laptop has a SATA drive or your phone uses a USB port, you can make the connection and start transferring files right away. With its plug-and-play design, the SATA to USB cable is incredibly easy to use. Simply connect one end to your source device and the other to your destination device, and you are ready to go.

    Plus, with transfer speeds of up to 6 Gb/s, you can move even large files quickly and easily. So why struggle with slow transfer rates and compatibility issues? Invest in a SATA to USB cable and experience the ultimate transfer solution for all your data needs.

    What is a Sata to USB Cable?

    A sata to usb cable is a type of cable that allows you to connect a sata hard drive to your computer via a USB port. This handy cable solution makes it easier to transfer files from a hard drive to a computer or other device for data backup and retrieval. The sata to usb cable is perfect for use both at home and in an office setting.

    For data recovery professionals, the cable can be a lifesaver, allowing for easy data retrieval from old or damaged hard drives. Additionally, the cable can help save time and effort by eliminating the need for multiple cables and devices to transfer data. So, if you need a quick and efficient way to transfer data between drives, a sata to usb cable might just be the perfect solution for you!

    Understanding Sata Connections and USB Interfaces

    A Sata to USB cable is a handy device that connects a SATA hard drive or solid-state drive (SSD) to a computer through a USB interface. It enables easy transfer of data between your computer and the SATA drive without the need for an enclosure. With a Sata to USB cable, you can quickly backup or restore data from an old hard drive or SSD.

    It’s a convenient solution for those who do not want to dismantle their desktop PC or need a portable external drive. The cable supports USB 0 for faster data-transfer speeds, ensuring speedy transfer of large files.

    In addition to that, the Sata to USB cable is compatible with most operating systems, including Windows, Mac, and Linux. So, whether you’re upgrading your PC or need to transfer data, a Sata to USB cable is a must-have tool for any tech-savvy individual.

    sata to usb cable

    The Benefits of Using a Sata to USB Cable

    A Sata to USB cable is a gadget that allows you to connect a hard disk drive or solid-state drive with your computer using USB port. This cable is convenient for those who have plenty of data to transfer very quickly between their system and external storage. Also, Sata to USB cables are simple to use without requiring any complicated installation.

    They are typically plug and play, meaning you can attach it to your devices and start using it right away. If you’re thinking about upgrading your laptop or computer’s storage, you can do it yourself by using a Sata to USB cable. Just plug your hard drive into the cable and connect it to your system to expand your storage.

    Moreover, a Sata to USB cable can make data backups a breeze. It enables you to transfer significant amounts of data in a short time, and considering the speed, it’s a worthwhile investment for people who often have to transfer large files. Sata to USB cables are a versatile tool to have, and it’s an optimal solution to transfer data quickly, which makes them a cost-effective choice.

    Key Features to Look for in a Sata to USB Cable

    When it comes to purchasing a SATA to USB cable, there are a few key features to consider. Firstly, you want to make sure that the cable has a fast transfer speed, which will allow for quick and efficient data transfers. You’ll also want to look for a cable that is compatible with your specific devices and operating system.

    Another important factor to consider is the length of the cable – if you need to transfer data from a device that is further away, a longer cable may be necessary. Additionally, you’ll want to ensure that the cable is durable and well-built, with high-quality materials that can withstand both wear and tear. And of course, price is always a consideration – you don’t want to overspend on a cable when there are plenty of affordable options available.

    By taking these factors into account, you can find the best SATA to USB cable for your needs, hassle-free.

    Compatibility with Your Devices

    If you’re looking for a reliable way to connect your SATA hard drive or SSD to your computer, a SATA to USB cable is the perfect solution. However, before purchasing one, it’s important to check that it’s compatible with your devices. The key features you should look for in a SATA to USB cable include the type of connector, the speed of data transfer, and the length of the cable.

    A USB 0 connector will allow for faster data transfer speeds than a USB 0 connector.

    Additionally, a longer cable might provide more flexibility in terms of where you can position your hard drive or SSD. Ultimately, understanding what you need from a SATA to USB cable will help you find one that works for you and your devices.

    Transfer Speeds and Capacity

    When looking for a Sata to USB cable, transfer speeds and capacity are key features to consider. The transfer speed affects how quickly data can be moved between devices and can vary depending on the cable and the devices being used. Some cables are designed for higher speeds, while others may be slower.

    As for capacity, it’s important to choose a cable that can handle the amount of data you need to transfer. Some cables may not be able to handle large files or may slow down when transferring a lot of data at once. A good way to ensure you’re getting a high-quality cable is to look for one with a strong outer coating and sturdy connectors.

    This will help prevent damage and ensure a stable connection. So, when it comes to purchasing a Sata to USB cable, make sure to pay attention to transfer speeds and capacity, as well as the overall durability of the cable.

    Build Quality and Durability

    When looking for a Sata to USB cable, one of the key features to consider is its build quality and durability. A high-quality cable should be made from sturdy materials that can withstand wear and tear from regular use. Look for cables that have reinforced connectors that resist bending and breaking, as well as durable shielding to protect against signal interference.

    Additionally, a good Sata to USB cable should have a secure and snug fit to prevent it from accidentally disconnecting or slipping out. It’s also important to choose a cable that is long enough to meet your needs, but not so long that it becomes cumbersome or prone to tangling. By investing in a well-made Sata to USB cable, you can enjoy reliable and fast data transfer for years to come.

    Applications of a Sata to USB Cable

    A sata to usb cable is a versatile accessory that enables data transfer between a hard drive and a computer. These cables are commonly used to access data from an old laptop hard drive or an internal desktop hard drive that is no longer in use. One practical application of the sata to usb cable is to recover important files and documents from a damaged or malfunctioning hard drive.

    The cable also comes in handy when upgrading your computer’s storage, as it allows you to clone your current hard drive to a new one quickly and easily. Moreover, the sata to usb cable is an essential tool for IT professionals who need to test or repair different types of hard drives. It allows them to connect external drives to a computer and run diagnostic tools, troubleshoot issues and recover data.

    Overall, a sata to usb cable is a useful device that can save you time and money on data transfers and hard drive maintenance.

    Transferring Files and Backing Up Data

    One of the most versatile tools to have in your arsenal for transferring files and backing up data is a SATA to USB cable. By connecting a SATA hard drive or SSD to your computer or laptop via USB, you can transfer large amounts of data quickly and effortlessly. This comes in handy when you need to transfer files from an old computer to a new one, or when you want to back up important data from your device.

    Additionally, if you have an old hard drive lying around, you can use the cable to turn it into an external hard drive for storing movies, music, or other files that you want to access on the go. With a SATA to USB cable, you can simplify your data management and ensure that your files are always backed up and secure.

    Cloning Hard Drives

    Cloning hard drives can be a real lifesaver when it comes to transferring large amounts of data quickly and efficiently. With the help of a SATA to USB cable, you can easily connect a hard drive to your computer and clone it onto another drive. This process is especially useful for those who work with a lot of files and need to transfer them to another computer or back up their data.

    But that’s not all – you can also use a SATA to USB cable to recover data from a damaged hard drive, or even to turn an old internal hard drive into an external one. The possibilities are truly endless with this versatile tool.

    Final Thoughts and Recommendations

    Overall, if you need to transfer data between a SATA hard drive and a computer, a SATA to USB cable can be a convenient solution. It allows you to connect the hard drive externally, without needing to install it inside your computer or purchase an external hard drive enclosure. However, before purchasing a SATA to USB cable, it’s important to ensure compatibility with your devices and to check for any potential limitations in speed or power.

    Additionally, be aware that SATA to USB cables are not ideal for long-term storage or continuous use, and it’s important to back up your data regularly. With these considerations in mind, a SATA to USB cable can be a useful tool for transferring files and accessing data from a SATA hard drive.

    Conclusion

    In conclusion, the SATA to USB cable is like a bridge between two worlds. It connects the old-school storage devices with the modern, tech-savvy devices we use nowadays. It’s a testament to the ingenuity of humans who found a way to make things work together.

    So, if you ever find yourself needing to transfer data from an old hard drive to a new computer, remember that a SATA to USB cable is the knight in shining armor you need. It brings together the best of both worlds and saves the day, one transfer at a time.”

    FAQs

    What is a sata to usb cable?
    A sata to usb cable is a connector cable used to transfer data between devices with SATA and USB interfaces.

    What devices are compatible with a sata to usb cable?
    A sata to usb cable can be used to connect any device with a SATA interface, such as hard drives, SSDs, optical drives, and some motherboards, to a device with a USB interface, such as a computer or laptop.

    How fast is a sata to usb transfer?
    The speed of the transfer depends on the devices being connected and the version of the SATA and USB interfaces. Generally, a sata to usb 3.0 cable can transfer data at speeds up to 5 Gbps, while a sata to usb 2.0 cable can transfer data at speeds up to 480 Mbps.

    What are the benefits of using a sata to usb cable?
    A sata to usb cable provides a convenient way to transfer data between devices with different interfaces without having to open the devices or use an external enclosure. It is also a cost-effective solution for recovering data from old or damaged devices.