
If you’re a Mac user, you know that having enough storage space is crucial for keeping your computer running smoothly and efficiently. One way to increase your storage is by using an external Solid State Drive (SSD), and the Samsung T7 is a popular choice. But how do you use it with your Mac? In this blog, we’ll take you through step-by-step instructions on how to set up and start using your Samsung T7 SSD on your Mac.
Plus, we’ll give you some tips and tricks for getting the most out of your new storage device. So, let’s dive in!
Check Compatibility
If you’re wondering how to use Samsung T7 SSD on Mac, the first step is to check for compatibility. Fortunately, the T7 is compatible with a range of operating systems, including macOS, but you’ll want to make sure your Mac meets the requirements before you get started. In general, you’ll need to be running macOS X
10 or later, and you’ll need a USB Type-C port with support for USB 2 Gen 2 (10Gbps) or higher. If your Mac doesn’t have a USB Type-C port, you may need to use an adapter.
Once you’ve confirmed compatibility, you can simply plug in your T7 SSD and start using it on your Mac like any other external drive. With its fast read and write speeds and compact design, the T7 makes a great choice for anyone looking to expand their Mac’s storage or improve its performance.
Confirm Your Mac has a USB-C Port
When it comes to using USB-C accessories on your Mac, the first step is to confirm that your computer has a USB-C port. This feature was first introduced in 2015 with the MacBook, and has since become standard on most new Mac models. However, if you are still using an older Mac, you may need to double-check its compatibility.
It’s important to note that while USB-C looks similar to the traditional USB-A connector, they are not the same and are not interchangeable. Before purchasing any USB-C devices, be sure to confirm that your Mac has this port to avoid any compatibility issues. An easy way to check is to look for the port on the side of your Mac or consult the device’s user manual for more information.
Ensure Your Mac is Running macOS 10.12 or Later
If you’re planning on upgrading your Mac or purchasing a new one, the first step is to make sure it’s compatible with the latest operating system. Apple’s macOS 12 or later is the current operating system for Macs, and it comes with a range of new features and improved security measures.
Before upgrading, however, it’s important to check the compatibility of your Mac. You can do this by going to the Apple menu, selecting “About This Mac,” and checking the version number. If your Mac is running macOS
12 or later, you’re good to go. If not, you may need to upgrade your hardware to ensure compatibility. It’s crucial to ensure compatibility before upgrading, as trying to install an incompatible operating system can lead to significant issues.
So, take a few minutes to check your Mac’s compatibility, and enjoy the benefits of the latest operating system.
Connect the Samsung T7 SSD to your Mac
If you’re wondering how to use Samsung T7 SSD on your Mac, worry not, the process is straightforward. The first step is to ensure your Mac has USB Type-C ports. If it doesn’t, you’ll need a USB Type-C to USB-A adapter to connect to the SSD.
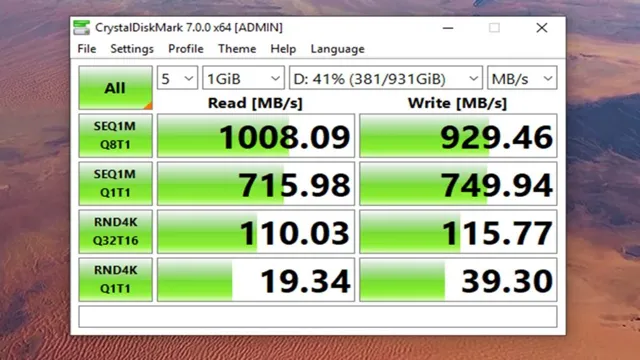
Once you’ve established the connection, your Mac should detect the T7 and recognize it as an external storage device. From here, you can choose to manually transfer files to the SSD or automatically backup your Mac using Samsung’s software, which you can download from their website. With transfer speeds of up to 1,050MB/s, the T7 is an excellent choice for anyone looking to quickly store or backup massive amounts of data.
So, if you need a reliable external storage solution, the Samsung T7 SSD is definitely worth considering.
Plug in the USB-C Cable to both the SSD and Mac
If you’re looking to expand your MacBook’s storage space, the Samsung T7 SSD is a great choice. To get started, you’ll need to connect the SSD to your Mac. The first step is to plug in the USB-C cable to both the SSD and your computer.
This will ensure your Mac recognizes the device and you can start using it. Don’t worry if you’ve never connected an external drive before; the process is quick and straightforward. The Samsung T7 SSD is compact and portable, making it a perfect choice for anyone who needs to work on multiple devices.
Plus, it’s lightning fast, so you can transfer files in no time. The great thing about the T7 SSD is that it’s compatible with both Mac and Windows devices, so you can use it for any computer you have. It’s a great accessory for anyone who’s always on the go and needs to carry around important files.
In no time, you’ll be able to start transferring documents, photos, and videos to your new storage device. So, get started and connect your Samsung T7 SSD to your Mac today!
Authenticate the Connection if Prompted
When connecting your Samsung T7 SSD to your Mac, you may be prompted to authenticate the connection. This is a security measure that ensures only authorized devices can access your data. To authenticate, simply enter your Mac’s password when prompted.
It’s important to note that if you don’t authenticate the connection, you won’t be able to access your data on the SSD. So, take a few seconds to go through the prompt and authenticate it. It’s that simple! Plus, it gives you peace of mind knowing that your data is secure and protected.
So, next time you connect your Samsung T7 SSD to your Mac, make sure to authenticate the connection so you can access your data without any hassle.
Format the Samsung T7 SSD for Mac Use
If you’re a Mac user and you’ve recently purchased a Samsung T7 SSD, you’ll need to format it before you can start using it. Fortunately, the process is pretty straightforward. First, make sure your Samsung T7 SSD is connected to your Mac.
Then, go to the “Disk Utility” app, which you can find by searching for it in Spotlight or by navigating to Applications > Utilities > Disk Utility in Finder. Once you’re in Disk Utility, you should see your Samsung T7 SSD in the list of drives. Select it and click on “Erase” in the toolbar.
From there, you can choose the format you want to use – we recommend choosing “Mac OS Extended (Journaled)” unless you have a specific reason to use a different format. Rename your drive to something that makes sense to you, and click on “Erase” again to confirm. Once the formatting process is complete, you’ll be able to use your Samsung T7 SSD just like any other external hard drive on your Mac.
It’s that simple!
Open Disk Utility on your Mac
If you’ve recently purchased a Samsung T7 external SSD and need to format it for use on your Mac, you’re in luck! The first step is to open Disk Utility, which can be found in the Utilities folder within your Applications folder. Once opened, select the Samsung T7 from the list of devices on the left-hand side. Then, click on the “Erase” button at the top of the window.
You’ll be prompted to choose a Name, Format, and Scheme for the device. For Mac use, it’s recommended to choose “Mac OS Extended (Journaled)” as the format and “GUID Partition Map” as the scheme. Once you’ve made your selections, click “Erase” and wait for the process to complete.
With these simple steps, your Samsung T7 SSD will now be ready for use on your Mac.
Locate the Samsung T7 SSD and Choose Erase
If you’re looking to use a Samsung T7 SSD with your Mac, the first thing you’ll need to do is format it. Start by locating the Samsung T7 SSD in your Finder window. Once you’ve found it, select the option to erase the drive.
This will wipe all data from the SSD and prepare it for use on your Mac. Be sure to select the option to format the drive for Mac use, as this will ensure that the file system is compatible with macOS. This process may take some time to complete, depending on the size of your SSD.
Once it’s done, you’ll be able to use your Samsung T7 SSD with your Mac as you would any other external drive. Just drag and drop files onto the drive to transfer them, or use it as a backup location for your important data. By formatting your Samsung T7 SSD for Mac use, you’ll be able to take full advantage of its fast transfer speeds and large storage capacity.
Select Mac OS Extended (Journaled) as the Format Type
To use the Samsung T7 SSD with your Mac, you’ll need to format it accordingly. One of the first and most important steps in formatting is selecting the correct Format Type. For Mac users, the best option is Mac OS Extended (Journaled).
This format is ideal for Apple’s operating system because it supports journaling, which creates a backup of the file system’s metadata. This added layer of security means that if there’s a power outage or unexpected shutdown, your data won’t be lost or corrupted. Additionally, Mac OS Extended (Journaled) allows for files larger than 4GB, which is helpful for those working with large files like video content.
In summary, when formatting the Samsung T7 SSD for use with your Mac, ensure that you select Mac OS Extended (Journaled) as the format type to guarantee the best compatibility and security for your data.
Rename the Drive If Desired
When you want to use your Samsung T7 SSD with your Mac, you need to format it for Mac use. One important step during this process is renaming the drive if desired. When you plug in your Samsung T7 SSD, it will likely have a generic name assigned to it, such as “Untitled”.
You can change this name to something more specific to make it easier to recognize and locate the drive on your Mac. To do this, simply right-click on the drive icon on your desktop, select “Get Info”, and then type the desired name in the “Name & Extension” field. It’s important to note that while renaming the drive won’t affect the performance of the SSD, it does make it easier to use, especially if you have multiple external drives connected to your Mac.
Overall, renaming your Samsung T7 SSD is a quick and simple step in the process of formatting it for use with your Mac.
Start Using Your Samsung T7 SSD on Mac
If you’ve recently purchased a Samsung T7 SSD and are wondering how to use it on your Mac, the process is quite simple. First, connect the SSD to your Mac using the included USB-C cable. Next, go to your “Finder” preferences and make sure that “External disks” is selected under the “Sidebar” tab.
This will ensure that your SSD is visible in the Finder. You can then drag and drop files onto the SSD just like any other external drive. You may also want to consider formatting the SSD to work specifically with your Mac, which can be done using the “Disk Utility” application.
Overall, using your Samsung T7 SSD on your Mac should be a smooth and seamless experience, providing you with fast and reliable storage for all of your important files.
Move Files to and from the SSD as Usual
If you’re a Mac user who just got a Samsung T7 SSD, congratulations! You’ve got a reliable, fast, and secure tool to store and access your data on-the-go. But how do you actually start using it? Well, the good news is that it’s as easy as moving files to and from any external drive. Simply connect your Samsung T7 SSD to your Mac via the USB-C cable included in the package, and it should be recognized automatically.
You can then use your Finder and drag-and-drop files or folders from your Mac’s internal storage to the Samsung T7 SSD, or vice versa. Don’t forget that you can also create new folders, rename files, and delete them on the Samsung T7 SSD as you would do on your Mac. Remember to safely eject the drive before unplugging it to avoid data corruption or loss.
With your Samsung T7 SSD, you’ll have ample space, lightning-fast speed, and advanced encryption to keep your files safe and accessible anytime, anywhere.
Safely Eject the SSD before Disconnecting It
When it comes to starting to use your Samsung T7 SSD on Mac, one important step to keep in mind is to safely eject the SSD before disconnecting it. This is a crucial step as it ensures that all of the data on the SSD is properly saved and not corrupted during the disconnection. To do this, simply hold down the “Control” key and click on the SSD icon on the desktop.
From there, select “Eject,” and wait until the SSD icon disappears before physically disconnecting the drive. By following this step, you can ensure that your Samsung T7 SSD stays in good working condition for longer.
Conclusion
Congratulations, you’re now officially an expert on how to use the Samsung T7 SSD with your Mac! With its lightning-fast speed and ample storage capacity, this little gadget is a must-have for anyone looking to stay organized and efficient. So go ahead, transfer, backup, and store all your important files with ease. With the Samsung T7 SSD, you’ll never have to worry about running out of space or losing important data again.
It’s like having a personal assistant for your digital life – fast, reliable, and always ready to help you stay on top of things. So what are you waiting for? Get your hands on a Samsung T7 SSD today, and experience the future of data storage on your Mac!”
FAQs
Is Samsung T7 SSD compatible with Mac?
Yes, Samsung T7 SSD is compatible with Mac. You can use it with macOS X version 10.10 or later.
How do I connect Samsung T7 SSD to my Mac?
You can connect Samsung T7 SSD to your Mac using the USB-C to USB-C cable provided with the drive. If your Mac has a Thunderbolt 3 port, you can use a Thunderbolt 3 cable for faster data transfer.
Do I need to install any drivers to use Samsung T7 SSD on Mac?
No, you don’t need to install any drivers to use Samsung T7 SSD on Mac. It is a plug-and-play device and will be detected by your Mac automatically.
How do I format Samsung T7 SSD for Mac?
You can format Samsung T7 SSD for Mac using the Disk Utility tool. Connect the drive to your Mac, open Disk Utility, select the drive from the list, and choose the format as Mac OS Extended (Journaled) or APFS depending on your macOS version.