Getting started with a new portable SSD can often feel intimidating, especially if you’re not familiar with the setup process. That’s why we’re here to guide you through the process of setting up your new SanDisk Extreme Portable SSD. This powerful device is perfect for keeping your files safe and secure, and ensuring you always have access to your important data.
From the moment you take it out of the box, we’ll walk you through the setup process step-by-step, so you can get started using your new device in no time. Are you ready to learn how to set up your SanDisk Extreme Portable SSD? Let’s get started.
System Requirements
Setting up a Sandisk Extreme Portable SSD is a straightforward process, but it’s important to make sure your system meets the necessary requirements. Firstly, ensure that your computer or laptop has a USB 1 Gen 2 Type-C port, which is needed to take full advantage of the drive’s speeds.
If your computer does not have this port, you can purchase an adapter for it. Additionally, it’s important to make sure your operating system is compatible with the drive. The Sandisk Extreme Portable SSD is compatible with Windows 10,
1, and 7, as well as macOS 11 or later. It’s also important to note that the drive is preformatted with the exFAT file system, which is compatible with both Windows and macOS without any additional installation.
However, it’s recommended that you download the SanDisk SecureAccess™ software to protect your data and ensure privacy, which can be installed on both Windows and macOS systems. By ensuring your system meets these requirements, you can enjoy the full benefits of the Sandisk Extreme Portable SSD.
Check if your computer has a USB type C port
If you’re considering purchasing a device that requires a USB type C port, it’s important to check if your computer has one before making the purchase. USB type C ports are becoming increasingly popular due to their fast data transfer speeds and ability to charge devices. To check if your computer has a USB type C port, look for a small, oval-shaped port that is usually colored light blue.
If you don’t see one, your computer may not support USB type C technology. However, you may be able to purchase an adapter that allows you to use USB type C devices with your computer. It’s worth noting that the absence of a USB type C port is not necessarily a deal-breaker, as many devices still support older versions of USB technology.
But if you’re looking for the most up-to-date technology, it’s worth investing in a computer that has a USB type C port.
Ensure that your operating system is updated to Windows® 10 or macOS® Sierra (or higher)
If you want your computer to run smoothly and securely, it’s important to make sure that your operating system is up-to-date. This means upgrading to Windows® 10 or macOS® Sierra (or a newer version of each). By doing this, you can take advantage of the latest features, security patches, and bug fixes that have been released by the operating system’s developers.
This can help to keep your computer running smoothly and prevent common problems such as crashes, freezes, and slowdowns. Plus, new operating systems often come with new tools and apps that can improve your computing experience and make it easier to get things done. So, if you haven’t already upgraded your operating system, it’s definitely worth considering.
Just be sure to check your computer’s system requirements first to make sure it can handle the update.
Connecting the Device
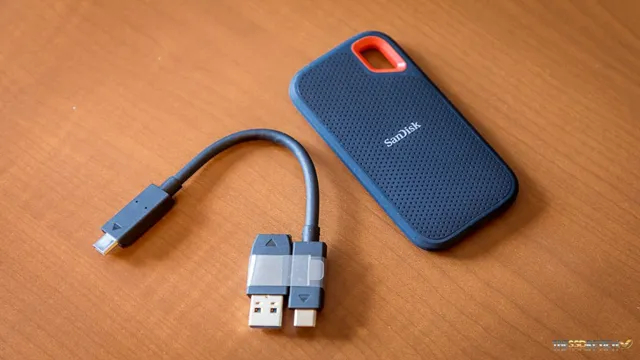
Are you wondering how to set up your SanDisk Extreme Portable SSD? It’s actually a pretty simple process. First, connect the device to your computer using the included USB Type-C cable. If your computer doesn’t have a USB Type-C port, don’t worry – a Type-C to Type-A adapter is also included.
Once the device is connected, it should appear on your computer as a new drive. If nothing appears, make sure the cable is securely plugged in and try a different USB port. If the issue persists, it could be a driver problem, and you may need to download specific drivers from the SanDisk website.
But in most cases, you should be able to start transferring your files right away. With speeds up to 1050 MB/s, the SanDisk Extreme Portable SSD is a great choice for anyone who needs fast, reliable storage on the go.
Connect the USB-C cable to the SanDisk Extreme Portable SSD and your computer’s USB Type-C port
Connecting the SanDisk Extreme Portable SSD to your computer is simple and straightforward. All you need to do is take the USB-C cable that comes with the device and connect one end to the SanDisk Extreme Portable SSD and the other end to your computer’s USB Type-C port. Once the cable is connected securely, your computer should recognize the device and allow you to access your files and folders stored on the SSD.
It’s important to note that the USB Type-C port on your computer should be compatible with the device, so make sure to check your computer’s specifications beforehand. With this easy connection process, you’ll be able to work with your files quickly and efficiently, making the SanDisk Extreme Portable SSD a great option for on-the-go storage. So, go ahead and connect your device and experience the benefits of this powerful and versatile storage solution.
An LED light should turn on when the connection is successful.
Connecting your device can be a simple process, but it’s important to know what to expect. Once you’ve plugged in your device and turned it on, you may need to complete a few steps to connect it to your network or other devices. One indication that your connection has been successful is the LED light on your device turning on.
This light should remain lit as long as your device is connected, and it provides an easy way to confirm that everything is working as it should be. If you’ve followed the instructions provided with your device and the LED light isn’t turning on, you may need to troubleshoot the connection to determine what’s causing the issue. But in general, if you see that little LED light shining bright, you can breathe a sigh of relief and get ready to start using your newly connected device.
Transferring Data
If you’re looking for a fast and reliable way to transfer data, the SanDisk Extreme Portable SSD is one device you should definitely consider. Its compact size belies the powerful performance it delivers, making it a popular choice for professionals and everyday users alike. Setting it up is also a breeze-just connect it to your computer or device using the USB-C cable provided, and you’ll be ready to go.
Once connected, you can copy files to or from the drive just like you would with any other external storage device. The SanDisk Extreme Portable SSD is also compatible with both Windows and macOS, so you can use it with almost any computer or device. Whether you’re transferring large video files, high-resolution images, or even a full backup of your data, the SanDisk Extreme Portable SSD is up to the task.
So why not give it a try and experience the convenience and performance it has to offer?
Once the device is connected, open the file explorer or Finder to access the SanDisk Extreme Portable SSD.
Transferring data from your computer to the SanDisk Extreme Portable SSD is a breeze! Once you have connected the device to your computer, you can immediately access it through the file explorer or Finder. From here, simply select the files you want to transfer and drag them over to the SanDisk drive. The speed of the transfer will depend on the size of the files and the USB port you are using, but the SanDisk Extreme Portable SSD allows for impressive read speeds up to 1050MB/s.
This means that you can transfer large files, such as high-resolution photos or 4K videos, in a matter of seconds. The process is straightforward and user-friendly, making it the perfect device for those who need to transfer data quickly and easily. Overall, the SanDisk Extreme Portable SSD is a reliable and efficient tool for all of your data storage needs.
To transfer files, simply drag and drop them into the SanDisk Extreme Portable SSD folder.
Transferring files from your computer to your SanDisk Extreme Portable SSD is a breeze. All you need to do is simply drag and drop the files into the SanDisk Extreme Portable SSD folder. This process is straightforward and easy to do, even for those who are not technology experts.
It’s important to note that the SanDisk Extreme Portable SSD is designed for fast data transfer speeds, which means you’ll be able to transfer even large files quickly and smoothly. Whether you’re working with photos, videos, or documents, transferring your files to the SSD is a simple and efficient process. With its compact and durable design, the SanDisk Extreme Portable SSD is the ideal storage solution for those on the go.
So, if you’re looking for a reliable and fast way to transfer your files, look no further than the SanDisk Extreme Portable SSD.
Ejecting the Device
If you want to know how to set up your Sandisk Extreme Portable SSD, it’s crucial to also know how to properly eject the device. This process is essential in ensuring that your data is safe and secure. To eject your device, you can either use the eject button on your computer or right-click on the device icon and select “Eject.
” Once you’ve completed these steps, it’s safe to unplug the device. It’s important to avoid physically disconnecting any external SSD without ejecting it first, as this can corrupt your data and damage the device. So, don’t skip this step! Always remember to properly eject your Sandisk Extreme Portable SSD and protect your valuable information.
Before disconnecting the device, ensure that all file transfers are complete.
When it comes to disconnecting a device from your computer, it’s important to ensure that all file transfers are complete before ejecting. This means waiting until all your files have finished copying to or from the device before disconnecting it. Ejecting the device before the transfer is complete could cause data loss or file corruption.
So, take your time and be patient – you’ll be glad you did. Once you’re certain everything has finished copying, you can then safely eject the device following your computer’s instructions. Remember, it’s always better to be safe than sorry when it comes to your important files.
So, take the time to ensure everything is in order before disconnecting your device.
Select the SanDisk Extreme Portable SSD in the file explorer/Finder, and click Eject.
Ejecting the SanDisk Extreme Portable SSD is a simple and straightforward process that ensures the safety of your data and the longevity of your device. It’s important to safely eject the device before disconnecting it from your computer to prevent data loss or corruption. To eject the device, simply select the SanDisk Extreme Portable SSD in your file explorer or Finder, and click on the eject icon.
The device will then safely disconnect from your computer, and you can safely unplug it from your system. It’s crucial to follow this step every time you’re disconnecting an external drive to avoid any mishap. By doing so, you’re not only safeguarding your data but also prolonging the lifespan of your device.
So, it’s always better to be safe than sorry. Remember, when it comes to external storage devices, “eject before you disconnect” is the golden rule to follow!
Safely disconnect the USB-C cable from the device and the computer
When you’re finished using a USB-C device with your computer, it’s important to safely disconnect the cable from both devices to prevent data loss or corruption. This is known as ejecting the device, and it’s a simple process that only takes a few seconds. To eject the device, you’ll first need to make sure that all files and programs that are using the device have been properly closed or saved.
Then, click on the eject icon, which usually looks like an upward-pointing arrow next to the device name in your computer’s file explorer or desktop. Once you click this icon, you’ll get a notification that it’s safe to remove the device. At this point, you can safely disconnect the USB-C cable from both your device and your computer.
By taking this simple step, you’ll protect your files and ensure that they stay organized and accessible for future use.
Conclusion
In conclusion, setting up the Sandisk Extreme Portable SSD is as easy as a walk on the beach. All you need is a USB-C or USB-A cable, plug it in, and let the SSD do the heavy lifting. With lightning-fast transfer speeds and robust durability, it’s the perfect tool for anyone looking to store their files with ease.
So, whether you’re a photographer, traveler, or simply looking for extra storage space, the Sandisk Extreme Portable SSD is your new best friend on this digital journey. Just remember to keep your toes in the sand and your data in the SSD.”
FAQs
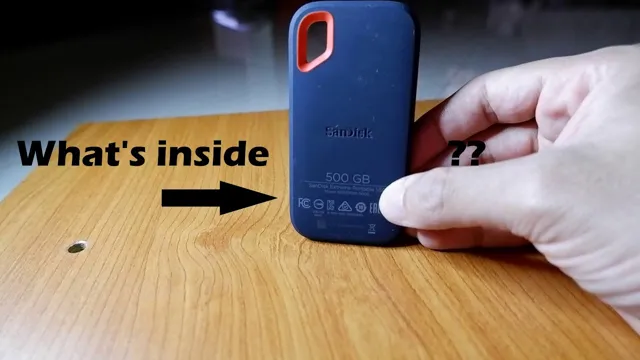
What is the maximum capacity of the SanDisk Extreme Portable SSD?
The maximum capacity of the SanDisk Extreme Portable SSD is 2TB.
Is the SanDisk Extreme Portable SSD compatible with both Mac and PC?
Yes, the SanDisk Extreme Portable SSD is compatible with both Mac and PC.
What is the read speed of the SanDisk Extreme Portable SSD?
The read speed of the SanDisk Extreme Portable SSD is up to 550MB/s.
How do I set up my SanDisk Extreme Portable SSD for the first time?
To set up your SanDisk Extreme Portable SSD for the first time, insert the USB-C to USB-C cable into your computer and the SSD. Then, follow the on-screen prompts to format and partition the SSD for your specific needs.
