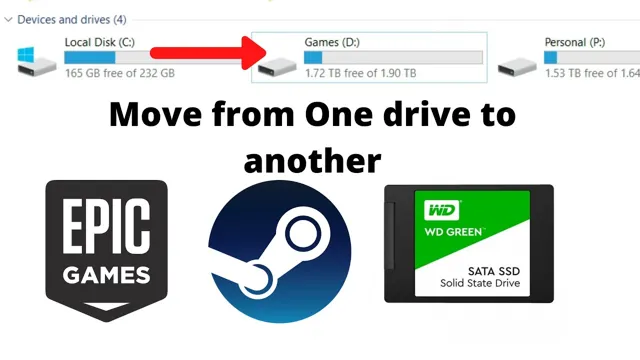
Are you an avid gamer? Do you find yourself running out of space on your SSD while trying to download all the latest and greatest games? Fear not, as this blog will guide you on how to move games from your SSD to your HDD, providing you with more space on your primary drive without losing access to all your beloved games. Moving games from an SSD to an HDD may seem daunting, but it is a simple process that can significantly benefit your computer’s overall performance. SSDs are known for their lightning-fast read and write speeds, but they tend to have smaller storage capacities than their HDD counterparts.
Moving games to your HDD is a surefire way of freeing up space while ensuring that your games run smoothly without any lag or hiccups. Moreover, moving your games from your SSD also allows you to prioritize your most used applications and data on one drive while storing other files, games, and programs on another. This process can save you time and hassle, especially when it’s time for a computer upgrade.
So, are you ready to get started on moving games from your SSD to your HDD? Stay tuned for our next blog post, where we will provide a comprehensive guide on how to transfer games from one drive to another using various methods. With just a few clicks, you’ll be well on your way to gaining more storage space and better computer performance.
Step 1: Locate the Game Files
If you’re running out of space on your SSD, you may want to move some of your games over to your HDD. The first step in this process is locating the game files. This can typically be done through your game launcher.
For example, if you use Steam, you can right-click the game in your library and select “Properties”. From there, go to the “Local Files” tab and click “Browse Local Files”. This will take you to the folder where the game is installed.
Once you’ve located the game files, you can begin the process of moving them to your HDD.
Open ‘File Explorer’ and navigate to the SSD
When it comes to locating your game files on your SSD, the first step you need to take is to navigate to the directory where they are saved. To do this, you need to open the File Explorer by clicking on the Windows logo on the taskbar or pressing the Windows key + E on your keyboard. Once the File Explorer opens, look for your SSD under the “This PC” section on the left-hand side of the window.
Click on it to expand the folder and see the contents inside. If you have installed your game on the SSD, you should be able to see its files and folders listed under the appropriate directory. From here, you can easily locate the game files you need and make any necessary changes or modifications to them.
By following this simple yet essential process, you can quickly access your game files on your SSD and start gaming without any hassle.
Find the folder with the game you want to move
To move a game to a different location on your computer, you need to first find the game files. This may seem like a daunting task, but with a little bit of exploration, you should be able to locate the necessary folder. Start by opening your file explorer and searching for the game’s name.
If you have recently played the game, it may appear in your recently used files or in your gaming library. Once you have found the game folder, you can easily move the files to a new location on your computer. This process can be helpful if you need to clear up storage space on a particular drive or if you want to consolidate your gaming library to one location.
By taking the time to locate the game files, you can continue to enjoy your favorite games without worrying about storage space or disorganization.
Step 2: Copy the Game Files
Now that you have identified which games take up too much space on your SSD, it’s time to move them over to your HDD. To start, you’ll need to copy the game files from your SSD to the desired location on your HDD. You can do this manually by locating the game folder in your SSD’s file explorer and dragging it to the designated folder in your HDD.
Alternatively, you can use the game distribution platform’s built-in backup and restore feature to move the game files effortlessly. Once the copying process is finished, you’ll need to ensure that the game is properly installed on your HDD and running smoothly. It’s essential to note that some games may require additional configurations, such as updating drivers or adjusting settings, to work correctly on your HDD.
With your game files safely transferred to your HDD, you’ll have more room on your SSD for essential files and faster load times for the games you have installed there.
Select the game folder and right-click to copy
Now that you know where your game folder is located, it’s time to make a copy of it. Right-click on the game folder and select “copy” from the drop-down menu. This will create a duplicate of your game files that you can save to another location, such as an external hard drive or cloud storage.
Copying your game files is important because it serves as a backup in case something happens to your original files, such as a hard drive failure or accidental deletion. Plus, having a copy of your game files makes it easier if you want to transfer the game to another device or share it with a friend. So be sure to complete this step before moving on to the next one.
Navigate to the HDD and create a new folder
After downloading the game files, the next step is to copy them to your HDD. Start by navigating to the HDD and creating a new folder. This will serve as the destination folder for the game files.
You can name the folder anything you like, but make sure it’s easy to remember and locate. Once you’ve created the new folder, go back to the downloaded game files and select them all. Then, use the copy function to copy the files to the new folder you just created on your HDD.
This step is critical as it ensures that the game files are stored in a safe and secure location. It also helps to keep your computer organized and free from clutter. When games are installed on your computer’s C drive, it can slow down your system and take up valuable space.
By storing game files on your HDD, you free up space on your C drive, making your computer run smoother. When copying files, it’s essential to ensure that you have enough space on your HDD. Games can be large, and if you don’t have enough space, the copying process may fail.
Therefore, it’s best to check the available space on your HDD before starting the copying process. If you need more space, consider deleting existing files or transferring them to an external drive. In summary, copying game files to your HDD is a straightforward process.
Create a new folder, select the downloaded files, and copy them to the new folder on your HDD. By doing so, you save space on your C drive, keep your computer organized, and ensure that the game files are stored in a safe and secure location.
Right-click in the new folder and select ‘Paste’
To move a game file, the first step is to create a new folder. This is where you’ll be storing the game files before moving them to their final destination. To create a new folder, right-click on your desktop, select “New” and then select “Folder”.
Give the folder a name that you’ll remember, and then open it up to start copying your game files. To copy a file, simply locate the file on your computer, right-click on it and select “Copy”. Once you’ve done that, go back to the new folder that you created and right-click in the folder.
Next, select “Paste” to copy the game file into the new folder. This step may seem simple, but it’s essential if you want to move your game files successfully. By creating a new folder, you’re ensuring that all of the files you need are in one place, making it easier to move them to their next destination.
Step 3: Delete the Original Game Files
Now that you have successfully copied your games from your SSD to your HDD, it’s time to delete the original game files from your SSD. You can simply right-click on the game folder and select “Delete,” or you can use a third-party application to uninstall the game and all its associated files. This step will free up space on your SSD, allowing it to perform better and extend its longevity.
Keep in mind that you should only delete the game files from your SSD if you are sure that they are working properly on your HDD. You don’t want to accidentally delete important files or corrupt your game data. By following these steps, you can easily move your games from your SSD to your HDD and free up valuable space on your SSD for other applications and files.
Go back to the SSD and delete the original game folder
After successfully transferring your game files to the new SSD, it’s time to part ways with the old game folder. Deleting the original game files is an important step in ensuring you have enough storage space and avoiding any confusion with duplicate files. However, before hitting the delete button, make sure that you have backed up any important files you may have missed during the transfer process.
When you’re sure that everything is safely transferred, go ahead and delete the original game folder to free up some space on your old storage device. It might be tempting to keep the old files as a backup, but if you’re sure that the transfer was successful, then it’s best to delete them to avoid confusion and to save valuable storage space on your old hard drive. Remember, a cluttered hard drive can slow down your computer’s performance, so it’s essential to maintain a tidy storage system.
Conclusion
Moving games from SSD to HDD is like relocating a house – you want to make sure everything important comes with you, while the rest gets left behind. With a few simple steps, you can effectively and efficiently transfer your games to an HDD, ensuring they are safe, organized, and accessible in all the right ways. Your SSD may have been your trusty nest egg, but sometimes you need to spread your wings and make room for more.
So go ahead and say goodbye to your old gaming home, as your HDD is ready to welcome your games with open arms.”
FAQs
What is the benefit of moving game files from SSD to HDD?
Moving game files from SSD to HDD can save space on your SSD and make room for other important files. It can also improve the longevity of your SSD by reducing the frequency of read and write operations on it.
How do I move game files from SSD to HDD?
To move game files from SSD to HDD, go to the game’s installation folder and cut the entire folder. Then, paste it into the desired location in your HDD. After that, you may need to create a new shortcut for the game on your desktop.
Will moving game files from SSD to HDD affect the game’s performance?
Moving game files from SSD to HDD may slightly affect the game’s loading times and overall performance. However, this largely depends on the speed and specifications of your HDD.
Can I move game files from SSD to HDD and still play the game normally?
Yes, moving game files from SSD to HDD should not affect your ability to play the game normally. However, it may take slightly longer for the game to load and launch.