If you’re looking to upgrade your computer’s performance, transferring your operating system from your hard disk drive (HDD) to a solid state drive (SSD) is one of the best things you can do. Not only does it boost your computer’s speed, but it also has a tremendous impact on your system’s overall performance. However, many people are hesitant to make the switch because they are unsure of the process.
Fear not, as we have got you covered. In this step-by-step guide, we will take you through everything you need to know about transferring your operating system from HDD to SSD. By the end of this article, you’ll be ready to make the switch and enjoy a lightning-fast computer.
Assessing Your HDD and SSD
If you’re considering transferring your operating system from an HDD to an SSD, you’re probably well aware of the benefits that come with doing so. But before you dive into the process, it’s important to assess both your HDD and SSD to ensure that the transfer is worth your investment of time and money. Firstly, take a moment to check the available space on your existing HDD.
If you’ve only used a small portion, it might not be worth the hassle of transferring your OS to an SSD. Additionally, if your HDD is in relatively good health with no significant errors or bad sectors, you may not see a significant performance boost from switching to an SSD. Conversely, if your HDD is showing signs of wear and tear and slow boot times, upgrading to an SSD can work wonders.
When it comes to selecting an SSD, opt for one that offers sufficient storage space and an appropriate price point that matches your budget. By taking these factors into consideration, you’ll be able to make an informed decision that results in a faster, more efficient and a smoother running system that better meets your needs.
Determine the Capacity of Both Drives
Assessing the capacity of your HDD and SSD is essential before making any upgrades. HDDs are known for their high capacity storage, while SSDs have relatively less storage space but offer faster speeds. To determine the capacity of your drives, check the physical size and available space on each drive.
You can also check the specifications to see the amount of storage each drive offers. Remember that the capacity varies depending on the manufacturer and the model of the drive. It’s important to assess your storage needs and choose the drive that best suits you.
If you’re someone who needs a lot of storage for multimedia files, then HDDs might be the best option for you. However, if you’re someone who requires fast application and boot-up times, then SSDs might be a better fit. Make sure you take a closer look at your requirements before making a final decision on which type of drive to choose.
Ensure that Your SSD is Compatible with Your PC
When it comes to upgrading your computer’s storage, the most important thing to consider is compatibility with your PC. Assessing your current hard disk drive (HDD) and solid-state drive (SSD) is essential in ensuring a smooth transition to a new storage device. You need to take note of your current drive’s specifications, such as its interface type, form factor, and capacity.
It’s also crucial to check your motherboard’s compatibility with the new SSD you plan to purchase. Make sure that you have the necessary connections, firmware, and drivers to support the SSD. Remember that not all SSDs are created equal, and choosing the wrong one could result in sluggish system performance or even incompatibility issues.
By carefully assessing your HDD and SSD and ensuring their compatibility with your PC, you can be confident that you’re making the right investment in your computer’s storage system.
Backing Up Your Important Data
If you’re looking to transfer your operating system from an HDD to an SSD, the first step is to create a backup of all your important data. This includes your documents, music, videos, and any other files that you don’t want to lose in the migration process. To do this, you can use a variety of different backup tools, such as Windows Backup and Restore, or third-party software like Acronis True Image or EaseUS Todo Backup.
Once you’ve backed up your data, you’ll need to clone your HDD onto your new SSD. This can be done using software like Clonezilla or Macrium Reflect. After the clone is complete, you’ll need to set your SSD as the primary boot drive in your computer’s BIOS settings.
With your new SSD up and running, you’ll enjoy much faster boot times and application load times, making for an all-around smoother computing experience. Don’t forget to securely wipe your old HDD before disposing of it!
Create a System Image of Your HDD
Backing up your important data is an essential task that should not be ignored. One effective way to ensure that all your data is secure and protected is by creating a system image of your HDD. A system image is an exact copy of your hard drive, including all the files, settings, and programs installed on it.
In case your hard drive crashes or gets infected by a virus, having a system image can make it easier to restore your PC to its previous state. Creating a system image is relatively easy, and you can use the built-in Windows tool or a third-party software to do it. One important thing to note is that you need to save the system image in a separate location, preferably an external hard drive or cloud storage, to ensure that your backup is not affected in case of a hardware failure.
Overall, creating a system image is an excellent way to protect your important data and ensure that you can quickly recover from any unexpected data loss.
Transfer Your Data to an External Drive
Backing up your important data is crucial to ensure that you don’t lose it in case of a system crash or other unexpected events. One of the best ways to accomplish this task is by transferring your data to an external drive. This process involves copying your important files, documents, and folders onto a hard drive or other storage device that can be carried around with you.
By doing so, you can keep your data safe and secure, knowing that you have a backup copy available in case you need it. Additionally, transferring your data to an external drive is easy and straightforward. You can connect the storage device to your computer via USB, and then drag and drop your files onto it.
With this simple process, you can create multiple backup copies of your data, giving you added peace of mind. So, take the time to back up your important data today, before it’s too late!
Disconnect Your External Drive and HDD
Backing up your important data is vital to ensure that you don’t lose your valuable information in case of a hardware failure, virus attack or other catastrophic events. One of the easiest and most efficient ways to perform this task is by using an external hard drive or an HDD. However, once you have finished copying your files to your external medium, you need to make sure that you safely disconnect your device before unplugging it.
Doing so will prevent any damage to your files or data corruption that can occur if you don’t complete the proper process. So, always make sure that you eject the device from your computer before physically removing it to avoid any potential issues. Remember, a small safety step can go a long way in preserving your important data!
Transferring the OS from HDD to SSD
If you’re looking to speed up your computer’s performance, then transferring your OS from an HDD to an SSD is a great place to start. The process of transferring the OS isn’t as complicated as it may seem. You can do it using various software available online free of cost.
Firstly, you need to choose an SSD with enough storage to hold your entire system. Then, connect the SSD to your computer using a cable or a dock. Next, download a cloning software and start the software.
Select your HDD as the source disk and your SSD as the target disk. Follow the cloning software’s prompts to begin the transfer process. Once everything is done, shut down your computer and disconnect the HDD.
Now, boot up your device, and you’ll notice a significant increase in speed and performance. With this quick and easy process, you can experience an improved system without having to purchase a whole new computer.
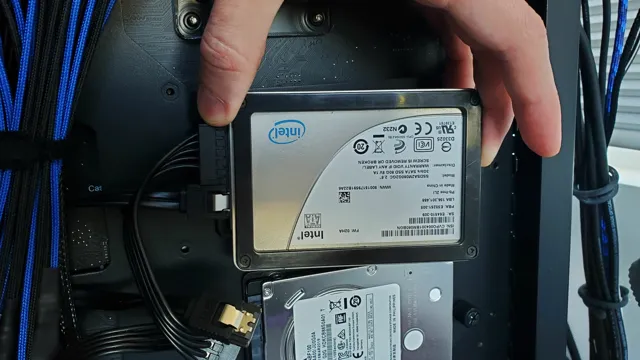
Connect the SSD to Your PC
When it comes to upgrading your PC’s performance, transferring the OS from HDD to SSD can make a significant difference. To start the process, you’ll want to first connect the SSD to your PC. This can typically be done by opening up your computer and attaching the SSD to an available SATA connector or through an external USB connection.
Once connected, you’ll want to use software such as EaseUS Todo Backup or Acronis True Image to clone your existing OS onto the SSD. This process ensures that your new SSD will have the same files, programs, and settings as your old HDD, ultimately allowing for a seamless transition and improved performance. Keep in mind that transferring your OS from HDD to SSD is not always a straightforward process, so it’s important to do your research and follow step-by-step instructions carefully.
With patience and attention to detail, you can upgrade your PC’s performance and enjoy faster load times and improved system functionality.
Migrate the OS to the SSD Using a Cloning Tool
Transferring the OS from HDD to SSD can be a game-changer for your computer’s performance. One effective way to do this is by using a cloning tool to migrate the OS data to the SSD. Before starting the process, you should ensure that the SSD is properly connected to your computer.
Once that is done, you can select the cloning tool of your choice and follow the steps provided. The tool will then create a copy of the OS data, including the system files, drivers, and settings onto the SSD. This process can take some time, depending on the size of the data being transferred, so it’s important to have patience.
Once completed, you can safely boot your computer using the new SSD and enjoy the faster load times and improved overall performance. Overall, transferring your OS to an SSD can be a game-changer for your computer’s speed, making it a worthy investment.
Confirm That Your New SSD is Bootable
Transferring the operating system (OS) from your old hard disk drive (HDD) to your new solid-state drive (SSD) may seem like a daunting task, but it’s a great way to improve your computer’s overall performance. However, before you start the process, it’s important to confirm that your new SSD is bootable. This means that your computer is capable of reading the Windows operating system from your new SSD, allowing it to start up and run smoothly.
To check this, you can enter your computer’s BIOS settings and ensure that the new SSD shows up as a bootable device. If you’re unsure how to do this, check the manufacturer’s website for instructions. By transferring your OS to your new SSD, you’ll enjoy faster boot times, quicker application loading, and overall improved performance.
Final Steps
If you’re planning to transfer your operating system from an HDD to an SSD, there are a few steps you need to follow. First things first, you need to make sure that the SSD has enough space to accommodate all the data currently stored on your HDD. Once you’ve ensured this, you can start cloning your drive.
There are many cloning software available online, but we recommend using a reliable one. Simply download and install the software, then create a bootable USB drive. Shut down your computer and replace your HDD with the SSD.
Boot up your computer using the bootable USB drive, and follow the prompts to clone your drive. Once this process is complete, shut down your computer and remove the bootable USB drive. Restart your computer, and you should now be running your operating system from your SSD.
Remember to go into your BIOS settings to ensure that your computer boots from your new SSD instead of your old HDD. With these final steps, you’re now ready to enjoy faster boot times and improved performance with your newly transferred operating system!
Change the Boot Sequence in Your BIOS
The final steps of changing the boot sequence in your BIOS involve saving your changes and exiting the BIOS menu. Once you have adjusted your boot order by moving your preferred device to the top of the list, navigate to the option to “Save and Exit” or “Exit Saving Changes.” This will prompt your computer to restart, and it will begin booting from the device you designated as the primary boot option.
It’s important to note that not all BIOS menus will have the same options or layout, so if you are unsure of how to navigate or adjust settings, consult the documentation for your specific computer or motherboard. By taking the time to change your boot sequence, you can ensure that your computer boots from the device you want every time you power on your machine, saving you time and frustration in the long run.
Connect Your External Drive Again
Now that you have successfully recovered your lost data, it’s time to wrap things up by reconnecting your external drive. Make sure to do this step with care to avoid any potential data loss or damage to your device. Connect the drive back to your computer, and wait for it to properly mount before accessing any data on it.
Double-check that all your files and folders are intact and in the correct locations. This is also a great opportunity to back up your recovered data to another location, such as your computer’s internal hard drive or a cloud storage service. Once you are confident with your data’s integrity, safely eject your external drive and pat yourself on the back for a job well done! Congratulations, you are now a data recovery expert.
Format Your HDD for Additional Storage
Once you have prepared your new hard drive and connected it to your computer, it’s time to format it for additional storage. This process involves creating a new partition on the drive and formatting it according to your preferences. To begin, access the Disk Management tool on your computer, which can usually be found in the Control Panel.
From there, you can select your new hard drive and create a partition using the unallocated space. Once the partition has been created, you can format it in a file system of your choice, such as NTFS or FAT3 This format will enable your computer to read and write data to the drive, giving you plenty of extra storage space for all your needs.
Remember to name the partition and assign a drive letter for easy access. With these final steps completed, you can enjoy the benefits of having additional storage space for media, documents, and whatever else you need to store.
Enjoy Your Speedy New SSD!
Congratulations on your new SSD! You’re about to experience lightning-fast speed like never before. But before you get too excited, there are a few final steps to take care of before you can fully enjoy your new hardware. First, make sure to transfer all your important files from your old hard drive to your new SSD.
This is a crucial step as it ensures you don’t lose any important data. Secondly, don’t forget to uninstall any unnecessary programs and software from your old hard drive to free up space and allow your new SSD to perform at optimal levels. Finally, ensure that your operating system is installed on your new SSD to fully utilize its potential.
With these final steps taken care of, you’re all set to enjoy the speed and efficiency of your new SSD.
Conclusion
In conclusion, transferring your operating system from an HDD to an SSD is like upgrading your car from a beat-up old sedan to a sleek sports car. It may seem daunting at first, but with the right tools and know-how, it’s a straightforward process that can greatly improve your computer’s performance. Plus, your computer will thank you for the upgrade with faster boot times, quicker application launches, and smoother overall operation.
It’s a win-win situation, just like upgrading your ride to something a bit more exciting.”
FAQs
What are the benefits of transferring the OS from HDD to SSD?
The benefits include faster boot and load times, improved overall system performance, and reduced power consumption.
Is it possible to transfer the OS from HDD to SSD without losing data?
Yes, it is possible to transfer the OS without losing data through cloning or imaging the HDD onto the SSD.
What software is required to transfer the OS from HDD to SSD?
There are many software options available, such as Macrium Reflect, Acronis True Image, and EaseUS Todo Backup, to name a few.
Can I transfer the OS from a larger HDD to a smaller SSD?
Yes, it is possible to transfer the OS from a larger HDD to a smaller SSD, but you need to make sure that the amount of data on your HDD will fit on the SSD before starting the transfer process.