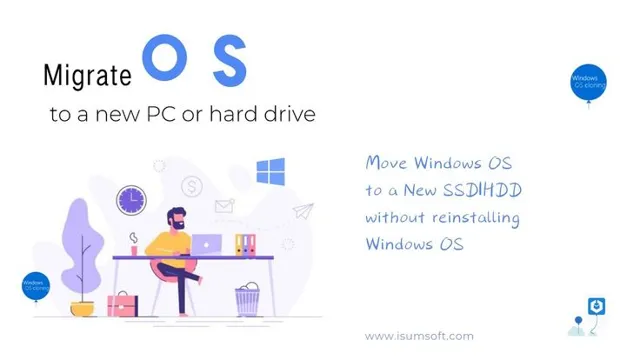
Are you looking to upgrade your computer’s storage capacity by transferring data between SSDs? Switching to a new SSD can enhance your system’s performance and speed, but transferring data may seem daunting. Don’t worry, the process is straightforward and can be accomplished with minimal effort. In this blog, we’ll guide you through the steps on how to transfer data between SSDs, so you can enjoy a quicker and more efficient experience on your computer.
Whether you’re upgrading to a bigger drive or just want to move data to a fresh installation, we’ve got you covered. So, let’s get started!
Check Compatibility and Capacity
If you’re wondering how to move everything from one SSD to another, the first thing you need to do is check compatibility and capacity. Make sure the new SSD is compatible with your computer’s hardware and software, and that it has enough space to accommodate all the data you’re transferring. You’ll also want to verify that the new SSD is of equal or greater capacity than the current one, so you don’t run out of storage space.
Once you confirm all these factors, you can begin the transfer process by backing up your files, cloning the old drive’s contents onto the new one, and then checking to make sure everything transferred properly. With careful planning and execution, you can seamlessly move all your data from one SSD to another and enjoy a more reliable and spacious storage solution.
Ensure the new SSD is compatible with your computer and has enough space.
When upgrading to a new SSD, it’s important to ensure that it is compatible with your computer and has enough space to meet your needs. This means checking the specifications of your computer, such as the type of interface and form factor, to make sure the SSD you choose is compatible. You’ll also need to consider the amount of storage space you need, taking into account the size of your operating system, applications, and personal files.
A general rule of thumb is to choose an SSD with at least double the capacity of your current hard drive to allow for future growth. It’s also important to consider the quality and brand of the SSD you choose, as this can impact speed and reliability. By taking these factors into consideration, you can ensure that you choose the right SSD for your needs and enjoy faster and more reliable performance from your computer.

Create a Backup
Moving everything from one SSD to another can seem like a daunting task, but it doesn’t have to be. The first step is to create a backup of all your important files. This will ensure you don’t lose anything during the transfer process.
You can use an external hard drive or cloud storage to backup your files. Once you’ve backed up your files, it’s time to transfer everything to your new SSD. There are a few different ways to do this, but the easiest is to use cloning software.
You can download cloning software online and use it to clone your old SSD onto the new one. This will transfer everything, including the operating system, programs, and files, from the old SSD to the new one. Simply connect the new SSD to your computer, open the cloning software, and follow the prompts.
It’s important to note that the process may take some time depending on how much data you have to transfer. However, once it’s complete, you’ll be able to enjoy all your files on your new SSD without any issues.
Backup all data from the old SSD to an external hard drive or cloud storage.
Creating a backup is an essential step you need to take before replacing an old SSD with a new one. You must begin by transferring all your data to an external hard drive or cloud storage, ensuring that you don’t miss any critical files or documents. Remember, losing data can be stressful, time-consuming and expensive to recover.
Cloud storage is an excellent option to backup data as it is secure, convenient and accessible from wherever you are. Also, it can save you the trouble of purchasing an external hard drive and the stress of carrying it around. However, if you prefer an external hard drive, ensure it has enough storage space for all your data.
Transferring your data to these external storage devices is easy and straightforward using in-built features like Time Machine for Mac users or FreeFileSync for Windows users. Once you have backed up your data, confirm that the transfer was successful before proceeding with your SSD replacement. Remember to safeguard the backup devices and keep them somewhere secure; this way, you can easily retrieve them whenever you need them in the future.
So go ahead, create a backup, and secure your data.
Install the New SSD
So you’ve got yourself a new SSD and you’re excited to get started. The first step is to install the new SSD into your computer. Before you do this, it is important to note that you will need to open up your computer and remove the old SSD.
Once this is done, you can then install the new SSD in its place. To transfer everything from one SSD to another, you will need to clone your old SSD onto your new one. There are a variety of programs available for this, such as Acronis True Image or EaseUS Todo Backup.
Simply choose the program that works best for you and follow the prompts. Once the cloning process is complete, you can then remove your old SSD and boot up your computer with the new one. Congratulations! You’ve successfully transferred everything from one SSD to another!
Open your computer and install the new SSD.
Installing a new SSD is much easier than you might think. First, make sure you have everything you need – the new SSD, a screwdriver, and any necessary cables. Then, open up your computer and locate your old hard drive.
Remove any screws holding it in place and unplug the cables. Take the old hard drive out and set it aside. Now, insert your new SSD into the same slot where the old hard drive was located.
Make sure it’s securely in place and reconnect any cables that you disconnected. Finally, secure the SSD in place with screws and your installation is complete! Enjoy the increased speed and performance of your new SSD. Remember to back up any important files before making any hardware changes.
With this simple process, you’ll be back to using your computer in no time!
Clone the Old SSD
Moving everything from one SSD to another can seem daunting, but it’s actually a straightforward process. To start, you’ll want to clone the old SSD onto the new one. This means making an exact copy of all the data, including the operating system and any installed programs.
To do this, you’ll need a cloning software, such as Clonezilla or Macrium Reflect. Once you have the software, connect both SSDs to your computer using a USB-to-SATA cable or a docking station. Open the cloning software and select the option to clone disk-to-disk.
Choose the old SSD as the source and the new SSD as the destination. The software will begin copying all the data over, which can take a few hours depending on the amount of data. When it’s finished, you can disconnect the old SSD and start using the new one as your main drive.
With this method, you won’t have to manually reinstall everything, saving you time and effort.
Use a cloning software to transfer all data from the old SSD to the new SSD.
If you want to transfer all your data from the old SSD to the new SSD, cloning the old SSD is the way to go. Cloning is a process of creating an exact replica of your old SSD and transferring it to the new SSD. By doing this, you don’t have to manually copy and paste all your data from the old SSD to the new SSD.
Instead, you can use cloning software to quickly and easily transfer everything. There are many cloning software options available, such as EaseUS Todo Backup, Macrium Reflect, and Clonezilla. These software programs will guide you through the cloning process step-by-step and ensure that everything is safely transferred.
It’s essential to understand that cloning your old SSD will copy everything, including the operating system, installed programs, and user settings. Therefore, the process of cloning can save you hours of time and reduce the stress of manually transferring every file. With the use of cloning software, you can simply sit back and let the program do the work for you.
So, if you’re looking to upgrade your SSD, cloning is the way to go. The process is straightforward and will ensure all your data is safely transferred to the new SSD, saving you time and effort in the long run.
Verify the Transfer
Congratulations, you’ve successfully moved everything from one SSD to another! But now it’s time to verify that everything has been transferred correctly. The first thing you should do is check the storage capacity of your new SSD and ensure that it matches the old one. Next, go through all your files and folders and ensure that everything has been transferred over correctly.
Check for any missing files or folders that may not have transferred successfully. You can use third-party software to help you with this task, such as Macrium Reflect or EaseUS Todo Backup. Finally, open a few programs to make sure they work properly and that all your settings are intact.
Once you’ve verified that everything is in proper working order, you can safely delete all the files from your old SSD to free up space. It’s that simple! With these steps, you can successfully move everything from one SSD to another without losing any data or encountering any problems.
Make sure all data has been successfully transferred to the new SSD.
When upgrading to a new SSD, it’s important to ensure that all of the data from your old hard drive has successfully transferred over. The last thing you want is to realize that important files or documents are missing, days or even weeks after the upgrade. To verify the transfer, take a closer look at the files and check to see if any are corrupted or missing.
You can also compare the amount of storage used on your old hard drive to the amount of storage used on your new SSD. Additionally, it’s a good idea to double-check the location of your files and make sure they have been properly transferred over to the new drive. By taking the time to verify the transfer, you can ensure a smooth and successful SSD upgrade without any headaches or setbacks.
Remove the Old SSD
When it comes to upgrading your SSD, the first step is to remove the old one from your device. Before you begin, make sure you have all the necessary tools and equipment, such as a screwdriver and an anti-static wristband. It’s important to take precautions to avoid damaging your other components or your new SSD.
Once you have everything you need, shut down your computer and unplug it from the wall. Then, open up your device’s case and locate your old SSD. Carefully unscrew it from your device and use a plastic pry tool to disconnect any cables or connectors.
It’s important to be gentle to avoid damaging any other components. Once your old SSD is safely removed, you can move on to installing your new one and transferring all your data over. By following these steps, you can upgrade your SSD with ease and ensure all your files and data are transferred over successfully.
Shutdown your computer and remove the old SSD.
When it’s time to upgrade your SSD, the first step is to shut down your computer. Once your computer is completely powered off, you can safely remove the old SSD. Start by opening up the computer case and locating the old SSD.
Depending on your computer’s setup, this may require removing a few screws or detaching cables. Take care not to damage any of the surrounding components. Once the old SSD is free, gently disconnect it from its slot, being careful not to bend any of the pins.
Finally, place the old SSD in a safe and secure location, so it doesn’t get lost or damaged. With the old SSD out of the way, you’re now ready to install your new one and start getting the most out of your computer’s performance. Remember, always handle your computer’s components with care, and if you’re unsure about any step of the process, seek the assistance of a professional.
Restart and Enjoy
So, you’ve just upgraded to a new SSD and are wondering how to move everything from the old one to the new one. No worries, it’s pretty simple. You’ll need to start by connecting the new SSD via a USB-to-SATA adapter or enclosure.
Then, use a cloning tool like EaseUS Todo Backup or Macrium Reflect to transfer the entire content of your old SSD to the new one. Once the process is complete, you can restart your computer and select the new SSD as your primary boot drive. Voila! All of your files, applications, and settings will be exactly where you left them, but with the added benefits of a faster and more reliable drive.
Just remember to properly dispose of your old SSD by wiping it completely or physically destroying it to prevent any potential data breaches.
Restart your computer and enjoy faster and more reliable storage on your new SSD.
After you’ve installed your brand-new SSD drive and transferred your data, it’s essential to restart your computer to fully experience the benefits of your upgrade. The process is straightforward: simply shut down your machine and turn it back on. Once it boots up, you’ll immediately notice faster boot times, snappier application loads, and smooth multitasking, all thanks to the lightning-fast read and write speeds of your SSD.
But that’s not all. Since SSDs don’t have any moving parts, they’re less prone to failure, making them a much more reliable option than traditional hard drives. So, go ahead, restart your computer and enjoy the speed and reliability that your new SSD has to offer.
Your computer (and your productivity) will thank you!
Conclusion
In conclusion, moving everything from one SSD to another can seem daunting at first, but with the right tools and a little patience, it can be a smooth and easy process. Just remember to back up all your important data, use a reliable cloning software, and enjoy the speed and efficiency of your brand new SSD. Because as they say, with great storage capacity comes great responsibility to make the most of it!”
FAQs
What are the steps to move everything from one SSD to another?
To move everything from one SSD to another, you need to follow these steps:
– Clone your old SSD to the new one using cloning software.
– Disconnect the old SSD and connect the new one.
– Change the boot order in BIOS to ensure the PC boots from the new SSD.
Can I use free software to move my data between SSDs?
Yes, there are many free cloning software options available that you can use to move everything from one SSD to another. Some popular choices include Macrium Reflect, EaseUS Todo Backup, and AOMEI Backupper.
Is it possible to move my operating system and applications to the new SSD?
Yes, it is possible to move your operating system and applications to the new SSD using cloning software. However, it is important to note that this process can be more complicated and may require additional steps to ensure that everything functions properly.
What should I do with my old SSD after I move everything to the new one?
You can reuse your old SSD as a secondary drive for storage or backup purposes, or you may choose to sell or donate it. Just make sure to securely erase any sensitive data before doing so.