
Are you tired of sluggish performance and long wait times on your computer? One effective solution is to upgrade to an SSD, or solid-state drive. However, if you already have a perfectly functional Windows 10 operating system on your old HDD, you may not want to go through the hassle of re-installing everything on your new SSD from scratch. That’s where moving your Windows 10 from your HDD to your SSD comes in.
It’s a bit of a complex process, but the end result is a much faster and more efficient computer experience. In this blog, we’ll go over steps you need to take to successfully move your Windows 10 from HDD to SSD. So, buckle up, and get ready to say goodbye to slow load times and frustrating latency issues once and for all.
Back Up Your Files
Are you looking to transfer your Windows 10 operating system from your HDD to an SSD? The first thing you’ll want to do before attempting any sort of transfer is to make sure you have a back up of all your important files. This includes any documents, photos, or programs you may want to keep. Once you’ve backed up your files, you can then go ahead and clone your HDD onto your new SSD.
There are a number of programs out there that can help you with this process, such as EaseUS Todo Backup and Clonezilla. It’s important to note that transferring your OS from an HDD to an SSD can greatly increase your computer’s speed and performance, so it’s definitely worth considering if you’re looking to optimize your device. Just remember to take the necessary precautions to ensure your files are safely backed up before proceeding with any sort of transfer.
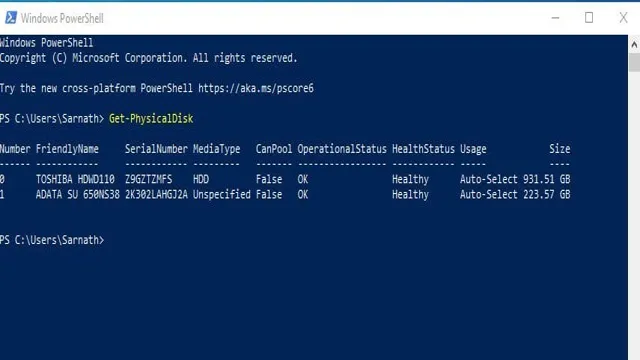
Identify Your SSD and HDD
When it comes to backing up your files, it’s important to identify your SSD and HDD to ensure that all of your important data is properly backed up. Knowing the difference between these two storage devices is crucial, as they both work differently and require different backup methods. Your SSD (Solid State Drive) is a newer technology that is faster and more reliable than your HDD (Hard Disk Drive).
Meanwhile, your HDD is a traditional storage device that has been around for a long time. Backing up your files is important because it ensures that your data is protected from unexpected loss due to hardware failure, viruses, or other issues. By backing up your files, you can recover them easily if your computer crashes or your device fails.
So, if you haven’t already, take the time to identify your SSD and HDD and back up your files today!
Create a Recovery Drive
Creating a recovery drive is an essential step in ensuring that your files are safe and secure. By backing up your files, you’ll be able to retrieve them in case of any unforeseen incidents like a system crash or a virus attack. A recovery drive is essentially a bootable USB drive that contains a copy of your operating system, along with all the necessary tools needed to troubleshoot and repair any issues that may arise.
To create a recovery drive, first, you’ll need to find a USB flash drive with at least 16GB of storage space. Once you have your USB drive ready, head over to the Control Panel and click on the “Backup and Restore” option. From there, select the “Create a system repair disc” option and follow the on-screen instructions to create your recovery drive.
Don’t forget to store your recovery drive in a safe place, away from any potential damage or loss, so that you can use it in case of an emergency. By taking these simple steps, you’ll be able to safeguard your files and restore your system back to its previous state with ease.
Clone Your Hard Drive
Moving your Windows 10 operating system (OS) from an HDD to an SSD can significantly boost your computer’s performance and speed. The best way to do this is by cloning your hard drive. Before you start, make sure you have a clone software installed on your computer.
Next, connect your SSD to your computer via USB and open the clone software. Choose the option to “clone disk,” select the HDD as the source disk and the SSD as the target disk. Then, initiate the cloning process, which can take several hours depending on the amount of data on your hard drive.
Once the cloning process is complete, shut down your computer, remove the HDD, and install the SSD. Restart your computer, and if everything is working correctly, your Windows 10 OS should now be running on your new SSD. Remember to delete any unnecessary files or programs from your HDD to free up storage space.
Download a Disk Cloning Software
If you’re looking to replace your hard drive or transfer all your data to a new computer, cloning your hard drive might be the solution you’re looking for. Cloning your hard drive means creating an exact copy of your original disk, including your operating system, applications, files, and settings. To do this, you’ll need a reliable disk cloning software, and luckily, there are many options available for free download online.
One popular option is Clonezilla, which is an open-source disk cloning and imaging software that offers both beginner and expert modes. Another great choice is EaseUS Todo Backup, which not only allows you to clone your hard drive but also offers backup and recovery features. Using disk cloning software can save you time and effort when transferring your data because you won’t have to reinstall or reconfigure anything on your new drive.
However, be sure to back up your data before cloning your drive, in case anything goes wrong during the process.
Connect Your SSD and HDD to Your Computer
To upgrade and enhance the performance of your computer, it’s recommended to use both solid-state drive (SSD) and hard disk drive (HDD). SSDs are faster and more reliable, while HDDs offer more storage capacity at a lower cost. Connecting these drives to your computer is easier than you might think.
First, make sure your computer has the appropriate ports and cables to accommodate both drives. Then, insert the SSD and HDD into their respective slots and connect the cables. Now it’s time to clone your hard drive.
This process ensures that your operating system, files, and applications are copied from your old hard drive to the new SSD. This way, you can enjoy faster startup times and better overall performance without losing any data. With your SSD and HDD connected and ready, you can maximize your computer’s potential and get the most out of your hardware investment.
Clone Your HDD to Your SSD
Cloning your hard drive to a new solid-state drive (SSD) can be a great way to upgrade your computer’s speed and storage without losing any of your data. There are a few different methods for cloning your hard drive, but most involve using software that can copy your entire hard drive – including the operating system – to your new SSD. One popular option is the software provided by your SSD manufacturer, which may be available for free or for a fee.
Another option is third-party software, such as Clonezilla or EaseUS Todo Backup, which can also help you easily clone your hard drive to your new SSD. Whichever method you choose, make sure to follow the instructions carefully and backup your important data beforehand, just in case. By cloning your hard drive to your SSD, you can enjoy faster boot times and improved performance with all your files intact.
Set Your SSD as the Boot Drive
Are you tired of your slow computer performance and considering moving your operating system from your HDD to SSD? If so, the first step is to set your SSD as the boot drive, which essentially means prioritizing it over your HDD during startup. To do this, you will need to access your computer’s BIOS and modify the boot order by selecting your SSD as the primary drive. Once you have done this, you can proceed with migrating your operating system to your SSD by using cloning software or a fresh installation.
While the process may seem daunting at first, it is relatively straightforward and can significantly improve your computer’s overall performance. Don’t let a slow computer hold you back, make the switch to an SSD, and enjoy lightning-fast speeds.
Enter BIOS or UEFI Firmware
If you have recently installed a Solid State Drive (SSD) on your system, setting it as the boot drive can significantly boost your computer’s performance. To do this, you will need to enter your BIOS or UEFI firmware. First, power up your computer and continuously press the appropriate key to enter the BIOS or UEFI Firmware during the boot process, which may be F2, Delete, or Esc.
Once inside the BIOS or UEFI Firmware, navigate to the Boot menu and find the option for Boot Device Priority or Boot Order. Here, you can select your SSD as the primary boot device by moving it to the top of the list. Once you have done this, save changes and exit the BIOS or UEFI Firmware.
Now, when you restart your computer, it should load the operating system from your SSD, resulting in faster load times and overall improved performance.
Configure Your BIOS or UEFI Firmware
Setting your SSD as the boot drive can significantly improve your computer’s performance and speed. To do so, you need to configure your BIOS or UEFI firmware settings. First, reboot your computer and enter the BIOS/UEFI by pressing the key recommended by your device’s manufacturer (usually F2, F10, or Delete).
Once in the BIOS/UEFI, navigate to the Boot tab and look for the Boot Priority option. Use the arrow keys to rearrange the priority order so that the SSD is at the top of the list. Save your changes and reboot your computer.
Your computer should now boot from the SSD, resulting in faster startup times and improved overall performance. Remember to keep your BIOS/UEFI firmware up to date for optimal SSD performance. So, take the leap and make the switch to a faster boot drive.
It’s worth it!
Wrap Up
Moving Windows 10 from an HDD to an SSD can be a game-changer for your computer’s speed and performance. The first step is to connect the SSD to your device, usually through a SATA cable. Then, you’ll need to clone the data on your current hard drive onto the new SSD.
This can be done using software such as Macrium Reflect or EaseUS Todo Backup. Once the cloning process is complete, you’ll need to change the boot order in the device’s BIOS to ensure the computer starts up from the SSD. Finally, confirm the transfer was successful by checking if the computer recognizes the new SSD as the primary hard drive.
Overall, transferring from an HDD to an SSD can significantly improve your computer’s functionality and speed. So if you’re wondering how to move Windows 10 from an HDD to an SSD, with some patience and software, it can be a pretty straightforward process.
Conclusion
Moving Windows 10 from an HDD to an SSD is like giving your old rusty bicycle a brand new carbon fiber frame and high-performance tires. Your computer will be faster, more efficient, and ready to take on any challenge. So don’t hesitate, grab your toolbox, and make the swap – it’s time to upgrade your ride!”
FAQs
What is the benefit of moving Windows 10 from HDD to SSD?
The benefit of moving Windows 10 from HDD to SSD is a significant improvement in system speed and performance. Access times are greatly reduced, leading to faster boot times and software load times.
Can I move Windows 10 from HDD to SSD without reinstalling it?
Yes, you can move Windows 10 from HDD to SSD without reinstalling it by cloning the contents of your current HDD to the new SSD. This can be done with cloning software such as Acronis True Image or EaseUS Todo Backup.
How much space do I need on the SSD to move Windows 10 from HDD?
You will need enough space on the SSD to accommodate all the data on your current HDD. This includes the operating system, installed programs, and personal files. As a general rule, a 120GB SSD is sufficient for most users, while power users or those with larger amounts of data may need a larger SSD.
What precautions should I take before moving Windows 10 from HDD to SSD?
Before moving Windows 10 from HDD to SSD, you should create a backup of your important data to an external drive or online storage, disable any antivirus software, and disconnect all unnecessary external devices. You may also want to update your drivers and firmware to ensure compatibility with the new SSD.