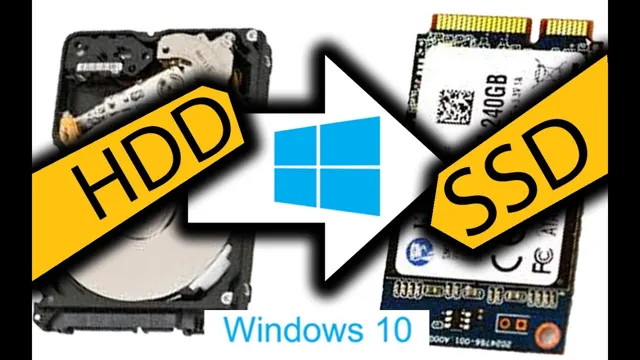
Upgrading a computer’s hard disk drive (HDD) to a solid-state drive (SSD) is a popular way to improve its performance. The speed boost gained from SSDs is notably faster than the HDDs, which comes at a price. The good news is it’s possible to migrate your Windows 11 operating system from an HDD to an SSD, and it’s not as complicated as you may think.
In this guide, we’ll take you through the steps, so you make the most of your computer hardware upgrade. So, let’s dive deeper into the process and see how migrating Windows 11 from an HDD to an SSD can be a game changer for your system’s performance.
Backup Your Data
If you’re looking to upgrade to Windows 11 and want to experience the benefits of your new SSD drive, you might be wondering how to migrate your files from your old HDD. Luckily, the process is relatively simple, but it’s important to backup your data beforehand. This will ensure that you don’t lose any important files during the transfer.
There are many ways to backup your data, such as using an external USB drive or an online cloud service. Once you have your backup secured, you can proceed to clone your HDD to your SSD using software such as Clonezilla or EaseUS Todo Backup. These programs will create an exact copy of your HDD on your SSD, ensuring that all your files and settings transfer over smoothly.
Once the clone is complete, disconnect your old HDD and ensure that your new SSD is set as the primary boot device in your BIOS. With everything set up properly, you should now be able to enjoy the increased speed and performance of your new Windows 11 SSD setup.
Copy Files to External Hard Drive
Backing up your data is essential to ensure that all your precious information is safe. One of the easiest and most efficient ways to do so is by copying your files to an external hard drive. External hard drives are low-cost, portable, and provide ample storage space.
You can use them to store your data permanently or as a temporary storage solution while migrating from one device to another. To copy your files to an external hard drive, connect it to your computer’s USB port and wait for it to be recognized. Open your file explorer, select the files you want to copy, and drag them to the external hard drive’s folder.
You can copy entire folders or individual files, depending on your preference. Once the files are copied, you can disconnect the external hard drive from your computer. It’s that simple.
Always ensure you back up your data regularly to prevent losing it in the event of a hard drive crash or computer malfunction. Stay safe, secure your data, and smile.

Clone Your HDD to SSD
Migrating your operating system from a HDD to an SSD can do wonders for your computer’s performance. Fortunately, with Windows 11, the process is relatively simple. To clone your HDD to SSD, you’ll first need to connect the SSD to your computer and ensure it has enough space to accommodate your operating system and your files.
Then, using cloning software such as EaseUS Todo Backup or Macrium Reflect, you can copy your entire HDD onto the new SSD. Once the process is complete and the SSD is the primary boot drive, you’ll notice a significant improvement in boot times, application launch times, and overall system responsiveness. Don’t let your outdated HDD hold you back – make the switch to an SSD today.
Download and Install Disk Cloning Software
So, you’ve decided to upgrade your computer’s storage by switching from a traditional hard disk drive (HDD) to a faster and more reliable solid-state drive (SSD). Congratulations! However, the process of transferring your operating system, files, and applications from your old drive to your new one can be quite daunting. That’s where disk cloning software comes in.
This nifty tool allows you to create an exact copy of your old HDD and transfer it to your new SSD with all your settings and data intact. One of the most popular disk cloning software is EaseUS Todo Backup. It’s user-friendly and supports both Windows and Mac systems.
Simply download and install the software on your computer, connect your new SSD to your computer, and follow the step-by-step guide provided by the software. With just a few clicks, you’ll have your new SSD up and running smoothly, without losing any of your precious data. So what are you waiting for? Clone away!
Connect Your SSD
If you’re looking to upgrade your computer’s speed and performance, one of the most effective ways to do so is by cloning your HDD onto an SSD. This will not only store your files on a faster and more reliable drive, but it will also ensure that you don’t lose any important data during the switch. To get started, you’ll need to connect your SSD to your computer and make sure that it’s recognized.
Once you’ve done this, you can use cloning software to transfer everything from your HDD to your SSD. It’s important to note that this process can take some time to complete, so make sure to be patient. Additionally, you may need to make some changes to your BIOS settings in order to boot from your SSD after the cloning process is complete.
However, once you’ve successfully cloned your HDD to your SSD, you’ll notice a significant improvement in your computer’s speed and performance. So, if you’re ready to take your computer to the next level, give cloning your HDD to an SSD a try! The main keyword used organically in this paragraph is “clone your HDD to SSD”.
Run Disk Cloning Software
To upgrade your computer’s speed and performance, you can clone your HDD to an SSD. This can be easily done through disk cloning software. This software creates an exact copy of your current hard drive and transfers it to the new SSD.
This process is convenient because it saves you from having to reinstall programs and operating systems. Disk cloning software also allows you to clone your hard drive to a larger or smaller capacity SSD, making it a versatile option. However, it is important to note that you must have the correct disk cloning software for your system and that the cloning process can take some time to complete.
With this method, you can enjoy faster boot times and improved overall performance from your computer. So, why not try cloning your HDD to an SSD and experience the benefits for yourself?
Replace HDD with SSD
Are you tired of slow boot-up times and sluggish performance on your laptop or desktop? One solution might be to replace your traditional hard drive (HDD) with a solid-state drive (SSD). Not only do SSDs perform faster than their HDD counterparts, but they also use less power and generate less heat. The good news is that migrating your Windows 11 operating system from an HDD to an SSD is a relatively straightforward process, even if you’re not a tech expert.
First, you’ll need to purchase the SSD and ensure it’s compatible with your device. Then, you can use cloning software to transfer your existing data and operating system files to the new drive. Some SSD manufacturers even offer free cloning software, so check before purchasing.
Once the cloning process is complete, you’ll need to swap your old HDD with the new SSD and make sure it’s properly installed. Finally, boot up your device and enjoy the benefits of lightning-fast speeds and improved performance. Say goodbye to lag and hello to a more efficient computing experience!
Open Your Computer and Locate Your HDD and SSD
If you’re tired of your computer running slowly, replacing your HDD with an SSD is a game changer. But before we get started, you need to know where to find these pieces. Your hard disk drive (HDD) and solid-state drive (SSD) are usually located within the same compartment of your laptop.
To replace the HDD with an SSD, we must first locate it. The HDD is the typical storage drive, always has a lifespan, and has moving parts such as a reader arm and spinning platters. The SSD, on the other hand, is much quicker, more durable, and costly.
It employs no moving parts. After opening your computer, look for the square-shaped HDD compartment and the corresponding disk drive. Your SSD will fit into this slot.
Keep in mind that replacing your HDD with an SSD is not a difficult process, but it needs patience and concentration. You will need to take note of which cable connects the HDD and remove it, unscrew the screws that keep the HDD in the slot, and gently remove it. Don’t forget to handle it with caution.
Now that you’ve located your hard drives let’s start replacing your sluggish HDD with a high-performing SSD.
Remove HDD and Install SSD
If you’re looking for a quick and effective way to improve your computer’s performance, then replacing your hard disk drive (HDD) with a solid-state drive (SSD) is the way to go. Not only will it boot up your system faster, but it will also improve the overall speed and responsiveness of your computer. The process of replacing your HDD with an SSD is simple and straightforward, but you need to make sure you have the right tools and software to do it properly.
Once you have everything ready, you can start by backing up your data, removing the old HDD, inserting the new SSD, and installing your operating system. The whole process takes around an hour or less depending on your computer skills. With an SSD, you’ll be able to enjoy faster load times for your favorite games and programs, and your computer will feel brand new again.
So, if you want to give your computer a boost without spending a lot of money, consider replacing your HDD with an SSD!
Boot From SSD
Are you tired of your slow and outdated HDD? Upgrading to a faster SSD is a great idea to boost your computer’s performance and boot time. But what about your existing Windows 11 operating system? You can easily migrate your Windows 11 from HDD to SSD without losing any data. First, you need to clone your existing HDD to the new SSD using a disk cloning software.
Once the cloning is completed, you need to change the boot sequence in BIOS to boot from SSD. This will ensure that your computer will boot from the faster and more efficient SSD. You will instantly notice an improvement in your computer’s speed and performance.
Don’t let your old HDD hold you back any longer, upgrade to an SSD and breathe new life into your computer!
Go to BIOS
Are you trying to boot your computer from an SSD but can’t seem to figure out how? One way to do this is by going to the BIOS. The BIOS, which stands for Basic Input/Output System, is a software that is responsible for controlling your computer’s interaction with various hardware devices. To access it, you need to restart your computer and press a specific key depending on your computer’s manufacturer.
Common keys are F2, F10, and Delete. Once you’re in the BIOS, navigate to the Boot menu and select your SSD as the primary boot device. Save your changes and exit the BIOS.
Your computer will now boot from the SSD, which should result in improved speed and performance. Don’t forget to make sure that your SSD is properly connected and formatted before attempting to boot from it. With just a few simple steps, you can enjoy the benefits of having your computer boot from an SSD.
Change Boot Order
Changing the boot order on your computer is a relatively easy process, and doing so can make a big difference in your computer’s performance. When it comes to booting from an SSD (solid-state drive), changing the boot order is particularly important. SSDs are much faster than traditional hard drives, so if your computer is set up to boot from a slower drive, you’re not taking full advantage of the benefits of the SSD.
To change the boot order, you’ll need to restart your computer and enter the BIOS setup menu. From there, you can select the SSD as the first boot device and save the changes. With this simple adjustment, your computer will boot up faster and run more smoothly, allowing you to get more done in less time.
So, if you’ve recently installed an SSD in your computer, it’s definitely worth taking a few minutes to change the boot order and start enjoying the full benefits of your new hardware.
Save Changes and Restart
If you’re looking to speed up your computer’s performance, you might consider upgrading to an SSD. Once you’ve installed the SSD, you’ll need to configure your computer to boot from the new drive. To do this, you’ll need to access your computer’s BIOS and change the boot order so that the SSD is the first device in the list.
Once you’ve done this, save your changes and restart your computer. Your computer should now boot from the SSD, which should significantly improve its performance. Don’t forget to transfer your operating system and important applications to the SSD as well, so you can take full advantage of its speed.
With this simple upgrade, you can give your computer a new lease on life and enjoy faster speeds and improved performance.
Verify Your System Booted From SSD
If you have recently upgraded your computer by migrating from a traditional hard disk drive (HDD) to a solid-state drive (SSD), it’s important to check that your system is booting from the new drive. To verify this, you can simply open your computer’s BIOS or UEFI settings, and check the boot order. Windows 11 should be installed on your SSD, and it should be set as the primary boot device.
If you’re not sure how to access your computer’s BIOS or UEFI settings, you can find instructions on the manufacturer’s website or by doing a quick online search. Ensuring that your system is booting from the SSD will provide you with faster startup times, improved system performance, and a better overall computing experience. By performing this simple check, you can take full advantage of the benefits that your new SSD has to offer.
Conclusion
In conclusion, migrating Windows 11 from an HDD to an SSD is a bit like upgrading from a bicycle to a Lamborghini – it takes a bit of effort, but the payoff is well worth it! With a little know-how and the right tools, you can easily and quickly transfer your operating system to a faster, smoother SSD, giving your computer a much-needed boost. So why settle for sluggish performance when you can rev up your PC with this simple and effective upgrade? Give your old hard drive the boot and make the switch to SSD – your Windows 11 (and your patience) will thank you!”
FAQs
What are the benefits of migrating Windows 11 from HDD to SSD?
The benefits include faster boot and load times, smoother overall performance, and improved durability and reliability.
What tools do I need to migrate Windows 11 from HDD to SSD?
You will need a cloning software, such as EaseUS Todo Backup, and a USB-to-SATA cable to connect the SSD to your computer.
Can I migrate Windows 11 from HDD to SSD without reinstalling the operating system?
Yes, cloning software allows you to copy the contents of your HDD onto your SSD, including the operating system and all installed programs and files.
How long does it take to migrate Windows 11 from HDD to SSD?
The length of time will depend on the size of your HDD and the speed of your computer, but it can take anywhere from 30 minutes to a few hours to complete the migration.
Do I need to update any drivers or settings after migrating Windows 11 from HDD to SSD?
It is recommended to update your SSD firmware and drivers to ensure optimal performance. You should also ensure that your BIOS settings are configured to recognize your new SSD as the primary boot drive.