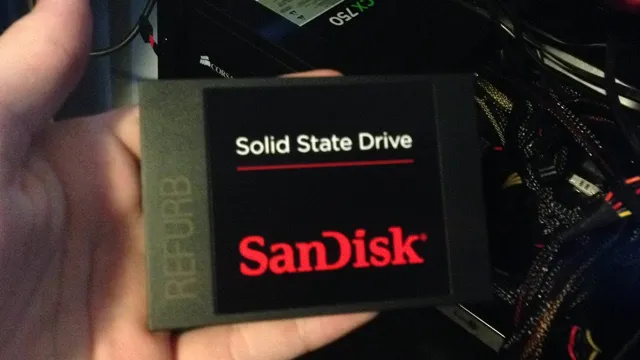
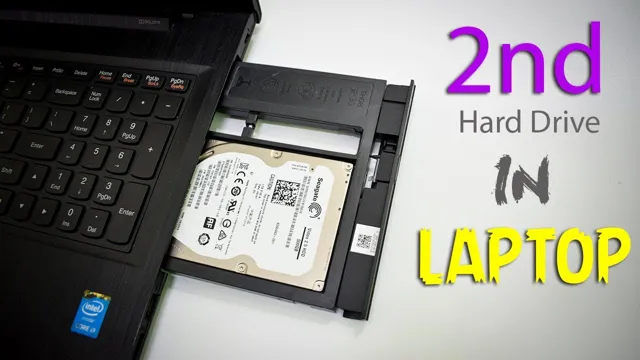
Ready to upgrade your computer’s storage capacity? Installing a secondary SSD might just be the solution you’ve been looking for! As we all know, solid-state drives (SSDs) are a game-changer in terms of data access and transfer speeds. Unlike traditional hard disk drives (HDDs), SSDs don’t have any moving parts, which means they’re faster, quieter, and less prone to damage. By adding a secondary SSD to your computer, you’ll not only increase your storage space but also boost your system’s performance.
So, let’s dive into the world of SSDs and learn how to install a secondary one in your machine!
Preparation
If you’re looking to increase the storage capacity of your computer, installing a secondary SSD is a great option. Before you begin, it’s important to ensure that your computer has the necessary connectors and power supply to support an additional drive. You may also need to purchase a mounting bracket or adapter to properly secure the drive in your computer’s case.
Once you have everything you need, you’ll want to power off your computer and unplug all cables before opening up the case. Take care not to touch any components with your bare hands, as static electricity can damage sensitive electronics. You’ll need to locate an available SATA data and power connector on your motherboard to connect the SSD, and then secure the drive in place with screws or brackets.
Once you’ve completed the physical installation, you’ll need to initialize and format the drive in your operating system before you can start using it. With a little bit of preparation and care, installing a secondary SSD can be a relatively simple and straightforward process that can greatly enhance your computer’s overall performance.
Check Compatibility
When it comes to checking compatibility, a little preparation can go a long way. The first step is to identify what it is you’re trying to check compatibility for. Is it software, hardware, or something else entirely? Once you know what you’re looking for, you can start to do some research.
Check the manufacturer’s website for compatibility information, and look for user forums or communities where people with similar setups may have asked similar questions. It’s also a good idea to gather information about your own setup, including your operating system, processor, and any other relevant details. By doing some preliminary work, you can increase your chances of finding accurate and useful compatibility information when you need it.

Gather Tools
Preparation is key when undertaking any task, and gathering tools is a crucial step in the process. When considering the tools needed, think not only about the equipment required but also the resources. For example, if you’re planning on doing some DIY, you’ll need not only a hammer and nails but also screws and other hardware.
Make a list of all the tools you need and prioritize them by importance. If your budget doesn’t allow for everything, focus on the essentials first. Don’t forget you can also take advantage of borrowing tools from friends or renting them from a hardware store.
By gathering all the necessary tools in advance, you’ll be able to begin your project smoothly and efficiently, avoiding unnecessary delays. Remember that preparation is the key to success in any endeavor, so take the time to gather all the tools you need before you start.
Hardware Installation
Are you planning to upgrade your computer’s storage capacity by adding a secondary SSD? Installing a secondary SSD is a relatively straightforward process that even beginners can handle. Before you proceed, make sure to shut down your computer and unplug all cables. Open the case to access the motherboard and locate the available SATA connectors.
Check your motherboard manual to identify the correct placement of the secondary SSD. Slide the SSD into the designated slot and screw it into place. Connect a SATA cable from the motherboard’s available SATA connector to the SSD.
Make sure to attach the power cable to the SSD as well. Reattach the case and all cables. Power on your computer and check if it detects the new secondary SSD.
You can then format the SSD to use it either for additional storage or as your new boot drive. Overall, adding a secondary SSD to your computer is an easy and effective way to improve its performance and storage capacity.
Open Computer Case
When it comes to hardware installation, one important step to consider is opening up the computer case. This can be a bit intimidating for those new to DIY computer building, but it’s actually a simple process that allows you to access the internal components of your computer. To start, make sure your computer is turned off and unplugged.
Then, locate the screws or clips holding the case in place and remove them. Once the case is open, you can easily add or replace components like RAM, hard drives, and graphics cards. Keep in mind that opening your computer case can potentially void any warranties, so proceed with caution and make sure you know what you’re doing.
With a little bit of research and practice, opening and working inside your computer case can be a great way to upgrade and customize your PC.
Mount SSD
Mounting an SSD is an easy way to upgrade your computer’s hardware and improve its performance. First, you need to shut down your computer and unplug all cables from it. Next, locate the hard drive bay in your computer case and remove the screws that hold it in place.
Then, gently slide the SSD into the bay and screw it back in. Be sure to connect the power and data cables to the SSD and motherboard. Finally, close up your computer case and power it on to make sure the installation was successful.
With an SSD, your computer will boot up faster, load applications quicker, and have more overall speed and responsiveness. So if you want to give your computer a boost, consider mounting an SSD today.
Software Configuration
Installing a secondary SSD on your computer can be a great way to expand your storage capacity and boost your system’s performance. But how do you go about doing it? To start, you’ll need to purchase the SSD and an adapter if necessary. Once you have those, shut down your computer and unplug it from all power sources.
Open up your computer case and locate the spot where you want to install the SSD. Then, carefully attach the adapter if needed and insert the SSD into the appropriate slot. Fasten it in place with screws if necessary and close up your computer case.
When you turn it on, your computer should recognize the new drive. From there, you can format and partition it as needed. With a little bit of know-how, installing a secondary SSD can be a great way to improve your computer’s performance and storage capacity.
Initialize SSD
SSD initialization is a crucial step that needs to be done before using a new SSD. It’s a process of configuring the SSD to work with the operating system. There are different ways to initialize an SSD, but the most common one is through the Disk Management utility in Windows OS.
To do this, you need to right-click on the Windows Start button and choose Disk Management from the menu. A window will appear showing all the connected drives, including the uninitialized SSD. Right-click on the uninitialized SSD and choose Initialize Disk.
You will be asked to choose between MBR and GPT partition styles. Choose the appropriate one for your system and click OK. The initialization process may take a few minutes, depending on the size of the SSD.
Once it’s done, you need to create a partition on the SSD and format it before you can start using it. Overall, SSD initialization is a simple process that ensures proper usage of your new SSD.
Format SSD
If you want to optimize the performance of your computer, one of the most effective measures you can take is to format your SSD. This process essentially erases all the data on the drive, reconfigures it to be more efficient, and installs the operating system from scratch. There are a variety of software tools available to help you format an SSD, from built-in functions in Windows to third-party applications like EaseUS Partition Master and MiniTool Partition Wizard.
However, before you get started, it’s important to back up any critical files on the drive and ensure that you have a recovery USB or CD in case something goes wrong. Once you’re ready to proceed, the process typically involves opening the disk management utility, selecting your SSD, deleting all the existing partitions, and creating a new one. While it may take a bit of time and effort, formatting your SSD can significantly boost your computer’s speed and responsiveness, making it well worth the investment.
Assign Drive Letter
When setting up your computer system, it is essential to assign drive letters to your storage devices and partitions. The drive letter allows you to easily identify and access the specific partition or storage device. Fortunately, configuring this is relatively straightforward on most operating systems.
On Windows, you can open the Disk Management tool and right-click the partition or storage device you want to assign a drive letter to, then select “Change Drive Letter and Paths.” From here, click “Change” and select a letter from the drop-down list. Similarly, on macOS, you can open the Disk Utility tool and select the partition or storage device.
Then choose “File” > “Get Info” from the menu, and you can assign a letter under the “Volume Information” section. This process can help you keep your files organized and easier to access, making it a worthwhile step in your system setup.
Conclusion
Congratulations! You’ve made it to the end of the journey of installing a secondary SSD. You’ve learned that it takes a bit of research, patience and a steady hand. But don’t forget, installing a secondary SSD is like adding an extra spice to your computer.
It’s a little extra flavor that will make your PC faster and more powerful than ever before. So go ahead, add that extra SSD, and take your computer to the next level. Your future-self will thank you!”
FAQs
What is a secondary SSD?
A secondary SSD is an additional solid-state drive that can be installed in a computer to increase storage capacity and improve performance.
How do I know if my computer supports a second SSD?
You can check the specifications of your computer or motherboard to see if it has an available slot for a secondary SSD. Additionally, you can consult with a computer technician or manufacturer for more information.
How do I physically install a secondary SSD?
First, turn off your computer and unplug it from any power source. Open the computer case and locate an available slot for the SSD. Mount the SSD onto the slot and secure it using screws or clips. Connect the necessary cables, close the case, and turn on the computer.
How do I format and configure the secondary SSD?
Once the SSD is physically installed, you will need to format it and configure it in your operating system. This may involve going into the computer’s BIOS or using disk management tools. You can also consult online guides or seek assistance from a professional.
