Welcome to the world of fast gaming with your PlayStation 5 console. Now that you have your hands on one of the best gaming consoles in the market, it’s time to upgrade your storage with a WD Black SSD. The WD Black SSD is an excellent choice as it offers impressively fast loading times that will enhance your gaming experience.
However, if you’re wondering how to install WD Black SSD on PS5, don’t worry, we’ve got you covered. In this blog, we’ll guide you through the installation process of your new WD Black SSD to the PS5 console. So, let’s dive in and get started!
What You Will Need
If you’re thinking of installing a WD Black SSD on your PS5, then you will need a few things to get started. First and foremost, you’ll require the SSD itself. Make sure you purchase the correct model that is compatible with the PS
Next, you will need a small Phillips-head screwdriver to open the back panel of your PS You should also have a USB flash drive with at least 1GB of free space to download the PS5 system software, which you will need to reinstall after installing the SSD. Additionally, you may want to have a microfiber cloth on hand to clean any dust or debris inside your PS
By having all of these items readily available, you can quickly and easily install the WD Black SSD onto your PS5 and experience faster load times and improved overall performance.
WD Black SSD Drive
If you are in the market for lightning-fast data transfer speeds and efficient performance, then the WD Black SSD Drive is the perfect solution for you. To install this cutting-edge storage technology, you will need a few things beforehand. Firstly, make sure that your computer has an available drive bay to accommodate the SSD.
Secondly, clone your current hard drive data to the new SSD before installation. This will ensure a seamless transition and preserve all of your current data. Additionally, invest in an external hard drive to back up sensitive files in case of a mishap during cloning.
Lastly, ensure you have a small screwdriver on hand to secure the SSD drive firmly in place. With these preparations in place, you can experience the smooth, uninterrupted performance and lightning-fast data transfer speeds that the WD Black SSD Drive has to offer.
PS5 Console
If you’re considering getting the new PS5 console, there are a few things you’ll need to make the most out of your gaming experience. Firstly, you’ll want to have a TV that can accommodate the PS5’s capabilities, preferably one that offers 4K resolution and 120Hz refresh rate. This will allow you to take advantage of the console’s powerful hardware and enjoy gaming in stunning detail and with smooth visuals.
Additionally, you’ll want to invest in a good pair of headphones or a sound system that can support 3D audio. This feature is a major selling point for the PS5 and creates an immersive, lifelike audio experience for gamers. Finally, make sure you have plenty of space for your new console and accessories.
The PS5 is a pretty big console, so you’ll want to clear a dedicated area for it and make sure you have enough room to store your controllers, games, and other peripherals. By ensuring you have the right setup for your new PS5 console, you can guarantee yourself the best possible gaming experience.
SATA Cable / M.2 SSD to SATA Converter
If you’re looking to upgrade your computer’s storage, you may be wondering what you will need to make the switch from a traditional SATA hard drive to a faster and more efficient M.2 SSD. One important piece of hardware you will need is a SATA cable or M.
2 SSD to SATA converter. This device will allow you to connect your M.2 SSD to your computer’s motherboard via a SATA port, enabling you to take advantage of the faster read and write speeds of the M.
2 drive. The converter will typically come with instructions on how to install it into your system, but it’s important to make sure that it’s compatible with your computer’s motherboard. Upgrading your storage is a great way to breathe new life into an older computer and improve overall performance.
By investing in a SATA cable or M.2 SSD to SATA converter, you can ensure that your new drive will function properly and provide the speed and efficiency you’re looking for.
Pre-Installation Steps
If you’re looking to install a WD Black SSD on your PS5, there are a few essential steps you need to follow before you start the process. Firstly, make sure your console is powered off and unplugged from the wall to avoid any damage to the internal components. Next, gather all the necessary tools, including a screwdriver set and an anti-static wristband to protect your new hardware during installation.
You’ll also need to download the latest system software update from Sony’s website to ensure compatibility with your new SSD. Once you’ve completed these pre-installation steps, you’re ready to proceed with the installation process, taking care to follow the manufacturer’s instructions and guidelines to ensure the best possible performance and longevity for your WD Black SSD. Remember, a successful installation can significantly improve your PS5’s storage capacity and speed, making for a more enjoyable gaming experience.
Back Up PS5 Data to External Storage
Backing up your PS5 data to an external storage device is a smart move that can save you a lot of trouble in the future. However, before you do that, there are a few pre-installation steps that you need to follow. First, make sure that you have a compatible external storage device that supports USB
0 or later. Next, ensure that the storage device has enough free space to accommodate all the data that you want to transfer. You can check the available space on your PS5 by going to Settings > Storage.
Once you have a suitable storage device, connect it to your PS5 using a USB cable. Then, follow the on-screen instructions to format the storage device as external storage. This will wipe out any existing data on the storage device, so make sure to back up any important files before you proceed.
Once the formatting is complete, you can start backing up your PS5 data to the external storage device. It’s a simple process that can save you a lot of headaches in case of any system failure or data loss. So, don’t wait any longer and start backing up your data today!
Power Off and Unplug PS5
If you’re getting ready to install your new PS5, there are a few important pre-installation steps you should take. First and foremost, make sure the console is powered off and unplugged. This may seem like a no-brainer, but it’s important to emphasize as it can prevent any potential damage or electrical hazards during the installation process.
Additionally, you may want to clear out any dust or debris from the area where you’ll be setting up your PS5 to ensure optimal airflow and prevent overheating. Overall, taking the time to properly prepare your installation area can help ensure a smooth and hassle-free setup experience. So, before you dive into the exciting world of gaming on your new PS5, take a moment to power it off and unplug it, and get your space clean and ready to go.
Hardware Installation
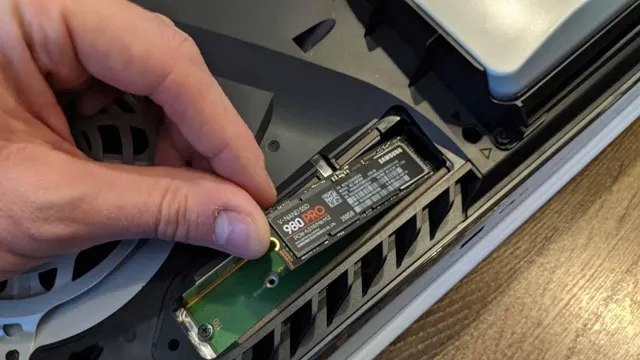
If you’re wondering how to install a WD Black SSD on your PS5, the process is easier than you might think. First, make sure your console is completely powered off and unplugged from any power source. Next, remove the cover on the bottom of the console by sliding it off.
You should see a slot specifically designed for an M.2 SSD. Take your WD Black SSD and insert it into the slot, making sure it’s properly aligned.
Once the SSD is in place, use the included screw to secure it. Finally, replace the cover and plug your PS5 back in. When you turn it on, the console should recognize the new SSD immediately, allowing you to enjoy faster load times and improved overall performance.
So don’t be intimidated by the prospect of installing new hardware – with a little patience and care, anyone can do it!
Open PS5 Cover
Are you looking to upgrade your PS5’s hardware? One simple way is by opening the PS5 cover and installing additional hardware components. Firstly, make sure to turn off your console and unplug it from the power source. Next, place the PS5 on a flat surface and remove the screw covers using a flathead screwdriver.
Then, using a Phillips screwdriver, remove the screws that hold the cover in place. Slowly slide the cover towards the back of the console and lift it off. You can then access the hardware components and install additional ones such as a solid-state drive (SSD) for extra storage space.
However, it’s essential to ensure that the hardware is compatible with the PS5 before installation. Don’t forget to put the cover back on, plug in the console, and turn it on to check that everything is working correctly. In conclusion, upgrading your PS5’s hardware can significantly enhance your gaming experience, and opening the cover is an effective way to install additional hardware components.
Identify the M.2 SSD Slot or 2.5-inch Drive Bay
When it comes to upgrading your computer’s storage, the first step is to identify the M.2 SSD slot or 5-inch drive bay on your machine.
The M.2 SSD slot is a smaller and more compact option found on newer motherboards, while the 5-inch drive bay is the more traditional option found on older machines.
To identify the M.2 SSD slot, you may need to consult your motherboard manual or online documentation to determine its location and compatibility with different sized M.2 drives.
With the 5-inch drive bay, you simply need to locate the physical bay which is often found on the front, back, or side of the computer case. Once you have identified the storage upgrade option that is compatible with your machine, you can begin the hardware installation process.
Whether you are upgrading to an M.2 SSD or a 5-inch drive, it is important to handle the hardware with care and follow the manufacturer’s instructions to ensure a successful installation.
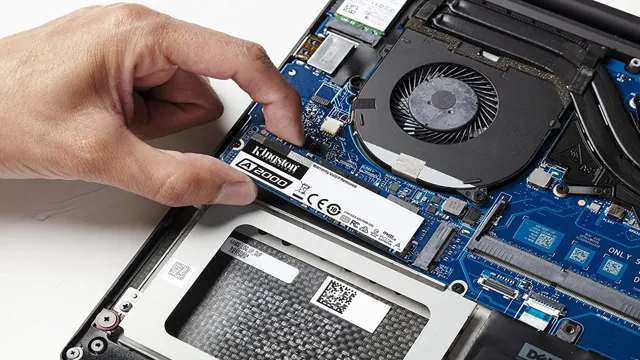
Insert the WD Black SSD into the Slot
Now that you have your WD Black SSD in hand, the next step is to install it into your system. Firstly, locate the M.2 slot that is usually present on the motherboard.
It is important to note that M.2 slots can vary in length and width, so make sure to match the SSD with the correct slot type. Once the slot is located, gently insert the SSD and use a screw to secure it in place.
It is advisable to refer to the user manual of your motherboard to ensure that you are installing it correctly. The WD Black SSD comes equipped with a heat sink that is designed to regulate the temperature and ensure optimal performance. So, you need not worry about overheating issues.
Once the SSD is securely in place, you can connect the cables as required and power up your system. The speed and performance improvements that you will experience with your new SSD will be worth the installation efforts. So, go ahead and give it a try!
Attach SATA Cable / M.2 SSD to SATA Converter to SSD and PS5
If you’re looking to expand your PlayStation 5’s storage, installing an M.2 SSD is a great way to do it. To start, you’ll need to attach a SATA cable and M.
2 SSD to SATA converter to your chosen SSD. After getting your tools ready, carefully insert the M.2 SSD into the SATA converter and secure it in place.
Once it’s firmly secured, connect the SATA cable to the converter and the PlayStation Make sure to double-check the connections before screwing everything back together. This installation process can take some time and effort, but the rewards of having extra storage capacity for your games on your PS5 will be worth it.
Just be sure to use compatible hardware to prevent any issues or complications. With this hardware installation complete, you can now enjoy all of your favorite games without constantly worrying about your storage capacity running low.
Post-Installation Steps
If you’re looking to upgrade the storage on your PS5, installing a WD Black SSD is a great choice for boosting performance. However, it’s important to follow a few post-installation steps to ensure everything runs smoothly. First, make sure to download the WD Black Dashboard software to monitor the drive’s health and performance.
You should also enable Game Boost mode in the PS5 settings, which optimizes the system for faster load times. Additionally, consider transferring over your most frequently played games to the new drive to free up space on the internal storage. By following these simple steps, you can make the most of your WD Black SSD and enjoy faster gaming on your PS
Power On PS5 and Verify SSD Installation
Now that you have installed your new SSD into your PS5, it’s time to turn it on and verify that the installation was successful. First, make sure all cables are properly connected and then press the power button on the front of the console. You should see the PS5 logo appear on the screen.
Once you’re on the home screen, go to the settings and select “Storage” to see if your new SSD is detected. If it is, you’re all set! If not, you may need to double-check that the SSD is installed correctly or try restarting the console. Don’t worry, it’s common to experience some bumps along the way, but with a little patience and troubleshooting, you’ll be enjoying lightning-fast load times and increased storage capacity in no time!
Restore PS5 Data from External Storage if Necessary
Once you’ve completed the initial setup of your new PS5, there are a few post-installation steps you should consider to ensure that your gaming experience is seamless and uninterrupted. One important step is restoring any data that you may have stored on an external storage device. If you backed up your data onto an external drive before setting up your new console, you can easily restore that data by connecting the drive to your PS5 and following the prompts.
This can be particularly useful if you want to transfer saved games, screenshots, or other important information from your old console to your new one. Simply navigate to the Settings menu, select the Storage menu, and choose the External Storage device to view and restore your files. By taking a few minutes to restore your data from an external drive, you can ensure that your PS5 is set up exactly as you like it, with all your game saves and important files available right where you left them.
Conclusion
In conclusion, installing a WD Black SSD on your PS5 is about as easy as sneaking past a sleeping dragon. With just a few simple steps, you can unleash the full power of your console and enjoy lightning-fast load times and seamless performance. So don’t wait any longer, grab your screwdriver and get ready to level up your gaming experience.
Just remember, as with any upgrade, take your time, use caution, and don’t forget to save your progress!”
FAQs
What is the compatibility of WD Black SSD with PS5?
WD Black SSD is compatible with PS5, but you will need to ensure that you have the latest firmware update on your PS5.
How do I prepare my PS5 for installation of WD Black SSD?
To prepare your PS5 for installation of WD Black SSD, you need to take a backup of your data and power off your PS5 completely.
Can I install WD Black SSD in my PS5 myself?
Yes, you can install WD Black SSD in your PS5 yourself. However, you need to be cautious while installing it and should follow the instructions given in the installation manual.
What is the difference between WD Black SSD and other SSDs available in the market?
WD Black SSD is specifically designed to offer high performance and reliability to gamers. It uses the latest NVMe technology and is backed by a 5-year limited warranty.