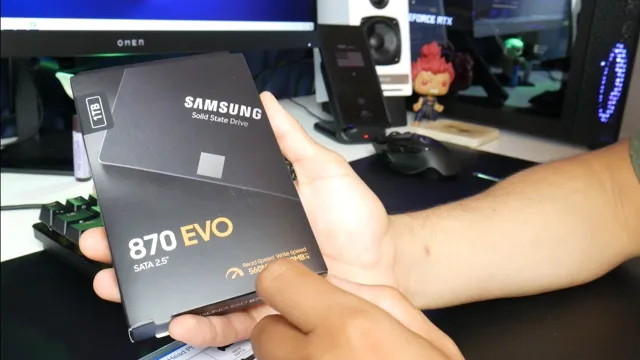
Are you ready to upgrade your computer’s storage capacity? Installing a Samsung 870 EVO SSD is a great way to give your PC a significant speed boost. Not only does it offer lightning-fast data transfer speeds, but it also comes with a range of features that make it easy to install and use. So, whether you are upgrading from a traditional hard drive or another SSD model, this step-by-step guide will walk you through the process of installing the Samsung 870 EVO SSD in your computer.
From preparing your tools to transferring data, we’ve got you covered. Let’s dive in!
What You Need
If you’re looking to install a Samsung 870 EVO SSD, then there are a few things you’ll need to make the process smooth and efficient. Firstly, you’ll obviously need the SSD itself, which comes in various storage sizes. You’ll also need a screwdriver to remove the back panel of your computer or laptop and attach the new drive.
It’s recommended to have an anti-static wrist strap to prevent damaging the drive with static electricity. Additionally, you’ll need a cloning software or a bootable USB drive to transfer your operating system and data to the new drive. Lastly, ensure that your computer or laptop is compatible with the Samsung 870 EVO, so you don’t run into any issues during the installation process.
With these things in place, installing the Samsung 870 EVO SSD should be a breeze.
Requirements for Installation
When it comes to installing any software, there are a few requirements that need to be met before you can begin. For starters, you’ll need a compatible device, whether it’s a computer, tablet, or smartphone. Next, you’ll need to ensure that your device has enough storage space to accommodate the software.
Depending on the program, it could take up a significant amount of space, so take that into consideration. You’ll also need a stable internet connection if you’re downloading the software online. This ensures that the download process is smooth and uninterrupted.
Lastly, it’s important to check the minimum system requirements needed for the software to operate efficiently on your device. If your device falls short of these requirements, the software may not run as intended or may not run at all. It’s always a good idea to double-check these requirements before proceeding with the installation.
By ensuring that you have everything you need before starting the installation process, you can avoid any potential problems or issues that may arise.
Preparing for Installation
If you’re looking to improve your computer’s speed and performance, installing a Samsung 870 EVO SSD might be the solution you need. Before you start, gather all the tools you’ll need, including a screwdriver, so you can easily access your computer’s hard drive bay. Remember to also get a cloning software to transfer your old hard drive’s contents to your new SSD if you’re not starting from scratch.
Shut down your computer and unplug it from the power source before opening it up. Locate the hard drive bay and remove the screws that hold the hard drive in place. Once you’ve removed the old hard drive, insert the new Samsung 870 EVO SSD into its place.
Tighten the screws, reconnect the cables and power on your computer. That’s it! You now have an upgraded computer with improved speed and performance thanks to your brand new Samsung 870 EVO SSD.
Back Up Your Data
Back Up Your Data Before you start preparing for installation, it’s essential to back up all your data. Installing a new operating system can be risky, and anything could happen during the process. You might lose your data, or even worse, it could get corrupted.
So, backing everything up is the most crucial step in ensuring that your data is safe. There are several ways to back up your data, including external hard drives, USB flash drives, or even cloud storage. It’s always best to choose a reliable method for backing up your data, and you should also double-check that everything has been backed up correctly before installing the new operating system.
Backing up your data may take some time, but it’s worth it in the end. Think about it like insurance for your computer – you hope you never need it, but if something goes wrong, you’ll be thankful you have it. Without a backup, you risk losing all your important documents, photos, music, and more.
So, take the time to make sure everything is safely backed up before you start your installation process. Once you have everything backed up, you can proceed with installing the new operating system without any worries. So, protect your data and take the time to back it up – you won’t regret it!
Shut Down Your PC and Disconnect Power
Before you begin installing hardware or making any changes to your PC, it’s important to shut it down properly and disconnect the power source. This can be done by simply clicking the shutdown button in your operating system or unplugging the power cord from the wall. This step is essential to ensure the safety of both yourself and your computer.
It will also prevent any unexpected power surges or damage to your equipment during the installation process. Additionally, make sure to take proper precautions such as wearing an anti-static wrist strap and handling components gently to avoid damage. By taking these steps and properly preparing for installation, you can ensure that your computer runs smoothly and efficiently for years to come.
Opening Your PC
If you’re looking to upgrade your PC’s storage capability and have just purchased a Samsung 870 EVO SSD, you’ll need to open up your PC to install it. But don’t worry, it’s actually easier than you might think! First, make sure your PC is turned off and unplugged from any power source, then locate the panel that needs to be removed to access the internal components. This could be on the side or back of the tower, or the bottom of a laptop.
Once removed, you’ll be able to see the existing storage drive(s) and where you can install your new Samsung SSD. Gently insert the SSD into an available slot and secure it with screws if needed. Don’t forget to reattach the panel and plug in your PC before powering it back on.
With your new Samsung 870 EVO SSD, you’ll have faster read and write speeds for improved performance and a larger storage capacity to store all your files and media.
Selecting the Right PCIe Slot
When it comes to selecting the right PCIe slot, the first step is opening up your PC. It may seem daunting at first, but don’t worry – it’s not as complicated as it seems. Simply unscrew the side panel and gently set it aside.
Once inside, you’ll want to locate the PCIe slots on your motherboard. These slots are typically longer than other expansion slots and are located closer to the processor. Keep in mind that not all PCIe slots are created equal – some may have more bandwidth or be better suited for certain types of devices.
Before selecting a slot, be sure to check your motherboard manual for any specific recommendations or limitations. By taking these steps, you can ensure that you select the right PCIe slot for your needs.
Removing the Cover
Removing the cover of your PC is the first step in opening it up and accessing its components. To begin, make sure your PC is powered off and unplugged from any power source. Locate the screws that hold the cover in place and use a screwdriver to remove them.
Some PC cases may have latches or slides that secure the cover, so check your PC manual for specific instructions. Once the screws or latches are removed, gently lift the cover away from the PC tower. It’s important to handle the cover and PC components with care to avoid damage.
With the cover removed, you can now access the internal components of your PC, such as the motherboard, graphics card, and hard drive. Remember to always handle everything with care, and keep screws and small components in a safe place to avoid losing them.
Safely Grounding Yourself
When it comes to opening up your PC, it’s important to ground yourself to avoid any potential damage from static electricity. The first step is to unplug your computer and all peripherals from the wall. Next, find a metal surface near your workstation and touch it with one hand.
This will discharge any static electricity you may have built up. Once you’ve grounded yourself, remove the screws from your computer case and carefully slide it off. Handle all components with care, avoiding any unnecessary touches and movements.
Always work on a stable surface, free from any clutter or potential hazards. By taking precautions and grounding yourself, you can ensure a safe and successful PC opening experience.
Installing the Samsung 870 EVO SSD
If you’re looking to upgrade your computer’s storage and performance, you may be considering installing a Samsung 870 EVO SSD. Fortunately, the process is quite simple and straightforward. First, ensure you have all necessary tools and equipment, including the SSD itself, a screwdriver, and any cables required for installation.
Next, shut down your computer and disconnect it from any power sources. You can then open up your computer and locate the existing storage drive. Remove it by unscrewing the bracket that holds it in place, disconnecting any cables, and carefully sliding it out.
Place the Samsung 870 EVO SSD in the same spot, screw it in place, and reconnect any necessary cables. Finally, turn your computer back on and ensure that it recognizes the new SSD. With just a few steps, you can enjoy improved storage and performance from your Samsung 870 EVO SSD.
Aligning and Inserting the SSD
If you’re looking for a faster speed and increased storage capacity, installing the Samsung 870 EVO SSD could be a great option. First, ensure that your computer has an available slot for the SSD. Then, shut down and unplug your PC, and carefully align the SSD in the designated slot.
Depending on your computer, you may need to take off a panel or loosen some screws to access the slot. Once aligned, firmly push the SSD into place until it clicks securely. After this, reconnect any screws or panels you removed and power up your computer to ensure that the SSD is recognized and functioning correctly.
With the Samsung 870 EVO SSD, you can enjoy faster speeds and greater storage capacity, all while completing the installation in a few simple steps.
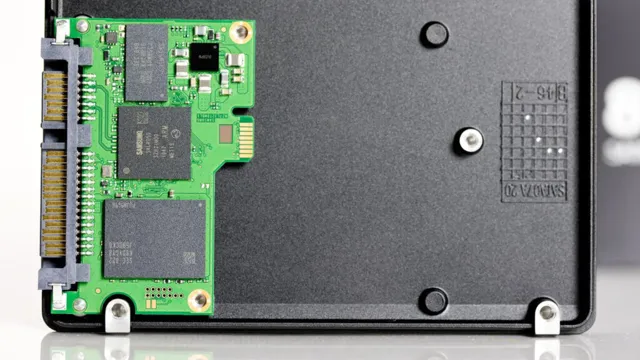
Securing the SSD with a Screw
One important step when installing the Samsung 870 EVO SSD is securing it with a screw. This helps ensure the SSD stays firmly in place and doesn’t move around inside your computer, which could cause damage. To do this, you’ll need to find the screw hole on your SSD and line it up with the screw hole in your computer’s drive bay.
Then, simply insert the screw and tighten it until the SSD is secure. It’s important not to overtighten the screw, though, as this can damage the drive or the screw itself. When done correctly, securing your SSD with a screw is a quick and easy way to add extra protection to your storage upgrade.
Booting Up and Configuring Your System
If you’ve got a new Samsung 870 EVO SSD, you’re in for a world of faster load times and more efficient operation. But first, you’ll need to install it and configure your system. Before you begin, make sure you have all the necessary tools: a screwdriver and an external drive enclosure or cloning software.
Start by turning off your computer and unplugging all the cables. Open up the case and locate the drive bay where you’ll be installing the SSD. If you’re replacing an existing drive, remove it first.
Then, insert the Samsung 870 EVO into the bay and screw it in place. Once the drive is secure, reconnect all the cables and turn your computer back on. You’ll need to set up the drive, either by installing a new operating system or cloning your existing one.
Once your system is up and running, make sure to check your BIOS settings to ensure the SSD is recognized and properly configured. With a little bit of tech savvy, you’ll be up and running with your new Samsung 870 EVO SSD in no time!
Powering On Your PC
Booting up your computer can be exciting, but it’s also important to follow certain steps for a successful configuration. First, ensure that your power supply is properly connected and switched on. You can then push the power button on your computer to turn it on.
This will display a startup screen, and you will be prompted to enter your login information. Once logged in, take some time to configure your system to your personal preferences. This can include setting up your wallpaper, background colors, screen resolution, and personalized folders for your files.
It’s important to keep your operating system updated and install necessary software updates regularly to keep your computer running smoothly. By properly booting up and configuring your system, you’ll be able to get the most out of your computer and optimize your user experience.
Configuring Your BIOS Settings
Configuring Your BIOS Settings Configuring your BIOS settings is an essential step in setting up your computer system. BIOS stands for Basic Input/Output System and is responsible for initializing hardware components and starting up the operating system. Configuring these settings varies across different computers, but accessing your BIOS is typically done by pressing a specific key during the boot-up process.
Common keys include F2, F10, or Del. Once you’ve accessed your BIOS, you can configure settings such as boot order, system time, and security options. It’s important to note that some changes in your BIOS can cause instability or even damage to your system, so it’s essential to understand the implications of any changes you make.
Taking the time to configure your BIOS settings properly can improve your system’s performance and stability.
Verifying Your SSD is Recognized
If you’ve installed a new SSD, it’s important to verify that your computer recognizes it before proceeding with any further configuration. To do this, you’ll need to access your computer’s BIOS settings by pressing a key (usually F2, F10, or Del) during startup. Once you’re in the BIOS, you can navigate to the Device Configuration or Storage Options menu to see if your new SSD is listed.
If it’s not, make sure it’s properly connected and try restarting your computer. If it’s still not recognized, you may need to update your BIOS firmware or consult with your computer manufacturer for further assistance. Once you’ve verified that your SSD is recognized, you can proceed with configuring your system for optimal performance.
Don’t forget to install your operating system and any necessary drivers to ensure your new SSD is ready to go.
Final Thoughts
In conclusion, installing a Samsung 870 EVO SSD is a relatively easy task that can greatly improve the performance of your computer. With the right tools and a bit of patience, you can upgrade your storage system and enjoy faster boot times, quicker loading of applications, and smoother multitasking. Remember to properly prepare your computer by backing up important data and creating a recovery disk or drive before starting the installation process.
Then, simply connect the SSD to your computer’s SATA port, mount it securely, and power up your system to begin the cloning process. Once completed, you can enjoy the benefits of your new SSD and the increased speed and efficiency it brings. With this step-by-step guide, you’ll soon be on your way to a more powerful, streamlined computing experience.
Conclusion
And there you have it, folks! Installing a Samsung 870 EVO SSD is as easy as pie with just a few simple steps. It’s like giving your old laptop or PC a second life, only better and faster. So, go ahead, take the plunge, and upgrade your storage game with this high-performance, reliable, and stylish SSD.
Trust us; your computer will thank you later! Happy installing!”
FAQs
What are the requirements for installing a Samsung 870 EVO SSD?
Before installing the Samsung 870 EVO SSD, ensure that you have a compatible system and sufficient storage space to accommodate the new SSD. Additionally, ensure that you have all the required tools, including a screwdriver and SATA cables.
How do I physically install the Samsung 870 EVO SSD?
To install the Samsung 870 EVO SSD, shut down your system and unplug all cables. Open the computer case and locate an empty 2.5-inch drive bay. Insert the SSD into the bay and secure it with screws. Then, connect the SATA and power cables to the SSD and motherboard.
What software do I need to install the Samsung 870 EVO SSD?
Samsung provides a free software tool called Samsung Magician that you can use to install and manage your new SSD. You can download this software from the Samsung website.
What do I do after installing the Samsung 870 EVO SSD?
After successfully installing the Samsung 870 EVO SSD, you can migrate your operating system and data from the previous hard drive to the SSD using Samsung Migration software. This will allow you to start using your new SSD right away, with all your programs and files intact.