Are you interested in upgrading your Steam Deck’s storage but don’t want to lose any of your precious game data? Cloning your Steam Deck SSD is the perfect solution! By doing this, you can transfer all of your games and settings to a larger SSD without having to reinstall everything from scratch. But how do you clone your Steam Deck SSD? Don’t worry, it’s easier than you think! In this article, we’ll go over step-by-step instructions on how to clone your Steam Deck SSD, so you can upgrade your storage with confidence. Just like upgrading your weapon in a game, cloning your SSD will help you level up your Steam Deck and give you an even better experience.
So, let’s get started!
Backup Data
Are you excited to receive your Steam Deck and want to ensure that all your data is backed up in case of any malfunctions or crashes? Well, the good news is that it is possible to clone your Steam Deck SSD to an external drive using cloning software. One of the most recommended software for this process is Macrium Reflect. Firstly, ensure that your external drive has enough space to accommodate all the data on your SSD.
Connect the drive to your Steam Deck and then download and install the Macrium Reflect software. Once installed, open the software and select the option to clone your SSD to the external drive. Follow the prompts to complete the process, and your entire Steam Deck SSD will be cloned onto the external drive.
This makes it easy to restore all your data in case of any problems. Remember to regularly back up your data to ensure that you always have an updated copy and avoid losing any crucial information.
Connect SSD via USB enclosure
If you’re looking to backup data from your SSD, a great option is to connect it to your computer via a USB enclosure. This allows you to access the data on the SSD and transfer it to another location for safekeeping. It’s also useful if you need to transfer data from an old computer to a new one without having to physically install the SSD inside the new computer.
When selecting a USB enclosure, make sure it’s compatible with the type of SSD you have, whether it’s SATA or NVMe. Once you have the enclosure, simply remove the SSD from your computer and insert it into the enclosure. Connect the enclosure to your computer with a USB cable and you should be able to access the SSD and backup your data.
This method is easy, efficient, and avoids the hassle of having to reinstall the SSD inside your computer.

Create disk image using backup software
Creating a disk image is an essential aspect of backing up data, and with backup software, the process has never been easier. By creating a disk image, you’re essentially taking a snapshot of your computer’s hard drive, allowing you to easily restore your operating system, files, and settings in case of a system failure or a malware attack. Backup software like Acronis True Image, Carbonite, or Norton Backup can help you create and schedule regular disk images, ensuring that your data is always up to date and safe.
With a few clicks, you can create a disk image of your hard drive, store it on an external drive or cloud storage, and rest easy knowing that you have a reliable backup of your important data. Overall, creating a disk image using backup software is a quick and straightforward process that provides peace of mind knowing that your data is safe from harm.
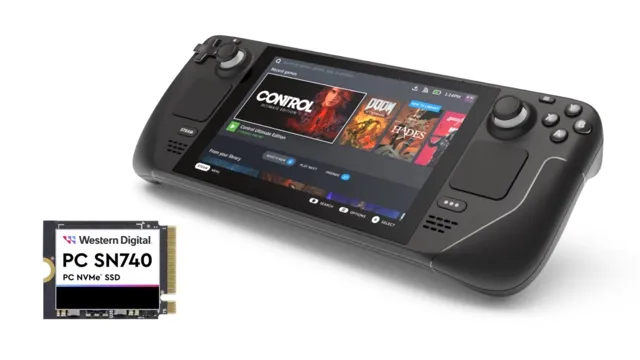
Prepare New SSD
If you’re getting your hands on a brand-new Steam Deck, it’s essential to understand how to clone its SSD. This process could aid you in migrating your current Windows operating system, games, and data onto the new SSD. First, obtain an appropriate cloning software, such as Acronis True Image, EaseUS ToDo, or Macrium Reflect.
Insert the brand new SSD to be cloned into your desktop PC and attach it to the motherboard. Make sure it’s recognized by your system and that you have sufficient disk space to hold all the data you’re cloning. Then, open the cloning software and follow the instructions provided to create a clone of the Steam Deck’s SSD.
Many videos and guides are available to help, so make use of them and be patient. Once the cloning is complete, you can remove the new SSD from your desktop and swap it into your Steam Deck. That’s it! You now have a cloned SSD with all your Windows operating system, games, and data readily available on your brand new Steam Deck.
Insert new SSD into USB enclosure
If you’ve recently acquired a new SSD and need to make use of it, you might consider getting a USB enclosure to house it. The enclosure is the perfect tool to use for data transfer and storage purposes. But before you begin the process of putting your new SSD into the enclosure, there are a few preparations you need to make.
First, you need to ensure that the new SSD is free from any dust and debris. Clean it properly before inserting it into the enclosure. Doing so will ensure the longevity and durability of the SSD.
Additionally, make sure that the enclosure and its components are free from dust and debris as well. Once everything is clean, you may proceed to insert your SSD into the enclosure. It’s a straightforward process that requires you to slide the SSD into the pre-made slots on the enclosure.
Once the SSD is securely in place, you can begin using it as an external storage device on your computer. Remember, taking good care of your equipment goes a long way in ensuring it lasts a long time.
Format new SSD with same file system as original
When upgrading your computer’s hard drive, it’s essential to format your new SSD with the same file system as the original one to ensure compatibility. The process of preparing a new SSD is straightforward and requires a few simple steps. First, make sure to back up all of your important files and data onto an external drive or cloud storage.
Next, insert the new SSD into your computer’s drive bay and connect the power and data cables. Then, turn on your computer and access the BIOS menu to ensure that the new SSD is detected by your system. Once the BIOS recognizes the new SSD, you can proceed to format it by selecting the same file system as the original one.
Whether it’s NTFS, FAT32, or exFAT, make sure to choose the correct file system before starting the format process. After formatting is complete, you can transfer your files and data back to your computer’s new SSD, ensuring that all your data and system configurations remain intact. By following these simple steps, you can experience improved performance and faster load times with your newly installed SSD.
Clone SSD
If you’re looking to upgrade your Steam Deck’s SSD or back up your data, cloning your existing SSD is a great option. To do so, you’ll need a cloning tool like Macrium Reflect or Clonezilla, an external SSD enclosure, and a new SSD of your choosing. First, connect your original SSD to the enclosure and plug in your new SSD to your PC.
Open your cloning software and select “clone this disk” or “clone this partition.” Select the original SSD as the source and the new SSD as the target, then follow the prompts to begin the cloning process. Once the process is complete, swap out the SSDs in your Steam Deck, and you’re good to go.
Remember to securely wipe your original SSD to protect your data. With a bit of patience and know-how, cloning your Steam Deck SSD is a straightforward process to improve the performance or keep your data safe.
Connect both SSDs to computer
Let’s move on to the next step of cloning an SSD, which is to connect both SSDs to your computer. This step will require you to open up your computer case and locate the SATA data and power connectors. Once you have located them, connect the SATA data cable to the SATA port on each SSD and then connect the SATA power cable to the power port on each SSD.
Make sure the connections are secure and tight to avoid any accidental disconnections during the data transfer process. Once you have successfully connected both SSDs to your computer, you can now move on to the next step of cloning the SSD. Remember to handle your SSD with care and avoid any physical damages that may occur during the transfer process.
By following these steps carefully, you can ensure a successful SSD cloning process and achieve faster boot times and improved performance of your system.
Use backup software to clone original SSD to new SSD
Cloning your original SSD to a new SSD may seem like a daunting task, but with the help of backup software, it can be done quickly and efficiently. One of the best backup software options on the market is Acronis True Image. With this software, you can create an exact copy of your original SSD and transfer it to your new SSD in just a few clicks.
This means that all of your files, folders, and settings will be seamlessly transferred over to the new drive, so you won’t have to spend hours manually reinstalling everything. When using Acronis True Image or any other backup software, it’s important to make sure that you have enough space on the new SSD to accommodate all of your data. Also, remember to disconnect any external drives and disable any anti-virus software before starting the cloning process.
With the right backup software and a bit of preparation, cloning your SSD can be a breeze.
Swap SSDs
If you’re looking to upgrade your Steam Deck’s storage, you may want to clone your current SSD onto a larger one. Fortunately, the process is quite simple. First, you’ll need to purchase a new SSD that’s compatible with your Steam Deck, making sure to get one with enough capacity to suit your needs.
Then, you’ll need to open up your Steam Deck by removing the back panel and disconnecting the battery. You can then remove the old SSD and install the new one in its place. Once you’ve done that, you can use software like Macrium Reflect or Clonezilla to clone your old SSD onto your new one.
This will make an exact copy of your old SSD, including your operating system, apps, and game saves. Once the cloning process is complete, you can reconnect the battery and replace the back panel, and your Steam Deck will be ready to go with its new and improved storage. By following these simple steps, you’ll be able to upgrade your Steam Deck’s SSD in no time.
Remove original SSD from Steam Deck
If you’re looking to upgrade the storage on your Steam Deck, the first step is to remove the original SSD that came with the device. This can be done by opening the back cover of the device and unscrewing the two screws that hold the SSD in place. Once removed, you can then swap in your new SSD of choice.
It’s important to note that not all SSDs are compatible with the Steam Deck, so make sure to do your research before making a purchase. Additionally, always remember to handle your SSD with care to avoid any damage or data loss. With the right SSD, though, you can significantly increase your storage capacity and enjoy all of your favorite games on the go without worrying about running out of space.
Insert new, cloned SSD
If you’re looking to improve the performance of your computer, swapping your old HDD for a newer SSD can be a game-changer. Before you dive in, it’s important to note that you’ll need to transfer all of your data over to the new drive, which can seem overwhelming at first. However, once you’ve backed everything up, it’s a relatively simple process to clone your old drive onto the new one.
Once you’ve got everything cloned, it’s just a matter of opening up your computer, removing the old drive, and inserting the new, cloned SSD. The process of swapping SSDs is not difficult and can do wonders for increasing the speed and performance of your computer. So, if you’re looking to give your machine a boost, don’t hesitate to swap out that old HDD for a new, high-performance SSD!
Power on Steam Deck and confirm successful cloning
Once you have successfully cloned your old SSD onto the new one and are confident that everything has transferred over correctly, it’s time to swap SSDs in your Steam Deck. To do this, make sure the device is powered off and remove all external cables and accessories. Find the screw that secures the SSD cover and unscrew it using a screwdriver.
Carefully remove the cover and locate the old SSD. Gently lift the SSD out of its socket and set it aside. Repeat the same process with the new SSD, but this time, insert it into the socket.
Make sure it is firmly in place and secure the cover back onto your Steam Deck using the screw. Once you’ve finished swapping the SSDs, power on your Steam Deck and confirm that everything has transferred over successfully. With this simple process, you can enjoy the improved speed and performance of your new SSD without losing any of your important files or data.
Conclusion
While it may seem like a daunting task to clone your Steam Deck SSD, it’s actually easier than you think! With a few simple steps, you can have an exact copy of your favorite games and files on a new SSD, ready to go at a moments notice. Just be sure to follow the instructions carefully and always make backups before tinkering with your precious data. And remember, with cloning comes great power, so use it wisely (and for gaming, of course).
Happy cloning!
FAQs
What is the process for cloning the SSD on a Steam Deck?
To clone the SSD on a Steam Deck, you will need a separate computer with cloning software installed. Connect both the Steam Deck and the computer together using a USB cable, and use the cloning software to create a duplicate image of the SSD, which can then be installed on a new drive.
Can I clone the SSD on a Steam Deck to a larger drive?
Yes, it is possible to clone the SSD on a Steam Deck to a larger drive, which can result in additional storage space for games and applications. However, it’s important to ensure that the new drive is compatible with the Steam Deck before attempting to clone the SSD.
Is it safe to clone the SSD on a Steam Deck?
Yes, cloning the SSD on a Steam Deck is safe as long as you follow the proper procedures and use reliable cloning software. It’s also important to backup your data before performing any cloning, just in case something goes wrong.
What are the benefits of cloning the SSD on a Steam Deck?
Cloning the SSD on a Steam Deck can provide several benefits, such as allowing for more storage space for games and applications, and creating a backup in case the original SSD fails. It can also be useful for transferring data to a new device or upgrading the SSD to a larger or faster model.