Looking to upgrade your laptop or computer’s storage space? Perhaps you need more room to store your photos, videos, games, and other files? Or maybe your current M.2 SSD is running out of space? Whatever the reason may be, cloning your M.2 SSD could save you time and potentially money.
It’s a process that allows you to copy all the data from your existing M.2 SSD to a new one without losing any files or data. But how exactly do you go about cloning an M.
2 SSD? In this blog post, we’ll walk you through the steps from start to finish, and provide some helpful tips and advice along the way!
Gather Your Materials
So, you want to learn how to clone a M.2 SSD? Great! Before we get started, you’ll need to gather a few materials. Firstly, you’ll need the new SSD that you want to clone to.
Make sure you check the specifications of your computer to ensure it is compatible with an M.2 form factor. You’ll also need a cloning software like Acronis True Image, EaseUs Todo, or Clonezilla.
It’s essential to choose a reliable software that comes with good reviews. Additionally, you’ll need a USB to M.2 SSD adapter or a M.
2 SSD enclosure, which will help you connect the new SSD to the computer. Lastly, you’ll need to have a screwdriver handy in case you need to open your computer’s casing to access the SSD slot. With all these materials gathered, we’re ready to start the cloning process.
Let’s get going!
M.2 SSD Cloning Software
M.2 SSD cloning software. Are you planning to clone your M.
2 SSD, but not quite sure where to start? Don’t worry, we’ve got you covered! To get started, you’ll need a few materials. First and foremost, you’ll need a reliable M.2 SSD cloning software.
Make sure you do your research and find a program that is compatible with both your source and target drives. You’ll also need an external hard drive or SSD to backup your data before starting the cloning process. This is important in case anything goes wrong during the cloning process, you’ll still have all your data safely backed up.
Additional materials you may need include a screwdriver to open your computer and access the M.2 SSD, and a USB enclosure to connect the new M.2 SSD to your computer.
With these materials ready, you can start your M.2 SSD cloning journey and upgrade your computer’s performance in no time!
Cloning Dock or Cable
When it comes to cloning a dock or a cable, there are certain materials you’ll need to get started. Firstly, you’ll need a cloning tool such as a USB clone cable or a cloning dock that will allow you to copy data from one device to another without the need for a computer. You’ll also need two identical hard drives or solid-state drives that are compatible with the cloning tool.
Once you have these materials, you can begin the cloning process. It’s important to note that if you’re cloning a dock, you’ll need to ensure that both docks are from the same manufacturer and have the same specifications. This will ensure a smooth and successful cloning process.
With the right materials at hand, you can clone your dock or cable with ease and convenience, saving time and effort in the process.
Prepare Your Source and Destination SSDs
If you’re looking to upgrade or replace your current M.2 SSD, cloning is an excellent option to seamlessly transfer all your data and files to the new drive. Before starting the cloning process, it’s crucial to prepare both the source and destination SSDs properly.
Begin by ensuring that both SSDs are compatible, as not all M.2 SSDs are the same. Check the specifications of your old and new SSD to ensure they both have the same interface and key notch.
After compatibility, verify that both SSDs are healthy and free of errors. Run a diagnosis tool to check for any bad sectors, as they can cause errors during the cloning process. If possible, back up all the data on the source SSD to an external drive before cloning.
Finally, ensure that the destination SSD has enough capacity to hold all your data. With these preparations in place, you’re ready to move onto the next steps of cloning your M.2 SSD with ease.
Back Up Your Data
When it comes to backing up your data, your source and destination SSDs play a crucial role in the process. First, you’ll want to ensure that your source SSD has enough space to store all the files you want to back up. If it doesn’t, consider deleting any unnecessary files or upgrading to a larger SSD.
Next, you’ll want to choose a destination SSD that has enough space to store your backup data. It’s important to note that you should never choose to back up your data onto the same SSD that your source data is stored on, as this defeats the purpose of having a backup in case of hardware failure. Additionally, make sure that your destination SSD is a reliable and durable option that will remain functional in case of unexpected data loss.
By taking these steps and carefully preparing your source and destination SSDs, you can ensure that your data is safely backed up and protected from any potential mishaps.
Insert Your SSDs into the Cloning Dock or Cable
When it comes to upgrading your computer’s storage capacity, one option you might consider is cloning your existing hard drive onto a new solid-state drive (SSD). Before you get started, however, you’ll want to make sure you have everything you need. This includes both a source drive (i.
e., the drive you’re currently using with your computer) and a destination drive (i.e.
, the drive you want to clone your data onto). These drives can be inserted into a cloning dock or connected via a cable. Once you’ve secured your drives, you can move on to the next steps of the cloning process.
By preparing your source and destination SSDs properly, you’ll help ensure a successful and stress-free cloning experience.
Clone Your M.2 SSD
If you’ve upgraded your computer’s M.2 SSD and want to transfer all your data and settings to the new one, cloning is your easiest and quickest solution. Cloning is the process of creating a replica of the original drive, and with the right cloning software, it’s a straightforward task.
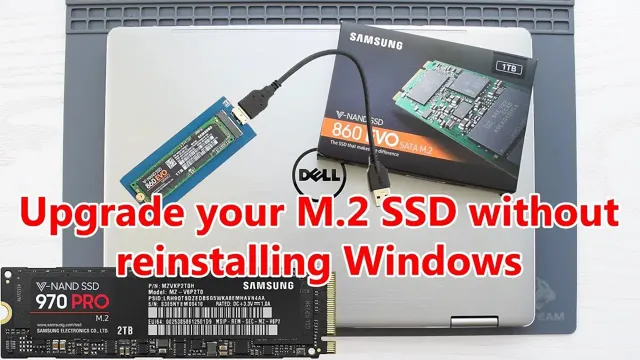
One option is to use a propriety software provided by the manufacturer of your new M.2 SSD. Samsung, for example, offers a cloning tool called Data Migration Software.
You can also use third-party software such as EaseUS, Acronis, or Macrium Reflect to clone your M.2 SSD. The process is similar with all the software available: plug in the new SSD drive, ensure the cloning software recognizes both drives, and follow the prompts to clone your existing OS and data to the new drive.
After completion, restart your computer, enter the BIOS settings, and ensure the new SSD is set as the primary boot device. With a cloned M.2 SSD, you can immediately continue working without losing anything you had on your old drive.
Plus, you’ll enjoy the benefits of increased storage capacity and faster read and write speeds, depending on the new SSD’s specifications. So, now that you know how to clone a M.2 SSD, you can upgrade with confidence knowing you won’t lose any data.
Start The Cloning Process
If you’re looking to upgrade your M.2 SSD, the first step is to clone your current drive. This process can be a bit daunting, but with the right tools, it’s actually quite straightforward.
To start, you’ll need a cloning software. There are many options available, both paid and free. Some popular choices include Acronis True Image, EaseUS Todo Backup, and Macrium Reflect.
Once you’ve selected your software, the next step is to connect your new SSD. You can either use an M.2 to USB adapter or connect it internally if your motherboard supports it.
Then, simply follow the instructions of your cloning software and you’ll be on your way to a faster, more spacious M.2 SSD in no time! Remember to back up your data beforehand in case any errors occur in the cloning process.
Wait for the Cloning Process to Finish
When cloning your M.2 SSD, it’s essential to wait for the cloning process to finish before doing anything else. The time it takes to clone your SSD can vary, depending on the amount of data you’re transferring, the speed of your SSDs, and the software you’re using.
It’s vital to be patient during this process and not interrupt the cloning process. Interrupting the cloning process could result in data loss, errors, and even render your SSDs unusable. So, sit back, relax and wait for the cloning process to finish.
Once the cloning is complete, you can swap out the old SSD for the new cloned SSD and enjoy the benefits of faster boot times, faster app launch, and more storage space. Just remember that cloning is not a backup solution, and it’s essential to have a backup of your data in case anything goes wrong.
Verify the Cloning Was Successful
After you have finished cloning your m.2 SSD, it is essential to verify the cloning was successful. Fortunately, it is relatively easy to do so.
The easiest way to tell if the cloning process was successful is to check if the new drive has enough storage capacity to support all your files and data. Also, make sure that all the files that were on the original drive were successfully transferred to the new one. You can also check the drive’s health status using a program like CrystalDiskInfo to ensure no errors or issues occurred during the cloning process.
Additionally, you may consider booting your computer from the cloned drive to see if it works correctly. If everything looks good, then congratulations, you have successfully cloned your m.2 SSD!
Test Your Newly Cloned SSD
After successfully cloning your SSD, it’s important to verify that the process went smoothly. This will help ensure that your new drive is fully operational and ready for use. One easy way to test your newly cloned SSD is by checking the capacity and available space.
You can do this by opening the file explorer and checking the properties of your new drive. If everything looks good, you can move on to copying or transferring files to your new SSD. Another important step is to make sure that your computer is booting up from the cloned drive.
You can do this by going into the BIOS settings and selecting your new SSD as the boot device. With these simple steps, you can verify that your newly cloned SSD is working properly and ready for use.
Compare Files with Source
After successfully cloning a repository, it is essential to verify that the cloned files are identical to the source. You can do this by comparing the original files with the cloned ones. This process ensures that the cloning was successful and that there were no errors during the copying process.
There are various methods to compare files, such as using a file comparison tool or the command-line interface. Some popular file comparison tools are Beyond Compare, WinMerge, and Araxis Merge. These tools have features that help highlight differences between the original and the cloned version.
Another way to do this is by using the command-line interface, which is built into most operating systems. It compares file contents by checking the hashes of the source and the cloned files. This method is faster compared to using comparison tools and is useful for people who prefer text-based interfaces.
By verifying the cloning process, you can ensure that the cloned files are identical to the original ones, providing peace of mind that your work is safe and secure.
Conclusion
Congratulations! You’ve successfully learned how to clone a M.2 SSD. Now you can confidently upgrade your storage without losing your data or starting from scratch.
Just remember, cloning is not the same as teleportation, but with the right tools and this guide, you can make a copy of your SSD faster than you can say “beam me up, Scotty.” Happy cloning!”
FAQs
What is an M.2 SSD?
M.2 SSD is a solid-state drive that uses the M.2 interface to slot directly into a compatible motherboard. It is a faster and more reliable storage option than traditional hard disk drives.
Can you clone an M.2 SSD to another M.2 SSD?
Yes, you can clone an M.2 SSD to another M.2 SSD using cloning software such as Clonezilla, Acronis True Image, or EaseUS Todo Backup. It simplifies the process of transferring data from the old SSD to a new one.
What is the easiest way to clone an M.2 SSD?
The easiest way to clone an M.2 SSD is to use a cloning software that supports M.2 SSDs. You can download cloning software such as Macrium Reflect Free, Samsung Data Migration, or MiniTool Partition Wizard Free.
Do you need to backup your data before cloning an M.2 SSD?
Yes, it is always recommended to backup your data before cloning an M.2 SSD. Although cloning is a safe procedure, there’s always a chance that something may go wrong during the process, and you do not want to lose your important data.