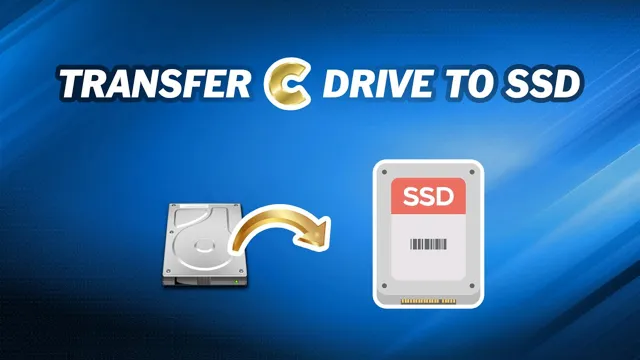
Are you tired of slow boot-up times and sluggish performance on your computer? Have you considered upgrading to a new SSD? Switching out your old hard drive for a speedy new SSD can be a game-changer in terms of speed and performance. However, it’s not as simple as just plugging it in and turning it on. In fact, you’ll need to transfer your operating system and all of your files from your current drive to the new one.
That’s where the process of changing your C drive to a new SSD comes in. In this blog, we’ll guide you through the steps you need to take to make the switch and get your computer running faster than ever before.
Preparing for the Transfer
If you’re looking to change your C drive to a new SSD, it’s important to prepare correctly for the transfer process. First, make sure that you’ve backed up any important files on your current C drive. Next, you’ll need to download and install cloning software that will allow you to clone your current C drive onto the new SSD.
Once the software is installed, you can connect the new SSD to your computer and begin the cloning process. This process may take some time depending on the amount of data on your current C drive. Once the cloning is complete, you’ll need to configure your computer to boot from the new SSD, which can be done through the BIOS settings.
With these steps completed, you should now be able to enjoy the benefits of improved performance and faster read and write speeds on your new SSD.
Backing Up Your Data
Before transferring your data to a new device or storage system, it’s essential to back up your files. Having a backup of your important files ensures that you don’t lose any valuable data in case something goes wrong during the transfer. To prepare for the backup, start by identifying the files you want to keep and create a backup plan.
You can choose to use an external hard drive, cloud storage, or an online backup service to back up your files. Once you have a backup plan, make sure to check that you have enough space on your backup device or account to store all your files. You don’t want to run out of space halfway through the backup process.
It’s also a good idea to organize your files before backing them up, so you can easily find and access the files you need later on. By taking these steps, you can ensure that your data is safe and secure during the transfer process.
Gathering Necessary Tools
When preparing for a domain transfer, it’s important to gather the necessary tools to ensure a smooth transition. One of the most important tools you’ll need is your domain registrar account login information. This will allow you to make changes to the domain’s settings and transfer authorization codes.
You may also need to gather information about your website hosting account, such as FTP login details and specific instructions for transferring website files and databases. It’s essential to have a clear understanding of what needs to be transferred and in what order, so it’s important to create a comprehensive checklist of all the necessary steps. By gathering the necessary tools and information beforehand, you can avoid potential errors and delays in the domain transfer process.
Cloning Your C Drive
If you’re running out of space on your C drive, or just want to upgrade to a faster SSD, you may be wondering how to transfer everything to your new drive. The good news is, cloning your C drive has never been easier. There are a few steps involved, but the process is simple and straightforward.
First, you’ll need to connect your new SSD to your computer and make sure it’s recognized by your system. Then, you’ll need to download cloning software such as EaseUS Todo Backup or Acronis True Image. From there, you’ll run the cloning software and select your C drive as the source, and your new SSD as the destination.
The software will then copy everything from your C drive to your new SSD, including your operating system, programs, and files. Once the cloning process is complete, you’ll need to change your boot order in the BIOS to boot from your new SSD. Voila! Your C drive is now on your new SSD, and you can enjoy faster speeds and more storage.
Installing Data Migration Software
When it comes to cloning your C drive, you will first need to install data migration software on your computer. This software is essential in transferring your entire operating system, files, and applications from the original drive to a new one. After installing the software, you can begin the cloning process by selecting the C drive as the source and the new drive as the destination.
Once you start the process, the software will create an exact copy of your C drive, including the operating system and all of your files and applications. This can be a time-consuming process, especially if you have a lot of data on your C drive. However, it’s important to be patient and let the software complete the cloning process to ensure that everything is transferred successfully.
Overall, cloning your C drive using data migration software can be a great way to upgrade your computer’s hard drive without losing any of your important data.
Transferring Data to the New SSD
Cloning Your C Drive Cloning your C drive can be an efficient way to transfer data to your new SSD. This process creates an exact copy of your current hard drive and moves it to the new SSD, allowing you to maintain all your current files, settings, and preferences without the need to reinstall everything. To get started, you’ll need cloning software, such as EaseUS Todo Backup or Clonezilla.
Once installed, connect your new SSD to your computer and launch the cloning software. Follow the prompts to select your current C drive as the source and the new SSD as the destination. Then, initiate the cloning process.
This can take anywhere from a few minutes to several hours, depending on the amount of data being transferred. Once complete, your new SSD should function just like your previous hard drive, with all your data and settings intact. It’s important to note that after the cloning process is complete, you should disconnect your old hard drive to avoid any confusion with your computer’s boot settings.
Overall, cloning your C drive is a reliable and straightforward way to make the transition to a new SSD.
Swapping the Drives
Looking to change your C drive to a new SSD? Well, it’s not a difficult task, and can significantly improve the speed and performance of your computer. First, you’ll need to clone your C drive to the new SSD using specialized software such as Macrium Reflect or EaseUS Todo Backup. Once the cloning process is complete, shut down your computer and disconnect the old C drive, leaving only the new SSD connected.
Boot up your computer and open your BIOS settings to ensure that the new SSD is recognized as the primary boot device. You may need to change the boot order to the new SSD if it’s not showing up as the top priority. Finally, save your new settings and restart your computer.
Your new SSD should now be the primary drive, and you can now enjoy the responsive performance of an SSD. It’s important to note that this process may require additional steps or specific settings depending on your computer’s hardware and operating system. If you’re unsure about any of these steps, seek professional guidance or consult your computer’s manual.
Shutting Down Your Computer and Disconnecting C Drive
Swapping the Drives Swapping your computer’s C drive can be quite an undertaking, but it’s not impossible. First, you’ll want to shut down your computer properly to ensure that everything is saved and closed. Once your computer is off, you can safely unplug the C drive.
But before you do so, ensure that you have all the necessary cables and components for your new drive. When you’re ready to swap the drives, remove the old C drive and replace it with the new one. Remember to ensure that everything is plugged in properly before turning your computer back on.
It’s important to note that swapping your C drive will erase all the data that was on the old drive, so be sure to backup any important files beforehand. You should also ensure that the new drive is compatible with your computer before making any changes. Take the time to research the specifications of your computer and the new drive beforehand to ensure that everything runs smoothly.
In conclusion, swapping your C drive can be a bit daunting, but it’s not impossible. Remember to backup your files, ensure compatibility, and take the necessary precautions when unplugging and plugging in new components. With a bit of preparation and know-how, you can successfully swap your C drive and get your computer up and running again in no time.
Installing the New SSD and Connecting Wires
Swapping the drives is a crucial step in installing the new SSD and connecting the wires of your computer. It requires some technical expertise and attention to detail, but it’s worth it in the end. First, you’ll need to locate your old hard drive and unplug the cables connected to it.
Then, carefully remove it from its slot. It’s essential to ground yourself and handle the drive with care to avoid any static electricity damage. Secondly, take the brand new SSD out of its packaging and place it into the slot where the old drive used to sit.
Make sure to screw it in place. Finally, connect the cables to the new SSD, ensuring that they are firmly attached. When done, you can test your computer and see if it boots up correctly.
By following these steps and swapping out the drives, you can enjoy faster boot-up times, improved system performance, and more storage space.
Finishing Touches
If you’re looking to upgrade your computer’s performance, switching from a traditional hard drive to a solid-state drive (SSD) is a great option. But what if you want to transfer all your data from your C drive to the new SSD? Fortunately, it’s not that difficult. The first step is to clone your C drive to the new SSD using disk cloning software.
Once that’s done, you’ll need to physically replace the old hard drive with the new SSD. Don’t forget to change the boot order in the BIOS so that your computer boots from the new drive. Finally, you’ll need to format the old C drive and assign it a new letter if you plan to use it for additional storage.
With these simple steps, you can easily change your C drive to a new SSD and enjoy faster performance and more storage space on your computer!
Booting Up Your Computer and Confirming the Transfer
“Booting Up Your Computer and Confirming the Transfer” Now that you’ve successfully transferred your important files to your new computer, it’s time to finish up by booting up your computer and confirming the transfer. Make sure all cables are properly connected and turn on your computer. You may need to sign in to your new computer with your username and password.
Once you’re logged in, navigate to your files and check that everything you wanted to transfer is there. You can do this by opening each file and confirming that it’s the correct version. Double-check that all of your important emails, photos, and documents have been successfully transferred and saved.
It’s always better to be safe than sorry, so take a few extra minutes to go through your files. If everything looks good and you’ve confirmed that your files and folders are intact, then congratulations! You’ve successfully migrated all of your valuable data to your new computer. Don’t forget to take some time to explore your new system and familiarize yourself with its features.
Erasing Data from Old C Drive
Erasing data from an old C drive is an essential step to ensure your personal information is safeguarded from unauthorized access. Once you have backed up any important files, it is time to wipe the drive clean. One effective way of doing this is by using a professional data erasure software program.
These applications use secure algorithms to overwrite the previous data on your hard drive, making it unrecoverable. It’s important to consider your specific needs when choosing a program and make sure that it meets the highest security standards. With the right tool, you can ensure that all sensitive information has been completely destroyed, leaving your old C drive clean and ready to be disposed of or repurposed.
Don’t leave anything to chance when it comes to your personal data – make sure that you take the necessary steps to erase it securely.
Conclusion
In conclusion, changing your C drive to a new SSD is like giving your computer a fresh start – a new lease on life. It’s like moving into a luxurious new home, with more space, better performance, and faster speed. And just like moving can be a daunting task, so too can this process feel overwhelming.
But with the right tools, preparation, and a bit of perseverance, you can successfully migrate all your data and applications seamlessly onto your new SSD. So go ahead and take the plunge, and watch your computer soar to new heights!”
FAQs
What are the benefits of upgrading to an SSD for the C drive?
Upgrading to an SSD for the C drive can result in faster boot-up times, improved overall system performance, and reduced file transfer times.
Can I clone my current C drive onto the new SSD?
Yes, it is possible to clone your current C drive onto the new SSD using software such as Clonezilla or Macrium Reflect.
Should I perform a clean install of Windows on the new SSD instead of cloning?
It is recommended to perform a clean install of Windows on the new SSD to ensure optimal performance and avoid any potential issues from old system files.
Is it better to purchase a larger SSD than my current C drive size?
It is recommended to purchase an SSD that is at least the same size as your current C drive to ensure all files can be transferred. However, purchasing a larger SSD can provide additional storage space for future use.