Have you ever felt like your Windows 11 PC is running sluggishly even though it’s relatively new? The sudden decrease in computer speed could be attributed to the traditional hard drive that comes with most PCs. If you tend to multitask frequently, your computer’s hard drive may not be fast enough to keep up with the demands of modern applications. However, all hope is not lost as you can add a Solid State Drive (SSD) to your Windows 11 PC to improve its performance significantly.
Think of it like trading in your bicycle for a Ferrari. An SSD is more expensive compared to a traditional hard drive, but its reliability and rapid performance make it a worthwhile investment. It comes equipped with faster read and write speeds, which makes booting up, launching applications, and processing multiple tasks smoother and faster.
Not only does it accelerate your PC’s performance, but it also saves you time and spares you from frustration. In this article, we’ll delve deeper into the benefits of adding an SSD to your Windows 11 PC and guide you through the process of installing one. We’ll also tackle frequently asked questions surrounding SSDs and address potential challenges in setting them up.
By the end of this article, you’ll know why adding an SSD is the best decision you could make for your Windows 11 PC. So, buckle up, and let’s get started!
Check Compatibility
Adding an SSD to your Windows 11 computer can offer a significant boost in performance, but it’s essential to check compatibility before making the upgrade. Firstly, you need to make sure that your PC has an open slot for an additional SSD and that it is compatible with the type of drive you want to install. Secondly, you need to ensure that your motherboard supports the proper interface for your SSD, whether it is SATA, M.
2, or NVMe. Once you have verified compatibility, the next step is to open your computer case carefully and install the SSD securely into the open slot. Finally, you need to configure the SSD properly in your Windows 11 settings and transfer data to the new drive for optimized performance.
With these simple steps, you can successfully add an SSD to your Windows 11 computer for faster boot times, better application performance, and an overall smoother computing experience.
Review system requirements for SSDs
If you’re planning to upgrade to an SSD, one important consideration is compatibility. Before purchasing an SSD, make sure to check your device’s system requirements, including the form factor or size, interface type, and capacity limits. Some SSDs are designed for specific devices or operating systems, so it’s worth doing some research to ensure that the one you choose is compatible with your device.
Additionally, some older devices may not support the latest SSD technology, so consider choosing an older or more basic SSD if that’s the case. By taking the time to check compatibility, you can ensure that your SSD upgrade will be successful and enhance your device’s performance.

Select SSD
If you’re looking to speed up your Windows 11 computer, adding an SSD is an excellent option. SSDs are faster and more reliable than traditional hard drives, and they’ll significantly improve your computer’s performance. Here’s how to add an SSD to Windows 11: First, you need to determine the type of SSD that’s compatible with your computer.
Some other important factors to consider are the size and capacity of the SSD. Then, you need to open your computer case and locate an available drive bay. Carefully remove any screws or brackets that secure the drive bay.
Gently slide your SSD into the bay, making sure it’s properly aligned. Secure it with screws or brackets if necessary. Next, verify that your computer recognizes the new SSD.
Launch Disk Management in Windows 11 and look for the SSD. Right-click on it, and then select ‘New Simple Volume’ from the context menu. Follow the prompts to format the SSD and assign a drive letter.
Finally, you need to clone your existing hard drive to the SSD. This is an important step because it will transfer all your existing data, operating system, and settings to the new drive. There are a few tools available for cloning drives, such as EaseUS Todo Backup, Macrium Reflect, and Acronis True Image.
Once you’ve cloned the drive, you can switch your computer off and remove the old hard drive. Your new SSD should now be the primary drive, and your computer should boot up much faster. Adding an SSD to your computer can be a bit intimidating, but it’s worth doing.
Choose an SSD based on storage needs and budget
SSD, storage, budget When it comes to choosing an SSD for your computer, the first consideration is the storage capacity you need based on your usage. If you are using your computer for basic tasks such as browsing the internet and using office applications, a smaller capacity SSD such as 120GB or 240GB would suffice. However, if you are a gamer, content creator, or store a lot of data, you may need to opt for higher capacities such as 500GB or 1TB.
Another important consideration is your budget. SSDs can range from affordable to expensive, and you should choose one that fits your budget without compromising on quality. Research the different brands, read reviews, and compare prices to make an informed decision.
Ultimately, choosing an SSD that fits both your storage needs and budget will ensure a fast and reliable computer experience.
Install SSD
Adding an SSD to your Windows 11 computer can be a game changer when it comes to speed and performance. To add an SSD to your PC, you’ll first need to acquire the SSD, either by purchasing it or salvaging it from another computer. Once you have the SSD in hand, you’ll need to connect it to your computer.
This can usually be done by connecting the SSD to your computer’s SATA port. You’ll then need to configure the SSD in your operating system to make the most of its benefits. This process can vary depending on your specific computer and operating system, but a quick Google search should provide all the necessary instructions.
Overall, adding an SSD to your Windows 11 machine is a fairly simple process with enormous benefits in terms of speed and performance. So if you’re looking to breathe new life into your PC, an SSD could be just the thing you need.
Open your computer and insert the SSD
When it comes to boosting the performance of your computer, installing a solid-state drive (SSD) is the way to go. The first step in the process is to physically install the SSD into your computer’s storage drive bay. To do this, you’ll need to open up your computer’s case and locate the storage bay.
Once you find it, carefully insert the SSD into the bay, making sure it’s securely in place. If you’re not sure where the storage bay is located or how to insert the SSD correctly, consult your computer’s manual or reach out to a professional for assistance. By taking this first step in the installation process, you’re well on your way to experiencing the speed and efficiency benefits of your new SSD.
Remember, a properly installed SSD can make all the difference in your computer’s performance.
Initiate SSD Setup
If you’re wondering how to add an SSD to your Windows 11 system, it’s a relatively simple process to get started. The critical first step is to ensure you have the right hardware components and tools on hand. You’ll need a compatible SSD drive, a SATA cable, and a screwdriver.
Once you have the necessary components, shut down your PC and open up the case. Locate an open drive bay and install the SSD drive, using your SATA cable to connect it to your motherboard. Then, power on your system and head into your system’s BIOS to confirm the drive is properly installed.
From there, you can initialize the drive, format it, and partition it according to your needs using Windows 11’s Disk Management tool. With your SSD set up and ready to go, you’ll notice a significant improvement in your system’s speed and performance.
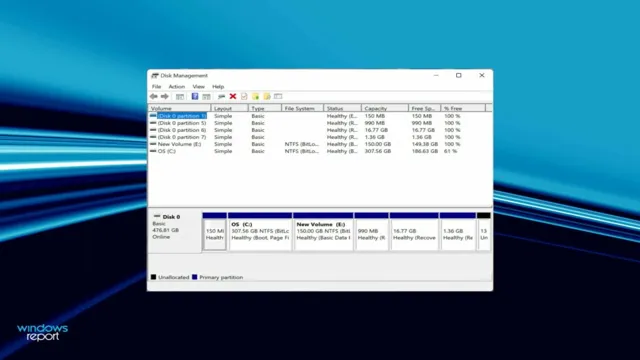
Access Windows 11 Disk Management
If you’re looking to set up your SSD on Windows 11, you’ll need to access the Disk Management tool. This can be done by right-clicking on the Start button and selecting Disk Management from the context menu. Once you’re there, you’ll see all of your hard drives and partitions listed.
To initiate the SSD setup process, you’ll need to locate the unallocated space on your hard drive and right-click on it. Then, select the “New Simple Volume” option and the wizard will guide you through the rest of the setup process. It’s essential to ensure that your SSD is set up correctly so that it can perform at its maximum capacity.
By following these steps, you’ll be well on your way to getting the most out of your SSD.
Format and partition your new SSD
Before you can start using your newly purchased SSD, you’ll need to format and partition it. Luckily, this process is relatively straightforward and doesn’t require any specialized technical skills. The first step in initiating SSD setup is to connect your SSD to your computer.
You can do this using either a SATA-to-USB adapter or by opening up your computer’s case and installing the SSD directly. Once your SSD is properly connected, you can open up your computer’s “Disk Management” tool. From there, you can initialize your SSD, create partitions, and format it using either the NTFS or exFAT file systems.
It’s important to note that formatting your SSD will remove any data that’s currently on it, so make sure you backup any important files before you proceed. With your SSD formatted and partitioned, you’ll be ready to start using it to store and access your files at lightning-fast speeds.
Transfer Data
Adding an SSD to your Windows 11 device can be a great way to speed up your computer and improve its performance. Once you’ve installed the SSD in your device, you may need to transfer your data from your old hard drive to your new SSD. There are several ways to transfer your data, including using a cloning software or manually transferring your files.
The easiest and most efficient way to transfer data is to use a cloning software. This software will transfer all your old files, programs, and operating system to the new SSD, making it look exactly like the old hard drive. However, if your new SSD is smaller than your old hard drive, you may need to manually transfer your files to ensure all your important data is saved.
Whether you choose to use a cloning software or manually transfer your files, adding an SSD to your Windows 11 device is a great way to improve its performance and speed up your computer.
Transfer data from the old hard drive to the new SSD
Transferring data from an old hard drive to a new SSD can seem like a daunting task, but it doesn’t have to be. One option is to use a data migration software, such as EaseUS Todo Backup, which can make the process quick and easy. First, ensure that both the old hard drive and new SSD are both connected to your computer.
Then, open the migration software and choose the source (old hard drive) and destination (new SSD) drives. Next, select the data you want to transfer, which can include everything or just selected files and folders. Finally, initiate the transfer and let the software do the rest.
Once the transfer is complete, you can disconnect the old hard drive and start using your new SSD with all your old data intact. Overall, transferring data may seem complicated, but with the right tools, it can be a stress-free process.
Test and Optimize
Adding an SSD to your Windows 11 computer can improve its performance, making it run faster and smoother. Here’s how you can do it. First, you need to buy an SSD that is compatible with your computer’s motherboard.
Once you have the SSD, you can open up your computer tower, insert the SSD into the vacant slot, and connect it to the motherboard. Next, you need to format the SSD, and then clone your existing hard drive onto the new SSD using a cloning software program. Once the cloning process is complete, you should adjust the boot order in the computer’s BIOS settings so that it boots from the SSD.
Finally, once you have successfully migrated your operating system to the SSD, you need to optimize it for peak performance by disabling any unnecessary services, updating drivers, and tweaking power settings. With these simple steps, you’ll be able to add an SSD to your Windows 11 computer and experience a significant boost in its overall performance.
Run performance and optimization tests on the new SSD
Now that you’ve upgraded your storage with a new SSD, it’s important to test and optimize its performance to ensure you’re getting the most out of it. One way to do this is by running a benchmark test on the drive. This test will measure the drive’s read and write speeds, as well as its random access times.
You can use software such as CrystalDiskMark or AS SSD Benchmark to run these tests. Once you have the results from the benchmark test, you can begin optimizing the drive’s performance. One way to do this is by enabling the TRIM command, which ensures that the drive’s performance stays consistent over time.
To enable TRIM on Windows, simply open the Command Prompt and type in “fsutil behavior set DisableDeleteNotify 0”. On macOS, TRIM is typically enabled automatically. Another way to optimize your SSD’s performance is by disabling any unnecessary services or applications that may be running in the background.
This can help reduce the load on your system and free up resources for your SSD to use. You can also ensure that your SSD is being used as your primary drive for your operating system and any frequently used applications. In conclusion, testing and optimizing your new SSD will help ensure that you’re getting the best performance possible.
By running benchmark tests, enabling TRIM, and optimizing your system settings, you can help maximize your SSD’s speed and lifespan. So be sure to take the time to fine-tune your new drive to get the most out of your investment.
Conclusion
In summary, adding an SSD to Windows 11 is like giving your computer a much-needed turbo boost. By simply following a few easy steps, you can improve the speed, efficiency, and overall performance of your system. Just remember to back up your important data, choose the right SSD for your needs, and have fun enjoying all the benefits that come with a faster and sleeker computer!”
FAQs
What is an SSD and why is it beneficial to add one to a Windows 11 computer?
SSD stands for solid-state drive, and it provides faster read and write speeds than a traditional hard drive. It can significantly improve overall system performance, reducing boot times and enhancing the responsiveness of applications and file transfers.
Can any computer be upgraded with an SSD?
Most desktop and laptop computers can be upgraded with an SSD, as long as they have an available drive bay or an external enclosure interface. However, some older systems may not support modern SSDs or may have compatibility issues with certain models.
How do I physically install an SSD into my Windows 11 computer?
Installing an SSD typically involves opening the computer case, locating an empty drive bay, installing the SSD using screws or slide-in brackets, and connecting the power and data cables. It is important to follow the manufacturer’s instructions and precautions to avoid damage to the drive or the computer.
What software tools do I need to clone my existing hard drive to the new SSD?
There are several popular disk cloning and migration tools available, including Acronis True Image, EaseUS Todo Backup, and Macrium Reflect. These tools can help you transfer all the data, settings, and applications from your existing hard drive to the new SSD, so that you can continue using your computer without reinstalling everything from scratch.