Are you looking to upgrade your Lenovo Legion 5 with an SSD but don’t know where to start? Look no further! By adding an SSD to your Lenovo Legion 5, you can enjoy a faster boot-up time, improved system performance, and quicker access to your files. But how do you go about adding an SSD to your laptop? Don’t worry, it’s simpler than you might think. With just a few tools and some basic knowledge, you can have your Lenovo Legion 5 up and running with an SSD in no time.
In this blog, we’ll break down the process step-by-step and provide you with all the information you need to know to successfully upgrade your laptop. We’ll cover everything from choosing the right SSD to installing it into your laptop, so you can feel confident and informed throughout the process. So, let’s get started and upgrade your Lenovo Legion 5 with an SSD today!
Check Compatibility
If you’re wondering how to add an SSD to your Lenovo Legion 5, it’s important to first check compatibility. Not all SSDs are compatible with every laptop, so it’s important to make sure you’re getting the right one for your device. The Lenovo Legion 5 is compatible with both M.
2 NVMe SSDs and SATA III SSDs, but it’s crucial to check the length of the SSD as well. Most Lenovo Legion 5 models can only accommodate SSDs that are 2280 (22 mm wide, 80 mm long) in size. If you’re unsure about compatibility, it’s always a good idea to consult the manufacturer’s website or reach out to their customer support team, who can provide you with more detailed information.
Check if your laptop can support SSD
SSD, laptop, compatibility Before you buy an SSD for your laptop, it’s essential to check if it can support it. Not all laptops are compatible with SSDs, and the last thing you want is to invest in a new SSD only to find out that your laptop can’t use it. One way to check for compatibility is to look for the laptop’s specifications.
Check the type of SSD it can support, such as M.2 or SATA. You can usually find this information by checking the manufacturer’s website or the laptop’s manual.
Next, confirm if your laptop has an open slot for the SSD. Some laptop models may come with an SSD installed, but if yours doesn’t, you need to make sure that the motherboard has an available slot for it. If you’re unsure about any of these steps, it’s best to consult a professional or contact the laptop manufacturer’s customer support for clarification.
By checking for compatibility beforehand, you can save yourself time, money, and frustration in the long run and ensure that your laptop will run smoothly with a new SSD upgrade.
Choose the Right SSD
If you’re looking to upgrade your Lenovo Legion 5 by adding an SSD, it’s important to choose the right one for your needs. There are a few factors to consider when selecting an SSD, including storage capacity, read/write speeds, and compatibility with your device. It’s also important to consider the form factor of the SSD, as some laptops may require a specific size or shape.
When it comes to the keyword “how to add SSD to Lenovo Legion 5,” step-by-step instructions can typically be found in the user manual or via online resources. With the right SSD and proper installation, you can greatly improve the performance and storage capacity of your Lenovo Legion 5 for a smoother, faster computing experience.
SATA or NVMe? Look for size and capacity
When it comes to choosing the right SSD for your needs, size and capacity should be your top priorities. SATA and NVMe are two common types of SSDs, with NVMe being the faster and more efficient option. However, if you only need a small SSD for basic storage needs, a SATA SSD might be the more budget-friendly choice.
On the other hand, if you require lightning-fast speeds and large storage capacities, then an NVMe SSD would be the better option. It’s also worth noting that while NVMe SSDs come in various sizes, they tend to be more expensive. Ultimately, your choice will depend on your specific needs and budget.
Just remember: size and capacity are key factors to consider when choosing the right SSD for you.
Gather Tools and Disconnect Battery
If you’re looking to add an SSD to your Lenovo Legion 5, there are a few things you’ll need to do to prepare first. The first step is to gather all the necessary tools, including a screwdriver and grounding strap. Once you have everything you need, the next step is to disconnect the battery before opening up your laptop.
This will help prevent any accidental damage to your device while you’re installing the SSD. To do this, locate the battery and use a small screwdriver to disconnect it from the motherboard. Once you’ve done this, you’re ready to move on to the next step, which is opening up your laptop and installing the SSD.
Remember, adding an SSD is a great way to boost your laptop’s performance, but it’s important to take the necessary precautions and follow the steps carefully to avoid any issues. With this in mind, let’s dive in and add that SSD to your Lenovo Legion
Prepare for installation process
Before starting the installation process, it’s crucial to gather all the necessary tools and disconnect the battery. Make sure to have a wrench, pliers, wire stripper, electrical tape, and a multimeter at hand to complete the installation smoothly. Firstly, disconnect the negative terminal of the battery with the help of a wrench.
This will prevent any electrical mishaps while working on the system. Afterward, use pliers to twist the positive and negative wires together and tape them securely with electrical tape. Once done, verify that there is no electrical current flowing through the wires by using a multimeter.
Remember, taking adequate safety measures before starting the installation process will save you from potential hazards and make the process hassle-free.
Open the Bottom Cover
If you’re looking to boost the storage capacity of your Lenovo Legion 5, adding an SSD can be a great option. To get started, the first step is to open the bottom cover of your laptop. This can be done by turning off your computer and unplugging it from any power source.
Then, locate the screws on the bottom cover and unscrew them using a screwdriver. Once the screws are removed, gently pry the cover off using a plastic tool, such as a credit card. Carefully set aside the cover and you should now have access to the inside of your laptop.
Be sure to follow all safety precautions and handle your computer with care throughout the installation process. With the cover removed, you’re now ready to install your SSD and enjoy the benefits of increased storage space.
Read user manuals carefully and properly
When it comes to opening the bottom cover of your electronic device, it’s important to first read the user manual carefully and thoroughly. The bottom cover is a crucial component of your device and opening it without knowledge of the proper procedure can cause irreversible damage to your device. Before attempting to open the bottom cover, make sure you have the correct tools and a clean workspace.
Additionally, identify any screws or clips that may need to be removed or released before accessing the bottom cover. It’s also important to take note of any warnings or precautions mentioned in the user manual, such as ensuring the device is completely powered off before proceeding. By reading the user manual carefully, you can effectively and safely open the bottom cover of your device without causing any harm.
Install the SSD into the Slot
So you’ve decided to add an SSD to your Lenovo Legion 5 – great choice! Now it’s time to install the SSD into the slot. First, make sure you have a compatible SSD – M.2 NVMe PCIe
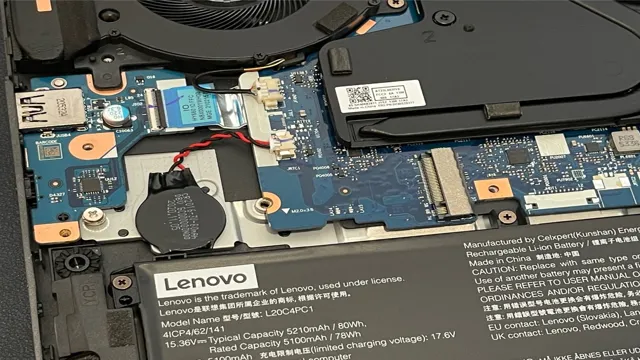
0 x4 is the recommended type. Next, turn off your laptop and unplug it from the wall. Locate the SSD slot, which should be towards the bottom center of the motherboard.
Gently insert the SSD into the slot at an angle, making sure to align the notches on the SSD with the pins in the slot. Once it’s in place, press down firmly to secure it in the slot. Finally, reattach the bottom panel of the laptop and screw it back in.
Congratulations, you’re done! Your Lenovo Legion 5 now has a speedy new SSD to help it run faster and smoother than ever before.
Gently place and screw carefully
Installing an SSD into the slot of your computer can be a daunting task, but fear not, it’s not as complicated as you may think! To properly install the SSD, first, ensure that your computer is shut down and unplugged. Next, locate the SSD slot, which is generally found near the hard drive bay. Carefully remove the cover of the slot or the bay and insert the SSD in the empty slot.
Gently place and screw in the SSD into the computer using the screws provided with the SSD. Be careful not to overtighten the screws as this may damage the components. Once installed, replace the cover and screw it back in place.
Power on your computer and confirm that the SSD has been recognized through the device manager or BIOS. Now you’re ready to enjoy faster boot and load times from your new SSD! Remember, proper installation will prevent damage and ensure that your computer runs smoothly.
Reconnect Battery and Turn on your Laptop
When it comes to upgrading your Lenovo Legion 5 with an SSD, the process may seem daunting, but it’s actually quite straightforward. Firstly, ensure to switch off your laptop and unplug it from the power source, then locate the hard drive panel on the back of your laptop. Undo the screws holding the panel in place and remove it to reveal the hard drive and the empty SSD slot.
Carefully insert the SSD into the slot, making sure it’s firmly in place, then reattach the panel and screw it back in. Reconnect the battery, plug in your laptop and turn it on to check that the new SSD has been installed successfully. So, don’t let the fear of messing up hold you back from upgrading your Lenovo Legion 5 with an SSD and unlocking its full potential!
Power on the laptop and format the SSD
After replacing your laptop’s SSD, the next step is to reconnect the battery and turn it on. You can do this by unplugging the laptop’s power supply, reconnecting the battery, and then pressing the power button. Once the laptop turns on, you will need to format the new SSD.
For Windows users, you can do this by right-clicking on the SSD in the file explorer and selecting “Format.” This will erase any data on the SSD and prepare the drive for use. When formatting, make sure to select the appropriate file system for your needs.
The process may take some time depending on the size of your SSD. Take this opportunity to install any necessary updates or drivers for the laptop. With your new SSD formatted and ready to go, you can now enjoy faster loading times and a more reliable computing experience.
Conclusion
So, there you have it folks! Adding an SSD to your Lenovo Legion 5 is easier than shooting fish in a barrel. With just a few simple steps, you can give your laptop the boost it deserves, and have it running like a cheetah on steroids. Trust me, you won’t know what hit you when you see the difference an SSD can make.
So go on, give it a try, and let us know how it goes. Happy upgrading!”
FAQs
Is it possible to add an SSD to Lenovo Legion 5?
Yes, it is possible to add an SSD to Lenovo Legion 5 by adding an M.2 NVMe SSD to the available slot.
What is the maximum SSD storage capacity of Lenovo Legion 5?
The maximum SSD storage capacity of Lenovo Legion 5 is 1TB.
Can I install Windows on the added SSD in Lenovo Legion 5?
Yes, you can install Windows on the added SSD in Lenovo Legion 5 by configuring the boot order in BIOS.
What is the recommended SSD for Lenovo Legion 5?
The recommended SSD for Lenovo Legion 5 is the M.2 NVMe SSD with a minimum read speed of 3,500MB/s and write speed of 3,000MB/s.
Do I need to clone the existing hard drive to the added SSD in Lenovo Legion 5?
No, you can directly install Windows and other software on the added SSD in Lenovo Legion 5 without cloning the existing hard drive.