Are you looking to speed up your computer’s performance and boot time? Installing Windows 10 on a solid-state drive (SSD) from a hard disk drive (HDD) could be the solution you’ve been searching for. Upgrading to an SSD can result in much faster boot and load times for your operating system and applications. Plus, the new drive will likely be more reliable than your current one.
However, the process of migrating Windows 10 from an HDD to an SSD can be intimidating if you’re not familiar with the steps involved. Luckily, we’ve got you covered. In this blog post, we’ll guide you through the process, step by step.
We’ll cover the tools you’ll need, the steps involved in cloning your HDD to the SSD, and how to change your boot settings to start up from the new drive. By the end of this post, you’ll be able to enjoy the benefits of a faster and more reliable computer. So, let’s get started!
Prepare Your SSD and HDD
When it comes to installing Windows 10 to an SSD from an HDD, preparation is key. Before diving in, ensure that you have backed up all important data on your computer. Once you have done so, you’ll need to prepare your SSD and HDD for the installation process.
First, plug in your SSD to your computer and format it. This will erase any data on the drive, so be sure to back up anything you want to keep beforehand. Next, unplug your HDD to avoid any confusion during the installation process.
You can reconnect it after the installation is complete. Finally, make sure you have a Windows 10 installation disc or USB drive ready to go. With your SSD and HDD properly prepared, you’re ready to begin the installation process and take advantage of the benefits of a faster, more efficient system.
Connect and Initialize Your SSD
If you’re planning to upgrade your PC’s storage with a new SSD, it’s vital to prepare your hard drive and SSD first. Connecting and initializing your SSD will ensure optimal performance and allow you to transfer data smoothly. Before you start, it’s important to back up your drive to avoid losing any important files.
Once you’ve connected your SSD to your motherboard with a SATA cable, you’ll need to initialize it in Disk Management. This will format the drive and prepare it for use. Once it’s initialized, you can start transferring data from your hard drive to your new SSD.
With careful preparation and setup, you can enjoy the improved performance and faster boot times that an SSD can offer.

Encrypted HDD? Decrypt it First
When it comes to transferring data from your old computer to a new one or simply preparing to sell your old hard drive, you need to make sure it is ready for its next owner. One crucial step is to ensure that encrypted HDD has been decrypted before the transfer or sale. This is because encrypted data is nearly impossible to access once put in place.
You may risk losing all your valuable data should you accidentally transfer an encrypted hard drive to a new computer that doesn’t have the decryption key. With that said, before wiping or selling your hard drive, make sure to decrypt it first. Your data is valuable, and it is crucial to take precautionary measures to protect it.
Preparing your SSD and HDD also involves the process of backing up your data so that you don’t lose anything important during the transfer or sale. Additionally, organizing your files, uninstalling any programs that you won’t be needing, and defragmenting your drives are all crucial steps in the process of preparing your hard drive for its next user. Once you’ve backed up your data and ensured that your encrypted data is decrypted, you can safely wipe your hard drive and be assured that all of your data is protected and ready for its next use.
Remember, taking proper care of your hard drive will increase its value and also help to protect your privacy.
Create a Windows 10 Installation Media
If you’re looking to install Windows 10 to an SSD from an HDD, the first step is to create a Windows 10 installation media. This can be done either by using Microsoft’s Media Creation Tool or by downloading the Windows 10 ISO file and using a third-party tool like Rufus to create a bootable USB drive. Once you have the installation media ready, connect your SSD to your computer and boot from the installation media.
Follow the prompts to set up the installation and select your SSD as the destination for the operating system. It’s important to note that you’ll need to back up all important data from your HDD before proceeding, as the installation process will wipe the drive clean. Additionally, make sure that your SSD is properly formatted to avoid any issues during the installation process.
With some patience and preparation, you can successfully install Windows 10 to your SSD and enjoy improved performance and speed for your computer.
Download and Create Installation Media
Creating a Windows 10 installation media can be a lifesaver for those who need to reinstall their operating system or install it on a new device. To create an installation media, you need to have a USB flash drive with at least 8 GB capacity and a Windows 10 ISO file. First, you will need to download the Windows 10 ISO file from the Microsoft website and save it to your computer.
Next, insert the USB flash drive into your computer and format it to make sure there are no existing files on it. Then, open the Windows USB/DVD Download Tool and follow the instructions to create the installation media. It is essential to ensure that the USB drive is selected as the destination drive before initiating the installation media creation process.
After the process is complete, you can use the installation media to reinstall or install Windows 10 on your device. Creating a Windows 10 installation media is a simple process that can save you time and effort down the road.
Boot Your Computer from the Installation Media
When you need to install Windows 10, it’s important to first create an installation media. This can be done on a USB drive or DVD. A USB drive is recommended, as it’s more convenient and faster.
To create an installation media, you will need to download the Media Creation Tool from Microsoft’s website. Once you have the tool downloaded and installed, you can run it and choose the option to create a Windows 10 installation media. The tool will then download the necessary files and create the installation media.
After creating the installation media, you can now boot your computer from it. This is done by inserting the USB drive or DVD into the computer and restarting it. As the computer starts up, you will need to enter the BIOS setup and change the boot order so that the computer boots from the installation media first.
Once you have done this, simply follow the prompts to install Windows 10 on your computer. It’s important to note that installing Windows 10 will erase all data on your hard drive, so it’s important to make sure you have a backup of any important files before proceeding. To sum up, creating a Windows 10 installation media is a crucial step in installing the operating system, and it’s important to follow the proper steps to ensure a successful installation.
Configure BIOS Settings
If you’re looking to install Windows 10 onto an SSD from an HDD, you’ll need to configure your BIOS settings first. Your BIOS is responsible for managing the hardware and software interactions between your computer’s components, so it’s essential to get the right settings in place before beginning the installation process. Start by going into your BIOS and setting the boot order so that your computer boots from your installation media, whether that be a USB drive or a CD/DVD.
You’ll also want to make sure that your SATA controller is set to AHCI mode, which optimizes performance for SATA-connected storage devices like SSDs. Finally, make sure your SSD is detected by your BIOS by checking the SATA port to which it’s connected. Once these settings are in place, you should be able to begin the process of installing Windows 10 onto your SSD and getting your computer up and running in no time.
Change Boot Order in BIOS Settings
Configuring the BIOS settings on your computer can be a daunting task, but it is necessary to ensure optimal performance and proper functioning of your system. One of the crucial settings that you may need to adjust is the boot order. By default, the BIOS is programmed to boot from your computer’s hard drive.
However, if you want to boot from another device such as a USB drive or CD, you need to change the boot order. To do this, you need to enter the BIOS setup by pressing a specific key when your computer boots up. Once in the BIOS, navigate to the boot option menu and rearrange the boot order.
Make sure to save your changes before exiting the BIOS setup. Remember that changing the boot order incorrectly may cause your computer to malfunction, so be cautious and double-check before making any changes. With these simple steps, you can configure your BIOS settings to meet your needs and ensure smooth operation of your system.
Enable AHCI Mode in BIOS Settings
If you want to speed up your computer’s performance, one way to accomplish this is to enable AHCI mode in your BIOS settings. AHCI (Advanced Host Controller Interface) is a newer technology that allows your hard drive to communicate with your computer’s CPU more quickly and efficiently than older IDE (Integrated Drive Electronics) technology. By enabling AHCI mode in your BIOS settings, you can take advantage of faster data transfer rates and smoother performance.
The process of enabling AHCI mode will vary depending on your computer’s motherboard, but in general, you will need to access your BIOS settings during startup and navigate to the appropriate menu to select the AHCI option. Once you’ve made the change, save your settings and reboot your computer. With AHCI mode enabled, you should notice a difference in your computer’s performance and responsiveness.
Install Windows 10 on Your SSD
If you’re looking to upgrade your computer’s performance, consider installing Windows 10 on your SSD. Here’s how to do it. First, you’ll need to make sure your SSD is properly connected to your computer and recognized by the BIOS.
Then, insert your Windows 10 installation media (either a USB or DVD) and restart your computer. During the boot process, press a key (usually F12 or Delete) to enter the boot menu and select your installation media. Follow the prompts to begin the installation and select your SSD as the installation destination.
Once the installation is complete, make sure to update your drivers and settings for optimal performance. By transferring Windows 10 to your SSD from your HDD, you’ll see a significant improvement in boot time and overall system speed.
Select Your Destination Drive
When installing Windows 10 on your SSD, the first step is selecting your destination drive. This may seem like a simple task, but it’s important to choose the correct drive to ensure your computer runs smoothly. The destination drive is where the operating system will be installed, and ideally, it should be the SSD as it will provide faster boot-up times and faster overall performance.
One analogy to consider is that choosing the wrong drive can be compared to trying to fit a square peg in a round hole – it just won’t work. As you go through the installation process, be sure to pay careful attention to which drive you are selecting as your destination drive. Once you’ve selected the SSD as your destination, you can move forward with the installation process knowing that you’ve made the right choice for optimal performance.
Complete the Installation Process
Now that your SSD is physically installed, it’s time to install the operating system (OS). As we’re focusing on Windows 10, you’ll need to have a Windows 10 installation disk or USB drive to complete the installation process. Insert the disk or drive into your computer and restart it.
You’ll be prompted to press a key to boot from the installation media. Choose the language and keyboard layout you prefer, then click on the “Install now” button. Accept the license terms and select the “Custom: Install Windows only (advanced)” option.
Next, select your SSD drive where you want to install Windows and click “Next”. Windows will begin to install on your SSD. The installation process may take some time, so be patient and don’t interrupt the installation process.
After the installation is complete, your computer will restart, and you’ll be prompted to set up your user account and preferences. From here on out, your computer will boot from your SSD and you can start enjoying faster load times and computing speeds!
Transfer Your Files from HDD to SSD
If you’re looking to upgrade your computer’s performance, switching from an HDD to an SSD is a great way to start. Installing Windows 10 on your new SSD can be intimidating, but it’s fairly straightforward. Before you begin, make sure you have a backup of your important files in case anything goes wrong.
You’ll need to create a bootable USB drive with the Windows 10 installation media, then insert it into your computer and boot from it. Select the language, time and keyboard, and then select “Install now.” Next, choose the version of Windows 10 you want to install and accept the license terms.
On the next screen, select “Custom: Install Windows only (advanced).” From there, select your SSD as the destination for the installation, and the setup will begin. Once the installation is complete, your computer will boot up from the SSD, and you can transfer your files from the HDD to the new SSD.
With your new SSD, you should see significant improvements in performance and speed.
Copy and Paste Files from HDD to SSD
If you recently upgraded your computer with an SSD and want to transfer your files from the HDD to the new drive, you can simply copy and paste them. It’s a straightforward process that doesn’t require any special tools or software. All you need is a file explorer, which you can access by clicking on the Windows Start menu and selecting File Explorer.
Once you’re in File Explorer, locate the files or folders you want to transfer, right-click on them, and select Copy. Then, navigate to the SSD drive in File Explorer and right-click on an empty area. Select Paste, and the files will start transferring to your SSD.
However, keep in mind that if you’re transferring a large number of files, it may take some time, so be patient and let the process complete. By transferring your files to an SSD, you can enjoy faster boot times and quicker access to your files, which can improve your overall computer experience.
Update Your Applications and Drivers
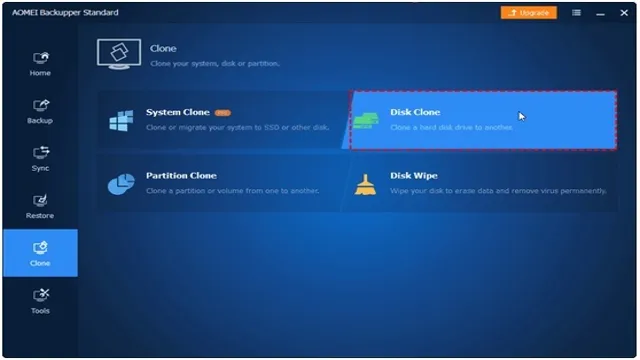
When upgrading to an SSD, it’s important to transfer all your important files from your HDD to your new solid-state drive. This will ensure that you have all your data, documents, programs, and media readily available on your faster and more reliable storage device. One way to do this is to use a cloning software to create a mirror image of your HDD onto your new SSD, making the transition quick and seamless.
Another method is to manually copy and paste specific files and folders onto your SSD, but this can be time-consuming and may require some technical knowledge. Whichever method you choose, be sure to back up all your important data before transferring it to your new SSD. This will protect you against any potential data loss during the migration process.
Conclusion
In summary, installing Windows 10 to an SSD from an HDD is like giving your computer a brand new pair of running shoes. The SSD provides lightning fast boot times and overall improved performance, while the HDD can still be used for additional storage. So don’t let your computer drag its feet anymore, upgrade to an SSD and let it sprint to the finish line!”
FAQs
What is the benefit of installing Windows 10 on an SSD instead of an HDD?
Installing Windows 10 on an SSD can significantly improve the boot time and overall performance of the system due to the faster read and write speeds of the SSD.
Can I install Windows 10 on my SSD and keep my files on my HDD?
Yes, you can install Windows 10 on your SSD and keep your files on your HDD. During the installation process, you can choose to install Windows 10 on the SSD and keep your files on the HDD.
How do I transfer my files from my HDD to my SSD after installing Windows 10?
You can transfer your files from your HDD to your SSD after installing Windows 10 by using a file transfer tool such as Windows Easy Transfer, manually copying and pasting the files, or using a backup and restore software.
Is it necessary to format my HDD after installing Windows 10 on my SSD?
It is not necessary to format your HDD after installing Windows 10 on your SSD. However, it is recommended to format your HDD if you want to use it as a secondary storage device to ensure that it is free of any previous system files and errors.