
If you’re tired of your Mac’s slow performance, there’s a solution – replacing your Fusion Drive with an SSD. This upgrade can greatly improve your computer’s speed and responsiveness, making your daily tasks a breeze. But what exactly is a Fusion Drive, and why should you consider swapping it out? A Fusion Drive is a combination of a traditional hard drive and an SSD, designed to give you the best of both worlds.
However, its performance can still lag behind a dedicated SSD. In this blog post, we’ll explore the benefits of replacing your Fusion Drive with an SSD and take you through each step of the process. So grab a cup of coffee and let’s dive in!
Introduction to Fusion Drive and SSD
If you’re looking to boost the performance of your Apple computer, you may be wondering about the process of replacing a Fusion Drive with an SSD. The good news is that it’s relatively easy to do so, even if you don’t have extensive technical skills. First, you’ll need to obtain the appropriate SSD for your computer model and backup your data.
Next, you’ll need to open up your computer and locate the Fusion Drive’s flash storage, as well as the hard drive. You can then disconnect the hard drive and replace it with the SSD, making sure to securely attach it in place. Once everything is reconnected, you can restore your data and enjoy the significantly faster performance and storage capacity of your new SSD.
By taking this simple step, you can transform your computer into a high-performing machine that’s capable of handling even the most demanding applications.
What is a Fusion Drive?
If you’re looking to upgrade your computer’s performance, a Fusion Drive might be just what you need. A Fusion Drive is a hybrid storage solution that combines a traditional hard drive and a solid-state drive (SSD) into one cohesive system. The SSD acts as a cache for frequently accessed files, while the hard drive provides more space for less frequently accessed files.
This combination provides the best of both worlds, giving a computer the speed of an SSD with the storage capacity of a traditional hard drive. Think of it like having a fast car that can also carry a lot of cargo. The best part is that you don’t need to manage the Fusion Drive yourself – the operating system automatically manages the data between the SSD and hard drive.
So if you’re looking for a faster and more efficient computing experience, consider upgrading to a Fusion Drive.
What is an SSD?
An SSD, or Solid-State Drive, is a storage device that utilizes flash memory to store data digitally. Unlike traditional hard disk drives (HDDs) that use spinning platters to read and write data, SSDs have no moving parts, which makes them faster, more durable, and energy-efficient. Fusion Drive, on the other hand, is a hybrid storage solution that combines both SSD and HDD technologies for better performance and storage capacity.
By using SSD as a cache to frequently accessed files, Fusion Drive provides a faster boot-up time, smoother application launches, and improved overall system performance. The keyword for this topic is “SSD,” which is crucial to understand the difference between SSDs and HDDs, as well as hybrid storage solutions like Fusion Drive. Choosing the right type of drive can improve your computer’s performance, speed, and reliability, which makes it worth considering when purchasing or upgrading your system.
9 Simple Steps to Replace Fusion Drive with SSD
Replacing a Fusion Drive with an SSD may seem daunting, but it’s actually quite simple if you follow these nine steps. First, back up all your important data to an external drive or cloud storage. Then, shut down your Mac and unplug all cables.
Next, remove the screws on the back cover and carefully lift it off. Locate the Fusion Drive and unscrew it from the logic board. Replace the Fusion Drive with the SSD and secure it in place.
Reattach the back cover and screws, plug in all cables, and boot up your Mac. Finally, use a cloning tool or a fresh install of macOS to transfer your data onto the new SSD. With these steps, you can enjoy faster performance and storage on your Mac in no time!
Step 1: Back up Your Data
Replacing a fusion drive with an SSD can enhance your Mac’s performance significantly. Before beginning the replacement process, it is crucial to back up your important data first. You can use Time Machine or any other backup software to create a copy of all your files, images, and documents.
The backup will eliminate any risk of losing data during the replacement process. Additionally, disconnect the Mac from any external devices such as printers, scanners, and hard drives to avoid any potential damage. Make sure the backup process is complete, and the files are readily accessible before proceeding with the replacement process.
The initial step is vital for safeguarding your data and ensuring smooth replacement of the fusion drive with an SSD.
Step 2: Shut Down Your Mac
When it comes to upgrading your Mac’s storage from a fusion drive to an SSD, the first step is to back up all your important data. Once you’ve ensured that your data is safe, the next step is to shut down your Mac completely. This is essential as it allows you to disconnect all cables and peripherals from your Mac and ensures that no electrical power is flowing through it.
Shutting down your Mac can be a bit tricky, especially if you’re not used to it. But it’s straightforward – you can either use the “Shut Down” option from the Apple menu or hold down the power button until your Mac turns off completely. Once shut down, it’s important not to rush into the next step.
Allow your Mac to sit for a few minutes to cool down before you start removing hardware. This will help prevent any damage to your Mac’s internal components. With your Mac safely shut down, you’re now ready to move on to the next step in upgrading your Mac’s storage from fusion drive to SSD.
Step 3: Open the Mac Case
In step 3 of replacing a Fusion Drive with an SSD in a Mac, it’s time to crack open the case. Before attempting any further steps, ensure you have all the necessary tools and precautions in place. First of all, shut down your Mac and unplug it from the power source.
Then, detach all the external connections such as keyboard, mouse, and monitor. Once you’re certain no power is running through the system, use a T6 Torx driver to unscrew the ten screws from the back of the case. Carefully remove the back cover and put it aside.
You’ll see the fans, logic board, and other components immediately. As you begin working on your Mac, take note of any standalone screws that may be holding the drive down, remove them gently. Keep your screws and components organized, so you know where they fit once the job is completed.
Now that the drive is exposed, it’s time to move to the next step.
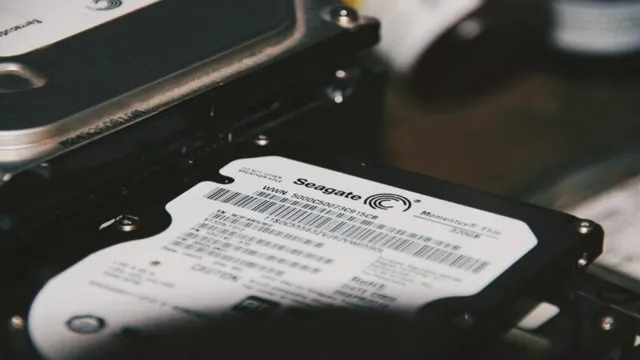
Step 4: Remove the Fusion Drive
After backing up your data and removing the logic board, it’s finally time to remove the Fusion Drive. This process involves unscrewing four screws on the drive bracket and unplugging the drive cable from the logic board. Once the Fusion Drive is removed, set it aside and replace it with your new SSD.
Make sure the SSD is properly seated in the drive bracket and connected securely to the logic board. We recommend double-checking all connections before reassembling your Mac. Installing an SSD in place of a Fusion Drive is an excellent way to significantly boost the speed and performance of your Mac.
So make sure you take your time with this process and enjoy the benefits of a faster, more efficient computer.
Step 5: Prepare the SSD
Now that we have removed the Fusion Drive and installed the new SSD, it’s time to prepare it for use. Follow these simple steps to ensure a smooth transition: Connect your SSD to your Mac using an enclosure or adapter.
Open Disk Utility from the Applications folder.
Locate your SSD in the left-hand sidebar and select it. Click on the Erase tab at the top of the window.
Choose APFS or macOS Extended (Journaled) as the format.
Name your SSD whatever you’d like, but avoid using special characters or spaces in the name. Check that the scheme is GUID Partition Map.
Press Erase to format the drive.
Step 6: Connect the SSD to the Mac
Once you have removed the old Fusion Drive and installed the new SSD in your Mac, it’s time to connect everything. The first step is to locate the SATA data cable and connect it to the SSD. Then, you need to connect the power cable to the SSD, making sure it’s firmly in place.
Once you’ve done that, it’s time to secure the SSD to the Mac using the screws provided in the kit. Before you close up your Mac, make sure everything is connected securely and stored in the appropriate place. Once you’re sure everything is in place and secure, you can close up your Mac and power it on.
Congratulations, you’ve successfully replaced your Fusion Drive with a powerful new SSD! Sit back, relax, and enjoy the improved speed and performance of your Mac.
Step 7: Install MacOS on the SSD
Once you’ve successfully partitioned and formatted your SSD, the final step is to install MacOS onto it. To do this, restart your Mac and hold down the Command and R keys until the Apple logo appears. This will start your Mac in Recovery mode, which will allow you to download and install a fresh copy of MacOS onto your SSD.
Once you’ve connected to a stable internet connection, select “Reinstall MacOS” and follow the on-screen instructions. Be sure to select your SSD as the destination for the installation, and sit back while your Mac does its thing. Depending on the speed of your internet connection, this process can take anywhere from 30 minutes to an hour or more.
Once the installation is complete, your Mac will restart automatically and you’ll be ready to enjoy lightning-fast performance on your newly-installed SSD!
Step 8: Transfer Data from Backup
As we reach step 8 of replacing your Fusion Drive with an SSD, it’s time to transfer your data from your backup onto the new drive. This is where all the preparation work you’ve done up until now comes into play. First, ensure that your backup is fully updated and includes all relevant files and programs.
Then, connect your backup drive to your computer and navigate to the migration tool. This tool will guide you through the process of copying your data from the backup onto your new SSD. The transfer may take some time, depending on the amount of data you have, but once it’s done, you can disconnect your backup and start using your new SSD.
Remember, always have a backup of your important data, just in case. With this step complete, you’re almost ready to enjoy the increased speed and performance of your new SSD.
Step 9: Enjoy Your New SSD!
Congratulations, you have successfully completed all the essential steps to replace your Fusion Drive with an SSD! Now it’s time to sit back and enjoy the benefits of a faster, more responsive computer. The speed improvements and increased performance will be noticeable from the moment you boot up your system. In addition to faster load times, you’ll also experience smoother multitasking capabilities and improved overall efficiency.
Whether you use your computer for work or play, you’ll find that the upgrade to an SSD was well worth the investment. So go ahead, enjoy the perks of your new SSD, and get ready to take your computing experience to the next level!
Why You Should Replace Fusion Drive with SSD
Replacing your Mac’s Fusion Drive with an SSD can greatly enhance its overall performance. Though it may sound intimidating, the process is actually fairly straightforward and can be done with the right tools and a bit of patience. SSDs are quicker, more efficient and reliable than traditional hard drives, meaning you can boot faster, launch apps in seconds and access files in the blink of an eye.
Furthermore, SSDs generate less heat, consume less power, and produce less noise than fusion drives, all while lasting much longer. If you are looking to boost the speed and efficiency of your Mac, replacing its Fusion Drive with an SSD is a smart move to make. All you need is an SSD, a set of screwdrivers, and a guide to help you along the way.
Faster Performance
If you want faster performance from your Mac, it’s time to ditch your Fusion Drive and replace it with an SSD. While Apple’s fusion drive technology combines a traditional hard drive with a small amount of flash storage, an SSD offers faster access speeds and much-improved performance. With an SSD, you’ll enjoy snappier boot times, faster app launches, and lightning-fast file transfers.
Plus, an SSD is more reliable, since it doesn’t have moving parts that can wear out over time. Upgrading to an SSD is an investment in your Mac’s performance – and your productivity. So why settle for slow performance when you can get the speed you need? Upgrade your Mac with an SSD today.
Improved Reliability
If you’re still using a Fusion Drive in your Mac, it might be time to upgrade to an SSD. While Fusion Drives combine a traditional hard drive with a smaller solid-state drive to improve performance, they can be prone to reliability issues. SSDs, on the other hand, are known for their durability and speed.
By replacing your Fusion Drive with an SSD, you’ll experience faster boot times, improved application loading, and better overall performance. Plus, you’ll have the peace of mind that comes with using a reliable storage solution. So, if you’re looking for a more stable and efficient storage option, consider upgrading to an SSD.
Better Energy Efficiency
Are you looking to improve your computer’s energy efficiency? If so, one simple change you can make is switching out your traditional hard drive for a solid-state drive (SSD). Unlike traditional hard drives with spinning disks, SSDs use flash memory to store information. This means that they consume significantly less power than their older counterparts.
In fact, studies have shown that SSDs can reduce energy consumption by up to 80%. Not only will this save you money on your electricity bill, but it will also help reduce your carbon footprint. So if you’re looking for a quick and easy way to make your computer more eco-friendly, consider upgrading to an SSD today.
Conclusion
In conclusion, replacing a fusion drive with an SSD is easier than convincing your cat to use the litter box. With the right tools and a little bit of know-how, swapping out your hard drive for a solid-state drive can be as simple as a walk in the park. So if you’re looking to speed up your computer and enjoy lightning-fast performance, don’t be afraid to give it a try – your tech-savvy friends will be impressed, and your computer will thank you for it!”
FAQs
What are the benefits of replacing a fusion drive with an SSD?
Replacing a fusion drive with an SSD can significantly improve the speed and performance of your computer. It allows for faster boot-up times, quicker application launches, and smoother overall experience.
Is it difficult to replace a fusion drive with an SSD?
The difficulty level varies depending on your computer model, but it can be done relatively easily with the right tools and some technical knowledge. It’s recommended to seek professional help if you’re unsure about the process.
Can you keep your data when replacing a fusion drive with an SSD?
Yes, you can transfer your data from the fusion drive to the new SSD. However, it’s important to back up your data before starting the replacement process to avoid the risk of data loss.
How much does it cost to replace a fusion drive with an SSD?
The cost of replacing a fusion drive with an SSD varies depending on the type of SSD you choose and if you do it yourself or hire a professional. On average, it can cost anywhere from $150-$500.