
Upgrading to a solid-state drive (SSD) is one of the best ways to improve your PC’s performance. Whether you’re gaming or just browsing the web, an SSD can significantly reduce load times and improve overall efficiency. However, moving Windows 7 to SSD can be quite intimidating for some users, especially if you’re not familiar with the process.
In this blog post, we’ll cover everything you need to know about upgrading to an SSD, including the benefits of an SSD, how to prepare your computer, and the steps you need to take to successfully migrate Windows 7 to SSD. So, if you’re ready to give your PC a much-needed boost, let’s get started!
Preparation: What You Need
Moving Windows 7 from an HDD to an SSD can seem like a daunting task, but with the right preparation and tools, it can be done quickly and easily. Firstly, you will need to ensure that your SSD has enough storage space to accommodate all of your data and operating system files. You will also need a SATA to USB adapter or enclosure, as well as a cloning software, such as CloneZilla or Macrium Reflect.
It is important to have a backup of all your important files and documents, as well as any installation media, such as drivers and software. You should also disable any unnecessary apps and services before cloning your HDD onto the SSD. This will ensure that your new system runs as quickly and efficiently as possible.
Once you have all of these tools and have completed your backups, you are ready to begin the cloning process. It’s important to follow the cloning software’s instructions carefully, and to ensure that your new SSD is properly connected and recognized by your computer. With the right preparation and care, moving Windows 7 from an HDD to an SSD should be smooth sailing!
SSD Drive and Cables
If you’re planning to upgrade to an SSD drive, there are a few things you’ll need before you begin. Firstly, it’s important to choose the right type of SSD for your computer and ensure that it is compatible with your motherboard. You’ll also need cables to connect the SSD to your motherboard.
The type of cable you’ll need will depend on the type of SSD you choose and the type of connection on your motherboard. It’s important to check the specifications of your motherboard and the SSD you’re purchasing to ensure they are compatible. Additionally, you may need a mounting bracket or adapter if the SSD is a different form factor than your computer’s current hard drive.
It’s important to have all of these items on hand before you begin the installation process to ensure a smooth and successful upgrade. With the right preparation and tools, upgrading to an SSD can greatly improve the performance and speed of your computer.
Windows 7 Installation Disc
If you’re planning to install Windows 7 on your computer, you’ll need to obtain an installation disc before you start. To do this, you’ll need a few things: a valid Windows 7 product key, an empty USB drive or DVD, and a PC that meets the minimum requirements for running Windows It’s important to note that not all PCs are capable of running Windows 7, so it’s a good idea to check your computer’s specifications beforehand.
Once you have everything you need, it’s time to create an installation disc. There are several ways to do this, but the easiest method is to use the Windows USB/DVD Download Tool, which allows you to create a bootable USB drive or DVD using an ISO file. This tool is available for free from the Microsoft website and is compatible with Windows 7 and later versions.
By following these simple steps, you’ll be ready to install Windows 7 on your computer in no time.
Backup Your Files
Backing up your files is an essential task that everyone should undertake to protect their important data from loss or damage. To prepare for this task, you’ll need a few things. Firstly, you’ll need an external hard drive or cloud storage service where you can save your data.
It’s important to make sure you have enough storage space to accommodate all your files. Secondly, you’ll need to decide on a backup schedule. Will you backup your data weekly, monthly, or daily? Finally, you’ll need to select a backup software program to automate the backup process.
This will ensure that your files are backed up regularly without any manual intervention. By having these elements in place, you can rest assured that your files are always safe from any unforeseen data loss events. So, take the first step towards protecting your data by preparing a backup plan today!
Clone Your Windows 7 HDD to the SSD
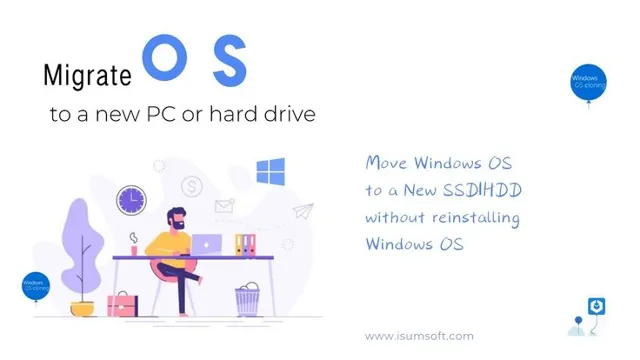
If you are looking to upgrade your computer’s performance by switching to an SSD, then you may be wondering how to move your Windows 7 operating system from your HDD to the new drive. Fortunately, it is possible to clone your entire hard drive and transfer it to the SSD. All you need is a cloning software program, a SATA to USB adapter cable, and of course, your new SSD.
The process may take some time, depending on the size of your HDD and how much data you have stored on it. However, once the cloning process is complete, your new SSD should contain everything that was on your old HDD, including your operating system, programs, and files. You can then install the SSD in your computer, and it should boot up with your familiar Windows 7 operating system.
With this simple process, you can enjoy faster load times, improved overall performance, and all the benefits that come with an SSD.
Download and Install Software
If you’re looking to speed up your Windows 7 system, upgrading to an SSD is a great way to do it. However, just buying an SSD and installing it won’t automatically give you the desired performance boost. You need to clone your existing Windows 7 HDD to the SSD to get all your apps, files, and settings migrated to the new disk.
To do this, you’ll need a cloning software tool. There are various cloning software options available online that you can download and install, including Macrium Reflect, EaseUS Todo Backup, and Clonezilla. These tools allow you to easily clone your Windows 7 HDD onto the SSD, including the operating system, without having to reinstall anything.
Once you have the cloning software installed, follow the step-by-step instructions and let it do its magic. With your new SSD up and running, you’ll have a noticeable improvement in your system’s startup times and overall performance.
Connect Your SSD and HDD
If you’re looking to boost your computer’s speed, installing a solid-state drive (SSD) along with your existing hard disk drive (HDD) can do wonders. The good news is that you don’t need to reinstall your operating system from scratch. By cloning your Windows 7 HDD to the SSD, you can transfer all your files, folders, programs, and operating system intact.
Begin by getting a cloning software that suits you best. You can download a free version or purchase a more advanced version with additional features. Once you have your software, connect the SSD via SATA cable and ensure the hard drive measurements align properly.
Then, launch the cloning software and select the source HDD as the source disk and the SSD as the target disk. Make sure you have checked the box corresponding to the option to copy the entire drive and initiate the cloning process. After the process has been complete, you can install the SSD in your computer’s drive bay, disconnect the HDD, and start your computer.
Your computer will boot from the SSD, providing a significant boost in speed and performance. Keyword: cloning software, solid-state drive, operating system, hard disk drive.
Clone Your HDD to the SSD
If you’re upgrading to a new SSD, you’ll want to clone your current Windows 7 HDD to the new drive. This process allows you to transfer all of your current files, settings, and applications to the new drive. Not only does this save you the hassle of having to reinstall everything, but it also ensures that everything will work as it did before the upgrade.
To clone your HDD to the SSD, you’ll need to use special software, which is often included with the SSD. One popular option is the Samsung Data Migration program. Once you’ve installed and opened the program, you’ll be prompted to select the disk you want to clone and the target location.
After confirming these settings, the program will begin cloning your Windows 7 HDD to the SSD. Depending on the size of your drive, this process can take anywhere from a few minutes to several hours. Once the cloning is complete, you’ll need to restart your computer and select the SSD as your primary boot device in the BIOS.
With your new SSD now up and running, you’ll be able to enjoy improved performance and faster load times.
Update Your SSD with Windows Updates and Drivers
If you are looking to move Windows 7 from an HDD to an SSD, you’ll want to make sure you update your Windows updates and drivers. This is because SSDs have different features and technologies that require newer drivers and updates to work properly. Windows 7, in particular, is an older operating system, so it’s important to ensure that all drivers and updates are up to date to optimize your SSD’s performance.
You can use Windows Update to check for all necessary updates and drivers, and ensure that they are installed before transferring your data to the new SSD. By doing so, you’ll have a smoother transition and ensure that your SSD is operating at its best capacity. Remember, always take proper precautions when moving data from one drive to another and backup your files before transferring them.
Connect to the Internet
When setting up your new SSD, it’s important to ensure that you’re connected to the internet so that you can receive the latest Windows updates and drivers. These updates are crucial for keeping your system running smoothly and protecting it from security threats. To connect to the internet, you’ll need to have an internet service provider and either an Ethernet cable or a Wi-Fi connection.
Once you’re connected, you can access the Windows update and driver settings and check for any available updates. It’s important to stay on top of updates and regularly check for them, as they can significantly improve the performance and security of your system. By keeping your SSD up to date, you’ll be able to enjoy a fast and reliable computer that’s always ready to meet your needs.
Check for Windows Updates and Install Them
If you’re running Windows on your computer, it’s important to keep your system updated with the latest software and drivers. One of the things you should do is check for Windows updates and install them. Updates not only provide new features, bug fixes, and enhanced security measures, but they can also ensure that your SSD is up-to-date and running smoothly.
Operating with outdated drivers can cause performance issues and provoke system errors. Simply go to the Windows Update settings and choose the option to check for and install updates. This process will download and install the latest updates for your system, including any necessary drivers.
Keeping your system updated will ensure that your computer runs smoothly and efficiently, and that you are providing optimal protection for your SSD.
Update Drivers for Your SSD and Other Hardware
If you’re experiencing slow loading times or other issues with your SSD, it might be time to update your drivers. One way to do this is through Windows updates, which can automatically provide new drivers for your hardware. You can also visit the website of your SSD manufacturer and download the latest drivers from there.
Keep in mind that updating your drivers can often improve the overall performance and stability of your system, so it’s worth taking the time to do it. By staying up to date with the latest drivers, you can ensure that your hardware is running at its best, and your computer will be able to handle even the most demanding tasks without issue. So, next time you’re experiencing slow SSD speeds or other issues, consider updating your drivers for a quick and easy fix.
Start Using Your New Windows 7 SSD
Congratulations on upgrading to a new Windows 7 SSD! Now that you have it, it’s time to move your operating system from your old HDD. This process may seem daunting, but it’s actually quite simple. Start by connecting your new SSD to your computer and making sure it’s recognized by your system.
Then, download and install a disk cloning software such as EaseUS Todo Backup. This will allow you to clone your old HDD onto your new SSD, preserving all of your files and settings. Once the cloning is complete, you can set your SSD as the primary boot drive in your computer’s BIOS settings.
Finally, you can enjoy the lightning-fast speed of your new Windows 7 SSD. Don’t forget to keep your old HDD as a backup in case anything goes wrong during the migration process. With this quick and easy process, you’ll be up and running on your new Windows 7 SSD in no time!
Boot from Your SSD
If you’ve just installed a new SSD in your Windows 7 computer, you’ll want to make sure you’re getting the most out of it by booting from it. To do this, you’ll need to change your BIOS settings so that your computer boots from the SSD instead of your old hard drive. Restart your computer and enter your BIOS by pressing the key that appears on your screen (usually F2 or Delete).
Navigate to the “Boot” menu and find the option for changing the boot order. Move your SSD to the top of the list and save your changes before exiting the BIOS. Now, when you restart your computer, it should boot up from your new SSD.
This will give you faster boot times and faster access to your programs and files. So, go ahead and enjoy the benefits of your new SSD!
Delete Old Windows 7 from Your HDD
If you’ve recently upgraded to a new Windows 7 SSD, it’s time to clean up your hard drive and get rid of the old operating system. This will not only free up space on your HDD, but also improve the performance of your computer. To start using your new Windows 7 SSD, you’ll need to delete the old Windows 7 files from your HDD.
This can easily be done using the Disk Cleanup tool, which will scan your hard drive for unnecessary files and give you the option to delete them. Simply select the option for “Previous Windows installation(s),” and the tool will remove all of the old Windows 7 files, freeing up valuable space on your hard drive. So go ahead and enjoy the speed and performance of your new Windows 7 SSD without any old operating system files bogging you down!
Enjoy Your Faster System!
Now that you have installed a SSD on your Windows 7 system, get ready to experience blazing-fast speeds and enjoy a more efficient workflow than ever before. The benefits of using a SSD are not limited to increased boot times and faster application launches, but will also give you a noticeable increase in overall system performance. With quicker read and write speeds, your system will run smoother, and switching between applications will be seamless.
Say goodbye to frustrating lag times and freezing screens. You’ll also notice a significant difference in your system’s multitasking abilities, as you can run multiple applications without any slowdowns. Don’t hesitate to take advantage of your new hardware and enjoy your faster system!
Conclusion
In conclusion, moving Windows 7 from a HDD to an SSD can be a daunting task, but with the right tools and approach, it can be a breeze! Just remember that the key to success is to back up your important files, clone your operating system, and install any necessary drivers before you make the switch. With a little bit of patience and determination, your computer will be running faster than ever before – and you’ll never look back!”
FAQs
What is the process to move Windows 7 from HDD to SSD?
The process involves cloning the HDD to the SSD using cloning software such as EaseUS or Macrium Reflect.
Can I move Windows 7 from HDD to SSD without cloning?
Yes, you can perform a clean installation of Windows 7 on the SSD and then transfer your data from the HDD manually.
What are the benefits of moving Windows 7 to SSD?
Moving Windows 7 to an SSD results in faster boot times, faster application launch times, and overall improved system performance.
Do I need to purchase a new copy of Windows 7 for the SSD?
No, you can use your existing copy of Windows 7 to install it on the SSD, as long as you have a valid license key. You may need to deactivate the license on the HDD to activate it on the SSD.