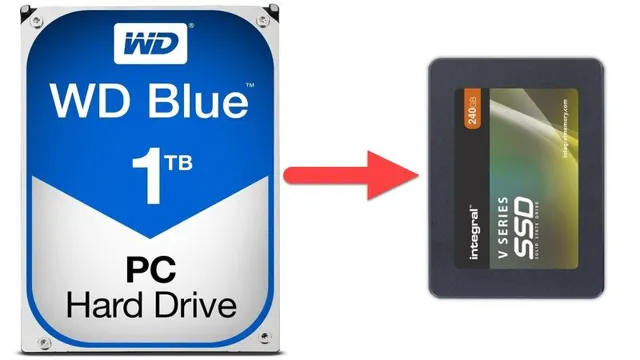
Upgrading your laptop or desktop with an SSD will dramatically improve its performance, speed, and storage capacity. One of the most efficient ways to migrate your data to a new PNY SSD is by cloning your old hard drive to it. Cloning your hard drive means creating an exact replica of your files, applications, and software configuration on the new SSD, so you won’t have to start from scratch.
If you’re unfamiliar with the process of cloning, don’t worry, we’ll guide you through it step-by-step. In this blog, we’ll show you how to clone your hard drive to a PNY SSD and provide you with some tips and tricks to make the process as easy and seamless as possible. So, sit back, relax, and prepare to upgrade your system’s performance like never before!
Preparation Steps
If you’re running out of storage space on your old hard drive, or if it’s starting to fail, you might be wondering how to transfer all your data to a new PNY SSD drive. Cloning the hard drive is an excellent solution that will transfer everything, including your operating system and personal files, to the new SSD drive. Before you start, make sure you have the right tools and software.
You’ll need a PNY SSD drive with at least the same capacity as your hard drive, a SATA cable, and cloning software, such as Macrium Reflect or Clonezilla. You’ll also need to back up all your critical data, just in case, as cloning is not without risks. Make sure your computer has enough power, as cloning can take a while, and consider defragmenting your hard drive before cloning to ensure a smoother transfer.
Once you have everything ready, follow the instructions provided by your cloning software and be patient while the transfer completes. With a bit of preparation and the right tools, cloning your hard drive to a PNY SSD is a straightforward process that will save you time and headaches.
Create backup & verify files
Preparing adequately for backups entails several steps that guarantee that system files and data are safe. Firstly, identify files and data that require backup and create a comprehensive list. Secondly, determine the best backup option, whether it is external hard drives, cloud-based solutions, or network-attached storage.
Thirdly, verify the files to ensure they are error-free before starting the backup process. During this stage, it’s essential to run checks on each file to eliminate corrupt files or those with errors. Fourthly, use a compression tool to minimize the file size, making it easier to transfer them to the backup location.
Lastly, set up an automatic backup schedule that ensures all files on the primary location are regularly backed up to the secondary location. By preparing adequately for backups, users can guarantee that their data is secure and easily retrievable should they experience any system failures or errors.

Insert PNY drive & Launch cloning software
The first step in preparing to clone your hard drive is to insert your PNY drive into your computer’s USB port. Once you have done this, you will need to download and launch cloning software. There are several options available for cloning software, including Macrium Reflect, EaseUS Todo Backup, and Acronis True Image.
It is important to choose a program that is compatible with your computer and the cloning process you wish to use. While some programs offer a simple one-click cloning process, others offer more advanced options for customizing your clone. Regardless of the program you choose, be sure to carefully follow the instructions and pay attention to any warning messages that may appear.
Taking the time to properly prepare your computer and select the right software will help ensure a successful and stress-free cloning process.
Cloning Steps
Have you ever wondered how to clone your hard drive to a PNY SSD drive? The process is actually simpler than you might think. First, connect your PNY SSD drive to your computer using a USB cable or an external adapter. Next, download and install cloning software, such as EaseUS Todo Backup or Clonezilla.
Once installed, launch the software and select the option for “disk clone.” From here, choose your hard drive as the source disk and PNY SSD drive as the target disk. Finally, start the cloning process and wait for it to complete.
Once finished, your PNY SSD drive will be an exact replica of your hard drive, with all your files and settings intact. Cloning your hard drive to a PNY SSD drive is a great way to upgrade your computer’s performance and ensure that your data remains safe and secure.
Select Source & Destination Hard Drive
When it comes to cloning your hard drive, it’s important to start by selecting your source and destination drives. The source drive is the one you want to clone, and the destination drive is the one you want to copy all the data onto. This is a key step in the cloning process because it ensures that all your important data is duplicated onto the new drive.
Whether you are upgrading your storage capacity or moving your data to a new computer, cloning your hard drive can save you time and ensure you don’t lose any important files. When selecting your drives, make sure to choose the correct ones and double-check your selection before proceeding. Cloning is a convenient way to ensure you have a backup of your data and peace of mind knowing your files are safe and secure.
So, what are you waiting for? Get those drives selected and start cloning today!
Follow Cloning Software Instructions
When it comes to cloning software, following the instructions is crucial to ensuring a successful cloning process. The first step is to select the proper cloning software for your specific needs and hardware. Once you’ve downloaded or purchased the software, carefully read the accompanying instructions to ensure you understand the cloning process.
Make sure to select the source and target disk properly, as selecting the wrong ones can result in data loss. It is also important to make sure all of your data is backed up and that your computer is properly formatted before beginning the cloning process. Following the step-by-step instructions provided by the software will help you create an exact replica of your existing hard drive, making it easy to transfer your files and applications to a new drive.
By investing the time and effort into properly following the instructions for your cloning software, you can avoid mistakes and ensure a successful transfer of data. So, whether you’re upgrading your computer or need to replace a failing hard drive, taking the time to follow the cloning software instructions will ensure that your data is safe and secure.
Completion Steps
If you’re looking to clone your hard drive to a PNY SSD drive, there are a few steps to follow to ensure a successful transfer of your files and operating system. First, you’ll need to connect both the hard drive and SSD drive to your computer. Next, you can use software such as EaseUS Todo Backup to clone the hard drive to the SSD drive.
This software offers a simple and easy-to-use interface to guide you through the cloning process. You’ll be able to select your source disk (the hard drive) and your target disk (the SSD drive). Once you’ve completed these steps, the software will begin cloning your files over to the new drive.
This process may take some time depending on the amount of data you’re transferring. Once the cloning is complete, you can disconnect your hard drive and boot up your computer from the new SSD drive. Overall, cloning your hard drive to a PNY SSD drive is a relatively straightforward process that can help optimize your computer’s speed and performance.
Remove Hard Drives & Boot PNY Drive
When it comes to upgrading or replacing hard drives in your computer, it’s important to follow the proper steps to ensure a smooth transition. The first step is to remove the old hard drives from your computer. This can be done by opening up your computer case and carefully disconnecting the cables and screws that hold the hard drives in place.
Once the old hard drives are removed, you can then boot up your computer using the new PNY drive. This drive can be connected using a USB port and should automatically boot up if it’s set as the primary boot device in your computer’s BIOS settings. By following these steps, you can upgrade your computer’s storage capacity with ease and without any data loss.
Remember to backup all important files before making any upgrades to your hardware.
Verify Cloning Success
After you have successfully cloned your desired plant, it is essential to verify that the process was successful. One of the easiest ways to do this is to compare the physical attributes of the original plant and the clone. Typically, the clone will have the same physical features as the original, including the same leaf shape, size, and color.
You can also perform a genetic test on the clone to confirm its similarity to the original plant. Another useful test is to see if the clone produces flowers or fruits similar to the original. It is essential to note that a successful clone does not always guarantee that the plant will thrive.
You must provide the clone with the same care and growing conditions as the original. By following these completion steps, you can ensure that your plant cloning process was successful, and your clone will grow into a healthy plant just like the original.
Conclusion
In conclusion, cloning a hard drive to a PNY SSD drive is like transplanting a brain into a younger, more agile body. By copying all the data from the old hard drive to the new SSD, you are essentially giving your computer a new lease on life. It’s like hitting the reset button without losing any of your precious files or settings.
So go ahead, give your computer the ultimate makeover and transport yourself into the future with a PNY SSD drive.”
FAQs
What is the process to clone a hard drive to a PNY SSD drive?
You can use a cloning software like Acronis True Image or Macrium Reflect to clone your hard drive to a PNY SSD drive. Connect the PNY SSD drive to your computer, open the cloning software, select the source drive (your hard drive) and the destination drive (PNY SSD), and start the cloning process.
How long does it take to clone a hard drive to a PNY SSD drive?
The time taken to clone a hard drive to a PNY SSD drive depends on the size of the hard drive and the speed of your computer. Typically, it can take a few hours to clone a 1TB hard drive. However, some cloning software can speed up the process by only copying the used sectors of the hard drive.
Do I need to format the PNY SSD drive before cloning my hard drive to it?
No, you do not need to format the PNY SSD drive before cloning your hard drive to it. The cloning software will automatically format the SSD drive and copy all the files and data from your hard drive to the SSD drive.
Can I use a PNY SSD drive to clone a laptop hard drive?
Yes, you can use a PNY SSD drive to clone a laptop hard drive. The process of cloning a laptop hard drive to a PNY SSD drive is similar to cloning a desktop hard drive. You can use a cloning software like Acronis True Image or Macrium Reflect to clone your laptop hard drive to a PNY SSD drive.
