Have you ever experienced that annoyingly slow startup time when you turn on your computer? It’s frustrating, right? Well, what if I told you that there’s an easy solution to this problem: setting up your boot to SSD! By doing this, you’ll significantly speed up your computer’s startup time and overall performance. Think of it like upgrading from a bicycle to a car; it’s an absolute game-changer. In this blog, we’ll dive into everything you need to know about setting up boot to SSD, including what it is, why you should do it, and how to do it.
So, grab your favorite beverage, sit back, and let’s get started on this journey of transforming your computer’s performance.
Check Compatibility
Setting up your boot to SSD can significantly boost your computer’s speed and overall performance. However, before doing so, it’s important to check if your computer is compatible with an SSD. One way to do this is by checking if your motherboard has a SATA III port, which is required for the most recent SSDs.
You can also check if your computer’s BIOS supports booting from an SSD. Another crucial factor to consider is the operating system you are running. The most recent operating systems, such as Windows 10, come with built-in support for SSDs, while older versions may require additional drivers.
Ensuring compatibility before making the switch will save you time and potential headaches in the long run. Once you have checked for compatibility, you can follow the manufacturer’s instructions to install the SSD and set it up as your boot drive, which will significantly improve your computer’s performance.
Is Your System Compatible with SSD?
If you’re thinking of upgrading your hard drive to an SSD, the first thing you need to do is to check if your system is compatible with it. SSDs are different from traditional hard drives, and not all computers can accommodate them. One important factor to consider is the type of interface your computer uses for storage.
Most new computers use SATA III interface, which means they are compatible with modern SSDs. However, if your computer is a bit older, it may use SATA II or even IDE interface, which means you may need to upgrade your motherboard or processor to use an SSD. Another thing to check is the size of your drive bay, as SSDs come in different sizes, and you want to make sure you get one that fits.
Overall, it’s important to check your system’s compatibility before buying an SSD, to avoid wasting money on a product that won’t work with your computer.
Clone Your System to SSD
Are you looking to upgrade your computer’s performance by cloning your system onto an SSD? Setting up your computer to boot from an SSD involves a few simple steps. First, install your SSD and connect it to your computer. You can then use a cloning software tool to copy your HDD files and operating system to your new SSD.
Once your cloning is complete, restart your computer and access your BIOS settings. In the boot order menu, select your new SSD as the first boot device. Save your changes and exit the BIOS.
Congratulations! Your computer should now boot up from your newly installed SSD, resulting in a significant boost in speed and performance. Remember to keep your old HDD as a backup or for additional storage. With these easy steps, you can easily set up your computer to start using the high-speed benefits of an SSD.
Install OS Migration Software
When it comes to upgrading your computer’s storage system, cloning your existing system to an SSD is a great way to transfer everything over quickly and easily. But before you can start the cloning process, you’ll need to install OS migration software on your computer. This software will create a copy of your existing operating system, applications, and files and transfer them to your SSD, creating an exact replica of your old system on the new drive.
Some popular OS migration software options include EaseUS Todo Backup, Acronis True Image, and Macrium Reflect. Using one of these programs is a straightforward process that can save you a lot of time and hassle compared to manually transferring all your files over to the new drive. With the right software and a bit of patience, you’ll have a speedy, reliable system with plenty of storage space!
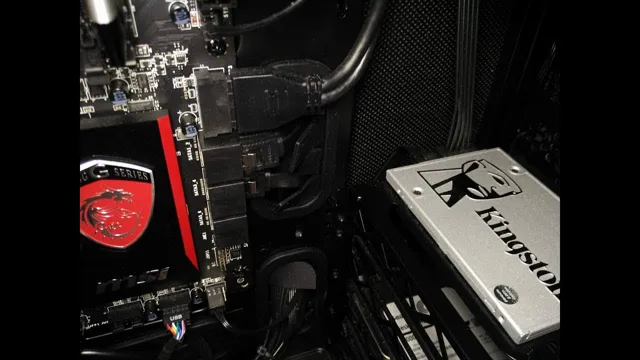
Connect SSD to the System
Connecting an SSD to your system is a relatively easy process that can lead to a significant boost in your computer’s performance. However, before you can start enjoying lightning-fast transfer speeds and reduced loading times, you need to clone your system to the SSD. This means creating an exact copy of your current operating system, including all files, settings, and applications, and transferring it to the new drive.
There are several software options available that can help you with this process, such as Clonezilla or EaseUS Todo Backup. Once you have your cloning tool of choice, follow the step-by-step instructions to transfer your system to the SSD. When the process is complete, you can connect the SSD to your system and set it as the primary drive.
With your new SSD in place, you can enjoy a more responsive and faster computer experience, with faster boot times and lightning-fast application loading. So, what are you waiting for? Upgrade your system with an SSD today and experience the difference it can make!
Clone Data to SSD
Are you looking to upgrade your computer’s performance? One of the best ways to do that is by cloning your system to an SSD (solid-state drive). This process involves copying all the data from your current hard drive to the new SSD. Not only does an SSD help speed up your computer, but it also has fewer moving parts, making it more durable than a traditional hard drive.
To clone your system, you’ll need to use software such as Clonezilla, Acronis True Image, or EaseUS Todo Backup. These programs will help make sure all your data is properly transferred to the new drive. Make sure to back up your data first and have a proper plan before starting the cloning process.
Once it’s complete, you’ll have a faster, more efficient computer. So, don’t let a slow computer hold you back; clone your data to an SSD and enjoy a snappier computing experience!
Changing Boot Order
So, you’ve installed your new SSD and you’re ready to set it as the primary boot drive for faster boot times and improved performance. To do this, you need to change the boot order in your computer’s BIOS settings. When you turn on your computer, press the key (usually F2, F10, or Delete) to enter the BIOS.
Look for the Boot menu or tab and find the option to change the boot order. You’ll want to move your SSD to the top of the list, so it’s the first device the computer looks for when booting up. Save your changes and exit the BIOS.
Restart your computer and it should now boot from the SSD. It’s as simple as that! Now you can enjoy faster boot speeds and improved system performance with your new SSD as the primary boot drive.
Enter BIOS Settings
Entering BIOS settings can be a confusing and overwhelming experience, especially for those who are not technologically savvy. However, changing the boot order in BIOS can be very beneficial, allowing you to boot your computer from external devices like USB drives or CD-ROMs. To do this, you need to access the BIOS settings by pressing a specific key during startup — typically F2 or Delete.
Once you’re in the BIOS settings, you need to navigate to the Boot menu and look for the Boot Priority option. Here, you can change the order in which your computer searches for bootable devices, making sure that the device you want to boot is at the top of the list. Don’t forget to save your changes before exiting BIOS! Overall, changing the boot order in BIOS can be a straightforward process once you know where to find the Boot Priority option.
It can be a valuable tool for troubleshooting your computer, as well as for running utilities or installing new operating systems from external devices. So, next time you need to boot your computer from a USB drive or CD-ROM, don’t hesitate to enter the BIOS settings and change the boot order. It could save you a lot of time and effort in the long run!
Set Boot Priority to SSD
Changing the boot order on your computer is a crucial step in ensuring that your system starts up as quickly and efficiently as possible. One important aspect of this process is setting the boot priority to your SSD. An SSD, or solid-state drive, can significantly improve the overall performance of your computer by speeding up boot times and reducing load times for programs and files.
To set the boot priority to your SSD, you’ll need to access your computer’s BIOS settings. This can typically be done by pressing a key, such as F2 or Del, during startup. Once in the BIOS, you’ll need to navigate to the Boot menu and then select your SSD as the first boot option.
This will ensure that your computer boots from your SSD first, rather than your slower traditional hard drive. By doing so, you’ll notice a significant improvement in the speed and responsiveness of your computer. So if you’re looking to get the most out of your SSD, be sure to set the boot priority accordingly in your computer’s BIOS.
Verify Boot to SSD
If you’ve recently installed an SSD in your computer, setting it up as your boot drive can greatly improve performance. To verify that your system is booting to the SSD, you’ll need to go into your computer’s BIOS settings and make sure the boot order is correctly configured. First, restart your computer and immediately press the key to enter your BIOS settings (this may vary depending on your computer, but it’s usually F2, Delete, or one of the Function keys).
Once you’re in the BIOS, find the Boot Order section and make sure your SSD is listed as the first option. If it’s not, use the arrow keys to move it to the top of the list. Save your changes and exit the BIOS, and your computer should now automatically boot from the SSD.
Checking your boot drive is an important step to make sure you’re getting the most out of your new SSD, and it’s a quick and easy process to do so.
Reboot Your System
If you want to give your system a fresh start and improve its overall performance, verifying boot to SSD is a crucial step. After all, an SSD is faster and more reliable than an HDD, and it can significantly reduce boot and load times. To check if your system is booting from an SSD, you can access the BIOS or UEFI firmware settings and look for the boot order or boot menu.
Make sure that the SSD is listed as the first boot option, and save the changes before exiting the settings. You can also use system information tools or disk management utilities to confirm that the SSD is recognized and functioning correctly. By ensuring that your system boots from an SSD, you can enjoy faster and smoother operations, especially when it comes to running resource-intensive applications or multitasking.
Check if Your System Boots to SSD
When you upgrade your computer to an SSD, you want to make sure your system is actually booting from the SSD and not your old hard drive. So, how do you check? First, you can look for indications during startup that your system is using the SSD. If your computer boots up quickly and applications run smoothly, that’s a good sign.
You can also look in your computer’s settings to see which drive is listed as the boot drive. Another option is to physically disconnect the old hard drive and attempt to boot up your computer. If it boots up successfully, you can be confident that your system is booting from the SSD.
Remember to make sure your data is backed up before attempting any of these steps, and if you’re not comfortable working with computer hardware, it’s best to seek help from a professional.
Conclusion
In conclusion, setting up your boot to SSD is like shifting into high gear on the highway of computer performance. It’s a simple process that can make a world of difference in the speed and responsiveness of your system. So dust off that screwdriver, roll up those sleeves, and get ready to unleash the full power of your computer!”
FAQs
What is SSD?
SSD stands for Solid State Drive and it is a type of storage device used in computers.
Why should I use an SSD as my boot drive?
Using an SSD as your boot drive can significantly improve the speed and performance of your computer.
How do I check if my computer supports SSD?
You can check your computer’s specifications or consult with your manufacturer to see if your computer supports SSD.
How do I physically install my SSD?
The installation process varies depending on your computer, but generally involves opening the computer case, connecting the SSD to a power supply and SATA port, and mounting it securely.
How do I set up my computer to boot from my SSD?
You can change the boot order in your BIOS settings to prioritize booting from your SSD. Consult with your manufacturer’s instructions or a professional if you are unsure how to do this.