Are you tired of slow boot-up times and sluggish performance on your computer? Adding an SSD (Solid-State Drive) can give your PC the boost it needs to run smoothly and efficiently. But if you’re new to the world of hardware upgrades, you might be wondering where to start. Don’t worry, we’ve got you covered! In this step-by-step guide, we’ll show you how to add an SSD to your PC, from choosing the right drive to installing it correctly.
Think of it like upgrading your car’s engine to a high-performance one – once you’ve made the switch, you’ll wonder how you ever lived without it. So, let’s get started!
Check compatibility
If you’re looking to add an SSD to your PC, the first step is to check compatibility. You’ll need to ensure that your computer has an available SATA port and that it can support the size and type of SSD you’re looking to install. Most modern computers should have no problem with this, but it’s always best to double-check before making any purchases.
Additionally, you’ll need to take into account the power requirements of your SSD. Some models may require more power than your current setup can provide, so be sure to do your research before upgrading. Overall, adding an SSD can be a great way to improve your computer’s performance and speed up load times, but it’s important to make sure everything is compatible before making any changes.
Ensure motherboard and SSD are compatible
When building a computer, it’s important to make sure that all the components are compatible with each other, including the motherboard and SSD. The motherboard is the foundation of your entire system, connecting all the different parts and allowing them to work together. If you choose a motherboard that isn’t compatible with your SSD, you may run into issues with speed, performance, or even functionality.
To avoid this, it’s important to do some research before making a purchase to ensure that your components are compatible. You can typically find compatibility information on the manufacturer’s website or by consulting with a computer building expert. By taking the time to check compatibility, you can help ensure that your computer runs smoothly and efficiently, providing you with the best possible experience.
Check if you have an open SATA port
If you plan on upgrading or adding a new hard drive to your computer, it’s important to check if your system is compatible with the new hardware. One thing to consider is whether you have an open SATA port available to connect your new drive. SATA (Serial ATA) is the most common interface used to connect storage devices in modern computers.
Before purchasing a new hard drive, take a look inside your computer and check if there are any open SATA ports on the motherboard. If all the ports are taken up, you may want to consider replacing an old drive instead of adding a new one. It’s important to make sure the hardware you plan on adding is compatible with your system to avoid damaging any hardware or losing data.
Take the time to do your research and make sure your upgrades are the right fit for your computer.
Back up your data
If you’re looking for a way to boost your PC’s performance, adding an SSD is a great option. The process might seem daunting at first, but it’s actually pretty straightforward. First, make sure you have an available slot in your motherboard and purchase an appropriate SSD for your system.
Then, shut down your PC, unplug everything, and open up the case. Find the slot where you’ll be installing the SSD and attach it securely. Once you’ve done that, you’ll need to configure your BIOS to recognize the new drive.
Finally, you’ll need to transfer your operating system and files to the new SSD. There are different methods to do this, but most involve cloning your existing drive onto the SSD using software like Macrium Reflect or EaseUS Todo Backup. With your new SSD installed and properly configured, you’ll enjoy faster boot times, quicker application load times, and overall improved system performance!
Save your important files to a separate drive or cloud storage
Backing up your data is crucial in today’s digitally-focused world. It’s essential to save your important files to a separate drive or cloud storage to prevent loss in case of any unforeseen circumstances. With cybercrime and hardware failure becoming more frequent, it is crucial to have a backup plan in place.
In the event of a cyber attack, data loss, or accidental deletion, having a backup can save you time, money, and heartache. A separate drive or cloud storage ensures that your data is secure and easily accessible from any device. It’s like having a spare tire in your car.
You may not need it every day, but you’ll be glad you have it when you experience a flat. In conclusion, backing up your data is non-negotiable. Take the time to save your important files to a separate drive or cloud storage and minimize the risk of losing critical data.
Install the SSD physically
If you’re looking to speed up your computer, adding a solid-state drive (SSD) can make a huge difference to your system’s performance. But how do you add an SSD to your PC? First, you need to physically install the SSD. The process is relatively simple if you have a desktop computer, as you’ll need to find an available drive bay to place the SSD in.
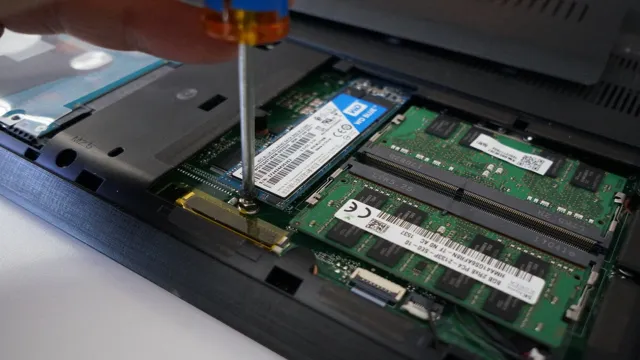
You’ll then need to connect the power and data cables from the SSD to the motherboard and power supply. If you have a laptop, the process may be a bit trickier, as you’ll need to open up the laptop and locate the hard drive bay. Once you’ve found the bay, you’ll need to remove the current hard drive and replace it with the SSD.
If you’re not comfortable with opening up your laptop, it may be best to enlist the help of a professional. Regardless of whether you have a desktop or laptop, installing an SSD can greatly improve your computer’s performance, making it a worthwhile upgrade.
Turn off the PC and unplug all cables
Before installing an SSD into your PC, it’s important to turn it off and unplug all of the cables. This will ensure that there is no power running through the system, and you won’t risk damaging any of the components. Once that’s done, you can begin the physical installation process.
First, locate the area where your current hard drive is installed. It’s usually situated near the bottom-front of your PC. Carefully remove the screws holding the mounting bracket in place, and gently pull the hard drive out of the bay.
Next, insert the SSD into the same bay, ensuring that it’s aligned correctly and snugly in place. Finally, secure the mounting bracket back onto the SSD, using the same screws you removed earlier. Congratulations, you’ve just installed an SSD! The speeding up of your PC and the faster load times will now be a lot more enjoyable.
Remove the case cover and locate the drive bays
To physically install your SSD, you’ll need to remove the case cover and locate the drive bays. This is typically a pretty straightforward process, but it’s important to be gentle and careful so you don’t damage any of the delicate components inside your computer. Once you have the drive bays in sight, you’ll want to carefully slide your SSD into place.
Make sure it’s securely fastened into the slot before you put the case cover back on and power your computer back on. By physically installing your SSD, you’ll be well on your way to improving your computer’s overall performance and speed. Remember to be patient and take your time to ensure that everything is installed properly.
With a little bit of effort, you can upgrade your computer and enjoy its improved performance in no time.
Mount the SSD in an open drive bay
If you’re looking to upgrade your computer’s storage to an SSD, the physical installation is relatively straightforward. First, you’ll need to mount the SSD in an open drive bay. This is typically done by removing a blank panel from the case and screwing in the SSD bracket.
Make sure to consult your case manual to ensure you’re mounting the SSD in the proper location. Once you have the SSD secured in place, you’ll need to connect it to your motherboard. This is done by plugging in a SATA cable and power cable from your power supply.
It’s important to ensure that the SSD is properly connected so that you can enjoy the benefits of faster boot and load times. Overall, the physical installation of an SSD is a quick and easy process that can greatly improve your computer’s functionality and performance.
Connect the cables
So you’ve decided to add an SSD to your PC to speed things up and improve performance. Excellent choice! Adding an SSD is relatively easy, and once you’ve done it, you’ll wonder why you didn’t do it sooner. First, power down your computer and unplug it from the wall.
Open your PC case and locate an empty drive bay, then connect the SATA and power cables to the SSD. Make sure you connect the cables securely, so your SSD doesn’t come loose. Next, you’ll want to mount the SSD in the drive bay.
This is usually done by screwing it in place with a couple of screws. Once you’ve secured your SSD in place, connect the other end of your SATA cable to the motherboard and your power supply. Close up your case, power your PC back on, and voila! You now have a super speedy SSD installed in your PC.
Enjoy the faster boot-up times and snappier performance for years to come. All in all, adding an SSD is an easy way to breathe new life into your trusty old PC, and it’s definitely worth the investment.
Connect the SATA cable to the motherboard and SSD
When building your own PC, it’s important to connect the SATA cable to both the motherboard and SSD to ensure that your system can interface with the storage device correctly. The SATA cable is most commonly used for connecting storage devices like hard drives and SSDs, so it’s important to connect it properly to get the full benefits of your storage device’s speed. First, locate the SATA port on your motherboard, which will be located near the other ports on the board.
Then, attach one end of your SATA cable to this port, ensuring that it is inserted correctly and securely. Next, locate the SATA port on your SSD and repeat the same process of attaching the other end of the cable. The connection will fit snugly and stay securely in place.
Remember to tighten all the screws to make sure the connection is stable. Following these straightforward instructions is all you need to do to connect your SATA cable to your motherboard and SSD.
Plug in the power cable to the SSD
When it comes to installing an SSD into your computer, connecting the cables can be a crucial step in making sure it works effectively. One of the most important connections to make is the power cable, which provides the necessary energy to your SSD. You’ll need to locate the power supply in your computer, then plug in the power cable to connect to the designated slot on the SSD.
This will usually involve a series of pins or sockets where you’ll need to line up the cable with the appropriate connector. Once you’ve secured the connection, you should be able to boot up your computer and begin using your SSD. Keep in mind that it’s important to handle your cables with care to avoid any damage or disconnection, and always be sure to follow any additional instructions or safety guidelines provided by the manufacturer.
By properly connecting your power cable to your SSD, you can enjoy faster performance, better storage capacity, and an overall smoother computing experience.
Configure the SSD
Adding an SSD to your PC can significantly improve its performance, especially in terms of boot time and application loading speed. Before installing the SSD, you need to configure it properly. First, ensure that your motherboard has an available SATA port to connect the SSD to.
Then, connect a SATA cable from the SSD to the motherboard and ensure it is secure. Next, access your computer’s BIOS to enable the SSD. In the BIOS settings, locate the “Boot Order” settings and prioritize the SSD as the primary boot device.
Once you’ve saved the changes, restart your computer, and it should now boot from the SSD. To further optimize the SSD’s performance, you can also ensure that it has the latest firmware and update your operating system’s storage drivers. With these steps, you can enjoy the full benefits of your new SSD and improve your PC’s performance.
So, how do I add an SSD to my PC? Follow these simple steps and enjoy a faster and smoother computing experience!
Access the BIOS and ensure SSD is recognized
When it comes to upgrading your computer’s storage, one of the first steps is configuring the new SSD. But before you do that, you need to ensure that the computer’s BIOS recognizes the SSD. You can access the BIOS by pressing a specific key during start-up, depending on your computer’s brand and model.
Once you’re in, navigate to the storage settings and check to see if the SSD is recognized. If it is, you’re ready to configure it. If not, double-check the connection between the SSD and the motherboard, and make sure the power and data cables are securely connected.
If it still isn’t recognized, you may need to update the BIOS or check for compatibility issues. Once you’ve confirmed that the SSD is recognized, you can configure it to your liking, such as setting it up as the boot drive or partitioning it for specific purposes. Overall, configuring the SSD can be a straightforward process as long as you ensure that it’s properly connected and recognized by the computer.
Format and partition the SSD
When configuring your new solid-state drive (SSD), one of the first steps you need to undertake is formatting and partitioning it. This process involves setting up a file system on the SSD so that your computer’s operating system can interact with it, as well as creating one or more partitions for organization purposes. To do this, you will want to use a tool like Disk Management on Windows or Disk Utility on macOS, both of which are built into their respective operating systems.
Once you open the disk management tool, you can right-click on the SSD and select “Format” to choose the file system you want to use and configure any additional settings. From there, you can create one or more partitions by right-clicking on the unallocated space and selecting “New Simple Volume” (Windows) or “Partition” (macOS). By having properly formatted and partitioned drives, you can ensure that your computer is able to use your SSD efficiently and effectively.
Transfer files to the SSD
So you’re ready to add an SSD to your PC and boost its speed and efficiency. Great! Now it’s time to transfer your files to the new drive. The process is fairly straightforward, but it’s important to have a plan and take precautions to avoid losing any data.
First, decide which files you’d like to transfer. You may want to move all your files to the SSD, or just certain ones that you frequently use. Next, make sure you have a backup of your files, either on an external hard drive or in the cloud.
This is crucial in case something goes wrong during the transfer process. Then, you can use built-in Windows tools like File Explorer or external software like EaseUS Todo PCTrans to move your files to the SSD. Depending on the size of your files and the speed of your connections, the transfer process may take a while.
Once complete, don’t forget to double-check that all your files have transferred successfully and are intact. Congratulations! You’ve successfully added an SSD to your PC and transferred your important files.
Transfer important files from backup to the new SSD
If you’ve recently upgraded to a new SSD, it’s essential to transfer all your important files from your backup to your new storage device. Doing so will ensure that you can access all your essential data and files without any issues. There are several methods you can use to transfer your files to your new SSD, including cloning your hard drive or manually copying and pasting your files.
However, the easiest and most straightforward option is to use a data migration software such as EaseUS Todo Backup or Acronis True Image. These tools allow you to transfer your files quickly and efficiently, ensuring that you don’t lose any data in the process. Overall, transferring your files to your new SSD is a crucial step in upgrading your computer, and it’s essential to take all necessary measures to ensure a smooth process.
Enjoy the speed boost!
If you’re looking to give your PC a significant speed boost, adding an SSD is a great option. But, how do you do that? Well, the process may vary depending on your PC’s configuration, but there are a few basic steps that you can follow. First, you need to choose the right SSD that fits your specific needs and budget.
Then, you need to locate the SATA ports on your motherboard and connect the SSD to one of them. After that, you need to ensure that your SSD is recognized in the BIOS and configure it as your primary boot device. Once everything is set up, you can install your operating system and other programs on the SSD to enjoy lightning-fast boot and load times.
Adding an SSD to your PC is a relatively straightforward process that can make a significant difference in performance. So, don’t hesitate to give it a try!
Conclusion
Adding an SSD to your PC is like giving your old clunker a nitro boost. It’s a quick and effective way to improve your computer’s performance and take your experience to the next level. Whether you’re a gamer looking for lightning-fast loading times or a professional needing to multitask with ease, adding an SSD is a smart investment that will pay dividends.
So what are you waiting for? Upgrade your rig and embrace the power of SSDs today!”
FAQs
What are the benefits of adding an SSD to my PC?
Adding an SSD to your PC can significantly improve its performance by reducing boot times and improving file transfer speeds. It also offers greater durability and reliability than traditional hard drives.
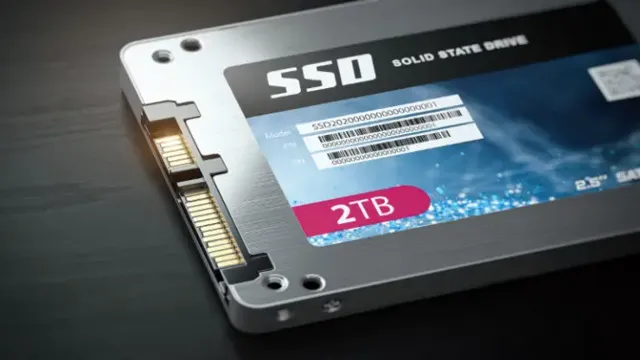
What kind of SSD should I get for my PC?
The type of SSD you need will depend on several factors, including the interface your PC supports (e.g., SATA, M.2), the form factor of your SSD slot, and your budget. It’s a good idea to do some research and read reviews before making a purchase.
Can I install an SSD in addition to my existing hard drive?
Yes, you can install an SSD in addition to your existing hard drive. This will give you the best of both worlds – fast boot and load times from the SSD, and plenty of storage space (and potentially cheaper storage) from the hard drive.
Do I need to reinstall my operating system when I add an SSD to my PC?
It’s not strictly necessary to reinstall your operating system when adding an SSD, but it’s recommended. A fresh install of Windows or macOS on your new SSD will ensure that you get the full benefits of its speed and performance, and avoid any potential compatibility issues.