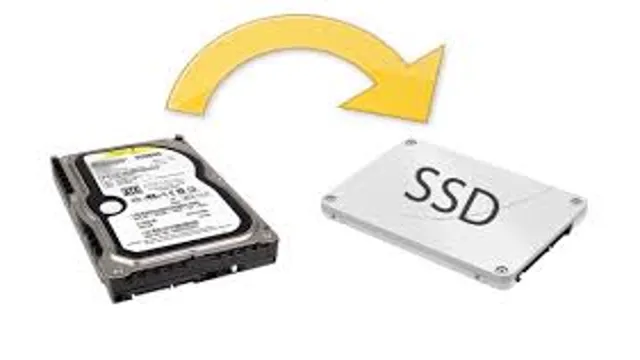
Have you ever realized that your computer’s speed isn’t what it used to be? The thought of moving your Operating System (OS) to a Solid State Drive (SSD) can be intimidating, but fear not! In this step-by-step guide, we’ll show you how to rejuvenate your computer and increase its speed by moving the OS to a brand new SSD. By the end of this guide, you’ll have a better understanding of the advantages of using an SSD and a more efficient way of upgrading your computer’s overall performance. So sit back, relax, and get ready to give your computer a whole new lease of life!
Backup Your Data First
Before moving your operating system (OS) to a solid-state drive (SSD), it’s crucial to backup your data first. A solid-state drive is faster, more durable, and more efficient than a traditional hard drive. However, moving your OS to an SSD requires a complete clone of the data on your current drive.
If the cloning process goes wrong, you could lose your data permanently. Therefore, it’s important to backup your data to an external hard drive, cloud storage or use Windows’ built-in backup tool. This way, you can easily retrieve your data if something goes wrong in the cloning process.
Once you’ve backed up your data, you can then proceed with cloning your OS to an SSD by using dedicated software or tools provided by your SSD manufacturer. Overall, backing up your data is a necessary step to ensure a smooth transition to an SSD and prevent data loss.
Why You Need to Do It
Backing up your data may seem like a trivial task, but it’s a crucial one that you should make a priority. Losing your valuable data due to unforeseen circumstances, such as hardware failures, hacking, or ransomware attacks, can be catastrophic for your business or personal life. That’s why it’s essential to take preventive measures to safeguard your data.
The first step is to back up your data to an external hard drive, cloud-based service, or both, depending on your storage needs. By backing up your data, you’ll have a secondary copy of it that you can use to restore or recover your data in case the primary copy gets lost or corrupted. It’s always better to be safe than sorry, and backing up your data is one of the simplest and most effective ways to protect yourself from data loss.
So, don’t wait until it’s too late – start backing up your data today!

Ways to Backup Your Data
As technology continues to advance and become an increasingly integral part of our daily lives, it’s crucial to take the necessary steps to protect our data. One of the easiest and most effective ways to do this is by backing up your data. There are numerous ways to backup your data, including cloud-based options such as Google Drive and Dropbox, as well as offline options such as external hard drives and USB drives.
By regularly backing up your data, you can ensure that you never lose important information due to a hardware failure, theft, or other unforeseen events. Plus, backing up your data can provide peace of mind knowing that your information is securely stored in more than one location. So, whether you’re a casual computer user or a business owner, make sure to prioritize backing up your data to keep it safe and readily accessible whenever you need it.
Check Compatibility and Prepare Your SSD
Moving your operating system (OS) to a solid-state drive (SSD) can provide a significant boost to your computer’s performance. However, before you begin the process, you need to ensure that your computer and SSD are compatible. Check your computer’s specifications to see if it can support an SSD, and ensure that the SSD you choose is compatible with your computer’s interface.
Once you’ve determined compatibility, you’ll need to prepare your SSD for the migration process. This includes backing up any important data, updating your SSD’s firmware, and cloning your existing OS to the SSD. It’s important to note that moving your OS to an SSD can be a complex process, and it’s important to follow instructions carefully to prevent data loss or other issues.
With the right preparation and attention to detail, however, you can enjoy the benefits of faster boot times and improved system performance.
The Importance of Compatibility
When it comes to SSDs, compatibility is key. Before you make any purchase, it’s important to check if the SSD you have your eye on is compatible with your device. This means checking the size, interface type, and form factor to ensure it will fit and work properly.
Once you’ve confirmed compatibility, it’s time to prepare your SSD for installation. This includes backing up any important data, initializing the drive, and formatting it to the correct file system. By taking these steps, you can ensure that your SSD will function optimally and give you the speed and storage capacity you need.
Don’t overlook the importance of compatibility and preparation – it will save you time, money, and frustration in the long run.
Formatting Your SSD for OS Installation
Before formatting your SSD for OS installation, it’s crucial to ensure that your SSD is compatible with your computer and operating system. Check your system’s manual or do some online research to confirm that your SSD meets the specifications needed to work with your system. Also, make sure to back up any important data as formatting your SSD will wipe all existing data.
Once you’ve checked compatibility and backed up your data, it’s time to prepare your SSD by connecting it to your computer and initializing it. This process involves creating a partition on your SSD and assigning a file system for it to use. This will allow your operating system to recognize your SSD as a storage device and enable you to install your OS onto it.
With the right preparation, formatting your SSD can be a straightforward process, giving you a faster and more efficient computer experience.
Clone Your OS to the SSD
If you want to speed up your computer, cloning your OS to a SSD can be a great way to do it. But how do you move your OS to a SSD? The first step is to purchase an SSD that is large enough to hold your operating system and any other programs you want to run quickly. Then, you can use software such as Macrium Reflect or EaseUS Todo Backup to copy your OS and everything on it to the SSD.
This process is called cloning. Once the cloning is complete, you can set your BIOS to boot from the SSD instead of your old hard drive. This will ensure that your computer starts up from the SSD every time you turn it on.
In no time at all, you’ll be enjoying faster boot and load times, and an overall more responsive computer. Just remember to back up all your important files before you start the cloning process, just in case something goes wrong.
Different Methods for Cloning Your OS
If you’re upgrading to an SSD, one of the first things you might want to do is to clone your OS to your new drive. This will ensure that you don’t need to reinstall your operating system and all your programs from scratch. There are a few different methods available for cloning your OS.
One popular program for cloning your OS is Macrium Reflect, which is free to use. You’ll also need a USB flash drive or DVD to create a bootable rescue media to use with Macrium. Another popular option is EaseUS Todo Backup, which is also free to use and allows you to clone your OS with just a few clicks.
Whatever method you choose, cloning your OS to your new SSD is a great way to save time and ensure that your new drive is up and running as quickly as possible.
How to Choose the Right Cloning Software
Choosing the right cloning software can make all the difference when it comes to moving your operating system onto a new SSD. There are plenty of options out there, but it’s important to find a software that not only clones your OS, but also moves your data and applications without any issues. Look for a software that provides easy-to-understand instructions and a user-friendly interface.
Some popular options include EaseUS Todo Backup, Acronis True Image, and Macrium Reflect. It’s also important to choose a software that works well with your specific operating system, whether it’s Windows or Mac. By doing your research and choosing the right cloning software, you can easily transfer your OS to your new SSD and continue operating without any interruptions.
Set Up Your Boot Order in BIOS
If you want to move your operating system (OS) from your standard hard drive to a solid-state drive (SSD), you’ll need to set up your boot order in the BIOS. The BIOS is the basic input/output system on a computer’s motherboard that controls how the computer boots up and runs. By default, the boot order is usually set to look for devices like the hard drive first, which means you’ll need to change it so that the computer loads from the SSD instead.
To do this, you’ll need to enter the BIOS setup menu and find the boot order settings. From there, you can move the SSD to the top of the list, which will ensure that the computer boots from the SSD instead of the hard drive. It’s important to note that the process may vary depending on your computer’s model and manufacturer, so it’s always a good idea to consult your user manual or search online for specific instructions.
Overall, changing your boot order is a simple but important step in moving your OS to an SSD and can significantly improve your computer’s overall performance.
What Is BIOS and Why You Need to Modify It?
BIOS BIOS, or Basic Input/Output System, is a firmware that comes pre-installed on a motherboard. It is responsible for initializing the hardware components when the computer is turned on and loading the operating system. However, BIOS also provides access to various settings that can be customized by the user to optimize the system’s performance.
One of the essential settings in BIOS is the boot order, which determines which device the computer will try to boot from first. By default, the boot order is set to the hard drive, meaning that the computer will load the operating system from it. But suppose you want to install a new operating system from a USB drive or DVD.
In that case, you need to modify the boot order to prioritize the device containing the installation media. This can be done by entering the BIOS setup during boot and navigating to the boot order section. From there, you can rearrange the boot devices by dragging and dropping them in the desired order using the arrow keys.
Remember to save the changes before exiting the setup to apply them. Overall, tweaking BIOS settings can be a powerful tool to optimize your system, so don’t be afraid to explore them.
Steps to Change Boot Order in BIOS
Changing the boot order in BIOS can be a simple and quick process, but it’s important to know the steps involved to avoid any issues. The boot order determines which device or drive your computer will start up from when it’s powered on. To change the boot order in BIOS, you first need to enter the BIOS setup menu.
This can typically be done by pressing a key or combination of keys during the boot process. Once in the BIOS menu, navigate to the boot order or boot priority section, which is usually located under the advanced or settings tab. From there, you can use the arrow keys to move the preferred device or drive to the top of the list.
It’s important to save and exit the BIOS menu after making changes, as failure to do so can result in the changes not being applied. By changing the boot order in BIOS, you can prioritize booting from a specific device or drive and improve the overall performance of your computer.
Install the SSD and Enjoy the Benefits
Looking to upgrade your computer with a faster storage solution? Installing an SSD (solid-state drive) can give your machine a noticeable performance boost and reduce load times significantly. But before you can reap the benefits of an SSD, you need to move your operating system (OS) to it. There are numerous methods available, but the easiest and most efficient way is by using a cloning software.
First, you need to connect the SSD to your computer, and then download and install the cloning software. Next, launch the software, select your OS drive as the source, and the SSD as the destination. Finally, initiate the cloning process and wait for it to finish.
Once it’s done, shut down your computer, disconnect the old hard drive, and boot up your system from the newly-installed SSD. And voila, your OS has been successfully migrated to a faster, more reliable storage solution. By following these simple steps, you can enjoy the faster load times and increased efficiency an SSD has to offer.
How to Install the SSD
If you’re looking to upgrade your computer’s storage capacity and speed, installing a solid-state drive (SSD) is a great choice. Not only will it give you faster boot and load times, but your programs will run smoother and your computer will be more responsive overall. To install an SSD, you’ll need to first ensure that your computer has an available SATA port and a power supply connector.
Once you have that, you’ll need to remove the existing hard drive and install the SSD in its place. Don’t worry, it’s not as complicated as it sounds! Just remember to backup your data beforehand and take your time during the installation process. With a new SSD in place, you’ll be able to enjoy all the benefits of quicker and more reliable storage.
Benefits of Moving OS to SSD
SSD, Operating System, Benefits If you’re looking to give your computer new life, consider moving your operating system (OS) to an SSD. The benefits are numerous. First, SSDs are significantly faster than traditional hard drives, which means your computer will boot up faster and programs will open with lightning speed.
They also offer greater durability, as they don’t have moving parts that can wear down over time. Additionally, SSDs are more energy-efficient, which is great news for anyone who wants to reduce their energy consumption. Finally, SSDs are quieter than hard drives, helping to create a more peaceful computing experience overall.
Make the move to an SSD and start enjoying all these benefits today!
Conclusion
If you want to give your old computer a new lease on life, moving your OS to an SSD is the way to go. Not only will you notice a significant boost in performance, but you’ll also have more space for all your important files and programs. And the best part? You’ll feel like a computer wizard for knowing how to do it yourself.
So go ahead, channel your inner tech guru and give your computer the upgrade it deserves!”
FAQs
What is an SSD and why should I move my OS to it?
An SSD (Solid State Drive) is a non-volatile storage device that can significantly improve your computer’s performance. Moving your operating system (OS) to an SSD can make your computer boot faster, load programs quicker, and increase overall system responsiveness.
Can I move my OS to an SSD without reinstalling Windows?
Yes, you can. There are a variety of tools available that allow you to clone or migrate your operating system from your old hard drive to a new SSD. Some popular options include Macrium Reflect, Acronis True Image, and EaseUS Todo Backup.
What size SSD do I need to move my OS?
The size of the SSD you need depends on the size of your operating system and the amount of data you have on your existing hard drive. As a general rule of thumb, you should get an SSD that is at least as large as your current hard drive. For example, if your existing hard drive is 500GB, you should get a 500GB SSD.
Do I need to backup my data before moving my OS to an SSD?
Yes, it is always a good idea to back up your data before making any changes to your computer’s storage. Moving your operating system to a new SSD involves some level of risk, and you don’t want to lose any important files or documents in the process. You can use an external hard drive or cloud storage service to back up your data.