
If you’re looking to increase your computer’s speed and performance, moving your operating system from a traditional hard drive to a solid-state drive (SSD) can make a world of difference. A boot drive is a storage device that holds the operating system and essential software your computer needs to start up. Upgrading this drive to an SSD is one of the easiest and most effective ways to breathe new life into your computer.
However, many people are intimidated by the prospect of moving their boot to an SSD. The process can seem complicated, but we’re here to guide you through it step-by-step. In this guide, we’ll explain why moving your boot to an SSD can be so valuable and walk you through the process of doing it yourself.
With our help, you’ll soon be enjoying faster boot ups and a significantly improved computing experience!
Backup Your Data
If you’re upgrading to a new SSD and want to move your boot over, there are a few steps you need to follow. The first thing you need to do is backup your data, just in case something goes wrong during the process. Once you’ve done that, you’ll need to clone your existing hard drive to the new SSD.
There are many tools that can help you with this, such as Acronis True Image or EaseUS Todo Backup. These programs will make a copy of your entire hard drive, including your operating system, applications, files, and settings. Once the cloning process is complete, you’ll need to set the new SSD as your boot drive.
You can do this by going into your BIOS settings and selecting the new SSD as the primary boot device. After that, you should be good to go! Your computer will now boot up faster and perform better overall, thanks to the increased speed and performance of your new SSD. So, don’t be afraid to make the switch – just make sure you backup your data first!
Using a Backup Service or External Hard Drive
Backing up your data is crucial to keeping your important files safe and secure. One method of backing up your data is by using a backup service or an external hard drive. A backup service allows you to upload your important files to a remote server, which can be accessed if your computer crashes or is stolen.
External hard drives are physical devices that can store your files and can be easily transported. Both methods have their pros and cons, so it’s important to weigh your options and choose the one that works best for you. With the rise of cyber-attacks and data breaches, a backup service can give you more peace of mind as it ensures that your data is stored offsite.
However, an external hard drive is good for those who prefer to physically have their data with them and want to avoid any subscription fees. Regardless of the method you choose, backing up your data should be an essential habit to ensure you never lose your important files.
Making Sure All Important Files are Saved
Backing up your data is essential in ensuring that all important files are saved, and you won’t lose them due to any unforeseen circumstances. There are multiple ways to backup your data, such as using a cloud-based service or an external hard drive. It’s always better to have multiple backups in different locations in case one backup fails.
Losing important data can be devastating, and it’s always better to be prepared beforehand to avoid any mishaps. It’s also important to regularly back up your data, so you always have access to the latest versions of your files. So, make sure to take the time to backup your data, and you’ll have peace of mind knowing that your files are safe and secure.
Cloning Your Boot Drive
If you’re wondering how to move your boot drive to your SSD, the process is called cloning and can save you a lot of time and hassle. Cloning your boot drive simply means copying everything from your existing drive to your new SSD, including the operating system, boot files, and any installed programs. To do this, you’ll need cloning software like Macrium Reflect or EaseUS Todo Backup.
Follow the step-by-step instructions provided by the software to create a bootable USB drive or CD, and then use it to boot your computer. You’ll then be able to clone your existing drive to the SSD by selecting the appropriate settings in the cloning software. Once the cloning process is complete, you can set your computer to boot from the SSD and enjoy faster performance and quicker boot times.
Just don’t forget to back up your important files before you begin, just in case anything goes wrong during the cloning process.
Using a Cloning Software
Cloning your boot drive can be an effective way to protect your system and ensure the smooth running of your computer. By using a cloning software, you can create an exact copy of your boot drive, including all the files and programs, and transfer them to a backup storage device or new computer. This process can save you a lot of time and hassle in case your primary disk fails or your system encounters any issues.
Additionally, cloning can also be useful if you want to upgrade your hard drive or migrate to a new computer without losing your data or settings. Overall, cloning your boot drive can provide peace of mind and help you maintain the efficiency of your system.
Creating a Bootable USB
Cloning your boot drive is an essential step in creating a bootable USB for your system. Cloning allows you to copy every detail, including files, applications, and operating system preferences, from your boot drive to the USB drive. This feature is incredibly useful for creating an exact replica of your current drive, allowing you to transfer it to another system or simply back it up.
To begin copying your boot drive, you’ll need a cloning software and a compatible USB drive. Once you have these things, simply follow the software’s instructions, and the software will do the rest for you. Remember, cloning your drive may take some time, so be sure to schedule enough time to complete the process fully.
By cloning your boot drive, you can have peace of mind that your current system is safe and secure, and you can take your system with you on the go.
Transferring the Cloned Data to SSD
Cloning your boot drive is a wise choice if you want to transfer all of your data and settings to a new solid-state drive (SSD). This process is straightforward and only requires software that can clone your hard drive. First, you need to connect your SSD to your computer, either through a USB adaptor or by installing it in your PC’s drive bay.
After that, install a cloning software and follow the instructions to clone your drive. Most cloning software comes with a step-by-step guide, so don’t worry if you’re not tech-savvy. Once the cloning process is complete, you can then swap out the drives and your new SSD should boot up and work seamlessly.
It’s crucial to backup all important data before starting the cloning process as it’s irreversible once started. Additionally, always make sure that the SSD has enough space to accommodate everything on your boot drive. By cloning your boot drive, you can enjoy faster boot times, quicker application response times, and an overall better computing experience that an SSD offers.
Installing the SSD
“Moving your Boot to Your SSD: Step-by-Step Guide” So you’ve decided to upgrade your computer’s storage performance by installing an SSD. Congratulations, you’re in for a faster and smoother computing experience! But now comes the tricky part — how do you move your boot to your SSD? Well, worry not, as we’ve got you covered with this step-by-step guide. First, before you install your new SSD, back up all your important data to an external hard drive or cloud storage.
This is important because you’ll be wiping your old hard drive clean before cloning your boot to your SSD. Next, use a cloning software such as EaseUS Partition Master, Macrium Reflect, or Clonezilla to clone your old hard drive’s boot partition to your new SSD. Make sure you select the option to “clone boot sector” or “clone MBR” (Master Boot Record) during the process.
Once the cloning is complete, shut down your computer and disconnect the old hard drive. With only the SSD plugged in, boot up your computer and go to the BIOS settings. Make sure the SSD is selected as the first boot device.
Save the changes and exit BIOS. You should now be able to boot up your computer normally from your new SSD. Finally, double-check that everything transferred correctly.
Check if your system recognizes the SSD as the new boot drive, and make sure all your files and applications are intact. You’re now ready to enjoy the improved speed and performance of your newly installed SSD! In summary, moving your boot to your SSD isn’t as complicated as it may seem. Just remember to back up your data, use a cloning software, update your BIOS settings, and check that everything is working correctly.
Happy computing!
Opening Your Computer and Finding the Appropriate Slot
To install an SSD in your computer, the first step is to open up your computer and locate the appropriate slot for the SSD. This may require a bit of research or consultation with your computer manual. Once you’ve located the correct slot, you can then insert the SSD.
Make sure you’re handling the SSD carefully and avoid touching any of the delicate components. It’s also important to ensure that the SSD is securely and firmly in place. Once you’ve installed the SSD, you’ll need to configure your computer to recognize it.
This may require some additional steps and configurations, but once completed, you’ll be able to enjoy the increased speed and performance of your computer. By following these steps, you can upgrade your computer’s storage capabilities and breathe new life into your system.
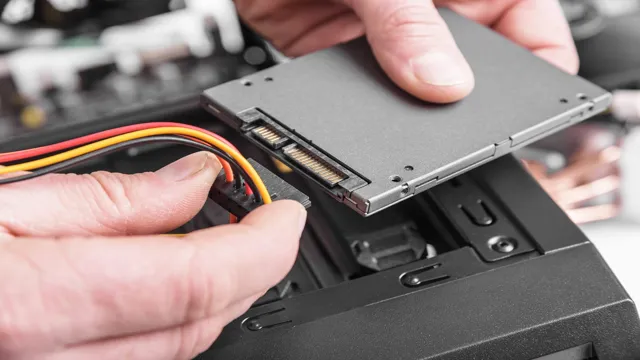
Plugging in the SSD and Securing It
The next step in installing an SSD is plugging it in and securing it. First, locate an empty drive bay in your computer case and gently insert the SSD into it. Next, connect the SATA data cable to the SSD and the motherboard, and connect the SATA power cable to the power supply unit.
It’s important to ensure that the cables are securely connected to prevent any loose connections. Once the SSD is connected, screw it into place using the small screws included with your computer case. Be careful not to overtighten the screws as this can damage the SSD or the case.
Now that your SSD is plugged in and secured, you’re one step closer to enjoying faster boot times and improved overall performance for your computer system.
Boot from the SSD
Moving your boot to your SSD can drastically improve your computer’s performance. To do so, you first need to clone your operating system to the SSD using a cloning tool like Clonezilla or EaseUS Todo Backup. Once the cloning process is complete, you can change your boot order in your computer’s BIOS to boot from the SSD.
This will ensure that your computer starts up faster and runs programs with greater speed and efficiency. However, it’s important to note that simply moving your boot to your SSD won’t solve all performance issues. You may still need to optimize your computer’s settings and remove unnecessary programs to truly get the most out of your SSD.
Overall, moving your boot to your SSD is a powerful way to optimize your computer’s performance and ensure it runs as smoothly as possible.
Changing Boot Priority in BIOS Settings
To boot from the SSD, you’ll need to change the boot priority in the BIOS settings. This process involves entering into the BIOS setup, locating the boot priority section, and moving your SSD to the top of the priority list. Essentially, this tells your computer to look for an operating system on the SSD before trying any other storage devices.
To do this, you’ll need to restart your computer and watch for a prompt to enter into the BIOS setup. This could be a key such as F2, F10, or Del, depending on the manufacturer of your motherboard. Once in the setup, navigate to the boot priority section and use the arrow keys to move your SSD to the top of the list.
Save and exit, and your computer will now boot from the SSD. It’s important to note that changing the boot priority can have implications for other operating systems or storage devices on your computer. If you have multiple drives with different operating systems installed, be sure to consider the order in which they should boot.
Additionally, make sure to save any important data before making changes to avoid any potential data loss.
Checking If the Boot Is Successful
After installing an SSD, the next step is to check if the boot is successful. The first thing to do is to ensure that the computer is set to boot from the SSD. This can be done by accessing the BIOS settings and setting the SSD as the primary boot drive.
Once this is done, save and exit the BIOS, and the computer will restart. If the boot is successful, the computer will start up quickly, and programs will open almost immediately. You can also check if the SSD is set as the primary drive by accessing the computer’s system properties.
Here, you can see information about your system and check if the SSD is the primary drive. In case the SSD is not the primary drive, you can change it by following the same process as earlier. Remember to always make sure that the SSD is set as the primary boot drive to get the most out of your SSD’s fast reading and writing speeds.
Enjoy Your Faster System!
Are you tired of dealing with sluggish system performance? One solution may be to move your boot to your SSD. Not sure how to do it? Don’t worry, it’s simpler than you might think. First, you’ll need to clone your existing boot drive onto your SSD.
There are various software options available to help you with this process. Once you’ve completed cloning your drive, you’ll need to set your SSD as the primary boot device in your system BIOS. This will ensure that your computer boots from your new, faster SSD.
Finally, you may need to do a bit of cleanup to optimize your system for your new SSD. Deleting old files and programs that you no longer need can help to free up space and improve performance. With a little bit of effort, you’ll be enjoying a much faster and more responsive system in no time!
Conclusion
Moving your boot to an SSD is like giving your computer a superhero upgrade. With lightning-fast speeds and increased performance, your computer will be transformed from a mere mortal to a tech powerhouse. So don’t hesitate to make the switch and let your computer soar to new heights!”
FAQs
What is an SSD?
An SSD (Solid State Drive) is a type of storage device similar to a hard drive that uses NAND-based flash memory to store data.
Why would someone want to move their boot to an SSD?
Moving your boot to an SSD can significantly improve your computer’s performance and speed up the boot time.
How do I check if my computer is compatible with an SSD?
You can check your computer’s specifications online or consult with a technician to see if your computer is compatible with an SSD.
Can I move my entire operating system to an SSD or just the boot?
You can move your entire operating system to an SSD using software like cloning tools or fresh installation methods.
How do I move my boot to an SSD?
You can move your boot to an SSD by cloning your current boot drive using software like EaseUS or Acronis or by fresh installing your operating system on the SSD.