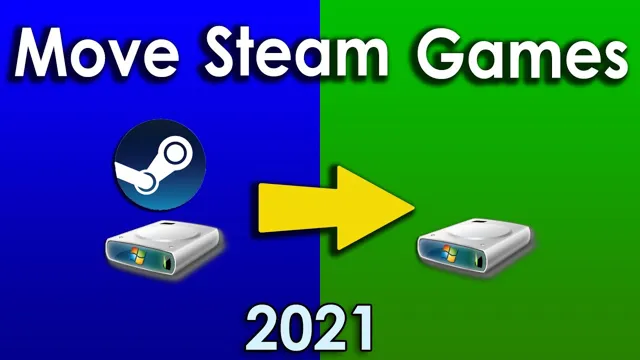
Do you love playing PC games but notice they’re taking up a considerable amount of space on your hard drive? One way to optimize your gaming experience is by moving your games to an SSD. Solid-State Drives are faster and more reliable than traditional hard drives, and they can enhance gaming performance by reducing load times and providing a smoother experience. However, transferring games to an SSD can be a daunting task, especially if you’re not well-versed in computer technology.
But fear not, dear gamer, because in this blog post, we will guide you step-by-step on how to move your games to an SSD and reap the benefits of faster load times and improved gameplay. So, grab your controller, and let’s get started.
Check Your SSD Storage Space
If you’re a gamer, you know how important storage space is when it comes to running your games smoothly. One way to boost your PC’s performance is by moving games to your SSD. But how do you do that? First, you need to check how much SSD storage space you have available.
This can easily be done by navigating to “My PC” and right-clicking on your SSD drive. From there, select “Properties” and you’ll be able to see how much space is available. Once you know how much space you have, it’s time to move your game.
You can do this by going into the game’s settings or options menu and finding the “install location” option. From there, select your SSD drive and click “install.” This will move the game from your old storage drive to your SSD, which should result in faster load times and smoother gameplay.
Remember, if you don’t have enough space on your SSD, you may need to remove or transfer other files to make room for your game. By taking these steps, you can optimize your PC’s performance for a better gaming experience.
Step One: Create a Folder on Your SSD
If you’re planning to utilize your solid-state drive (SSD) more effectively, you need to create a separate folder on it. But before that, you must check the space available on your SSD. You don’t want to end up filling your SSD completely because doing so could result in slower performance.
One effective way to check your SSD’s storage space is by using the in-built Windows feature. Simply right-click on your SSD drive and select “Properties.” From there, you will be able to see the remaining space on your SSD.
If you’re running low on space, you can consider deleting large files or programs or transfer them to an external hard drive. Once you’ve freed up enough space, go ahead and create a new folder on your SSD. This folder will help you to organize your files and prevent things from getting cluttered.
Make sure to give it a descriptive name and move your files into it regularly to keep things tidy.
Step Two: Locate the Game on Your Current Hard Drive
Once you’ve verified that the game is installed on your hard drive, the next crucial step is to check your SSD storage space. Depending on the game size and the current capacity of your SSD, you may need to free up some space or move the game to a larger drive. The simplest way to determine your storage space availability is to go into your computer settings or file explorer and check the properties of your SSD.
You can also utilize disk management software to analyze the disk space utilization and identify which files are taking up the most space. It’s important to keep in mind that full SSDs can negatively impact system performance, so if your SSD is nearing maximum capacity, moving the game to another drive could improve overall performance. Taking the time to evaluate and manage your SSD storage space can make the process of locating your game much smoother and even improve computer performance in the long run.
Step Three: Move the Game Files to the SSD Folder
Before moving your game files to your SSD folder, it’s important to check your SSD storage space to ensure that you have enough room to accommodate the game files. SSDs tend to have smaller storage capacities compared to traditional hard drives, and you don’t want to run out of space mid-transfer. To check your SSD storage space, simply open File Explorer and navigate to your SSD.
Right-click on it and select Properties. You’ll be able to see the total capacity of your SSD as well as the amount of used and free space. Make sure you have enough free space for the game files you want to move over.
If not, you’ll need to delete some unnecessary files or consider upgrading to a larger SSD. Once you’ve cleared up enough space, you can proceed with moving the game files to your SSD folder. This will help to improve the game’s loading times and overall performance.
Update Game Settings to Point to the SSD Folder
If you’re wondering how to move your game to an SSD, it’s a fairly easy process once you know where to point your game settings. The first step is to make sure your SSD is properly installed and recognized by your computer. Next, locate the folder where your game is currently installed.
This will be different for each game, but it’s typically found in the Program Files folder in your C drive. Once you’ve found the game folder, copy and paste it into the folder in your SSD where you want it to be moved. Finally, open your game settings and update the file path to point to the new SSD folder location.
It’s important to note that not all games will have the option to change file paths in the game settings, so you may need to research how to manually change the file paths in those cases. By moving your games to an SSD, you’ll significantly decrease load times and improve overall performance.
Step One: Open the Game Launcher or Configuration File
When upgrading your gaming setup, the first step is to ensure that your game settings are pointing to the correct folder on your SSD. This can easily be done by opening the game launcher or configuration file and updating the settings accordingly. By doing so, you’ll be able to take advantage of the superior loading times and performance benefits of your SSD.
This is especially important for games with long loading times, as it can significantly improve your overall gaming experience. So don’t overlook this crucial step in your gaming setup upgrade, and make sure your game settings are pointing to the right folder on your SSD.
Step Two: Locate the Game Folder Location Setting
Once you’ve identified your game folder location, the next step is to update your game settings to point to the SSD folder. This step is crucial in ensuring that your game runs smoothly and is optimized for performance. To do this, simply open up your game settings and look for the “game folder location” option.
Once you’ve found it, update the path to the new folder location on your SSD. This will ensure that your game is reading and writing data to your SSD instead of your HDD, which can result in faster load times, quicker file transfers, and a smoother overall gaming experience. With this simple step, you can make a significant improvement to your gaming performance and ensure that your games are running at their optimal level.
So, don’t overlook this important setting and take the time to update your game settings to point to your SSD folder today.
Step Three: Change the Path to the SSD Folder Location
Now that you’ve successfully cloned your game files onto your SSD, it’s important to update your game settings to point to the new folder location. This step is crucial for ensuring that your games run smoothly and efficiently on your SSD. To do this, open your game launcher and navigate to the settings menu.
Look for an option that allows you to change the installation path or folder location. Select this option and browse for the new folder location on your SSD. Once you’ve selected the correct location, save the changes and exit the settings menu.
It may take a few moments for the changes to take effect, but once they do, you should notice a significant improvement in game performance. By updating your game settings to point to the SSD folder location, you’ll be able to enjoy faster load times, smoother gameplay, and an overall improved gaming experience.
Start Playing the Game from Your SSD
If you’re looking to improve your gaming experience, moving a game to your SSD is a great start. SSDs provide faster load times, minimized game stuttering, and shorter level transitions. So, how do you move a game to your SSD? Firstly, make sure your SSD is properly set up and formatted.
Then, find the game you want to move on your hard drive and create a new folder on your SSD where you want the game to go. Next, copy the game’s files to the new folder on your SSD and delete them from your hard drive. Finally, open the game and update any necessary file paths or settings.
Congratulations! You can now enjoy faster, smoother gameplay with your SSD. Just make sure to only move games that take up a lot of storage and actually benefit from being on the SSD.
Step One: Launch the Game
So, you’ve installed your favorite game on your brand new SSD and can’t wait to launch it. Good news, you’re just a few clicks away from experiencing the lightning-fast loading times and smoother gameplay! To start playing, simply locate the game on your desktop or in your library and click on it. The game should load up quickly due to the SSD’s faster read and write speeds.
It’s like having your game on a superhighway instead of a congested city street. Plus, with an SSD, you’ll also benefit from reduced loading times between levels and less lag during gameplay, which can make all the difference in competitive games. So, sit back, relax, and get ready to immerse yourself in your gaming experience with quickload times and smoother gameplay, all thanks to your SSD.
Step Two: Confirm the Game is Running from the SSD
Once you’ve installed your game onto your SSD, it’s important to make sure that it’s actually running from that drive instead of your old hard drive. This can be done by checking the game’s settings and making sure that the installation path is set to the SSD. Once you’ve confirmed that the game is running from your SSD, you can start playing and enjoy the benefits of improved performance and faster loading times.
Just remember that using an SSD for gaming is not only faster, but also has a positive impact on your overall computer system. So, whether you’re a casual gamer or an esports enthusiast, upgrading to an SSD is definitely worth considering if you want to optimize your gaming experience.
Conclusion
In short, moving a game to your SSD is like giving your car a turbocharger. It enhances the performance and speed, giving you a smoother and faster ride. With just a few simple steps, you can easily transfer your game and get ready for a more exhilarating gaming experience.
Don’t let slow load times hold you back – upgrade your gaming setup and move that game to your SSD today!”
FAQs
What are the benefits of moving a game to an SSD?
Moving a game to an SSD can significantly reduce loading times and improve overall performance, giving you a smoother gaming experience.
How do I move a game to my SSD?
You can move a game to your SSD by first installing the game onto your HDD and then using a game migration tool to transfer it to your SSD.
What game migration tools are available to use?
There are many game migration tools available, such as Steam Mover, GameSave Manager, and EaseUS Todo PCTrans.
Can I move multiple games to my SSD at once?
Yes, you can use a game migration tool to move multiple games to your SSD at once, saving you time and effort. Just make sure your SSD has enough space to accommodate all the games you want to move.