Upgrading from an HDD to an SSD can significantly improve the speed and performance of your computer. However, starting fresh with a new SSD can be a time-consuming process. That’s where cloning comes in handy! By cloning your HDD to your new SSD, you can transplant all your data, settings, and preferences, and skip the long process of reinstalling everything from scratch.
In this step-by-step guide, we’ll take you through the process of cloning your HDD to SSD, ensuring a smooth and effortless transition. So, if you’re looking to upgrade your PC’s performance without losing any of your data, keep reading to learn everything you need to know about cloning your HDD to your new SSD.
Backup Your Data
If you’re thinking about upgrading your computer’s hard drive to a solid-state drive, it’s important to learn how to clone your HDD to SSD. This process allows you to transfer all your valuable data from the old drive to the new one quickly and easily. Cloning your hard drive helps you avoid the time-consuming process of re-installing operating systems, applications, and documents.
First, you need to buy an SSD with bigger storage space than your current HDD. Then, you will need to download a free cloning software, like Macrium Reflect or Clonezilla. Once you have installed the software and connected the new SSD to your computer, you can start the cloning process.
Just follow the instructions on the software. The process may take a few hours, depending on the size of the data being cloned. After the process is finished, test the new SSD to make sure all your files and programs are working correctly.
Cloning your hard drive can save you a lot of time and hassle, and it’s important to backup your data regularly to ensure you don’t lose any important files.
Copy Important Files to External Drive
Backing up your important data is an essential step in avoiding the devastating loss of your valuable files. One way to ensure the safety of your files is to copy them to an external drive. An external drive serves as a physical backup of your data, meaning that in the event of a system crash or malware attack, you can quickly recover your files.
Furthermore, it is important to remember that external hard drives are not immune to failure, so it is necessary to have multiple backups of your data. When you copy your files to an external drive, make sure to keep it in a secure place, safe from physical damage, theft, or any other risk that might jeopardize your files. Overall, backing up your data is an investment in your peace of mind.
So, don’t wait until it’s too late to safeguard your valuable files – start backing up today!
Create System Image with Windows Backup Tool
Backing up your data is crucial in case of any unforeseen incidents such as hardware failure, theft, or malware attacks that can lead to data loss. One of the best ways to ensure the safety of your data is by creating a system image with Windows Backup tool. A system image is a copy of all the data on your computer, and it includes your operating system, programs, documents, and settings.
This means that in case of a data loss, you can easily restore your computer to the last state when the system image was created. The process of creating a system image using the Windows Backup tool is quite simple and straightforward. You can access it by going to the Control Panel and selecting “Backup and Restore”.
From there, you can follow the steps to create a system image on an external hard drive or any other reliable storage media. By doing so, you ensure that your data is always safe and secure.
Prepare Your SSD
If you’re looking to upgrade your computer’s speed, you might be wondering how to clone your HDD to an SSD. The first step is to prepare your SSD by connecting it to your computer and formatting it. Once that’s done, you can use a cloning software to copy everything from your old HDD over to your new SSD.
Keep in mind that an SSD might have a smaller capacity than your original HDD, so you may need to delete unnecessary files or transfer them to an external storage device. It’s important to make sure that your computer can boot from the SSD before you remove the old HDD from your system. With a bit of patience and the right tools, you can enjoy a significant increase in speed and performance with your new SSD.
So don’t be afraid to take the plunge and make the switch!
Initialize and Format the SSD
One of the crucial steps in setting up your brand new SSD is initializing and formatting it. Before you start working with the SSD, you need to prepare it for use. To do so, you can leverage Windows or Mac OS’s built-in functionality to initialize and format the SSD according to your preferences.
Initializing the SSD prepares it for formatting and configuration. Formatting it makes sure that the new drive is entirely empty and ready to receive data. It is vital to note that formatting an SSD can take several minutes or hours, depending on the size of the SSD and the system’s processing speed.
In summary, you need to initialize and format your SSD to use it. Without this step, you won’t be able to enjoy all the benefits of the new drive and could risk data loss. So, when setting up your SSD, don’t forget to follow the necessary steps to prepare it before use.
Partition the SSD to Match HDD
When preparing to migrate from an HDD to an SSD, it’s essential to partition the SSD to match the HDD’s layout. This step requires careful consideration to ensure that the SSD’s partitions align with the HDD’s partitions, thus making the transition seamless. One of the most effective methods is to use disk cloning software to transfer the data from the HDD to the SSD.
This software will create a copy of the partitions on the HDD and transfer them to the appropriate partitions on the SSD. However, before cloning the disk, the SSD should be formatted to match the HDD’s file system format, and all data on the SSD should be backed up. Additionally, it’s essential to check for any differences in the sector size between the HDD and SSD to avoid any potential alignment issues.
Once the SSD is ready, the next step is to transfer the data, which can take some time, depending on the amount of data being transferred. Overall, preparing the SSD before migrating data is critical to the success of the process.
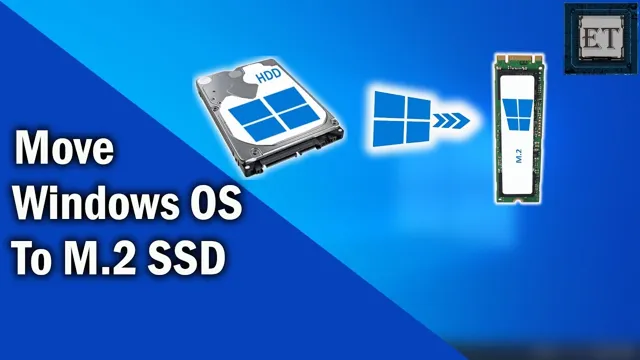
Clone HDD to SSD
If you’ve just purchased a new SSD, your first thought is likely “how do I clone my HDD to my new SSD?” Luckily, the process isn’t as daunting as it may seem. First, you’ll want to ensure your SSD has enough space to hold everything on your HDD. Then, you can use a cloning software, such as EaseUS Todo Backup or Macrium Reflect, to transfer all files and settings from your HDD to your SSD.
This ensures your new drive is an exact replica of your old one, including your operating system and program files. Once the cloning is complete, make sure to set your boot order to prioritize your new SSD, so your computer will automatically boot from it instead of your old HDD. Cloning your HDD to an SSD is a quick and simple way to speed up your computer’s performance and ensure you don’t lose any important files or settings.
Use Free Software like Macrium Reflect or EaseUS Todo
When it comes to upgrading your computer’s HDD to an SSD, it’s important to ensure that all of your files, settings, and data are transferred over seamlessly. That’s where free software like Macrium Reflect or EaseUS Todo comes in handy. These powerful tools make it easy to clone your HDD to your new SSD, ensuring that all of your files and programs are fully transferred over without any data loss.
Not only does this help you avoid the hassle of manually transferring files, but it can also save you a lot of time and effort in the process. Using these software tools is a breeze, too. Simply install the software on your computer, connect your new SSD to your old HDD, and follow the step-by-step instructions to clone your drive.
Depending on the size of your data, this process may take a few hours to complete, but it’s well worth the wait. Plus, with the added benefit of creating a complete system backup, you’ll have peace of mind knowing that all of your data is safe and secure. So the next time you’re considering an upgrade to your computer’s storage, be sure to take advantage of free software like Macrium Reflect or EaseUS Todo.
With their powerful drive cloning capabilities, you can rest assured that your data will be transferred quickly and seamlessly, without any risk of data loss. Whether you’re a seasoned computer user or a novice, these user-friendly tools make upgrading to an SSD a breeze, ensuring that you can get back to doing what you do best.
Connect SSD to PC and open Cloning Software
If you want your computer to run faster, one solution is to switch to an SSD (solid-state drive). But if you’re worried about losing your data, there’s a simple solution: Clone your current hard drive to the SSD. To do that, the first thing you’ll need to do is connect the SSD to your PC.
You can do this using a USB adapter or by removing your old hard drive and replacing it with the new SSD. Once you’ve got the SSD connected, you’ll need to use cloning software to copy all your data from the old hard drive to the new one. This software works by making an exact copy of your old hard drive, including your operating system and all your files.
It’s like making a carbon copy of your old hard drive, but on a faster and more reliable drive. Plus, with an SSD, you’ll enjoy faster boot and load times, and overall better performance. So, what are you waiting for? Download a cloning software, connect your SSD to your PC and clone HDD to SSD today!
Select HDD as Source and SSD as Destination Drive
Cloning your hard drive to a solid-state drive (SSD) is a great way to breathe new life into an older computer or upgrade your storage capacity without losing any data. To get started, you’ll need to select your HDD as the source drive and your SSD as the destination drive. This process involves copying all of the data and files from your old hard drive over to the new solid-state drive.
Once you’ve selected the correct drives, you’ll need to install a disk cloning software and follow the instructions provided. This can take some time, depending on the amount of data you have on your hard drive, so make sure you don’t interrupt the process. After the clone is complete, you’ll need to set your new SSD as the boot device in your BIOS and restart your computer.
From there, you should notice a significant improvement in your computer’s overall performance and faster load times for your favorite programs and applications. Don’t forget to securely wipe your old hard drive before disposing of it to protect your personal data from prying eyes.
Start Cloning Process
If you’re looking to upgrade your computer’s performance, cloning your HDD to an SSD can make a world of difference. Not only does it speed up boot and load times, but it can also increase overall responsiveness. The process of cloning a hard drive involves copying all the data from one drive to another, which is particularly useful if you don’t want to lose any of your files or data during the upgrade process.
First, you’ll need to select a reliable cloning software that suits your needs and budget. Once you’ve downloaded the software of your choice and connected your new SSD to your computer, you can start the cloning process. The software will guide you through the steps, which typically involves selecting the source and destination drives and choosing any additional options such as partition sizes.
The process can take anywhere from a few minutes to several hours, depending on the size of your hard drive and the speed of your computer. Once the cloning is complete, you can replace your old hard drive with your new SSD and enjoy a significant boost in performance. It’s important to note that cloning is not recommended if your hard drive has any physical damage or is failing, as this could lead to data loss.
Overall, cloning your HDD to an SSD can be a cost-effective and efficient way to upgrade your computer’s performance without losing any of your files or data.
Set SSD as Boot Drive
If you want to improve the performance of your computer, you should consider upgrading your hard drive to an SSD. But how do you transfer all your data from your old HDD to your new SSD? The answer is to clone your HDD to your SSD. The process involves creating an exact copy of your HDD, including the operating system and applications, and transferring it to your new SSD.
However, before you can clone your HDD, you need to set your SSD as the boot drive. This means telling your computer to use your SSD as the primary drive to boot up the operating system. Setting up your SSD as a boot drive involves going into your computer’s BIOS and changing the boot order.
Once your SSD is set as the primary boot drive, you can begin the cloning process. There are several software options available that can help you with the cloning process, such as EaseUS Todo Backup, Macrium Reflect, or Clonezilla. By cloning your HDD to your SSD and setting the SSD as the boot drive, you can enjoy faster boot times and improved performance on your computer.
Restart PC and access BIOS or UEFI settings
Possible blog section: Restart PC and access BIOS or UEFI settings If you want to set your SSD as the boot drive for faster startup times and better system performance, you need to access the BIOS or UEFI settings of your computer and change the boot order to prioritize the SSD. Here’s how you can do it: Restart your computer by clicking on the Start menu, selecting Power, and then Restart.
As soon as your computer starts booting up, press the key or keys indicated on the screen to enter the BIOS or UEFI setup utility. The most common keys are F2, F10, DEL, or ESC, but it may vary depending on your brand and model of the motherboard.
Once you enter the BIOS or UEFI settings, look for a section called Boot or Boot Order, which lists the devices your computer can boot from in order of priority. Typically, the first device is the hard drive or SSD with the operating system installed, and the second device is the CD/DVD or USB drive, followed by other options.
Use the arrow keys to navigate to the SSD that you want to be the boot drive, and then move it to the top of the list by pressing the + or – key, or by dragging and dropping it to the top.
Save the changes and exit the BIOS or UEFI setup utility by pressing the key or keys indicated on the screen. Usually, it’s F10 or ESC.
Restart your computer again and check if it boots up from the SSD. If it does, congratulations! You have successfully set your SSD as the boot drive. By setting your SSD as the boot drive, you can enjoy faster boot times, faster application load times, and overall snappier performance from your computer.
Set SSD as Boot Drive and Save Changes
To set SSD as your boot drive, you need to access your computer’s BIOS settings and change the boot order. Typically, BIOS settings can be accessed by pressing a specific key during startup, such as F2 or Del. Once in BIOS, navigate to the Boot menu and look for the option to change the boot order.
Select the SSD as the first boot device and save your changes. This will ensure that your computer boots from the SSD instead of the previous boot device, such as a hard drive. By doing so, you can significantly reduce startup times and improve overall system performance.
So, if you want a faster and more responsive computer, setting your SSD as the primary boot drive is a must-do.
Conclusion
In short, cloning your HDD to an SSD is like giving your old, worn-out car a brand new engine. Your computer will run faster and smoother than ever before, just like a sleek sports car. So why settle for a clunky old machine when you can upgrade to a high-performance computer without the hassle of completely starting over? Clone that HDD to an SSD, and drive off into the digital sunset with ease and style.
“
FAQs
What is HDD cloning?
HDD cloning is the process of copying the contents of one hard disk drive to another.
Why would I want to clone my HDD to SSD?
Cloning your HDD to SSD can drastically increase the speed and performance of your computer.
How do I clone my HDD to SSD?
You can use software like EaseUS Todo Backup or Acronis True Image to clone your HDD to SSD.
Can I clone my HDD to SSD without losing any data?
Yes, you can clone your HDD to SSD without losing any data as long as you have enough space on the SSD to accommodate all the data on your HDD.
Do I need any additional hardware to clone my HDD to SSD?
You do not necessarily need any additional hardware, but it is recommended to use a SATA to USB adapter to connect your SSD to your computer during the cloning process.