
Are you tired of slow boot times, sluggish performance, and long wait times for data transfer? If you’re nodding your head, then you’re in the right place. Upgrading to an SSD is one of the simplest and most effective ways to speed up your computer, and in this beginner’s guide, we’re going to show you how to migrate Windows 10 to an SSD. Think of an SSD as a flash drive on steroids.
It uses nonvolatile flash memory to store and retrieve data, in contrast to a traditional hard disk drive (HDD) that uses spinning platters and mechanical read/write heads. This means that an SSD can perform read and write operations in a fraction of the time it takes for an HDD to do the same task. But how do you migrate your existing Windows 10 installation to this blazing-fast SSD? Don’t worry, we’ve got you covered.
We’ll walk you through the process step-by-step and provide all the necessary information and guidance you need to make the switch. By the end of this guide, you’ll have learned how to clone your existing drive, transfer your data, and configure your new SSD for optimal performance. So, get ready to say goodbye to sluggish load times and hello to lightning-fast speeds.
Let’s get started!
Preparing for Migration
So, you’re ready to upgrade and wondering how do I migrate Windows 10 to SSD? First, it’s important to backup all your important data and files before starting the migration process. You can use Windows built-in backup and restore features or third-party software for this task. Now it’s time to clone your existing Windows 10 installation to the new SSD.
You can use free software like Clonezilla or paid options like Acronis True Image to do this easily. Once you have cloned your Windows 10 to the SSD, it’s time to change the boot order settings in your BIOS to boot from the SSD. Make sure everything is working fine before you erase your old installation from your hard drive.
Finally, you can erase the old Windows 10 installation from your hard drive to free up space. And with that, you now have successfully migrated your Windows 10 to SSD, and you’ll feel the difference in improved performance in no time!
Backing up Your Data
One of the most important steps to take before migrating your data is to back it up properly. It’s crucial to safeguard your sensitive data and ensure that you don’t lose any of it during the migration process. This means making copies of all your files, software, applications, and settings and saving them to a safe and secure location.
That way, if anything goes wrong during the migration or something is lost or corrupted, you’ll still have a backup to rely on. There are many ways to backup your data, but cloud storage and external hard drives are two of the most common. Whichever method you choose, make sure to regularly update your backups, test them to make sure they work properly, and keep them in a different location than your main computer or device.
By taking the time to properly backup your data before migration, you’ll have peace of mind knowing that your valuable information is protected.
Check for Compatibility
When preparing for migration, it’s important to check for compatibility with your new platform or system. This involves ensuring that all of your existing hardware, software, and data can effectively work with the new technology. Compatibility issues can be a major stumbling block for migrations, so it’s important to thoroughly test and identify any areas that may present problems.
This can involve conducting compatibility tests or running simulations to identify any potential issues. Ensuring compatibility also involves checking for any necessary updates or patches to existing systems, as well as ensuring that any vendor or third-party applications are compatible as well. By taking the time to check for compatibility ahead of time, you can avoid major headaches down the road and ensure a smooth migration process.
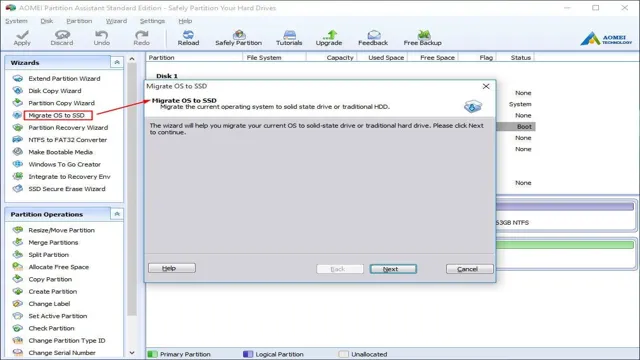
Cloning Windows 10 to SSD
If you’re thinking about upgrading your gaming rig, then moving to a solid-state drive (SSD) can be an excellent decision. But how do you migrate Windows 10 to SSD without breaking anything? The process involves cloning the operating system (OS) from your existing drive to the new storage device, and you can use software like Clonezilla, Macrium Reflect, or EaseUS Todo Backup to do it. Once you have the software, connect your new SSD to your computer, and start the cloning process by selecting the source and destination drives.
After the process is complete, you’ll need to adjust the boot priority in your BIOS to the SSD, and you’re ready to go. Remember to backup your data before you start the cloning process to avoid losing any essential files. With a new SSD and your OS successfully migrated, you’ll notice a significant boost in performance, and your PC will boot up and shut down much faster than before.
Creating a Bootable Drive
Cloning Windows 10 to SSD can be a helpful and efficient way to speed up your computer. The first step in this process is to create a bootable drive. This can be done by downloading a free tool such as Rufus or Windows 10 Media Creation Tool.
Once you have the tool, insert a blank USB drive into your computer and run the tool. Follow the prompts to create a bootable drive. This will allow you to start your computer from the USB drive and install Windows 10 onto your new SSD.
Cloning your old hard drive to the SSD is a simple process that will copy over all of your data and settings. This will save you time and hassle when it comes to setting up your new system. With a new SSD and a cloned version of Windows 10, you will notice a significant improvement in the speed and performance of your computer.
So why wait? Give cloning Windows 10 a try and see the difference for yourself!
Connect the SSD
Now that you have gotten your hands on an SSD, it’s time to transfer over your operating system. The process of cloning Windows 10 to SSD isn’t as complicated as most people might think. You’ll need an external USB enclosure, which is essentially a hard drive case that connects your SSD to your computer via USB.
Once you’ve installed your SSD into the enclosure, connect it to your computer and download a cloning software like Clonezilla. Boot up Clonezilla and select the option to clone your current Windows installation to your SSD. It’s important to note that this process might take some time, depending on the size of your SSD and the amount of data you have on your old hard drive.
But once the cloning process is complete, you can swap out your old hard drive for your new SSD and enjoy a faster, more responsive Windows 10 experience. Remember to ensure your computer is properly shut down and unplugged before opening it up to do any hardware work!
Select a Cloning Software
When it comes to upgrading to a faster SSD on your Windows 10 system, cloning your existing drive can save you a lot of time and hassle. Fortunately, there are plenty of cloning software options available, both free and paid. One popular choice is EaseUS Todo Backup, which offers a straightforward interface and reliable performance.
Another option is Macrium Reflect, which has a variety of advanced features for power users. Whichever software you choose, the process of cloning your Windows 10 system involves creating a full backup image of your current drive and then transferring that image to the new SSD. This ensures that all your files and settings are preserved and ready to go on the new drive, without needing to reinstall the operating system or any of your programs.
With the right cloning software and a bit of patience, upgrading to an SSD can be a breeze, vastly improving your system’s speed and performance.
Finishing Touches
If you’re wondering how to migrate Windows 10 to SSD, there are a few finishing touches to consider once you’ve completed the actual migration process. First and foremost, make sure you’ve enabled TRIM on your new SSD. This will allow the operating system to quickly and efficiently manage the storage of data on the drive, improving its overall performance.
Next, disable hibernation, as this feature is not necessary on an SSD and can take up valuable space. Additionally, make sure your power settings are optimized to conserve energy and avoid unnecessary strain on your new SSD. Lastly, consider installing and regularly running a disk cleanup utility to keep your SSD in top condition.
With these finishing touches, you’ll be able to fully enjoy the benefits of a faster, more efficient computer with Windows 10 running on your new SSD.
Confirming Boot Order
Confirming boot order is a vital step to ensure that your computer boots up correctly. It’s essential to arrange your boot order in such a way that your system checks the primary storage device, usually your hard drive, first before attempting to boot from any other devices such as CDs, DVDs, or USB drives. Once you have made your changes to the boot order settings, you should save and exit your BIOS setup utility.
This will then restart your computer and boot it up with the new settings you made. In summary, always remember to double-check the boot order before leaving the BIOS setup utility to avoid any potential boot issues.
Testing the Cloned Drive
Once you have successfully cloned your drive, it’s essential to run some tests to ensure that everything is in working order. The last thing you want is to rely on a backup drive that doesn’t function correctly when you need it the most! Start by booting up your computer using the cloned drive and ensure that all your applications and programs are functioning as normal. Check for any error messages, broken links, or missing data.
It’s also a good idea to test the read and write speeds of your drive to ensure that there are no issues with data transfer. Another critical test to perform is to check your computer’s performance when running more complex tasks, like gaming or video editing, to ensure that the cloned drive can handle the load without any lag or hiccups. By performing these tests, you can be confident that your cloned drive is a reliable and functional backup solution to keep your data secure in case of a system failure.
Conclusion
In conclusion, migrating Windows 10 to an SSD can be a daunting task for those who are not tech-savvy. But fear not, with the right tools and knowledge, you can make the transition seamlessly. It’s like moving your entire living room to a new and improved space – yes, it takes some effort, but once you settle in, you’ll wonder how you ever lived without it.
So don’t wait – give your computer a much-needed upgrade and enjoy faster performance like never before!”
FAQs
What are the benefits of migrating Windows 10 to an SSD?
Migrating your Windows 10 operating system to an SSD can significantly improve the overall performance of your computer by reducing boot times and increasing the speed of file transfers and software operations.
What are the requirements for migrating Windows 10 to an SSD?
To migrate Windows 10 to an SSD, you will need to ensure that your SSD has enough storage space to accommodate your operating system and all of your files, as well as a USB drive for creating a bootable installation media.
Can I migrate Windows 10 to an SSD without losing my data?
Yes, it is possible to migrate your Windows 10 operating system to an SSD without losing any of your data by using a tool such as EaseUS Todo Backup or Clonezilla to clone your entire hard drive to the new SSD.
How long does it take to migrate Windows 10 to an SSD?
The time it takes to migrate Windows 10 to an SSD will depend on a variety of factors, including the size of your hard drive, the speed of your computer, and the tools you use for the migration process. Typically, the process can take anywhere from a few hours to a full day.