If you’re a gamer or perform heavy tasks on your computer, you know the importance of having a fast and reliable storage drive. That’s where an SSD comes in! Not only do these drives provide faster boot and load times, but they’re also more durable and energy-efficient compared to traditional hard drives. However, installing an SSD may seem like a daunting task for some.
In this tutorial, we’ll show you step-by-step how to install an SSD drive so you can take advantage of all the benefits it has to offer. So grab your screwdriver and let’s get started!
Check Compatibility
If you’re wondering how to install an SSD drive so it shows up on your computer, the first thing to do is check compatibility. Not all computers are built to support SSDs, so it’s crucial to make sure your PC or laptop can handle the upgrade. Check your computer’s manual or online specifications to see if it has an available slot for an SSD.
If it doesn’t, you may need to upgrade your motherboard or purchase an external enclosure. Once you’ve confirmed compatibility, opening up your computer and installing your SSD is relatively straightforward. Ensure you have all the necessary tools and follow the manufacturer’s instructions, which typically involve removing the old hard drive, connecting the SSD via SATA cable or another connection, and securing it in place with screws.
After installation, you’ll need to format your SSD and migrate data from your old hard drive to enjoy faster boot and load times.
Check motherboard manual for M.2 or SATA slots.
When it comes to upgrading your PC, it’s essential to check compatibility before purchasing any new hardware. If you’re looking to add an M.2 or SATA drive to your system, the first thing to do is to check your motherboard’s manual.
Most modern motherboards have M.2 slots available, but it’s essential to ensure that the drive you plan to purchase is compatible with your motherboard. SATA slots, on the other hand, are much more common and can be found on most motherboards.
Again, it’s crucial to make sure that the drive you want to install is compatible with both the motherboard and the other components in your system. Checking compatibility is especially important if you’re planning to install a high-end NVMe M.2 drive, as some low-end motherboards may not support these types of drives.
In short, before purchasing any M.2 or SATA drives, make sure to check your motherboard’s manual to ensure compatibility. Upgrading your system can be a great way to improve performance, but not taking the time to check compatibility can result in a waste of time and money.
By doing your research beforehand, you can make sure that your upgrade goes smoothly and that your system runs faster and more efficiently than ever before.

Make sure SSD is compatible with port type.
One essential factor to consider when upgrading your computer’s storage to an SSD is the compatibility of the drive with the port type. Not all SSDs are compatible with all port types, and using an incompatible SSD could lead to performance issues or, at worst, damage to your computer. Before purchasing an SSD, it’s crucial to check the specifications of both your computer and the SSD to ensure compatibility.
This step is especially important if you have an older computer with outdated ports, as you may need to upgrade your motherboard to use certain types of SSDs. So, before you make any purchases, take the time to check compatibility and make sure you’re buying the right SSD for your computer’s port type.
Connect the SSD
When it comes to upgrading your computer’s storage speed, installing an SSD drive can make a world of difference. But once you’ve purchased your new SSD, how do you go about installing it so that it shows up on your system? First, you’ll need to physically connect the drive to your computer. Most modern computers have a dedicated slot for SSDs, but you may need to use an adapter to fit the drive correctly.
Once everything is connected, you’ll need to power up your computer and head into your system’s BIOS. From there, you’ll want to navigate to the boot settings and make sure that your SSD is selected as the primary boot device. Finally, save your changes and exit the BIOS.
Your computer should now recognize the new drive and display it in the file explorer. With a little bit of patience and some careful installation, your SSD should be up and running in no time, delivering lightning-fast speeds and superior storage performance.
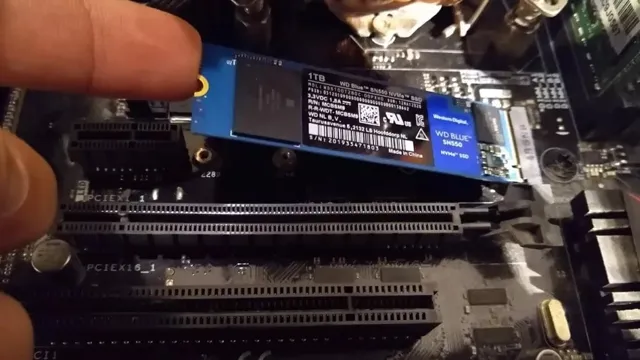
Plug in power and data cable to motherboard and SSD.
When it comes to installing an SSD (solid-state drive), one of the essential steps is connecting it to the motherboard and power source. To do this, you’ll need to plug in the power and data cable to both the motherboard and the SSD. This step is relatively simple and straightforward, but it’s essential to ensure that you’ve plugged in everything correctly.
The SSD will typically have a small, rectangular port where you’ll connect the data cable, while the power cable will connect to a larger, square-shaped port. Once you’ve plugged both the cables, you should be good to go, and your motherboard should detect the SSD automatically. Keep in mind that if you’re building a PC from scratch, it’s crucial to make sure that your power supply unit has enough power connectors to support all the components, including the SSD.
By following this step, you can ensure that your SSD is connected and ready to go, allowing you to take full advantage of its faster read/write speeds and improved performance.
Screw in SSD to case.
After screwing in the SSD to the case, it’s time to connect it. First, locate the SATA connector on the motherboard. It’s usually located near the bottom of the board and will be labeled as SATA 1, SATA 2, etc.
Connect one end of the SATA cable to the connector on the motherboard and the other to the SSD. Make sure the connector is properly seated on both ends. Next, locate the power connector on the power supply.
It’s a small, rectangular connector with multiple pins. Connect one end of the power cable to the power connector on the SSD and the other to the power supply. Again, make sure the connector is properly seated on both ends.
It’s important to note that if you’re using an M.2 SSD, you don’t need to connect a SATA cable or a power cable. M.
2 SSDs connect directly to the motherboard and are powered by the motherboard as well. Once you’ve connected the cables, double-check that everything is connected properly and securely. You don’t want any loose connections that could cause data loss or damage to your hardware.
Once you’re confident that everything is connected correctly, you’re ready to start using your new SSD!
Initialize and Format SSD
If you’ve recently purchased an SSD drive, you’re probably wondering how to install it properly in your computer. First, you’ll need to initialize the SSD in your system’s Disk Management utility. This will ensure it’s recognized by your computer and ready for use.
To do this, right-click the Windows Start button and select Disk Management. From there, find the SSD drive and select Initialize Disk. Once it’s initialized, you can create partitions on the SSD and format it for use.
When formatting, you should choose the NTFS file system for maximum compatibility with your system. Once the formatting process is complete, your SSD drive should show up in Windows Explorer, ready for you to use as a lightning-fast storage option. So, if you’re looking to speed up your computer and improve its overall performance, consider adding an SSD drive and following these simple steps to get it up and running quickly.
Right-click Start Menu and open Disk Management.
If you’ve just installed a new SSD and are wondering how to get it ready for use, the first step is to initialize and format it. This can be done easily by right-clicking on the Start menu and selecting Disk Management. A new window will open up, showing you all the disks connected to your computer.
Find your new SSD on the list, right-click it, and select “Initialize Disk.” A wizard will guide you through the process of selecting the partition style (either MBR or GPT) and creating a partition on the disk. Once the disk is initialized, you can format it by right-clicking on the unallocated space and selecting “New Simple Volume.
” Follow the wizard to select the file system and format the disk. Once this is done, your new SSD is ready to use! With its faster speeds and improved stability, you’re sure to notice a difference in your computer’s performance. So why not take a few minutes to initialize and format your new SSD today?
Initialize SSD and format disk to NTFS file system.
Initializing and formatting a new SSD is an essential step towards setting up your system or adding storage to an existing one. To begin, you should first install your SSD into an available drive bay in your computer or attach it through a USB adapter. Once the new storage device is connected to the computer, you can then initialize it through the “Disk Management” tool in Windows.
Be sure to select the proper disk to initialize and choose the correct partition style, GPT or MBR, based on your system requirements. Next, you will need to format the SSD to the NTFS file system, which is the standard file system used in Windows operating systems. Formatting will also create a usable file structure, for example, the Master File Table (MFT) that keeps track of all the files on the drive.
By formatting the SSD to NTFS, you can maximize the storage capacity, improve disk performance, and ensure compatibility with other software applications. With the SSD initialized and formatted, you can then begin transferring over your files or installing your favorite games and programs without any hiccups.
Verify SSD is Showing Up
If you’ve installed an SSD into your computer but it’s not showing up, there may be a few things you need to check. Firstly, ensure that the drive is correctly connected to your motherboard. Double-check all cables to make sure they’re properly seated and snug.
Once you’ve confirmed that the cables aren’t the issue, head to your computer’s BIOS. Check if it recognizes your new SSD. If it does, it should be visible in your boot order options.
If it’s still not showing, consider formatting the drive, or possibly updating your BIOS. Lastly, it’s worth checking your operating system to ensure the drive is recognized in your disk management. This may involve selecting and initializing the drive to make it available for use.
Once you’ve done all of these checks, your SSD should be successfully detected.
Open Disk Management and look for SSD.
SSD. Are you having trouble finding your SSD on your computer? Don’t worry; we’ve got you covered. First, open Disk Management on your computer.
You can do this by searching for it in the Windows search bar or right-clicking on the Windows button and selecting Disk Management. Once you’re in Disk Management, look for your SSD. It should be labeled as “Disk 0” with a size equal to or larger than your SSD’s capacity.
If you can’t see it, make sure it’s properly connected to your computer. If it is, right-click the unallocated space and select “New simple volume.” Follow the prompts to create a new partition for your SSD.
Now, you should be able to see your SSD in File Explorer. Congratulations, you’ve successfully verified that your SSD is showing up!
If not, check BIOS settings and update drivers.
If your new SSD is not showing up on your computer, the first thing you should do is verify that it is properly connected. Check if the cables are securely plugged into both the SSD and the motherboard. If that doesn’t solve the issue, make sure to check your BIOS settings.
Sometimes, your computer might not recognize the SSD since it is not set as the default boot device. You can change this in your BIOS settings. Additionally, it is essential to keep your drivers up to date.
Outdated drivers could cause problems when trying to connect your SSD. You can check if you have the latest drivers for your motherboard and SSD by visiting the manufacturer’s website and downloading the latest versions. In conclusion, if your new SSD is not showing up, don’t panic.
The first step is to make sure it is properly connected, and if that doesn’t work, check your BIOS settings and update your drivers. With a few simple troubleshooting steps, you can ensure that your SSD is up and running in no time. Remember to always double-check everything to save yourself the trouble of dealing with the same issue in the future.
Keep your technology updated, and you’ll be good to go!
Conclusion
Congratulations, you’re about to give your computer a fresh spring in its step by installing an SSD drive! And don’t worry, it’s not rocket science – just follow the simple steps we’ve outlined and you’ll have your drive appearing in no time. Think of it like giving your trusty old computer a new pair of speedy sneakers – it’ll be zipping through tasks with lightning-fast speed in no time. So, strap on your tech toolbelt and get ready to become an SSD installation pro.
“
FAQs
What tools do I need to install an SSD drive?
You will need a screwdriver, an SATA cable, and a power cable for the SSD drive.
Do I need to clone my existing hard drive before installing an SSD?
It is recommended to clone your existing hard drive to the new SSD drive to transfer your operating system and data.
How do I physically install the SSD drive?
You should first shut down and unplug your computer, then open the case, locate an available drive bay, and screw in the SSD drive.
How do I ensure that my computer recognizes the new SSD drive?
After physically installing the drive, you can enter your computer’s BIOS settings and ensure that the SATA port connected to the SSD drive is enabled.