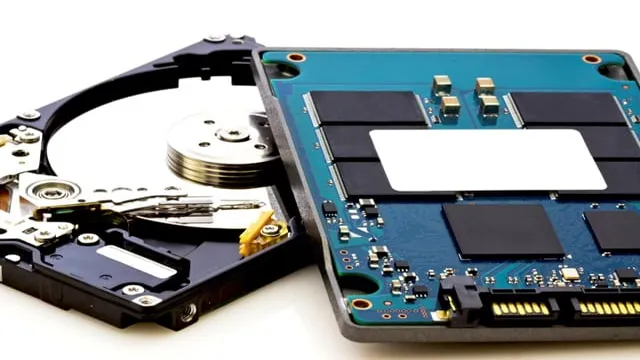
If you’re tired of sluggish performance and long boot times on your desktop computer, it might be time for an upgrade. Specifically, upgrading your hard drive from a traditional hard disk drive (HDD) to a solid-state drive (SSD) can make a world of difference. SSDs are faster, more reliable, and more energy-efficient than HDDs, making them a popular choice for computer enthusiasts and professionals alike.
But before you pull the trigger on an SSD upgrade, it’s important to know what you’re getting into. In this blog post, we’ll explore the benefits of upgrading from HDD to SSD, what you need to consider before making the switch, and how to install your new SSD for optimal performance. So sit back, relax, and get ready to take your desktop computing experience to the next level!
Preparation
If you are looking to upgrade from an HDD to an SSD on your desktop, there are a few things you need to prepare before making the switch. Firstly, you need to ensure that the SSD you purchase is compatible with your desktop. Check your motherboard to make sure it supports SATA III or NVMe, which are the most common connectors for SSDs.
You also need to make sure you have enough space on your SSD to transfer all the data from your HDD. It’s a good idea to get an SSD that has a larger capacity than your HDD to ensure you have ample storage space going forward. Before you physically install the SSD, you should also make sure to back up all your data to an external drive or cloud storage.
This ensures that you don’t lose any important files during the transfer process. Once you have everything backed up and your SSD ready, you’re ready to make the switch and enjoy the speed and performance benefits of an SSD!
Back up your data
Backing up your data is an essential aspect of computer maintenance that is often overlooked. The process of preparing for a data backup involves several important steps. Firstly, it is crucial to determine what data you need to back up.
Important files such as documents, photos, and videos should be included, along with any other files that are essential to your work or personal life. Next, you’ll need to choose the backup method that works best for you, such as cloud storage, an external hard drive, or a USB drive. Once you have decided on the method, make sure it is set up correctly and that you have sufficient storage space.
Finally, it’s critical to establish a regular backup schedule to ensure that your data is always up-to-date and secure. By taking these steps to prepare for a data backup, you can enjoy peace of mind knowing that your files are safe and easily accessible whenever you need them.
Choose the right SSD for your desktop
Choosing the right SSD for your desktop requires some preparation. Before you begin your search, it’s important to know what you’re looking for in terms of storage capacity, transfer speeds, and reliability. Take a look at the amount of storage you currently have on your desktop and think about how much more you might need in the near future.
Do you use a lot of big files? If so, you’ll need more storage than someone who only uses basic programs and files. Next, consider the transfer speeds you need. If you frequently transfer large files from one location to another, you’ll need a drive with fast transfer speeds to avoid delays or slowing down your computer.
Finally, think about reliability. You want to choose a drive with a good reputation for durability, so it won’t fail on you after only a short time. By taking these factors into consideration, you’ll be able to choose the right SSD for your desktop and get the storage and speed you need to power through your projects.
Check your system compatibility
One of the most critical steps in installing or upgrading software is to check your system compatibility before starting the installation process. It may seem like an unnecessary step that you can skip, but preparing your system beforehand can save you time and frustration down the road. Most software applications have a set of minimum system requirements that your computer must meet to run them correctly.
These requirements could include hardware specifications, such as processor speed, RAM, and disk space, or software prerequisites, such as operating system version and installed libraries. Ignoring these requirements could lead to errors, crashes, or overall poor performance of the software. Therefore, it’s essential to check your system compatibility first by reviewing the software’s system requirements and cross-checking them against your computer specifications.
This will help ensure that everything runs smoothly when you start the installation process. So, take a few minutes to prepare and save yourself from a potential headache.
Installation
So, you’re ready to make the switch from an HDD to an SSD on your desktop. Congratulations, you’re about to experience a whole new level of speed and performance! But, before you dive in, there are a few things to keep in mind. First, make sure that your desktop supports an SSD.
You can do this by checking the specifications of your motherboard or consulting with a professional. Once you’ve confirmed that your desktop is compatible, you’ll need to back up all your data from your HDD onto an external drive or cloud storage. Then, you’ll want to physically install the SSD by opening up your desktop and locating the drive bay.
Carefully insert the SSD into the bay and secure it in place. Next, connect the power and data cables to the SSD and motherboard respectively. Finally, you’ll need to transfer your data from the external storage to the SSD and configure it as your primary drive.
By following these steps, you’ll have successfully upgraded your desktop from an HDD to an SSD!
Shut down your desktop and open the case
If you want to upgrade your computer’s hardware, the first thing to do is shut down your desktop and open up the case. Make sure you’re working in a clean and well-lit space before starting. Once you’ve got the case open, take note of how everything is currently arranged.
This will be helpful when it’s time to put everything back together. If you’re not comfortable doing this on your own, don’t hesitate to call a professional. They can make sure everything is done properly and safely.
When you’re ready to begin the installation process, start by unplugging the power cord and any other cables that are attached to the devices you’re replacing. Carefully remove the devices, being careful not to damage any wires or components. Install the new hardware according to the instructions provided, taking care to connect any necessary cables.
Once everything is in place, replace the cover and reconnect all the cables. Finally, turn your computer back on and make sure everything is working correctly. With a little patience and attention to detail, you can upgrade your computer’s hardware and improve its performance in no time!
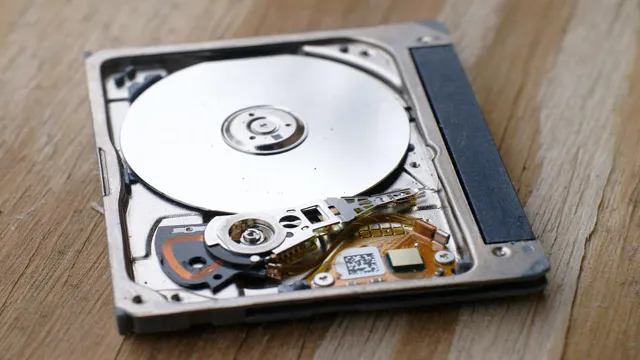
Find the HDD and disconnect it
If you are looking to upgrade your computer’s storage capacity, you may need to install a new HDD. Before doing so, you need to find the location of the current HDD and disconnect it safely. This will ensure that you don’t accidentally damage any components or lose any data.
To find the HDD, you can refer to your computer’s user manual or conduct a quick online search. Once you have located it, you need to shut down your computer and unplug it from the power source. Then, carefully remove the cover of your computer to access the HDD.
Depending on your computer model, the HDD may be attached by screws or clips. Unscrew or unclip the HDD and gently disconnect any cables connected to it. You can now safely remove the old HDD and install the new one.
Remember to handle the HDD with care to avoid static discharge and damage. By following these steps, you can upgrade your computer’s storage capacity safely and efficiently.
Install the SSD and connect it
When it comes to installing an SSD for your computer, the process is simple and straightforward. First, you need to locate the SSD bay in your computer’s case and then carefully slide the SSD into the slot. Don’t force it, as SSDs are delicate and can be easily damaged.
Once the SSD is firmly in place, you will need to connect the power cable and the SATA data cable to the SSD. These cables should be connected to the motherboard and your power supply unit. If you have a laptop, you may need to remove the old hard drive first before installing the SSD.
Overall, the process of installing an SSD is relatively easy, and it offers a significant upgrade in terms of fast boot times and improved performance. By upgrading your hard drive to an SSD, you can give your computer a new lease on life and enjoy faster system responsiveness. So if you’re looking to improve your computer’s performance, consider installing an SSD today!
Secure the SSD in place
When it comes to installing an SSD, it’s crucial to secure it in place to prevent any potential damage. There are different ways to mount an SSD depending on your computer’s case and mounting options. One effective method is to use a bracket or adapter that screws into the case and holds the SSD securely in place.
Another option is a drive bay that slides into the case and has designated slots for the SSD’s screws. Whichever method you choose, make sure to use the correct screws that fit your drive and case. Not securing the SSD properly can lead to it becoming loose, which can cause damage and affect its performance.
Remember to always handle the SSD with care and take your time during the installation process to avoid any mishaps. By following these steps, you’ll be well on your way to a properly installed SSD that functions smoothly and efficiently.
Migrating Data
So, you’ve decided to upgrade your desktop’s hard drive to a faster and more reliable solid-state drive (SSD). But, how do you actually transfer all your data from your old HDD to the new SSD? Well, there are a few different methods you could use depending on your situation. First, you could physically remove the old HDD and install the new SSD, then use a cloning software to transfer everything over.
Another option is to create a backup of your data onto an external hard drive and then restore that backup onto the new SSD. Either way, it’s important to make sure you have a backup of all your important files before making any changes. Once the migration is complete, you should notice a significant increase in the speed and performance of your desktop.
So, don’t be afraid to make the switch to an SSD and enjoy the benefits it brings.
Migrate your operating system
Migrating an operating system can be a daunting task, but it’s not impossible. Moving your data from one operating system to another requires careful planning and execution. It’s crucial to back up your data before attempting a migration.
Once the backup is complete, you can use either a manual transfer method or automated software to complete the migration. Automated software can scan all your files and transfer them accordingly, saving you time and effort. It’s important to ensure that the target system has all the necessary drivers and software installed before migrating your data.
This will help prevent any compatibility issues and ensure that your new operating system functions correctly. By following these tips, you can make the migration process as smooth as possible, so you can get back to using your computer in no time.
Transfer your files
Whether you’re upgrading to a new computer or switching to a different operating system, migrating your data can be an overwhelming task. Fortunately, there are plenty of options available to make the transfer process as seamless as possible. One of the most popular methods is to use an external hard drive to transfer your files.
This method involves copying all of your data onto the hard drive and then transferring it to your new or different computer. Another option is to use a cloud storage service, such as Google Drive or Dropbox, to back up and transfer all of your files. This is a great option if you have limited storage space on your external hard drive or if you want to access your files from anywhere.
Regardless of which option you choose, it’s important to make sure that all of your important files, such as photos, documents, and emails, are backed up and transferred safely. By taking the time to migrate your data properly, you can save yourself a lot of headaches down the road and ensure that your files are always easily accessible.
Update your BIOS, firmware, and drivers
When migrating data, you should always remember to update your BIOS, firmware, and drivers beforehand. This is important because the latest versions contain bug fixes, security updates, and new features that can improve the compatibility and stability of your system. Updating your BIOS, firmware, and drivers can also prevent data loss or corruption during the migration process.
Think of it like taking care of your car before a long road trip – you wouldn’t want to hit the road without checking if your tires are properly inflated and your oil is changed, right? Similarly, updating your system’s components is an essential step to ensure a smooth and successful data migration. Make sure to check the manufacturer’s website for updates or use a reliable driver updater tool to automate the process. By doing this, you can avoid any potential headaches and protect your valuable data.
Conclusion
Upgrading from an HDD to an SSD desktop is like upgrading from a bicycle to a Ferrari. The process may seem intimidating at first, but with a little bit of patience and know-how, anyone can make the switch. The result will be a lightning-fast desktop that can handle any task with ease – leaving your old HDD in the dust.
So don’t be afraid to take the leap and join the SSD revolution, your computer (and your patience) will thank you.”
FAQs
What are the benefits of upgrading from an HDD to an SSD for a desktop computer?
Upgrading to an SSD can result in significantly faster boot times, application load times, and overall system performance. It can also improve energy efficiency and potentially extend the lifespan of your computer’s hardware.
Is it difficult to replace an HDD with an SSD in a desktop computer?
The complexity of the process can vary depending on your computer’s make and model, but in general, it is a fairly straightforward process that involves cloning your existing operating system onto the new SSD and physically replacing the storage drive.
Can I keep my existing files and software when upgrading to an SSD?
Yes, it is possible to clone your existing operating system and files onto the new SSD using software such as EaseUS Todo Backup or Macrium Reflect. However, it is recommended that you back up all important files before attempting the upgrade.
What should I look for when choosing an SSD for my desktop computer?
Look for an SSD with a high read and write speed, a sufficient amount of storage space for your needs, and a reasonable price point. It is also important to consider factors such as the SSD’s form factor, interface type, and endurance rating.