Are you tired of waiting for your computer to boot up? Do you want to speed up the process and make your computer run faster? One solution to this problem is to install your Operating System (OS) on a Solid-State Drive (SSD). This will greatly improve your computer’s performance and make it run smoother than ever before. If you’re not sure where to start, don’t worry! In this blog, we’ll guide you through the process of booting your OS from an SSD, step-by-step.
Think of it as upgrading your old beat-up pickup truck to a brand new Ferrari. You won’t regret it!
Check BIOS Settings
If you’ve installed an SSD into your computer, you may be wondering how to get your operating system to boot from it. The first step is to check your BIOS settings. BIOS stands for Basic Input/Output System – it’s the software that’s built into your computer’s motherboard and controls the hardware.
When your computer starts up, it runs the BIOS before anything else. By default, the BIOS is configured to boot from your computer’s hard drive. However, you’ll need to change this setting to boot from your SSD instead.
To access your BIOS settings, restart your computer and look for a message that says “Press [KEY] to enter setup” – the key can be F2, Del, Esc, or another depending on your computer. Once you’re in the BIOS settings, look for the “Boot Order” or “Boot Priority” option. Move your SSD to the top of the list, save your changes, and exit the BIOS.
Your computer should now boot from the SSD.
Enter BIOS Settings
Entering BIOS settings is an important step to check and modify the settings of your device’s hardware and software. BIOS or Basic Input/Output System is the first software that runs when your computer boots up. To enter BIOS settings, you need to press a specific key during the boot-up process which varies depending on your computer model and manufacturer.
This key is usually displayed on the screen during the boot process, but if you miss it, you can check the user manual or do a quick internet search to find out which key you need to press. Once you enter the BIOS settings, you can check various settings such as the boot order, CPU settings, RAM configuration, and more. It’s important to check these settings to make sure your computer is running at its optimal performance and to troubleshoot issues.
So, next time you need to check the BIOS settings, remember to press the correct key during the boot-up process.
Find Boot Options
When you’re troubleshooting boot problems on your computer, one important step is to check the BIOS settings. The BIOS (Basic Input/Output System) controls the hardware settings of your computer, including the boot order. The boot order determines which devices the computer will try to boot from when it starts up.
If the boot order is incorrect, the computer may not boot from the proper device, which can cause boot problems. To check the BIOS settings, you’ll need to restart your computer and press the appropriate key to enter the BIOS setup. This key is usually displayed on the screen during startup, but it may vary depending on your computer.
Once you’re in the BIOS setup, look for the boot options and make sure that the device you want to boot from is at the top of the list. If the device is not listed or the order is incorrect, you can change it by using the arrow keys to select the device and moving it up or down in the list. Once you’ve made the changes, save the settings and exit the BIOS setup.
By checking and adjusting your BIOS settings, you can ensure that your computer boots properly and avoid further troubleshooting headaches.
Select SSD as Boot Drive
If you have recently installed a solid-state drive (SSD) on your computer, one of the most important steps to take is to select it as a boot drive. This will ensure that your system starts up faster and your computer overall performs better. However, before you can select it as your boot drive, you need to check your BIOS settings.
BIOS (Basic Input/Output System) is software that runs on your computer before the operating system starts up. To access BIOS, you need to press a specific key during startup. Once you are in BIOS, navigate to the Boot menu and look for the option to select your SSD as the primary boot drive.
Keep in mind that the specific steps may differ depending on your computer’s manufacturer and model. By selecting your SSD as the boot drive, you can enjoy the many benefits of faster boot times and improved overall performance.
Clone Your OS to SSD
If you’re looking to upgrade to a solid-state drive (SSD) for faster boot times and better overall performance, you’ll need to clone your operating system (OS) from your old hard drive to the new SSD. Fortunately, this process isn’t as complicated as it might seem. First, connect your new SSD to your computer and open cloning software.
You can use a free program like EaseUS Todo Backup or pay for a more advanced option like Acronis True Image. Once you’ve selected your software, select your old hard drive as the source and your new SSD as the destination drive. Be sure to set the right parameters and options, such as ensuring that the operating system is copied over.
After you start the cloning process, be prepared to wait some time while the software does its work. Once the cloning is complete, shut down your computer, disconnect the old hard drive, and boot up from the new SSD. With a bit of patience and careful attention to detail, you’ll be enjoying faster load times and better performance in no time.
Download a Cloning Software
If you’re looking to boost the performance of your computer, upgrading to an SSD (Solid State Drive) is a great option. Once you’ve purchased your SSD, the next step is to clone your OS (Operating System) onto it. To do this, you’ll need to download a cloning software.
There are various options available, including EaseUS Todo Backup, Macrium Reflect, and MiniTool Partition Wizard. These software programs allow you to create an exact copy of your OS, applications, and files onto the SSD. This enables you to seamlessly transition to the new drive without losing any of your data.
Once the cloning process is complete, you simply need to set the SSD as your boot drive, and you will be able to enjoy a faster and more responsive computer. Just make sure to back up your data beforehand and follow the instructions carefully. With the right cloning software and a bit of patience, you can easily clone your OS onto your new SSD.
Connect SSD and Install Software
If you want to improve the performance of your computer and give it a new lease on life, cloning your operating system to an SSD can make a huge difference. But before you get started, you need to connect your SSD and install the necessary software. To connect your SSD, you’ll need to shut down your computer, remove the cover to access your hardware, and insert the SSD into an available slot.
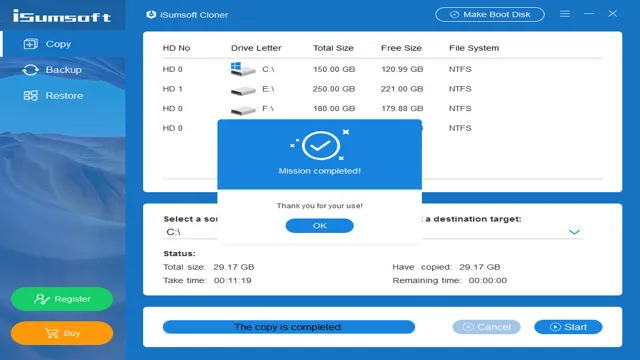
Once your SSD is connected, you’ll need to install the clone software onto your computer. There are many different software options available, so be sure to do your research to find the best one for your needs. Once you’ve installed the software, you can begin the cloning process.
This will copy all of your operating system files, settings, and preferences to your new SSD, making it a perfect copy of your old hard drive. With your OS now residing on your new SSD, you’ll enjoy lightning-fast boot times, faster application load times, and an all-around snappier computing experience. So if you’re looking to breathe new life into your old computer, cloning your OS to an SSD is definitely worth considering.
Select the Source and Destination Drives
When it comes to upgrading your computer’s hard drive to a faster SSD, one of the first steps is selecting the source and destination drives for cloning your OS. The source drive will be your current hard drive, while the destination drive will be the SSD you want to clone to. It’s important to select the right drives, as any data on the destination drive will be erased during the cloning process.
You also want to ensure that the destination drive has enough space to hold all the data from your current hard drive. Once you’ve selected your drives, cloning software can easily copy your OS and all its settings to the new SSD. This allows you to enjoy faster boot and load times and an overall smoother experience using your computer.
Don’t forget to back up your important files before starting the cloning process, just in case anything goes wrong. With a few simple steps, you’ll be on your way to faster performance with your newly cloned SSD.
Begin the Cloning Process
If you want to boost the performance of your computer, one of the best ways to do it is by cloning your existing operating system onto an SSD. This process is much easier than reinstalling your OS from scratch and can significantly speed up your system’s startup and application loading times. To begin the cloning process, you’ll need a cloning software like EaseUS Todo Backup or Macrium Reflect.
These programs will help you create an exact copy of your current OS and all the data on it onto the SSD. You can then install the SSD into your computer and boot from it. It’s important to note that you should only clone the OS and system files onto the SSD and not include any other data or files to ensure that the cloning process is successful.
Once you’ve cloned your OS to SSD, you’ll enjoy faster and more efficient performance from your computer.
Reinstall Your OS on SSD
If you’re wondering how to get your OS to boot from an SSD, it’s essential to first understand the process of reinstalling your operating system on the new drive. The first step is to back up all your essential data to an external hard drive or cloud storage platform. Once you’ve done this, create a bootable USB drive or DVD containing your OS and system files.
You can do this using a tool like Rufus or Windows Media Creation Tool. After creating this bootable media, shut down your computer, insert it into a USB port or DVD drive, and boot from it. During the installation, choose the SSD as the installation location, and after it’s finished installing the OS, restore your backed-up data.
Upon accessing the BIOS, set the boot order to prioritize the SSD as the primary drive. Doing so will ensure that your computer boots from the SSD every time you turn it on, which will result in faster boot times and overall performance for your computer.
Create a Bootable USB Drive with OS Installation File
One of the most common reasons for reinstalling your operating system is when upgrading to a new solid-state drive (SSD). To do this, you’ll need to create a bootable USB drive with the operating system installation file. This can be done easily by downloading the operating system installer from the manufacturer’s website and using a free tool like Rufus to create the bootable USB.
Once you have the bootable USB, simply plug it into your computer and follow the prompts to reinstall your operating system on your new SSD. It’s important to note that this process will erase all data on your current hard drive, so make sure to back up your important files before starting. By reinstalling your OS on your new SSD, you’ll enjoy faster boot times and overall faster performance.
Connect SSD and Boot from USB Drive
Reinstalling your OS on an SSD can greatly improve performance, and connecting the SSD and booting from a USB drive can make the process easier than you might think. First, ensure that your BIOS is set to boot from USB in order to install the OS onto the SSD. Once the USB is inserted and the computer is powered on, the installation process will begin.
During the process, you’ll be asked to choose the destination for the OS installation, select the SSD as the destination and follow the prompts to proceed with the installation. Once the installation is complete, you may need to adjust the boot order in the BIOS settings to make the SSD the primary boot device. By following these steps, you’ll be able to seamlessly transfer your current operating system or install a fresh one onto your new SSD, taking advantage of its superior performance.
Follow OS Installation Steps
If you’re looking to upgrade your computer’s performance, one of the best ways to do so is by reinstalling your operating system (OS) onto a solid-state drive (SSD). But before you dive in, it’s important to make sure you follow the correct installation steps. The first thing you’ll want to do is backup all of your important files and data to an external hard drive or cloud storage.
Once you’ve done that, you’ll need to create an installation media, such as a USB drive, that contains your OS installation files. After shutting down your computer and inserting the installation media, follow the prompts to boot from it and begin the installation process. Be sure to choose your SSD as the destination for the OS installation, and format the drive if necessary.
Once the installation is complete, you’ll need to install any necessary drivers and update your settings to ensure optimal performance. With these steps, you’ll be enjoying faster speeds and improved performance in no time!
Select SSD as Installation Destination
When it comes to upgrading your computer’s performance, installing a solid-state drive (SSD) can make a significant difference in speed and responsiveness. If you’re planning to reinstall your operating system (OS), it’s the perfect opportunity to select SSD as your installation destination. By doing this, you can bypass traditional hard drive limitations, including restricted transfer rates and slow boot times.
By selecting an SSD, you can give your system a new lease of life, transforming its performance capabilities and speeding up even the most intensive processes. And the best part? It’s easy to perform, and you don’t need exceptional technical expertise to do it. Simply follow the instructions provided, and within a short time, you can let your computer take advantage of SSD technology.
So, what are you waiting for? Say goodbye to sluggish performance and upgrade your system with an SSD installation destination.
Final Thoughts
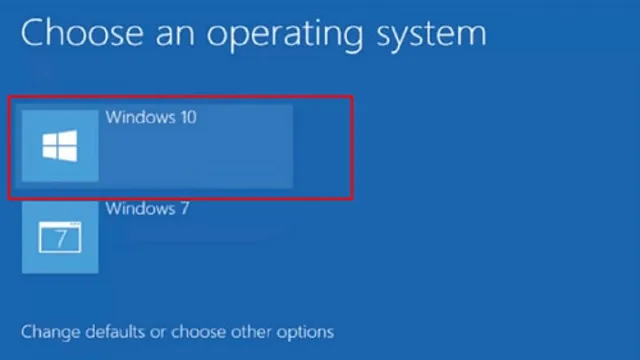
So, you’ve got your shiny new SSD installed and now you want to make sure your operating system boots from it. It’s actually a lot easier than you might think! First, you’ll want to make sure your SSD is set as the primary boot device in your computer’s BIOS settings. To do this, restart your system and press the corresponding key (usually F2, F10, or DELETE) to enter the BIOS menu.
From there, navigate to the Boot tab and select your SSD as the first boot device. Save the changes and exit the BIOS. Now, when your system boots up, it should automatically load the operating system from your SSD.
If you’re still having trouble, you can try disconnecting any other hard drives or external storage devices to make sure your system is only booting from the SSD. With these simple steps, you can enjoy lightning-fast boot and load times from your SSD!
Conclusion
Well, my dear friend, getting your OS to boot from an SSD is not rocket science. It’s all about knowing the right steps and following them religiously. So, put on your tech-savvy hat, give your computer a little love, and before you know it, you’ll be booting up faster than Usain Bolt at the Olympics! And remember, just like a healthy breakfast, nothing beats the feeling of a fast boot-up to start your day with a bang!”
FAQs
What is SSD and how does it differ from a regular hard drive?
SSD, or Solid State Drive, is a type of storage device that uses flash memory to store data, whereas a regular hard drive uses a spinning disk. SSDs are faster and more reliable than regular hard drives.
Can I install my operating system on an SSD?
Yes, you can install your operating system on an SSD. In fact, installing your OS on an SSD can significantly improve your system’s performance and boot times.
How do I check if my computer recognizes my SSD?
You can check if your computer recognizes your SSD by going to the BIOS settings and checking if the SSD is listed as a bootable device. You can also check the Device Manager in your operating system to see if the SSD is recognized.
How do I configure my BIOS settings to boot from my SSD?
To configure your BIOS settings to boot from your SSD, you need to enter the BIOS setup utility and change the boot order to prioritize the SSD. This process may vary depending on your computer’s manufacturer and BIOS version.