Ready to upgrade your computer’s storage capacity by adding a speedy solid-state drive (SSD)? There’s no doubt that an SSD can significantly improve the performance of your computer. However, before you can start enjoying its benefits, you first need to transfer your data to the new drive, and that’s where things can get tricky. Fortunately, connecting your SSD to clone your old drive is an easy process that even those with minimal technical experience can accomplish.
In this step-by-step guide, we’ll show you how to make a seamless transition to your new SSD without losing your valuable data. So, sit back, relax, and let’s get to work!
What You Will Need
If you’re wondering how to connect an SSD to clone your hard drive, then you’re in the right place. First things first, you will need the following items: a solid-state drive (SSD), a USB to SATA adapter (or a USB enclosure), and cloning software. Once you have all of these, it’s pretty easy to do the actual cloning.
However, before you start, make sure that all of your important files are backed up. Next, connect your SSD to your computer using the USB to SATA adapter or enclosure. Then, open your cloning software and select the hard drive that you want to clone.
Choose your SSD as the destination drive, and then start the cloning process. Once the cloning is complete, you can switch out your hard drive for the newly cloned SSD and start using it right away. Don’t forget to keep your old hard drive as a backup, just in case anything goes wrong with your new SSD.
Overall, the process of connecting an SSD to clone your hard drive is straightforward, and with the right tools and a little bit of patience, you’ll have a new and improved system in no time.
SSD Drive
If you’re thinking about upgrading your computer’s storage capabilities, then you might be interested in an SSD drive. SSD stands for Solid State Drive, and it’s a newer type of storage device that uses flash memory to store data. Unlike traditional hard disk drives, SSDs have no moving parts, making them more durable and energy-efficient.
However, before you buy an SSD, you’ll need to make sure your computer is compatible with it. You’ll also need to decide on the size of the drive you want and make sure you have enough room in your computer to install it. Once you have everything you need, installing an SSD drive is relatively straightforward, and you should notice a significant improvement in your computer’s performance.
So, if you’re tired of slow load times and sluggish performance, then an SSD drive might be just what you need to give your computer a boost.

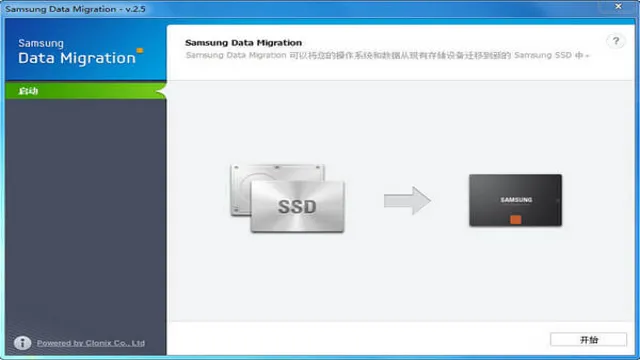
Cloning Software
Cloning software can be a useful tool, whether you are looking to replicate your operating system or create multiple copies of entire systems for backup purposes or distribution. To get started, you will need a cloning software application. There are many options available, both free and paid, but you’ll want to choose one that suits your needs and your computer’s hardware specifications.
Some popular choices include EaseUS Todo Backup, Acronis True Image, and Clonezilla. Additionally, you will need a secondary storage device with sufficient capacity to save the cloned image. This can be an external hard drive, USB flash drive, or network storage location.
Keep in mind that the process of cloning your system will take some time and requires patience, so be sure to allow enough time for the process to complete without interruption. With the right cloning software and storage device, you’ll be well on your way to safeguarding your system or creating multiple copies efficiently and with ease.
USB to SATA Cable
If you’re looking to connect an internal hard drive to your computer without having to install it into your PC tower, using a USB to SATA cable is the way to go. These handy little adapters allow you to easily transfer data from any SATA-based storage device to your computer and backup your valuable data. To use a USB to SATA cable, you’ll need a few things besides the cable itself.
First, make sure you have an available USB port on your computer. Next, you’ll need a power source to power the hard drive. This can either be a wall outlet or another USB port on your computer.
Lastly, you’ll need a SATA-based storage device, like an internal hard drive, SSD, or CD/DVD drive. Once you have all these things, simply plug the USB end of the cable into your computer and the SATA end into your storage device, and you’re ready to go! With a USB to SATA cable, moving your data around has never been easier or more convenient.
Step 1: Preparing the SSD Drive
Connecting an SSD to clone a hard drive may seem daunting at first, but it’s a lot simpler than it seems. First, make sure the SSD is properly connected to your computer via SATA cable or a USB-to-SATA adapter. Once connected, you should ensure that the SSD has enough space to accommodate all of the data from your hard drive.
After this, you will need to select the appropriate cloning software, which will copy all of your data from the hard drive to the SSD. It’s important to keep in mind that not all cloning software is created equal, so make sure to do your research and find a reputable program. Some popular options include Clonezilla, Acronis True Image, and EaseUS Todo Backup.
Once the cloning process is complete, you can disconnect your hard drive and start using your new, faster SSD!
Connect SSD to Computer via SATA Cable
If you’re looking to connect your SSD to your computer via a SATA cable, the first thing you need to do is properly prepare the SSD drive. First, you’ll want to make sure the SSD is securely mounted into its designated bay within your computer. Check your computer’s documentation or online resources to determine the proper location for your particular model.
Once you’ve located the bay and slid the SSD into place, fasten any screws or locking mechanisms to secure it in place. Next, you may need to connect the power and SATA cables to the drive. Consult your documentation or online resources for the proper cable connections or consider seeking assistance from a professional if you’re unsure.
With your SSD properly mounted and connected, you’re ready to move onto the next steps in setting up your upgraded computer system.
Open Disk Management and Initialize SSD
If you’re looking to install a new SSD in your computer, you need to prepare it before you can start using it. One of the first steps is to open Disk Management and initialize the drive. This will allocate the necessary storage space and let your computer recognize the device.
To do this, click on the Windows start menu, and search for “Disk Management.” When the “Create and format hard disk partitions” option pops up, click on it to open the tool. From there, identify your SSD and right-click on it to select “Initialize Disk.
” Then, choose the partition style, either MBR or GPT. MBR is usually the go-to choice for smaller drives, while GPT is better for larger drives that require more advanced features. Initializing the drive is a crucial step to get your SSD up and running, so be sure to follow these steps carefully to avoid any issues in the future.
Step 2: Install and Open Cloning Software
Now that you have chosen your preferred cloning software, it’s time to get started on installing and opening it. Before you do that, ensure that your computer is turned off and properly grounded to avoid any electrostatic discharge damages that can harm your SSD or any other component of your PC. Then, carefully connect your SSD to the computer using a SATA-to-USB adapter cable.
Once that’s done, power up your computer and insert the cloning software installation disc or download it from the internet. Follow the installation instructions until it’s fully downloaded. After that, open the cloning software and select the drive you want to clone, which is your computer’s hard drive, and the destination drive, which is the SSD that you just connected.
Then, click start and allow the cloning process to complete. With these simple steps, you have successfully connected your SSD to clone your hard drive.
Download and Install Cloning Software
After selecting the hard drive you want to clone, the next step is to download and install cloning software. This software will help you create a perfect copy of the data on your existing hard drive onto the new drive. There are many options available, so make sure to choose one that is compatible with your system and offers the features you need.
Once you have downloaded and installed the software, it’s time to open it up and start the cloning process. Most software will guide you through the process step by step, so even if you’re not familiar with the technical aspects of cloning, you should be able to follow along with ease. Just make sure to follow the instructions carefully and double-check everything before proceeding.
With the right cloning software, you’ll be able to transfer all of your data quickly and easily to your new hard drive.
Open Cloning Software and Select Source and Destination Drives
Open cloning software To clone your hard drive, you will need a cloning software tool that will help you create an exact copy of your source drive on your destination drive. The first step is installing the software on your computer and then opening it. Next, you will select both the source and destination drives.
The source drive is the one you want to clone, while the destination drive is the new drive that will store the cloned data. It’s crucial to double-check that you’ve selected the correct source and destination drives to avoid any data loss. Once you’ve completed this step, you can proceed to the next step and configure the cloning options to your preference.
Choose a reliable, open cloning software that is compatible with your operating system to ensure successful data transfer from your source drive to the destination drive.
Step 3: Begin Cloning Process
Now that we have everything we need, it’s time to begin the cloning process. The first step is to connect your new SSD to your computer. This can be done in a few different ways, depending on your setup.
If your computer has a spare SATA port, you can simply plug in your SSD using a SATA cable. If your computer doesn’t have a spare SATA port, you can use a USB to SATA adapter. This will allow you to plug in your SSD to a USB port on your computer.
Once your SSD is connected, you can begin the cloning process. There are a variety of cloning software options available, including Clonezilla and Macrium Reflect, which can guide you through the process step-by-step. Just make sure to follow the instructions carefully, and double-check all settings before you begin.
With a bit of patience, the cloning process should be complete in no time.
Start Cloning Process and Wait for Completion
Now that you have prepared your cloning materials and set up your platform, it’s time to start the cloning process. This is where the magic happens, and your clones start to take shape. Depending on the size and complexity of your project, cloning can take anywhere from a few minutes to several hours.
It’s important to be patient during this stage and not interrupt the process, as doing so can result in errors and incomplete clones. As the cloning process runs, you will be able to monitor its progress and receive notifications when it’s complete. Once the cloning is finished, you can move onto the next step of your project.
Remember, the more time and care you put into the cloning process, the better your final product will be – so take the necessary steps to ensure that your clones are fully formed and ready for action. With this in mind, start your cloning process with the confidence that you’ve done everything right to set yourself up for success.
Step 4: Verify Cloning Success
If you’re wondering how to connect your newly cloned SSD, it’s important to verify that the cloning process was successful first. There are a few ways to do this, but one of the easiest is to simply compare the amount of used space on your old hard drive to the amount of used space on your new SSD. If they are relatively similar, it’s likely that your cloning was successful.
Another way to check is to try booting up your computer using only the SSD – if it boots successfully and you have access to your files and programs, your cloning was likely successful. When connecting your SSD, you’ll need to ensure that your computer recognizes it as the primary boot drive, which can often be done through the BIOS settings. With this step complete, you’ll be able to enjoy the benefits of increased speed and improved performance on your newly cloned SSD.
Check SSD Drive for Cloned Data
After finishing the cloning process, it’s essential to ensure that all the data is successfully copied from the source drive to the SSD. Checking the SSD for cloned data is simple and requires a bit of time. The first step you should take is to double-check if all the files and folders are available on the SSD.
It’s also essential to check if any errors or issues occur during the cloning process, such as corrupt files. One effective approach to verifying that the cloned data is accurate is to use a software tool that can compare the contents of the source and destination disks. This tool compares every file’s size, date, and time stamp to determine if they are precisely the same.
Moreover, you can also confirm that the files on both drives have identical MD5 or SHA-1 hashes. This process ensures that there are no discrepancies between the two disks, and everything is accurately copied. By taking these steps, you can be sure that your cloned data is accurate and ready for use.
Conclusion
Connecting an SSD to clone is a piece of cake! With a few clicks and switches, you can watch your old drive morph into a lean, mean, computing machine. Think of it like giving your computer a makeover – it’s faster, sleeker, and ready to take on the world. So go ahead, connect that SSD and clone away – your computer will thank you for it!”
FAQs
What cables do I need to connect an SSD for cloning?
You will need a SATA III cable or a USB drive enclosure with USB 3.0 connectivity.
Is it necessary to install SSD cloning software?
Yes, you will need to install SSD cloning software to clone your hard drive onto your SSD.
Can I connect multiple SSDs to clone at the same time?
Yes, you can connect multiple SSDs, but it’s recommended to clone them one at a time.
Can I clone my hard drive to a smaller SSD?
Yes, you can clone your hard drive to a smaller SSD as long as the content on the hard drive fits within the capacity of the SSD.
How do I make sure the cloning process was successful?
You can check if the cloning process was successful by comparing the files and data on the original hard drive to the cloned SSD.