
Looking to clone your SSD to HDD? It might seem like a daunting task, but fortunately, it’s a process that’s fairly easy to execute. Whether you’re looking to replicate your hard drive contents as part of a backup procedure or upgrading from an SSD to an HDD, cloning your drive can save you a significant amount of time and effort. With the right tools and a bit of guidance, you can copy all of your files, data, and settings to your new drive in no time.
In this blog post, we’ll guide you through the process and provide you with helpful tips to ensure a successful cloning experience. So if you’re ready to learn how to clone your SSD to HDD, keep reading!
Back Up Your Data
If you want to backup your data, one way to do it is by cloning your SSD to your HDD. Cloning makes an exact copy of your drive, so you don’t have to worry about losing any files. To do this, you will need software.
There are many software options available, some of which are free, like Macrium Reflect or Clonezilla. Once you have your software downloaded, follow the instructions to clone your drive. Cloning can take some time, so be patient.
When it’s finished, you’ll have an exact replica of your SSD on your HDD. Having a backup of your data is important, as data loss can happen unexpectedly. Making a clone of your SSD to your HDD is a smart way to keep your data safe.
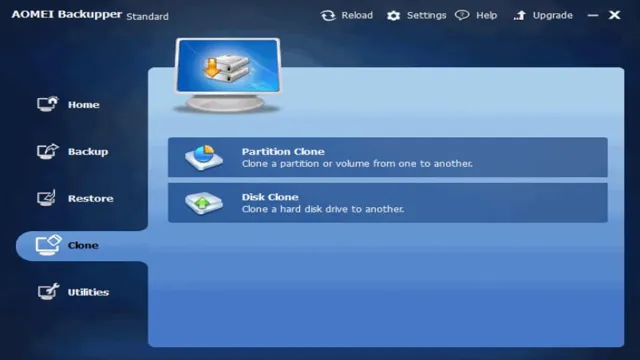
Use a Disk Cloning Software
Backing up your important data is crucial to ensure that all of your valuable information is safe. One effective method to back up your data is to use a disk cloning software. This type of software creates an exact copy of your entire hard drive, including the operating system, applications, preferences, and data.
By doing this, you can quickly restore your data in the event of a hard drive failure, virus attack, or accidental deletion. Disk cloning software can also be an excellent way to migrate to a new computer without having to reinstall everything from scratch. It’s important to note that disk cloning can be time-consuming, so it’s best to schedule it during times when you won’t need your computer for a while.
Overall, using disk cloning software can provide you with peace of mind knowing that your data is safely backed up and easily restored when needed.
Connect the SSD and HDD
To connect your SSD and HDD, it’s important to first back up your data. This ensures no data loss occurs during the process. Backing up data can be done through cloud services such as Google Drive or Dropbox, or through physical devices like external hard drives.
Once the data has been safely backed up, you can begin the process of physically connecting the SSD and HDD. First, turn off the computer and unplug all cables. Open the computer case and locate the SATA connectors on the motherboard.
Attach the SSD to an available SATA connector and connect the power cable. Then, attach the HDD to a different SATA connector and connect the power cable. Finally, boot up the computer and ensure that both drives are recognized in the BIOS.
With your data safely backed up and your SSD and HDD connected, you’re ready to take full advantage of the increased storage space and faster speeds of your upgraded system.
Start the Cloning Process
Cloning your SSD to your HDD might seem like a daunting task, but don’t worry, it’s not as complicated as it sounds. The first step is to choose a cloning software that will copy all the data from your SSD to your HDD. There are many great software options available, both free and paid, such as EaseUS Todo Backup, Acronis True Image, and Clonezilla.
Once you have selected your preferred software, connect your SSD and HDD to your computer, and ensure that your computer is booting from your SSD. Open the cloning software, select your SSD as the source disk and your HDD as the destination disk, and begin the cloning process. The duration of the cloning process will vary depending on the amount of data being transferred from your SSD to your HDD.
Once the cloning process is complete, shut down your computer, remove your SSD, and set your HDD as your boot device. Congratulations, you have successfully cloned your SSD to your HDD!
Select the Source and Destination Disks
Before starting the cloning process, you need to choose the source and destination disks carefully. The source disk is the one that contains the original data you want to clone, while the destination disk is the one where you want to copy the data to. You can use various tools to clone the disks, such as EaseUS Todo Backup or Clonezilla.
These tools will guide you through the process of selecting the source and destination disks. Once you have chosen the disks, you can start the cloning process. Cloning a disk can take some time, depending on the size of the data you are copying.
Therefore, it is essential to be patient and avoid interrupting the process in any way. You can speed up the cloning process by using a high-speed USB drive or connecting both disks to the same computer, so the data can be transferred faster. It is also essential to ensure that the destination disk has enough space to store the cloned data.
You can check the free space on the destination disk by viewing its properties. If there is not enough space, you may need to delete some files or transfer them to another disk before starting the cloning process. In summary, start the cloning process by carefully selecting the source and destination disks, using cloning tools like EaseUS Todo Backup or Clonezilla, avoiding interruptions, and ensuring that the destination disk has enough space to store the cloned data.
By following these steps, you can successfully clone your disk and keep a backup of your important data without any data loss.
Choose the Cloning Method
When it comes to cloning, choosing the right method is crucial. There are several techniques you can use, ranging from simple to highly complex. One popular method is the Restriction Fragment Length Polymorphism (RFLP) method, which involves cutting DNA molecules using specific enzymes.
Another common technique is Polymerase Chain Reaction (PCR), which amplifies specific DNA fragments. The choice of method will depend on the type of cloning you need to do and the resources available to you. For example, RFLP is suitable for cloning organisms with large genomes, while PCR is ideal for cloning smaller fragments.
Once you have selected the appropriate method, you can begin the cloning process by extracting DNA from the source organism and isolating the target gene. You can then insert the gene into a vector, such as a plasmid, which will act as a carrier. The vector can be introduced into a host organism, where the gene will be replicated and expressed.
With the right method and careful execution, cloning can be a powerful tool for scientific research and biotechnology.
Preview the Cloning Process
Cloning Process If you’re interested in cloning, the first step is to prepare the cells you will be cloning. This typically involves selecting a specific cell type, such as skin cells or liver cells, and then isolating them from the body. Once you have a viable cell sample, the actual process of cloning can begin.
This typically involves transferring the nucleus of the target cell into an egg cell that has had its own nucleus removed. This egg cell can then be stimulated to divide and develop into an embryo, which can then be implanted into a surrogate mother for gestation. The process of cloning is complex, but with careful planning and execution, it can be an incredibly powerful tool for scientific research and discovery.
So, are you ready to start the cloning process? Let’s dive in and see what we can create.
Finish and Verify the Clone
If you’re looking to clone your SSD to an HDD, the first step is to make sure you have the necessary tools. You’ll need cloning software, which can be found for free online, as well as a USB-to-SATA cable to connect your drives. Once you have everything set up, the next step is to initiate the cloning process.
This involves selecting the source drive (your SSD) and the destination drive (your HDD) and then choosing any additional options, such as whether to clone all partitions or just the boot partition. Once you’ve made your selections, the software will begin the cloning process, which can take anywhere from a few minutes to a few hours depending on the size of your drives. After the cloning is complete, you’ll want to verify that everything was copied correctly by checking the contents of your HDD.
With these steps, you should be able to successfully clone your SSD to an HDD.
Disconnect the SSD
Once the cloning process is complete, it’s time to disconnect the SSD from the computer. Before doing so, ensure that everything is working correctly by verifying that all of the data has been transferred to the new SSD. One way to do this is by checking if the files and applications are opening correctly, and there are no errors or missing data.
If everything is in order, you can proceed to disconnect the SSD. Depending on the type of cloning software used, there may be specific instructions to follow. Keep in mind that there may be some leftover files or temporary data on the SSD, which can be deleted after the clone is complete.
Once the SSD is taken out and stored safely, you can begin using your newly cloned drive, which should have all of your old files and applications intact.
Set the HDD as the Boot Disk
Now that we have successfully cloned our HDD to the new SSD, we need to set the HDD as the boot disk. This will ensure that the system boots from the HDD instead of the SSD. To set the HDD as the boot disk, we need to access the BIOS or UEFI settings.
We need to restart our computer and access the BIOS menu by pressing the appropriate button during startup. Next, we need to go to the boot menu and change the boot order so that the HDD is the first boot device. Once we have set the HDD as the boot disk, we need to save the changes and exit the BIOS menu.
After restarting the computer, we need to verify that the clone was successful by checking that all our files and settings are present on the new SSD. We can now enjoy faster boot times and improved overall system performance. So, let’s get started and set the HDD as the boot disk!
Conclusion
In conclusion, cloning your SSD to your HDD is like replicating your DNA. It’s a process of creating an identical copy of your digital world. Just as cloning has the potential to create new possibilities, so does the cloning of your SSD to your HDD.
With this process, you can ensure that your data is safe and secure, and that you have a backup plan in case of any mishaps. So, if you want to replicate your digital life, just follow the steps and give birth to your cloned data!”
FAQs
What software can I use to clone my SSD to my HDD?
There are several software options available for cloning your SSD to your HDD, including EaseUS Todo Backup, Acronis True Image, and Macrium Reflect.
Can I clone my SSD to a larger HDD?
Yes, you can clone your SSD to a larger HDD as long as the target HDD has enough storage space to accommodate all of the data on the source SSD.
Do I need any special hardware to clone my SSD to my HDD?
No, you don’t need any special hardware to clone your SSD to your HDD. All you need is a software program that supports cloning, and both your SSD and HDD should be connected to your computer.
Can I continue to use my SSD after cloning it to my HDD?
Yes, you can continue to use your SSD after cloning it to your HDD. However, you’ll need to make sure that your computer is set up to boot from your HDD instead of your SSD if you want to use the cloned data on your HDD.