If you’re looking for a way to improve the performance of your computer, installing an SSD (solid-state drive) is a great option. Not only does it boost your computer’s speed, but it can also enhance the overall user experience. However, the installation process may seem overwhelming, especially if you’re not familiar with the inner workings of your PC.
That’s where we come in – we’ve put together a step-by-step guide on how to install an SSD in a Coolmaster 1 With our easy-to-follow instructions, you’ll be up and running in no time!
Pre-Installation Checklist
Installing an SSD into your Coolmaster Elite 110 is a great way to improve its overall performance, but before you get started, it’s important to have a pre-installation checklist. Firstly, ensure that you have all the required tools and parts that you need to carry out the installation, such as a screwdriver and the appropriate cables. Secondly, make sure you have downloaded any necessary drivers or software beforehand to avoid any issues during installation.
Thirdly, ensure that your computer is unplugged from the mains supply before attempting to install the SSD and take necessary precautions to prevent any static electricity build-up, for example, using an anti-static wrist strap. Finally, be careful when handling the SSD as it is delicate and can be easily damaged. By following these simple steps, you’ll be able to install your new SSD smoothly and hassle-free, and enjoy the improved performance of your Coolmaster Elite 1
Ensure Compatibility
If you’re planning to install new software or hardware on your computer, it’s important to ensure compatibility before you start the installation process. This will save you from potential frustration and lost productivity down the line. To do this, you’ll need to check the system requirements of the software or hardware you want to install and compare them to the specifications of your computer or device.
Check if your operating system is supported and if you have enough RAM, processor speed, and storage space to run the software or hardware. It’s also important to make sure that any other software or programs that the software or hardware may rely on are already installed on your computer. Taking these steps before installation will help make sure that your new software or hardware runs smoothly.
Gather Required Tools
Before you begin your installation, it’s important to make sure you have all the necessary tools on hand. This will save you time and frustration in the long run. Make sure you have a screwdriver, pliers, wire strippers, and a voltage detector.
These tools will come in handy throughout the installation process. Additionally, it’s important to make sure you have all the necessary parts and wires for your specific installation. Take a look at the instruction manual and double-check that you have everything you need.
Once you have all your tools and parts ready to go, you can move on to the next step with confidence. Remember, preparation is key to a successful installation.
Removing Old HDD
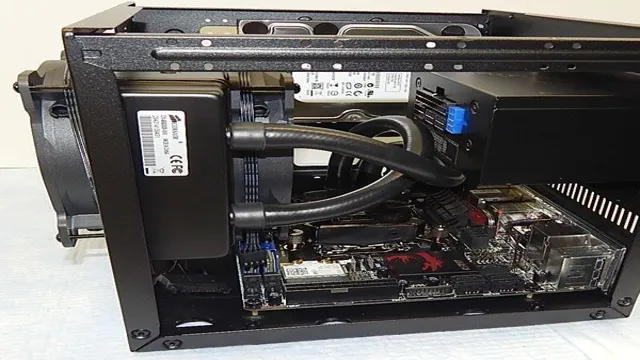
If you’re looking to upgrade your system’s storage setup, the Coolmaster Elite 110 provides an ideal solution. The first step is to remove the old HDD, which you’ll need to take out before installing your new SSD. You can do this by shutting down your computer and unplugging all its power cords.
Before opening the computer case, you should ground yourself to avoid damage to the components. Once inside, locate the HDD and carefully unplug its cables. You may need to remove screws or clips holding it in place before gently lifting it out of the case.
Once you’ve removed the old HDD, you can install your new SSD and start enjoying its faster speeds and reliability. In summary, with the Coolmaster Elite 110, upgrading to an SSD is easy if you follow the correct procedures and precautions.
Shut Down and Disconnect Cables
When it’s time to upgrade or replace an old hard disk drive (HDD), there are a number of steps to take to ensure a smooth and successful process. One of the most important steps is to shut down the computer completely and disconnect all cables that are connected to it. This includes the power cable, Ethernet cable, and any other cables that may be connected to the computer.
Once you have disconnected all cables, you can begin to remove the old HDD. It’s important to be careful and gentle when handling the HDD, as they can be delicate and easily damaged. Use a screwdriver or other appropriate tool to remove any screws or clips that may be holding the HDD in place.
Gently slide the old HDD out of its housing, being careful not to tug or pull on any wires or components that may be connected to it. By taking these steps carefully and methodically, you can remove the old HDD without damaging any other components and prepare for a successful upgrade.
Remove Side Panel and Locate HDD
Removing the old HDD is an important step when upgrading your computer’s storage capacity. To do this, you need to first remove the side panel of your computer and locate the HDD. This can be a bit confusing for those who are not familiar with the internals of their computer.
Once you have removed the panel, you should be able to see the hard drive sitting next to the motherboard. Make sure to disconnect any cables that are attached to the HDD before removing it. Once you have done this, you can go ahead and unscrew the hard drive from its mounting bracket and slide it out of its slot.
Remember to handle the HDD with care and avoid any physical shocks or jarring movements that could damage the delicate components inside. With the old HDD removed, you can now proceed with installing the new one and power up your computer for a faster and more efficient computing experience.
Unscrew and Disconnect HDD
Removing the old HDD is an essential task when upgrading or replacing the hard drive of your computer. The first step is to unscrew and disconnect the HDD from the computer’s CPU. It may sound complicated, but it’s a straightforward process that anyone can do with a little effort.
To begin, make sure you have turned off the computer and unplugged it from the power source. Locate the hard drive inside the CPU and remove all the screws attaching it to the computer. After removing the screws, gently pull out the hard drive while disconnecting all the cables and wires attached to it.
This ensures that you don’t damage any other parts of your computer while removing the old hard drive. Remember to handle the hard drive with care and avoid touching the electronic components, as this can cause damage to the drive. Overall, removing the old HDD from your computer is a crucial step that paves the way for the installation of the new hard drive.
By carefully following the steps, you’ll ensure a smooth and successful upgrade process, leaving you with a faster and more efficient computer.
Installing SSD
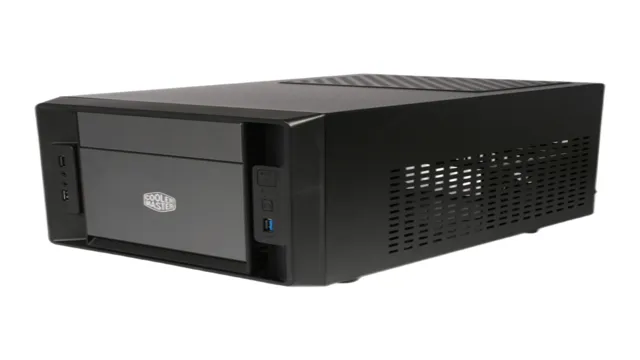
If you own a Coolmaster Elite 110 and want to boost your computer’s performance, then installing an SSD is the way to go. The good news is that installing an SSD is a relatively easy process, and you don’t need to be a tech whiz to get it done. First, open up the side panel of your Coolmaster Elite 110 and locate the hard drive bay.
Remove the hard drive from the bay and replace it with your new SSD. Make sure that you connect all the necessary cables, and double-check to ensure that the SSD is firmly in place. Once you’re finished, replace the side panel and turn on your computer.
Congratulations, you’ve successfully installed a new SSD! Now you can enjoy faster boot times and improved performance. So why wait? Upgrade your Coolmaster Elite 110 today and experience the benefits of an SSD for yourself.
Attach SSD in HDD Bracket
If you’re looking to upgrade your computer’s storage and speed, installing an SSD is an excellent choice. However, you might run into the problem of mounting it properly. One solution to this problem is to attach the SSD in an HDD bracket.
This way, you can easily screw your SSD into the bracket and into the computer’s drive bay. Another benefit of this solution is that it also provides proper grounding for your SSD. Before installing the SSD, make sure to check the bracket’s compatibility with your computer’s case and check what hardware you need to mount the bracket.
With the proper tools and a little bit of patience, attaching your SSD in an HDD bracket is a straightforward process that will help you boost your computer’s performance.
Slide Bracket into HDD Slot
If you’re looking for a way to boost your computer’s performance, installing an SSD could be the solution you need. One of the first steps in this process is slide bracket into HDD slot. Essentially, this involves fitting the SSD into the bay that previously housed your old hard drive.
It’s important to take the time to properly position the bracket to ensure a secure fit. Once you’ve done that, you can screw it into place to make sure it doesn’t move around or become unset. With this done, you’re one big step closer to enjoying faster load times and a smoother overall computing experience.
So why not give it a try and see how much of a difference it can make?
Secure with Screws and Connect Cables
When it comes to installing an SSD, one of the most important steps is to secure it with screws and connect the necessary cables. This ensures that the drive is properly installed and will function correctly. First, locate the mounting points in your computer case where the SSD will be installed.
Make sure to use the appropriate screws to secure the drive in place. Next, connect the necessary cables to the SSD and the motherboard, making sure to match the connectors correctly. Once everything is securely in place, power on your computer and make sure the SSD is recognized in the BIOS.
By following these steps, you can install your SSD with confidence and take advantage of its speed and performance benefits.
Reassembling and Testing
So you’ve successfully installed your SSD into your Coolmaster Elite 110, but now it’s time to reassemble and test to make sure everything is running smoothly. First, reattach all screws and cables that you may have removed during the installation process, making sure to double check that everything is securely fastened. Once everything is reconnected, turn on your computer and enter your BIOS to ensure that your computer recognizes the new SSD.
If it does not, you may need to go back and check your connections or consult your computer’s manual for more troubleshooting tips. You can also run a benchmark test to make sure that your new SSD is performing at the expected speeds, and to identify any potential issues early on. Congratulations, your Coolmaster Elite 110 SSD installation is complete and your computer is now running even faster!
Put back Side Panel and Cables
Once you’ve completed your PC build, it is time to reassemble everything and start testing. First, put back the side panel on the case and make sure it is securely fastened. Then, reconnect all the cables to their proper components.
Make sure the power supply cable is plugged in properly, as well as the graphics card, hard drive, and any other necessary cables. Double-check all connections to make sure they are tight and snug. Once everything is in place, it’s time to test your system.
Boot up your computer and ensure that everything is functioning properly. Test your graphics card, hard drive, and any other components to make sure they are working as expected. It’s essential to test your system to catch any potential issues early on before they become more significant problems.
Turn on PC and Verify Installation
Now the moment of truth has arrived! It’s time to turn on your PC and verify the installation. But before you power up your machine, make sure you have reassembled everything correctly and have connected all the necessary wires, such as the HDMI cable, keyboard, and mouse. Once you have done that, press the power button and wait for your computer to come alive.
At this stage, you should hear the fan spinning and see the light on your motherboard, indicating that the power supply is working correctly. If you’re not sure whether everything is functioning as it should, don’t panic! You can perform some basic tests to ensure that the installation was successful. For example, you can check that all the ports on your PC are responding correctly, that your graphics card is working correctly, and that all the drivers are up to date.
Once you have completed these tests, you can safely say that your PC is ready for use. Congratulations, you have just successfully built your very own computer!
Conclusion
All in all, installing an SSD in a Coolmaster Elite 110 is a breeze. With a quick setup and a bit of know-how, you’ll have a blazing-fast machine that can handle anything you throw at it. So say goodbye to slow boot times and frustrating load screens, and hello to the lightning-fast speed and performance that only an SSD can provide.
Happy installing!”
FAQs
What size of SSD can fit into the Coolmaster Elite 110 case?
The case can fit a 2.5-inch SSD.
Is there a specific slot for the SSD to be installed in the Coolmaster Elite 110 case?
Yes, there is a specific area designated for the SSD located behind the front panel.
Do I need any additional hardware to install the SSD in the Coolmaster Elite 110 case?
No, all necessary hardware is included with the case for SSD installation.
Can the SSD be hot-swapped in the Coolmaster Elite 110 case?
No, the SSD cannot be hot-swapped in this case. The system should be powered off before installing or removing the SSD.
Is it necessary to use screws to secure the SSD in the Coolmaster Elite 110 case?
Yes, it is recommended to use the included screws to secure the SSD in place to prevent any movement or damage during transportation.