If you’re looking to boost the performance of your computer, upgrading to an SSD is one of the most effective ways to do so. And if you’ve recently purchased a Patriot Memory Burst SSD, you’re likely wondering how to configure it for best results. Fear not, as we’ve got you covered with this guide on configuring your Patriot Memory Burst SSD.
In just a few easy steps, you can optimize your drive and experience lightning-fast speeds that will transform your computing experience. So let’s get started!
Step One: Understand the Patriot Memory Burst SSD
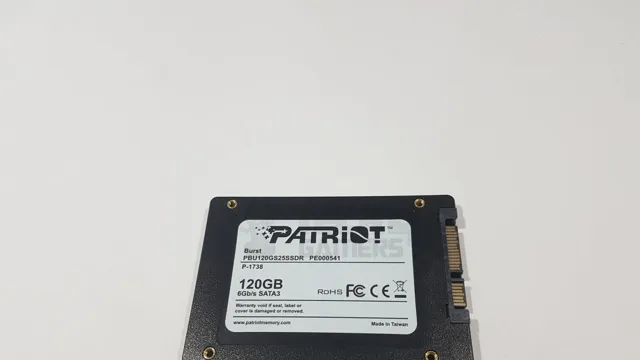
To configure a Patriot Memory Burst SSD, the first step is to understand its basic features. This solid-state drive has a storage capacity of up to 480GB, making it a great option for upgrading your computer’s storage. It has a read speed of up to 560MB/s and a write speed of up to 540MB/s, which means that it can handle large data transfers and boot up times quickly.
One thing to keep in mind is that the actual performance of your SSD may vary based on your computer’s hardware and software configuration. Additionally, you should ensure that your computer has SATA III connectors for optimal performance. By understanding the basic features of the Patriot Memory Burst SSD, you can make the necessary preparations to configure it correctly.
What is the Patriot Memory Burst SSD?
The Patriot Memory Burst SSD is one of the latest SSD options on the market today. It’s essentially a solid-state drive that provides faster access to data than traditional hard drives. The Patriot Memory Burst SSD comes with various storage capacities that range from 120GB to 960GB, making it an ideal option for gamers, content creators and everyday users who require fast and reliable storage solutions.
This SSD uses the SATA III interface, which guarantees smooth data transfer rates and excellent overall performance. With its ultra-thin and lightweight design, it can fit into any device that has a 5-inch drive bay.
Overall, the Patriot Memory Burst SSD is the perfect choice for anyone who wants to upgrade their storage performance without breaking the bank. So why not invest in one today and watch your device burst into action with lightning-fast speed?
Why choose the Patriot Memory Burst SSD?
If you’re looking for a reliable and affordable SSD, the Patriot Memory Burst is a great option. This SSD is particularly useful for those looking to upgrade their laptop or desktop computer without breaking the bank. With its fast read and write speeds, you can expect faster boot times, quicker application launches, and snappier performance overall.
Plus, with up to 480GB of storage, you’ll be able to store plenty of files, programs, and media. What sets the Patriot Memory Burst SSD apart from other options on the market is its ability to handle large bursts of data without slowing down. This means you can expect consistent performance even during heavy usage.
So if you’re looking to speed up your computer and increase your storage capacity, consider the Patriot Memory Burst SSD as a reliable and cost-effective option.
Step Two: Preparing your system for the SSD
Before installing the Patriot Memory Burst SSD, it’s essential to prepare your system for the upgrade. First, you should backup your existing data to avoid any loss during the cloning process. Then, you need to configure your system’s BIOS settings to enable AHCI mode that allows for faster SSD performance.
You can follow the manufacturer’s instructions for accessing and altering BIOS settings. Additionally, you should run a full system scan to ensure that your computer’s files and settings are optimized for the new SSD. Once everything is prepared, you can proceed with cloning your existing hard drive onto the Patriot Memory Burst SSD using cloning software, provided by most SSD manufacturers.
With these simple preparations, you can guarantee a seamless upgrade and start benefiting from faster boot times, data transfer, and overall system performance. By configuring Patriot Memory Burst SSD to your system, you can ensure that your computer will work more efficiently and speedily.
Check your system compatibility
Before installing an SSD, it’s essential to check your system compatibility in order to ensure a smooth installation process and maximum performance. The first thing to consider is the type of SSD and interface that your system supports. For instance, you need to check whether your motherboard supports SATA or NVMe PCIe interfaces.
You can check this information through the motherboard manual or by searching for the specifications online. Additionally, you should also consider the size and form factor of the SSD to ensure it fits correctly in your system’s drive bay or slot. Once you have confirmed these details, you can proceed with the installation process with confidence.
By taking the time to prepare your system for the SSD, you can ensure a seamless experience that will help unlock your system’s full potential.
Backing up your data
Preparing your system for the SSD is an essential step to ensure that the installation process goes smoothly. First, make sure you have backed up all your data before installing the new SSD. This ensures that you won’t lose any important files during the installation process.
Next, ensure that your system is up-to-date with the latest software updates and drivers. Outdated drivers can cause compatibility issues with the new SSD, leading to delays and potential data loss. Additionally, make sure you have enough space on your hard drive for the new SSD.
You may need to remove some files or programs to free up some space. Lastly, defragment your hard drive before installing the new SSD. This speeds up the cloning process, ensuring a faster and smoother transition.
By taking these simple steps, you can guarantee a hassle-free installation and improve the performance of your system with the new SSD.
Upgrading your OS and drivers
Before installing your new SSD, it’s important to ensure that your operating system and drivers are up to date. This step will not only help to ensure compatibility with your new drive but also improve overall system performance. Start by checking for updates to your current operating system, whether that be Windows or another OS.
You should also check for driver updates, especially for your storage controller and chipset. Updating these drivers can make a significant difference in overall system performance. It’s also a good time to clean up your system by uninstalling any unused programs or files that may be taking up unnecessary space.
By taking these steps, you can ensure that your computer is ready to reap the full benefits of your new SSD.
Step Three: Installing the SSD
When it comes to configuring your Patriot Memory Burst SSD for optimal performance, it’s important to take the time to properly install it. The first step is to shut down your computer and unplug it from any power source. Then, locate the SATA connector on your motherboard and connect the SSD to it.
Make sure the SSD is firmly in place before moving on to the next step. Once the SSD is installed, it’s time to configure it. Start by opening the disk management utility on your computer and initializing the SSD.
Then, create a new partition on the drive and format it. Finally, assign a drive letter to the SSD and you’re ready to go. Once your Patriot Memory Burst SSD is configured and installed, you’ll enjoy lightning-fast boot and load times, and overall improved performance for all your computing needs.
Physical installation
Now it’s time to install your new SSD into your computer. First, make sure your computer is turned off and unplugged from the power source. Next, open up your computer case by removing any screws or latches that may be holding it in place.
Locate the drive bays, which should be towards the front of the case, and pick one that’s open. Then, gently slide the SSD into the bay and secure it with screws to prevent any movement. Finally, plug in the SATA data cable and the power cable from your power supply.
Once everything is secure and connected, you can close up your computer case and start your system. Congratulations, you’ve successfully installed your new SSD!
Configuring BIOS and disk management
Now that you’ve prepared your computer with the necessary adjustments, it’s time to install the SSD and enjoy faster performance. Here’s how to do it: Open your computer’s case and locate the hard drive. Carefully disconnect the power and data cables from the hard drive and remove it.
Plug in the SSD to the same cables and mount it in the same place where the hard drive was. Boot up your computer and go into the BIOS to configure the boot order. Make sure your new SSD is set as the primary boot device.
Then, open up disk management and initialize the SSD. You can then format the SSD and partition it however you like. Once that’s done, you’re all set to start using your new SSD.
Congrats on a job well done! With improved performance, you’ll be able to enjoy faster boot times, application launches, and file transfers.
Step Four: Optimizing your Patriot Memory Burst SSD
If you’ve recently purchased the Patriot Memory Burst SSD, you may want to optimize it to get the most out of its performance. Configuring your SSD involves several steps, including enabling AHCI mode in your BIOS and adjusting power settings in your operating system. You’ll also want to make sure that the firmware and drivers are up to date, as this can impact performance as well.
Once you’ve completed these basic steps, you can further optimize your Patriot Memory Burst SSD by disabling unnecessary services and adjusting your disk cache settings. By taking these steps, you can ensure that your SSD is running at its best and that you’re getting the most out of your investment.
Updating firmware and drivers
After completing the previous steps, you are now ready to optimize your Patriot Memory Burst SSD for peak performance. One important aspect of this optimization process is to make sure that you have the latest firmware and drivers installed. Firmware updates can improve the performance and stability of your SSD by fixing bugs and enhancing its functionality.
Similarly, updating your drivers can ensure that your SSD is running at optimal speed and efficiency. You can usually find the latest firmware and driver updates on the manufacturer’s website. Remember to follow the instructions carefully when installing the updates to avoid any potential issues.
By keeping your SSD’s firmware and drivers up to date, you can ensure that your system is performing at its best and avoid any potential issues that could arise from outdated software.
Maximizing performance and lifespan
If you want to maximize the performance and lifespan of your Patriot Memory Burst SSD, optimizing it is key. First, ensure that you have the latest firmware installed, as this can improve performance and address any bugs or stability issues. Next, enable trim support, which helps maintain the speed of the SSD over time by freeing up unused space.
You can also disable hibernation and superfetch to free up more space on your drive and avoid unnecessary write operations. Finally, consider running regular disk cleanup and defragmentation to keep your SSD running smoothly and efficiently. By following these steps, you can get the most out of your Patriot Memory Burst SSD and extend its lifespan.
Conclusion and Next Steps
In conclusion, configuring a Patriot Memory Burst SSD is a piece of cake! It’s as simple as following a recipe to bake a cake, but instead of measuring sugar and flour, you are adjusting settings like the TRIM command and over provisioning. With a little bit of technical know-how, you can optimize your SSD’s performance and feel like a true tech wizard. So go ahead, configure away and let your Patriot Memory Burst SSD burst with lightning-fast speed!”
FAQs
What is the capacity of the Patriot Memory Burst SSD?
The Patriot Memory Burst SSD comes in capacities of 120GB, 240GB, and 480GB.
Is it easy to install the Patriot Memory Burst SSD?
Yes, the Patriot Memory Burst SSD comes with a simple installation guide, and you can install it yourself without much technical knowledge.
Can the Patriot Memory Burst SSD improve the performance of my computer?
Yes, the Patriot Memory Burst SSD is designed to improve the boot-up time and overall performance of your computer.
How can I configure the Patriot Memory Burst SSD on my computer?
You can easily configure the Patriot Memory Burst SSD by connecting it to your computer’s motherboard and then following the instructions provided in the user manual.
Does the Patriot Memory Burst SSD come with a warranty?
Yes, the Patriot Memory Burst SSD comes with a 3-year warranty, ensuring its reliability and performance.