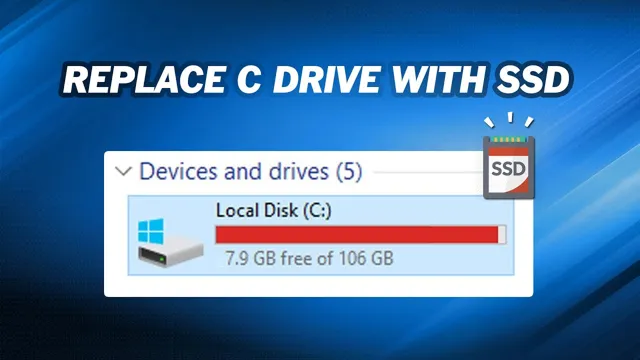
Upgrading your computer’s storage device can be a game-changer when it comes to improving your device’s overall performance. It can be overwhelming if you’ve never done it before, but fear not, as we’re here to help you out. If you’re the owner of a Acer Chromebook C740-C4PE and are considering upgrading your storage device, then you’re in the right place.
In this article, we’ll go over everything you need to know about changing your SSD in the C740-C4PE. We’ll guide you through each step of the process, give you some tips and tricks along the way, and provide you with all the information you need to make an informed decision. So, let’s dive in and get started!
Step 1: Gathering necessary tools
If you’re thinking of upgrading your Acer C740 Chromebook by changing its SSD, then you’ll need to gather a few necessary tools before getting started. First, you’ll need a small Phillips-head screwdriver that’s suitable for working with delicate electronics. Additionally, you’ll need a tool to pry open the plastic clips that hold the laptop’s bottom case in place.
A spudger tool or a set of plastic opening tools should suffice. Lastly, you’ll need a replacement SSD that’s compatible with your Acer C740 model. It’s important to choose an SSD that meets the specifications of your laptop to ensure it works properly.
With these tools on hand, you’re ready to get started with the upgrade process.
Checking laptop specifications
Before embarking on checking your laptop specifications, you need to gather necessary tools to make the process more effective. A good starting point is having a notepad and a pen to note down the specifications once you get them. Additionally, you’ll need the laptop’s serial number, which is typically at the bottom of the laptop.
This number helps in identifying the model of the laptop, making it easier to access its specifications. You may also require a Phillips screwdriver to open the laptop and access various components such as the RAM or the hard drive. A USB stick can also come in handy if you need to update or reinstall drivers.
With these tools, you can obtain vital information about your laptop’s hardware, which can help you make informed decisions about maintenance, upgrades, or repairs.
Identifying compatible replacement SSD
When identifying a compatible replacement SSD, it’s essential to gather the necessary tools before starting the process. These tools include a screwdriver, an anti-static wrist strap, and a compatibility tracking sheet. The screwdriver is necessary for removing the screws keeping the SSD in place, while the anti-static wrist strap prevents any electrostatic discharge that may damage the SSD.
The compatibility tracking sheet helps keep track of the compatible SSD specifications. Before starting, ensure to power off the computer and unplug it from the electrical outlet. Identifying a compatible replacement SSD can be overwhelming, but by gathering the necessary tools, you can replace the SSD safely and efficiently.
Gathering screwdriver and other tools
When it comes to repairing or assembling something, having the right tools is essential. Gathering the necessary tools is the first step in any DIY project, including building furniture or fixing appliances. One of the most important tools you’ll need is a screwdriver.
If you’re not sure which type of screwdriver to use, check the screws in your project to see if they require a Phillips, flathead, or another type of screwdriver. It’s also a good idea to have a set of pliers, wrenches, and a utility knife on hand, as they can come in handy for different tasks. Additionally, having a level, tape measure, and drill can make a big difference in ensuring that your project is accurate and stable.
By taking the time to gather the right tools for the job, you’ll save yourself time and frustration later on.
Step 2: Preparing the laptop for replacement
Now that you have your new SSD ready, it’s time to prepare your Lenovo c740-c4pe for replacement. First, make sure your laptop is turned off and disconnected from any power source. Next, locate the screws on the bottom cover of your laptop and use a screwdriver to remove them.
Gently lift off the cover to reveal the old SSD. Carefully remove it by gently sliding it out of the socket. Take note of the orientation of the old SSD and be sure to insert the new one in the same direction.
You may need to remove the bracket from the old SSD and attach it to the new SSD before inserting it into the socket. Once the new SSD is securely in place, replace the bottom cover and screws. Using a software tool such as Lenovo Vantage, ensure that your laptop recognizes the new SSD and update any necessary drivers.
Congratulations, you are all set with your new and improved SSD!
Shutting down the laptop
When it comes to replacing your laptop, there are a few things you need to keep in mind. One of the essential steps is preparing the laptop for replacement, and that entails shutting it down properly. Before you power off your laptop, you’ll want to save any open files and close any running applications.
This ensures that your data is saved and that you won’t lose any unsaved work. Once you’ve saved your work, you can select the power button and click on “Shut Down.” Your laptop will now power off in just a few seconds, and you can begin the process of replacing it with a new one.
Remember, it’s always important to shut down your laptop correctly to avoid any potential damage or loss of data. So, take your time, make sure everything is saved, and then power down your laptop before replacing it with a newer model.
Disconnecting all cables and peripherals
When it comes to replacing a laptop, it’s important to prepare it properly to prevent any damage during the transition. The second step in this process is disconnecting all cables and peripherals. This includes any power cords, USB cables, and external monitors.
It’s essential to turn off the laptop and unplug all cables before you start disconnecting. Once everything is unplugged, you can then close the laptop and place it on a stable surface ready for the next step in the process. By disconnecting these cables and peripherals, you’ll prevent any damage to the laptop or other devices during the replacement process.
Failure to unplug the laptop while it is still connected to external devices or power sources can lead to electrical damage or other issues that will make it difficult to replace the device or any of the other peripherals. Therefore, it’s necessary to be diligent and take your time when disconnecting all these cables and peripherals. Doing so will ensure that the laptop is properly prepared for the replacement, and will allow for a smooth transition to the new device, unencumbered by any issues that may arise if you fail to take these steps properly.
Removing the battery
Removing the battery is an essential step when preparing your laptop for replacement. First, make sure your laptop is turned off and unplugged from any power source. Then, locate the battery on the underside of your laptop.
Most laptops have a latch or release switch that you will need to slide or press to remove the battery. If you are unsure where the release switch is, consult your laptop’s manual. Once you have located the switch, slide or press it, and the battery should pop out easily.
Be careful when handling the battery, as it is usually quite heavy and can be fragile. Place the battery in a safe location, away from anything that could damage it. By following these simple steps, you can safely remove the battery from your laptop and prepare it for replacement.
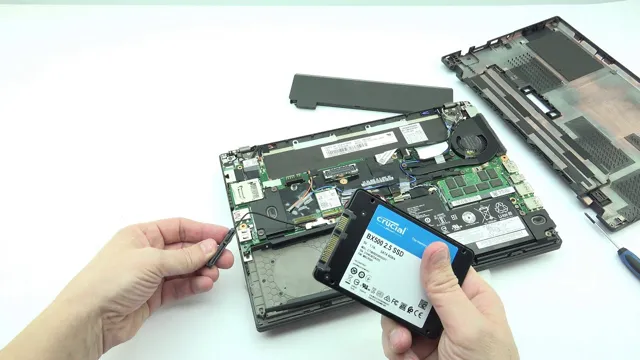
Step 3: Removing the old SSD
Now that you have backed up your data and removed all external devices from your Lenovo C740-C4PE laptop, it’s time to remove the old SSD. Start by locating the bottom cover of your laptop and removing all screws holding it in place. Once you remove the screws, gently pry open the cover, being careful not to damage any of the internal components.
You should see the SSD secured to the motherboard with a screw. Unscrew it and gently pull the SSD out. Be extremely careful not to touch any other components while removing the SSD to avoid damaging or disconnecting any parts.
Once you have removed the old SSD, you are ready to insert the new one and begin the installation process.
Locating the SSD compartment
When it comes to upgrading your laptop’s SSD, locating the compartment where the SSD is housed is crucial. In step three of the process, you need to remove the old SSD, and to do that, you must first locate it. Most laptops have the SSD compartment at the bottom of the device, but some may have it on the side or under the keyboard.
To locate the compartment, consult your laptop’s user manual or look it up online. Once you’ve located the compartment, turn off your laptop and unplug it from the power source. Then, remove the screws or clips that hold the compartment cover in place and carefully remove it.
Voila! You’ve located your laptop’s SSD compartment. Now, you’re ready to remove the old SSD and replace it with a new one, bringing new life and improved performance to your laptop.
Removing screws and cover
As we move on to Step 3 of upgrading your laptop’s SSD, it’s time to remove the old one. First, make sure your laptop is turned off and unplugged. Then, locate the screws that hold the back cover in place.
Typically, you’ll find them on the bottom of the laptop, although depending on the make and model, they may be in an unconventional location. Once you’ve identified the screws, carefully remove them with a screwdriver. You may need different sizes of screwdrivers depending on the screws’ size.
Once the screws are removed, gently pry the back cover off the laptop. Be sure not to force it open as this could damage the cover or the laptop’s internal components. Now that the back cover is removed, it’s time to locate the old SSD.
Depending on the model of your laptop, the old SSD may be in plain sight, or it may be tucked away under additional components. This is when it comes in handy to consult the laptop manual or look for tutorials specific to your laptop model. Once you’ve located the old SSD, carefully remove it from its socket.
Be sure to remember the orientation in which it was inserted to avoid damaging the new SSD’s socket when you install it. Note that launching the old SSD from your laptop doesn’t mean you’re done with it. You can either sell and recycle it, donate it, or store it as a backup drive.
With the old SSD removed, you’re now ready to install the new SSD.
Disconnecting the old SSD
As we move onto Step 3 of upgrading our SSD, we need to disconnect the old drive from our system. This is a crucial step in ensuring that we don’t damage any of the components or files contained on the SSD. First, we need to power off our computer and unplug any cables connected to it.
Then, we’ll need to locate the old SSD and identify the cables connected to it. Depending on your system, this might be SATA cables or an M.2 connector.
Once you’ve identified these, gently remove the cables from the SSD, being cautious not to damage any of the pins. Some systems may use screws to hold the SSD in place, so be sure to remove those as well. With the SSD removed, we’re ready to start installing our new drive!
Step 4: Installing the new SSD
Now that you’ve removed the old SSD from your Lenovo C740-C4PE laptop, it’s time to install the new one! Begin by inserting the new SSD into the empty slot, making sure it’s in the correct orientation. Then, gently push it down until it clicks into place. Next, you’ll need to secure the new SSD by putting the screws back into the bracket.
Make sure the screws are tightened but not too tight, as overtightening could damage the SSD. Once you’ve finished securing the new SSD, you can then replace the back cover and secure it with the Phillips screws. Congratulations, you’ve successfully upgraded your Lenovo C740-C4PE with a new SSD!
Inserting the new SSD
Now that you have safely removed the old SSD from your computer, it’s time to install the new one. First, locate the SSD slot which is usually found in the motherboard and make sure to not confuse it with other ports. Next, gently align the SSD with the ports on the motherboard.
You should be able to easily slide the SSD into place without having to apply too much force. Once you’ve inserted the SSD, it’s recommended to secure it in place with the provided screws. Tighten the screws just enough to ensure that the SSD is firmly in place and won’t budge.
Finally, connect the power cable and data cable to the SSD. Congratulations, you’ve successfully installed your new SSD! Now, it’s time to close up your computer and turn it on to begin taking advantage of your newly improved storage space and speed.
Screwing in the cover
Now that you’ve successfully removed the back cover of your laptop, it’s time to install the new SSD. The next step is to carefully screw in the cover of the new SSD. Make sure not to overtighten the screws, as this can damage the threads and make it difficult to remove the cover in the future if needed.
It’s important to make sure that each screw is lined up correctly and that they’re snugly in place. Once you’ve double-checked that everything is secure and properly installed, you can put the back cover on your laptop. Voilà! Your new SSD is now installed and ready to use.
Don’t forget to test everything out and make sure it’s working properly before closing up the back cover for good. With a new SSD installed, you’ll enjoy faster boot-up times, quicker program launches, and overall improved performance.
Reconnecting the battery and peripherals
Now that we’ve reconnected the battery and peripherals in our laptop, it’s time to tackle the next step in upgrading: installing the new SSD. This process involves opening up the laptop to access the storage compartment and replacing the existing hard drive with the new SSD. Before getting started, it’s important to check the laptop’s manual or manufacturer’s website for specific instructions on how to open your particular model.
Once you have located the storage compartment and removed any screws or brackets, carefully remove the old hard drive and insert the new SSD in its place. Be sure to reattach any screws or brackets and reconnect any cables before closing up the laptop and powering it on. With the new SSD installed, your laptop should see a significant boost in speed and performance, making it feel like a whole new machine.
Step 5: Booting up the laptop and checking the new SSD
Once you’ve successfully installed your new SSD, it’s time to turn on your device and make sure everything is running smoothly. For the c740-c4pe model, press the power button and wait for the device to boot up. Depending on the operating system you’ve installed, it may prompt you to go through a setup process.
Once everything is set up, open your disk management tool to ensure that your new SSD is recognized and functioning properly. You may need to format the SSD before you use it, which can be done through the disk management tool. You should also confirm that your device recognizes the full amount of space on the SSD.
Congratulations on successfully changing out your SSD! Enjoy the improved performance and storage space of your c740-c4pe laptop.
Turning on the laptop
After successfully installing the new SSD, it’s time to turn on the laptop and see if everything is working as expected. Simply press the power button and wait for the magic to happen! As the computer turns on, you’ll be able to see the BIOS screen, which shows some basic information about your system, including the amount of RAM and processor speed. From there, your computer should boot into your preferred operating system without any issues.
Once you’re logged in, take a moment to check if all your files, programs, and settings are intact. This can be done by opening a few applications, running a quick scan for viruses or malware, and browsing some websites. If your laptop is running smoothly, then congratulations! You’ve successfully upgraded your laptop’s storage, and it should now be much faster and more efficient.
Don’t forget to keep your old hard drive in a safe place as a backup, just in case you need to access any old files in the future.
Checking if the new SSD is detected
Once you’ve installed a new SSD, it’s important to ensure that your laptop detects it. To do this, you’ll need to boot up your laptop and check the new SSD. Start by powering up your laptop and accessing the BIOS settings by pressing the specific key on your keyboard as prompted during startup.
Once you’re in the BIOS settings, navigate to the “storage” or “drives” tab and see if the new SSD is listed. If it’s there, you’re good to go! You may also want to check the operating system to see if the new drive is visible. If it’s not listed in either the BIOS or operating system, double-check the connections to ensure that the SSD is installed correctly.
Additionally, you may need to download and install the appropriate drivers to ensure that the new SSD is recognized by your laptop’s operating system. By following these steps, you can ensure that your new SSD is detected and ready to use, providing you with improved performance and storage capacity for your laptop.
Conclusion
In conclusion, swapping out your old SSD for a new one may seem daunting, but with the right tools and knowledge, it’s a breeze. Just follow the step-by-step guide for your specific model, and voila! You’ll have a faster, more powerful device to take on whatever challenges come your way. Plus, you’ll be the envy of all your tech-savvy friends.
So go ahead, give your computer a makeover, and embrace the future of technology. Your new SSD is waiting for you!”
FAQs
What is the maximum storage capacity of an SSD for c740-c4pe?
The maximum storage capacity of an SSD for c740-c4pe is 2TB.
Is it possible to replace the SSD on c740-c4pe?
Yes, it is possible to replace the SSD on c740-c4pe. You can easily replace it by following the instructions provided by the manufacturer.
How to open c740-c4pe to replace the SSD?
To open c740-c4pe and replace the SSD, you need to remove the back cover of the laptop. It can be done by removing the screws on the bottom of the laptop. After that, you need to remove the screws that are holding the SSD in place and gently remove it from the socket.
Which type of SSD is compatible with c740-c4pe?
c740-c4pe is compatible with NVMe SSDs, which are faster than traditional SATA SSDs. You should choose an NVMe SSD that is compatible with your laptop and meets your storage requirements.