
Are you trying to configure a secondary SSD drive but don’t know where to start? Don’t worry, we’ve got you covered. In this blog post, we’ll explore how you can use bcdedit to configure your secondary SSD drive effectively. If you’re not familiar with bcdedit, it’s a command-line tool that allows you to manage the boot configuration data (BCD) for Windows.
This means you can use it to configure the boot settings for Windows and other operating systems on your computer. So why would you want to use bcdedit to configure a secondary SSD drive? Well, if you have an SSD that you’d like to use as your primary boot drive or for running specific applications, you’ll need to configure the boot settings accordingly. This can be a bit tricky, but with bcdedit, it’s relatively easy to do.
In this blog post, we’ll provide a step-by-step guide to using bcdedit to configure your secondary SSD drive. We’ll cover everything from accessing the command prompt to creating a new boot entry for your SSD drive. By the end of this post, you’ll have the knowledge and confidence to configure your secondary SSD drive and optimize its performance.
So without further ado, let’s dive in and explore how to use bcdedit to configure a secondary SSD drive.
What is bcdedit?
Are you looking to move your Windows operating system from one drive to another, such as from the primary hard drive to a secondary SSD? Bcdedit is a command-line tool that can assist in this process. Bcdedit stands for Boot Configuration Data Editor and is used to manage the boot configuration data store in Windows. This tool can help you enable or disable a particular boot entry, modify boot parameters, or even create a new one.
When it comes to moving your Windows OS to a new drive, bcdedit can be used to ensure that the correct boot entry is pointing to the new location. By using the command-line, you can execute bcdedit and make the necessary changes to the boot configuration data store. With bcdedit, moving your Windows operating system to a secondary SSD can be a straightforward process, as long as you understand how to use the tool correctly.
Explanation of bcdedit utility for Windows
If you’re a Windows user, chances are you’ve come across the bcdedit utility at some point. But what exactly is bcdedit? Well, put simply, it’s a command-line tool built into Windows that allows users to manage the boot configuration data (BCD) of their system. This includes things like adding, removing, or modifying boot entries, as well as configuring boot options for each entry.
In other words, it’s a powerful tool for anyone who wants greater control over the way their system boots up. Whether you’re troubleshooting boot-related issues or just want to customize your boot process, bcdedit is an indispensable tool for Windows users.
Preparing Your Secondary SSD Drive
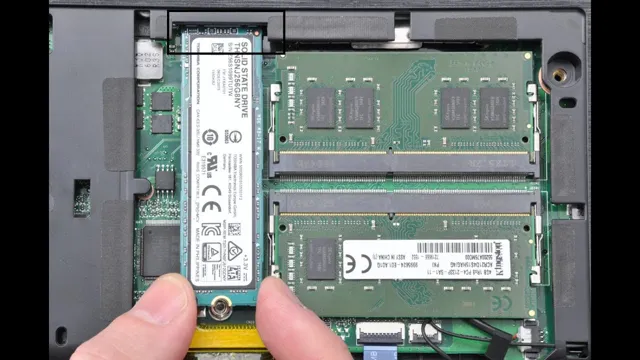
If you’re looking to add a secondary SSD drive to your computer, you’ll need to prepare it for use with Windows. One important step in this process is to ensure that the boot partition is properly configured. To do this, you can use the bcdedit command in the Windows Command Prompt.
First, make sure that your secondary SSD drive is recognized by your computer and has been initialized in Disk Management. Then, open the Command Prompt as an administrator and type “bcdedit /set {default} device partition=E:” (where “E:” is the drive letter assigned to your secondary SSD). This will set the boot partition to your new drive.
Finally, type “bcdedit /set {default} osdevice partition=E:” to ensure that the operating system is also pointing to your new drive. With these steps complete, your secondary SSD should now be ready for use and optimized for maximum performance.
Formatting the drive and assigning a drive letter
If you’ve recently installed a secondary SSD drive, you’ll need to format and assign a drive letter to it before you can start using it. Formatting is the process of preparing the drive for use by creating a file system and clearing any data that may exist on it. Start by connecting your new drive to your computer, then right-click on the Windows icon and select Disk Management.
Find your new drive in the list and right-click on it, then select the option to format the drive. Choose your desired file system, such as NTFS, and click OK to begin the process. Once formatting is complete, you’ll need to assign a drive letter to the new drive so that you can access it.
Right-click on the newly formatted drive and select “Change Drive Letter and Paths”. Click Add and assign a drive letter, then click OK. Your secondary SSD drive is now ready to use, and you can start transferring files and installing programs to it for extra storage space.
Creating a bootable partition on the drive
If you’re installing a secondary SSD drive, you may want to consider creating a bootable partition on the drive to speed up your boot times. To do this, you’ll need to prepare the drive properly. First, make sure it’s physically installed correctly and recognized by your system.
Next, you’ll need to format the drive in the appropriate file system format. NTFS is a good choice for Windows users, while Mac users should use HFS+. Once the drive is formatted, you can partition it as desired.
Be sure to allocate enough space for your operating system, applications, and any files you’ll be storing on the drive. Creating a bootable partition can be a great way to reduce boot times and improve your overall system performance. Just be sure to follow the proper steps to ensure everything is set up correctly.
Using bcdedit to Configure the Drive
If you’re looking to configure a secondary drive, such as an SSD, using bcdedit can be a helpful solution. Bcdedit is a command-line tool that allows users to modify the boot configuration data (BCD) store. To configure the drive, you’ll first need to open a command prompt as an administrator.
Type in “bcdedit” to view the current boot configuration data. Identify the device ID of the drive you want to set as the new boot drive by using the “diskpart” command. Then, modify the BCD store by running “bcdedit /set {bootmgr} device partition=X”.
Replace “X” with the device ID of the desired drive. Finally, set the new drive as the default boot device by running “bcdedit /default {new_device_ID}”. By using bcdedit, configuring a secondary drive can be a quick and efficient process.
Locating the drive in bcdedit
When it comes to configuring a drive using bcdedit, locating the drive within bcdedit is an important step. Bcdedit is a command-line tool that enables users to manipulate the Windows boot configuration data store. Once you open the command prompt as an administrator, type the command “bcdedit” followed by the Enter key.
This will display the current boot configuration data, which contains information about the boot loader, boot drivers, and firmware settings. You can now locate the drive you wish to configure by scrolling down the command prompt output and searching for the device identifier. Once you have located the drive, you can continue to configure it using the commands available within bcdedit.
So, if you’re looking to configure your drive using bcdedit, make sure you know how to locate it using this powerful command-line tool.
Setting the drive as a boot option
Setting the drive as a boot option can seem like a daunting task, but using bcdedit to configure the drive can make it a lot easier. Bcdedit is a command-line tool that enables users to manage Windows boot settings. It can be used to add, delete, and configure boot options, making it an indispensable tool for users looking to set up their boot options.
The process involves opening the command prompt and entering specific commands to set up the drive as a boot option. One of the essential commands includes determining the drive’s identifier, after which you can then add it as a boot option using the bcdedit tool. Remember to always back up your data before proceeding with any configuration changes to avoid data loss.
Overall, using bcdedit to configure your drive as a boot option is a useful solution that can make the process a lot more manageable.
Configuring advanced options for the drive
When it comes to configuring advanced options for a drive, one useful tool to consider is bcdedit. This command-line utility can help users modify the boot configuration data (BCD), which controls how the operating system loads on the computer. With bcdedit, you can adjust settings like the default operating system, boot order, and timeout period.
This can be especially helpful for those who have multiple operating systems installed on their device and want to prioritize which one loads first. Additionally, bcdedit can be used to troubleshoot boot problems and fix issues with the boot manager. Although it requires a bit of technical know-how, learning how to use bcdedit can be a valuable skill for anyone looking to get the most out of their drive.
Testing Your Configuration
So you’ve installed a secondary SSD drive, configured it with bcdedit, and now you’re wondering how to test if it’s properly set up? There are a few steps you can take to ensure that your configuration is working as intended. The first thing you’ll want to do is restart your computer and access the BIOS settings to make sure that the secondary drive is recognized and set as the default boot drive. Once you’ve confirmed that, you can try booting up your system and checking that all your files and programs are running from the secondary drive.
You can also run some speed tests to make sure your SSD is performing as it should be. Additionally, you can check the Event Viewer to make sure there are no error messages related to the secondary drive and that it’s functioning smoothly. By following these steps, you can rest assured that your bcdedit configuration has been successful, and your secondary SSD drive is ready to go.
Verifying that the secondary SSD drive is bootable
After installing a secondary SSD drive in your computer, it’s important to check if it’s bootable. To do this, you need to access the BIOS settings of your computer. Restart your computer and press the key that appears on the screen to access the BIOS settings.
Once you’re in the BIOS settings, navigate to the boot options and choose the secondary SSD drive as the primary boot device. Save your changes and exit the BIOS settings. Your computer will now restart and attempt to boot from the secondary SSD drive.
If it boots successfully, congratulations! Your secondary SSD drive is now bootable and can be used as your primary drive. However, if it doesn’t boot successfully, you may need to check the connection of the SSD and ensure that it’s properly installed. It could also be a sign that the drive is faulty and needs to be replaced.
Always make sure to test your configuration after making any hardware changes to your computer.
Resolving common issues with bcdedit configuration
When it comes to configuring bcdedit, it’s important to test your changes to ensure they’re working as intended. One way to do this is to use the bcdedit /enum command to view your configuration and confirm that the changes have been made. Additionally, you can use the bcdedit /set command to make any necessary adjustments and see if they take effect.
It’s also helpful to test your configuration by rebooting the system and verifying that it boots up properly. This can help prevent any potential issues down the line and ensure that your bcdedit configuration is functioning correctly. By utilizing these testing methods, you can avoid common issues with bcdedit configuration and ensure a smooth operating system.
Conclusion
In conclusion, configuring your secondary drive SSD with bcdedit may seem daunting at first, but with some patience and perseverance, you’ll be able to optimize your system’s performance and maximize your storage space. By following these steps, you’ll be well on your way to achieving a lightning-fast boot time and a seamless user experience. So, go forth and bcdedit away, my friends!”
FAQs
FAQ 1: What is bcdedit? Answer: bcdedit is a command-line tool used to configure the boot manager in Windows. FAQ 2: How do I add a secondary drive to my computer? Answer: To add a secondary drive to your computer, you will need to physically install the drive and then initialize it in Disk Management. Once the drive is initialized, you can create a partition and format the drive. FAQ 3: Can I install Windows on an SSD? Answer: Yes, you can install Windows on an SSD. In fact, SSDs are a popular choice for installing operating systems as they offer faster read/write speeds than traditional hard drives. FAQ 4: How do I migrate my operating system to an SSD using bcdedit? Answer: To migrate your operating system to an SSD using bcdedit, you will need to create a bootable USB drive with a cloning software such as Macrium Reflect. Once the cloning software has been installed on the USB drive, you can boot your computer from the USB drive and use the software to clone your operating system to the SSD. Then, using bcdedit, you can configure the boot manager to boot from the SSD.