
Are you thinking about upgrading your PC with an M.2 SSD? If you own an ASUS Prime B250M-C CSM motherboard, you’re in luck because installing an M.2 SSD can be done easily, quickly, and without much hassle.
This motherboard is known for its reliability, affordability, and its compatibility with various components, including M.2 SSDs. In this article, we’ll guide you through the process of installing an M.
2 SSD on your ASUS Prime B250M-C CSM motherboard, step by step. We’ll explain what an M.2 SSD is, why it’s beneficial to have one, and how to install it properly.
Our goal is to make the installation process as smooth as possible and help you unleash the full potential of your PC. First, let’s start with the basics. An M.
2 SSD is a solid-state drive that uses a tiny circuit board to connect to your motherboard directly. It’s a compact and high-speed storage device that can drastically improve your computer’s performance, boot time, and file transfer speed. Compared to traditional hard drives, M.
2 SSDs are faster, more reliable, and consume less power. They are also easier to install because they don’t require any cables or additional power sources. If you’re looking to upgrade your PC, installing an M.
Check Compatibility
If you’re looking to install an M.2 SSD on your ASUS Prime B250M-C CSM motherboard, it’s important to check compatibility before making any purchase. First, make sure that the motherboard has an M.
2 slot which supports the type of SSD you plan to install. Additionally, ensure that the M.2 slot supports the NVMe or SATA protocol that your SSD uses.
It’s also worth checking the motherboard’s BIOS to see if it recognizes M.2 SSDs, as some older BIOS versions may not. By doing your due diligence and checking for compatibility beforehand, you can ensure a smooth installation process and avoid any potential issues with your system.
Verify M.2 SSD is supported by ASUS Prime B250M-C CSM
If you’re looking to upgrade your ASUS Prime B250M-C CSM’s storage with an M.2 SSD, it’s important to ensure that the drive is compatible with your motherboard. To check compatibility, you can refer to the motherboard’s specifications or consult with ASUS support.
The ASUS Prime B250M-C CSM supports M.2 SSDs with the M key and SATA or PCIe interface. It’s important to note that not all M.
2 SSDs are created equal and some may not be compatible with your motherboard. So, before making any purchases, make sure to double-check the specifications and compatibility of the M.2 SSD that you’re eyeing.
By doing so, you’ll ensure a hassle-free installation and a faster storage solution for your system.
Prepare Your System
If you’re looking to increase the storage capabilities of your ASUS Prime B250M-C CSM motherboard, installing an M.2 SSD is a great idea. However, before you begin, it’s important to prepare your system properly.
First, make sure your BIOS is up to date. You can check the ASUS website for the latest version of the BIOS and follow the instructions to update it. Next, ensure that the M.
2 slot is compatible with your SSD. Check the motherboard manual to determine the supported types of M.2 drives.
Finally, disable any RAID configurations in your BIOS settings if you have them. Once your system is prepared, you can install the M.2 SSD with ease.
With this additional storage, you’ll have more space and faster performance for your system.
Power down your ASUS Prime B250M-C CSM
If you’re looking to power down your ASUS Prime B250M-C CSM, the first step is to prepare your system for shutdown. Before you hit that power button, make sure you’ve saved all your documents and closed out of any applications you may have been using. This will help prevent any data loss or corruption that could occur if you shut down your system abruptly.
Once you’ve done this, you can safely power down your computer by clicking on the Start menu, selecting the Power icon, and then choosing Shut Down. Alternatively, you can simply press and hold the power button on your computer until it turns off. Remember that shutting down your system properly can help prolong the life of your components and prevent any damage that could occur from abrupt shutdowns.
So take the time to prepare your system properly before powering down, and enjoy the peace of mind that comes with knowing you’re taking good care of your computer.
Gather necessary tools: M.2 SSD, screwdriver, and standoff
When upgrading your PC, one of the first steps is to prepare your system for installation. This includes gathering the necessary tools to install your new M.2 SSD.
You will need both a screwdriver and a standoff to install the new drive. Without these tools, the installation process can be frustrating, as you will need to stop and find the right tools to complete the job. Having these tools on hand will make the process much smoother.
It’s like trying to bake a cake without measuring cups and spoons – it’s possible, but certainly not easy! So, before starting your installation, make sure you have your M.2 SSD, screwdriver, and standoff ready to go. With these tools at the ready, installation is a breeze, and you can start enjoying the benefits of a faster, more efficient system in no time!
Insert M.2 SSD
If you’re looking to install an M.2 SSD on your Asus Prime B250M-C CSM motherboard, the process is relatively straightforward. Begin by locating the M.
2 slot on your motherboard, typically found near the CPU socket. Next, you’ll want to screw in the standoff screw provided with your SSD kit to the appropriate mounting hole. Then, gently insert the M.
2 SSD into the M.2 slot at a slight angle, being careful not to bend any of the pins. Finally, use the retention screw provided with your SSD kit to secure the drive in place.
Once secured, you can close up your computer and start enjoying the faster boot and load times that come with an M.2 SSD. Just remember to check your motherboard’s manual for any specific instructions on installing an M.
2 SSD for your particular model.
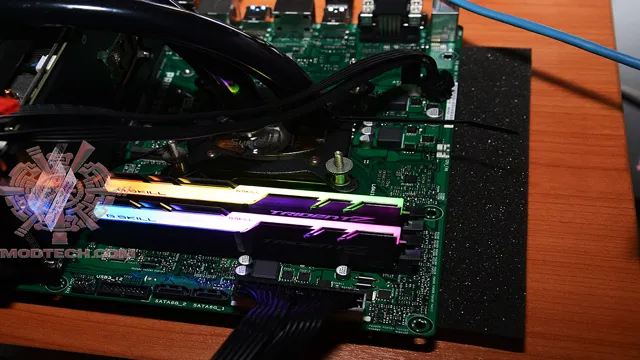
Find the M.2 slot on your ASUS Prime B250M-C CSM motherboard
If you’re looking to upgrade your computer’s storage system, an M.2 SSD is a great option. To insert it into your ASUS Prime B250M-C CSM motherboard, you’ll first need to locate the M.
2 slot. This motherboard has one M.2 slot located near the bottom of the board, just above the SATA ports.
It’s easy to spot as it’s labeled “M.2” and is designed with a specific size and shape to accommodate an M.2 SSD.
To insert the SSD, first, make sure the computer is unplugged from the wall. Next, take the M.2 SSD and gently line up the notches on the sides of the SSD with the notches in the M.
2 slot. Push the SSD in until it’s seated firmly. Then, use the screw that came with your motherboard and attach it to the standoff on the motherboard.
This will secure the SSD in place and prevent it from moving around. Once you’ve secured the SSD in place, you’re ready to start using it! You’ll need to boot up your computer and format the new drive before you can start storing files on it. To do this, go to your computer’s disk management tool and locate the new drive.
Insert the standoff screw into the designated hole
If you’re looking to upgrade your computer’s storage capacity, one of the easiest ways to do so is by installing an M.2 SSD. This small, powerful SSD connects directly to your motherboard and can vastly improve your computer’s speed and performance.
Before you begin, make sure your motherboard has an M.2 slot and that the SSD you’re using is compatible. Once you have those details squared away, it’s time to install the SSD.
Inserting the standoff screw into the designated hole is the first step. This screw ensures that the SSD is secure and won’t move around during operation. Once you’ve done that, gently insert the SSD into the M.
2 slot until it clicks into place. Then, you’ll need to tighten the screw to secure it further. Congratulations! You’ve successfully installed your new M.
2 SSD and can now enjoy faster boot times, quicker load speeds, and a more efficient computer overall.
Align your M.2 SSD and tighten the screw to secure
If you’re building your own computer, one of the things you’ll need to do is insert an M.2 SSD. This will help your computer run faster, as it operates on the PCIe interface and is much quicker than a hard drive.
In order to properly insert an M.2 SSD, you’ll need to make sure you align it correctly. Typically, your M.
2 slot will have a small divot in it, so you’ll need to line that up with the small notch on your SSD. Once you’ve done this, the SSD should slide right into the slot. You’ll also need to secure it in place with a screw.
This will help ensure that it doesn’t wiggle or come loose while your computer is running. After you’ve completed these steps, you’ll be ready to begin using your M.2 SSD!
Post-Installation Setup
To install an M.2 SSD on an ASUS Prime B250M-C-CSM, there are a few post-installation setup steps to follow. Start by powering down the computer and opening the case.
Locate the M.2 slot on the motherboard and remove the screw that holds the cover. Carefully insert the M.
2 SSD into the slot and secure it with the screw. Next, turn on the computer and enter the BIOS settings. Ensure that the M.
2 slot is enabled and set it as the primary boot drive. Save the changes and exit the BIOS. Once the computer restarts, you may be prompted to format the drive.
Follow the prompts, and you’re ready to use your new M.2 SSD for lightning-fast storage. With the ASUS Prime B250M-C-CSM, this process is straightforward and can significantly improve the performance of your computer.
Happy computing!
Boot your system and enter BIOS settings
When you’ve finished installing your operating system, the next step is to configure your computer’s BIOS settings before booting it up. BIOS (Basic Input/Output System) is a program that runs before the operating system as it initializes and checks your computer’s hardware devices to make sure they’re working correctly. Pressing the appropriate key during the boot-up sequence will enable you to enter the BIOS setup utility and configure system parameters.
One of the first things you should do is to ensure that your computer’s clock is set to the correct time and date. You should also check other settings, such as boot order and boot device priority, to ensure that your computer boots from the right device each time you start it up. Adjusting these settings can help your computer start up faster and run more smoothly.
Additionally, you can change other system settings, such as enabling or disabling certain hardware components, overclocking your processor, and adjusting your memory timings for optimal performance. Overall, accessing and configuring your BIOS settings can help you customize your computer to work the way you want it to and get the most out of your hardware.
Navigate to boot settings and set M.2 SSD as the primary boot device
Congratulations on successfully installing your M.2 SSD! Now it’s time to set it as the primary boot device. This is a crucial step as it ensures that your computer boots from the M.
2 SSD rather than the old drive. The first thing you need to do is to navigate to the boot settings of your computer. You can usually access this menu by pressing a specific key during startup, such as F2 or F1
Once you’re in the boot settings menu, look for an option to change the boot order. Select the M.2 SSD as the primary boot device and move it to the top of the list.
This will ensure that your computer boots from the M.2 SSD every time you start it up. Don’t forget to save your changes before exiting the menu, or your changes won’t be applied.
With this simple step, you’ve successfully completed the post-installation setup and can now enjoy faster boot times and improved overall performance with your new M.2 SSD!
Save changes and exit BIOS settings
After installing the operating system on your computer, it’s important to complete the post-installation setup. One crucial step is to save any changes made in the BIOS settings before exiting. BIOS, also known as Basic Input/Output System, is the first program that runs when you start your computer.
It controls the hardware and software configurations, including boot order and clock speeds. By making changes in the BIOS settings, you can optimize your system’s performance and functionality. Once you finish adjusting the settings, be sure to save your changes and exit the BIOS.
This ensures that your computer remembers the changes made and uses them during startup. Neglecting to save changes could result in your computer reverting to the default settings, effectively undoing all your hard work. Therefore, don’t forget to save any changes made during the BIOS setup before exiting the program.
This way, you can enjoy a smoother and more efficient computing experience.
Conclusion
In conclusion, installing an M.2 SSD on the ASUS Prime B250M-C CSM motherboard is a breeze. Simply locate the M.
2 slot on the motherboard, insert the SSD into the slot, and secure it in place with a screw. With lightning-fast read and write speeds, your computer will be running like a well-oiled machine in no time. Say goodbye to slow load times and hello to snappy performance with the ASUS Prime B250M-C CSM and M.
2 SSD combo!”
FAQs
What is M.2 SSD and why is it better than traditional storage options?
M.2 SSD is a solid-state drive that uses the M.2 form factor to connect to a computer’s motherboard. It is better than traditional storage options because it has faster read and write speeds, consumes less power, and is more compact.
Is the ASUS Prime B250M-C compatible with M.2 SSDs?
Yes, the ASUS Prime B250M-C is compatible with M.2 SSDs. It has an M.2 socket that supports M.2 PCIe and SATA SSDs.
How do I install an M.2 SSD on an ASUS Prime B250M-C?
To install an M.2 SSD on an ASUS Prime B250M-C, first locate the M.2 socket on the motherboard. Insert the M.2 SSD into the socket at a 30-degree angle, then press it down until it clicks into place. Secure the SSD with the screw provided.
How do I set up the M.2 SSD as the boot drive on my ASUS Prime B250M-C?
To set up the M.2 SSD as the boot drive on your ASUS Prime B250M-C, enter BIOS and go to the Boot tab. Select the M.2 SSD as the primary boot device and save the changes. Your computer will now boot from the M.2 SSD.