Maximizing your computer’s performance is important, especially if you’re running resource-heavy programs like video editors or games. Two key components that affect performance are the Random Access Memory (RAM) and the Solid State Drive (SSD). These two components work together to allow your computer to access and load information quickly.
In this blog, we’re going to explore how to maximize your computer’s performance with RAM and SSD in Windows We’ll be discussing the benefits of upgrading your RAM, selecting the right SSD, and optimizing your computer’s settings to get the most out of your hardware. Whether you’re a gamer, a content creator, or simply looking to speed up your computer, this blog is your guide to achieving maximum performance with RAM and SSD in Windows
So, let’s dive in and start optimizing!
Check System Requirements and Compatibility
If you’ve recently upgraded your RAM and added an SSD to your Windows 7 system, you’ll want to ensure that you’re maximizing your newfound performance upgrades. One step to take is checking your system requirements and compatibility. Ensure that your computer meets the recommended specifications for Windows 7, particularly with regards to processor speed and RAM allocation.
Additionally, make sure that your new RAM and SSD are compatible with your motherboard and other hardware components. A mismatch in compatibility can cause performance issues or even damage your hardware. By ensuring that your system meets the right requirements and compatibility standards, you’ll be able to optimize your performance and get the most out of your upgrade.
So, take the time to double-check your setup to avoid any potential complications down the line.
Verify your system can support the additional RAM and SSD
Upgrading your RAM and SSD can be a great way to boost your computer’s performance. But before you start shopping for new hardware, it’s important to make sure your system can support the upgrades you’re considering. First, check the system requirements for the RAM and SSD you’re planning to purchase.
Make sure your computer’s motherboard supports the type and speed of RAM you want to add, and that the SSD you’re considering is compatible with your existing storage interface. You can usually find this information in your computer’s documentation, on the manufacturer’s website, or by contacting customer support. It’s also worth checking whether your operating system has any limitations on RAM or SSD capacity.
Keep in mind that while upgrading your hardware can be a great way to improve your computer’s speed, it may not be the only solution. In some cases, software updates or a thorough system cleanup can address performance issues without the need for new hardware. With the right information and a bit of research, you can make an informed decision about whether upgrading your RAM and SSD is the right choice for your system.

Optimize Power Settings
If you’ve recently upgraded your computer’s RAM and added an SSD, you may be wondering how to further improve its performance. One way to do this is by optimizing your power settings. Windows 7 has a Power Options feature that allows you to choose power plans that prioritize performance or battery life.
To access this feature, click on the Start button, type “power options” in the search box, and select the Power Options from the results. From there, you can choose the High Performance power plan to maximize your computer’s performance. This will increase the speed at which your computer processes data, making it faster and more efficient.
Keep in mind that this may decrease battery life, so it’s important to switch back to a balanced plan if you’re using your laptop on the go. By optimizing your power settings, you can get the most out of your upgraded computer.
Ensure power settings prioritize performance over energy efficiency
If you’re experiencing sluggish performance on your computer, the issue could be that your power settings are prioritizing energy efficiency over performance. By optimizing your power settings, you can ensure that your computer is performing at its best. One way to do this is by adjusting your power plan settings in the control panel.
Typically, you’ll want to choose the “High Performance” setting to prioritize performance over energy efficiency. You can also adjust advanced power settings, such as setting the minimum processor state to 100% and disabling power-saving features like USB selective suspend. By optimizing your power settings, you can ensure that your computer is running at peak performance when you need it most.
Update Drivers and Firmware
If you’ve recently added more RAM and an SSD to your computer, you may be wondering how to maximize its performance on Windows Updating your drivers and firmware is one step that can make a significant difference. Outdated drivers can cause sluggish system performance, while the latest drivers optimize your computer’s hardware.
Many manufacturers provide driver updates on their websites, so be sure to check for them regularly. Firmware updates for your SSD can also boost its performance by fixing bugs and enhancing its features. Don’t forget to update the firmware on any other peripherals you use, such as your mouse or keyboard, as they may have an impact on your computer’s overall performance.
By keeping your drivers and firmware up to date, you can maximize the benefits of your new RAM and SSD and enjoy faster speeds and better overall performance on your Windows 7 machine.
Ensure all hardware and software are up-to-date for optimal performance
As technology advances, it’s crucial to keep up with software and hardware updates to ensure optimal performance. One aspect of this is updating drivers and firmware. Drivers are essential software components that allow hardware devices to communicate with your computer’s operating system.
Ensuring that drivers are up-to-date can lead to better performance, increased stability, and improved compatibility. Firmware, on the other hand, is software that controls the internal functions of hardware devices. Updating firmware can enhance the device’s functionality and may even fix any bugs or security issues.
Neglecting to update drivers and firmware can lead to compatibility issues, system crashes, or security vulnerabilities. Therefore, make sure to regularly check for updates for all your hardware devices and software programs and install them promptly to ensure the best possible performance and security.
Use Defragmentation
When you add more RAM and install an SSD in your Windows 7 computer, you have a great opportunity to boost its performance. But in addition to these hardware upgrades, you can also use defragmentation to maximize its potential. Defragmentation is a process that reorganizes the files on your hard drive, making them easier for the computer to access and reducing the time it takes to load programs and files.
By running defragmentation regularly, you can keep your computer running smoothly and avoid the lag and slowdowns that can occur over time. Simply go to the Start menu, click on Computer, right-click on the hard drive you want to defragment, and choose Properties. Then, click on the Tools tab and select Defragment Now.
This easy step can significantly improve your computer’s performance and help ensure that it’s working at its best. With your added RAM and SSD, your computer will be running like new again.
Use built-in Windows defragmentation tool to optimize data storage
Defragmentation In today’s world, data storage has become an essential part of our everyday lives. With numerous files and folders, the performance of our systems can become sluggish. Therefore, it is important to optimize your data storage, and using the built-in Windows defragmentation tool can help achieve that.
Defragmentation is the process of organizing your system’s storage space, so that everything runs smoothly and efficiently. During the data writing process, information is saved in different locations depending on available space, which means it may take longer to retrieve those files. Defragmenting the hard drive rearranges the data, so that all files are on one location, making it easier and quicker to access them.
Windows defragmentation tool also identifies and repairs issues with bad sectors or corrupted data on the hard drive. This not only cleans up your system but also improves its overall performance. By using defragmentation, you can ensure that your computer is running smoothly, improving its speed, and prolonging its lifespan.
So, give your system a tune-up today by using the built-in Windows defragmentation tool.
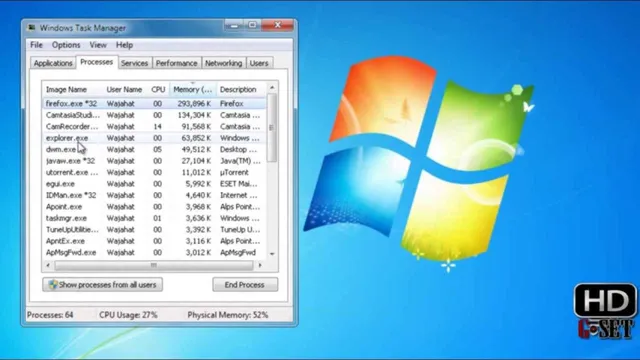
Disable Unused Programs and Services
If you’ve recently added more RAM and installed an SSD, it’s time to start thinking about maximizing your computer’s performance. One way to do this is by disabling unused programs and services. When you start up your computer, there are likely a plethora of programs and services that start running in the background, whether you use them or not.
This can slow down your computer’s performance and eat up valuable resources. To disable these programs and services, simply go to the Control Panel and click on “Administrative Tools”. From there, open “Services” and click on the program or service you want to disable.
Once you’ve selected it, click on “Stop” to prevent it from running in the background. By disabling unused programs and services, you’ll free up more resources for the programs and applications you actually want to use, which will help maximize your computer’s performance.
Disable startup programs and background services not in use for better performance
If your computer is running slow, it might be due to all the unnecessary background programs and services that are draining your system resources. To boost your computer’s performance, it is recommended to disable startup programs and background services that you are not using. These programs and services can include items like instant messengers, media players, and system tray apps that automatically start running when you boot up your computer.
Disabling them can free up your computer’s memory, CPU, and other resources, allowing your computer to run faster and smoother. Just make sure to only disable programs and services that you are sure you don’t need, as some of them may be necessary for your computer’s proper functioning. You can do this in your computer’s Task Manager or System Configuration Utility, or by using a third-party program like CCleaner.
Try this tip if you’re looking to optimize your computer’s performance and speed up your overall workflow.
Utilize ReadyBoost
If you’ve recently added more RAM and an SSD to your Windows 7 computer, congratulations! You’ve already taken some big steps to maximizing your system’s performance. But did you know that there’s another trick you can utilize to boost your computer’s speed even further? It’s called ReadyBoost. This feature uses a USB drive or SD card to cache frequently-needed data and files, which can reduce the amount of time your computer spends accessing your slower hard drive.
When you connect a ReadyBoost-enabled drive, Windows will ask if you want to use it as a cache. If you choose to do so, you can select how much space to allocate to ReadyBoost. Keep in mind that ReadyBoost won’t have a huge impact on a system that already has plenty of RAM and an SSD, but it’s still a handy tool to have in your arsenal.
Give it a try and see if you notice a difference in your computer’s performance!
Use Windows ReadyBoost feature to further enhance performance with SSD and USB devices
If you’re looking for a way to further enhance the performance of your SSD or USB device, you may want to consider using the ReadyBoost feature found in Windows. This feature allows you to use a USB drive or SD card to act as additional memory for your computer. Essentially, it acts as a cache for frequently accessed files and data, which can help speed up your system.
To utilize ReadyBoost, simply insert your USB device into your computer and follow the on-screen instructions to optimize it for ReadyBoost. Keep in mind that while ReadyBoost can certainly help improve performance, it’s not a replacement for actually upgrading your computer’s hardware if it’s older or struggling to keep up with your demands. So, give ReadyBoost a try and see if it provides the boost you need!
Conclusion
In conclusion, adding more RAM and SSD to your Windows 7 system is like giving your car a turbocharger and upgrading the tires. It helps you reach high speeds and handle corners with ease. By maximizing your computer’s performance, you’ll be able to run more programs simultaneously, access files faster, and reduce lag time.
It’s like giving your work an adrenaline shot, allowing you to power through tasks like a boss. So if you’re looking to take your Windows 7 system to the next level, consider adding more RAM and SSD. Your computer (and your productivity) will thank you.
“
FAQs
How can I check the current amount of RAM and SSD installed on my Windows 7 computer?
To check the amount of RAM and SSD installed on your Windows 7 computer, go to the Start menu and type “system information” in the search bar. Open the System Information app and click on “Components” followed by “Storage” to view your SSD information. For RAM information, click on “Memory.”
Does adding RAM and SSD really improve performance on Windows 7?
Yes, adding more RAM and SSD to your Windows 7 computer can significantly improve its overall performance. More RAM means your computer can handle more tasks and applications, while an SSD makes accessing and opening files faster.
What are some tips to maximize performance on Windows 7 after adding RAM and SSD?
After adding more RAM and SSD to your Windows 7 computer, you can further maximize its performance by clearing out unnecessary startup programs, disabling visual effects and animations, and regularly cleaning up your system files using disk cleanup.
Can I upgrade my Windows 7 computer to Windows 10 for better performance?
Yes, upgrading your Windows 7 computer to Windows 10 can improve its overall performance as Windows 10 is optimized for modern hardware and has better resource management. However, make sure your computer meets the minimum requirements for Windows 10 before upgrading.