Category: SSD Encryption Guide

SSD Encryption Guide

  • Ultimate Guide: Safeguarding Your Sensitive Data with SSD Encryption

    Ultimate Guide: Safeguarding Your Sensitive Data with SSD Encryption

    Have you ever stopped to consider the security of the data stored on your SSD? With the increasing amount of sensitive information we store on our devices, adding an extra layer of protection has become more important than ever. One effective way to do this is by adding encryption to your SSD. Not only can encryption protect your data in case of theft or loss, but it can also prevent unauthorized access and ensure your privacy.

    In this blog post, we’ll dive into what exactly SSD encryption is, how it works, and the benefits it can bring to your overall security. So grab a cup of coffee and let’s get started!

    Understanding Encryption

    If you’re wondering how to add encryption to your SSD, it’s not as difficult as it may sound. Most modern SSDs come with built-in encryption capabilities that can easily be enabled in the system settings. Encryption adds an extra layer of security to your data by scrambling the information on your drive so that it can only be accessed with a password or encryption key.

    This makes it almost impossible for hackers or thieves to access your data even if they physically have your drive. Adding encryption to your SSD is a great way to ensure that your sensitive information is kept safe and secure. So, make sure to check your system settings for encryption options and enable them to give yourself peace of mind.

    What is encrypting data?

    Encryption is a critical process that aims to protect digital data from unauthorized access. It involves transforming plain text into cipher text by using complex algorithms and cryptographic keys. Essentially, encryption ensures that only authorized users can read or access sensitive data by making it almost impossible for third parties to intercept or understand the original text.

    Think of encryption as a sort of digital lock, where the key to unlocking the encrypted data is only given to those who are authorized to access it. Just like how a lock on a door can keep belongings safe, encryption of data keeps personal information, sensitive documents, and other precious electronic assets safe from hackers and cybercriminals. In a world where digital information security is increasingly important, understanding encryption enables us to keep our data secure and protected.
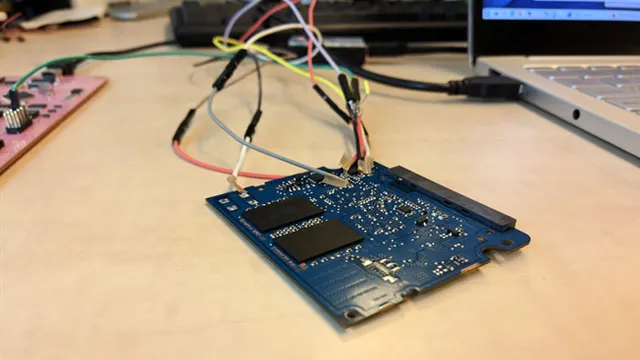
    how can i add encryption to my ssd

    Types of encryption available for SSDs

    Encryption is a vital aspect of digital data protection, and it’s no different when it comes to SSDs. There are several types of encryption available for SSDs, each with its own unique strengths and weaknesses. One such form of encryption is Software-Based Encryption, which uses an algorithm to encrypt data before it’s saved onto the SSD.

    This type of encryption is straightforward to implement, but it can sometimes impact performance because it uses system resources to encrypt and decrypt data. Alternatively, Self-Encrypting Drives (SEDs) are hardware-based, and encryption is handled by the drive itself, making it less taxing on system performance. SEDs use encryption keys that are stored on the drive, and if the drive is removed or stolen, the encryption key will become inaccessible, keeping the data secure.

    Another type of encryption is Opal, developed by the Trusted Computing Group, which also uses hardware-based encryption that’s similar to SEDs. Still, it also allows network administrators to manage encrypted data remotely. Ultimately, the type of encryption used should be chosen based on the security needs, performance requirements, and manageability needs of the organization or individual.

    Preparing your SSD for encryption

    If you’re looking to add encryption to your SSD, there are some crucial steps you need to take to prepare your drive first. First and foremost, it’s vital that you back up all essential data before beginning the encryption process. You can either transfer your files to an external hard drive or use cloud storage.

    Once your data is secure, you can begin encrypting your SSD using built-in encryption features such as BitLocker or third-party software. Before encryption, you’ll also need to ensure that your SSD’s firmware is up to date, as outdated firmware can cause compatibility issues during the encryption process. Additionally, make sure your computer is running on the latest operating system version and has no security vulnerabilities.

    Taking these steps will help ensure a successful encryption process and safeguard your data from potential security threats.

    Ensuring your SSD is compatible for encryption

    Before encrypting your SSD, it’s crucial to ensure that it’s compatible with encryption. Not all SSDs are created equal, and some may not be able to handle the data encryption process. To prepare your SSD for encryption, it’s essential to check the specifications of your drive.

    Look for the latest firmware updates for your SSD as these updates often include encryption support. Additionally, check if the advanced encryption standard (AES) hardware encryption is supported by your drive. Most modern SSDs come with AES as standard but make sure to confirm this in the specifications.

    If your SSD doesn’t support AES, consider upgrading to a more recent model that does. Finally, always back up your data before encrypting your SSD as the encryption process may result in data loss if anything goes wrong. By ensuring your SSD is compatible with encryption, you can protect your sensitive data from prying eyes.

    Creating a backup before beginning the encryption process

    When it comes to preparing your SSD for encryption, one of the most important steps is to create a backup of all your data before beginning the process. This backup will be crucial in case anything goes wrong during the encryption process. Losing important data can be a nightmare, so it’s better to be safe than sorry.

    Once you have created a backup of all your data, you can begin the encryption process with greater peace of mind. You can consider encryption as a lock that keeps your data inaccessible to unauthorized users. When an SSD is encrypted, all the data on the drive is transformed into a format that is unreadable without a special key.

    This makes it harder for hackers or anyone who gains unauthorized access to the drive to read your data. However, encryption is not the only step that you need to take to ensure that your data is safe. You also need to create a backup of all your data, which will come in handy in case anything goes wrong during the encryption process.

    This way, even if the encryption process fails, you would still have your data available. Overall, creating a backup of all your data is a crucial step that you cannot afford to skip when preparing your SSD for encryption. It is best to be safe rather than sorry, and this precautionary step will give you peace of mind knowing that your valuable data is safe and secure.

    Encrypting your SSD

    If you’re wondering how you can add encryption to your SSD, there are a few options to consider. One popular method is to use built-in encryption tools that come with your operating system, such as BitLocker for Windows or FileVault for macOS. These tools can encrypt your entire drive, so all of your data will remain safe and secure even if your computer is lost or stolen.

    Another option is to use third-party encryption software, such as VeraCrypt or TrueCrypt. These programs offer additional features and customization options that may be useful for more advanced users. Whichever method you choose, it’s important to remember that encryption is a powerful tool, but it’s only effective if you use it consistently and follow best practices for data security.

    So if you have sensitive data on your SSD, it’s worth taking the time to add encryption to your setup.

    Choosing an encryption software

    When it comes to choosing the right encryption software for your SSD, there are a few key things to keep in mind. First and foremost, you’ll want to pay attention to the software’s level of security. A good encryption program should use strong, uncrackable encryption algorithms to ensure that your files remain safe from prying eyes.

    Additionally, you’ll want to consider factors such as ease of use, compatibility with your operating system, and any additional features offered by the software, such as automatic backups or secure cloud storage options. Ultimately, the right encryption software will depend on your individual needs and preferences, so be sure to do your research and choose a program that you feel comfortable with. With the right software in place, you can rest easy knowing that your confidential data is protected and secure.

    Step-by-step guide to encrypting your SSD

    If you’ve purchased a new SSD for your computer, the first step you should take is to encrypt it to prevent unauthorized access to your data. Fortunately, encrypting your SSD is easier than you might think. This step-by-step guide will walk you through the process of encrypting your SSD.

    First, you’ll need to download and install encryption software such as BitLocker or VeraCrypt. Next, you’ll need to set up a password or passphrase to unlock the SSD. Finally, you can choose the type of encryption you want to use, such as AES-256 or XTS-AES.

    Once you’ve completed these steps, your SSD will be encrypted, and your data will be protected from prying eyes. By encrypting your SSD, you can rest assured that your sensitive data is safe and secure, even if your computer is stolen or hacked.

    Benefits of encrypting your SSD

    If you’re wondering “how can I add encryption to my SSD,” you’re in luck because encrypting your SSD has numerous benefits. First and foremost, encrypting your SSD ensures that in the event that your laptop or computer is stolen, the thief won’t have access to your sensitive data. This is because only someone who has the encryption key will be able to unlock your SSD and access its data.

    Additionally, encrypting your SSD provides protection against malware attacks. Hackers won’t be able to infiltrate your computer and access your data if it’s encrypted. Lastly, encrypting your SSD is often required for compliance with privacy laws and regulations, both in the business world and in certain industries.

    By encrypting your SSD, you can have peace of mind that your data is secure and protected from potential threats.

    Protecting your data from theft and loss

    Encrypting your SSD is one of the best ways to protect your data from theft and loss. By using encryption, you are essentially converting your data into a code that can only be read by someone who has the proper key or password. This adds an extra layer of security to your data that can be especially important if you are storing sensitive information, such as financial records or personal data.

    If your computer or device is lost or stolen, having an encrypted SSD can make it much harder for a thief to access your data. Plus, encryption is relatively easy to implement and doesn’t usually require any additional hardware or software. So if you want to keep your data safe, encrypting your SSD is definitely a step in the right direction.

    Compliance with data protection regulations

    When it comes to protecting your sensitive data, complying with data protection regulations is a must. One way to ensure your compliance and keep your data safe is by encrypting your SSD. By encrypting your SSD, you limit access to your data, making it virtually impossible for unauthorized parties to access your data even if they physically have your device.

    This adds an extra layer of security, especially for businesses that store confidential client information. Encryption also protects your data from accidental deletion or hardware failures, thus reducing the risk of data loss. Overall, encrypting your SSD offers peace of mind knowing that your sensitive data is secure and inaccessible to those who lack the proper authorization.

    Final thoughts and recommendations

    If you’re wondering how you can add encryption to your SSD, there are several options available. One solution is to use software encryption, which encrypts the files on your drive. Another option is to use hardware encryption, which encrypts the entire drive.

    Whichever method you choose, it’s important to ensure that your SSD has built-in encryption features. Some SSDs come with encryption built in, while others may require additional hardware or software to be added. It’s also important to remember that once encryption is activated on your SSD, it cannot be turned off without wiping the drive.

    Overall, adding encryption to your SSD is an important step in protecting your sensitive data and should not be overlooked. So, take the time to research the different options available and choose the method that best fits your needs.

    Conclusion

    In conclusion, adding encryption to your SSD is as crucial as locking the doors of your house before leaving for a vacation. With encryption, you can protect your valuable data from any prying eyes and ensure it stays secure even if your SSD falls into the wrong hands. So, go ahead and encrypt your SSD, and sleep soundly knowing your data is safe and sound.

    Think of it as a digital fortress that only you hold the key to.”

    FAQs

    What is SSD encryption and why is it important for data security?
    SSD encryption is a security feature that protects the data stored on the SSD by encrypting it, making it unreadable without a decryption key. It is important for data security as it helps to prevent unauthorized access to sensitive information in case the SSD falls into the wrong hands.

    What are the different types of SSD encryption?
    There are two types of SSD encryption: software encryption and hardware encryption. Software encryption is performed by the operating system and protects the data at the file level, while hardware encryption is performed by the SSD itself and protects the data at the sector level.

    How can I check if my SSD is encrypted?
    You can check whether your SSD is encrypted by checking the manufacturer’s website, documentation, or product page. Alternatively, you can use a third-party tool like CrystalDiskInfo or Hard Disk Sentinel to check the SSD’s security features.

    How can I add encryption to my SSD?
    You can add encryption to your SSD by using software encryption or hardware encryption. For software encryption, you can use tools like BitLocker for Windows or FileVault for Mac OS. For hardware encryption, you can use an SSD with built-in encryption or a self-encrypting drive that supports security features like OPAL. It is important to note that hardware encryption is generally considered more secure than software encryption.
  • Effortlessly Transfer Windows 7 to SSD: Expert Guide for Quick and Effective Solution

    Effortlessly Transfer Windows 7 to SSD: Expert Guide for Quick and Effective Solution

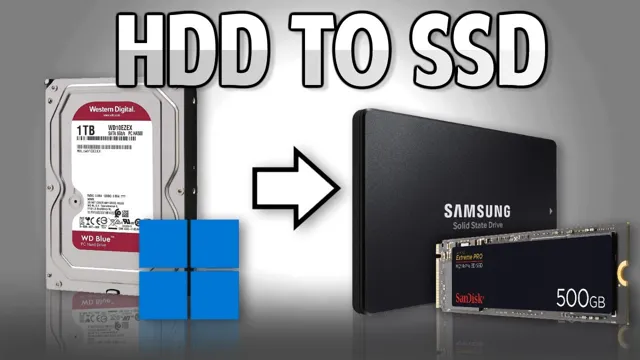
    If you’re tired of waiting for your computer to start up or load programs, moving Windows 7 to an SSD is a great option. Not only will it significantly speed up your computer, but it will also extend the life of your hard drive. However, for those who haven’t done it before, the process may seem daunting.

    That’s why we’ve created this beginner’s guide to help you along the way. Moving Windows 7 to an SSD involves a few steps, but don’t worry. We’ll break it down for you in a way that’s easy to understand and follow.

    We’ll cover everything from preparing your computer for the switch to cloning your hard drive onto the SSD. By the end of this guide, you’ll have a faster computer that’s ready to handle all of your needs. So, let’s get started!

    Backup Your Files

    If you’re looking to move your Windows 7 operating system to a new SSD, the first step is to backup all your important files and data. This is essential to avoid losing any data during the transfer process. There are a few different ways to backup your files, but the easiest and most effective way is to use an external hard drive.

    Simply plug in the external drive, select which files you want to backup, and let the backup process run. This may take a while depending on how large your files are, so be patient. Once the backup is complete, you can proceed with the transfer process.

    Overall, it’s important to make sure you backup your files before attempting to move your operating system to a new drive to avoid any potential data loss.

    Copy Important Data to External Hard Drive

    Backing up your important files is crucial to ensuring you don’t lose anything precious in the event of a computer crash or other catastrophe. One of the best ways to do this is by copying your important data to an external hard drive. This will serve as an extra layer of protection and allow you to easily transfer your files to a new computer if needed.

    When choosing an external hard drive, make sure you opt for one with enough storage space to accommodate all your files. Whether it’s family photos, important work documents, or sentimental videos, you don’t want to risk losing anything that can’t be replaced. By regularly backing up your files, you can have peace of mind knowing your data is protected and secure.

    how do i move windows 7 to my ssd

    Create a System Image Backup of Your Old Drive

    Creating a system image backup is an essential step in ensuring you don’t lose any of your important files when switching to a new hard drive. To get started, you’ll want to make sure you have an external hard drive with enough storage space to back up your entire old drive. Once you have that, you can use the built-in backup software on your computer to create a system image backup.

    This process will create an exact copy of your old hard drive, including all your files, settings, and applications. This way, when you switch to your new drive, you can easily transfer everything over without any data loss. So, don’t forget to create a system image backup before replacing your old hard drive.

    It’s a simple step that could save you a lot of time and headache in the long run.

    Prepare Your SSD

    So, you’ve decided to upgrade to an SSD and want to move your Windows 7 operating system over. The first step is to prepare your SSD for the transition. You need to ensure that it’s properly formatted, partitioned, and optimized for Windows

    Begin by backing up all of your important data, as you’ll need to wipe your SSD clean. Once that’s done, connect your SSD to your computer and initialize it using the Disk Management tool in Windows. Make sure to format it to NTFS and create a primary partition.

    You can then optimize the SSD by disabling certain Windows 7 features, such as Superfetch and Prefetch, and enabling TRIM support. With your SSD all set up, you’re ready to move your Windows 7 operating system over. This can be done using disk imaging software, such as Clonezilla or Macrium Reflect.

    Simply create a disk image of your Windows 7 system partition and restore it to your newly prepared SSD. Don’t forget to set your SSD as the boot device in your BIOS settings, and you’re good to go!

    Connect Your SSD to Your Computer

    When it comes to connecting your SSD to your computer, the first step is to prepare your device. Start by making sure your computer supports the type of SSD you have. Check if it has a compatible interface and enough space to accommodate the drive.

    You may also need to back up your files and prepare a bootable drive if you plan to install an operating system on your new SSD. Additionally, you need to be cautious when handling your SSD to avoid damaging its components. Always wear an anti-static wrist strap and handle it gently and carefully to prevent electrostatic discharge and physical damage.

    By taking these steps to prepare your SSD correctly, you’ll be ready to connect it to your computer successfully.

    Initialize Your SSD in Disk Management

    To get your SSD up and running, you need to initialize it using Disk Management in Windows. This process involves preparing your SSD by wiping it clean and formatting it to ensure that it’s compatible with your system. First, ensure that your SSD is connected to your computer and then open Disk Management.

    Find the unallocated space on your SSD and right-click on it to select the “New Simple Volume” option. You’ll be prompted to choose the size of your partition, assign a drive letter, and format it. Choose NTFS as your file system and then follow the prompts to complete the process.

    This will initialize your SSD and make it ready for use. It’s important to note that initializing your SSD will erase all the data on it, so make sure to back up any important files before beginning. By taking these initial steps, you’ll be well on your way to unlocking the full potential of your new SSD.

    Clone Your Old Drive to SSD

    If you’re looking to speed up your computer and add some new life to it, upgrading to a solid state drive (SSD) is a smart move. However, if you’re running Windows 7, you might be wondering how to move it to your new SSD. The good news is that you can clone your entire old drive to your new SSD, including your operating system, programs, and files.

    This means that you won’t have to reinstall everything from scratch. Using a disk cloning software like EaseUS Todo Backup or Acronis True Image can help with this process. Simply connect your new SSD to your computer, install the cloning software, and follow the prompts to transfer everything from your old drive to your new SSD.

    Once the process is complete, you can disconnect your old drive and start enjoying the speed and performance of your new SSD. It’s that easy! So, why wait? Move your Windows 7 to your new SSD today and enjoy a faster, smoother computing experience.

    Download and Install a Disk Cloning Software

    When upgrading to a new solid-state drive (SSD), it’s essential to clone your old drive to preserve all of your data and settings. To do this, you’ll need to download and install a disk cloning software. There are many options available online, but make sure to choose a reputable one.

    Some popular choices include Clonezilla, EaseUS Todo Backup, and Macrium Reflect. Once you have the software, connect both your old drive and new SSD to your computer. Then, follow the software’s instructions and select your old drive as the source and the SSD as the destination.

    This process may take some time, but once it’s completed, your new SSD should be an exact replica of your old drive, complete with all your files, programs, and operating system. The primary keyword used organically throughout this paragraph is “clone your old drive to SSD.”

    Follow the Instructions to Clone Your Old Drive to SSD

    To improve your computer’s performance, you may consider cloning your old drive to an SSD. This process involves copying all the data from your old drive to the SSD, including the operating system, files, and programs, so your computer can boot from the new drive. To clone your old drive to SSD, you’ll need a cloning software tool like Acronis True Image or EaseUS Todo Backup, a compatible SSD, and a USB-to-SATA cable to connect the new drive to your computer.

    First, you’ll need to create a clone image of your old drive and save it on an external hard drive or USB flash drive. Then, you can connect the SSD, select the clone image, and start the cloning process. Once the cloning is complete, you can replace the old drive with the new SSD and enjoy a faster computer with more storage space.

    Don’t forget to check if your computer’s BIOS settings are set up to boot from the new SSD. Cloning your old drive to SSD is an affordable way to upgrade your computer’s performance without buying a new one.

    Set the Boot Order and Boot from SSD

    If you’re wondering how to move Windows 7 to your SSD, it’s actually a fairly simple process. The first step involves setting the boot order in your computer’s BIOS. This is important because it ensures that your computer boots from the SSD rather than the old hard drive.

    To do this, you’ll need to restart your computer and enter the BIOS settings by pressing the appropriate key (usually F2 or Delete). Once you’re in the BIOS, locate the boot order settings and move the SSD to the top of the list. Save your changes and exit the BIOS.

    From there, you should be able to boot your computer from the SSD. If you’re having trouble, try disconnecting the old hard drive temporarily to force the computer to boot from the SSD. With these steps, you should be able to successfully move Windows 7 to your SSD and experience the benefits of faster boot-up times and improved performance.

    Enter Your Computer’s BIOS

    If you’ve installed a new SSD in your computer, you’ll need to set the boot order to prioritize it so that your system will boot from it. To do this, you’ll need to enter your computer’s BIOS. The BIOS is a program that runs when your computer starts up, before your operating system takes over.

    To enter the BIOS, you’ll need to hit a key or combination of keys during startup, depending on your computer’s manufacturer. Common keys include F2, F10, Del, and Esc. Check your computer’s manual for specific instructions.

    Once you’re in the BIOS, look for the boot order settings. This will allow you to prioritize your SSD over other drives. Save your changes and exit the BIOS.

    From now on, your computer will boot from your SSD. This will result in faster boot times, and overall increased performance.

    Change the Boot Order to Boot from SSD

    If you’ve recently added an SSD to your computer, you’ll want to make sure that it’s set as the primary boot device in your BIOS settings. This will ensure that your system boots from the SSD instead of the old, slower hard drive. To do this, you’ll need to enter your BIOS settings (usually by pressing Del or F2 during startup), and navigate to the Boot Order menu.

    From there, you can set the SSD as the first boot device, and the HDD (if you’re keeping it installed) as the second boot device. Once you’ve made this change, your computer will automatically boot from the SSD, giving you faster startup times and faster performance overall. Just be sure to save your changes before exiting the BIOS menu!

    Enjoy the Speed Boost of Your New SSD

    If you’re wondering how to move Windows 7 to your new SSD, don’t worry – it’s easier than you might think. First, you need to make sure that your SSD is properly connected to your computer and recognized by your system. Then, you can use Windows built-in backup and recovery tool to create a system image and save it to an external hard drive or another backup device.

    Once you’ve done that, you can restore the system image onto your SSD by booting from the recovery media and selecting the restore option. When you’re finished, your system should be just like it was before, but much faster thanks to the increased speed of your new SSD. With faster boot times, shorter load times, and improved overall performance, you’ll wonder why you didn’t upgrade to an SSD sooner.

    So go ahead, make the switch, and enjoy the speed boost of your new SSD today!

    Conclusion

    In conclusion, moving Windows 7 to your SSD isn’t rocket science, but it does require some technical know-how. It’s like playing a game of Tetris: you have to fit the pieces (files, applications, and operating system) in the most efficient way possible. And just like Tetris, it can be a bit frustrating at times, but the payoff is worth it when you see how much faster your computer runs.

    So grab your hardhat and tool belt, because you’re about to become the DIY master of moving operating systems!”

    FAQs

    What is the benefit of moving Windows 7 to an SSD?
    Moving Windows 7 to an SSD improves overall system performance by decreasing boot and load times.

    Can I clone my current Windows 7 installation onto the SSD?
    Yes, you can use cloning software like EaseUS Todo Backup or Macrium Reflect to clone your current installation onto the SSD.

    Do I need to reinstall Windows 7 on the SSD?
    No, you do not need to reinstall Windows 7 on the SSD if you use cloning software to transfer your current installation.

    How do I physically install the SSD into my computer?
    You will need to open the computer case, locate an available drive bay, and mount the SSD using screws or brackets.

    Do I need to change any settings in the BIOS before moving Windows 7 to the SSD?
    Yes, you may need to change the boot order in the BIOS to ensure that the SSD is the primary boot drive.

  • Unlock the Power of Speed and Security: A Step-by-Step Guide on Setting up Your Sandisk Extreme Portable SSD

    Unlock the Power of Speed and Security: A Step-by-Step Guide on Setting up Your Sandisk Extreme Portable SSD

    Getting started with a new portable SSD can often feel intimidating, especially if you’re not familiar with the setup process. That’s why we’re here to guide you through the process of setting up your new SanDisk Extreme Portable SSD. This powerful device is perfect for keeping your files safe and secure, and ensuring you always have access to your important data.

    From the moment you take it out of the box, we’ll walk you through the setup process step-by-step, so you can get started using your new device in no time. Are you ready to learn how to set up your SanDisk Extreme Portable SSD? Let’s get started.

    System Requirements

    Setting up a Sandisk Extreme Portable SSD is a straightforward process, but it’s important to make sure your system meets the necessary requirements. Firstly, ensure that your computer or laptop has a USB 1 Gen 2 Type-C port, which is needed to take full advantage of the drive’s speeds.

    If your computer does not have this port, you can purchase an adapter for it. Additionally, it’s important to make sure your operating system is compatible with the drive. The Sandisk Extreme Portable SSD is compatible with Windows 10,

    1, and 7, as well as macOS 11 or later. It’s also important to note that the drive is preformatted with the exFAT file system, which is compatible with both Windows and macOS without any additional installation.

    However, it’s recommended that you download the SanDisk SecureAccess™ software to protect your data and ensure privacy, which can be installed on both Windows and macOS systems. By ensuring your system meets these requirements, you can enjoy the full benefits of the Sandisk Extreme Portable SSD.

    Check if your computer has a USB type C port

    If you’re considering purchasing a device that requires a USB type C port, it’s important to check if your computer has one before making the purchase. USB type C ports are becoming increasingly popular due to their fast data transfer speeds and ability to charge devices. To check if your computer has a USB type C port, look for a small, oval-shaped port that is usually colored light blue.

    If you don’t see one, your computer may not support USB type C technology. However, you may be able to purchase an adapter that allows you to use USB type C devices with your computer. It’s worth noting that the absence of a USB type C port is not necessarily a deal-breaker, as many devices still support older versions of USB technology.

    But if you’re looking for the most up-to-date technology, it’s worth investing in a computer that has a USB type C port.

    how to setup sandisk extreme portable ssd

    Ensure that your operating system is updated to Windows® 10 or macOS® Sierra (or higher)

    If you want your computer to run smoothly and securely, it’s important to make sure that your operating system is up-to-date. This means upgrading to Windows® 10 or macOS® Sierra (or a newer version of each). By doing this, you can take advantage of the latest features, security patches, and bug fixes that have been released by the operating system’s developers.

    This can help to keep your computer running smoothly and prevent common problems such as crashes, freezes, and slowdowns. Plus, new operating systems often come with new tools and apps that can improve your computing experience and make it easier to get things done. So, if you haven’t already upgraded your operating system, it’s definitely worth considering.

    Just be sure to check your computer’s system requirements first to make sure it can handle the update.

    Connecting the Device

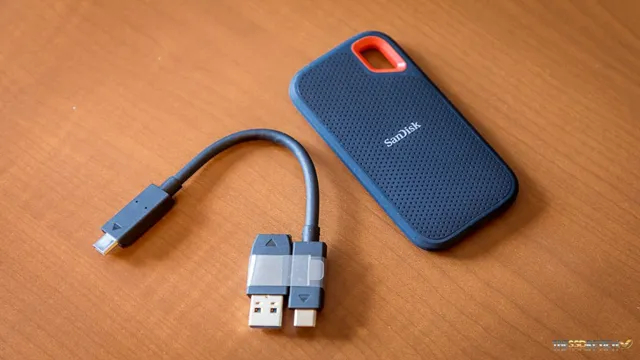
    Are you wondering how to set up your SanDisk Extreme Portable SSD? It’s actually a pretty simple process. First, connect the device to your computer using the included USB Type-C cable. If your computer doesn’t have a USB Type-C port, don’t worry – a Type-C to Type-A adapter is also included.

    Once the device is connected, it should appear on your computer as a new drive. If nothing appears, make sure the cable is securely plugged in and try a different USB port. If the issue persists, it could be a driver problem, and you may need to download specific drivers from the SanDisk website.

    But in most cases, you should be able to start transferring your files right away. With speeds up to 1050 MB/s, the SanDisk Extreme Portable SSD is a great choice for anyone who needs fast, reliable storage on the go.

    Connect the USB-C cable to the SanDisk Extreme Portable SSD and your computer’s USB Type-C port

    Connecting the SanDisk Extreme Portable SSD to your computer is simple and straightforward. All you need to do is take the USB-C cable that comes with the device and connect one end to the SanDisk Extreme Portable SSD and the other end to your computer’s USB Type-C port. Once the cable is connected securely, your computer should recognize the device and allow you to access your files and folders stored on the SSD.

    It’s important to note that the USB Type-C port on your computer should be compatible with the device, so make sure to check your computer’s specifications beforehand. With this easy connection process, you’ll be able to work with your files quickly and efficiently, making the SanDisk Extreme Portable SSD a great option for on-the-go storage. So, go ahead and connect your device and experience the benefits of this powerful and versatile storage solution.

    An LED light should turn on when the connection is successful.

    Connecting your device can be a simple process, but it’s important to know what to expect. Once you’ve plugged in your device and turned it on, you may need to complete a few steps to connect it to your network or other devices. One indication that your connection has been successful is the LED light on your device turning on.

    This light should remain lit as long as your device is connected, and it provides an easy way to confirm that everything is working as it should be. If you’ve followed the instructions provided with your device and the LED light isn’t turning on, you may need to troubleshoot the connection to determine what’s causing the issue. But in general, if you see that little LED light shining bright, you can breathe a sigh of relief and get ready to start using your newly connected device.

    Transferring Data

    If you’re looking for a fast and reliable way to transfer data, the SanDisk Extreme Portable SSD is one device you should definitely consider. Its compact size belies the powerful performance it delivers, making it a popular choice for professionals and everyday users alike. Setting it up is also a breeze-just connect it to your computer or device using the USB-C cable provided, and you’ll be ready to go.

    Once connected, you can copy files to or from the drive just like you would with any other external storage device. The SanDisk Extreme Portable SSD is also compatible with both Windows and macOS, so you can use it with almost any computer or device. Whether you’re transferring large video files, high-resolution images, or even a full backup of your data, the SanDisk Extreme Portable SSD is up to the task.

    So why not give it a try and experience the convenience and performance it has to offer?

    Once the device is connected, open the file explorer or Finder to access the SanDisk Extreme Portable SSD.

    Transferring data from your computer to the SanDisk Extreme Portable SSD is a breeze! Once you have connected the device to your computer, you can immediately access it through the file explorer or Finder. From here, simply select the files you want to transfer and drag them over to the SanDisk drive. The speed of the transfer will depend on the size of the files and the USB port you are using, but the SanDisk Extreme Portable SSD allows for impressive read speeds up to 1050MB/s.

    This means that you can transfer large files, such as high-resolution photos or 4K videos, in a matter of seconds. The process is straightforward and user-friendly, making it the perfect device for those who need to transfer data quickly and easily. Overall, the SanDisk Extreme Portable SSD is a reliable and efficient tool for all of your data storage needs.

    To transfer files, simply drag and drop them into the SanDisk Extreme Portable SSD folder.

    Transferring files from your computer to your SanDisk Extreme Portable SSD is a breeze. All you need to do is simply drag and drop the files into the SanDisk Extreme Portable SSD folder. This process is straightforward and easy to do, even for those who are not technology experts.

    It’s important to note that the SanDisk Extreme Portable SSD is designed for fast data transfer speeds, which means you’ll be able to transfer even large files quickly and smoothly. Whether you’re working with photos, videos, or documents, transferring your files to the SSD is a simple and efficient process. With its compact and durable design, the SanDisk Extreme Portable SSD is the ideal storage solution for those on the go.

    So, if you’re looking for a reliable and fast way to transfer your files, look no further than the SanDisk Extreme Portable SSD.

    Ejecting the Device

    If you want to know how to set up your Sandisk Extreme Portable SSD, it’s crucial to also know how to properly eject the device. This process is essential in ensuring that your data is safe and secure. To eject your device, you can either use the eject button on your computer or right-click on the device icon and select “Eject.

    ” Once you’ve completed these steps, it’s safe to unplug the device. It’s important to avoid physically disconnecting any external SSD without ejecting it first, as this can corrupt your data and damage the device. So, don’t skip this step! Always remember to properly eject your Sandisk Extreme Portable SSD and protect your valuable information.

    Before disconnecting the device, ensure that all file transfers are complete.

    When it comes to disconnecting a device from your computer, it’s important to ensure that all file transfers are complete before ejecting. This means waiting until all your files have finished copying to or from the device before disconnecting it. Ejecting the device before the transfer is complete could cause data loss or file corruption.

    So, take your time and be patient – you’ll be glad you did. Once you’re certain everything has finished copying, you can then safely eject the device following your computer’s instructions. Remember, it’s always better to be safe than sorry when it comes to your important files.

    So, take the time to ensure everything is in order before disconnecting your device.

    Select the SanDisk Extreme Portable SSD in the file explorer/Finder, and click Eject.

    Ejecting the SanDisk Extreme Portable SSD is a simple and straightforward process that ensures the safety of your data and the longevity of your device. It’s important to safely eject the device before disconnecting it from your computer to prevent data loss or corruption. To eject the device, simply select the SanDisk Extreme Portable SSD in your file explorer or Finder, and click on the eject icon.

    The device will then safely disconnect from your computer, and you can safely unplug it from your system. It’s crucial to follow this step every time you’re disconnecting an external drive to avoid any mishap. By doing so, you’re not only safeguarding your data but also prolonging the lifespan of your device.

    So, it’s always better to be safe than sorry. Remember, when it comes to external storage devices, “eject before you disconnect” is the golden rule to follow!

    Safely disconnect the USB-C cable from the device and the computer

    When you’re finished using a USB-C device with your computer, it’s important to safely disconnect the cable from both devices to prevent data loss or corruption. This is known as ejecting the device, and it’s a simple process that only takes a few seconds. To eject the device, you’ll first need to make sure that all files and programs that are using the device have been properly closed or saved.

    Then, click on the eject icon, which usually looks like an upward-pointing arrow next to the device name in your computer’s file explorer or desktop. Once you click this icon, you’ll get a notification that it’s safe to remove the device. At this point, you can safely disconnect the USB-C cable from both your device and your computer.

    By taking this simple step, you’ll protect your files and ensure that they stay organized and accessible for future use.

    Conclusion

    In conclusion, setting up the Sandisk Extreme Portable SSD is as easy as a walk on the beach. All you need is a USB-C or USB-A cable, plug it in, and let the SSD do the heavy lifting. With lightning-fast transfer speeds and robust durability, it’s the perfect tool for anyone looking to store their files with ease.

    So, whether you’re a photographer, traveler, or simply looking for extra storage space, the Sandisk Extreme Portable SSD is your new best friend on this digital journey. Just remember to keep your toes in the sand and your data in the SSD.”

    FAQs

    What is the maximum capacity of the SanDisk Extreme Portable SSD?
    The maximum capacity of the SanDisk Extreme Portable SSD is 2TB.

    Is the SanDisk Extreme Portable SSD compatible with both Mac and PC?
    Yes, the SanDisk Extreme Portable SSD is compatible with both Mac and PC.

    What is the read speed of the SanDisk Extreme Portable SSD?
    The read speed of the SanDisk Extreme Portable SSD is up to 550MB/s.

    How do I set up my SanDisk Extreme Portable SSD for the first time?
    To set up your SanDisk Extreme Portable SSD for the first time, insert the USB-C to USB-C cable into your computer and the SSD. Then, follow the on-screen prompts to format and partition the SSD for your specific needs.

  • Upgrade Your Storage Speed: A Step-by-Step Guide on How to Transfer Data from SSD to NVMe

    If you’re someone who wants to increase their computer’s storage or upgrade to a faster storage device, chances are you’ve come across SSDs and NVMe drives. These storage devices are both reliable and efficient, but the dilemma arises when one has to transfer their data from an existing SSD to an NVMe drive. The process might seem daunting at first, but it’s actually quite simple.

    In this blog post, we’ll delve into the procedure of transferring data from SSD to NVMe so that you can upgrade your system without losing any important data.

    Check Compatibility

    When transferring data from an SSD to an NVMe, the first step is to check compatibility. Ensure that the NVMe slot on your motherboard is compatible with the NVMe drive you want to use. Some older motherboards may not support NVMe, so it’s always important to check the motherboard specifications.

    Additionally, it’s crucial to ensure that the SSD and NVMe use the same partition scheme. If they use different partition schemes, the data transfer may not work correctly, and you may lose data. Finally, before transferring data, ensure that you have a backup of all important files stored on the SSD.

    It’s better to be safe than sorry, and having a backup can help prevent data loss if something goes wrong during the transfer process. By checking compatibility and taking necessary precautions, you can safely transfer important data from an SSD to an NVMe without troubles.

    Ensure Both Drives are Compatible with Each Other

    When looking to use two hard drives together, it’s important to make sure that both drives are compatible with each other. This involves checking the interface type, storage capacity, and speed of both drives. Different interfaces include SATA, IDE, and SCSI, with SATA being the most common for modern hard drives.

    Storage capacity should match or exceed the size of the drive you are adding it to, and speed should be matched as well for optimal performance. It’s important to do your research and ensure that both drives will work well together before starting the installation process. Just like how you wouldn’t use a VHS tape in a DVD player, you wouldn’t want to use incompatible hard drives in your computer.

    Compatibility is key for a successful installation and optimal performance.

    how to transfer data from ssd to nvme

    Check if Your Motherboard has NVMe slots

    If you’re looking to upgrade your system’s storage capabilities, it’s important to first check if your motherboard has NVMe slots. NVMe, or Non-Volatile Memory Express, is a new standard for storage that offers faster speeds and lower latency than traditional SATA drives. However, not all motherboards are compatible with NVMe drives, so it’s crucial to check before making a purchase.

    The easiest way to check compatibility is to look at your motherboard’s manual or specifications online. Look for information on the number of M.2 slots and their compatibility with NVMe.

    If your motherboard doesn’t have compatible slots, you may need to consider upgrading your motherboard as well. Upgrading your storage can greatly improve your system’s performance, but always make sure to do your research and check compatibility before making any purchases.

    Cloning your SSD

    Are you planning to upgrade your system’s storage by moving your data from your SSD to an NVMe drive? Doing so can provide a significant boost in performance, but the process can be quite tricky if you’re not familiar with it. The best way to do this is by cloning your SSD to an NVMe drive. Cloning allows for an exact copy of your current drive, including the operating system and all files and applications, to be transferred to the new drive.

    To begin, you’ll need cloning software, which can be downloaded for free online. Once you have the software installed, attach your new NVMe drive to your computer and launch the software. From there, select the option to clone your SSD to the NVMe drive, choose the source and target drives, and let the software do the rest.

    Once complete, your new NVMe drive should be a duplicate of your old drive, and you can remove your old drive and start using your new and faster storage solution. With this simple process, you can transfer your data from your SSD to NVMe without losing any of your files or applications.

    Create a Backup

    Cloning your SSD can be a great way to create a backup of your important data. SSDs have become increasingly popular due to their speed and reliability, but no storage medium is completely invulnerable to failure. Cloning your SSD means creating an exact copy of everything on it, including all your files, applications, and operating system.

    This way, if your original drive fails, you can simply swap in the cloned drive and be back up and running in no time. It’s also a good idea to regularly create new clones as you add new data to your drive or make significant changes to your system. This ensures that you always have a current backup on hand should anything go wrong.

    With the right software, cloning your SSD is a fairly straightforward process that can give you peace of mind and keep your data safe. So, if you haven’t already, consider cloning your SSD today.

    Purchase a Cloning Software like EaseUS ToDo Backup

    If you’re looking to upgrade your computer’s hard drive to a faster SSD, you may want to consider cloning your existing drive using a software like EaseUS ToDo Backup. Cloning your SSD ensures that all your data and settings remain intact while making the switch. The process of cloning involves creating an exact copy of your current drive onto the new SSD.

    This means you won’t have to reinstall all your programs, transfer files, or reconfigure your settings, saving you time and hassle. EaseUS ToDo Backup is a reliable and user-friendly cloning software that can help you make the switch smoothly. With just a few clicks, you can clone your drive and enjoy the increased speed and performance of your new SSD.

    So, if you’re ready to take the leap, consider investing in a cloning software and cloning your SSD today!

    Connect Your NVMe Drive

    If you’re thinking of upgrading your PC’s storage storage, using a NVMe drive is a great option. Before you can start using it, though, you’ll need to make sure all the data on your current drive is transferred over first. That’s where cloning comes in.

    Cloning your SSD is the process of copying all the data and files on it to a new drive, essentially making a perfect duplicate. This ensures that you don’t miss anything important, and also saves you the trouble of having to manually copy everything over. Once you’ve cloned your SSD, you can then connect your NVMe drive and start enjoying its faster speeds and increased storage capacity.

    It’s a simple process, and definitely worth considering if you’re running out of space on your current drive or just want to boost your PC’s performance.

    Begin Data Transfer Process

    So you’ve decided to upgrade your laptop or desktop computer with a new SSD, but you’re not sure what to do next. The next step is to clone your existing hard drive onto the new SSD. This process transfers all your data, settings, and operating system onto the new drive, so you don’t have to reinstall everything from scratch.

    Cloning is also a good way to backup your system and safeguard your data against hardware failure or other mishaps. To begin the data transfer process, you’ll need a cloning software program and an external hard drive or USB flash drive to store the clone. There are many free and paid cloning software options available, such as Clonezilla, EaseUS Todo Backup, and Acronis True Image.

    Just make sure to choose a reputable software with good reviews and customer support. Cloning your SSD isn’t difficult, but it does take some time, so sit back, relax, and let the software do its thing. Once the clone is complete, insert the new SSD into your computer and enjoy the benefits of faster boot-up times and improved performance!

    Manually Transferring Data

    If you’ve recently upgraded to a newer, faster NVMe drive, you may be wondering how to transfer your data from your old SSD. Fortunately, the process is straightforward and can be accomplished with a few manual steps. The first step is to ensure that your NVMe drive is properly installed and recognized by your system.

    Once that’s done, you’ll need to create a backup of your data from your old SSD to an external drive or cloud storage. Then, you can copy or drag and drop your backed-up files onto your new NVMe drive. It’s worth noting that you may need to reinstall any programs or applications you had installed on your old SSD, as they typically won’t transfer over in this process.

    But overall, transferring data from an SSD to an NVMe drive is a relatively simple process that should only take a few minutes. With the improved performance and speeds of your new NVMe drive, you’ll quickly see the benefits of upgrading.

    Move Important Files to External Storage

    If you’re running out of space on your device, moving important files to an external storage device can help free up some precious space. This process can be done manually, and it’s a great way to ensure that your important files are safe and secure. Before you begin the transfer process, make sure you have an external storage device that is large enough to accommodate all of your files.

    Once you have your external storage device, you can begin transferring your files by connecting it to your device and selecting the files you wish to transfer. This process can take some time depending on the size of the files, but once the transfer is complete, you can rest assured that your important files are safely stored on an external device. By doing so, you can also keep a backup of your important data in case of any unexpected system failures, ensuring your data is never lost.

    Download and Install the NVMe Driver

    If you’re looking to boost your computer’s performance speed, downloading and installing the NVMe driver could be the solution you need. However, this process can be difficult for those without technical experience. Manually transferring data is a complicated task that requires precision and technical know-how.

    But don’t worry, there are resources available to help with this process. By following step-by-step instructions or seeking professional assistance, you can ensure a successful installation of the NVMe driver. Once installed, be prepared for a significant improvement in your computer’s speed and overall functionality.

    Don’t let the complex process of manual data transfer keep you from optimizing your computer’s performance. Take advantage of the NVMe driver and experience the benefits it offers.

    Copy and Paste Data from SSD to NVMe

    If you’re upgrading your storage system from an SSD to an NVMe drive, you may need to transfer your data manually. While this may seem like a daunting task, it’s actually quite straightforward. The first step is to connect both drives to your computer and make sure they’re both recognized by the system.

    Then, you’ll need to copy and paste the data from your SSD to your NVMe. This can be done using your computer’s file explorer. Simply select the files or folders you want to transfer, right-click, and select “Copy.

    ” Then, navigate to the location where you want to transfer the data to and right-click again, this time selecting “Paste.” Depending on the amount of data you’re transferring, this process may take some time, but it’s a simple and effective way to get your data from your old drive to your new one. Just remember to triple-check that you’ve transferred everything you need before wiping your old drive and retiring it.

    Final Checks

    Before completing the transfer of data from SSD to NVMe, it is important to perform several final checks to ensure that everything has been transferred correctly. First, make sure that you have backed up all of your important data in case anything goes wrong during the transfer process. Then, check that the software you used for the transfer has successfully transferred all of your data.

    Double-check that the NVMe drive has enough capacity to hold all the data that you transferred from your SSD. Finally, run a test to confirm that the NVMe drive is working correctly and that you can access your data without any issues. Once you have confirmed that everything has been transferred correctly and the NVMe drive is fully operational, you can start using it to boost the performance of your PC, making it run faster and smoother.

    Ensure All Data Has Been Transferred

    When it comes to transferring data from one device to another, it’s important to make sure that all the data has been transferred successfully. It’s easy to assume that everything has been transferred when you see some files on the new device, but there can also be files that have been left behind or missed out completely. This can be a frustrating experience, especially if you realize that the missing data was important.

    To avoid this situation, make sure that you do a final check before you finish the transfer process. This involves going through all the folders and files on the old device, making sure that everything has been copied over to the new device. You should also check that the files are accessible and can be opened without any errors.

    It’s also a good idea to create a backup of the transferred files as soon as possible, just in case anything goes wrong with the new device or if you accidentally delete some files. This ensures that you have a copy of all the files that you transferred, which can give you peace of mind and prevent you from losing any important data. In summary, make sure that you do a final check of all the files and folders before you finish the transfer process.

    It’s better to be safe than sorry, and taking a few extra minutes to double-check can save you a lot of trouble in the long run. Remember to always create a backup of your files to avoid any mishaps or accidental loss of data.

    Disconnect SSD

    When it’s time for your computer’s SSD to be disconnected, it’s important to make sure that all other components are safe from harm. Before doing anything else, you should shut down your computer and unplug it from the power source. It’s also a good idea to ground yourself by touching a metal object, such as the frame of your computer case.

    The next step is to locate the SSD and remove any screws or mounting brackets that are holding it in place. Once it’s free, gently disconnect the power and data cables from the SSD, making sure not to tug or twist them. You can then safely remove the SSD from your computer.

    Remember to take care when handling electronic components and always follow proper safety procedures to avoid damage or injury.

    Boot Up and Enjoy Your NVMe Drive

    Now that you’ve successfully installed your new NVMe drive, it’s essential to perform some final checks to ensure everything is working correctly. First, check your BIOS settings to make sure your computer recognizes the new drive. You may need to enable NVMe support in your BIOS settings if it’s not already enabled.

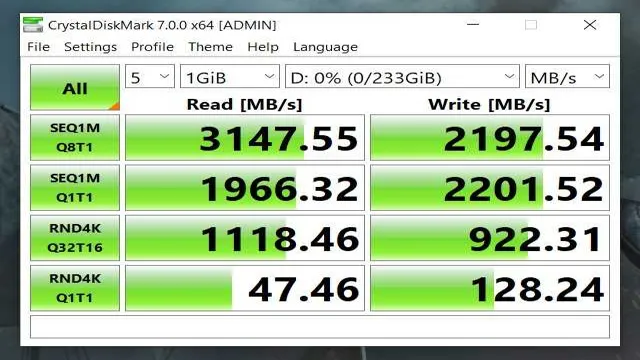
    Next, confirm that your operating system detects your NVMe drive and that it appears as a new hard drive in your file explorer. Finally, run some benchmark tests to see if your new NVMe drive is performing as expected. You might be surprised by how much faster your computer is booting up and loading applications with the new drive.

    Overall, by following these simple steps, you can ensure that your NVMe drive is working correctly and that you’ll enjoy faster application load times and speedy boot-up times. So sit back, relax, and let your computer do the heavy lifting!

    Conclusion

    In conclusion, transferring data from an SSD to NVMe may seem daunting at first, but with the right tools and mindset, it can be an easy and seamless process. Think of it like upgrading from a bicycle to a sports car – faster and more efficient, with the ability to handle heavier workloads. So, gear up and get ready to shift your data into high gear with the power and speed of NVMe technology!”

    FAQs

    What is the difference between SSD and NVMe?
    SSD or solid-state drive is a type of storage device that uses NAND flash memory to store data, whereas NVMe or Non-Volatile Memory Express is a protocol designed for efficient communication between the storage device and the computer’s central processor. The main difference between these two is that NVMe is faster than SSD because it communicates directly with the CPU, whereas SSD has to go through the I/O controller.

    Why would I want to transfer data from SSD to NVMe?
    You would want to transfer data from SSD to NVMe because NVMe is faster than SSD. If you have large files or applications that require high-speed data transfer, then transferring data from SSD to NVMe can help to improve the speed of your computer.

    How do I check if my computer supports NVMe?
    To check if your computer supports NVMe, you can check the specifications of your motherboard or contact the manufacturer. Another way is to check if your computer has an M.2 connector, which is a small slot on the motherboard designed for NVMe storage devices.

    How do I transfer data from SSD to NVMe?
    To transfer data from SSD to NVMe, you can do it in several ways. One way is to use a data migration tool that can clone the data from your SSD to the NVMe. Another way is to copy and paste the data manually, but this can be time-consuming and error-prone. You can also reinstall the operating system onto the NVMe and then move the data over. It is recommended to backup your data before transferring to avoid data loss.

  • How to Encrypt Your SSD: A Step-by-Step Guide

    In today’s digital age, it’s more important than ever to keep your personal information secure. One way to do this is to encrypt your SSD (solid-state drive), which stores your computer’s data. Encrypting your SSD makes it much more difficult for hackers to access your personal information, even if they gain access to your computer. In this article, we’ll provide a step-by-step guide on how to encrypt your SSD to ensure your personal information is safe.

    Why should you encrypt your SSD?

    Encrypting your SSD is an essential step in securing your personal information. SSDs are particularly vulnerable to hacking, as they can be easily removed from a computer and accessed by an attacker. By encrypting your SSD, you can ensure that even if someone gains access to your computer or removes the SSD, they will be unable to access your data without your encryption key.

    Step 1: Backup your data

    Before you begin the encryption process, it’s essential to backup your data. Encryption can sometimes cause data loss, so it’s crucial to have a backup in case anything goes wrong. You can backup your data to an external hard drive or to cloud storage, such as Google Drive or Dropbox.

    Step 2: Enable BitLocker

    If you’re using a Windows computer, you can use BitLocker to encrypt your SSD. BitLocker is a built-in encryption tool that’s available on Windows 10 Pro, Enterprise, and Education editions. To enable BitLocker, follow these steps:

    1. Click on the Start menu and type “BitLocker” into the search bar.
    2. Click on “Manage BitLocker” from the search results.
    3. Click on “Turn on BitLocker” next to the drive you want to encrypt.
    4. Follow the prompts to set up your encryption key.

    Step 3: Encrypt your SSD

    Once you’ve enabled BitLocker, you can begin the encryption process. The time it takes to encrypt your SSD will depend on the size of your drive and the speed of your computer. To encrypt your SSD, follow these steps:

    1. Open the Start menu and type “BitLocker” into the search bar.
    2. Click on “Manage BitLocker” from the search results.
    3. Click on “Turn on BitLocker” next to the drive you want to encrypt.
    4. Select the option to “Encrypt entire drive.”
    5. Choose how you want to store your recovery key. You can save it to a file, print it, or save it to your Microsoft account.
    6. Follow the prompts to start the encryption process.

    Step 4: Wait for the encryption process to complete

    The encryption process can take several hours to complete, depending on the size of your drive and the speed of your computer. It’s important to let the process complete without interruption, as interrupting the encryption process can cause data loss.

    Step 5: Test your encryption

    Once the encryption process is complete, it’s important to test your encryption to ensure that it’s working correctly. To test your encryption, try to access your data without entering your encryption key. If you’re unable to access your data, your encryption is working correctly.

    Step 6: Keep your encryption key safe

    Finally, it’s essential to keep your encryption key safe. Without your encryption key, you won’t be able to access your data, so it’s crucial to keep it in a secure location. You can save your encryption key to a file, print it, or save it to your Microsoft account. Whatever method you choose, make sure to keep your encryption key in a secure location.

    Conclusion

    Encrypting your SSD is an important task that can help protect your personal data from being accessed by unauthorized users. By backing up your data, enabling BitLocker, encrypting your SSD, and testing your encryption, you can ensure that your personal information is safe and secure. Remember to keep your encryption key safe and in a secure location. With these steps, you can have peace of mind knowing that your personal information is safe from prying eyes.

    FAQ:

    1. What is SSD encryption?
      • SSD encryption is a security measure that helps protect the data stored on your solid-state drive from unauthorized access.
    2. Why should I encrypt my SSD?
      • Encrypting your SSD can help keep your personal information secure in case your computer is lost, stolen, or hacked.
    3. Can I still use my computer normally after encrypting my SSD?
      • Yes, you can continue to use your computer as normal after encrypting your SSD. You will simply need to enter your encryption key to access your data.
    4. Can I encrypt an SSD that already has data on it?
      • Yes, you can encrypt an SSD that already has data on it, but you should back up your data first to ensure that you don’t lose any important files.
    5. What happens if I forget my encryption key?
      • If you forget your encryption key, you may not be able to access your data. It is important to keep your encryption key in a secure location to prevent this from happening.