Category: News and Updates

News and Updates

  • Turbocharge Your System with NVMe PCIe: The Ultimate Guide

    Do you remember the time when hard drives were the only option for storing your data? Times have changed, and now we have solid-state drives (SSDs). But what’s next? The answer is NVMe PCIe, the future of solid-state drives. NVMe (Non-Volatile Memory Express) is the latest interface protocol designed to optimize the performance of SSDs.

    PCIe (Peripheral Component Interconnect Express) is the high-speed communication interface that connects your computer’s motherboard to its components. Together, these two technologies offer unparalleled performance, speed, and efficiency for your storage needs. NVMe PCIe SSDs can deliver up to six times faster performance compared to their SATA-based SSD counterparts.

    That means your files, operating system, and applications load faster than ever before. They also consume less power and generate less heat, making them suitable for laptops and other portable devices. Imagine NVMe PCIe as a sports car compared to a traditional car.

    Just as a sports car can reach incredible speeds and handle twists and turns smoothly, NVMe PCIe can process large files, run complex applications, and multitask with ease. With the NVMe PCIe SSD, you can access your data at lightning speed and improve the overall performance of your system. In conclusion, NVMe PCIe is the future of solid-state drives, offering lightning-fast speeds and unmatched performance.

    It’s a game-changer in the storage industry, and it’s time to embrace change. Are you ready?

    What is NVMe PCIe?

    NVMe PCIe is a recently developed technology that has revolutionized the storage industry. NVMe stands for Non-Volatile Memory Express, which is a protocol for accessing solid-state drives (SSDs). PCIe, on the other hand, is a high-speed serial computer expansion bus standard that has been around for many years.

    Combining these two technologies has resulted in a new storage standard that is incredibly fast and efficient. NVMe PCIe SSDs are capable of delivering faster read and write speeds than traditional hard disk drives (HDDs) and even older SSDs. This makes them ideal for high-performance computing applications that require low latency and high throughput, such as gaming, video editing, and data analysis.

    Additionally, NVMe PCIe SSDs use less power and generate less heat, making them an ideal choice for laptops and other portable devices. Overall, NVMe PCIe is a game-changer in the world of storage technology, allowing for faster, more efficient, and reliable storage solutions.

    Explaining the Terminology

    NVMe PCIe, or Non-Volatile Memory Express Peripheral Component Interconnect Express, is a high-speed data transfer protocol designed for solid-state drives (SSDs). It is replacing the older Advanced Host Controller Interface (AHCI) that was designed for hard disk drives (HDDs). NVMe operates via the PCIe bus, allowing for much faster data transfer speeds than with AHCI.

    PCIe is a computer interface that connects peripherals like graphics cards, network cards, and SSDs to the motherboard. Think of PCIe as a highway with multiple lanes, allowing data to travel faster and more efficiently. NVMe is like a sports car speeding down that highway, allowing for even faster data transfer speeds.

    To sum it up, NVMe PCIe is a new and improved protocol for SSDs that allows for much faster data transfer, which in turn leads to faster load times and improved overall performance.
    nvme pcie

    Why is NVMe PCIe Superior to Other SSD Interfaces?

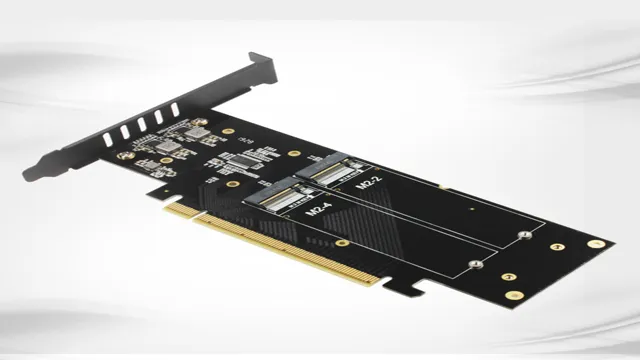
    NVMe PCIe is a type of interface used to connect solid-state drives (SSDs) to your computer’s motherboard, and it has quickly become the superior choice for SSDs. NVMe stands for Non-Volatile Memory Express, which is a protocol that takes advantage of the PCIe (Peripheral Component Interconnect Express) bus technology to deliver faster communication speeds between the SSD and the rest of the computer. Not only does this allow for faster data transfer rates, but it also helps to reduce latency and improve overall system performance.

    NVMe PCIe drives are smaller and more power efficient than other SSD interfaces, making them a great choice for laptops and other mobile devices. Additionally, NVMe PCIe drives can provide a substantial boost in speed for those who need to move large files around quickly, such as video editors or gamers. In short, NVMe PCIe is the future of SSD interfaces, providing faster speeds, better latency, and improved system performance.

    Performance Benefits of NVMe PCIe

    NVMe PCIe is a game-changer when it comes to storage performance. It allows for faster data transfer rates, lower latency, and improved overall system responsiveness. With traditional hard drives, there is a physical limit to the speed at which data can be read or written due to the mechanics of the rotating disk.

    NVMe PCIe, on the other hand, takes advantage of the high-speed interface and low latency of PCIe to deliver incredibly fast read and write speeds. This means that tasks like booting the operating system, launching applications, and transferring large files can be accomplished in a fraction of the time it would take with a traditional hard drive. In short, NVMe PCIe offers significant performance benefits for data-intensive applications and tasks, making it an ideal choice for gamers, content creators, and professionals who rely on high-performance storage.

    Faster Read/Write Speeds

    Modern computer users are always looking for ways to improve their system’s performance. Fortunately, the advancements in technology have led to NVMe PCIe drives, which offer faster read/write speeds than their SATA counterparts. These drives provide faster access and transfer of data, which means quick load times, smoother performance, and increased productivity.

    Additionally, NVMe PCIe drives are more efficient and consume less power than traditional drives, contributing to longer battery life and reduced energy costs. So if you’re someone who wants to take your system’s performance to the next level, upgrading to an NVMe PCIe drive is a great investment. With its faster read/write speeds and increased efficiency, you can say goodbye to slow load times and hello to a smoother, faster computing experience.

    Lower Latency

    NVMe PCIe, lower latency One of the biggest advantages of using NVMe solid-state drives (SSDs) with PCIe technology is lower latency. NVMe protocol offers a direct interface between the processor and the SSD storage, bypassing bottlenecks that exist in SATA connections, which result in reduced latency and faster transfer rates. PCIe provides a more direct connection which consequently minimizes network latency and enhances performance.

    Lower latency means that data can move faster, and the CPU can access it more quickly because the data transfer path is shorter. It also means that applications can respond more quickly and that the performance of your system is enhanced overall. For those who work with high-performance computing, virtualization, and database applications, NVMe PCIe-based SSDs are a must, freeing up memory and providing seamless performance.

    In essence, NVMe SSDs with PCIe technology offer a superior level of performance that can benefit the speed and efficiency of your applications, especially those that involve higher workloads and bursty workloads.

    Higher Throughput

    NVMe PCIe, throughput, performance benefits Upgrading from traditional hard drives to NVMe PCIe offers a significant increase in throughput, providing users with a boost in performance benefits. With NVMe PCIe, data can travel much faster compared to other storage options, allowing for enhanced read and write speeds that can have a profound impact on overall system performance. This can be especially beneficial for those who utilize high-demand applications such as video editing or gaming.

    The benefits of NVMe PCIe technology can be likened to upgrading from a bicycle to a sports car. Just as a high-performance vehicle can travel at much faster speeds than a bike, NVMe PCIe allows data to travel at much faster speeds than a traditional hard drive, providing users with the ability to complete tasks more quickly and efficiently. Overall, the implementation of NVMe PCIe technology can lead to a significant increase in productivity and performance for users.

    NVMe PCIe in Real-World Applications

    NVMe PCIe has transformed the way we store data and access information. This cutting-edge technology offers high-speed data transfer, low latency, and increased performance, making it an excellent choice for real-world applications. Businesses and organizations that require quick access to large sets of data can benefit significantly from NVMe PCIe.

    For instance, gaming enthusiasts would appreciate faster game load times and smoother gameplay. In the healthcare industry, medical professionals can rapidly access and process critical patient data for better diagnosis and treatment. Additionally, industries that require real-time data analytics and high-performance computing, such as finance and oil exploration, can leverage NVMe PCIe for enhanced productivity and faster decision-making.

    Overall, NVMe PCIe has revolutionized data storage and access, and it is here to stay as more industries leverage its speed and efficiency to improve their business operations.

    Gaming

    As gamers, we all want the best performance our systems can provide. One of the most significant upgrades you can make is swapping out your traditional hard drive for an NVMe PCIe solid-state drive. Not only does this upgrade offer faster read and write speeds, but it also reduces load times in games and applications.

    In real-world applications, this means that your programs and games launch quicker and transfer files faster than ever before. The burstiness of NVMe PCIe is especially noticeable in open-world games like Red Dead Redemption 2, where fast transferring speeds and lower loading times can make all the difference. Moreover, even if you have an older system, it is still possible to take advantage of this technology through external enclosures.

    If you’re a gamer who wants to improve their gaming experience, investing in an NVMe PCIe drive is a no-brainer.

    Data Centers and Enterprise Environments

    NVMe PCIe NVMe PCIe technology has made a significant impact on data center and enterprise environments. This technology provides faster access to data and better performance than traditional storage devices. It allows for faster processing of large amounts of data, which is very beneficial for companies that deal with big data.

    Real-world applications of NVMe PCIe technology include database management, data warehousing, virtualization, cloud computing, and high-performance computing. The technology has also led to the development of faster storage devices, such as NVMe PCIe Solid-State Drives (SSDs). These SSDs have higher read and write speeds, making them ideal for applications that require fast data access, such as gaming and video editing.

    Overall, NVMe PCIe technology has proven to be a game-changer in the world of data centers and enterprise environments, allowing for faster access to data and more efficient processing of large amounts of data.

    Conclusion

    In conclusion, nvme pcie is like the Usain Bolt of storage solutions – it’s lightning-fast, insanely efficient, and leaves its competitors stumbling behind in the dust. With its exceptional speed and optimal performance, nvme pcie is the Formula 1 race car of the storage world, zooming ahead of the pack with ease. So if you’re looking for an ultra-fast and reliable storage solution, nvme pcie is the only name you need to know!”

    FAQs

    What is NVMe PCIe?
    NVMe PCIe (Non-Volatile Memory Express Peripheral Component Interconnect Express) is a high-speed data transfer interface that connects storage devices to a computer’s CPU. It is a newer technology that offers faster data transfer speeds and lower latency compared to traditional storage interfaces like SATA or SCSI.

    What are the benefits of using NVMe PCIe?
    NVMe PCIe offers several benefits, including faster data transfer speeds, lower latency, and lower power consumption. These benefits make it an ideal interface for high-performance computing, gaming, and enterprise storage solutions.

    How does NVMe PCIe compare to traditional storage interfaces like SATA?
    NVMe PCIe provides significantly faster data transfer speeds and lower latency compared to SATA. SATA was designed for hard disk drives (HDDs) and cannot fully utilize the performance of solid-state drives (SSDs), which are increasingly common in modern computing. NVMe PCIe was specifically designed for SSDs and can provide near-maximum performance for these drives.

    What are some common NVMe PCIe devices?
    Some common NVMe PCIe devices include high-performance SSDs, enterprise-grade storage solutions, and high-end gaming motherboards. As the technology becomes more widely adopted, we may see additional devices that take advantage of its high-speed data transfer capabilities.

  • Revolutionize Your PC Performance with NVMe M.2: The Ultimate Guide

    Are you tired of slow boot-up times and sluggish data transfers? NVMe M.2 is the game-changer you’ve been waiting for. This next-level storage technology can take your computer’s performance to new heights and transform the way you work and play.

    But what exactly is NVMe M.2, and how does it work? In simple terms, it’s a faster, more efficient way of accessing and storing data on solid-state drives (SSDs). Unlike traditional hard disk drives (HDDs), SSDs have no moving parts and can access data instantly.

    But NVMe M.2 takes it a step further by using the PCIe interface to deliver even faster speeds. Think of it like having a high-speed highway for your data, enabling lightning-fast transfers and reducing waiting times.

    If you’re ready to take your storage game to the next level, NVMe M.2 is the way to go.

    What is NVMe M.2?

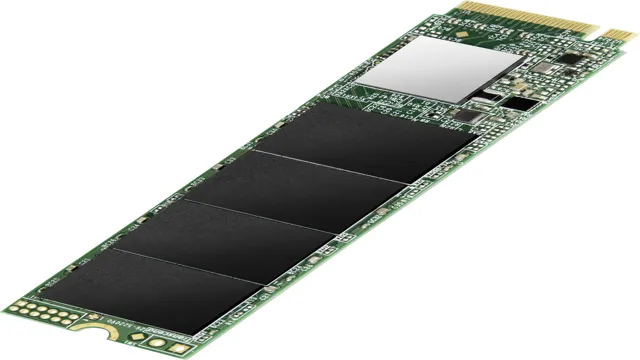
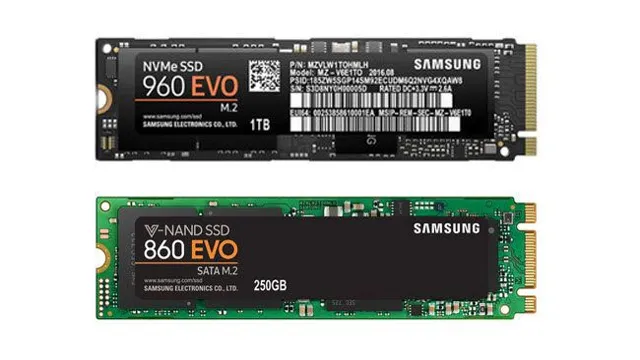
    NVMe M.2 is a new standard for solid-state drives (SSDs) that is gaining popularity in the market today. It refers to a small form factor that is more compact than traditional SSDs, with faster read and write speeds.

    NVMe M.2 is a name for the connector and interface that connects SSDs to the motherboard. NVMe M.

    2 SSDs typically offer lower power consumption, high reliability, and increased storage capacity, making them an excellent choice for gamers, content creators, and other heavy users. They are quickly becoming the go-to option for high-performance storage because of their outstanding performance and compatibility with the latest PC components. In summary, NVMe M.

    2 is a high-performance storage solution that is up and coming in the tech world, and it is a worthy investment for anyone looking for an upgrade in their system.

    A brief introduction to NVMe and M.2 form factor

    NVMe M.2 is a new and improved technology that has revolutionized the storage industry. NVMe stands for Non-Volatile Memory Express, and it is a new type of storage interface that provides faster transfer speeds than its predecessors.

    The M.2 form factor is a tiny module that is designed to be inserted into a computer’s motherboard. Unlike the traditional hard drives and solid-state drives (SSDs), which use SATA interface, NVMe M.

    2 uses the PCI Express (PCIe) interface, making it faster and more efficient. Think of NVMe M.2 as a super-fast race car compared to a regular car.

    It has a turbocharged engine under the hood, advanced suspension, and a sleek, aerodynamic design that allows it to reach speeds that would be impossible for a regular car. Similarly, NVMe M.2 has multiple parallel data transfer channels, advanced flash memory, and a streamlined design that allows it to achieve data transfer speeds of up to 3500 MB/s, which is more than five times faster than SATA SSDs.

    Overall, NVMe M.2 devices offer a significant performance boost, making them ideal for high-end workstations, gaming rigs, and other demanding applications. They are also very compact and energy-efficient, which means they can be used in smaller form factor devices such as ultra-thin laptops and mini-PCs.

    As technology advances, we can expect to see more devices embrace this technology and the outstanding performance it has to offer.

    nvme m2

    Speed and Performance

    NVMe M.2 is the next generation storage technology that is designed to offer lightning-fast speed and performance. It is seamlessly integrated into high-end motherboards and laptops, and it boasts an incredible data transfer rate of up to 7,000 MB/s.

    This is more than six times faster than the traditional SATA SSDs, which makes it an ideal choice for demanding tasks such as gaming, video editing, and 3D rendering. The NVMe M.2 operates on the PCIe interface and only requires power from the motherboard, making it energy-efficient and compact.

    It is undeniably one of the greatest technological advancements in the storage industry, and a must-have component for any user who desires peak performance and productivity. Investing in an NVMe M.2 means faster boot times, quicker file transfers, and reduced loading times for applications and games.

    Overall, the NVMe M.2 is one of the best upgrades one can make to their system for an incredible boost in speed and performance.

    How NVMe M.2 outperforms traditional storage drives

    NVMe M.2 is a revolutionary storage technology that has taken the performance of SSDs to the next level. Its lightning-fast speed and performance have made it the go-to storage solution for serious gamers, content creators, and anyone who demands high-speed data transfer.

    With read and write speeds that can reach up to 3,500 MB/s and 3,300 MB/s, respectively, NVMe M.2 outperforms traditional storage drives like HDDs and SATA SSDs, which offer read and write speeds of 100-200 MB/s and 400-500 MB/s, respectively. NVMe M.

    2 achieves this performance by using the PCIe interface, which provides a direct connection between the storage device and the CPU, bypassing the slower SATA interface. So, if you’re looking for a storage solution that can keep up with the demands of modern computing, NVMe M.2 is the way to go.

    Real-world examples of speed and performance improvements

    Speed and Performance When it comes to the digital world, speed and performance are crucial factors for success. Slow loading times can turn off potential customers, and outdated technology can hinder productivity and efficiency. Fortunately, there are many real-world examples of how improvements in speed and performance can make a huge difference.

    For example, the popular video conferencing platform Zoom saw a huge increase in usage during the COVID-19 pandemic. In response, they implemented a series of performance enhancements to improve their service. These included reducing the amount of data sent across the network, optimizing video codecs, and improving the platform’s overall stability.

    As a result, Zoom was able to handle a massive increase in users and still maintain high-quality service. Another example is the popular e-commerce site Etsy, which made a series of design and performance changes to increase their page loading speeds. These included reducing the size of images, optimizing their code, and using a content delivery network (CDN) to distribute content more efficiently.

    These changes resulted in a 10% increase in revenue for Etsy, demonstrating the importance of speed and performance for online businesses. Overall, these real-world examples show that investing in speed and performance improvements can have a significant impact on the success of digital businesses.

    Compatibility and Connectivity

    NVMe M.2 drives are popular storage solutions due to their faster read/write speeds compared to traditional hard drives. However, before purchasing an NVMe M.

    2 drive, it’s important to check if your motherboard supports it. Typically, motherboards that were released after 2015 have the necessary M.2 slot for NVMe drives, but it’s always best to double-check by referring to your motherboard’s manual.

    Additionally, ensure that your computer’s BIOS is updated to the latest version for proper compatibility. NVMe M.2 drives can also improve connectivity between components within your computer as they directly connect to the motherboard, resulting in faster transfer speeds between the drive and other components such as the CPU and GPU.

    Keep in mind that despite the faster speeds, NVMe M.2 drives may not be necessary for everyone and may only have a noticeable impact on those who rely heavily on large file transfers or use programs that require high-speed storage. Overall, if your motherboard supports it and you require faster storage speeds, an NVMe M.

    2 drive can be a valuable upgrade.

    Is your device compatible with NVMe M.2?

    If you’re planning on upgrading your laptop or desktop with a new NVMe M.2 SSD, it’s vital to check if your device is compatible with it. The first thing to look for is whether your device has an M.

    2 slot that supports NVMe. If it doesn’t, you may need to purchase an adapter or settle for a slower SATA-based SSD. Even if your device does have an NVMe M.

    2 slot, make sure to check the connector type and key, as different devices use different connector keys like B or M key types. It’s important to note that installing an NVMe M.2 SSD may require updating your device’s BIOS or UEFI firmware.

    This process will differ depending on the device, and cautiousness is always warranted when making BIOS changes. Nevertheless, an NVMe M.2 SSD can provide a significant improvement in speed and system responsiveness for compatible devices.

    Ultimately, ensuring that your device is compatible with NVMe M.2 SSDs before making any upgrades can help you avoid unnecessary expenses and hardware incompatibilities down the line.

    How to connect and set up NVMe M.2

    NVMe M.2 When it comes to connecting and setting up an NVMe M.2 drive, compatibility and connectivity are two crucial factors.

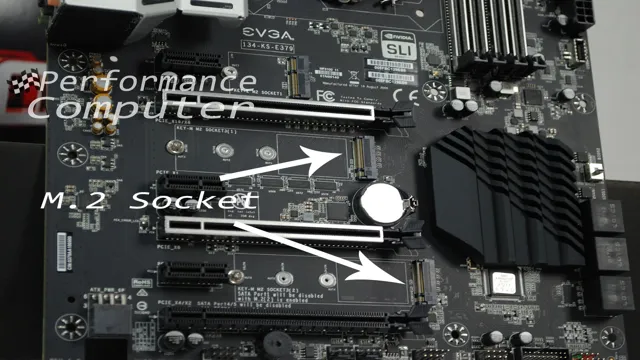
    Before purchasing an NVMe M.2 drive, it is important to ensure that the motherboard supports it. Most modern motherboards have at least one M.

    2 slot that supports NVMe, but it is always best to check the specifications to avoid frustration. You should also ensure that the NVMe M.2 drive you choose is compatible with your system.

    The next step is to install the NVMe M.2 drive into the motherboard. Locate the M.

    2 slot on your motherboard and carefully insert the NVMe M.2 drive into the slot. Make sure the drive is securely fastened in place and that the screw is tightened.

    Once the NVMe M.2 drive is installed, it needs to be initialized and formatted. You can do this by accessing your computer’s BIOS and selecting the NVMe M.

    Choosing the Right NVMe M.2 Drive

    When it comes to choosing the right NVMe M.2 drive, there are several factors to consider. First, make sure that your motherboard supports NVMe M.

    2 drives so that you can take full advantage of their fast speeds. Next, think about the capacity you need and your budget. NVMe M.

    2 drives with higher capacities tend to be more expensive, so it’s important to find a balance between what you need and what you can afford. Additionally, consider the read and write speeds of the drive as well as its endurance rating if you plan on using it frequently. Overall, the right NVMe M.

    2 drive for you will depend on your specific needs and budget, so take some time to research and compare different options before making a decision.

    Factors to consider when choosing an NVMe M.2 drive

    When it comes to choosing an NVMe M.2 drive, there are several factors that you need to take into consideration to ensure that you get the one that best suits your requirements. One of the main factors to consider is the storage capacity that you need, as NVMe M.

    2 drives come with varying levels of storage space. You should also consider the read and write speeds of the drive, as these will affect the performance of your computer. Another factor to consider is the type of interface that the drive has, as this will determine whether it is compatible with your computer or not.

    Additionally, you may want to consider the brand and warranty that comes with the drive, as this will give you peace of mind knowing that you are investing in a high-quality product. By considering these factors, you will be able to choose the right NVMe M.2 drive for your needs.

    Top NVMe M.2 drives on the market

    As the demand for faster and more efficient storage devices continues to increase, the use of NVMe M.2 drives has become prevalent among users. Choosing the right NVMe M.

    2 drive can be a challenging task due to the numerous options available on the market. However, the crucial factors to consider when making a choice include performance, storage capacity, durability, and price. Some of the top NVMe M.

    2 drives to consider include the Samsung 970 Evo Plus, WD Black SN750, and the Corsair Force MP600. These drives offer impressive read and write speeds, large storage capacity, and excellent endurance rates. It’s important to choose an NVMe M.

    2 drive that meets your specific needs and budget while providing top-notch performance.

    Conclusion

    In conclusion, NVMe M.2 technology is the superhero of data storage, providing lightning-fast speeds and unmatched performance. It may look small and unassuming, but don’t let that fool you – this tiny powerhouse is capable of taking on any data-intensive task with ease.

    So if you’re looking for storage that’s faster than a speeding bullet and more powerful than a locomotive, look no further than NVMe M.2!”

    FAQs

    What is an NVMe M.2 drive?
    An NVMe M.2 drive is a type of solid-state drive that uses the NVMe (Non-Volatile Memory Express) protocol and is designed to be installed directly into a motherboard’s M.2 slot.

    What are the advantages of using an NVMe M.2 drive?
    NVMe M.2 drives offer faster read and write speeds compared to traditional SATA SSDs, making them ideal for high-performance applications like gaming and video editing. They are also smaller and more power-efficient than traditional SSDs, which makes them ideal for use in small form-factor devices like laptops and ultrabooks.

    Can I install an NVMe M.2 drive on any motherboard?
    Not all motherboards support NVMe M.2 drives, so it’s important to check your motherboard’s specification before purchasing an NVMe M.2 drive. Motherboards with an M.2 slot that supports PCIe or NVMe will work with NVMe M.2 drives.

    How do I install an NVMe M.2 drive?
    Installing an NVMe M.2 drive is relatively simple. First, locate the M.2 slot on your motherboard. Then, insert the NVMe M.2 drive into the slot at an angle until it clicks into place. Finally, secure the NVMe M.2 drive with the mounting screw provided and you’re done!

  • Screw your Storage Woes with NVMe Screw: A Revolutionary SSD Fixation Solution

    If you’re building your own PC or upgrading your existing one, you should definitely pay attention to the small details, such as the NVMe screw. This tiny screw plays a crucial role in the installation of an NVMe SSD, and neglecting it can lead to various issues that you don’t want to deal with. Think of the NVMe screw as the foundation of your SSD.

    Just like a building needs a solid foundation to stand tall, your NVMe SSD also needs a sturdy screw to stay in place. Without it, your SSD could loosen up, causing instability and even damage to your system. But that’s not all.

    The NVMe screw also ensures that the SSD is properly connected to your motherboard’s M.2 slot. Without the screw, the SSD might not align correctly, which can result in poor performance or connectivity issues.

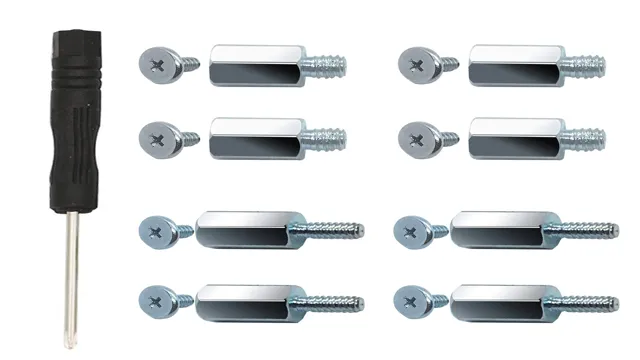
    Now you might be thinking, “But can’t I just use any screw?” The answer is a resounding no. The NVMe screw is specifically designed for M.2 SSDs and is often shorter than regular screws.

    Using a regular screw can cause damage to your SSD or motherboard, so it’s important to use the right one. In conclusion, while the NVMe screw may seem insignificant, it’s actually an essential component in the installation of an NVMe SSD. It ensures stability, alignment, and proper connectivity, so be sure to pay close attention to it during your next build or upgrade.

    What is NVMe Screw?

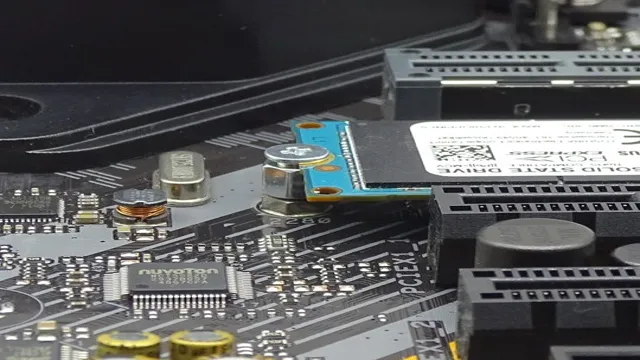
    NVMe screw is a tiny screw that is used to fasten an NVMe drive onto the motherboard. The screw itself is typically very small and sits flush against the surface of the drive. NVMe drives are becoming increasingly popular due to their speed and efficiency compared to traditional hard drives, and as such, the need for NVMe screws has also increased.

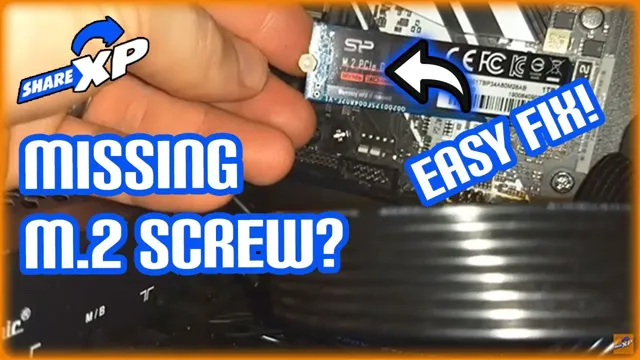
    One important thing to note is that not all motherboards come with an included NVMe screw, so it’s important to double-check before purchasing an NVMe drive. Without an NVMe screw, the drive won’t be properly secured to the motherboard and could potentially cause damage or become dislodged. So if you’re building a PC or upgrading your existing system with an NVMe drive, be sure to check if you need an NVMe screw, and if so, make sure to purchase one separately if necessary.

    Understanding SSD NVMe Screws

    An NVMe screw is a specialized screw used to secure NVMe solid-state drives (SSDs) to their slots on the motherboard. It is different from traditional screws used for hard disk drives (HDDs) because it is smaller and has a different shape. The NVMe screw is essential in installing an NVMe SSD as it ensures that the drive is firmly held in place, preventing it from moving around and causing damage to the internal components.

    The absence of an NVMe screw could also lead to data loss or corruption as the SSD may disconnect from the motherboard during data transfer. Thus, it is crucial to use the correct NVMe screw when installing an NVMe SSD to ensure the drive’s stability and functionality. The NVMe screw is also easily identifiable as it usually has a different color or label from other screws in the PC.

    nvme screw

    Why is It Important to Use an NVMe Screw?

    An NVMe screw is a specialized screw used in the installation of NVMe M.2 SSD drives. These drives are known for their high-speed data transfer rates and require a specific screw to keep them securely in place.

    While some people may assume any screw will do, using the wrong screw can cause serious damage to both the drive and the motherboard. That’s why it is crucial to use an NVMe screw when installing an NVMe M.2 SSD.

    The screw’s unique design ensures the drive is held firmly in place while also preventing any electrical interference that could potentially damage the components. So, if you’re planning on upgrading your computer’s storage with an NVMe M.2 SSD, make sure you have the right screw on hand to get the job done safely and correctly.

    Different Types of NVMe Screws

    NVMe screws are essential components when it comes to installing NVMe SSDs onto motherboards or PC cases. There are several different types of NVMe screws ranging from M.2 standard screws (

    0mm in diameter) to specialty screws such as countersunk screws. Another type of screw commonly used in NVMe installations is the stand-off screw which helps to secure the SSD into place and prevent any flex or movement. It’s important to note that the type of NVMe screw required for your installation may vary depending on the motherboard or case manufacturer, so it’s always best to double-check before purchasing.

    When installing NVMe SSDs, it’s crucial to use the correct screws to ensure a secure and stable installation, preventing any damage to your hardware. So, whether you’re building a new PC or upgrading your existing setup, make sure to research the necessary screws beforehand and choose the right ones for your system to ensure optimal performance and longevity.

    The M.2 NVMe screw

    The M.2 NVMe screw is an essential component in securing your NVMe drive on your motherboard. However, with the various types of screws in the market, choosing the right one can be quite confusing.

    Three types of screws are commonly used: the stand-off screw, the locking pin screw, and the captive screw. The stand-off screw is the most common type and is used to secure the NVMe drive in place using a standoff above the motherboard. The locking pin screw, on the other hand, has two pins that secure it to the motherboard and the drive.

    Finally, the captive screw has a reduced head size, making it easier to mount the drive and compatible with most motherboards. When choosing the right screw, ensure it matches the threading on your motherboard and the drive’s mounting holes. In summary, the M.

    2 NVMe screw is essential for securing your drive on your motherboard, and choosing the right one guarantees a secure and stable connection.

    The mini PCIe NVMe screw

    Mini PCIe NVMe Screw If you’re planning on building or upgrading your computer, you may come across a component called the mini PCIe NVMe screw. This small but crucial item is responsible for securing your NVMe drive in place, preventing it from coming loose during use. However, not all mini PCIe NVMe screws are created equal.

    There are different types of screws that may be used depending on the specific motherboard or NVMe drive you’re using. Some common types include M2x5, M2x3, and M2x

    These screws may vary in length and thread size, so it’s important to check the specifications of your motherboard and NVMe drive to ensure you have the correct screw. Overall, while the mini PCIe NVMe screw may seem like a small detail, it’s an essential component to keep your computer running smoothly and securely.

    The U.2 NVMe screw

    The U.2 NVMe screw is an essential component in installing NVMe drives. However, not all screws are built the same.

    There are different types of NVMe screws that can cause compatibility issues with your drives if not matched correctly. The most common screws are M.2, M.

    3, and U. The U.

    2 NVMe screw is a unique type, with a symmetrical screw head that only fits a U.2 port. This screw is often used for enterprise-level NVMe SSDs, which have more storage capacity than consumer-grade drives and require higher performance and reliability.

    So, before purchasing an NVMe drive, it’s important to determine the compatible screw type to avoid any issues during installation.

    Tips for Installing NVMe Screws

    Installing NVMe screws may seem like a daunting task, but with the right tools and techniques, it can be a breeze. First, ensure that you have the correct size screwdriver to match the size of your NVMe screw. Using the wrong size screwdriver can result in stripping the screw head, making it difficult to remove or adjust in the future.

    Additionally, be cautious not to tighten the screw too much, as overtightening can damage the screw or the slot it sits in. It’s recommended to tighten the screw to a comfortable level of resistance without forcing it. Finally, always double-check the orientation of the NVMe screw before installing it.

    It’s easy to accidentally insert it into the wrong slot or angle, which could ultimately damage your computer or NVMe drive. With these tips in mind, installing NVMe screws should be a stress-free and straightforward process.

    Make Sure You Have the Right Screwdriver

    NVMe screws Installing NVMe screws can be a tricky task, but it becomes easier when you have the right screwdriver. Before you begin, it’s important to ensure that your screwdriver fits the tiny screws on the NVMe drive. Using the wrong size screwdriver may damage the screw or leave it loose, which could result in your drive falling out or becoming corrupted.

    When you have the correct screwdriver, finding the right placement on the NVMe drive may also take some time, so it’s important to be patient and avoid rushing the process. Once you’ve found the right placement, use a gentle hand to ensure you don’t over-tighten and strip the screw. These tips may seem simple, but they can prevent a lot of frustration in the long run and help ensure your NVMe drive is installed securely and correctly.

    Don’t overlook the importance of having the right tool for the job.

    Gently Tighten the Screw to Prevent Damage

    Installing NVMe screws might seem like a trivial task, but it’s crucial to take precautions to prevent damage to your hardware. One of the most important tips to keep in mind is to gently tighten the screw, as applying too much force can cause the screw to become misaligned or damage the threads. You don’t need to apply a lot of pressure to secure the screw, as it only needs to be snug to ensure your NVMe drive is securely in place.

    It’s also a good idea to use a magnetic screwdriver to prevent accidentally dropping the screw into your system, which can cause further damage. Overall, taking care when installing NVMe screws can prevent unnecessary headaches and ensure your hardware performs at its best.

    Conclusion: NVMe Screw is Crucial for SSD Installation

    In conclusion, the NVMe screw may seem like a small, insignificant detail in the world of technology, but it plays a vital role in ensuring that your NVMe drive is securely installed and functioning properly. Without this screw, your fancy new drive could be left flopping around in its slot like a fish out of water, leading to all sorts of data loss and performance issues. So, the next time you’re building a computer or upgrading your storage, don’t overlook the humble NVMe screw – your data will thank you!”

    FAQs

    What is an NVMe screw?
    An NVMe screw is a small screw used to secure an NVMe SSD to a motherboard.

    Are all NVMe screws the same size?
    No, NVMe screws can vary in size depending on the motherboard and SSD model. It is important to check the manufacturer’s specifications for the necessary screw size.

    What happens if I don’t use an NVMe screw to secure my SSD?
    Without a secure mounting, an NVMe SSD may be susceptible to damage or disconnection from the motherboard, affecting performance and potentially causing data loss.

    Can I use a regular screw instead of an NVMe screw?
    It is not recommended to use a regular screw in place of an NVMe screw as it may not fit properly or could damage the SSD or motherboard. It is always best to use the specified screw provided by the manufacturer.

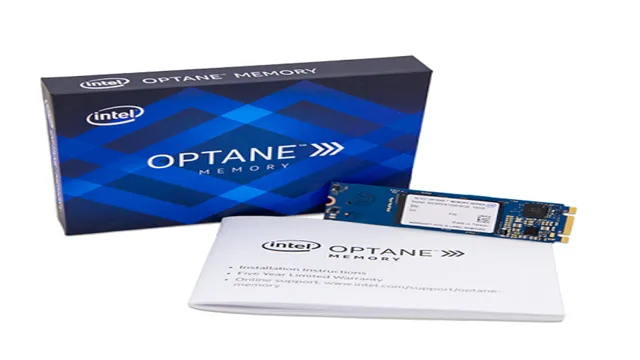
  • Unleashing the Power of Optane Memory H20: The Ultimate Solution for Faster and Efficient Storage – HBRPEKNL0203A-1TB

    Unleashing the Power of Optane Memory H20: The Ultimate Solution for Faster and Efficient Storage – HBRPEKNL0203A-1TB

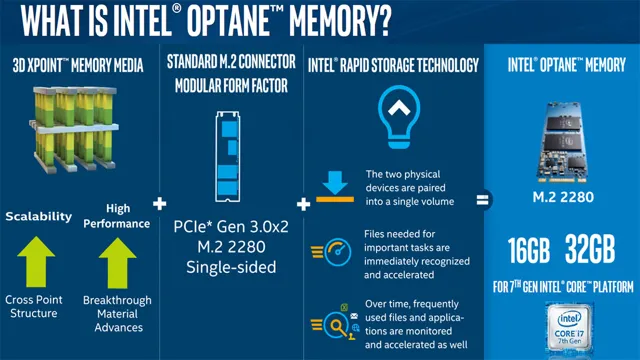
    If you’re looking to boost your PC’s performance, you may have come across the term “Optane Memory H20”. What is it, and how does it work? Essentially, Optane Memory H20 is a type of storage technology that combines traditional hard disk drives (HDDs) with Intel Optane Memory. This creates a hybrid storage system that offers the speed of solid-state drives (SSDs) with the capacity of HDDs.

    Think of it like adding a turbocharger to your car’s engine. Optane Memory H20 can supercharge your PC’s performance, making it faster and more efficient. It does this by automatically storing frequently used data in the Optane Memory, which is much faster than a standard HDD.

    This means you can access your favorite applications, files, and programs much more quickly, without having to wait for your computer to catch up. So, what are the benefits of using Optane Memory H20? For one, it can increase the speed and responsiveness of your PC, making it more efficient for everyday tasks. It can also help with multitasking and reduce load times for larger files and applications.

    Additionally, because it combines the benefits of SSDs and HDDs, it provides a cost-effective way to upgrade your computer’s storage without sacrificing capacity. In short, Optane Memory H20 is a powerful tool for those looking to maximize their PC’s performance. With its hybrid storage technology and intelligent caching system, it can help you decrease load times, increase speed and responsiveness, and make your computer more efficient overall.

    So why not give it a try and see how it can take your PC to the next level?

    Take Your Computing to the Next Level

    Optane Memory H20-HBRPEKNL0203A-1TB is a game-changer in the computing world. This innovative technology takes your computer’s performance to the next level. Its unique ability to merge Optane Memory with QLC NAND storage gives it an edge over other storage options.

    With its impressive speed and reliability, your applications will load faster and your computer will run smoother than ever before. Imagine being able to complete complex tasks in seconds. That’s what Optane Memory H20-HBRPEKNL0203A-1TB can do for you.

    Whether you’re a gamer, content creator, or just looking to optimize your computer’s performance, Optane Memory H20-HBRPEKNL0203A-1TB is the solution you’ve been searching for. Upgrade your computer’s storage to Optane Memory H20-HBRPEKNL0203A-1TB and experience a high-performance computing experience like no other.

    The Optane Memory H20: Features and Specs

    If you’re looking to boost your computer’s speed and performance, the Optane Memory H20 is the perfect tool for you. This innovative piece of hardware doesn’t just improve your computer’s processing power – it also increases storage capacity. By pairing Intel’s Optane memory technology with high-speed QLC NAND storage, the Optane Memory H20 offers lightning-fast read and write speeds that will take your computing experience to the next level.

    With up to 1TB storage capacity, the H20 is also ideal for storing large files such as photos, videos, and games. So why settle for sluggish performance with limited storage when you can upgrade to the Optane Memory H20 and unlock your computer’s full potential?

    optane memory h20-hbrpeknl0203a-1tb

    How the Optane Memory H20 Works

    Looking for a way to take your computing to the next level? Look no further than the Optane Memory H20. This innovative technology combines traditional SSD storage with Intel’s breakthrough 3D XPoint technology to create a faster, smarter, more efficient system. The Optane Memory H20 utilizes machine learning to predict which apps and files you’ll need most, allowing for faster access to your most used programs.

    Additionally, it automatically moves your frequently accessed data to the front of the SSD to reduce latency and speed up performance. So whether you’re gaming, streaming, or simply working, the Optane Memory H20 can help you work smarter, not harder.

    Maximize Your Productivity with Optane Memory H20

    Are you tired of slow-loading apps and sluggish software? Say hello to Optane Memory H20! This powerful tool is the solution to all your productivity woes. With its lightning-fast speed and superior performance, you can get more work done in less time. Optane Memory H20 is an innovative combination of Intel Optane Memory and advanced SSD technology, delivering high-speed storage for your system.

    This means faster boot times, quicker app launches, and speedy file transfers so that you can focus on what’s important- your work. With Optane Memory H20, you no longer have to deal with the frustration of sluggish computer performance, enabling you to increase your productivity and efficiency. So why wait? Get your hands on Optane Memory H20 today and kickstart your productivity!

    Faster Boot Times and Application Launches

    Are you tired of waiting for your computer to boot up or for applications to launch? Look no further than Intel’s Optane Memory H20 to maximize your productivity. With faster boot times and application launches, you can spend less time waiting and more time working. Think of it like a turbocharger for your computer, giving it the extra boost it needs to perform at its best.

    This innovative technology combines Intel Optane Memory and QLC NAND into a single solid-state drive, allowing for quick access to frequently used files and programs. So say goodbye to the frustration of slow loading times and hello to a more efficient and productive workday. Upgrade to Optane Memory H20 and experience the difference for yourself.

    Improved Responsiveness and Multitasking

    Maximizing productivity has never been easier with the Optane Memory H20 – an innovation that improves responsiveness and multitasking of your system. With this powerful device, you can now say goodbye to lagging and slow loading times. The Optane Memory H20 acts as a cache between your HDD and CPU, enhancing your system’s overall performance by accelerating your most frequently used files and applications.

    Its unique technology even makes it possible to open multiple applications simultaneously without any performance glitches. Think of it as a personal assistant that optimizes your computer’s speed and efficiency, giving you more time to focus on the tasks that matter most. Say goodbye to slow computing and hello to a more productive day with the Optane Memory H20!

    Efficient Storage and Retrieval of Frequently Accessed Data

    If you’re looking for an effortless way to make your frequently accessed data more accessible, Optane Memory H20 might just be the perfect solution. This innovative technology is designed to help you maximize your productivity by enhancing both storage and retrieval processes. Optane Memory H20 is designed keeping in mind the modern burstiness and complexity of workloads.

    It combines high-speed solid-state storage with intelligent memory caching to store frequently accessed data more intelligently, making retrieval times much faster. The Optane Memory H20 uses a sophisticated algorithm to analyze access patterns, ensuring that frequently used files are loaded into the cache for speedy access. Additionally, Optane Memory H20 is incredibly easy to use, allowing users to install it like any other storage device.

    With Optane Memory H20, you’ll get a performance boost that makes your work easier and more efficient, giving you more time to focus on the tasks that matter.

    Installation and Compatibility

    Installing Optane Memory H20-HBRPEKNL0203A-1TB is a straightforward process, and it is compatible with numerous motherboards and processors. However, it is crucial to ensure compatibility with your system before installation. Optane memory utilizes Intel Rapid Storage Technology (IRST) version 1

    5 or higher, which is compatible with 7th generation or later Intel Core processors. It is also advisable to have an open M.2 slot on your motherboard with a compatible key and space to accommodate the Optane Memory H20-HBRPEKNL0203A-1TB.

    Once compatibility is assured, the installation process is relatively simple plug and play. You can install the drive using the provided screws, and the system will recognize and configure it in a few minutes. Once installed, Optane Memory H20-HBRPEKNL0203A-1TB will enhance the performance of your system by storing frequently used files and speeding up your hard drive’s response time.

    Easy Setup for Desktop and Laptop

    When it comes to setting up your desktop or laptop for an optimal experience, installation and compatibility are key factors to consider. Fortunately, most software programs these days are designed with ease in mind, and installation is often as simple as downloading and running an installer package. As for compatibility, it’s essential to ensure that your device meets the minimum system requirements for the program you wish to use.

    It’s also essential to keep in mind the type of device you’re using and its particular quirks and limitations. One good practice is to always check the software developer’s website for compatibility information and troubleshooting tips before installing a new program. By taking the time to properly install and assess software compatibility, users can save themselves a lot of frustration and ensure that their desktop or laptop is running at peak performance.

    Compatibility with Common Operating Systems and Platforms

    When it comes to installing new software, compatibility with your current operating system and platform can be a major concern. Fortunately, our software is designed to work seamlessly with all of the most common operating systems and platforms. Whether you are using Windows, Mac, or Linux, you can rest assured that our software will run smoothly and without any issues.

    Plus, our software is designed to be easy to install and use, so you can start enjoying all of its features right away. So if you’re considering using our software, you can feel confident that it will work with your existing setup, no matter what type of computer or device you’re using. With our software, compatibility concerns are a thing of the past!

    Upgrade Your System Today!

    Are you tired of slow boot-up times and sluggish system performance? An easy solution is right at your fingertips with the Optane Memory H20-HBRPEKNL0203A-1TB. This innovative technology combines the power of Intel’s Optane memory and NAND flash memory to provide lightning-fast speed and responsiveness. Not only will it improve your system’s overall performance, but it also offers ample storage space with its 1TB capacity.

    Plus, it’s easy to install with its plug-and-play design. Say goodbye to the frustration of waiting for your computer to load and upgrade your system today with Optane Memory H20-HBRPEKNL0203A-1TB. Trust us, you won’t regret it!

    Conclusion

    In conclusion, the Optane Memory H20-HBRPEKNL0203A-1TB is like a trusty sidekick for your computer. It’s a combination of traditional storage with lightning-fast Optane memory, creating a storage device that’s both spacious and speedy. Like Batman and Robin, or Han Solo and Chewbacca, the Optane Memory H20-HBRPEKNL0203A-1TB is the perfect duo for anyone who demands performance and storage in equal measure.

    With this technology, you can bring a whole new level of intelligence to your computer and take on your computing tasks with ease. So, take on the world and make your computer more powerful than ever with the Optane Memory H20-HBRPEKNL0203A-1TB!”

    FAQs

    What is Optane Memory H20-HBRPEKNL0203A-1TB?
    Optane Memory H20-HBRPEKNL0203A-1TB is a type of memory module that combines Optane Technology and QLC NAND. It is designed to provide fast boot and load times, as well as improve overall system performance.

    What are the benefits of using Optane Memory H20-HBRPEKNL0203A-1TB?
    The benefits of using Optane Memory H20-HBRPEKNL0203A-1TB include faster boot and load times, improved system performance, and increased storage capacity. It can also help reduce power consumption and extend battery life in laptops and portable devices.

    Is Optane Memory H20-HBRPEKNL0203A-1TB compatible with my computer?
    Compatibility with Optane Memory H20-HBRPEKNL0203A-1TB will depend on your computer’s specifications. It is designed to work with systems that support Intel Optane Technology and have an available M.2 slot. You should consult your computer’s manual or contact the manufacturer to confirm compatibility.

    Can I install Optane Memory H20-HBRPEKNL0203A-1TB myself?
    Installing Optane Memory H20-HBRPEKNL0203A-1TB requires some technical skill and knowledge. If you are not familiar with upgrading computer hardware, it is recommended to have it installed by a professional or someone with experience. You should also ensure that you have the necessary tools and equipment before attempting any installation.

  • Maximize Your M.2’s Performance with These Sleek and Effective Heatsinks

    Maximize Your M.2’s Performance with These Sleek and Effective Heatsinks

    Are you one of the many looking to achieve top-notch M.2 performance in your PC? Look no further than adding a heatsink to your setup. M.

    2 solid-state drives are a popular choice amongst individuals seeking high-speed storage. However, with increased usage comes the risk of overheating and thermal throttling. When this happens, the drive performance is reduced, hindering the overall user experience.

    This is where heatsinks come in, by actively dissipating any heat generated by the drive, allowing for optimal usage. Think of it like a cool breeze on a hot summer day, except in your computer! In this blog post, we’ll explore the world of M.2 heatsinks and how they can maximize your drive’s performance.

    What is an M.2 Heatsink?

    If you’re building your own PC, you’re probably familiar with the M.2 SSD. This tiny, high-speed storage drive is a popular choice for enthusiasts, thanks to its speed and compact size.

    However, with all that power comes heat, and that’s where the M.2 heatsink comes in. Simply put, an M.

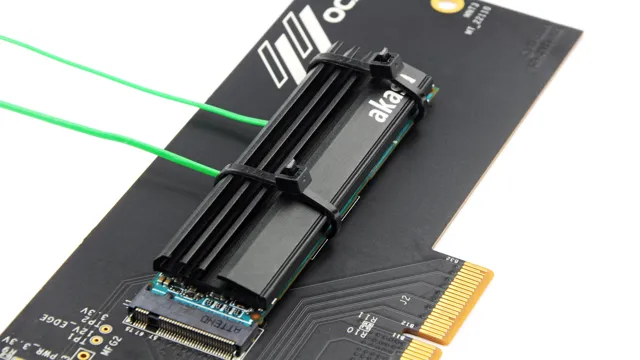
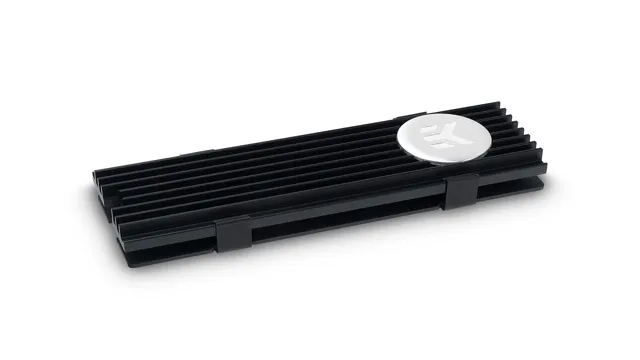
    2 heatsink is a small piece of metal designed to attach to your M.2 SSD. It helps to dissipate heat away from the drive, keeping it cooler and running smoothly.

    Without a heatsink, your M.2 SSD can overheat and suffer from reduced performance or even complete failure. So if you’re serious about your PC build, don’t forget to invest in an M.

    2 heatsink to keep your storage running at its best!

    Explanation of M.2 SSDs and thermal throttling

    M.2 SSDs, thermal throttling, M.2 heatsink If you’re a gamer or a PC enthusiast, you’ve probably heard of M.

    2 SSDs and how they can significantly boost your computer’s performance. However, you may have also heard of thermal throttling, which can occur when your M.2 SSD gets too hot.

    This is where an M.2 heatsink comes in. An M.

    2 heatsink is a small, flat piece of metal that attaches to your M.2 SSD to help dissipate heat. With an M.

    2 heatsink, the heat generated by your M.2 SSD is transferred more efficiently to the metal, which then helps distribute the heat more evenly across the surface. This process can prevent your M.

    2 SSD from overheating and potentially prolong its lifespan. It’s worth noting that not all M.2 SSDs require a heatsink.

    m.2 heatsink

    How an M.2 Heatsink can help

    An M.2 heatsink is a small accessory that can help keep your M.2 SSD cool.

    M.2 SSDs are notorious for generating a lot of heat, which can cause throttling and reduce their lifespan. The heatsink attaches to the M.

    2 SSD and helps dissipate heat, ensuring that it runs optimally. It is a simple but effective solution to a common problem faced by many computer users. Installing an M.

    2 heatsink is easy, and it can be done without the need for any special tools. Simply attach the heatsink to the SSD, and you’re good to go. So, if you’re looking to extend the lifespan of your M.

    2 SSD and improve its performance, consider getting an M.2 heatsink. It is an affordable investment that can make a big difference in the long run.

    Installation of an M.2 Heatsink

    If you’re looking to improve the performance and longevity of your M.2 SSD, you may want to consider installing an M.2 heatsink.

    This handy accessory can help dissipate heat from the SSD, preventing it from overheating and slowing down your system. The installation process is fairly simple, and can be done in just a few minutes. First, you’ll need to remove the M.

    2 SSD from your motherboard. Then, clean the surface of the SSD to remove any debris or thermal paste. After that, you can attach the heatsink to the SSD using the provided adhesive or screws.

    When you’re finished, simply reinsert the SSD into its slot on the motherboard and you’re good to go! Overall, installing an M.2 heatsink is a quick and easy way to improve the performance and lifespan of your M.2 SSD, so why not give it a try?

    Tools and materials needed

    Installing an M.2 heatsink requires a few tools and materials. The most important tool is a screwdriver that fits the screws used to secure the heatsink onto the M.

    2 SSD. You also need thermal paste to help conduct heat from the SSD to the heatsink. If your heatsink does not come with pre-applied thermal paste, you can purchase it separately.

    You will also need a clean cloth or tissue to clean the surface of the SSD before applying the thermal paste. It’s important to make sure the surface is free from dust, debris, or any other contaminants that might affect heat transfer. Once you have all the tools and materials, you’re ready to begin the installation process.

    Step-by-step guide with visuals

    Installing an M.2 heatsink is an effective way to prevent your M.2 SSD from overheating and resulting in slow system performance.

    It’s a simple process that can be done in a few steps. Firstly, ensure that your system is turned off and disconnected from any power source. Then, locate the M.

    2 slot on your motherboard and remove the SSD from it. Next, clean the area surrounding the M.2 slot with a dry cloth to remove any dust or debris.

    After that, remove the protective film from the adhesive side of the heatsink. Carefully place the heatsink onto the M.2 SSD, ensuring that it aligns precisely with the SSD.

    Finally, press down firmly on the heatsink to secure it in place. And voila! Your M.2 SSD is now protected from overheating.

    Remember to periodically check the temperature of your SSD to ensure that it stays within a safe range. By following these simple steps, you can prolong the lifespan of your M.2 SSD and enjoy fast and efficient system performance.

    Tips and tricks for a successful installation

    Installing an M.2 heatsink can help regulate temperatures and improve the performance of your M.2 SSD.

    Here are some tips and tricks to ensure a successful installation. Firstly, make sure your motherboard has an M.2 slot that supports the heatsink.

    The M.2 heatsink usually comes with thermal pads or thermal paste, which should be placed on the surface of the M.2 SSD.

    Next, line up the M.2 heatsink with the M.2 SSD and attach it to the motherboard.

    Be careful not to apply too much pressure, as this could damage the SSD. Once the heatsink is secure, turn on your system and check that the temperature of the M.2 SSD has decreased.

    If it has, then you have successfully installed the M.2 heatsink! Remember to clean any excess thermal paste and ensure that the heatsink is properly secured to prevent any damage to your system. With these tips and tricks, installing an M.

    Improving System Stability with an M.2 Heatsink

    If you’re looking to improve the stability of your computer system, consider investing in an M.2 heatsink. This small but powerful accessory attaches to your M.

    2 SSD, helping to dissipate heat and prevent overheating. Overheating can cause system crashes, slow down performance, and even damage your hardware in the long term. An M.

    2 heatsink is especially crucial for gamers and power users with high-end systems that run intensive applications. By keeping your M.2 SSD cool and stable, you can ensure that your system runs smoothly and efficiently.

    Plus, an M.2 heatsink is relatively easy to install and can be a cost-effective solution to preventing system errors caused by overheating. So, if you’re looking to optimize your system’s performance, consider adding an M.

    2 heatsink to your setup.

    Preventing crashes and freezing

    If you’re experiencing crashes, freezing, or other types of instability on your computer, it’s time to consider an M.2 heatsink. This small accessory can make a big difference when it comes to improving system stability.

    The M.2 heatsink is specifically designed to cool down M.2 SSDs, which tend to run hot and become unstable when they get too warm.

    With an M.2 heatsink, however, you can prevent your SSD from overheating and reduce the risk of system crashes or freezes. Plus, the extra cooling power can also help improve overall system performance by allowing your computer to run more efficiently.

    So if you’re looking for a simple and effective way to improve your system’s stability, consider investing in an M.2 heatsink today.

    Optimizing performance for heavy workloads and gaming

    Are you someone who pushes your computer to the limit with heavy workloads and gaming? Then you probably know that high temperatures can lead to performance issues and even system instability. This is where an M.2 heatsink can prove to be a game-changer.

    By dissipating the heat that is generated by the M.2 SSD, an M.2 heatsink can keep your system running smoothly even during extended periods of heavy use.

    Additionally, it can prevent your M.2 SSD from thermal throttling, which in turn can lead to faster read and write speeds. Simply put, an M.

    2 heatsink is an affordable investment that can make a big difference in your computer’s overall performance and stability. So why not give it a try and see the difference for yourself?

    Conclusion and Recommendations

    In conclusion, a heatsink for your M.2 drive is like sunscreen for your skin on a hot summer day. Just as sunscreen prevents your skin from getting burned and damaged by the sun, a heatsink prevents your M.

    2 drive from overheating and possibly causing damage to your system. It’s a small investment that can go a long way in ensuring optimal performance and longevity of your hardware. Plus, who doesn’t like their technology looking cool and stylish with an added heatsink? So, protect your M.

    2 and stay cool with a heatsink today!”

    FAQs

    What is an M.2 heatsink?
    An M.2 heatsink is a small component designed to cool down M.2 SSDs by dissipating the heat generated by them.

    Why is an M.2 heatsink important in a computer build?
    M.2 SSDs are known to generate quite a bit of heat during operation, which can lead to thermal throttling or even damage. An M.2 heatsink helps to dissipate this heat, which in turn can improve the overall performance and lifespan of the SSD.

    Can I install an M.2 heatsink on any M.2 SSD?
    In most cases, yes. M.2 heatsinks are designed to be compatible with most M.2 SSDs, regardless of the brand or model. However, it is always a good idea to check the specifications of your SSD and heatsink to ensure they are compatible.

    Does installing an M.2 heatsink require any additional hardware or tools?
    Typically, no. M.2 heatsinks are designed to be easy to install and require no additional hardware or tools. However, it is important to follow the manufacturer’s instructions carefully to ensure proper installation and compatibility.

  • 5 Reasons Why M.2 NVMe is the Future of Fast Storage: A Comprehensive Guide

    If you’re building a custom PC or upgrading an existing one, you may have come across the term “M.2 NVMe” while researching storage options. In a nutshell, M.

    2 NVMe is a type of solid-state drive (SSD) that uses the M.2 form factor and the PCIe interface to deliver lightning-fast read and write speeds. But what does all that jargon actually mean? And how do you know if M.

    2 NVMe is right for your needs? In this blog, we’ll break down the technical details and give you a practical overview of what M.2 NVMe is, how it works, and whether you should consider it for your next storage upgrade. So if you’re curious about this exciting technology, keep reading!

    Small and Fast

    When it comes to fast storage solutions, the m.2 NVMe format has really taken the lead. Whether you’re a gamer, content creator, or just someone who wants their computer to run as quickly as possible, an m.

    2 NVMe drive can give you the speed you need. These drives are incredibly small, which means they’re perfect for systems that have limited space. Plus, they’re incredibly fast, which means you’ll be booting up your computer in no time and loading your applications in seconds.

    If you’re still using the traditional spinning hard drive, you’re going to be blown away by the speed and performance boost that an m.2 NVMe drive can give you. So if you want to upgrade your storage to something small and fast, an m.

    2 NVMe drive is the way to go!

    Fits into Small Spaces

    One of the best things about small devices is that they can fit into small spaces easily. This is especially true for small and fast machines, which can be incredibly handy in tight spaces. Whether you’re working in a small workshop or trying to fix something in a tight corner, a small and fast device can help you get the job done.

    Plus, they’re also perfect for people who are always on the go and need a device that can keep up with their busy lifestyle. These machines may be small, but they’re mighty, and they’re perfect for anyone who needs a solid tool that can fit into their pocket. So if you’re in need of a device that can keep up with your fast-paced lifestyle, look no further than a small and fast machine.

    m.2 nvme

    Transfers Data at Lightning Speeds

    If you’re looking for lightning-speed data transfers, there are plenty of options available on the market. But if you’re after something small and fast, that allows you to move data seamlessly, then you’ll definitely want to check out our latest offering. Our revolutionary data transfer technology has been engineered to provide lightning-fast transfer speeds while remaining compact and portable.

    Whether you’re looking to transfer large files or just want to send a quick message to a colleague, our technology is designed to get the job done quickly and efficiently. And what’s more, our transfer rates are unbeatable, ensuring that you can enjoy lightning-fast transfer speeds no matter what type of data you’re working with. With our technology, you can rest assured that your data is safe, secure, and being transferred at lightning speeds, all while remaining completely portable and easy to use.

    So why wait? Give our data transfer solution a try today and see for yourself just how fast and efficient it can be!

    M.2 NVMe vs. Other Storage Options

    M.2 NVMe is a relatively new storage option that is becoming increasingly popular among computer enthusiasts and gamers. This technology uses the NVMe (Non-Volatile Memory Express) interface to deliver blazing-fast speeds and low latency, making it ideal for high-performance workloads and demanding applications.

    Compared to other storage options such as SATA SSDs and traditional hard drives, M.2 NVMe can transfer data at lightning-fast speeds, offering up to six times faster read and write speeds. This significant speed boost can improve system performance, reduce program loading times, and enhance gaming experiences.

    Another benefit of M.2 NVMe is its compact form factor, which is much smaller than traditional drives and allows for a more streamlined and efficient build. Overall, M.

    2 NVMe is an excellent choice for those who crave speed and performance, especially when working with large files, heavy workloads, and demanding applications.

    SSD and HDD Comparison

    When it comes to choosing storage options for your computer, you may be overwhelmed by the different types available. One popular choice these days is M.2 NVMe.

    So how does it compare to other storage options like traditional hard disk drives or SATA SSDs? Well, M.2 NVMe drives are definitely faster than their counterparts. They use the PCI Express interface, which allows for read and write speeds that can go up to 4 GB per second.

    This means that applications can launch much faster, and you can transfer large files in a matter of seconds. On the other hand, traditional hard disk drives use spinning disks to read and write data. This process takes longer and is generally slower than M.

    2 NVMe. SATA SSDs are faster than HDDs, but they still can’t compete with the speed of M.2 NVMe.

    But bear in mind, M.2 NVMe drives can be quite expensive compared to traditional HDDs. So if you’re on a tight budget, you might want to consider a SATA SSD instead.

    In summary, M.2 NVMe drives are the fastest storage options available in the market, but they come at a higher cost. Depending on your needs and budget, you could still benefit from using traditional HDDs or SATA SSDs.

    PCIe and AHCI Comparison

    When it comes to storage options for your computer, there are a few different paths you could take. One newer option is the M.2 NVMe drive.

    But how does it compare to other options like SATA SSDs or traditional hard drives? Let’s break it down. First off, the M.2 NVMe drive connects to your computer via the PCIe interface.

    This means it can take advantage of PCIe’s faster speeds compared to the older SATA interface that traditional SSDs use. In fact, the best M.2 NVMe drives can easily offer read and write speeds over 3,000 MB/s, which is several times faster than even the fastest SATA SSDs.

    What does this mean in practice? Well, for starters, your computer will boot up faster with an M.2 NVMe drive. Loading times for games, applications, and files will also be significantly reduced.

    It’s like going from a bicycle to a sports car in terms of speed. Another advantage of M.2 NVMe drives is their size.

    They’re tiny compared to traditional drives, which means they take up less physical space inside your computer. This can be especially important if you’re building a compact PC. That being said, M.

    Compatibility and Portability Considerations

    When choosing a storage option for your computer, one of the most debated choices is between M.2 NVMe and other options such as SATA or HDD. The main advantage of M.

    2 NVMe is its lightning-fast read and write speeds, making it ideal for gamers or anyone who needs fast access to data. However, it is essential to note that M.2 NVMe requires a compatible motherboard with an M.

    2 slot, and not all computers support it. On the other hand, SATA and HDD are compatible with most motherboards, making them a popular choice for those who require storage with no compatibility issues. Additionally, while M.

    2 NVMe is known for its speed, it comes at a premium cost, which may not be ideal for some budgets. Ultimately, when deciding between the various storage options, one should consider their specific needs and their computer’s ability to support the chosen storage option.

    Benefits of Using M.2 NVMe

    M.2 NVMe is a high-speed storage interface that has become increasingly popular among PC users and enthusiasts. Its benefits include faster read and write speeds, lower power consumption, and compact physical size.

    M.2 NVMe drives are capable of achieving speeds well beyond those of traditional SATA drives, providing lightning-fast load times and increased productivity for demanding applications. Additionally, M.

    2 NVMe drives require less power than traditional drives, making them more energy-efficient and reducing overall system heat. Plus, their compact form factor allows for more space in your PC case, making it easier to install additional components. Overall, investing in an M.

    2 NVMe drive is a wise decision that can greatly improve the performance and functionality of your PC.

    Increased Speed and Performance

    M.2 NVMe is a game-changer when it comes to boosting the speed and performance of your computer. One of the biggest benefits of M.

    2 NVMe is the fact that it uses a PCIe interface, which provides faster data transfer speeds than traditional SATA connections. With read and write speeds that can reach up to 3,500MB/s and 3,300MB/s respectively, M.2 NVMe can dramatically reduce boot times and significantly improve the overall performance of your system.

    Additionally, the compact size of M.2 NVMe drives allows for more efficient use of space within your computer case. Overall, if you want to increase the speed and performance of your computer, M.

    2 NVMe is definitely worth considering.

    Efficient and Cost-Effective

    When it comes to storage solutions for computers, M.2 NVMe drives have been gaining popularity due to their numerous benefits. One of the biggest advantages of using M.

    2 NVMe drives is their efficiency. These drives are designed to deliver quick read and write speeds which results in faster boot-up times and quicker application load times. Additionally, they have larger storage capacities compared to traditional hard drives, which means you can store more data without sacrificing speed.

    Another plus for M.2 NVMe drives is that they are also cost-effective in the long run. Although they may be initially more expensive than traditional hard drives, the longevity and speed make them worth the investment.

    The low power consumption of these drives also translates to lower electricity bills. In summary, when considering storage solutions for your computer, M.2 NVMe drives are an efficient and cost-effective option that provides high performance and reliability.

    Installation and Maintenance

    Installing and maintaining an M.2 NVMe drive can seem daunting at first, but it’s a relatively straightforward process. First, ensure that your motherboard supports M.

    2 NVMe drives, and locate the M.2 slot. Insert the drive into the slot and secure it with the screw provided.

    Next, reboot your system and enter the BIOS to make sure that the drive is recognized and set as the boot drive if desired. When it comes to maintenance, it’s essential to keep your M.2 NVMe drive clean and free of dust, as this can cause overheating and decreased performance.

    Regularly updating your system and firmware can also help ensure optimal performance. With proper installation and maintenance, an M.2 NVMe drive can significantly improve your computer’s speed and overall performance.

    Step-by-Step Guide for Installation

    Installing and maintaining a new piece of equipment can be overwhelming, but with a step-by-step guide, it can be a breeze. Here are the basic steps for installing and maintaining your equipment. First, ensure you have all the necessary tools and equipment before beginning.

    It’s essential to read through the manufacturer’s instruction manual and follow every step carefully to avoid damaging the equipment or injuring yourself. It’s also important to note that some equipment may require professional installation to justify warranties. You should aim to keep your equipment clean, well-lubricated, and efficiently maintained to ensure its longevity and safe operation.

    Regular inspection is also crucial to detect any signs of wear and tear or potential problems early on, which may save you costly repairs and downtime. Remember, proper installation and maintenance of your equipment are essential to ensure optimal performance and extend its lifespan. Taking the time to do it right is well worth it in the long run.

    Tips for Maintenance and Optimization

    When it comes to installing and maintaining your equipment, there are a few things that you should keep in mind. Firstly, it’s essential to carefully follow the manufacturer’s instructions during installation, as even a small mistake could lead to bigger problems down the line. Additionally, regular maintenance is crucial for keeping your equipment running smoothly and reducing wear and tear.

    This might include things like cleaning the equipment, checking for any signs of damage or wear, and replacing any parts that are showing signs of wear and tear. By taking the time to properly install and maintain your equipment, you can save yourself time and money in the long run and ensure that it’s functioning at its best. So, be sure to take this aspect seriously, and don’t let a lack of attention to detail put your equipment at risk.

    Conclusion

    In conclusion, the M.2 NVMe drive is the speed demon of the storage world, propelling your system to new heights of performance and efficiency. With its lightning-fast read and write speeds, this solid state drive is the perfect choice for demanding tasks such as gaming, video editing, and data-intensive applications.

    So if you want to take your computer to the next level, get yourself an M.2 NVMe drive and watch your machine blaze through any task with ease!”

    FAQs

    What is an M.2 NVMe drive and how is it different from a SATA SSD?
    An M.2 NVMe (Non-Volatile Memory express) drive is a type of solid-state drive (SSD) that uses the NVMe interface to connect to a computer, providing faster data transfer speeds than a traditional SATA SSD. NVMe drives use the PCIe (Peripheral Component Interconnect express) interface, which is faster than the SATA interface commonly used in standard SSDs.

    What are the benefits of using an M.2 NVMe drive in a laptop?
    M.2 NVMe drives provide faster boot and load times, making your laptop more responsive. They are also smaller and lighter than traditional SATA SSDs, making them ideal for laptops where space is at a premium. M.2 NVMe drives also consume less power, improving battery life, and generating less heat, which can help keep your laptop cooler and quieter.

    Can I replace a traditional SATA SSD with an M.2 NVMe drive in my laptop?
    It depends on your laptop’s specifications. Some laptops only support SATA SSDs, while others have an M.2 NVMe slot available. You should check your laptop’s documentation or manufacturer’s website to see if it supports NVMe drives. If it does, you can usually replace a traditional SATA SSD with an M.2 NVMe drive as long as it is the correct form factor and size.

    Do all M.2 NVMe drives have the same performance?
    No, different M.2 NVMe drives have different speeds and performance. The performance of an M.2 NVMe drive depends on factors such as the type of NAND flash memory used, the number of channels, the controller, and the firmware. You should compare the specifications of different M.2 NVMe drives before choosing one that fits your needs and budget.

  • Boost Your PC Performance with the Ultimate m.2 SATA RAID Enclosure: The Future of Storage!

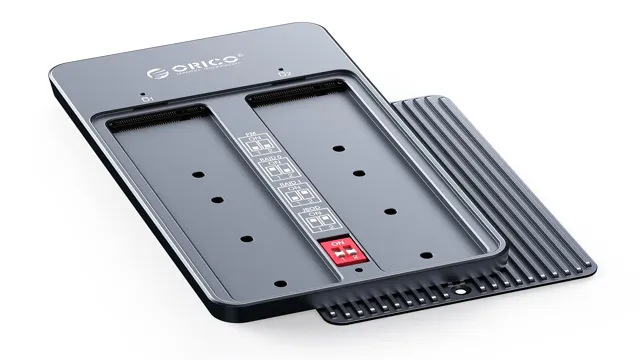
    Hey there fellow tech enthusiasts! Are you struggling with storage management? Are you wondering how to maximize your storage efficiency and make the most out of your computer’s capabilities? Well, look no further because I have the solution for you! Introducing the m.2 SATA RAID enclosure, a game-changer in the world of storage management. With the ability to support multiple drives and configure them into a RAID array, you can now achieve the storage capacity and speed that you’ve always dreamed of.

    Not only will this enclosure allow you to store and access your files with lightning-fast speed, but it will also ensure that your data is safe and secure with its redundancy capabilities. No need to worry about losing important documents or compromising files. But wait, there’s more! The m.

    2 SATA RAID enclosure is not only efficient in terms of storage space but also in the physical space it takes up. This compact and lightweight device can easily fit in the palm of your hand, freeing up valuable desk space. So don’t settle for a cluttered and inefficient storage system.

    Upgrade to the m.2 SATA RAID enclosure and experience the full potential of your computer’s storage capabilities.

    What is an m.2 SATA RAID Enclosure?

    An m.2 SATA RAID enclosure is a device designed to accommodate m.2 solid-state drives (SSDs) and allow them to be used in a RAID configuration.

    RAID (Redundant Array of Independent Disks) is a system that combines multiple disks into a single logical unit for improved performance or data redundancy. An m.2 SATA RAID enclosure typically has multiple bays for holding m.

    2 SSDs and can be connected to a computer or other device through a variety of interfaces such as USB or Thunderbolt. These enclosures are popular among users who require high-speed storage for demanding applications such as video editing or gaming and want the added benefits of RAID such as data protection and fault tolerance. Overall, an m.

    2 SATA RAID enclosure is a versatile storage solution that offers a range of benefits for users who need high-performance storage and the added benefits of RAID.

    A Brief Overview of m.2 SATA Technology

    An m.2 SATA RAID enclosure is a device that allows you to create a RAID array using m.2 SATA drives.

    m.2 SATA is a newer technology that offers faster data transfer speeds and smaller form factors than traditional SATA drives. The m.

    2 SATA RAID enclosure allows you to combine multiple m.2 SATA drives into a single unit, providing increased storage capacity and faster read and write speeds. Whether you’re using the enclosure for gaming, video editing, or file storage, the m.

    2 SATA RAID enclosure is a powerful and versatile tool that can meet your needs. So, if you’re looking for a way to improve your storage performance, consider investing in an m.2 SATA RAID enclosure today.

    m.2 sata raid enclosure

    Advantages of Using a RAID Enclosure

    An m.2 SATA RAID Enclosure is a device that allows users to connect multiple hard drives and SSDs together to create a redundant storage system. RAID stands for Redundant Array of Inexpensive (or Independent) Disks.

    This technology offers various advantages, including improved performance, higher data availability, and better reliability. With an m.2 SATA RAID Enclosure, users can increase the speed of their storage system by combining the capacity of multiple drives while ensuring the data is safe in the event of a drive failure.

    Additionally, users can add or remove drives at will without affecting the data on the system. This is particularly useful for professionals who require a flexible and scalable storage solution. Furthermore, an m.

    2 SATA RAID Enclosure can be more cost-effective than a single large-capacity drive, while providing a higher level of security and performance. Overall, an m.2 SATA RAID Enclosure is an excellent option for those who need a reliable and flexible storage solution without the expense of a high-end enterprise storage system.

    Choosing the Right m.2 SATA RAID Enclosure

    If you’re planning to build a high-performance desktop or upgrade an existing one, you might want to consider investing in an m.2 SATA RAID enclosure. But with so many options out there, how do you find the right one? It all depends on your specific needs and budget.

    Some things to consider include the number of drives and RAID levels supported, the type of interface (e.g., USB, Thunderbolt), and the overall build quality.

    Additionally, make sure the enclosure is compatible with your motherboard and supports the type of RAID configuration you want. With the right m.2 SATA RAID enclosure, you can enjoy faster data transfer speeds and better storage performance, making it a worthwhile investment for any power user.

    Considerations for Your Storage Needs

    When it comes to choosing the right m.2 SATA RAID enclosure for your storage needs, there are a few key factors to consider. One of the most important is the number of drives that you need to store your data.

    Some enclosures support a single drive, while others can accommodate multiple drives in a RAID configuration for increased performance and redundancy. Another important consideration is the speed of the enclosure, as faster speeds will allow for quicker access times and smoother performance. It’s also important to think about the physical size and design of the enclosure, as well as its compatibility with your existing hardware and software.

    Ultimately, the right m.2 SATA RAID enclosure will depend on your specific storage needs, budget, and overall preferences. By taking the time to research and compare different options, you can find the perfect solution for your needs and enjoy reliable storage and fast performance for years to come.

    Top Brands to Look Out For

    When it comes to choosing the right m.2 SATA RAID Enclosure, there are a few top brands that stand out for their quality and reliability. One such brand is StarTech.

    They offer a range of enclosures that support multiple RAID configurations, and their products are built to last. Another brand to consider is OWC, which is known for its rugged and durable enclosures. They offer a variety of options, including PCIe and Thunderbolt enclosures.

    If you’re looking for a high-end option, consider the Thunder3 Quad X enclosure from Akitio. This enclosure supports up to four m.2 drives and features Thunderbolt 3 connectivity for lightning-fast data transfer speeds.

    Whatever your needs may be, there’s an m.2 SATA RAID enclosure out there for you. And with these top brands to choose from, you can be sure you’re getting a product that’s built to last.

    Compatible Devices and Operating Systems

    When it comes to choosing the right m.2 SATA RAID enclosure, one of the most critical factors to consider is compatibility with your device and operating system. Not all devices are created equal, and not all RAID enclosures are designed to work with all operating systems.

    For instance, if you’re using a Mac, you’ll want to make sure that the enclosure you choose is compatible with macOS. Similarly, if you’re using a Windows PC, you’ll want to ensure that the enclosure supports Windows. However, there are some enclosures that work with both Mac and Windows, which can be a great option if you need to switch between the two.

    It’s also essential to consider the types of devices you’ll be using the enclosure with, whether it be a laptop, desktop, or other device. Overall, taking the time to research and ensure compatibility can save you a lot of frustration and hassle down the road.

    Installation and Setup

    If you’re looking to set up an m.2 SATA RAID enclosure, then you’ve come to the right place. First things first, make sure you have all the necessary components for installation – the enclosure itself, compatible hard drives, and a screwdriver.

    Once you have everything, begin by removing the screws on the bottom of the enclosure and opening it up. Then, insert the SATA hard drives into the slots provided and secure them using the screws provided. Next, connect the power and data cables from the enclosure to your computer’s motherboard and power supply.

    Make sure the cables are securely connected before closing up the enclosure. Once everything is connected, power on your computer and open the disk management tool to configure the RAID array. We highly recommend researching the specific steps for your individual setup to ensure successful installation.

    Don’t forget to format your RAID array before using it for storage to avoid any data corruption. With a bit of patience and attention to detail, you’ll have your very own m.2 SATA RAID enclosure up and running in no time!

    Step-by-Step Guide to Setting up Your m.2 SATA RAID Enclosure

    Setting up your m.2 SATA RAID enclosure can be a daunting task, but with this step-by-step guide, you’ll have everything up and running in no time. First, you’ll need to gather all necessary components including your enclosure, SSDs, screws, and screwdriver.

    Next, you’ll want to insert the SSDs into the enclosure, making sure they are secured with screws. After that, connect the enclosure to your computer’s PCIe slot using the provided cable, and power it up. Once your computer recognizes the RAID drive, you’ll need to format it to allocate its full capacity.

    From here, you can begin using your new RAID drive for increased storage space and faster read/write speeds. Remember, take your time and follow the instructions carefully to ensure a successful installation.

    Tips to Maximize Performance

    When it comes to maximizing performance, proper installation and setup are key. First off, it’s important to ensure that your hardware meets the necessary requirements for the software you’re installing. After that, make sure to carefully follow the installation instructions and properly configure settings to suit your needs.

    For instance, some software may have options for optimizing performance based on the resources available on your system. Taking advantage of these options, along with ensuring that the software is running on an up-to-date operating system and compatible hardware, can help to ensure the best possible performance. So, before diving right into using your new software or application, take some time to make sure everything is set up correctly to get the most out of it.

    Conclusion

    In conclusion, a M.2 SATA RAID enclosure is like a superhero’s utility belt for your computer’s storage needs. It combines the speed and convenience of M.

    2 drives with the reliability and redundancy of RAID setups, all neatly packed into a compact and stylish package. Whether you need to store massive amounts of data or just want to speed up your system’s performance, a M.2 SATA RAID enclosure is the perfect sidekick for any tech-savvy user.

    So why settle for a mere mortal computer setup when you can have a superhero one?”

    The Benefits of an m.2 SATA RAID Enclosure

    Installation and Setup for an m.2 SATA RAID Enclosure is a breeze. With the right tools and a bit of patience, you can quickly assemble the enclosure and start reaping the benefits of a faster, more efficient system.

    By installing multiple m.2 SATA drives in a RAID configuration, you’ll not only increase your storage capacity but also improve your system’s overall speed and performance. The enclosure protects the drives from external damage while still allowing for easy access and maintenance.

    Setting up the RAID configuration is also relatively simple, as most enclosures come with software that guides you through the process. Whether you’re a gamer, designer, or professional working with large media files, an m.2 SATA RAID Enclosure is an investment that will undoubtedly benefit your work or leisure.

    FAQs

    What is an M.2 SATA RAID enclosure?
    An M.2 SATA RAID enclosure is a device that can hold two or more M.2 SATA SSDs and allows users to create a RAID array.

    How many M.2 SATA SSDs can an M.2 SATA RAID enclosure hold?
    The number of M.2 SATA SSDs that an M.2 SATA RAID enclosure can hold depends on the specific model. Some enclosures can hold two M.2 SATA SSDs, while others can hold four or more.

    What types of RAID configurations can be created using an M.2 SATA RAID enclosure?
    An M.2 SATA RAID enclosure typically supports RAID 0, RAID 1, and JBOD configurations.

    Is it possible to replace M.2 SATA SSDs in an M.2 SATA RAID enclosure?
    Yes, most M.2 SATA RAID enclosures allow users to replace SSDs. However, it’s important to check the specific model’s documentation for compatibility and installation instructions.

  • Unlock Lightning-fast Speeds: Maximizing Your Computer’s Potential with M.2 SATA SSD in NVMe Slot

    Unlock Lightning-fast Speeds: Maximizing Your Computer’s Potential with M.2 SATA SSD in NVMe Slot

    If you’re planning to build a PC or upgrade your system, you might be wondering if you can use an M.2 SATA SSD in an NVMe slot. After all, both types of SSDs seem to look the same.

    But can you really use one in place of the other? The short answer is no. While M.2 SATA SSDs and NVMe SSDs share the same physical form factor, they use different protocols to communicate with your computer’s motherboard.

    In other words, an M.2 SATA SSD won’t work in an NVMe slot. But don’t worry, we’ve got you covered.

    In this blog post, we’ll explain what you need to know about M.2 SATA SSDs and NVMe SSDs, and why you can’t use one in place of the other. So sit back, relax, and read on.

    Understanding M.2 SATA SSDs and NVMe Slots

    Have you ever wondered what the difference is between an M.2 SATA SSD and an NVMe slot? To put it simply, an M.2 SATA SSD is a storage device that uses the SATA interface, while an NVMe slot is a high-speed interface that is specifically designed for solid-state drives (SSDs).

    Now, what happens when you install an M.2 SATA SSD into an NVMe slot? The answer is that it will still work, but you won’t get the full benefit of the NVMe interface. This is because the M.

    2 SATA SSD is limited by the SATA interface’s slower speed, which means it won’t be able to take full advantage of the NVMe slot’s high speeds. In other words, installing an M.2 SATA SSD in an NVMe slot will not increase the speed of the SSD beyond that of the SATA interface.

    It’s important to note that not all M.2 slots are NVMe compatible. Some motherboards only have M.

    2 slots that support SATA interfaces, so be sure to check your hardware specifications before purchasing an SSD. Additionally, some M.2 SATA SSDs may have an NVMe-compatible variant, so it’s always worth doing some research to find the best option for your needs.

    In conclusion, while an M.2 SATA SSD can technically be installed in an NVMe slot, it won’t provide the full benefits of the NVMe interface. If you’re in the market for a new SSD, it’s important to do your research and choose the option that’s best suited for your hardware and performance needs.

    Different Types of M.2 Slots and SSDs

    M.2 slots, SATA SSDs, NVMe slots If you’re looking to upgrade your computer’s storage with an M.2 slot and SSD, there are a few things to consider.

    M.2 slots come in different sizes, with the most common being M.2 2280.

    SATA SSDs can be used in these slots, but they don’t offer the same speed as NVMe SSDs. NVMe slots, on the other hand, allow for faster speeds and lower latency, making them the better choice for high-performance tasks like gaming and video editing. It’s important to note that not all motherboards support NVMe, so be sure to check before making your purchase.

    When shopping for an M.2 SSD, pay attention to its capacity and read/write speeds, as well as the warranty and customer reviews. By understanding the differences between M.

    2 SATA SSDs and NVMe slots, you can make an informed decision on the best storage upgrade for your needs.

    m.2 sata ssd in nvme slot

    Why Use M.2 SATA SSDs in NVMe Slots?

    M.2 SATA SSDs, NVMe slots If you’re building a PC or upgrading your system, you might be wondering about the difference between M.2 SATA SSDs and NVMe slots.

    M.2 refers to the physical form factor of the drive, while SATA and NVMe refer to the interface the drive uses to communicate with your computer. M.

    2 SATA SSDs are cheaper and slower than NVMe SSDs but can still be used in NVMe slots. So, why use M.2 SATA SSDs in NVMe slots? It’s mainly about compatibility and flexibility.

    If you want to save a little money and still get a performance boost over a traditional hard drive, an M.2 SATA SSD in an NVMe slot can be a good option. Plus, it leaves your other PCIe slots free for other components like graphics cards.

    Just keep in mind that if you have a high-performance M.2 NVMe SSD, the slot will be limited to the slower SATA speeds if you use an M.2 SATA SSD instead.

    Ultimately, the choice comes down to your specific needs and budget.

    Installation Guide: How to Install M.2 SATA SSD in NVMe Slot

    Installing an M.2 SATA SSD in an NVMe slot can offer faster boot and data access times compared to standard hard drives. However, before purchasing an M.

    2 SSD, make sure it is compatible with your motherboard’s NVMe slot. First, turn off your computer and unplug all cables. Then locate the M.

    2 slot on your motherboard, usually near the PCIe slots. Make sure the screw is removed and insert the M.2 SSD gently at an angle, then push it down towards the standoff.

    Use the screw provided in the packaging to secure the SSD in place. Next, reconnect the cables, turn on your computer, and access the BIOS to check if your SSD is recognized. If detected, configure the boot order to prioritize the M.

    2 SSD. After the installation, you can transfer your operating system and other important files to your new SSD for improved performance. Overall, installing an M.

    2 SATA SSD in an NVMe slot is a straightforward process and can be done by anyone with basic computer hardware knowledge.

    Precautions Before Installation

    Before proceeding with the installation of your new M.2 SATA SSD into an NVMe slot, it’s important to take a few precautions to avoid any potential issues. Firstly, ensure that you have discharged any static electricity from yourself by touching a grounded metal object, such as a lamp or radiator.

    This can help prevent damage to both your SSD and your computer. Next, make sure that your computer is turned off and unplugged from the power supply to avoid any electrical shocks. Finally, refer to your computer’s manual or manufacturer’s website for specific instructions on opening your computer’s case and accessing the NVMe slot.

    These precautions may seem like small steps, but they can make a significant difference in prolonging the life of your new SSD and preventing any accidental damage. So take the time to follow these guidelines thoroughly before diving into the installation process.

    Step-by-Step Installation Guide

    If you’re looking to upgrade your computer’s storage capacity, installing an M.2 SATA SSD in an NVMe slot is a great option. The process is easy, even for those who aren’t tech-savvy.

    Firstly, make sure that your motherboard supports NVMe SSDs. Then, locate the NVMe slot, which is usually found near the RAM slots. Open the slot latch using a screwdriver or your fingers.

    Next, insert the M.2 SATA SSD into the slot using a slight angle, and then gently press down on it until it clicks into place. After the installation is complete, your computer should recognize the new SSD automatically.

    However, you may need to format and partition the SSD to use it properly. You can do this by going into your computer’s disk management tool and following the on-screen prompts. Overall, installing an M.

    2 SATA SSD in an NVMe slot is a quick and simple process. It’s a great way to increase your computer’s storage capacity and overall performance. So go ahead and upgrade your system today!

    Testing Your M.2 SATA SSD in NVMe Slot

    Installing an M.2 SATA SSD in an NVMe slot can be a bit tricky, but with a little bit of guidance, it’s easy to do on your own. The first step is to check whether your motherboard supports both M.

    2 SATA and NVMe slots, as not all motherboards support both. Once you have confirmed this, you can proceed with installing the M.2 SATA SSD in the NVMe slot.

    Start by locating the NVMe slot on your motherboard, which is typically located near the CPU. Insert the M.2 SATA SSD into the NVMe slot and secure it with the screw provided with the motherboard.

    Make sure to handle the SSD gently, as it’s delicate and can be easily damaged. Once the installation is complete, it’s crucial to test the SSD in the NVMe slot to ensure that it’s working correctly. To do this, you need to check if the BIOS is detecting the SSD.

    Restart your computer and enter the BIOS settings by pressing the appropriate key (usually F2, F10, or Delete). Check the storage devices section, and you should see your M.2 SATA SSD listed as a storage device in the NVMe slot.

    In conclusion, installing an M.2 SATA SSD in an NVMe slot isn’t as complicated as it might seem. As long as you follow the instructions carefully and handle the SSD with care, this upgrade can significantly increase your computer’s speed and performance.

    M.2 SATA SSD Compatibility with NVMe Slots

    If you’re looking to upgrade your computer’s storage and wondering if an M.2 SATA SSD will work in an NVMe slot, the answer is yes and no. While the physical connectors for both SSD types are the same, the protocols used to transfer data are different.

    M.2 SATA SSDs use the SATA protocol, which has a slower speed limit of 6Gb/s, while NVMe SSDs use the PCIe protocol and can reach speeds of up to 32Gb/s. So, if you try to use an M.

    2 SATA SSD in an NVMe slot, it will physically fit but won’t perform at its full potential. However, if your computer only has an NVMe slot and you need to use an M.2 SATA SSD, you can use an M.

    2 to SATA adapter to connect the drive to the motherboard’s SATA port. Keep in mind that this means you’ll be limited by the slower SATA speeds, so it might not be the best option if you need faster read and write speeds. In summary, while M.

    2 SATA SSDs are physically compatible with NVMe slots, their performance will be limited due to the slower SATA protocol.

    Compatibility Chart for Popular Motherboards/Notebooks

    If you’re looking to upgrade to an M.2 SATA SSD, it’s important to ensure compatibility with your motherboard or notebook’s NVMe slot. Luckily, many modern motherboards and notebooks support both SATA and NVMe M.

    2 SSDs. However, it’s always best to check your device’s manufacturer website or user manual to confirm compatibility. In simple terms, an M.

    2 SATA SSD is a type of solid-state drive that uses the SATA interface, while an NVMe SSD uses the newer, faster PCIe interface. NVMe drives offer faster speeds than SATA, but may cost more. When it comes to compatibility, most motherboards and notebooks have M.

    2 slots that support both SATA and NVMe SSDs. But be aware that some older models may only support SATA or NVMe, not both. Additionally, if you’re installing an M.

    2 SATA SSD in an NVMe slot, it may still work, but at slower SATA speeds. It’s important to double-check compatibility to ensure you’re getting the full benefits of your new SSD. In conclusion, always research compatibility before upgrading your storage.

    Keep in mind the differences between M.2 SATA and NVMe SSDs, and double-check that your device supports the type of drive you want to install. With a little bit of research, you can easily upgrade your storage and enjoy faster speeds and improved performance.

    Issues with M.2 SATA SSDs in NVMe Slots and How to Fix Them

    M.2 SATA SSDs, NVMe slots, compatibility, issues, fix If you’ve ever attempted to install an M.2 SATA SSD into an NVMe slot, you may have run into some compatibility issues.

    Despite their similar physical appearance, M.2 SATA SSDs and NVMe slots operate using different protocols, which can cause problems when attempting to use them together. While M.

    2 SATA SSDs are designed to work with SATA slots, NVMe slots are meant for use with much faster NVMe SSDs. Fortunately, there are several ways to fix this issue. One option is to check your motherboard manual to ensure compatibility between the two.

    If they’re not compatible, you can purchase an adapter to convert your M.2 SATA SSD into an NVMe drive. Alternatively, you could upgrade to a newer motherboard that supports both M.

    2 SATA and NVMe SSDs. Whatever your solution, it’s important to be aware of these compatibility issues before purchasing and installing storage on your device.

    Conclusion: Is M.2 SATA SSD in NVMe Slot Right for You?

    In conclusion, using an M.2 SATA SSD in an NVMe slot is like driving a sports car on a dirt road – it may work, but you’re not getting the full potential out of your machine. So, if you want to see what your system is truly capable of, it’s time to upgrade to the faster and more efficient NVMe SSD.

    Don’t let your hardware hold you back – reach new speeds and embrace the full power of your computer today!”

    FAQs

    What is an M.2 SATA SSD?
    M.2 SATA SSD is a solid-state drive that uses the M.2 form factor and the SATA interface to transfer data.

    What is an NVMe slot?
    An NVMe slot is a type of M.2 slot that uses the NVMe (Non-Volatile Memory Express) protocol to transfer data, providing faster speeds compared to SATA.

    Can I use an M.2 SATA SSD in an NVMe slot?
    While M.2 SATA SSDs are physically compatible with NVMe slots, they will only work at SATA speeds and not take advantage of NVMe’s faster speeds.

    What is the benefit of using an M.2 NVMe SSD over an M.2 SATA SSD in an NVMe slot?
    An M.2 NVMe SSD can take advantage of NVMe’s faster speeds, providing faster read and write speeds compared to an M.2 SATA SSD in an NVMe slot.

    Is it possible to use an M.2 SATA SSD and an M.2 NVMe SSD together on the same motherboard?
    Yes, as long as there are enough M.2 slots available on the motherboard, it is possible to use both an M.2 SATA SSD and an M.2 NVMe SSD simultaneously. However, they will operate at their respective speeds and not take advantage of each other’s faster speeds.

  • Unveiling the Perfect M.2 Screw for MSI Motherboard: A Complete Guide

    Unveiling the Perfect M.2 Screw for MSI Motherboard: A Complete Guide

    If you’re building your own MSI motherboard system, you’ve probably realized that finding the right screws for your M.2 is critical. Without them, you risk losing your data and facing other performance issues.

    But where can you find the perfect screws for your specific motherboard? The answer may be simpler than you think. In this blog post, we’ll walk you through the steps of finding M.2 screws for MSI motherboards, so you can get back to building your dream PC.

    So, put on your builder’s hat, and let’s get started!

    Understanding M.2 Screws

    If you’re upgrading your MSI motherboard, one thing you may need to consider is the M.2 screw. This tiny screw is used to secure your M.

    2 NVMe SSD to the motherboard, and it’s essential for keeping everything in place. But, not all M.2 screws are the same! Some motherboards come with their M.

    2 screws, but if yours didn’t, you’ll need to find the right one. Look for an M.2 screw for MSI motherboards, because different motherboards have varying screw sizes and placements.

    MSI motherboards typically require M.2 screws with an M5 thread size and a length of around 3mm to 4mm.

    It’s important to choose the right screw because using the wrong size could cause damage to your motherboard or SSD. So, if you’re not sure what screw you need, check your motherboard’s manual or contact the manufacturer for guidance. It’s better to be safe than sorry when it comes to this tiny but important component.

    What are M.2 Screws and Why Do You Need Them?

    If you’re building or upgrading a computer, you may have come across M.2 screws. These are small screws specifically designed for securing M.

    2 solid-state drives to the motherboard. Despite their small size, they play a crucial role in ensuring your M.2 drive stays safely in place.

    Without M.2 screws, your drive may vibrate loose, potentially causing issues with performance or even damaging your components. M.

    2 screws are typically included with your motherboard or M.2 drive, but it’s always a good idea to double-check and make sure you have them on hand before starting your build. Investing in a set of extra M.

    2 screws can also come in handy in case you lose or misplace them. In short, while they may seem like a small and insignificant component, M.2 screws are an essential part of any computer build involving an M.

    2 solid-state drive.

    m.2 screw for msi motherboard

    What Are the Different Types of M.2 Screws?

    M.2 Screws M.2 screws come in different shapes and sizes, depending on the type of M.

    2 SSD you are installing. There are two common M.2 screw types – standoffs and screws.

    Standoffs are cylindrical spacers that help to keep your SSD securely in place. They are usually 3mm or 5mm long and have an M2 thread. On the other hand, screws are either M2 x 3mm or M2 x

    5mm in size and are used to attach the SSD to the motherboard. Some SSDs even come with their own screws, so you don’t have to worry about finding the right one. It’s important to note that M.

    2 screws can be very small and easy to lose. If this happens, it’s easy to find replacements online or at your local hardware store. Knowing the different types of M.

    2 screws will help you choose the right one when installing an M.2 SSD, ensuring that it is securely in place.

    Finding the Right M.2 Screw for Your MSI Motherboard

    If you’re building a PC using an MSI motherboard, you’ll need to find the right M.2 screw to secure your M.2 SSD in place.

    These small screws are essential for keeping your M.2 SSD in place and preventing damage from vibrations and movements. Unfortunately, not all M.

    2 screws are created equal, and it can be challenging to find the right one for your MSI motherboard. The good news is that MSI usually includes the necessary screws with their motherboards, but if you’ve lost or damaged yours, you may need to order a replacement. It’s important to note that M.

    2 screws come in different thread sizes, lengths, and head types, so make sure you get the correct one for your motherboard. You can either check your motherboard’s manual or contact MSI’s tech support for help finding the right M.2 screw.

    Investing in a high-quality screw will ensure your M.2 SSD is secure and fully functional, giving you peace of mind and boosting your PC’s performance.

    Identifying Your MSI Motherboard’s Screw Size

    If you’re looking to install an M.2 SSD onto your MSI motherboard, you’ll need to ensure you have the correct screw size for the job. The process of identifying the correct screw size is relatively straightforward, but it’s important to get it right to avoid damaging your hardware.

    One method to identify the screw size is to check the user manual that came with your motherboard. Often the screw size specifications will be listed for you to reference. If you don’t have the manual, you can measure an existing screw that’s holding another piece of hardware in place.

    Typically, M.2 screws are M2x3mm or M2x5mm in size.

    It’s important to note that not all M.2 SSDs will come with screws, so you may need to purchase them separately. Once you have the correct screw size, you’ll be able to confidently install your M.

    2 SSD and enjoy high-speed performance.

    Where to Buy M.2 Screws for MSI Motherboards

    If you’re looking for M.2 screws for your MSI motherboard, you’re in luck – they’re easy to find and purchase. The first place to check is MSI’s website, as they often carry replacement parts for their products.

    If you can’t find what you’re looking for there, you can also try searching for M.2 screws on Amazon or other online retailers. Just make sure to double-check the measurements and compatibility with your specific motherboard before ordering.

    Another option is to reach out to MSI’s customer support team and see if they can assist you in acquiring the necessary screws. With a little bit of searching and patience, you should be able to find the right M.2 screws for your MSI motherboard in no time.

    So, don’t fret – you’ll be up and running with your new M.2 drive in no time.

    Choosing the Right M.2 Screw Material

    When it comes to choosing the right M.2 screw material for your MSI motherboard, the task can be quite daunting. However, it’s essential to choose the right screw material to avoid any issues with your M.

    2 NVME SSDs. The most commonly used materials for M.2 screws are brass and steel.

    Brass screws are known to be softer and less durable compared to steel screws that are harder and stronger. But, both materials will work well for MSI motherboards, and the choice often comes down to preference. Additionally, it is essential to make sure that the screw size and length match the M.

    2 socket on your motherboard, as using the wrong size can lead to damage to your SSD. Overall, choosing the right M.2 screw for your MSI motherboard will ensure your SSD remains secure and functioning correctly.

    Installing Your M.2 Screw on Your MSI Motherboard

    When building a PC, it’s important to secure your M.2 solid-state drive in place with an M.2 screw for your MSI motherboard.

    This tiny but crucial screw keeps your M.2 SSD from moving around or becoming dislodged, preventing damage to your drive and motherboard. To install the M.

    2 screw on your MSI motherboard, first locate the M.2 slot on your motherboard. You should see a gold-colored standoff in the center of the slot that will align with the screw hole on your M.

    2 drive. Take your M.2 screw and align it with the standoff, using a screwdriver to gently tighten it into place.

    Be careful not to overtighten the screw, as this can damage the components. Double-check that the screw is securely in place before proceeding with the rest of your build. With this simple step, you can ensure that your M.

    2 SSD is safely and securely installed in your MSI motherboard.

    Step-by-Step Guide to Installing M.2 Screws on MSI Motherboards

    Installing M.2 Screws on MSI Motherboards can seem like a daunting task, but with the right guidance, it can be an easy process. The first step is to locate the M.

    2 slot on your MSI motherboard, which is usually located close to the CPU socket. Once you have located it, you need to remove the screw that is already in place. Ensure that you have a magnetic tip screwdriver handy to avoid dropping it.

    Then, insert your M.2 SSD into the slot and align it with the socket pins. You’ll then need to secure it by inserting your M.

    2 screw. Tighten the screw until you feel some resistance, but do not overtighten it. You now have successfully installed your M.

    2 screw on your MSI motherboard. It’s essential to ensure that the screw is tightened correctly to avoid damage to your SSD or M.2 slot over time.

    So, double-check before finishing up.

    Tips and Tricks for Installing M.2 Screws on MSI Motherboards

    If you have an MSI motherboard and you’re looking to install an M.2 screw, don’t worry – it’s not as difficult as it may seem. First, it’s important to locate the M.

    2 slot on your motherboard. Once you’ve found it, gently insert your M.2 screw into the designated hole.

    Be careful not to tighten the screw too much, as this could damage your motherboard. When you’re done installing the screw, you should be able to secure your M.2 SSD in place.

    Overall, the process of installing an M.2 screw on an MSI motherboard is straightforward and shouldn’t take more than a few minutes. With the steps above, you should be able to do it quickly and easily.

    Conclusion

    In conclusion, the M.2 screw for MSI motherboard is like the cherry on top of a proverbial tech sundae. It may be small and easily overlooked, but it plays an essential role in securing and optimizing the performance of your M.

    2 SSD. Without it, your system may lack the stability and speed it needs to run at its full potential. So, if you’re building a new computer or upgrading your existing one, don’t forget to give the M.

    2 screw the attention, love, and tightness it deserves!”

    FAQs

    What size of M.2 screw does MSI motherboard support?
    Most MSI motherboards support M.2 screws with a size of M2.5×3.5mm.

    Can I use any M.2 screw for my MSI motherboard?
    It is recommended to use the provided M.2 screw that came with your MSI motherboard to ensure compatibility and prevent damage.

    Where can I find the M.2 screw on my MSI motherboard?
    The M.2 screw is usually located near the M.2 slot on the MSI motherboard. Refer to the motherboard manual for the exact location.

    What should I do if I lost the M.2 screw for my MSI motherboard?
    You can purchase M.2 screws that are compatible with MSI motherboards from computer hardware stores or online retailers. It is important to ensure that the screw size and threading are compatible with your motherboard.

  • Unleashing the Power of M.2 with Our Sleek and Stylish Storage Cases: Revolutionize Your Storage Game Today!

    Have you ever invested in valuable M.2 SSDs for your computer, only to realize that there’s no proper way to protect them when not in use? Cue the anxiety-inducing fear of dropping or misplacing a tiny, but critical, piece of hardware. If this sounds all too familiar, then an M.

    2 storage case might just be the solution you need. Protecting your M.2 SSDs shouldn’t be a worry every time you’re not using them.

    These little storage devices store crucial data and are integral components in powering up your computer. That’s why it’s essential to invest in an M.2 storage case that can both house and secure your SSDs.

    Imagine having a reliable storage case that allows you to carry your M.2 SSDs with ease. With features like anti-vibration pads, waterproofing, dust-proofing, and shock resistance, an M.

    2 storage case would provide the ultimate protection for your valuable hardware. And let’s not forget about style – an M.2 storage case is not only practical, but it can also be trendy.

    With a variety of colors and designs available, you can choose a case that fits your personality and personal style, making it feel more like an accessory than just another computer component. Investing in an M.2 storage case might be the best decision you make in securing your sensitive data.

    What is an M.2 storage case?

    An M.2 storage case is a compact and versatile device used to house M.2 solid-state drives (SSDs).

    M.2 storage cases come in a variety of shapes and sizes, with some designed to fit into a desktop computer case and others intended for use as external storage devices. M.

    2 storage cases offer fast and reliable data transfer rates, making them an excellent choice for anyone who needs high-speed storage. These devices are typically lightweight and easy to install, which makes them a popular choice for DIY computer builders. With an M.

    2 storage case, you can easily upgrade your computer’s storage capacity and improve its performance without the need for an expensive and bulky hard drive. Overall, M.2 storage cases are an excellent investment for anyone looking to upgrade their computer’s storage capabilities without breaking the bank.

    Explanation of M.2 SSDs and their vulnerabilities

    An M.2 storage case is a small and compact form factor that is commonly used for solid-state drives (SSDs) in modern computing devices such as laptops and desktops. M.

    2 storage cases offer high-speed data transfer rates and reduced power consumption compared to traditional hard drives, making them a popular choice for users who demand maximum performance from their devices. However, M.2 SSDs are also vulnerable to cyber threats such as data breaches and malware attacks due to their low-level access to the operating system.

    It is essential to implement strong security measures such as encryption and two-factor authentication to safeguard the data stored on M.2 SSDs from potential threats. Overall, M.

    2 storage cases offer great benefits to users, but it is crucial to be aware of their vulnerabilities and implement the best security practices to protect sensitive data.

    m.2 storage case

    Importance of protecting M.2 SSDs

    M.2 SSDs, storage case An M.2 storage case is a protective accessory designed to safeguard M.

    2 SSDs from various hazards such as physical damage and overheating. M.2 SSDs are compact storage devices that store data on solid-state memory chips, which makes them faster and less prone to mechanical failures compared to traditional hard drives.

    However, they are also more delicate and can get damaged easily if not handled with care. This is where an M.2 storage case comes in handy.

    It is a simple yet effective solution that helps protect your M.2 SSD investment and ensures it lasts longer. These cases are typically made from durable materials such as aluminum or plastic and often feature heat-dissipating fins that help cool down the SSD.

    Some even come with built-in thermal sensors that allow you to monitor the temperature of your storage device. Overall, investing in an M.2 storage case is a smart move if you want to ensure your valuable data is safe and your system performs optimally.

    With its sturdy and protective design, it is a small price to pay for the longevity and reliability of your storage device.

    Features of a good M.2 storage case

    If you are in the market for a good M.2 storage case, there are certain features that you should look out for. First and foremost, it should be compatible with your M.

    2 drive. This means it should have the appropriate interface and the correct dimensions to fit your drive securely. Another important feature to consider is the material used to make the case.

    Ideally, it should be made from durable materials that can protect your drive from accidental damage. Additionally, the case should have good heat dissipation properties to avoid overheating and prolong the lifespan of your M.2 drive.

    A good M.2 storage case should also be easy to install and remove, allowing you to quickly and easily swap out your drives when necessary. Overall, finding a storage case that meets these criteria will help ensure that your M.

    2 drive is adequately protected and will operate smoothly for years to come.

    Durability

    Durability, M.2 storage case, features, good, keyword: Durability When it comes to M.2 storage cases, durability is a crucial factor to consider.

    A good M.2 storage case should be designed with durable materials that can withstand constant wear and tear. This ensures that your data is safe and secure at all times.

    Another important feature to look out for is the build quality of the case. The case should be constructed in such a way that it can handle impacts and bumps without damaging the internal components. Additionally, the case should be able to protect the M.

    2 drive from dust and debris, which can cause damage over time. Another important feature to consider is the cooling system of the case, as overheating can cause damage to the M.2 drive.

    A good M.2 storage case should have an efficient cooling system to prevent overheating and prolong the lifespan of the drive. Therefore, when shopping for an M.

    2 storage case, make sure to prioritize durability as a key feature.

    Water-resistance

    Water-resistance When it comes to protecting your M.2 storage device, a good storage case should have a few key features. One of the most important of these features is water-resistance.

    A water-resistant case will ensure that your M.2 drive stays protected from accidental spills or rain exposure. Look for cases made with waterproof materials like silicone or rubber, or ones with a tight seal to prevent water from seeping inside.

    Not only will a water-resistant case protect your data from damage, but it will also provide peace of mind knowing that your storage device is safe and secure. So, the next time you shop for an M.2 storage case, make sure to prioritize water-resistance as one of the key features.

    Shock-proofing

    When it comes to M.2 storage cases, one of the most important features to consider is shock-proofing. We all know that accidents can happen, and dropping or banging a storage device can cause serious damage.

    That’s why it’s crucial to invest in a case that can protect your valuable data from shocks and impacts. A good M.2 storage case should have a strong and durable design that can absorb the shock of impact.

    Look for cases made from materials like aluminum or silicone, which are known for their shock-absorbing properties. Additionally, the case should fit perfectly around the M.2 drive to prevent it from moving around and potentially getting damaged.

    By prioritizing shock-proofing in your choice of an M.2 storage case, you can rest assured that your data is safe, even in the event of an accident. So, don’t skimp on protection – choose a case that will keep your drive safe and secure.

    Top M.2 storage case recommendations

    If you’re looking for a way to store your M.2 solid-state drives (SSDs) safely and neatly, investing in an M.2 storage case is a great choice.

    These small but durable cases come in various sizes and styles, and they can hold one or more M.2 SSDs, making them an ideal solution for those who need to carry their data around. One top recommendation is the Sabrent M.

    2 NVMe SSD enclosure. This well-designed case is made from high-quality aluminum, which keeps your SSDs cool, and it supports blazing-fast transfer speeds of up to 10Gbps. Another great option is the SilverStone Technology M.

    2 NVMe SSD-changing case. This case comes equipped with USB Type-C and Thunderbolt 3 connectors, so you can easily connect your SSD to your PC or laptop. Additionally, it’s made from a sturdy aluminum alloy that protects your drives from impact and drops.

    No matter which case you choose, you won’t go wrong with these top quality M.2 storage cases.

    Product 1: Description and features

    Looking for the best M.2 storage case for your computer? Look no further than the high-end product known as the Gigabyte AORUS NVMe Gen With impressive read and write speeds of up to 5,000 and 4,400 MB/s respectively, this storage case boasts some of the best performance on the market.

    It’s designed to work with both PCIe 0 and PCIe 0 interfaces, and offers integrated thermal guards to keep your M.

    2 SSD cool during intense use. Plus, its user-friendly design and RGB lighting make it a great choice for anyone looking to add a touch of personality to their build. Overall, if you’re searching for a reliable, high-performing M.

    2 storage case, the Gigabyte AORUS NVMe Gen4 is definitely worth considering.

    Product 2: Description and features

    Looking for the best M.2 storage case? Look no further than our top recommendations! These cases are designed to provide top-notch performance and protection for your valuable M.2 drives.

    One standout feature of these cases is their compact size, making them easy to transport and install. They are also made with high-quality materials that ensure durability and reliability. The cases come with the latest connectivity options, including USB-C, USB

    0, and Thunderbolt 3, allowing for lightning-fast data transfer. Additionally, some models feature advanced cooling mechanisms, such as built-in fans and heatsinks, to prevent overheating and ensure optimal performance. Whether you need reliable storage for gaming, multimedia, or everyday use, our top M.

    2 storage case recommendations have got you covered.

    Conclusion: Invest in an M.2 storage case for ultimate protection.

    In summary, a good M.2 storage case is like a superhero outfit – it might not seem like much at first, but it can provide incredible power and protection to its valuable data. With its sleek design and sturdy shell, an M.

    2 storage case can keep your SSD safe and sound, giving you the peace of mind you need to take on the digital world with confidence. So, if you want to keep your data protected and ready for action, don’t hesitate to suit up with an M.2 storage case today!”

    FAQs

    What is an M.2 storage case?
    An M.2 storage case is a device that allows you to install an M.2 solid-state drive (SSD) and connect it to your computer.

    What are the benefits of using an M.2 storage case?
    Some benefits of using an M.2 storage case include faster read and write speeds, higher storage capacity, and a smaller form factor compared to traditional hard drives.

    Can I use any M.2 SSD with an M.2 storage case?
    Yes, most M.2 storage cases are compatible with a wide range of M.2 SSDs. However, it’s important to check the specifications of both the storage case and SSD to ensure compatibility.

    Do I need any additional cables or connectors to use an M.2 storage case?
    It depends on the specific M.2 storage case and your computer’s hardware. Some storage cases may require an adapter or cable to connect to your computer.

    How do I install an M.2 SSD into an M.2 storage case?
    To install an M.2 SSD into an M.2 storage case, first locate the M.2 slot on the storage case. Then, insert the M.2 SSD into the slot and fasten any screws or clips that secure it in place. Finally, connect the storage case to your computer using the appropriate cables or connectors.