Category: How to

How to

  • Step-By-Step Guide: Elevate Your Laptop Performance with SSD Upgrade for Dell D630

    Have you been experiencing slow boot-up times and lagging performance on your Dell D630 laptop? Upgrading to a solid-state drive (SSD) may be the solution to your problems. An SSD is a faster and more efficient storage device than a traditional hard disk drive (HDD), which can significantly boost your laptop’s performance. In this blog post, we’ll guide you through the process of upgrading your Dell D630 to an SSD, including important factors to consider before making the switch.

    So, grab your screwdriver and let’s get started!

    Check Compatibility

    If you’re wondering how to upgrade your Dell Latitude D630 to an SSD, one of the first things you should do is check compatibility. Not all SSDs are compatible with all computers, so it’s important to choose an SSD that will work with your Dell D630. One way to check compatibility is to consult the documentation that came with your computer or check the manufacturer’s website.

    Additionally, you should consider factors such as the type of connector your D630 uses, the amount of space available in the computer for an SSD, and any other requirements or limitations that may affect the installation process. Doing some research beforehand and making sure you choose a compatible SSD can save you time, money, and headaches down the line.

    Confirm if D630 supports 2.5-inch SATA SSD

    If you’re wondering whether the Dell Latitude D630 laptop supports a 5-inch SATA SSD, the short answer is yes, it does. However, there are a few things you need to check to ensure compatibility.

    First, you need to make sure that your D630 has a SATA interface and not an IDE interface, which older models did. To do this, you can check the specifications of your laptop or look at the connectors inside your laptop. Additionally, you need to ensure that your SSD is compatible with the SATA version of your laptop, which is likely to be SATA II or SATA III.

    You can check this by referring to the specifications of your SSD. If your SSD is newer and supports SATA III, it can still work on a laptop with a SATA II interface, but you might not get the maximum speed that the SSD is capable of delivering. Overall, if you have a Dell Latitude D630 laptop with a SATA interface and compatible SATA version, you can confidently install a

    5-inch SATA SSD to improve the performance and storage capacity of your laptop.
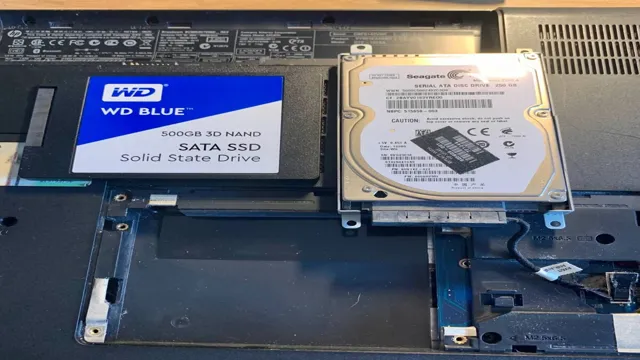
    how do i upgrade d630 to a ssd

    Backup Data

    Upgrading your Dell D630 to an SSD is a great way to enhance your computer’s performance and speed. However, before you begin the process, it’s important to backup all of your important data to prevent any loss or damage. To do this, you can use an external hard drive, cloud storage, or any other backup method that suits your needs.

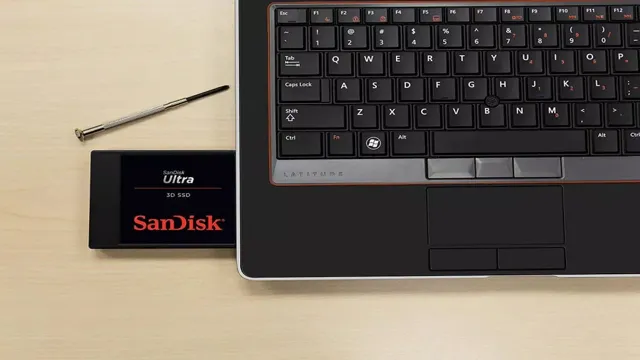
    Once you’ve safely backed up all of your important files, it’s time to begin the process of installing the new SSD. First, make sure that you have all of the necessary tools on hand, including a screwdriver and the new SSD. Then, open up your laptop and carefully remove the old hard drive.

    Replace it with the new SSD and securely fasten it in place. Finally, reassemble your laptop, turn it on, and enjoy the improved speed and performance of your upgraded Dell D630. By backing up your data and following these simple steps, you can upgrade your laptop without any worries or issues.

    Save important files to external drive or cloud storage

    Backing up data is crucial to ensure that you don’t lose any vital information in case of a hardware crash or any other unforeseen circumstance. One of the best ways to do this is to save important files to an external drive or cloud storage. These options are secure and easy to use, and you can choose whichever one suits your needs.

    With an external hard drive, all you need to do is plug it into your computer and transfer your data. This method is ideal for people with a lot of data to back up, as it offers a massive amount of storage space. Cloud storage, on the other hand, is perfect for people who want to access their data from anywhere in the world.

    The best part about cloud storage is that it automatically backs up your files whenever you connect to the internet, ensuring that you never lose any data. Using either an external hard drive or cloud storage are excellent options to ensure you never lose your valuable data.

    Gather Supplies

    Upgrading a Dell D630 laptop to a solid-state drive (SSD) is a great way to increase performance and speed up your computer. But before you start, you’ll need to gather some supplies. First and foremost, you’ll need an SSD that is compatible with your laptop.

    Check the specifications of your D630 to determine which type of SSD it requires. You’ll also need a screwdriver set to remove the back cover of your laptop and replace the old hard drive with the new one. It’s important to purchase an anti-static wristband or mat to avoid damaging the internal components of your laptop during the upgrade process.

    Finally, make sure to have a backup of all important data before beginning the upgrade process. With all the necessary supplies at hand, you can proceed with upgrading your D630 to a speedy SSD.

    SSD, screwdriver, SATA to USB adapter (optional)

    If you’re looking to upgrade your computer’s storage, then you’ll need a few supplies to get started. The most important thing you’ll need is an SSD (solid-state drive) – this is the new hard drive that you’ll be installing. You’ll also need a screwdriver that fits the screws on your computer case – this will allow you to open up your computer and swap out the old hard drive for the new SSD.

    Additionally, you may want to consider getting a SATA to USB adapter – this will make it easier to connect your old hard drive to your computer so that you can transfer your files over to the new SSD. Overall, gathering the necessary supplies is the first step in upgrading your computer’s storage, and having everything you need before you start will save you time and hassle in the long run.

    Install SSD

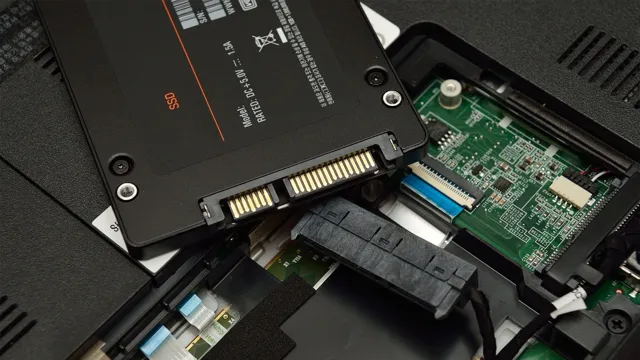
    If you’re wondering how to upgrade your Dell D630 to an SSD, you’re in luck. Upgrading to an SSD is a quick and easy way to boost your computer’s speed and performance. Before installing an SSD on your D630, you’ll want to make sure your computer is compatible.

    Most modern laptops and PCs have a standard 5-inch SATA drive bay, which is where the SSD will go. Once you have determined that your computer is compatible, you’ll need to open up your computer and locate the hard drive.

    Carefully remove the old hard drive and slide in your new SSD. Secure it and connect the necessary cables. Once everything is in place, you can power on your computer and install your operating system and other software onto your new SSD.

    Remember to backup your data beforehand, and enjoy the improved speed and performance of your upgraded Dell D630.

    Remove battery, remove old HDD, replace with SSD

    So, you’ve decided to take the plunge and upgrade to an SSD? Congratulations! It’s a fantastic decision that will boost your computer’s performance and speed. The first step is to remove the battery from your laptop to prevent any electrical mishaps. Once that’s done, it’s time to remove the old hard drive.

    Make sure to back up any important documents or files before you start. Next, locate the hard drive bay and remove the screws holding the old HDD in place. Carefully disconnect the cables and slide out the old drive.

    Now it’s time to install the new SSD. You’ll want to carefully align the connectors and screw the new drive in place. Finally, connect the cables, replace the battery, and power up your laptop.

    Voila! Your shiny new SSD is ready to enhance your computing experience. The difference in speed and performance will astound you, and you’ll be happy you took the time to make the upgrade.

    Install OS and Software

    Upgrading your Dell Latitude D630 to a solid-state drive (SSD) is an excellent way to boost its performance and speed. To start the process, you’ll need to install the new SSD and operating system (OS). First, back up any critical files and data to avoid losing them during the installation process.

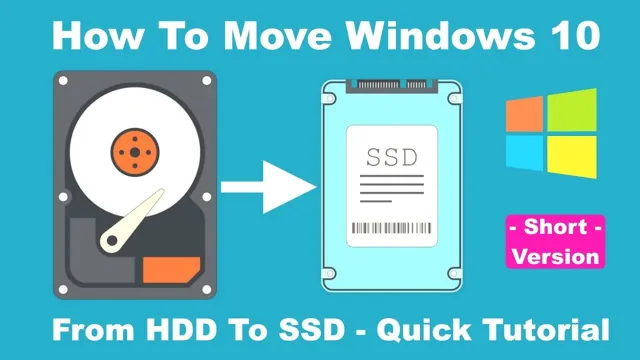
    Then, remove the old hard drive from the D630 and attach the SSD to the SATA port on your laptop. Next, use a bootable USB drive or DVD to install your preferred OS, such as Windows or Linux. After the installation is complete, you’ll need to download and install any necessary drivers and software for your system to operate smoothly.

    With a brand new SSD and a fresh OS installation, your Dell Latitude D630 is bound to operate faster and more efficiently. Overall, the process of upgrading your D630 to an SSD is fairly straightforward, and it can make a significant difference in your computer’s performance and usability.

    Use installation media or cloning software

    When it comes to installing an operating system and software, there are a few different methods you can use. One option is to use installation media, which involves downloading the necessary files onto a USB drive or DVD and then booting your computer from that device. This can be a bit of a time-consuming process, but it can be useful if you need to install the software on multiple devices or if you are working with an older computer that doesn’t have internet access.

    Another option is to use cloning software, which allows you to create an exact copy of your current system. This can be useful if you want to transfer your entire system to a new computer or if you want to create a backup in case your current system crashes. However, it’s important to note that cloning software can be more complex and may require a bit of technical know-how.

    No matter which method you choose, it’s important to make sure you have all the necessary drivers and updates for your system. This will ensure that everything runs smoothly and that your software is properly installed. So whether you choose installation media or cloning software, take the time to prepare and research in advance to make the installation process as smooth as possible.

    Enjoy Faster Performance

    If you’re wondering “how do I upgrade d630 to a SSD?” you’re in luck! The upgrade process is straightforward and can significantly improve your laptop’s performance. An SSD, or solid-state drive, is a fast and reliable storage option that can speed up boot times, application launches, and overall system responsiveness. To upgrade your Dell Latitude D630 to an SSD, you’ll need to find the right drive that fits the size and SATA interface of your laptop.

    Once you have the new drive, it’s just a matter of transferring your data and installing the SSD in place of your old hard drive. With an SSD, you’ll enjoy faster performance and smoother operation, making it a worthwhile investment for any laptop user.

    Conclusion

    Upgrading your Dell D630 to an SSD is like giving your old clunker of a car a brand new engine – suddenly it has the power and speed to keep up with the latest models on the road. With an SSD, your computer will boot up faster, run programs smoother, and ultimately give you a better computing experience. So don’t settle for sluggish performance – make the switch to an SSD and speed your way to success!”

    FAQs

    FAQ 1: Q: What type of SSD is compatible with Dell Latitude D630? A: Dell Latitude D630 requires a 2.5-inch SATA SSD for upgrade. FAQ 2: Q: Can I upgrade my D630 to SSD without losing my files? A: Yes, you can clone your hard drive to the new SSD and keep all your files and settings intact. FAQ 3: Q: Is it difficult to upgrade Dell D630 to SSD? A: Upgrading to SSD is relatively easy and straightforward. You need to remove the old hard drive, insert the new SSD, and install the operating system. FAQ 4: Q: How much does it cost to upgrade Dell D630 to SSD? A: The cost of upgrading to SSD depends on the capacity and brand of the SSD you choose. Generally, a 256GB SSD costs around $50 to $80, while a 512GB SSD costs around $100 to $150.
  • SSD Size Matters: What Is the Perfect Size for Your Gaming PC?

    When it comes to building a gaming PC, one of the most important components to consider is your storage solution. You want something that’s fast, reliable, and has enough space to store your favorite games and files. But with so many options out there, it can be tough to figure out what size SSD is right for your needs.

    Luckily, we’re here to help you find the perfect fit. First, let’s talk about what an SSD is. A solid-state drive, or SSD, is essentially a faster, more durable version of a traditional hard drive.

    They use flash memory to store data, which means they can access and load files much more quickly than an HDD. This is especially important when it comes to gaming, where loading times can make or break your experience. So, how much storage do you actually need? That depends on a few factors.

    If you only play a couple of games at a time, a smaller SSD might be enough for your needs. On the other hand, if you’re someone who likes to have a library of games at your disposal, you’ll want to go for a larger option. Additionally, if you plan on using your gaming PC for work or other tasks that require a lot of storage, you might need to go even bigger.

    As a rule of thumb, we recommend a minimum of 256GB for your gaming SSD. This will give you enough space to install your most-played games and still have room left over for your operating system and other essential files. If you can afford it, we suggest going for at least 500GB or even 1TB.

    This will give you plenty of space to work with, which means you won’t have to worry about constantly deleting games to make room for new ones. Overall, finding the perfect size SSD for your gaming PC comes down to your individual needs and budget. But with these tips in mind, you should be able to choose a storage solution that will give you the best possible gaming experience.

    What is an SSD?

    When it comes to gaming PCs, one of the most essential components you’ll need is a Solid-State Drive (SSD). This type of storage device uses flash memory to store data, making it much faster than traditional hard disk drives. But how big should your SSD actually be? Well, it depends on a few factors.

    First, you’ll want to consider the size of the games you plan on playing. A single AAA title can easily take up 50GB or more of storage space, so if you plan on playing many games at once, you’ll need a larger SSD. Additionally, if you plan on storing other files on your SSD such as music, movies, or photos, you’ll need even more storage.

    Generally, most gamers opt for an SSD with at least 500GB of storage, but if you have the budget, a 1TB or even 2TB SSD will give you plenty of space to store all your games and media. So, go ahead and prioritize your storage needs when purchasing your SSD for a smooth gaming experience.

    Explanation of SSDs

    An SSD (Solid State Drive) is a type of storage device that is becoming increasingly popular among consumers and businesses alike. Unlike traditional mechanical hard drives, SSDs use flash memory to store data, which means they have no moving parts. This results in faster read and write speeds, and improved reliability, since there are no mechanical components to wear out over time.

    In fact, an SSD can boot up a computer in just a few seconds, compared to the minutes it can take with a traditional hard drive. Additionally, SSDs are typically more energy-efficient than traditional hard drives, since they require less power to operate. Overall, if you’re looking to upgrade your computer’s storage, an SSD is definitely worth considering.

    how big does my ssd need to be gaming pc

    How much storage do you need?

    Are you planning to build a gaming PC but unsure how big your SSD should be? The size of your SSD depends on the number of games you want to store. Most AAA games require at least 50GB of storage space, while other games can take up to 100GB or more. If you’re a hardcore gamer and want to store several games at once, you’ll need a larger SSD.

    A 1TB SSD is perfect for gamers who want to store multiple games, as it provides enough space for most games and other files. However, if you plan to store only a few games, a 500GB SSD is enough. Keep in mind that larger games are released every year, and game updates can take up more storage space, so it’s always a good idea to invest in a larger SSD if you have the budget.

    Ultimately, your SSD’s size will depend on your budget, game library, and gaming needs.

    Factors to consider

    When it comes to choosing the right storage for your business needs, the first factor to consider is how much storage you actually need. This will depend on a few different factors, such as the amount of data you need to store and how frequently you access that data. For smaller businesses, a few terabytes of storage may be sufficient, while larger companies may require petabytes of storage to accommodate their data needs.

    It’s important to evaluate your current needs and anticipate any future growth or expansion that may require additional storage space. One thing to keep in mind when determining your storage needs is the concept of perplexity. This refers to the unpredictability of data growth, which can be difficult to account for.

    To prepare for this, it’s a good idea to choose a storage solution that can be easily scaled up or down as needed. Another factor to consider is burstiness, which refers to sudden spikes in data usage. This can occur due to seasonal demands or unexpected events, and it’s important to choose a storage solution that can handle these bursts without slowing down or causing data loss.

    Cloud storage can be a good option for businesses that experience burstiness, as it allows for easy scaling and flexibility. Ultimately, choosing the right amount of storage for your business comes down to carefully evaluating your current and future needs, as well as considering factors like perplexity and burstiness. By taking the time to choose the right solution, you can ensure that your data is safe, secure, and easily accessible when you need it most.

    Examples based on popular games and their storage requirements

    Have you ever wondered how much storage you need to store your favorite games on your PC or console? Different games have different storage requirements depending on their complexity, graphics, and modes. For instance, if you’re a fan of Call of Duty, you’ll need at least 50-100 GB of storage to install the game fully. Similarly, if you’re a fan of Grand Theft Auto V, you’ll require around 70-80 GB of storage space.

    Games like Dota 2 and Counter-Strike: Global Offensive require significantly less storage space, around 15-20 GB. However, keep in mind that these storage requirements can vary depending on the game settings you choose to play at and any additional gaming packs or add-ons you decide to install. Therefore, always check the game’s system requirements beforehand to ensure your device’s storage space can handle your favorite games.

    Other Benefits of a Bigger SSD

    When it comes to gaming PCs, having a large SSD can bring a plethora of benefits. Firstly, with a bigger SSD, you can install a greater number of games and programs, allowing you to have an expansive library of games at your fingertips. Not only does this save you time from having to constantly uninstall and reinstall games, it also speeds up load times, allowing for a smoother and more enjoyable gaming experience overall.

    Additionally, a bigger SSD means you can have more space for files such as documents, images, and videos, reducing the need for additional external storage devices. With a larger SSD, you can also take advantage of faster transfer speeds, making it easier to transfer large files between devices. So, how big does your SSD need to be for gaming? It all depends on how many games and programs you want to have installed at once.

    However, 500 GB to 1 TB should suffice for most gaming needs, providing plenty of storage space and improving overall performance.

    Faster load times and boot times

    If you’re looking to upgrade your computer’s speed and performance, a bigger SSD can offer many benefits. Aside from increased storage space, one significant advantage is faster load times and boot times. With a bigger SSD, your computer can access data more quickly, leading to shorter wait times and a more responsive system overall.

    Additionally, a larger SSD can help reduce system lag and improve overall performance, making it an excellent choice for gamers, content creators, and anyone who demands high performance from their computer. So if you’re tired of waiting for your computer to load, consider upgrading to a bigger SSD and take your computing experience to the next level.

    Ability to store more games and programs

    A larger SSD has more benefits than just faster load times. One major perk is the ability to store more games and programs. With a bigger SSD, you won’t have to constantly delete old games or applications to make space for new ones.

    You can keep all your favorites easily accessible and organized. Plus, with so many amazing games and programs available these days, having a larger SSD means you can enjoy even more of them without worrying about storage limitations. So if you’re a gamer, designer, or just someone who wants to have access to a wide range of software, investing in a bigger SSD is definitely worth considering.

    Conclusion

    In conclusion, the size of your SSD for gaming depends on how much storage space you require to store your games, applications, and operating system. As gaming evolves and games get larger in size, it’s recommended to have a larger SSD to fit all your favorite games without sacrificing performance. It’s always better to have more space than less, so go big or go home, or in this case, go big and game at home without any storage limitations.

    Recap of points

    Recap of points: In addition to the faster boot-up, application loading, and file transfer times, upgrading to a larger SSD has other benefits. One of the most significant advantages is that it increases the overall performance of the computer. A bigger SSD not only speeds up the data transfer speed of the primary drive but also allows for more programs and files to be stored on it, reducing the reliance on secondary storage options such as external hard drives.

    Additionally, a larger SSD can improve the battery life of your laptop by reducing the number of times the hard drive will need to access secondary storage, thus consuming less power. Finally, a larger SSD can also reduce the risk of data loss, as SSDs have no moving parts and can better withstand environmental factors that can cause physical damage to traditional hard drives. So, if you’re looking to improve your computer’s performance and reliability, upgrading to a larger SSD is a worthwhile investment.

    Final recommendations

    Apart from faster boot-up times and smoother program launches, having a bigger SSD can offer various other benefits as well. One such benefit is increased file transfer speeds. The larger the SSD, the more data it can transfer at a time, resulting in quicker file transfers.

    This can be particularly useful for professionals such as video editors, photographers, and graphic designers who work with large file sizes regularly. Moreover, having a bigger SSD can also reduce loading times in video games by storing the game’s files and assets on the drive. This means the game can be loaded faster, and players can start playing their favorite titles without any delays or interruptions.

    Overall, having a larger SSD can be a game-changer, not only in terms of faster boot-up times but also in terms of improved file transfer speeds and game loading times.

    FAQs

    What is an SSD and why do I need one for gaming on my PC?
    An SSD, or solid-state drive, is a type of storage device that allows for faster data access and boot times than traditional hard disk drives. For gaming, an SSD can greatly reduce loading times for games and improve overall system performance.

    How much storage do I need on my SSD for a gaming PC?
    The amount of storage you need will depend on the number and size of games you plan to install on your PC. However, a good rule of thumb for a gaming PC would be a minimum of 256GB SSD for your operating system and frequently played games, with additional storage for other files and less frequently used games.

    Is it better to have multiple SSDs or one large SSD for gaming?
    It can be beneficial to have multiple SSDs for gaming, as you could have one dedicated to your operating system and frequently played games, and another for storage of less frequently used games and other files. However, if purchasing a large enough SSD to hold all your necessary files is more practical, that could be a good option as well.

    Does the speed of an SSD matter for gaming performance?
    Yes, the speed of an SSD can greatly impact gaming performance, as faster read and write speeds can reduce loading times for games and improve overall system responsiveness. When shopping for an SSD, look for one with high read and write speeds, often listed as sequential read and write speeds in product specifications.

  • Boost Your Acer E15 Performance: Step-by-Step Guide to Install an M.2 SSD

    Are you tired of your Acer E15’s slow performance? Then installing an M.2 SSD might be the upgrade you need to breathe new life into your laptop! As technology advances, laptops become outdated much quicker than we would like. Luckily, installing an M.

    2 SSD can help speed up your laptop’s processing time, making it run like new. Think of it as giving your laptop a turbo boost! In this blog, we’ll guide you through the process of installing an M.2 SSD in your Acer E15, step-by-step.

    From purchasing the right SSD to installing it correctly, we’ve got you covered. Get ready to say goodbye to slow load times and hello to lightning-fast performance!

    Check Compatibility

    If you’re considering upgrading your Acer E15 laptop by installing an M.2 SSD, it’s important to make sure that the SSD you choose is compatible with your device. First, you’ll need to determine the type of M.

    2 SSD that your Acer E15 supports. Check the documentation that came with your laptop or do a quick search online to find out. Next, check the specifications of the M.

    2 SSD you’re considering buying to ensure that it matches the type and size that your laptop supports. You’ll also want to make sure that the SSD is fast enough to meet your needs, with a read and write speed that’s equal to or faster than your current hard drive. Finally, you may need to update your laptop’s BIOS to enable it to see the new SSD, so it’s worth checking for any necessary updates before you get started.

    By taking the time to check compatibility before you buy and install your new SSD, you can ensure that your Acer E15 runs smoothly and efficiently with its new upgrade.

    Confirm if E15 has M.2 slot

    If you’re wondering whether the Lenovo ThinkPad E15 has an M.2 slot, you’ll be happy to know that it does. Having an M.

    2 slot is essential if you’re looking to upgrade your laptop’s storage or add an additional SSD. However, it’s important to check compatibility before making any purchases. Not all M.

    2 slots are the same size, and not all SSDs will fit into every M.2 slot. It’s recommended to check your laptop’s specifications and the SSD’s compatibility requirements before purchasing to ensure a seamless upgrade process.

    With the M.2 slot, you’ll find that the Lenovo ThinkPad E15 is a great option for those in need of extra storage space or looking to upgrade their laptop’s performance.

    acer e15 how to install an m.2 ssd

    Determine compatible M.2 SSDs

    When it comes to upgrading your computer’s storage with an M.2 SSD, it is crucial to ensure compatibility before making a purchase. Not all M.

    2 SSDs are created equal, and compatibility varies depending on various factors such as motherboard type, form factor, and interface. To determine compatible M.2 SSDs for your computer, start by checking your motherboard’s manual to see what M.

    2 slot(s) it supports and at what speed. From there, you can search for M.2 SSDs that meet those specifications.

    Make sure to consider the form factor of the SSD, as some motherboards support only certain sizes. Additionally, the interface also matters, as some M.2 SSDs use SATA, while others use PCIe, and some even support both.

    Using the right M.2 SSD that is compatible with your computer will allow you to take full advantage of its speed and performance benefits.

    Preparation

    If you’re looking to upgrade your Acer E15’s storage capacity by installing an M.2 SSD, there are a few things you’ll need to do to prepare. First, make sure you have the necessary tools, including a screwdriver that fits the size of the screws on your laptop’s bottom cover.

    Then, back up any important data on your current hard drive as the installation process will require you to remove it. You’ll also need to disable any BitLocker encryption on the current drive before you remove it. Lastly, make sure you have a compatible M.

    2 SSD and do some research beforehand to ensure it’s the right size, speed, and capacity for your needs. With these preparations in place, you’ll be ready to move on to the actual installation process.

    Power off E15 and remove battery

    When it comes to preparing to remove the battery from your Acer Aspire E15, it’s important to take the necessary steps to ensure your safety and prevent any damage to your device. First, make sure to power off the laptop completely and unplug it from any power sources. This will prevent any electrical shock or damage that can occur if you attempt to remove the battery while the laptop is still on.

    Once you’ve powered off the E15, carefully flip it over and locate the battery compartment. To remove the battery, you may need to use a small screwdriver or other tool to slide the latch or release button. Always take care to remove the battery gently and avoid any bending or twisting motions that can damage the contacts or circuitry.

    By following these simple steps, you can safely and easily remove your battery and prepare your E15 for any maintenance or upgrades you may need to make in the future.

    Secure necessary tools and components

    When it comes to undertaking any form of project, one of the most crucial steps is ensuring that you have the necessary tools and components before you even begin. This is especially vital when it comes to projects that require a heightened level of security, such as those involving sensitive data or personal information. Having these tools at the ready will help you move through your project with confidence, knowing that you are able to tackle any challenges that may arise.

    One of the most important things you can do to prepare for your project is to take inventory of all of the tools you will need. This list should include not only the tools themselves, but also any necessary components such as hardware, software, or other materials. Once you have identified everything you need, it is time to start gathering these items.

    It’s important to make sure that all of the tools and components you select are secure and reliable. This means doing research on the brands you choose, ensuring that they have a reputation for quality and safety. It may also be a good idea to consult with experts in the field to get their recommendations on the best tools and components to use for your particular project.

    By taking the time to carefully select and gather all of the necessary tools and components for your project, you are setting yourself up for success. With everything you need at your fingertips, you can focus on the task at hand and work confidently towards achieving your goals. So next time you undertake a project, remember to take the time to properly prepare and secure your necessary tools and components.

    Back up important data

    Backing up important data is one of the most important things you can do to protect yourself from data loss. The first step in preparing to back up your data is to determine what data is truly important. You may have files that can be easily replaced or that are not critical to your daily life, while others may be irreplaceable.

    Once you have identified the important files, you will need to decide on the type of backup you want to perform. The most common options are external hard drives, cloud storage, or network-attached storage. Each method has its own advantages and disadvantages, so it’s important to choose the one that best suits your needs.

    Don’t forget to regularly update your backups to ensure that you always have the most recent versions of your files. By taking these simple steps, you can avoid the stress and frustration of losing important data.

    Installation

    If you own an Acer E15 laptop and want to boost its storage capacity, installing an M.2 SSD drive is an excellent solution. To begin the installation process, turn off the laptop and remove the AC adapter and battery.

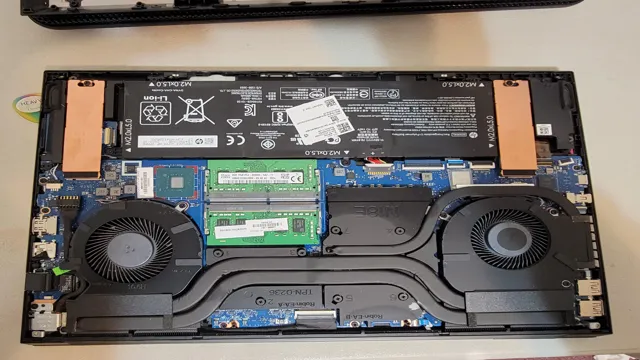
    Then locate the M.2 slot, which is usually on the bottom of the laptop and has a screw securing the cover. Use a screwdriver to remove the screw and cover, and carefully insert the M.

    2 SSD into the slot. Push it down gently until it snaps into place, then replace the cover and screw. Reassemble the laptop, turn it back on, and navigate to the BIOS or UEFI to verify that the drive is recognized.

    If it is not, check the connection and try again. Once you confirm that the M.2 SSD is recognized, you can use a cloning tool to transfer the operating system and data from the old drive to the new one, or simply install a fresh copy of Windows.

    With the M.2 SSD installed, you’ll experience faster boot times, application launches, and overall system performance, making your Acer E15 more enjoyable to use.

    Locate the M.2 slot on E15 motherboard

    When it comes to installing an M.2 SSD on your Lenovo E15, the first step is to locate the M.2 slot on the motherboard.

    Fortunately, this can be done relatively easily. If you flip your laptop over and remove the bottom panel, you should be able to find the M.2 slot towards the center of the motherboard.

    It will typically be labeled as “M.2 SSD” or something similar. If you’re having trouble finding it, check your laptop’s manual or look for a diagram online to help guide you.

    Once you’ve located the M.2 slot, installing the SSD is a simple matter of sliding it into place and securing it with a screw. And voila! You’ve just upgraded your E15’s storage and improved its performance, all thanks to the M.

    2 SSD.

    Install M.2 SSD into the slot

    Installing an M.2 SSD into the slot is a simple yet crucial step in upgrading your system’s storage capacity. Firstly, make sure to locate the M.

    2 slot on your motherboard, which can usually be found near the CPU socket or in the lower half of the board. Then, unscrew the protective covering on the M.2 slot and carefully insert the SSD into the slot, ensuring that the notch on the SSD aligns with the slot.

    Gently push the SSD into place, and screw it in tightly to secure it. After installation, remember to enable the M.2 slot in the BIOS settings of your computer.

    With the installation of an M.2 SSD, you can expect faster boot and load times, increased read and write speeds, and an overall improvement in system performance. So, don’t hesitate to upgrade your system’s storage with an M.

    2 SSD installation.

    Secure M.2 SSD with screw or clip

    When installing an M.2 SSD, it’s important to secure it properly to prevent any damage or data loss. One option for securing it is using a screw or clip.

    The screw method involves placing the SSD onto the slot and securing it with a small screw. This method offers a sturdy and long-lasting hold on the device, ensuring it won’t move or come loose during use. On the other hand, a clip is used to secure the SSD without the need for a screw.

    The clip simply attaches to the SSD and clicks onto the slot, keeping it in place. While this method is faster and easier, it may not be as secure as the screw method. It’s important to consider the specific needs of your device and choose the method that will best ensure its safety and longevity.

    Ultimately, using either a screw or clip will help guarantee your M.2 SSD stays in place and keeps your data secure.

    Post-installation

    If you’re looking to upgrade your Acer E15 laptop, installing an M.2 SSD is a great place to start. To get started, you’ll need to purchase an M.

    2 SSD that is compatible with your Acer E15 model. Once you have your new SSD, you’ll need to remove the back panel of your laptop to access the internal components. Ensure that your device is turned off and unplugged before opening it up.

    Once you have access to the internals, locate the M.2 SSD slot, carefully insert the SSD and tighten any screws necessary. Reattach the back panel and turn your laptop back on, your new SSD should now be detected by your computer’s operating system.

    You can now transfer your files and programs to your new SSD for faster read and write times. By installing an M.2 SSD in your Acer E15, you’ll be able to dramatically improve your computer’s performance and load times.

    Reassemble E15 and power on

    Finally, the moment of truth has arrived – it’s time to reassemble your E15 and power it on! After following all the installation steps carefully and ensuring that everything is properly connected, it’s time to put everything back in place. Start by screwing the back cover back onto the laptop and ensure that all the screws are nice and snug. Once that’s done, it’s time to connect the power cord and turn on your laptop.

    Make sure to double-check that you haven’t missed anything before you hit the power button. Once you’re sure that everything is in place and secure, it’s time to power on your laptop and see if everything works as it should. Don’t worry if it takes a few minutes for the laptop to turn on – this is completely normal and common during the post-installation process.

    Sit back and relax while your laptop boots up and enjoy the satisfaction of accomplishing a successful DIY upgrade.

    Initialize and format M.2 SSD

    After successfully installing your M.2 SSD, it’s essential to initialize and format it to ensure that it’s functional and effective. To initialize the SSD, you need to partition and format it.

    You can do this through the Disk Management tool on Windows or Disk Utility on Mac. Once you’ve initialized the SSD, you’ll need to format it to a compatible file system, such as NTFS, exFAT, or APFS. The formatting process is straightforward, but it may take a while, depending on the size of your SSD.

    It’s crucial to note that formatting the SSD will erase any data present on it, so be sure to back up your files before proceeding. A well-formatted SSD will improve the speed and performance of your system and ensure that you get the most out of your M.2 SSD.

    By following these simple steps, you can initialize and format your M.2 SSD with ease and enjoy a seamless computing experience.

    Transfer data to new storage device

    Once you’ve set up your new storage device, it’s important to transfer your data over to it so you can start using it as your primary storage. You can transfer your data by either manually copying and pasting files over to the new drive, or by using a data migration tool. If you only have a small amount of data, manually transferring it may be the easiest option.

    However, if you have a lot of files or want to transfer software and settings as well, a data migration tool is the way to go. These tools take care of everything for you, automatically transferring all of your data and settings to the new device. Make sure to back up all of your data before beginning the transfer process in case anything goes wrong.

    With a new storage device and all of your data safely transferred over, you can start enjoying faster speeds and more space for all of your files and programs.

    Conclusion

    Congratulations on taking the first step toward upgrading your Acer E15! Installing an M.2 SSD is a great way to improve your computer’s speed and performance. By following the steps in this guide, you’re sure to be enjoying lightning-fast load times and increased productivity in no time.

    So go ahead, get your hands dirty and show that Acer E15 who’s boss! And remember, if you ever need a refresher, this guide is always here to help. Now go forth and conquer the digital world!”

    FAQs

    What is an M.2 SSD and why should I consider installing one in my Acer E15?
    M.2 SSDs are a type of storage device that offers faster read and write speeds than traditional hard drives. Installing one in your Acer E15 can significantly improve your system’s overall performance and speed.

    What kind of M.2 SSD should I buy for my Acer E15?
    Your Acer E15 supports M.2 SATA SSDs with a maximum capacity of 512GB. Make sure to buy an SSD with the correct interface (SATA, NVMe, or PCIe) and form factor (most likely 2280) for your laptop.

    How do I open my Acer E15 to install an M.2 SSD?
    First, make sure your laptop is turned off and unplugged. Then, use a small screwdriver to remove the screws on the bottom of your Acer E15. Locate the M.2 slot, which is usually labeled, and carefully insert the SSD into the slot at a 30-degree angle. Secure it in place with the screw provided.

    Do I need to reinstall my operating system after installing an M.2 SSD?
    It’s not necessary to reinstall your operating system, but it’s recommended to clone your existing system onto the new SSD for a smoother transition. You can use third-party cloning software or built-in tools like Acer Care Center to clone your system.

  • Unlocking the Mystery: How Long Does it Take to Copy 1TB SSD?

    Upgrading your SSD can be a fantastic way to give your computer a new lease on life. But with so many files and programs stored on your existing drive, the idea of transferring everything to a new SSD can be daunting. Especially when you’re looking at transferring a massive drive like a 1TB SSD.

    But fear not, as it is easier than you might think. In this quick guide, we’ll walk you through the process of copying a 1TB SSD to a new drive, including what software you’ll need, and what to expect during the process. So, grab a cup of coffee and read on, as we guide you through the process.

    Factors Affecting Copying Time

    If you’re wondering how long it takes to copy 1TB SSD, there are a few factors to consider. First, the transfer speed of the devices being used will play a significant role in the time it takes to complete the task. Generally, USB

    0 or Thunderbolt cables offer faster data transfer speeds than USB 0. Additionally, the amount of files and their size can impact the overall copy time.

    Many small files will take longer to transfer than a few large files of the same size. Lastly, the health of the SSD can also affect copying time. If the SSD is damaged or has many bad sectors, it may take longer to copy files or may even fail to copy certain files altogether.

    So, to determine how long it will take to copy 1TB SSD, you must consider these factors and then make an estimation accordingly.

    Type of Port Used

    The type of port used is a crucial factor affecting copying time. Different types of ports have different data transfer rates, and this can significantly impact the speed at which data is copied. Ports like USB

    0 have a maximum transfer rate of 480 Mbps, while USB 0 can transfer data at up to 5 Gbps. So, if you’re using a USB

    0 port to copy a large number of files, it’ll take longer than copying the same files via USB 0. The same principle applies to other types of ports, such as Ethernet and FireWire.

    The speed of your copying process depends on your computer’s ports, the type of device you’re copying from, and the type of data you’re copying. Overall, choosing the appropriate port can save you time and boost your copying efficiency.

    how long to copy 1tb ssd

    Speed of Source and Target Drives

    When it comes to copying files, the speed of the source and target drives can play a significant role in determining the overall copying time. If the source drive is slow and can only transmit data at a limited rate, it will take longer to copy files to the target drive. Similarly, if the target drive is slow or full to capacity, it can also slow down the copying process.

    However, one cannot overlook the fact that other factors such as the size and number of files being copied, the type of files, and the computer’s processing power can also affect copying time. To ensure efficient and quick copying, it is essential to have high-speed options for both the source and target drives. This can help cut down on the copying time and make the entire process much less frustrating.

    Amount of Data on Drive

    When it comes to copying data from one drive to another, the amount of data you’re transferring can greatly affect the time it takes. The more data you have, the longer it will take to transfer. However, there are other factors that can come into play as well.

    For example, the speed of your drives can impact the speed of the transfer. If you’re copying data from an old, slow hard drive to a newer, faster SSD, the transfer may take longer than if you were transferring the data between two SSDs. Another factor is the connection type you’re using.

    USB 0 will be slower than USB 0, which is slower than Thunderbolt.

    Finally, the amount of other activity happening on your computer can impact transfer speeds. If you have a lot of other programs running, they may be competing for resources and slowing down the transfer. So if you’re looking to transfer a large amount of data, make sure you take these factors into account and plan accordingly.

    How Long Does it Take to Copy a 1TB SSD?

    If you are wondering how long it takes to copy a 1TB SSD, the answer depends on several factors. Firstly, the type of hardware being used to transfer the data might affect the speed of the copying process. For instance, using a Thunderbolt cable to transfer data between two SSDs could be a lot faster than using a USB

    0 port. Secondly, the speed of the SSD being copied from could also impact the copying time. For example, you would expect the copying process to take longer if you are copying data from a slower SSD.

    Furthermore, the amount of data being transferred could also significantly impact the copying time. In general, transferring 1TB of data would take a considerable amount of time, regardless of how fast the hardware used is. On average, transferring 1TB of data could take up to a few hours, depending on all of the factors mentioned above.

    USB 2.0 Port

    USB 0 port If you have ever wondered how long it takes to copy a 1TB SSD through a USB 0 port, the answer might surprise you.

    At the maximum theoretical transfer rate of 480 Mbps, it would take about 3 hours to transfer a 1TB file. However, in real-world scenarios, transfer rates are often slower due to file fragmentation, system resources, and other factors.

    In fact, it may take several hours to copy a large file like this. If you frequently transfer large files, it might be worth investing in a faster transfer method like USB 0 or

    1, Thunderbolt, or a network-attached storage device. These options provide faster transfer speeds and can significantly reduce the time it takes to transfer large files. So, while a USB

    0 port may be convenient, it may not always be the best option for transferring large amounts of data quickly.

    USB 3.0 Port

    If you’re looking to copy a 1TB SSD, you might be wondering how long it will take to transfer all that data. The answer largely depends on the speed of your USB 0 port.

    With USB 0, you can expect transfer speeds of up to 5 Gbps, which is 10 times faster than the previous standard, USB 0.

    That means a 1TB SSD can be copied in as little as 20 minutes, depending on the variables like how many files you’re copying or the size of each individual file. However, it’s worth noting that not all devices and storage drives are created equal; slower or older devices will not achieve these speeds, and other factors like compatibility and available bandwidth will also affect transfer times. That being said, investing in a USB

    0 port is definitely a good idea if you’re looking to transfer large amounts of data quickly.

    Thunderbolt Port

    If you’re considering using a Thunderbolt port to copy a 1TB SSD, you might be wondering how long it will take. Well, the answer depends on a few factors such as the speed of your Thunderbolt port and the type of SSD you’re working with. A Thunderbolt 3 port, for instance, can transfer data at a rate of up to 40Gbps, which means that copying a 1TB SSD could take only a matter of minutes.

    However, other versions of Thunderbolt ports are slower and may take longer to complete the transfer. Additionally, the type of SSD you’re working with can impact transfer speeds. NVMe SSDs, for example, are faster than traditional SATA SSDs, so the transfer may be completed even more quickly with a Thunderbolt port.

    Ultimately, the Thunderbolt port is a fast and reliable option for transferring large amounts of data, making it a popular choice for many professionals and enthusiasts alike.

    Tips to Speed Up SSD Copying Time

    If you’re wondering how long it takes to copy 1TB SSD, it can vary depending on factors like the device being used, file sizes, and transfer speeds. However, there are ways to speed up the copying process and make it more efficient. One tip is to use a USB

    0 or 1 port for faster transfer speeds. Another helpful strategy is to compress files before copying them, as this can reduce their overall size and make the process faster.

    You can also consider using a specialized software for SSD cloning, which can streamline the process and make it more reliable. Remember, copying large amounts of data can be time-consuming, so it’s always a good idea to plan ahead and allow for extra time if needed.

    Use a Faster Port

    One simple way to reduce your SSD copying time is to use a faster port. Some ports can transfer data faster than others, and using the right one can make a big difference in how quickly your files are copied. If you’re using an older computer, you might have a USB

    0 port, which can be quite slow. Upgrading to a computer with a USB 0 or higher port can significantly speed up your copying time.

    Alternatively, if your computer has a Thunderbolt or eSATA port, using one of those can be even faster than USB. So, next time you’re copying large files to your SSD, check if you’re using the fastest port available and make the switch if necessary.

    Clean Up the Drive Before Copying

    When it comes to copying files to your SSD, you may notice that the process is slower than expected. One way to speed it up is to clean up your drive before copying. This means getting rid of any unnecessary files and programs that may be taking up space and slowing down the copying process.

    Another tip is to close any open applications or programs that you are not using, as they can also slow down the copying speed. By optimizing your SSD drive before copying, you can save time and get the job done faster. So, take the time to tidy up your SSD before you start copying to ensure a smoother and quicker process.

    Avoid Using the Computer During Copying

    If you’re looking for ways to speed up the copying time on your SSD, one important tip is to avoid using your computer during the process. When your computer is actively running other applications or programs, it can seriously slow down the speed at which your SSD is copying files. This is because your computer’s resources are being divided between the copying process and whatever other tasks are running.

    To get the best copying results, it’s important to close all running applications and programs and to avoid using your computer for any other activities while copying. This will ensure that your SSD is able to dedicate all of its resources to the copying process, resulting in a much faster and more efficient transfer of data. By keeping this tip in mind, you can avoid frustrating delays and make the most of your SSD’s copying capabilities.

    Conclusion

    In conclusion, the speed it takes to copy 1tb of data onto an SSD depends on a variety of factors. It can range from lightning-fast if you have a high-speed USB 1 or Thunderbolt connection, to a sloth’s crawl if you’re still using a USB

    0 port. However, with the advancements in technology and the availability of faster transfer methods, it’s safe to say that copying a 1tb SSD should take less time than it would for you to binge-watch a season of your favorite TV show. So sit back, relax, and let technology do the heavy lifting for you!”

    FAQs

    What is the average transfer speed for copying a 1TB SSD?
    The average transfer speed for copying a 1TB SSD can vary depending on the specific hardware and software being used, but typically ranges from 50-150MB/s.

    How long will it take to copy a 1TB SSD using a USB 3.0 connection?
    The time it takes to copy a 1TB SSD using a USB 3.0 connection can vary depending on the specific hardware and software being used, but it can take anywhere from 2-5 hours.

    Can I use a different type of connection to copy a 1TB SSD faster?
    Yes, using a faster connection such as Thunderbolt or a PCIe adapter can significantly reduce the amount of time it takes to copy a 1TB SSD. However, the compatibility of these connections will depend on the specific hardware and software being used.

    Is it safe to copy a 1TB SSD while it is in use?
    It is generally not recommended to copy a 1TB SSD while it is in use as it can cause data corruption or other errors. It is best to shut down the system and remove the SSD before copying it to avoid any potential issues.

  • Upgrade Your Computer’s Speed: The Ultimate Guide on How to Transfer OS from One SSD to Another

    If you have recently upgraded your computer hardware and want the same lightning-speed performance from your new SSD, transferring your operating system from the old SSD may seem like a daunting task. However, with the right steps and tools, it can be a straightforward process. In this step-by-step guide, we will show you how to transfer your OS from SSD to SSD and get back your PC’s optimal performance in no time.

    Whether you are a computer enthusiast or just a regular user, this guide will simplify the process and help you avoid any confusion. So, buckle up and let’s get started!

    Check Compatibility of the SSD

    When transferring your OS from one SSD to another, it is important to ensure that these two drives are compatible. You should check the specifications of both SSDs to ensure that they have the same interface type, form factor, and storage capacity. Additionally, you want to ensure that your new SSD has the same or higher write and read speeds than your current one.

    Incompatible SSDs can cause data corruption, system crashes, and overall instability. Take the time to research your new SSD before making the switch to avoid any complications during and after the transfer process. A good rule of thumb is to choose an SSD that matches or exceeds the speed and capacity of your existing one – this will ensure that your new drive can handle the demands of your current OS without any issues.

    By taking these simple steps, you can ensure a smooth and successful transfer of your OS to your new SSD.

    Make sure the SSD ports are supported

    When selecting an SSD for your computer, it’s important to check if the SSD ports are supported. Not all SSDs are compatible with all ports, so it’s important to do your research before making a purchase. Some SSDs may require a different port than what your computer currently has, which could be a costly mistake.

    It’s also important to consider the type of port your SSD requires, such as NVMe or SATA, as this will impact the speed and performance of your SSD. By ensuring compatibility with your SSD ports, you can make the most out of your investment and experience faster data transfer speeds and improved overall performance. So before purchasing a new SSD, be sure to check the compatibility of the SSD ports to avoid any headaches down the line.

    how to transfer os from one ssd to another

    Ensure the new SSD has enough storage

    When upgrading to a new SSD, it’s essential to ensure compatibility with your system. Before purchasing an SSD, check the specifications for your computer or laptop to ensure that the new drive is compatible. This includes checking the interface, form factor, and capacity.

    Another crucial factor to consider is ensuring that the new SSD has enough storage for your needs. If you plan on storing large files or running resource-intensive applications, then a higher capacity SSD may be necessary. Remember to compare the performance, reliability, and storage space when selecting an SSD, as these factors can vary between different brands and models.

    By choosing a compatible and suitable SSD, you can significantly improve the speed and performance of your system.

    Backup the old SSD

    When it comes to transferring your operating system (OS) from one SSD to another, it’s essential to backup the old SSD first. This step will ensure that you don’t lose any crucial data during the transfer process. A backup can be done in various ways, but the most common and straightforward method is to copy all your files and data to an external hard drive or cloud-based storage solution.

    Windows operating systems come with a built-in backup tool that makes this process a breeze. Just connect your external hard drive or choose your preferred cloud-based backup solution, and open the backup tool. Select the files and folders you want to backup, including system files if necessary, and initiate the backup process.

    Once the backup is complete, you’re ready to transfer your OS to the new SSD without any worries. Remember, having a backup is always a good practice, even if you’re not transferring your OS between drives!

    Create a system image backup

    To ensure that all of your files and data are safely transferred to your new SSD, it’s important to create a system image backup of your old SSD. This can be easily done using Windows Backup and Restore feature. Start by connecting your external hard drive or USB drive to your computer and then open the Backup and Restore tool from the Control Panel.

    Select “Create a system image” and choose the external drive as the backup location. This process may take some time depending on the size of your data, so be patient and don’t interrupt the backup. Once the backup is complete, you can safely swap out your old SSD with the new one and restore the system image backup to your new SSD.

    This will ensure that all of your files, settings, and programs are exactly how they were before, saving you valuable time and effort. By following these simple steps, you can easily backup your old SSD and seamlessly transfer all of your files to your new SSD.

    Save data files and programs backup

    When it comes to upgrading to a new SSD, one of the crucial steps is to backup all your data files and programs from your old SSD. It’s essential to do this to ensure that you don’t lose any important information during the process. It’s also a great opportunity to clean up your files and get rid of any unnecessary data, which will save you valuable space on your new SSD.

    To backup your old SSD, there are several methods to choose from. You can use an external hard drive, cloud storage, or even a USB drive. The key is to make sure that you have enough space to store all your data.

    It’s also a good idea to check that your backup is complete before proceeding with the upgrade. By taking the time to backup your data, you can make sure that your upgrade process goes smoothly, and you’re not left trying to recover lost files. Don’t skip this step, take the time to backup your old SSD, and you’ll have peace of mind knowing that your data is safe and secure.

    Create a Bootable USB drive

    If you’re planning on upgrading your SSD or even transferring your OS from one SSD to another, you’ll need to create a bootable USB drive. This is a straightforward process that involves copying the contents of your current operating system onto a USB drive, and then using that drive to install the OS on your new SSD. To get started, you’ll need a blank USB drive that’s at least 8GB in size, a working computer, and a Windows installation file.

    Once you have these items, you can use a tool like Rufus to create a bootable USB drive. Simply select your USB drive, choose the Windows installation file, and click “Start”. The tool will take care of the rest, copying all of the necessary files onto your USB drive and creating a bootable installation media.

    Once the process is complete, you can connect your new SSD to your computer, boot from the USB drive, and follow the prompts to install your operating system on your new drive. With this method, you can easily transfer your OS from one SSD to another without any data loss or complications.

    Download software and create a bootable USB

    Creating a bootable USB drive is an easy and convenient way to install software on your computer or laptop. All you need is a USB drive and the software you want to install. First of all, download the software you want to install from a trusted source.

    Once the download is complete, open the software and look for an option to create a bootable USB drive. Follow the instructions provided by the software and select the USB drive you want to use. It’s important to note that creating a bootable USB drive can erase all data on the drive, so make sure to back up any important files.

    Once the bootable USB has been created, restart your computer or laptop and select the USB drive as the boot device. The software will then install on your computer directly from the USB. Creating a bootable USB drive is a quick and easy way to install software without the need for a CD or DVD drive, and it can save you time and hassle in the long run.

    So, next time you need to install software, consider creating a bootable USB drive for a convenient and efficient installation process.

    Insert the USB into the computer

    Creating a bootable USB drive is a straightforward process that requires a few easy-to-follow steps. Once you have downloaded the ISO image, you need to insert the USB stick into your computer. Most computers have USB ports located on the side or back of the device.

    If you are using Windows, the operating system will typically recognize the USB drive as soon as you insert it. However, your computer may display a message asking what you want to do with the USB stick. For Mac users, inserting the USB drive will display an icon on the desktop that indicates the drive is ready for use.

    Once you have inserted the USB drive, you are ready to move onto the next steps. Whether you are creating an emergency backup of your computer or installing a new operating system, creating a bootable USB drive is an essential task that can help you avoid costly or time-consuming data loss. With a little bit of guidance and a few simple tools, anyone can create a bootable USB drive that works like a charm.

    Install the new SSD

    When it comes to upgrading your computer, transferring your operating system (OS) to a new SSD is a crucial step. Luckily, it’s relatively simple to do with the right tools and know-how. First, you’ll need to connect your new SSD to your computer and make sure it’s recognized.

    Then, you can use software like Clonezilla or Macrium Reflect to clone your OS from your old SSD to the new one. This creates an exact copy of your old OS, including all your files, settings, and applications. Once the cloning process is complete, you can disconnect your old SSD and connect the new one as your primary drive.

    Your computer should now boot up just like it did before, but with faster load times and improved performance. It’s important to note that this process may vary depending on your specific computer and operating system, so be sure to do your research and follow the instructions carefully. With a little patience, you’ll be enjoying your new and improved computer in no time!

    Disconnect and remove the old SSD

    Once you have disconnected the old SSD, it’s time to install the new one. Before you start, make sure you have the right size and type of SSD for your computer. Open the compartment that houses the hard drive, then insert the new SSD into the designated slot.

    Make sure it is inserted firmly and properly. Secure the new SSD in place with the screws provided in the kit. Once you’ve done that, you can reconnect the power and data cables to the new SSD.

    It’s important to remember that installation processes may vary depending on the type and brand of your computer or laptop. So, it’s important to refer to the manufacturer’s instructions to ensure you complete the installation process accurately. Remember that when you are installing the new SSD, take gentle and careful actions to prevent damage to the hard drive or any other parts of your computer.

    Congrats! You are ready to experience the speed and capacity upgrade you have been looking for!

    Install and connect the new SSD

    To start installing the new SSD, turn off the computer and unplug all cables. You’ll need a screwdriver to open the computer case and locate the hard drive bay where the SSD will be installed. Once you’ve located it, remove the screws holding the bay in place and slide it out.

    If there’s already a hard drive in the bay, you’ll need to carefully disconnect the cables and unscrew it before removing it. Once the bay is empty, attach the SSD to it using the screws provided and secure it in place. Next, reconnect any cables that were disconnected and make sure they are securely fastened.

    Slide the bay back into its original position and replace the screws. You’re now ready to start connecting the new SSD to your computer.

    Transfer OS to New SSD

    Are you upgrading your computer’s storage and want to transfer your operating system (OS) from one SSD to another? Don’t worry, it’s easier than you think. You’ll need to clone the OS from your old SSD to the new one. First, make sure both SSDs are connected to your computer.

    Then, download and install a cloning software, such as Macrium Reflect or EaseUS Todo Backup. Open the software and select the option to clone your OS. Choose the old SSD as the source and the new SSD as the destination.

    Follow the prompts to start the cloning process. Once it’s complete, shut down your computer and swap out the old SSD for the new one. When you turn your computer back on, it should boot up from the new SSD without any issues.

    By transferring your OS to a new SSD, you’ll experience faster boot times and improved overall performance. It’s a worthwhile investment for any computer user looking to speed up their system.

    Run the created bootable USB

    Once you have created a bootable USB drive with your desired operating system, it’s time to transfer it to your new SSD. Before proceeding, make sure that your computer recognizes the SSD as a bootable device by checking the BIOS settings. Once you’ve confirmed that everything is in order, insert the bootable USB into your computer and restart it.

    Your system will boot from the USB drive, and you’ll be prompted to select the language, time zone, and keyboard layout. After that, you’ll be asked where you want to install the operating system. Choose the new SSD, and the installation process will begin.

    It may take some time, depending on the size of the operating system and the speed of your SSD. Once the installation is complete, your computer will restart, and you can start using your new SSD. With this simple process, you’ll be up and running with your new SSD in no time!

    Select the system image backup

    When it comes to transferring your operating system to a new SSD, selecting the right system image backup is crucial. This backup is essentially a snapshot of your entire operating system, including all the applications, settings, and data on your computer. Without it, you’ll have to start from scratch, which can be time-consuming and frustrating.

    To select the right system image backup, you’ll need to consider a few factors. First, make sure the backup is recent – ideally, it should be no more than a few days old. This ensures that any changes or updates you’ve made to your system are included in the backup.

    Second, check that the backup includes all the necessary components to boot your system on the new SSD. This includes the operating system itself, any necessary drivers, and any essential system files. Finally, consider the size of the backup and the capacity of your new SSD.

    You don’t want to select a backup that’s too large to fit on your new drive, or one that’s too small and leaves you with insufficient space for your applications and files. By selecting the right system image backup, you’ll be able to easily transfer your operating system to your new SSD and continue working without any interruptions or lost data. So take the time to select the right backup and ensure that your transition to your new SSD is as smooth as possible.

    Complete the transfer process

    If you’ve just acquired a new SSD and need to transfer your operating system (OS) to it, don’t worry, the process is quite straightforward. To start, you’ll need cloning software that’s compatible with your OS. Examples of such software include Acronis True Image and EaseUS Todo Backup.

    Once you’ve installed the cloning software, connect your new SSD to your computer and follow the software’s instructions to create a clone of your OS from your old drive. This usually entails selecting the OS partition on your old drive and copying it to the new SSD. Afterward, you might need to adjust your BIOS settings to ensure your computer boots from the new SSD.

    Voila! Your OS transfer is complete. One thing to keep in mind is to ensure that your new SSD is compatible with your motherboard and has enough storage space for your OS and any applications you want to run on it. By doing so, you can avoid any compatibility issues that might occur later on when you try to run your PC.

    Update boot settings & BIOS

    If you are planning to transfer your OS from one SSD to another, you will need to update your boot settings and BIOS. First, you will need to enter your BIOS by pressing a key when your computer starts up. This key may vary depending on your computer’s manufacturer, but you can usually find it displayed on the screen during startup.

    Once you are in your BIOS, you will need to navigate to the boot settings and select the new SSD as the primary boot device. Make sure to save your changes before exiting the BIOS. Before transferring the OS, it is crucial to format your new SSD to ensure a clean installation of your operating system.

    To do this, you will need to connect the new SSD to your computer and format it through the Disk Management tool on Windows. Once the formatting is complete, you can transfer your OS to the new SSD using a cloning tool. There are numerous cloning tools available, but it is recommended to use a reliable and reputable one.

    Once the cloning is complete, shut down your computer and disconnect the old SSD. Finally, when you restart your computer, your new SSD should be the primary boot device, and the OS should boot up without any issues. By following these steps, you can successfully transfer your OS from one SSD to another and enjoy the improved performance of your new drive!

    Enter BIOS settings

    In order to update your boot settings and BIOS, you’ll need to enter the BIOS settings on your computer. This can be done by pressing a specific key during startup, such as F2, F10, or Delete. The key to press can vary depending on your computer manufacturer and model, so it’s important to check the manual or do some research online to find out which key to use.

    Once you’ve entered the BIOS settings, you can navigate through the menus to make any necessary changes to your boot settings and update your BIOS firmware. This process can be a bit technical, so it’s important to follow instructions carefully and double-check any changes you make to ensure that you don’t cause any issues with your computer. By updating your boot settings and BIOS firmware as needed, you can ensure that your computer is running smoothly and efficiently, with the latest features and improved performance.

    Change boot order and save settings

    If you’re experiencing issues with your computer’s booting process, changing the boot order and updating BIOS settings could solve the problem. The BIOS (Basic Input/Output System) is responsible for controlling the communication between the motherboard and other components. To change the boot order, you need to access the BIOS settings.

    The process for entering BIOS varies between computers, but you can usually find the instructions displayed briefly on the screen during boot-up. Once you’re in BIOS, navigate to the Boot tab and use the arrow keys to change the boot order. You can move devices up or down in the list, so the computer attempts to boot from them in that order.

    Make sure to save your changes before exiting BIOS. If you’re not sure which device to prioritize, set the hard drive as the first boot option. Updating the BIOS can also fix booting problems and improve computer performance.

    To update the BIOS, download the latest version from the manufacturer’s website onto a USB drive. Then, restart the computer and enter BIOS to find the update utility and follow the on-screen instructions. Keep in mind that updating the BIOS is a delicate process that, if not done correctly, can cause irreversible damage to your computer.

    Therefore, it’s essential to follow instructions carefully and avoid power interruptions during the update process.

    Restart Your Computer

    Transferring your operating system from one SSD to another can be a daunting task for many. However, it can be a necessary process if you want to upgrade your current SSD or if it has become faulty. There are various methods to transfer your OS, but the most common and efficient method is through cloning.

    Cloning your current SSD to the new one will replicate all your files, settings, and configurations hence ensuring a seamless transition. You can use cloning software such as EaseUS Todo Backup, Acronis True Image, or Macrium Reflect. Once you have cloned the SSD, you need to restart your computer and go to your BIOS settings and set the new SSD as the primary boot device.

    Finally, confirm that the new SSD is functioning correctly by checking if your OS boots up correctly. By following these steps, you can transfer your OS to your new SSD without any issues.

    Boot the computer using the new SSD

    Congratulations! You’ve successfully cloned your previous hard drive onto your brand new SSD. Now comes the exciting part – booting up your computer using your new drive. Before you do this, make sure to shut down your computer completely, insert your new SSD into the appropriate slot, and remove any other external hard drives.

    Once you’ve done this, it’s time to restart your computer. Press the power button and wait for your computer to start up. You’ll notice that your computer will boot up much faster than before, thanks to the SSD’s lightning-fast speed.

    If your computer boots up properly and you can access your files and programs without any issues, congratulations! You’ve successfully installed and booted up your new SSD. It’s important to note that if you encounter any issues, you may need to check your BIOS settings to make sure that your computer recognizes your new drive. With your new SSD, you’ll experience a faster, more responsive computer that can handle even the most demanding tasks with ease.

    Conclusion

    In summary, transferring an OS from one SSD to another can seem intimidating, but with the right tools and know-how, it’s a breeze. Just imagine it like a game of musical chairs – as long as you have enough chairs (SSDs), you can easily swap one person (the OS) from one chair to another without missing a beat. So, don’t be afraid to take the leap and upgrade or migrate your storage – with a bit of confidence and a few clicks, your computer will be zippier than ever before!”

    FAQs

    What tools do I need to transfer my OS from one SSD to another?
    You would need a data transfer cable, a new SSD, and a cloning software such as “Acronis True Image” or “EaseUS Todo Backup.”

    Can I transfer my OS to a smaller SSD than the one I’m currently using?
    Yes, as long as the new SSD can accommodate the size of the data on your current SSD.

    Will transferring my OS affect any of my existing files or programs?
    No, transferring your OS should not affect existing files or programs. However, it is always recommended to back up your data before doing any major changes to your computer.

    How long does it usually take to transfer an OS from one SSD to another?
    The time it takes to transfer an OS from one SSD to another depends on the amount of data being transferred and the speed of your computer and SSD. On average, it can take anywhere from 30 minutes to a few hours to complete.

    Do I need to reinstall any drivers or software after the transfer is complete?
    No, all drivers and software should be transferred along with the OS. However, it is recommended to check for updates and install any necessary ones after the transfer is complete.

  • SSD vs HDD: The Ultimate Speed Test Revealed

    Are you in the process of upgrading your computer storage system and wondering which is better: SSD or HDD? The speed of the drive is one of the most important factors to consider when it comes to choosing the perfect storage system for your needs. In this blog, we’ll take a deep dive into the differences between SSD and HDD speeds to help you make an informed decision. When it comes to speed, SSDs (Solid State Drives) are leaps and bounds faster than HDDs (Hard Disk Drives).

    An SSD stores data on flash memory chips, which can be accessed almost instantly, whereas an HDD stores data on spinning disks and arms that move back and forth to read and write data, which takes longer. To put it into perspective, imagine you’re trying to find a book in a library. With an HDD, it’s like having to search through all the shelves until you find the book, whereas with an SSD, it’s like having all the books at your fingertips without having to move an inch.

    Understanding the differences in speed between SSDs and HDDs is crucial in making a decision that’s right for you. So, let’s dive deeper into the differences between SSD and HDD speed to help you make an informed decision.

    Understanding SSD and HDD Technology

    If you’re looking for a high-speed storage solution, you might be wondering how fast an SSD drive is compared to an HDD. Well, the answer is pretty simple: SSDs are much faster than HDDs. The reason why is because an SSD drive uses flash memory to store data, while an HDD uses mechanical platters.

    This means that an SSD drive can access and transfer data much faster than an HDD, which relies on a moving arm to read and write data. In fact, SSD drives can be up to 100 times faster than HDDs, which is why they have become the go-to choice for gamers, content creators, and anyone else who needs fast storage. So, if speed is important to you, you should definitely consider getting an SSD drive instead of an HDD.

    SSD and HDD: Key Differences

    SSD and HDD Understanding the difference between SSD and HDD technology is crucial when selecting a storage device. SSD stands for solid-state drive and uses flash memory to store data, much like a USB flash drive. In contrast, HDD stands for hard disk drive and uses spinning disks to store data.

    The key advantage of SSDs is their speed, as they can access and write data much faster than HDDs due to the lack of moving parts. Additionally, SSDs are less prone to physical damage and are typically more durable than HDDs. However, HDDs still have their advantages, such as offering more storage space at a lower cost.

    Ultimately, the decision between SSD and HDD depends on individual needs and budget, but it’s important to understand the key differences before making a purchase.

    how fast is ssd drive compared to hdd

    SSD and HDD Speed Comparison

    Have you ever wondered how fast an SSD drive is compared to an HDD? Well, the answer is that an SSD is significantly faster than an HDD. In fact, SSDs are up to 10 times faster than traditional hard drives. This is due to the way that SSDs work, as they don’t have any moving parts that need to spin up, which is the main reason why HDDs are slower.

    Because of this, SSDs can access and transfer data much quicker than HDDs. Additionally, SSDs also have faster read and write speeds and lower access times than HDDs. This means that with an SSD, your computer will boot up faster, programs will launch quicker, and you can transfer files in a shorter amount of time.

    In conclusion, if you want a faster and more efficient computer, then upgrading to an SSD is certainly worth considering.

    SSD: Lightning Fast Performance

    SSD If you’re looking for lightning-fast performance when it comes to using your computer, then upgrading to an SSD is definitely the way to go. SSDs or Solid State Drives are a newer technology compared to the traditional HDDs or Hard Disk Drives, but they’re much faster and more efficient. In terms of speed alone, an SSD will definitely outperform an HDD.

    This is because an SSD uses flash storage technology, which allows data to be accessed almost instantly. In comparison, an HDD uses spinning disks and moving parts, which leads to slower read and write times. It’s like the difference between a sports car and a bicycle, where SSDs are the sports cars.

    Additionally, SSDs are more reliable and durable since they don’t have any moving parts that can wear down over time. So if you’re looking for a faster and more efficient computing experience, upgrading to an SSD should definitely be on your to-do list.

    HDD: Limited by Mechanical Parts

    While HDDs have been the go-to storage solution for decades, they come with limitations due to their mechanical structure. SSDs have burst onto the scene as a faster and more reliable alternative, leaving many wondering how they compare. In a head-to-head comparison, SSDs vastly outstrip HDDs in terms of data transfer rates.

    HDDs rely on spinning disks and mechanical parts to access data, which leads to increased latency and slower read/write speeds. In contrast, SSDs use flash memory and have no moving parts, making them more reliable and giving them faster read/write speeds. This speed difference is even more noticeable when working with large files or running demanding applications.

    While HDDs may still have a place in backup storage solutions, those looking for top-notch performance should seriously consider jumping aboard the SSD train.

    Benchmark Tests and Real-World Performance

    When considering storage options for your computer, the choice between SSD and HDD can be a daunting one. While HDDs have been the standard for years, SSDs are becoming increasingly popular due to their faster speeds and overall better performance. But just how much faster are SSDs compared to HDDs? In benchmark tests, SSDs consistently outperform HDDs in terms of read and write speeds, as well as data transfer rates.

    However, real-world performance can vary greatly depending on the specific tasks being performed and the overall system configuration. For example, an SSD may provide a noticeable improvement in boot times and program loading, but may not make a significant difference in file transfer times. Overall, while SSDs are generally faster than HDDs, the true speed benefits may not always be apparent in day-to-day use.

    It ultimately comes down to personal preference and the specific needs of the user.

    Additional Benefits of SSDs

    When it comes to the question of how fast is an SSD drive compared to an HDD, the answer is clear: SSD drives are significantly faster. This is due to SSDs not having any movable parts, unlike HDDs. HDDs rely on spinning disks and mechanical arms to read and write data, which adds significant latency to the process.

    With SSDs, data can be accessed almost instantaneously since there are no physical components to slow things down. Aside from the speed benefits, SSDs also offer additional advantages. For one, they are much more durable than HDDs since they don’t have any moving parts that can break.

    Additionally, SSDs consume less power, making them an ideal choice for laptops or other devices that need extended battery life. Finally, SSDs are typically much quieter than HDDs since they don’t generate any noise from spinning disks. In summary, if you’re looking for a faster and more reliable storage option, an SSD is the way to go.

    The speed benefits alone make it worth the investment, but the additional advantages outlined here only add to the appeal. So if you’re still operating with an HDD, it might be time to consider upgrading to an SSD.

    Improved Durability and Reliability

    Aside from the faster speed and increased productivity, there are plenty of other benefits that SSDs bring to the table. One of these is improved durability and reliability. Unlike traditional hard drives, SSDs have no moving parts, rendering them less susceptible to physical damage or wear and tear.

    This means that your data is much safer and more secure on an SSD, reducing the risk of data loss due to accidental drops or impacts. The lack of moving parts also results in less heat generation and lower power consumption, making them ideal for use in portable devices. Additionally, SSDs are less prone to data corruption and errors, resulting in fewer instances of lost or corrupted files.

    Overall, the improved durability and reliability of SSDs make them a worthwhile investment for anyone looking to protect their data and improve their system’s performance.

    Reduced Power Consumption and Noise Levels

    It’s no secret that SSDs have taken the computer world by storm with their lightning-fast speeds, but did you know that they also offer reduced power consumption and noise levels? Unlike traditional hard disk drives that require spinning disks and mechanical read/write heads, SSDs operate entirely using microchips and have no moving parts. This means that SSDs consume significantly less power than HDDs, which results in lower heat output and less cooling required inside your computer. Additionally, because there are no moving parts, SSDs generate zero noise and are virtually silent.

    So not only do SSDs increase the overall performance of your computer, but they also offer added benefits of reduced power consumption and noise levels. It’s a win-win situation!

    Final Thoughts and Recommendations

    If you’re wondering how fast an SSD drive is compared to an HDD, the answer is simple – it’s significantly faster. Solid-state drives have flash memory, which means they don’t have any moving parts and can access data much faster than traditional mechanical hard drives. This makes them a great choice for tasks that require speed, such as booting up your computer and launching applications.

    Additionally, SSDs tend to have faster read and write speeds, which means they can transfer data more quickly than HDDs. Overall, if you’re looking to upgrade your computer’s performance, investing in an SSD drive is definitely worth considering. Not only will you notice a significant improvement in speed, but you’ll also enjoy other benefits like improved durability and energy efficiency.

    So why wait? Make the switch to an SSD drive today and experience the difference for yourself!

    Conclusion

    In short, an SSD drive is like a ninja while an HDD is like a snail. The SSD’s lightning-fast speeds and seamless efficiency make it the clear winner when it comes to storage technology. So if you want your computer to run like Usain Bolt instead of a turtle, invest in an SSD drive today.

    FAQs

    What is the difference in speed between SSD and HDD drives?
    SSD drives have faster read and write speeds compared to traditional HDD drives. This is because SSD drives have no moving parts and data is accessed electronically.

    How do SSD drives improve overall system performance?
    SSD drives improve system performance by allowing faster boot times, quicker access to applications, and faster file transfers. Additionally, they have lower latency and faster data transfer rates.

    Can SSD drives be used in laptops or desktops?
    Yes, SSD drives can be used in both laptops and desktops. In fact, many modern laptops and desktops come with SSD drives as the primary storage device.

    Are SSD drives more expensive than HDD drives?
    Yes, SSD drives are typically more expensive than traditional HDD drives. However, their faster speeds and increased durability can make them a worthwhile investment for many users.

    What is the lifespan of an SSD drive?
    The lifespan of an SSD drive depends on a number of factors, including usage habits and storage capacity. However, most SSD drives are designed to last for several years with normal use.

  • Get Back on Track: A Step-by-Step Guide on Replacing Your Crashed SSD

    Replacing your SSD after a crash can be a stressful and overwhelming experience. The fear of losing important data and the hassle of finding a replacement can cause anyone to panic. But fear not, we have created a step-by-step guide to make the process as smooth as possible.

    In this blog, we will cover everything you need to know, from identifying the type of SSD to transferring data to the new drive. By the end of this article, you will have the confidence to replace your SSD and get back to business without any hiccups. So let’s get started and turn this daunting task into a manageable one.

    Assessing the damage

    If your SSD has crashed and you need to replace it, the first step is to assess the damage. Depending on the cause of the crash, the data on the drive may not be recoverable. If the crash was caused by physical damage, such as a drop or impact, the chances of data recovery are lower.

    However, if the crash was caused by software issues or corruption, data recovery may be possible. It’s important to back up your data regularly to prevent data loss in the event of a crash. Once you’ve assessed the damage, you’ll need to purchase a new SSD.

    It’s important to ensure that the replacement SSD is compatible with your computer and meets your performance needs. Installing the SSD can be a DIY task if you’re comfortable with opening up your computer and following instructions, or you can seek the help of a professional.

    Backing up important data

    When it comes to backing up important data, one of the most crucial steps is assessing the damage. This means taking a look at what data has been lost or corrupted and evaluating the impact it will have on your business or personal life. It can be a stressful and overwhelming experience, but it’s important to remain calm and focused.

    Start by identifying which files are essential and cannot be replaced, such as financial records, client contracts, or family photos. Then, prioritize restoring these files first. Remember to also check for any hardware damage or issues that may have contributed to the loss of data.

    By carefully assessing the damage, you can create an action plan to recover and protect your important data in the future. Don’t wait until disaster strikes – make sure to regularly back up your data and take preventative measures to avoid data loss.

    how do ii replace my ssd due to crashes

    Running diagnostic tests

    When you notice that your computer is struggling, running diagnostic tests can help pinpoint the cause of the problem. These tests assess the damage and determine what needs to be fixed in order to restore your computer to working order. It is important to accurately diagnose the issue, which can range from hardware problems like failing hard drives or overheating components, to software issues like viruses or corrupted files.

    Once the problem has been identified, it is easier to determine the best course of action to fix it. Running diagnostic tests regularly can help prevent major damage and keep your computer running smoothly. So, if you notice any performance issues with your computer, don’t hesitate to run a diagnostic test to identify the issue and get it fixed quickly.

    Selecting a replacement SSD

    If your SSD has crashed, don’t panic, it’s time to select a replacement SSD. To start the process, you’ll need to gather some information about your current SSD, such as its capacity and interface (SATA, M.2, etc.

    ). You’ll also want to determine your budget and any specific features you need, such as higher endurance for heavy usage or built-in encryption for extra security. Once you’ve done your research, you can start browsing different SSD models and brands, reading reviews and comparing prices.

    While selecting a replacement SSD, make sure to choose one that can meet your current and future storage needs, and has the necessary performance for your intended usage. With a little bit of patience and careful consideration, you’ll find a suitable replacement SSD that will get your system up and running again.

    Understanding compatibility requirements

    When selecting a replacement SSD, it’s important to understand the compatibility requirements of your device. You don’t want to purchase an SSD that won’t fit or is not compatible with your device’s interface. Some of the key compatibility factors to keep in mind are the drive’s form factor, interface, and capacity.

    The most common form factors are 5-inch and M.2, while the most common interfaces are SATA and PCIe.

    Make sure to check your device’s manual or manufacturer’s website to determine the supported form factor and interface. Additionally, you’ll want to pay attention to the capacity of the SSD, as some devices may have limitations on the maximum capacity they support. Overall, taking the time to understand your device’s compatibility requirements will help ensure that you select an SSD that works seamlessly with your device, providing optimal performance and storage capacity.

    Comparing different options

    When it comes to selecting a replacement SSD, there are a few factors to consider. First, you’ll want to compare different options and look at their specifications to determine which SSD will give you the best performance for your needs. You may also want to consider factors such as capacity, durability, and price.

    A popular option that ticks all of these boxes is the Samsung 970 EVO Plus SSD. With read/write speeds of up to 3,500/3,300 MB/s and a capacity of up to 2TB, this SSD is perfect for those who need high-speed performance and plenty of storage space. It’s also designed to last, with a five-year limited warranty and up to 1,200 TBW endurance rating.

    Plus, while it is a bit pricier than some other options, its exceptional performance and longevity make it well worth the investment.

    Considering budget constraints

    When it comes to selecting a replacement SSD, budget constraints can often be a deciding factor in the decision-making process. It’s important to find a balance between affordability and performance, keeping in mind that not all SSDs are created equal. Opting for the cheapest option may result in sacrificing speed and reliability, while overspending may not yield significant performance gains.

    One option is to consider mid-range SSDs, which offer a decent balance between cost and performance. Another consideration is looking for deals or discounts on reputable brands, which may offer better value for money. Ultimately, it’s important to do research and compare options before making a final decision, ensuring the replacement SSD meets your needs while also fitting within your budget.

    Installing the new SSD

    So, your SSD has crashed, and you need to replace it. Don’t worry; it’s not as complicated as it sounds. The first step you should take is to back up all your important data.

    Once you’ve done that, you need to determine the type of SSD your laptop or desktop uses. You can do this by checking your user manual or opening your device’s casing to take a look. Next, you need to purchase a compatible SSD, preferably one with higher storage space than your previous one.

    Installing the new SSD is as easy as unscrewing the old one and replacing it with the new one. Most SSDs come with a migration tool that helps transfer your OS and data from the old SSD to the new one. If not, you can manually install your OS and transfer your data.

    Voila! Your device is as good as new, and you have a higher storage capacity. Remember, you can always seek professional help if you’re not confident in your technical abilities.

    Preparing the computer

    Now that the computer is ready, it’s time to install the new SSD. Before we proceed, let’s make sure we have all the necessary tools on hand. You’ll need a screwdriver, an anti-static wristband, and your SSD.

    Once you have everything you need, it’s time to open up the computer casing. If you’re unsure where to find the SSD slot, refer to your computer manual as it can differ across different models. Once found, remove the screws that hold the casing in place.

    You should now have access to the SSD slot. Carefully insert the SSD into the slot and screw it into place. Remember to use the anti-static wristband to prevent any damage from occurring.

    Once installed, it’s time to close the casing and screw it back into place. Congratulations, you have now successfully installed your new SSD.

    Physically replacing the drive

    Installing a new SSD is an excellent option to boost your computer’s performance, but it requires physically replacing the drive. Firstly, you must check your computer’s specifications to ensure that the new SSD is compatible with your device. Once confirmed, you can start the installation process.

    Firstly, shut down your computer and unplug it from the power source. Open up the computer case and locate the old hard drive. Carefully remove it from its bay, taking note of how it was connected.

    Then, take your new SSD and connect it to the SATA port on the motherboard, making sure to use the appropriate cables. Next, install the SSD into the drive bay of the computer case and secure it with screws. Finally, connect the power and data cables to the SSD, and close the computer case.

    Congratulations, you have successfully installed a new SSD that will enhance your computer’s speed and performance.

    Testing and optimizing the new SSD

    If you’re experiencing crashes on your computer and suspect that your SSD might be the culprit, it may be time to replace it. Replacing your SSD is a relatively simple process, but it’s important to ensure that the new SSD works optimally. First, you’ll want to test the new SSD to make sure it’s functioning correctly.

    This can involve running a stress test to see how the SSD performs under heavy usage. If the SSD passes the stress test, you’ll want to optimize it for better performance. This can involve adjusting the sector size or enabling TRIM to clean up unused sectors.

    Finally, you’ll want to ensure that your data is properly migrated over from the old SSD to the new one. With these steps, you can replace your SSD and ensure that your computer is running smoothly once again.

    Conclusion

    Replacing an SSD due to crashes may seem like a daunting task, but fear not! It’s as easy as switching out your favorite pair of socks. Just make sure to back up your data, grab a screwdriver, and follow a simple tutorial. In no time at all, you’ll have a fresh and speedy SSD powering your system once again.

    Say goodbye to crashes and hello to pure SSD bliss!”

    FAQs

    What are the signs that indicate that my SSD has crashed?
    Your computer might freeze, crash, or operate slower than usual if your SSD has crashed. You may also notice corrupted files or strange noises coming from your device.

    Can I recover data from a crashed SSD, or is it lost forever?
    It is possible to recover data from a crashed SSD, but it can be challenging and costly. You may need to consult with a professional data recovery service to retrieve your information.

    Do I need to replace my entire computer, or just the SSD?
    If your SSD is the only component that has crashed, you can simply replace it without replacing your entire computer. However, if other parts of your device are failing as well, it may be more economical to upgrade to a new device.

    How can I prevent my SSD from crashing in the future?
    You can prevent SSD crashes by regularly backing up your data, keeping your device’s firmware up-to-date, and monitoring your device’s temperature and usage to avoid overheating and exceeding its capacity.

  • Unraveling the Mystery: What Happened to My SSD Storage Capacity – From 125GB to 90GB

    Have you ever noticed that the storage capacity of your SSD seems to decrease over time, despite not adding any new files or applications? If so, you’re not alone. Many people have wondered why their SSDs lose space without any apparent reason. Well, the answer lies in the way SSDs work.

    While they offer faster read and write speeds and increased durability over traditional hard drives, there is a downside. SSDs use a type of memory called NAND flash, which can only be written and erased a certain number of times. As a result, as you use your SSD, its capacity may decrease due to the regular wear and tear it experiences.

    Understanding SSD Technology

    If you’ve noticed that your SSD has seemingly lost space, there could be a few reasons behind it. First and foremost, it’s important to understand how SSD technology works. While traditional hard drives use spinning disks to read and write data, SSDs rely on flash memory.

    This generally allows for faster read/write speeds and more durability, but it also means that SSDs are more prone to “burstiness”. This means that the amount of space available on your drive can fluctuate depending on how the drive is being used. Additionally, over time, SSDs can become more susceptible to wear and tear, which can further reduce the available space.

    So if you’re noticing a decrease in your SSD’s size, it’s likely due to one or both of these factors. It’s also worth noting that certain settings and programs can contribute to a reduction in drive space. However, as long as you’re aware of how SSDs work and take care of your drive, minor fluctuations in space should not be cause for concern.

    Storage Allocations and Over-Provisioning

    SSD technology SSD technology has revolutionized data storage, offering faster read and write speeds and a longer lifespan than traditional hard drives. One important aspect of SSDs is storage allocation, which refers to how the drive allocates space for files and data. Over-provisioning is a useful technique that allocates more space than is actually available to the operating system, which improves performance and extends the lifespan of the drive.

    Think of it like a packed suitcase with space left over. If you overpack your suitcase, it becomes more difficult to find and access items. But if you leave room for flexibility, it’s easier to organize and find what you need.

    Likewise, over-provisioning allows the SSD to better manage and organize data, reducing the need for constant relocation and extending the lifespan of the drive. Understanding storage allocations and over-provisioning is important for maximizing the performance and lifespan of your SSD. By allocating more space than is actually available, you ensure faster read and write speeds and reduce the risk of data loss or corruption.

    Whether you’re a gamer, a content creator, or simply a tech enthusiast, investing in high-quality SSD technology with effective storage allocation techniques will be a game-changer for your computing experience.

    how did my ssd go from 125 gb to 90

    Trim Support and Garbage Collection

    Trim Support and Garbage Collection are important features of SSD technology that help to maintain the performance and lifespan of SSDs. Trim Support is a command that allows the operating system to inform the SSD which blocks of data are no longer in use and can be erased. This helps to prevent the SSD from becoming cluttered with stale data, which can slow down performance over time.

    Garbage Collection, on the other hand, is a process that the SSD uses to identify and erase blocks of data that are no longer needed. This helps to keep the SSD operating at peak performance and extend its lifespan. While Trim Support and Garbage Collection are both essential to maintaining the health of your SSD, it’s important to note that not all SSDs support these features.

    If you’re in the market for a new SSD, be sure to choose one that supports both Trim and Garbage Collection for optimal performance and longevity. So, when it comes to choosing your SSD, make sure to pay attention to the details and choose wisely to ensure the best performance and lifespan for your device.

    Common Causes of Storage Loss

    Have you ever wondered how your SSD storage disappeared so quickly? There are several common causes of storage loss, including files and programs that take up more space than you realize. A cluttered hard drive can also lead to storage loss, especially if you don’t regularly clean up and delete old or unused files. Another culprit is temporary files that accumulate over time and take up valuable space.

    It’s also possible that the operating system or other software is taking up more space than expected. In some cases, there may even be hidden files or folders that you’re not aware of. So if you’re wondering why your SSD went from 125GB to 90GB, it’s likely due to a combination of these factors.

    The good news is that you can take steps to free up space and optimize your storage.

    Operating System Storage Utilization

    Operating System Storage Utilization Have you ever wondered why your device’s storage space always seems to be running out? There are several common causes of storage loss in operating systems. One of the major culprits is the accumulation of unnecessary data, such as temporary files, cache, and log files, which are generated by the system, applications, and browsers, to aid in their operation. Another cause is the presence of duplicate files, which can consume a significant amount of storage.

    These files may be created unintentionally, as a result of copying or downloading the same file multiple times. Unused applications and their associated data can also take up considerable storage space. In addition to these causes, operating systems may also reserve a significant amount of space for updates, backups, and system files, which may not be visible to the user.

    By understanding these common causes, you can take steps to reduce storage loss on your device and ensure that you have enough space for all your needs.

    Temporary and Junk Files

    Are you running out of storage on your device and don’t know why? One common reason for storage loss is temporary and junk files. These files take up space on your device but don’t hold any important information. Temporary files are created and stored when you use certain apps or programs, and junk files are unused data or files left behind by apps and programs that you’ve uninstalled.

    Over time, these files can accumulate and take up a significant amount of storage on your device. To free up space, you can manually delete these files or use a cleaning app to do it for you. It’s important to regularly clear out temporary and junk files to ensure your device is running efficiently and has enough storage space for important files and apps.

    Hardware or Software Errors

    One of the worst things that can happen to anyone is the loss of data on their storage device. It can be caused by various factors such as hardware or software errors. Hardware errors occur when there’s a physical damage or malfunction to the storage device.

    It could be a failing hard drive, damaged controller chip or faulty power supply. On the other hand, software errors may result from malware, viruses, operating system crashes, or file system corruption. The good news is that certain measures can be taken to prevent such incidents from happening.

    Always backup your important files on a cloud server or external hard drive. Keep your computer protected with antivirus software and avoid downloading suspicious files or emails. Also, it’s important to replace your storage device after a few years to avoid potential hardware failures.

    By following these simple steps, you can avoid the heartache and stress of losing your valuable data.

    How to Check SSD Capacity and Regain Lost Space

    If you’re wondering how your SSD capacity went from 125gb to 90gb, there are a few things you can do to check and regain lost space. One of the first steps is to check the size of your installed programs and applications, as well as any temporary files that they create. You can use a program like WinDirStat to visualize which files and programs are taking up the most space on your drive.

    Another factor to consider is the size of your system and user files, such as downloads, documents, and pictures. By regularly cleaning out unnecessary files and organizing your data, you can free up space on your SSD and improve its overall performance. Additionally, you can check for any hidden partitions or system backups that may be consuming storage space.

    By taking these steps and being mindful of your storage usage, you can keep your SSD running smoothly and efficiently.

    Using Disk Cleanup Tool

    If you’re running low on SSD storage space, the Disk Cleanup tool is a quick and effective way to regain lost space and optimize the performance of your computer. To check your SSD capacity, you can easily navigate to the Properties tab of your drive. From there, you can check the amount of used and free space available.

    The Disk Cleanup tool allows you to delete unnecessary files, such as temporary internet files and system files that are just taking up space on your SSD. By doing so, you can free up valuable space and potentially speed up your computer’s performance. Plus, it’s easy to use and built right into Windows, so there’s no need to download any additional software or programs.

    Give it a try and see how much space you can free up!

    Disabling Hibernation Feature

    SSD SSD drives have become more popular over the years due to their fast speed and durability. However, a common issue that users face is low capacity. One way to check SSD capacity is by going to the “This PC” option in the file explorer and right-clicking on the SSD drive to select “Properties.

    ” This will show the used and free space on the drive. If the drive is low on space, one solution is to disable the hibernation feature. Hibernation creates a file that stores the system’s state into the hard drive when the computer goes into a sleep mode.

    Disabling hibernation can regain space on the SSD since the file created during hibernation can take up a considerable amount of space. To disable hibernation, open the command prompt as an administrator and type “powercfg.exe /hibernate off.

    ” This will disable the hibernation feature and free up space on the SSD drive. This simple process can make a significant difference in available storage space for your computer.

    Updating Firmware and Drivers

    If you’ve noticed that your SSD is running slower than usual or is running out of storage space, it may be time to check your capacity and regain lost space. One way to do this is by updating your firmware and drivers. Firmware is the software that controls the operations of your SSD, while drivers are software programs that enable your operating system to communicate with your hardware.

    By updating these, you can improve your SSD’s performance and ensure that it is operating at its fullest potential. To check your SSD capacity, you can use your computer’s built-in disk management tool or download third-party software that can provide more detailed information. Once you’ve identified any unused space or unnecessary files, you can delete them to regain lost space and free up your SSD for more important data.

    With a little regular maintenance, you can extend the life of your SSD and prevent any potential issues down the line.

    Conclusion

    Well, it seems that your SSD shrunk faster than a cotton shirt in the dryer. Maybe it went on a crash diet or simply lost some of its digital weight. Either way, the important thing is to make sure that you back up your important files before they too disappear into the digital abyss.

    As for the missing gigabytes, don’t worry, they’re just off on an adventure exploring the vast, digital universe.”

    FAQs

    What could be the possible reasons for the decrease in my SSD storage from 125 GB to 90 GB?
    There could be multiple reasons like system updates, temporary files, applications, or malware taking up space on your computer.

    How can I identify which files or applications are using up my SSD storage?
    You can use built-in tools like File Explorer or third-party software to identify which files or applications are consuming the most space on your SSD.

    Can formatting the SSD solve the issue of decreasing storage space?
    Yes, formatting the SSD can help regain some of the lost storage space, but it will also delete all the data stored on the drive.

    Is upgrading to a higher capacity SSD the only solution to tackle the issue of decreasing storage space?
    No, upgrading to a higher capacity SSD is one solution, but you can also try optimizing your applications and deleting unwanted files to free up space on your current SSD.

  • Game Faster with Battle Net: The Ultimate Guide to Moving Games to SSD

    Are you tired of your games running slow and taking forever to load on your Battle.net client? Well, we have a solution for you – move your games to an SSD! An SSD, or solid-state drive, provides faster load times and improves overall performance compared to a traditional hard drive. In this article, we’ll show you how to move your games to an SSD on Battle.

    net, step-by-step. It’s easy to do and can make a significant difference in your gaming experience. So, let’s get started!

    Check Your SSD’s Available Space

    If you’re a gaming enthusiast, you’re probably aware of the importance of having enough storage space for your games. Battle.net, one of the most popular gaming platforms, allows you to move your games to an SSD to enhance their performance and decrease load times.

    However, before moving your games, it’s crucial to check your SSD’s available space to ensure that there’s enough room for your games. Checking your SSD’s available space is easy; simply navigate to your computer’s settings and locate your SSD’s storage. Once you have determined how much space is available, you can proceed to move your games to your SSD.

    This simple step can significantly improve your gaming experience by reducing load times and improving overall performance. So if you’re looking to enhance your gaming experience, consider moving your games to your SSD and stay on top of your available space to avoid any issues.

    Open Your Battle.net Client

    Are you experiencing issues with your Battle.net client while downloading games or updates? One possible reason could be low disk space on your SSD. Before you start troubleshooting other possible causes, it’s worth checking the available space on your hard drive.

    To do this, open File Explorer and navigate to your SSD, then right-click on it and choose Properties. In the General tab, you’ll see how much space is free and how much is used. Ideally, you should have at least 10-15% of the total capacity free for your system to run smoothly.

    If you’re running low on space, consider uninstalling programs or files you no longer need, or moving them to an external drive to free up some space. By doing this, you can avoid running into any storage-related problems when using your Battle.net client.

    battle net how to move games to ssd

    Locate Your Game Install Folder

    If you are a passionate gamer, you are probably always looking for ways to optimize your gaming experience. One important factor to consider is the amount of space available on your SSD. After all, most modern games come with huge installation files that can easily take up several gigabytes of space.

    So, before you go ahead and install your favorite game, it’s always a good idea to check your SSD’s available space first. This will give you an idea of how much space you have left and whether or not you need to free up some space by deleting old games or files. Once you have enough space available, the next step is to locate your game install folder.

    This is where your game will be installed, and it’s important to know where it is so that you can access it easily and make any necessary changes or updates. Simply go to the game’s properties and look for the install folder. From there, you can easily locate it and start enjoying your favorite game without any worries.

    Copy Your Game Files to SSD

    If you’re a gamer, you know the drill – you need to move your games to an SSD. Not only does it speed up your games, but it can also help cut down on load times. Thankfully, transferring files from your Battle.

    net account to an SSD is pretty simple. First, make sure you have enough space on your SSD to hold the game you want to move. Then, open up Battle.

    net and navigate to the game you want to move. Click on the game’s settings and find the “game install/update” section. From there, you’ll have the option to move the game to your SSD.

    Click “move,” and voila! Your game will now be on your SSD. You’ll see a noticeable improvement in loading times, and your computer will thank you for it. So, don’t waste any more time waiting for your games to load – move them to your SSD today!

    Create a New Folder on Your SSD

    Creating a new folder on your SSD can be a simple yet effective way to optimize your gaming experience. After all, you want your games to load quickly and run smoothly. To copy your game files to the SSD, first, create a new folder on the SSD specifically for your games.

    You can name it whatever you like, such as “Games” or “Gaming Files”. Then, go to your current game files, which are likely stored on your hard drive. Select the game files you want to transfer and copy them to the newly created folder on the SSD.

    This may take some time, depending on the size of the files, but once the transfer is complete, you can delete the original game files from your hard drive to free up space. By having your game files on your SSD, you can enjoy faster loading times, smoother gameplay, and an overall better gaming experience. So, give it a try!

    Copy Your Game Folder from HDD to SSD

    Copying your game files to an SSD can significantly improve your gaming experience by reducing loading times and improving overall performance. To begin, locate the directory where your game files are saved on your HDD. Typically, this will be found in the Steam or Origin folder.

    You can then copy this folder and paste it onto your SSD. However, ensure that your SSD has enough storage space to accommodate the size of your game folder. Once the transfer is complete, you can launch the game from the SSD to experience faster load times and better overall performance.

    In essence, copying your game folder from your HDD to your SSD is a simple yet effective way to enhance your gaming experience.

    Update Your Game Settings in Battle.net

    If you’re looking to improve your gaming experience and reduce your load times, moving your games to an SSD is a great way to do it. Battle.net makes it easy to update your game settings and move your games to an SSD.

    Simply follow these steps: Open up Battle.net and go to the game you want to move.

    Under the “Options” tab, select “Game Settings.”

    In the “Game Install/Update” section, click “Move Folder.” Choose the folder where you want to move the game.

    Click “Start Move.”

    Wait for the move to complete and enjoy faster load times! By following these steps, you can easily move your games to your SSD and experience the benefits of faster load times. Don’t let slow load times drag down your gaming experience – take advantage of Battle.net’s easy-to-use settings and move your games to an SSD today.

    Open Game Settings

    Do you love tweaking your game settings to perfection? Then you’ll love the new feature in Battle.net, the Open Game Settings. This game settings feature gives you incredible customization options for your games, allowing you to fine-tune everything from graphics to control settings, all in one convenient place.

    This way, you can easily switch between games and ensure your experience is tuned to your liking. To get started, simply open Battle.net and click on the “Games” tab.

    From there, locate the game you want to customize and click on the “Options” dropdown. Select “Open Game Settings” and voila! Now you have full control over every aspect of the game settings. Whether you want to boost your FPS or make controls more responsive, Open Game Settings has got you covered.

    So why settle for default settings when you can customize your game to your heart’s content?

    Change Game Install Folder Location

    Are you tired of your game install folder taking up too much space on your computer? Did you know that you can easily change the location of your game install folder within Battle.net? This simple process can free up valuable space on your hard drive and make managing your game files much easier. To start, open up Battle.

    net and click on the game you want to change the install location for. Next, click on the “Options” tab and select “Game Settings.” From there, you will see an option to “Install Folder.

    ” Simply click on the “Browse” button and choose the new location where you want your game to be installed. It’s that easy! Keep in mind that depending on the size of the game, it may take some time to move it to the new location. Once it’s finished, you’ll be able to enjoy your game without worrying about it taking up too much space on your computer.

    In conclusion, if you’re looking to free up space on your computer or simply want to manage your game files more efficiently, changing the install location is a simple solution. Just follow the steps in Battle.net and you’ll be on your way to a cleaner and more organized gaming experience.

    So go ahead and give it a try – your hard drive will thank you!

    Enjoy Faster Load Times on SSD

    If you are looking to enjoy faster load times on your Battle.net games, moving them to an SSD is a great option. But how exactly do you do that? First, make sure that the SSD is properly connected and set up on your computer.

    Next, open the Battle.net launcher and click on the game you want to move to the SSD. From there, click on the “Options” menu and select “Game Settings”.

    Under “Game Install/Update”, you should see an option to “Choose a different location”. Click that and select the SSD as the new installation location. Once you confirm the action, the game will begin the migration process.

    It’s important to note that the time it takes to move the game depends on the size of the game and the speed of the SSD. Keep in mind that SSDs are significantly faster than traditional hard drives, so you can expect to see a noticeable improvement in load times once the migration is complete. Happy gaming!

    Conclusion

    In conclusion, moving games from your hard drive to an SSD is a strategic choice that can greatly enhance your gaming experience. With faster load times and improved overall performance, you’ll be able to navigate through virtual battlefields like a true champion. So don’t hesitate to make the switch and enjoy the glory of victory from the comfort of your lightning-fast SSD.

    FAQs

    How do I move games from the Battle.net app to an SSD?
    To move games from Battle.net to an SSD, follow these steps: 1) Open Battle.net and go to the game you want to move. 2) Click on Options and select Show in Explorer. 3) Close Battle.net and cut the game folder from the current location to the SSD location. 4) Open Battle.net, go to the same game, and click on Options > Install. 5) Select the SSD location and click on Start Install. The game will now start downloading to the SSD location.

    Will moving a game to an SSD improve its performance in Battle.net?
    Moving a game to an SSD will improve its performance in Battle.net as it increases the read and write speed of the drive which can result in faster load times and less stuttering.

    Can I move multiple games to an SSD at once?
    Yes, you can move multiple games to an SSD at once by following the same steps mentioned earlier. Just select all the games you want to move and cut their folders to the SSD location.

    Will moving games to an SSD affect my game save files?
    Moving games to an SSD will not affect your game save files as they are usually stored in a different location which remains unchanged during the move. However, it is always recommended to back-up your game saves before making any major changes.

  • Boost Your Computer’s Speed: A Simple Guide on How to Effortlessly Move Your OS onto an SSD

    Is your computer feeling sluggish and slow? Are apps and programs taking too long to load? Then it’s high time you moved your operating system onto a solid-state drive or SSD. It’s the easiest way to give your computer the boost it needs to perform at its optimal level. But, before you raise your eyebrows with confusion and ask, “how do I do that?” fear not! Moving your OS onto an SSD is much simpler than it sounds.

    With the right tools and basic knowledge, you can complete the process in just a few easy steps. Not only will this help you speed up your system, but it can also help prolong the lifespan of your computer and give you more storage space for your files and applications. So, roll up your sleeves, put on your favorite playlist, and let’s dive into the exciting world of solid-state drives.

    By the end, you’ll wonder why you didn’t make the switch sooner!

    Benefits of Moving OS to SSD

    Moving your OS onto an SSD has numerous benefits that can be easily achieved. One of the most significant advantages of transferring your OS to an SSD is the significant boost in performance. SSDs are much faster than traditional hard drives, making your system much snappier.

    The speed increase is noticeable, especially when you’re booting up the system, running programs, or transferring files. Additionally, SSDs are more reliable than traditional hard drives because they have no moving parts. This means that they’re less likely to fail, saving you the time and cost of data recovery.

    It’s also essential to note that SSDs can extend the life of your computer, allowing you to use it for several more years. Overall, moving your OS to an SSD is an easy process that can provide significant benefits such as improved speed and reliability, making it a worthy investment for any computer user.

    Faster Boot Time

    Moving your operating system to a solid-state drive (SSD) can bring numerous benefits, one of which is faster boot time. Traditional hard disk drives (HDDs) take time to spin up their disks and locate the necessary files to launch your system, resulting in a slow startup process. In contrast, SSDs have no moving parts and use flash memory to store data, allowing them to quickly access the required files and launch your OS in a matter of seconds.

    This means no more waiting around for your computer to start up, and a quicker access to your applications and files once you’re logged in. Additionally, using an SSD as your primary drive can also lead to smoother performance when opening and running programs, copying files, and performing other operations that rely on disk access speeds. So, if you haven’t yet considered upgrading your system’s drive to an SSD, you may be missing out on a significant boost in overall performance.

    how easy to move os onto ssd

    Increased Responsiveness

    Moving your operating system (OS) from a traditional hard drive to a solid-state drive (SSD) can provide a significant increase in responsiveness. This is because SSDs use flash memory, which has considerably faster read and write speeds compared to traditional hard drives that rely on spinning disks and mechanical components. As a result, your computer boots up faster and applications launch more quickly.

    This is particularly useful if you’re someone who frequently toggles between different programs or deals with large files and documents. Additionally, transferring files and accessing data can also be done much quicker with an SSD, saving you time and increasing productivity. The benefits of moving your OS to an SSD are numerous and are a great investment for those looking to improve their computer’s overall performance.

    Higher Data Transfer Rates

    One of the major benefits of moving your operating system (OS) to a Solid State Drive (SSD) is the higher data transfer rates. SSDs provide significantly faster read and write speeds compared to traditional Hard Disk Drives (HDDs). This means that your computer will boot up faster, applications will load more quickly, and you will experience shorter wait times for data to process.

    With an SSD, data is transferred at lightning-fast speeds, making for a smoother and more efficient computing experience. The increased data transfer rates can make a significant difference in your productivity, especially if you rely heavily on your computer for work, gaming, or other demanding tasks. By upgrading to an SSD, you can enjoy improved speed and performance, which ultimately translates to a more enjoyable and productive computing experience.

    Requirements for Moving OS to SSD

    When it comes to moving your operating system (OS) onto a solid-state drive (SSD), the process can be relatively simple or more complex depending on a few requirements. First, you’ll need to ensure that your SSD has enough storage space to accommodate your current system files. You may also need to create a bootable USB drive, as some operating systems require this to install onto a new drive.

    Additionally, you’ll want to backup any important files and programs before making the switch, as the installation process will likely require wiping your current hard drive. Overall, while moving your OS to an SSD may require some technical expertise, the benefits in terms of increased speed and improved system performance are definitely worth it. So if you’re looking to give your computer a boost, it’s time to consider making the switch to an SSD.

    Compatible SSD

    If you’re planning to move your operating system to an SSD, it’s important to ensure that your hardware is compatible. The requirements for a compatible SSD depend on your computer’s motherboard and its available connection ports. Most modern motherboards support SATA III, which is a standard interface for connecting SSDs.

    However, if your computer is older, it might only support SATA II or even SATA I, which are slower than SATA III. In this case, you’ll need to check the SSD’s specifications to ensure it’s compatible with your motherboard’s available connection ports. Additionally, you should also check your computer’s BIOS settings to ensure that it recognizes the new SSD and that it’s set as the primary boot device.

    Making sure your SSD is compatible with your hardware is crucial when moving your operating system to avoid compatibility issues and maximize performance.

    External SSD Enclosure or SATA to USB Adapter

    Moving your operating system (OS) to an SSD is a great way to significantly boost your computer’s speed. However, there are a few requirements that you need to be aware of before getting started. One of the things you will need is an external SSD enclosure or SATA to USB adapter.

    These accessories are essential because they provide a way for you to transfer data from your old hard drive to the new SSD. The external SSD enclosure allows you to install your new SSD and connect it to your computer via a USB port. With this accessory, you can clone your operating system, applications, and data from your old hard drive to the new SSD.

    On the other hand, a SATA to USB adapter connects your computer’s SATA port to a USB port. This adapter converts the SATA signals into USB signals, allowing you to connect any SATA drive to your computer via a USB port. Before transferring your OS to an SSD, ensure that your computer’s BIOS is set up to boot from the USB port.

    You will also need to check the size of your old hard drive and ensure that your new SSD is bigger than or equal to the size of the old hard drive. Additionally, you should make sure your computer has enough RAM to run your OS and applications smoothly without relying on the page file. In conclusion, to transfer your operating system to an SSD, you will need an external SSD enclosure or SATA to USB adapter.

    These accessories provide a way to clone your data from your old hard drive to the new SSD. Furthermore, before transferring your OS, ensure that your BIOS is set up to boot from the USB port and that your new SSD is bigger than or equal to the size of your old hard drive. Finally, make sure your computer has enough RAM to run your OS and applications smoothly.

    Cloning Software

    When it comes to moving your operating system to a new Solid State Drive (SSD), cloning software can make the process a lot easier. However, there are a few requirements that you should be aware of before you get started. First, you’ll need a cloning software that is compatible with your computer’s operating system and the type of SSD you plan to use.

    Next, you should make sure that your SSD has enough space to accommodate all of your files and data. In some cases, you may need to remove unnecessary files or upgrade to a larger SSD. Additionally, you’ll want to ensure that your computer has enough RAM and processing power to handle the cloning process.

    By taking these steps and using reliable cloning software, you can smoothly transfer your OS to an SSD and enjoy faster boot times and improved performance.

    Steps to Move OS to SSD

    If you’re wondering how easy it is to move your OS to an SSD, the answer is that it’s actually quite simple! There are a few steps you’ll need to take, but with the right tools and a bit of patience, you can make the transition in no time. First, you’ll need to clone your existing hard drive onto the new SSD. This can be done using a variety of software programs, such as Acronis True Image or Clonezilla.

    Once your data has been copied over, you’ll need to adjust the boot order in your BIOS to ensure that your system starts up from the SSD rather than the hard drive. Finally, you may want to uninstall any unnecessary programs or files to maximize the available space on your new drive. With these steps complete, you’ll be up and running on your new SSD in no time, enjoying faster boot times and improved overall system performance.

    Connect SSD to Computer

    If you’re looking to speed up your computer’s performance and move your operating system to a faster SSD, you’re in the right place. The first step is to connect the SSD to your computer, which is a straightforward process. Depending on your computer’s specifications, you can connect the SSD to a SATA port on your motherboard or use a USB to SATA adapter to connect the SSD externally.

    Once connected, you’ll need to transfer your operating system and files to the SSD. This process can be done using cloning software, and there are plenty of options available, such as Clonezilla or EaseUS Todo Backup. By moving your OS to an SSD, you’ll notice a significant boost in your computer’s speed and overall performance.

    With faster boot times and quicker access to files, you’ll wonder how you ever lived without an SSD. So why not take the plunge and connect an SSD to your computer today? Your computer (and sanity) will thank you.

    Install Cloning Software

    Moving your operating system onto a new SSD can significantly improve your computer’s performance and speed. One important step before doing so is to install cloning software. This software allows you to copy your current OS onto the new SSD without having to manually reinstall it.

    There are various cloning software options available, and some of them are free. Once you have installed the cloning software, the next step is to connect the new SSD to your computer. However, it is important to note that some computers may require an adapter to connect the SSD.

    Once connected, you can then use the cloning software to copy the OS onto the new SSD, which may take a few hours depending on how much data needs to be transferred. After completion, you can then replace the old hard drive with the new SSD, and your computer should be running much faster and smoother. Remember to backup your important files before starting the clone process, just in case.

    Clone OS to SSD

    Moving your operating system to an SSD can significantly improve your computer’s speed and performance. Thankfully, cloning your OS to an SSD is a simple process that requires only a few steps. First, back up all your data to avoid losing any important files.

    Next, download a disk imaging software that can clone your current OS to the new SSD. Once you have the software installed, connect your SSD to your computer and begin the cloning process. This process could take a few hours, but once it’s complete, you’ll be able to boot up your computer from the new SSD.

    In no time, you’ll experience lightning-fast speeds that will make you wonder how you ever used a traditional hard drive. So why not give it a try and see the difference for yourself? Your computer will thank you!

    Change Boot Order in BIOS

    Moving an operating system to an SSD can significantly speed up your computer’s performance. To do so, you first need to change the boot order in BIOS. This process is simple and varies depending on the computer manufacturer.

    First, access BIOS by pressing the necessary key during startup (usually F1, F2, F12, or Delete). Then, navigate to the “Boot” tab and look for the “Boot Order” option. Use the arrow keys to select the SSD as the first boot device.

    Finally, save the changes and exit BIOS. Keep in mind that if you have multiple drives, you may also need to change the boot partition. This can be done through the Disk Manager in Windows.

    Overall, moving your operating system to an SSD can greatly improve your computer’s performance and changing the boot order in BIOS is an essential step in the process.

    Conclusion

    In conclusion, moving your operating system onto an SSD is as easy as swapping out your loafers for sneakers – it’s a quick and painless process that can greatly improve your overall performance. Just take a few simple steps, and before you know it, you’ll be moving at lightning speeds. So put on your running shoes, err, I mean, grab your SSD, and let’s hit the ground running!”

    Moving OS to SSD is Easy and Worth the Effort

    If you’re seeking to speed up your computer’s operating system by migrating it to a new SSD, it’s important to know that the process is straightforward and worth doing. The main keyword “move OS to SSD” can seem like a daunting task, but it’s simpler than you think. Here are the easy steps to transfer your system to an SSD.

    First, obtain your new SSD and ensure that it has the capacity to hold your OS and other system files. Before that, make sure to back up your important data to an external drive or cloud service. Then, use migration software to copy your existing OS files and transfer them to the new SSD.

    Finally, to complete the move to your new SSD, shut down your system, remove the old drive, and install the new SSD. As a result, you’ll experience faster boot and load times, which is well worth the effort. In conclusion, moving your OS to an SSD is a wise investment, and it’s something you can quickly complete with these simple steps.

    FAQs

    What is an SSD?
    SSD stands for Solid State Drive which is a kind of storage device similar to a hard disk drive but uses NAND-based flash memory to store data instead of spinning disks.

    How do I know if my computer can support an SSD?
    If your computer has a SATA interface, it should be able to support an SSD with similar interface. You can check the specifications of your computer’s motherboard to see if it has an available SATA connector.

    Can I transfer my operating system (OS) onto an SSD?
    Yes, it is possible to transfer your OS from a hard disk drive to an SSD. There are several ways to do it, such as using cloning software or a fresh installation of the OS.

    What are the benefits of moving my OS onto an SSD?
    Moving your OS onto an SSD can significantly improve your computer’s boot-up time, application loading speed, and overall system performance. It also reduces the risk of data loss due to faults in mechanical hard drives.