Category: How to

How to

  • Effortlessly Clone Your SSD: Step-by-Step Guide to Copying Everything from One SSD to Another

    Upgrading your computer’s storage space is essential to ensure smooth performance. However, transferring large amounts of data from one storage device to another can be daunting for some. Have you ever asked yourself, “How can I copy an SSD to another with ease?” Worry not, we’ve got you covered.

    In this step-by-step guide, we’ll explain how to clone an SSD and make the process as simple as possible. We’ll provide analogies and examples to help you understand the technical terms better. So, grab a cup of coffee, sit back, and let’s get started!

    Use an External Drive for Backup

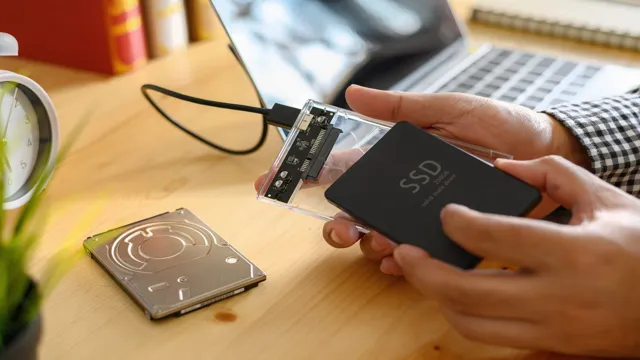
    If you’re looking to copy everything on one SSD to another, one option is to use an external drive for backup. By backing up the contents of your original SSD onto an external hard drive, you can then transfer those files to your new SSD. To do this, connect the external drive to your computer, open your backup software, and select the option to create a backup of your SSD.

    This will usually involve selecting the SSD as the source and the external drive as the destination. Once the backup is complete, you can then swap out the original SSD and insert the new one. With the external drive still connected, restore the backup you created earlier onto the new SSD.

    This process may take some time depending on the size of the backup, but it should result in an exact replica of your original SSD on the new drive. Overall, using an external drive for backup is a safe and convenient way to copy everything from one SSD to another.

    Connect the SSD and the External Drive

    Connecting an SSD and an external drive is essential for backing up your important data and ensuring it stays safe. Using an external drive for backup allows you to have an additional storage solution that is not connected to your computer. This way, you can have a backup that is not vulnerable to malware, ransomware, or other security threats that could potentially affect your device.

    To connect the SSD and external drive, you can use a USB cable or any other compatible cables that might be needed for your specific devices. Simply connect one end of the cable to the external drive and the other end to the USB port on your computer. Once connected, you can simply drag and drop files from your SSD to the external drive to create an easy-to-access backup.

    Keep in mind that it’s essential to regularly backup your data to ensure your files remain secure and easily accessible, even if your device malfunctions or gets lost.
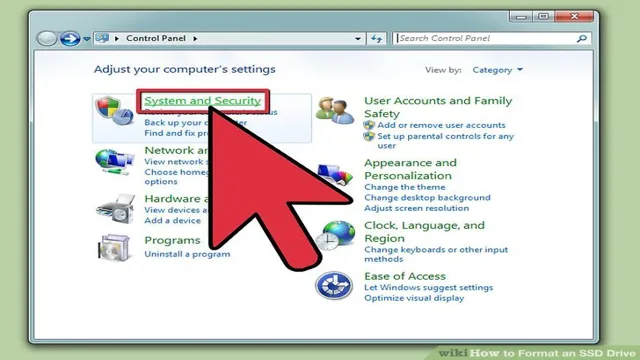
    how do i copy everything on one ssd to another

    Clone the SSD to the External Drive

    Using an external drive for backup is an essential practice that should never be overlooked. Cloning your SSD to your external drive can be a lifesaver, especially when it comes to recovering important data in case of any mishap. It is always a good idea to have a backup of your important files and documents to avoid any data loss.

    With the help of software like Carbon Copy Cloner or SuperDuper, you can easily clone your SSD to your external drive. The process is straightforward and can be done in a few simple steps. By doing so, you can have peace of mind knowing that your important files are safe and secure.

    Plus, it is an excellent way to ensure that you don’t lose your data if your primary drive fails. So, don’t take any risks and start backing up your data today!

    Insert the New SSD

    If you’re looking to upgrade your computer’s storage, transferring everything from one SSD to another can seem like a daunting task. However, the process can be made much simpler by following a few key steps. Firstly, make sure you have the new SSD ready to go, and ensure that all necessary drivers are installed.

    Then, you can either use a cloning software such as EaseUS Todo Backup or simply copy and paste all of the files over to the new SSD manually. Once everything has been transferred, it’s time to physically insert the new SSD into your computer. This involves opening up your computer case and locating the SSD slot, which can vary depending on your computer model.

    Once you’ve inserted the new SSD, it’s important to check that it’s working properly in your computer’s BIOS settings. With these steps completed, you’ll be able to enjoy your new, upgraded storage space with confidence.

    Connect the New SSD

    To begin with, connecting the new SSD is a crucial step in upgrading your computer’s storage to improve its speed and performance. Inserting a new SSD may sound daunting, but it is a relatively simple process. Firstly, shut down your computer and unplug it from any power sources.

    Next, locate the hard drive bay and unscrew it using the necessary tools. Carefully remove the old hard drive and replace it with the new SSD. Make sure to securely fasten the SSD and reconnect any cables that were previously attached to the old hard drive.

    Finally, screw the bay cover back on and plug in the computer. Voila! You have successfully connected the new SSD, but remember to install the necessary drivers and migrate your data to the new drive for a seamless transition. Overall, connecting a new SSD is a straightforward process that can drastically improve your computer’s speed and performance.

    Use a Cloning Tool

    When upgrading to a new SSD, it’s important to properly transfer all of your data from the old drive. One way to do this is by using a cloning tool. This software will create an exact copy of your old SSD onto the new one, preserving all of your files, programs, and settings.

    Not only does this save you the hassle of having to reinstall everything manually, but it also ensures that everything on your computer will continue to work seamlessly. Once you have the cloning tool installed on your computer, it’s a simple matter of following the instructions to transfer the data. Having a new and faster SSD can greatly improve the speed and performance of your computer, so don’t hesitate to try this method if you’re looking to upgrade.

    With a few simple steps, you can have your new SSD up and running in no time.

    Check Your Cloned Data

    If you’ve bought a new SSD and want to copy everything on your old one to the new drive, the first thing you should do is check your cloned data. Before you start the cloning process, make sure you have a backup of all your important files, just in case. Once you’ve created the backup, use a reliable cloning software to copy all your data from the old SSD to the new one.

    There are a number of free and paid software options available online, so choose one that suits your needs and follow the instructions carefully. After the cloning process is complete, it’s crucial to check your cloned data for accuracy. Verify that all your files and folders have been transferred over and that there are no errors or formatting issues.

    Regularly backing up your files and monitoring your cloned data ensures that you won’t lose any important information during the transfer process. By doing so, you can be confident that your new SSD will have all the same files and settings as your original drive.

    Boot Your Computer from the New SSD

    Now that you have successfully cloned your old hard drive onto the new SSD, it’s time to check whether the cloned data is accurate and complete. Before you start using the new SSD as your primary storage device, it’s crucial to verify if everything has been transferred successfully to avoid any data loss. Start by checking whether the primary partitions, your operating system, and all your data are present and accessible from the SSD.

    In case you have any software or programs installed, you must ensure they still function correctly after the cloning process. If you encounter any issues, you should troubleshoot or reclone the data to ensure your new SSD performs as well as possible. Additionally, ensure that all your drivers and firmware are updated to maximize performance.

    By carefully verifying the data on your new SSD, you can eliminate any mistakes and set up a fast and reliable new storage drive for your computer.

    Check Your Files and Folders

    When you clone data from one device to another, it’s important to double-check your files and folders for accuracy and completeness. It’s not uncommon for files to get left behind or for errors to occur during the transfer process, so taking the time to review your cloned data is a crucial step in ensuring you have everything you need. Start by comparing your original files to those on your new device, looking for any discrepancies or missing information.

    You can use a file comparison tool to make this process easier and more efficient. Once you’ve verified the accuracy of your data, consider creating backups or additional copies to protect against future data loss. Remember, a little extra effort now can save you a lot of trouble down the line, so take the time to check your cloned data thoroughly.

    Final Steps

    If you’ve recently upgraded your SSD or you just want to clone everything onto a new one, there are a few steps you need to take to ensure that everything gets copied over properly. First, make sure you have enough space on your new SSD to accommodate all the data from your old one. You can do this by checking the capacity of your old SSD and making sure the new one is equal to or larger.

    Next, you will need to download software that will help you clone your old SSD onto the new one. Some popular programs include Clonezilla, Acronis True Image, and EaseUS Todo Backup. Once you have the software, simply follow the prompts and allow the program to do its thing.

    When it’s done, shut down your computer, remove the old SSD, and insert the new one. Turn your computer back on, and everything should look and feel just the same as it did before – but faster, since you’re using a new and improved SSD.

    Disconnect the External Drive

    Before simply unplugging the external hard drive from your computer, make sure to disconnect it first. This step helps prevent any chance of data loss or corruption since the drive may still be in use. It’s crucial to follow this precaution, especially when transferring or moving large files.

    To avoid any complications, simply locate the eject button and disconnect the drive safely. This process may take a few seconds, but it ensures that your hard drive has been removed from your computer properly. Remember, it’s crucial to exercise caution when handling any external device to ensure that your files remain safe and secure.

    By doing this, you can avoid the potential for any data loss or corruption, and you’ll be able to use your external hard drive for years to come.

    Conclusion

    Well, my dear friend, copying everything on one SSD to another is not rocket science. It’s a simple process that can be accomplished with the right tools and a little bit of patience. Whether you’re upgrading your computer or just looking to back up your important data, transferring files from one SSD to another can be a breeze.

    So, don’t stress yourself out over it. Just gather your tools, follow the steps, and in no time, you’ll be on your way with a new and improved SSD at your disposal.”

    FAQs

    What is the process to copy data from one SSD to another?
    There are several ways to copy data from one SSD to another. You can use software like EaseUS Todo Backup, Acronis True Image, or CloneZilla to clone the entire drive to another SSD.

    Can I copy only a certain folder or file to another SSD?
    Yes, you can copy a certain folder or file from one SSD to another by simply copying and pasting it or by using the drag and drop method. Alternatively, you can use file sync software like FreeFileSync or SyncBackFree to synchronize specific folders between two SSDs.

    How long does it take to copy everything from one SSD to another?
    The duration of copying everything from one SSD to another depends on several factors such as the size of the SSD, the amount of data to be copied, the method used for copying, and the speed of the SSD. On average, it can take anywhere from a few minutes to several hours to copy everything from one SSD to another.

    Can I copy a bootable SSD to another SSD?
    Yes, you can copy a bootable SSD to another SSD by creating a disk image file of the original SSD and then restoring it to the new SSD using software like AOMEI Backupper or Macrium Reflect. Make sure that the new SSD has the same or larger capacity as the original SSD.

    Do I need to format the new SSD before copying everything to it?
    If the new SSD is brand new, then you need to format it before copying everything to it. However, if the new SSD already has data on it, you need to make sure that you back up or transfer the existing data before formatting it.
  • Step-by-Step Guide to Swapping SSD on AcePC: Upgrade Your System in No Time!

    If you’re looking to upgrade the storage capacity of your ACEPC, swapping the SSD could be a great option. By doing this, you’ll also be able to improve the overall performance of your device. However, you might be wondering about the process involved in swapping an SSD in ACEPC.

    Don’t worry – we’ve got you covered! In this article, we’ll take a look at the steps involved in swapping an SSD in ACEPC. We’ll provide you with all the information you need to make the process as smooth and hassle-free as possible. So, let’s get started and dive into the world of SSD swapping for ACEPC!

    Prepare for the Swap

    If you’re looking to upgrade your Acepc mini PC’s storage, you’ll need to swap out the existing SSD. The first thing you should do is ensure you have the correct replacement SSD that’s compatible with your Acepc model. Once you have the new SSD, you’ll need to turn off your mini PC and unplug any cables attached to it.

    Then, unscrew the back panel and locate the existing SSD. Carefully remove it from its slot and replace it with the new SSD, making sure it’s securely in place. After reattaching the back panel and plugging in all the cables, you can turn on your mini PC and enjoy the increased storage capacity.

    Remember to back up your important data before making any hardware changes, just to be safe. With these simple steps, you’ll be able to upgrade your Acepc mini PC’s storage in no time!

    Backup Data

    Backing up your data is crucial before initiating a swap. This critical step ensures that all your valuable information will not be lost during the process. There are a variety of ways to backup your data, from using an external hard drive, online cloud storage, or even USB drives.

    Take the time to assess which method will work best for your needs. It is essential to back up data regularly to ensure that you have the most up-to-date information, ensuring that what you’ll be swapping will be the most accurate version. Don’t risk losing vital information, take the precautionary step to safeguard your data and ensure a seamless transition.

    Remember, it only takes one missed step to lose everything, so invest in backing up your data to avoid any significant problems and enjoy peace of mind.

    acepc how to swap ssd

    Power Off and Disconnect Cables

    Preparing for a hardware swap requires a few steps to ensure everything goes smoothly. First and foremost, it’s crucial to power off your device and disconnect all cables to avoid any risk of electric shock or damage. If you’re swapping a desktop computer or laptop, unplug the power cord from the outlet and remove the battery if possible.

    For servers or network equipment, turn off the power supply and detach all cables, including Ethernet, power, and peripherals. Once you’ve taken these steps, you can safely proceed with the hardware swap. Remember to handle all components with care and keep them free from static electricity.

    Taking these precautions will minimize the chances of technical issues and ensure a seamless transition to the new hardware.

    Get Replacement SSD

    If you’re looking to upgrade your computer’s storage capabilities, then getting a replacement SSD is a great option. However, before you make the swap, it’s important to prepare yourself and your system to ensure a smooth transition. First, make sure you have all the necessary tools and equipment, such as screwdrivers and SATA cables.

    Then, back up all of your important files and data in case there are any unforeseen issues during the process. Additionally, it’s a good idea to check the manufacturer’s website for any firmware updates or compatibility issues with your current system. By taking these steps, you can ensure a safe and successful SSD replacement that will boost your system’s performance and capabilities.

    Swap SSD

    If you’re looking to customize your ACEPC computer, swapping out the SSD is a great option. It provides more space for your files and can improve overall performance. The first step is to remove the cover on the bottom of the device.

    This can usually be done by removing a few screws. Once the cover is removed, locate the SSD and disconnect it from the device. You may need to unscrew it from its mount first.

    Once the old SSD is removed, you can insert the new one and fasten it in place. Finally, connect the new SSD to the device and replace the cover. It’s important to note that you should back up your data before attempting any hardware changes.

    With a little bit of technical know-how, swapping out the SSD on your ACEPC can be a great way to customize your computer.

    Remove Old SSD

    If you want to upgrade your computer’s hard drive storage, one option is to swap out your old SSD for a new one. However, before you can install your new SSD, you need to remove the old one safely. First, shut down your computer and unplug it from the power source.

    Then, locate the existing SSD inside your computer and disconnect all the cables attached to it. Depending on your computer’s design, you may need to remove screws or fasteners to get to the SSD. Carefully remove the old SSD and set it aside.

    Keep in mind that SSDs are delicate and sensitive to static electricity, so handle them with care. Once you’ve removed the old SSD, you’re ready to install your new one and enjoy increased storage capacity and faster speeds.

    Install Replacement SSD

    If you’re looking to upgrade your computer’s storage space and speed, swapping out your old SSD for a new one can provide a significant boost to your system’s performance. Installing a replacement SSD may seem daunting, but with some basic knowledge and the right tools, it’s a relatively straightforward process. First, make sure to back up all of your important data to an external drive or cloud storage.

    Then, shut down your computer and unplug all cables. Next, remove the back panel or casing to access the internal components of your computer. Locate the old SSD and carefully detach it from the motherboard.

    Insert your new SSD and securely fasten any screws or brackets. Finally, reattach the back panel or casing and reconnect all cables. Power up your computer and make sure the new SSD is recognized.

    With a few simple steps, you can enjoy the benefits of a faster and more spacious system.

    Reassemble ACEPC

    If you’re looking to swap out the SSD in your ACEPC, it’s actually a pretty straightforward process. First, you’ll need to gather your tools – a screwdriver and an external caddy for the old SSD. After shutting down and unplugging your ACEPC, remove the bottom panel and locate the existing SSD.

    Carefully unscrew and disconnect the old SSD, being mindful of any clips or cables. Once it’s completely removed, you can install the new SSD in its place and reattach any screws clips or cables. Place the old SSD into the external caddy for safekeeping or disposal.

    Finally, replace the bottom panel and power on your ACEPC to make sure it’s working properly. With a little bit of patience and the right tools, you can easily swap out an old SSD for a new one in your ACEPC.

    Reconnect Cables and Power On

    After completing any necessary upgrades or repairs to your ACEPC, it’s time to reassemble it. First, make sure all cables are correctly plugged back in, including any peripherals, such as a keyboard or mouse. Once everything is connected, it’s time to power on your ACEPC again.

    Don’t forget to turn on your monitor and any other devices that may need to be powered on. The process of reassembling your ACEPC can feel daunting, but with a little patience and attention to detail, it will be up and running again in no time. Remember to be gentle with your device and take your time to avoid any mistakes.

    By following these steps, you’ll have a fully operational ACEPC in no time.

    Restore Data from Backup

    To reassemble ACEPC after a malfunction, it’s important to restore data from your backup. This will make sure that all of your files and settings are the way they were before the issue occurred. Start by locating your backup and following the instructions for restoring the data.

    Once the data is restored, you can begin reassembling ACEPC. Begin by checking all of the cables and connections to ensure they’re secure and in the proper place. Verify that all of the components are in working order and not damaged.

    If any parts need to be replaced, do so before continuing. Finally, power on the device and test it thoroughly to make sure all of the components are working correctly. By following these steps, you can easily reassemble ACEPC and get it running like-new once again.

    Final Thoughts

    In conclusion, swapping the SSD on an ACEPC mini PC is a relatively easy process if you follow the necessary steps. Make sure to back up all your important data before you begin. Acquire the appropriate tools and use caution when opening up the device and removing the old SSD.

    Once you have installed the new SSD, remember to reattach all cables and screws properly. Finally, power on the device and reinstall your operating system and all necessary files. With a little bit of patience and attention to detail, you can seamlessly upgrade your ACEPC mini PC’s storage and enjoy a faster, more efficient computing experience.

    And don’t forget, if you have any issues or concerns during the process, you can always consult the manufacturer’s support resources or seek advice from the online ACEPC community.

    Conclusion

    In conclusion, swapping out the SSD in your AcePC is as easy as swapping out a lightbulb! With a few simple steps, you can upgrade your system’s performance and storage capacity in no time. So why settle for a dimly lit computer when you can shine bright like a diamond with a shiny new SSD? Don’t wait, swap it out and join the SSD revolution today!”

    FAQs

    How do I swap the SSD on my ACEPC computer?
    To swap the SSD on your ACEPC computer, first shut down and unplug the device. Remove the screws on the bottom panel and carefully lift it up to access the current SSD. Unscrew the SSD and gently remove it from its slot. Insert your new SSD and screw it into place before reattaching the bottom panel.

    What size SSD should I use for my ACEPC computer?
    The size of the SSD you can use for your ACEPC computer will depend on the specific model you have. Some may have an M.2 slot that supports different sizes of SSDs, while others may require a specific size. Check your computer’s specifications or manual to ensure compatibility.

    Is it easy to upgrade the SSD on an ACEPC computer?
    Depending on the model of your ACEPC computer, upgrading the SSD can range from easy to moderately difficult. If your computer has a removable bottom panel and easily accessible SSD slot, it should be a simple process. However, if the SSD is built-in or hidden under other components, it may require more technical skills and tools.

    Can I clone my current SSD to a new one for my ACEPC computer?
    Yes, you can clone your current SSD to a new one for your ACEPC computer using a data migration software such as EaseUS Todo Backup, Macrium Reflect, or AOMEI Backupper. These tools can make an identical copy of the contents of your existing SSD, including your operating system, files, and settings, to the new SSD.

  • Maximizing Your Crucial SSD Performance: A Step-by-Step Guide on Turning On TRIM

    Have you noticed that your Crucial SSD is running slower than usual? If you’re using an older model, it may not be optimized for the TRIM function, which can result in slower performance over time. But the good news is that enabling TRIM on your Crucial SSD is a relatively simple process. By allowing the drive to communicate with your operating system and optimize its storage space, TRIM can help improve the speed and longevity of your SSD.

    In this blog post, we’ll dive into the world of TRIM and guide you through the process of enabling it on your Crucial SSD. So, buckle up and get ready to give your computer a boost!

    What is TRIM?

    If you’re using a Crucial SSD, you may want to know how to turn TRIM on for optimal performance. But what exactly is TRIM? In short, it’s a command that helps maintain the speed and longevity of SSDs. When you delete a file on a traditional hard drive, the operating system simply marks the space as available, but the data is still physically there until something overwrites it.

    This can lead to slower read/write speeds over time. TRIM, on the other hand, informs the SSD which blocks of data are no longer in use and can be wiped, making space for new data. Enabling TRIM can improve your Crucial SSD’s performance and lifespan, so it’s recommended that you enable it.

    The process for turning TRIM on is simple, but will vary depending on your operating system. For example, on Windows, you can open the Command Prompt and enter “fsutil behavior set disabledeletenotify 0” to turn TRIM on.

    Definition and Importance

    TRIM is a term used to refer to the process of managing and optimizing storage performance in solid-state drives (SSDs). It helps to improve the speed and longevity of SSDs by making it easier for the drive to find and use data. Without TRIM, SSDs can become quite slow over time as they struggle to locate and organize all the data stored within them.

    This can lead to decreased performance and a shorter lifespan for the SSD. With TRIM, however, the SSD is able to run much more efficiently, allowing it to maintain its speed and responsiveness over time. Overall, TRIM is an essential tool for anyone looking to get the most out of their SSD and ensure that it lasts for as long as possible.

    crucial ssd how to turn trim on

    Checking for TRIM Support on Your Crucial SSD

    If you have a Crucial SSD, you may be wondering how to turn on TRIM support. TRIM is important for keeping your SSD running smoothly and avoiding performance degradation over time. The good news is that most modern Crucial SSDs come with TRIM support already enabled by default.

    However, it’s still a good idea to double-check and make sure it’s turned on. To do so, you’ll need to access your computer’s device manager and locate the SSD under the “Disk drives” category. From there, right-click on the drive and select “Properties.

    ” Next, click on the “Policies” tab and make sure that “Enable write caching on the device” and “Turn off Windows write-cache buffer flushing” are both unchecked. This will ensure that TRIM is enabled and doing its job to keep your Crucial SSD running at its best.

    Step-by-Step Guide

    If you’ve recently installed a Crucial SSD, you might be wondering whether it supports TRIM. TRIM is a command that helps an SSD maintain its performance over time by allowing the drive to clean up and organize unused data blocks. Checking for TRIM support on your Crucial SSD is quite easy.

    The first step is to open the Windows Device Manager and locate your SSD. Then, right-click on the SSD and select “Properties.” Next, go to the “Details” tab and select “Device instance path” from the drop-down menu.

    You should see the letters “TRIM” somewhere in the string of characters that appear in the value box. If you can see “TRIM” in the value box, it means that TRIM is supported on your Crucial SSD, and you can optimize it for better performance.

    Enabling TRIM on Your Crucial SSD

    If you’re using a Crucial SSD, you might want to enable TRIM to ensure optimal performance. TRIM is an essential maintenance command that helps prolong the lifespan of your SSD. By default, Crucial SSDs have TRIM support, but you might need to enable it manually if it’s not activated on your computer.

    The process of enabling TRIM on your Crucial SSD is pretty straightforward. The first step is to make sure that your operating system supports TRIM. If you’re using Windows 10, 8, or 7, TRIM is already supported.

    However, if you have an older version of Windows or a different operating system, you might need to check for compatibility. Once you’ve confirmed that your operating system supports TRIM, the next step is to enable it on your SSD. One way to do this is to use an application provided by Crucial called the Storage Executive.

    This software has a user-friendly interface that allows you to check your SSD’s health, temperature, and capacity. You can also enable TRIM from the Storage Executive by selecting the SSD and clicking on the “Momentum Cache” option. From there, you can toggle the TRIM option on and off.

    Another way to enable TRIM on your Crucial SSD is through the command prompt. This method is more technical and requires some basic knowledge of command-line interfaces. To enable TRIM through Command Prompt, you need to open the command prompt as an administrator, type “fsutil behavior set disabledeletenotify 0,” and hit enter.

    This command enables TRIM on your SSD. In conclusion, enabling TRIM on your Crucial SSD is essential for ensuring optimal performance and longevity. With the Storage Executive or Command Prompt, you can enable TRIM easily and effectively.

    Step-by-Step Guide

    Enabling TRIM on an SSD can significantly improve its overall performance, as it effectively helps free up unused memory blocks. This is especially important for Crucial SSDs, which are reliable and efficient storage devices that can last for years. Enabling TRIM is a simple process that can be done in a few easy steps.

    First, you will need to ensure that your operating system supports TRIM. Most modern operating systems do, but you can check by opening up the command prompt and typing “fsutil behavior query disabledeletenotify”. Then, you will need to enable TRIM on your SSD by opening up the Command Prompt as an administrator and typing “fsutil behavior set disabledeletenotify 0”.

    With TRIM enabled, your Crucial SSD will be able to clean up unused memory blocks more efficiently, resulting in a faster and smoother user experience.

    Using Windows Command Prompt

    Enabling TRIM on your Crucial SSD is essential to ensure the longevity and performance of your solid-state drive. TRIM is a command that allows the operating system to inform the SSD which blocks of data are no longer in use, thus allowing the SSD to erase them and free up space for new data. By enabling TRIM, you can prevent the SSD from slowing down over time and increase its lifespan.

    To enable TRIM on your Crucial SSD, you can use the Windows Command Prompt. First, open the Command Prompt by pressing the Windows key + R and typing “cmd” in the Run box. Then, type “fsutil behavior query DisableDeleteNotify” and press Enter.

    If the result is “DisableDeleteNotify = 0”, TRIM is already enabled on your SSD. If the result is “DisableDeleteNotify = 1”, TRIM is disabled on your SSD. To enable it, type “fsutil behavior set DisableDeleteNotify 0” and press Enter.

    You should receive a message stating: “The operation completed successfully.” It’s important to note that not all SSDs support TRIM, so it’s best to check with the manufacturer first. Additionally, enabling TRIM may reduce the lifespan of some older SSDs, so it’s recommended to only enable it on newer models.

    With TRIM enabled, you can ensure the optimal performance and longevity of your Crucial SSD.

    Using Third-Party Software

    If you’re looking to extend the lifespan of your SSD and improve its overall performance, enabling TRIM is a must. This feature helps your drive maintain its speed by efficiently managing unused data blocks. While some operating systems from Microsoft and Apple enable TRIM by default, others do not, which is where third-party software comes in.

    One such software is Crucial’s Storage Executive, which allows you to easily enable and schedule TRIM commands. Plus, it comes with other features like firmware updates and drive health monitoring. By activating TRIM, you’ll notice faster boot times, quicker app launches, and improved file transfer speeds.

    So, if you haven’t enabled TRIM on your Crucial SSD yet, give it a try and see the difference for yourself.

    Conclusion and Final Thoughts

    And with that, we come to the end of our journey on how to turn TRIM on to maximize the performance and longevity of your crucial SSD. Remember, TRIM is like a personal trainer for your SSD, helping it stay lean and efficient even with constant use. So, don’t forget to turn it on and give your SSD the love and care it deserves – After all, a happy SSD means a happy user!

    FAQs

    What is a crucial SSD and how does it differ from a regular hard drive?
    A crucial SSD is a solid-state drive that uses flash memory instead of traditional spinning disks to store data. This results in faster read/write times and higher reliability compared to regular hard drives.

    How do I turn on TRIM for my crucial SSD?
    To enable TRIM on a crucial SSD, you need to ensure that your operating system and motherboard support it. Once confirmed, you can turn on TRIM in your operating system settings or use a third-party tool to do so.

    Why is TRIM important for my crucial SSD?
    TRIM is important for a crucial SSD because it helps to maintain the drive’s performance and prolong its lifespan. Without TRIM, the drive can suffer from performance degradation and reduced longevity over time.

    Can I upgrade my existing hard drive to a crucial SSD?
    Yes, you can upgrade your existing hard drive to a crucial SSD as long as your computer supports it. You will need to clone your existing hard drive onto the SSD using a cloning tool or perform a fresh installation of your operating system onto the new drive.

  • Unlocking the Mystery: Discover How Many GB is Equal to 256 SSD

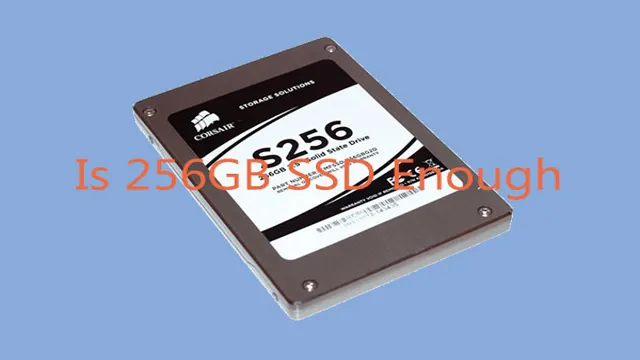
    Have you ever wondered how much storage space a 256 SSD actually provides? It’s a common question among tech enthusiasts and computer users alike. SSDs (Solid State Drives) are gaining immense popularity for their fast read and write speeds and durability. But when it comes to storage, the capacity of an SSD is usually measured in GBs instead of the traditional measure of GBs.

    So, how many GBs are there in a 256 SSD? The answer may surprise you. In this blog, we will explore the relationship between SSD capacity and storage space, and how much storage you can expect to get from a 256 SSD. So, grab your favorite tech gadgets, and let’s dive in!

    Understanding SSD and GB

    When it comes to storage devices, SSDs (solid-state drives) and GB (gigabytes) are two terms that frequently come up. If you’re confused about how much storage space a 256 GB SSD provides, fret not! A 256 SSD is, in fact, equal to 256 GB of storage space. Essentially, SSDs use flash memory technology to store data and are significantly faster than conventional hard disk drives.

    Additionally, SSDs are far less prone to physical damage and provide faster boot times and data transfer rates. So, if you’re in need of a quick and dependable storage solution, a higher capacity SSD could be the right choice. As a general rule, it’s always better to opt for a slightly larger storage capacity than you think you’ll require, as you never know when you might need more space.

    Defining SSD and Its Capacity

    SSD and GB Do you know what SSD stands for? It’s an abbreviation for Solid State Drive, a storage device that uses flash memory to store data. Unlike traditional hard drives, SSDs don’t have any moving parts, making them faster and more durable. SSDs come in a variety of capacities, usually ranging from 128GB to 4TB.

    GB stands for gigabytes, which is a measure of digital storage capacity. 1 GB is equal to 1024 megabytes (MB) and is often used to describe the amount of space needed to store files, photos, and videos. The capacity of your SSD depends on how much storage you need.

    If you only use your computer for browsing the web, emailing, and basic tasks, a 128GB SSD will suffice. However, if you’re a power user who works with large files and needs to run resource-intensive software, you’ll want a higher capacity SSD, such as 1TB or 2TB. It’s important to note that the higher the capacity, the more expensive the SSD will be.

    So, choose wisely according to your needs.

    256 ssd equal to how many gb

    What Is a GB?

    When you’re shopping for a new SSD, you might come across a term that’s unfamiliar: GB. GB stands for gigabyte, which is a measure of digital storage. It’s how much space your SSD has to store your files and data.

    Understanding GB is important when choosing an SSD because you want to make sure you have enough storage space for your needs. If you’re just using your computer for basic tasks like web browsing and email, you can probably get away with a smaller SSD. But if you store a lot of photos, videos, or other large files, you’ll need more GBs.

    Think of it like a closet: if you have a lot of clothes, you need a bigger closet. The same goes for your SSD. So, before you buy an SSD, consider how much storage space you need, and make sure you get enough GBs to meet those needs.

    Calculating SSD Capacity in GB

    If you’re looking to buy a laptop or upgrade your current one, you may have come across the term “256 ssd”. But what does it mean? Essentially, SSD stands for solid-state drive, and it’s a type of storage device that uses flash memory to store data much faster than traditional hard disk drives. But how much storage capacity does a 256 SSD really have? Well, it actually means that it has 256 gigabytes (GB) of storage space.

    This may not seem like a lot compared to the terabytes of storage found in desktop computers, but it’s actually quite a significant amount for a laptop or tablet. To put it into perspective, a 256 GB SSD is enough to store around 50,000 photos or 100 hours of HD video. So, if you’re in the market for a laptop with a 256 SSD, you can expect to have plenty of storage space for your everyday needs.

    How to Convert SSD Capacity to GB?

    When it comes to SSD capacity, understanding how to convert that into GBs can be a bit confusing. However, it’s important to know this information so that you can properly manage your storage. To calculate your SSD capacity in GBs, you need to know two things: the capacity of the SSD and the number of bytes in a gigabyte.

    This is because SSD capacity is typically given in bytes, whereas we typically measure file sizes and storage space in GBs. One gigabyte is equal to 1,073,741,824 bytes. So, to convert your SSD capacity to GBs, simply divide the total number of bytes by this value.

    For example, if your SSD has a capacity of 500,000,000,000 bytes, you would divide that by 1,073,741,824 to get 4666 GBs. Understanding this conversion can help you better manage your storage and ensure that you have enough space for your needs.

    Examples of SSD and GB Conversion

    SSD conversion to GB When it comes to understanding the storage capacity of your SSD, it’s important to know its conversion to GB. The size of an SSD can be a bit confusing since manufacturers use different units of measurement. For instance, some manufacturers advertise their SSDs in terms of gigabytes (GB) while others use gibibytes (GiB).

    To convert your SSD’s capacity to gigabytes, simply divide the total number of bytes by 1 billion. So, if your SSD has a total capacity of 500,000,000,000 bytes, its capacity in GB would be 500 GB. It’s important to note that you’ll never see exactly the same storage amount on your computer as what is advertised since the operating system uses some of the capacity for system files.

    Additionally, some SSD vendors reserve disk space for overprovisioning, which helps prolong the lifespan of the drive.

    Factors That Affect SSD Capacity

    Calculating SSD Capacity in GB The SSD capacity is one of the most important factors when choosing an SSD for your computer. It’s essential to understand how capacity is calculated in GB to make sure you’re getting the right amount of storage for your needs. SSD capacity is calculated based on the number of memory cells it contains.

    Each cell stores data and can hold multiple bits of information. The more cells an SSD has, the higher its capacity will be. Different factors can affect an SSD’s capacity, such as the type of NAND flash used, the controller, and the firmware.

    The type of NAND flash determines how many bits can be stored per memory cell. SLC (Single-Level Cell) NAND flash can store one bit per cell, while MLC (Multi-Level Cell) and TLC (Triple-Level Cell) NAND flash can store two and three bits per cell, respectively. The controller and firmware manage how data is stored and accessed on the SSD, affecting how much capacity is available for use.

    To calculate SSD capacity in GB, you need to know the total number of memory cells and the size of each cell. For example, if an SSD has 1024 memory cells, and the size of each cell is 64 GB, then the total capacity of the SSD would be 64,000 GB (1024 x 64). However, the actual usable capacity would be less due to factors such as formatting and system overhead.

    In conclusion, understanding how SSD capacity is calculated in GB is critical in choosing the right SSD for your needs. It’s essential to consider not only the total capacity but also the factors that affect capacity such as the type of NAND flash, controller, and firmware. By doing so, you can ensure that you’re getting the right amount of storage and performance for your specific requirements.

    Choosing the Right SSD Capacity

    If you’ve been wondering about the capacity of a 256GB SSD, it’s equivalent to 256 gigabytes (GB). But how much storage does that actually provide? Well, it depends on your needs and usage. A 256GB SSD can offer plenty of storage for some users, especially if you’re using it as a secondary drive for storing files and programs.

    However, if you’re someone who works with large media files, such as video or Photoshop projects, you may find 256GB too limiting. In that case, you may want to opt for a larger capacity SSD, such as 500GB or 1TB, to ensure you have enough space to meet your needs. Ultimately, the right SSD capacity for you depends on your usage patterns, so take some time to think about how you plan to use your computer and what you need to store.

    How Much GB Do You Need?

    When it comes to choosing the right SSD capacity, it can be tough to decide how much GB you actually need. It all depends on what you plan on using your computer for. If you’re just using it for basic web browsing and document editing, you can likely get away with a lower capacity SSD, such as 128GB or 256GB.

    However, if you’re a gamer, video editor, or do a lot of graphic design work, you’ll likely need a higher capacity SSD, such as 500GB or even 1TB. The key is to assess your needs and choose a capacity that allows you to store all your important files without slowing down your system. Remember, it’s always better to have a little extra space than to run out and have to continuously delete files to make room for new ones.

    So, take your time, consider your usage, and don’t be afraid to invest in a higher capacity SSD if you need it.

    Considerations When Choosing SSD Capacity

    When it comes to choosing the right SSD (solid-state drive) capacity, there are a few important considerations to keep in mind. Firstly, you’ll need to think about your storage needs, both currently and in the future. If you’re someone who regularly works with large files such as videos or graphics, you may need a higher capacity SSD to store all your data.

    However, if you’re someone who mainly uses their computer for browsing and basic tasks, a lower capacity SSD may suffice. It’s also worth considering the longevity of your SSD – while higher capacity drives may seem like the better choice, they can also be more susceptible to wear and tear over time. Ultimately, the key is to strike a balance between your current needs and the potential for future growth.

    By assessing your usage and storage needs and researching different SSD options, you’ll be able to choose the capacity that’s right for you.

    Conclusion

    In conclusion, asking how many GB are contained in a 256 SSD is like asking how many licks it takes to get to the center of a Tootsie Pop – it all depends on the size and content of the data being stored! But, to answer the question, a 256 SSD typically holds around 240 GB of usable storage. So, next time you’re wondering about data storage, remember to consider the many variables at play and use your tech-savvy skills to maximize your storage space. Happy computing! “

    FAQs

    What is the storage capacity of a 256 SSD?
    A 256 SSD has a storage capacity of 256 GB.

    Is a 256 SSD better than a 128 SSD in terms of storage capacity?
    Yes, a 256 SSD has double the storage capacity of a 128 SSD.

    Can a 256 SSD be upgraded to more storage capacity?
    No, the storage capacity of an SSD cannot be upgraded. You will need to purchase a new SSD with a higher storage capacity.

    How many files can a 256 SSD hold?
    The number of files that can be stored on a 256 SSD depends on the size of the files. However, it can hold a significant number of files ranging from documents to high-resolution videos and images.

    What is the difference between a 256 SSD and a 256 SD card?
    The main difference between a 256 SSD and a 256 SD card is the interface they use. An SSD uses a SATA or NVMe interface, while an SD card typically uses a microSD or SD interface. Additionally, SSDs are much faster than SD cards when it comes to read and write speeds.

  • Unlocking the Mystery: A Step-by-Step Guide on How to Check if Your SSD has DRAM

    If you’re looking for a faster, more efficient storage solution for your computer, then investing in an SSD is definitely the way to go. But, not all SSDs are created equal, and it’s important to know what features to look for before making a purchase. One of the key components that determine an SSD’s performance is its DRAM cache.

    Simply put, having a DRAM cache allows for faster read and write speeds, resulting in better overall performance. So, how can you check if your SSD has DRAM? In this blog post, we’ll explore the different ways to check for DRAM on your SSD and why it matters in the first place. So, let’s dive in and get started!

    What is DRAM in SSDs?

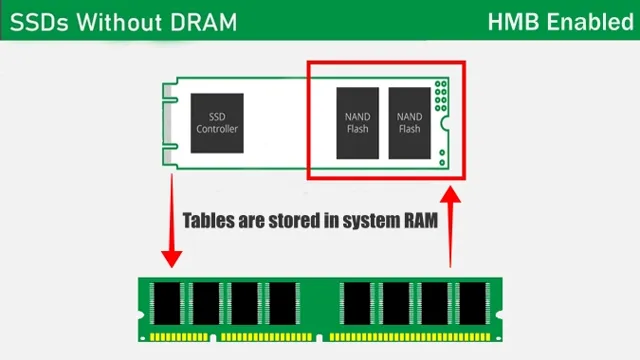
    If you are wondering whether your SSD has DRAM, there are a few ways to check. DRAM stands for Dynamic Random Access Memory, which essentially acts as a buffer between your CPU and SSD to help improve performance. One way to check if your SSD has DRAM is to look up the specifications of the model you own.

    If the SSD has DRAM, it will usually be listed in the technical specifications. Another way to check is to use a tool like CrystalDiskInfo, which can provide detailed information about the components of your SSD. If you find that your SSD does not have DRAM, don’t worry too much.

    While having DRAM can certainly help improve performance, many SSDs without DRAM still perform quite well and may be more affordable. Ultimately, the decision to choose an SSD with or without DRAM will depend on your specific needs and budget.

    Explanation of DRAM and its Importance

    DRAM, SSDs DRAM stands for Dynamic Random Access Memory, which is a type of computer memory that is frequently used in SSDs (Solid State Drives). DRAM is an important component in SSDs as it serves as a buffer between the processor and the storage. This allows the processor to access data more quickly and efficiently.

    DRAM stores information temporarily and is volatile, which means that it requires power to maintain its storage. Despite its volatile nature, DRAM is a critical component in SSDs as it helps to increase the speed and performance of the drive. The amount of DRAM in an SSD can have a significant impact on its overall performance.

    Higher capacity DRAM can handle more data at once, resulting in faster data transfer and reduced latency. In summary, DRAM plays a crucial role in the overall performance and speed of an SSD, making it an essential component in modern computing systems.

    how to check if my ssd has dram

    Different Methods to Check DRAM in SSDs

    If you’re wondering how to check if your SSD has DRAM, there are a few different methods you can try. One option is to check the manufacturer’s website or specification sheet for the SSD model you have. This information should indicate whether or not the SSD contains a DRAM cache.

    Another method is to use diagnostic software, such as CrystalDiskInfo or HWinfo64, which can provide you with detailed information about your SSD’s hardware components, including the presence of DRAM. Lastly, you can physically disassemble your SSD (if you’re comfortable with it) and locate the DRAM chip on the PCB. However, keep in mind that opening up your SSD will void any warranty it may have and is generally discouraged for safety reasons.

    In any case, making sure your SSD has DRAM can have a big impact on its performance, so it’s worth checking to see if it’s included.

    Method 1: Using the Device Manager in Windows

    SSD DRAM check If you want to check the DRAM in your SSDs, you might want to try using the Device Manager in Windows. This is a helpful method for confirming whether your SSD has DRAM or not. First, you need to open the Device Manager by typing “device manager” into the start menu search bar.

    Once it’s opened, go to the “Disk drives” tab, and locate your SSD. Right-click on the SSD and click on “Properties.” A new window will appear, go to the “Volumes” tab, and click on “Populate.

    ” This will list the type of disk and the file system used. If your SSD has DRAM, you will see “DRAM” in the list, but if not, you will see “Non-volatile memory” or “NAND.” Using the Device Manager is a quick and easy way to check the DRAM in your SSDs.

    Method 2: Using Third-Party Software

    When it comes to checking DRAM in SSDs, there are a few methods that you can use. One of those methods is by using third-party software. You can download and install software programs like HWiNFO, which can give you a lot of information about your hardware components, including your SSD.

    Once you have installed the software, you simply need to run it and look for the information about your SSD. You will be able to see the amount of DRAM that is present in your SSD, along with other details such as the interface type and the firmware version. This method is quite simple and doesn’t require you to open your PC, making it a great option for those who are not familiar with hardware components.

    However, it is important to note that not all software programs are reliable and some may give you inaccurate information. Therefore, it’s always a good idea to use a trusted and reputable software program.

    Method 3: Looking Up the SSD’s Technical Specifications

    Checking DRAM in SSDs can be done by looking up the SSD’s technical specifications. This method requires some technical knowledge about SSDs, but it is a reliable way to determine if your SSD has DRAM or not. Most SSD manufacturers list the technical specifications of their products on their websites or in the product manual.

    Look for terms like “cache,” “DRAM,” or “buffer” in the specifications to determine if your SSD has DRAM. If the technical specifications do not mention these terms, it is likely that your SSD does not have DRAM. Keep in mind that the presence of DRAM does not necessarily guarantee better performance.

    Other factors, such as the type of NAND flash used and the controller chip, can also affect an SSD’s performance. So, if you want to ensure that your SSD has DRAM, make sure to check the technical specifications carefully to avoid any performance-related surprises.

    Factors to Consider When Choosing an SSD with DRAM

    When it comes to choosing an SSD with DRAM, there are a few factors to consider to ensure that you are getting the best performance for your needs. One of the easiest ways to check if an SSD has DRAM is to look at the specifications provided by the manufacturer. If the SSD explicitly mentions having DRAM cache, then it likely has it.

    Additionally, you can also check independent reviews and benchmarks to see how an SSD performs in real-world scenarios. Factors like read and write speeds, endurance, and reliability should also be considered when choosing an SSD with DRAM. However, it’s important to note that having DRAM does come at an additional cost, so it’s up to you to decide whether the increased performance justifies the extra expense.

    Ultimately, the decision to choose an SSD with DRAM really comes down to your specific needs and budget.

    Price vs Performance: Is DRAM Worth It?

    When it comes to choosing an SSD, one of the factors to consider is whether or not it has DRAM. DRAM (dynamic random access memory) is a type of volatile memory that stores data temporarily for quick access. Having DRAM on an SSD can significantly improve its performance, but it also comes at a higher cost.

    So, is DRAM worth it? Well, it depends on your specific needs. If you are a gamer or a designer who requires fast and multi-tasking performance, then a SSD with DRAM is definitely worth the investment. On the other hand, if you are just a casual user who only needs basic computing needs, then an SSD without DRAM may suffice.

    Ultimately, it’s important to weigh the price vs performance benefits before making a decision.

    Types of DRAM and Their Benefits

    SSD with DRAM When choosing an SSD with DRAM, there are a few factors to consider. The first thing to consider is the type of DRAM used in the SSD. There are two types of DRAM used in SSDs, SLC and MLC.

    SLC DRAM is faster and more reliable than MLC DRAM, but it is also more expensive. MLC DRAM is slower but more cost-effective. The second thing to consider is the capacity of the DRAM.

    The more DRAM a device has, the faster it will be. A larger capacity is also essential for handling heavy workloads. Finally, you should consider the price of the SSD.

    SSDs with more DRAM and higher capacity are generally more expensive. Therefore, you should find a balance between the price and performance of the SSD. Ultimately, if you prioritize a faster, more reliable device, choose an SSD with SLC DRAM.

    If you need a more cost-effective option, choose an SSD with MLC DRAM.

    Conclusion

    Now you know how to check if your SSD has DRAM! It’s a simple process that can save you a lot of headaches in the future. Don’t be left in the dark with an SSD without DRAM, make sure you do your research and choose wisely. Because at the end of the day, having DRAM is like having a high-speed booster for your SSD, and who doesn’t want that kind of power? So go forth, check those specs, and may your SSD always have the sweet nectar of DRAM flowing through its circuits!”

    FAQs

    What is DRAM, and why is it important in SSD?
    DRAM stands for Dynamic Random Access Memory, and it is important in SSDs because it serves as the cache memory, speeding up data access and improving performance.

    How can I check if my SSD has DRAM?
    You can check the specifications of your SSD model or use software tools like CrystalDiskInfo, HWiNFO, or SSD-Z to see if your SSD has DRAM.

    Is it essential to have DRAM in SSD?
    While it is not essential to have DRAM in SSD, it significantly improves its performance, especially when handling large data transfers and multitasking.

    Are there any disadvantages of using an SSD without DRAM?
    SSDs without DRAM may experience slower performance, reduced lifespan, and lower endurance due to more frequent writes to the flash storage cells. However, this depends on the workload and usage of the SSD.

  • Step-by-Step Guide: Installing SSD in Coolermaster Elite 110 for Ultimate Performance!

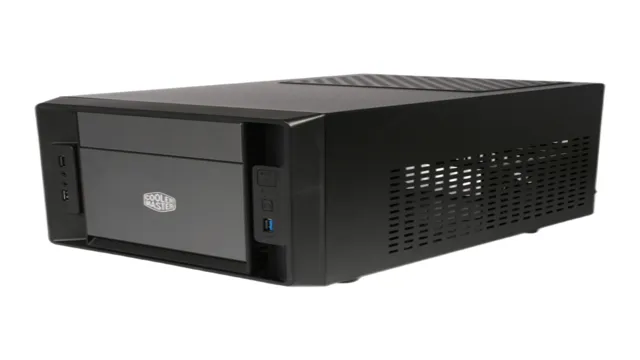
    If you’re looking for a way to improve the performance of your computer, installing an SSD (solid-state drive) is a great option. Not only does it boost your computer’s speed, but it can also enhance the overall user experience. However, the installation process may seem overwhelming, especially if you’re not familiar with the inner workings of your PC.

    That’s where we come in – we’ve put together a step-by-step guide on how to install an SSD in a Coolmaster 1 With our easy-to-follow instructions, you’ll be up and running in no time!

    Pre-Installation Checklist

    Installing an SSD into your Coolmaster Elite 110 is a great way to improve its overall performance, but before you get started, it’s important to have a pre-installation checklist. Firstly, ensure that you have all the required tools and parts that you need to carry out the installation, such as a screwdriver and the appropriate cables. Secondly, make sure you have downloaded any necessary drivers or software beforehand to avoid any issues during installation.

    Thirdly, ensure that your computer is unplugged from the mains supply before attempting to install the SSD and take necessary precautions to prevent any static electricity build-up, for example, using an anti-static wrist strap. Finally, be careful when handling the SSD as it is delicate and can be easily damaged. By following these simple steps, you’ll be able to install your new SSD smoothly and hassle-free, and enjoy the improved performance of your Coolmaster Elite 1

    Ensure Compatibility

    If you’re planning to install new software or hardware on your computer, it’s important to ensure compatibility before you start the installation process. This will save you from potential frustration and lost productivity down the line. To do this, you’ll need to check the system requirements of the software or hardware you want to install and compare them to the specifications of your computer or device.

    Check if your operating system is supported and if you have enough RAM, processor speed, and storage space to run the software or hardware. It’s also important to make sure that any other software or programs that the software or hardware may rely on are already installed on your computer. Taking these steps before installation will help make sure that your new software or hardware runs smoothly.

    coolmaster elite 110 ssd how to install

    Gather Required Tools

    Before you begin your installation, it’s important to make sure you have all the necessary tools on hand. This will save you time and frustration in the long run. Make sure you have a screwdriver, pliers, wire strippers, and a voltage detector.

    These tools will come in handy throughout the installation process. Additionally, it’s important to make sure you have all the necessary parts and wires for your specific installation. Take a look at the instruction manual and double-check that you have everything you need.

    Once you have all your tools and parts ready to go, you can move on to the next step with confidence. Remember, preparation is key to a successful installation.

    Removing Old HDD

    If you’re looking to upgrade your system’s storage setup, the Coolmaster Elite 110 provides an ideal solution. The first step is to remove the old HDD, which you’ll need to take out before installing your new SSD. You can do this by shutting down your computer and unplugging all its power cords.

    Before opening the computer case, you should ground yourself to avoid damage to the components. Once inside, locate the HDD and carefully unplug its cables. You may need to remove screws or clips holding it in place before gently lifting it out of the case.

    Once you’ve removed the old HDD, you can install your new SSD and start enjoying its faster speeds and reliability. In summary, with the Coolmaster Elite 110, upgrading to an SSD is easy if you follow the correct procedures and precautions.

    Shut Down and Disconnect Cables

    When it’s time to upgrade or replace an old hard disk drive (HDD), there are a number of steps to take to ensure a smooth and successful process. One of the most important steps is to shut down the computer completely and disconnect all cables that are connected to it. This includes the power cable, Ethernet cable, and any other cables that may be connected to the computer.

    Once you have disconnected all cables, you can begin to remove the old HDD. It’s important to be careful and gentle when handling the HDD, as they can be delicate and easily damaged. Use a screwdriver or other appropriate tool to remove any screws or clips that may be holding the HDD in place.

    Gently slide the old HDD out of its housing, being careful not to tug or pull on any wires or components that may be connected to it. By taking these steps carefully and methodically, you can remove the old HDD without damaging any other components and prepare for a successful upgrade.

    Remove Side Panel and Locate HDD

    Removing the old HDD is an important step when upgrading your computer’s storage capacity. To do this, you need to first remove the side panel of your computer and locate the HDD. This can be a bit confusing for those who are not familiar with the internals of their computer.

    Once you have removed the panel, you should be able to see the hard drive sitting next to the motherboard. Make sure to disconnect any cables that are attached to the HDD before removing it. Once you have done this, you can go ahead and unscrew the hard drive from its mounting bracket and slide it out of its slot.

    Remember to handle the HDD with care and avoid any physical shocks or jarring movements that could damage the delicate components inside. With the old HDD removed, you can now proceed with installing the new one and power up your computer for a faster and more efficient computing experience.

    Unscrew and Disconnect HDD

    Removing the old HDD is an essential task when upgrading or replacing the hard drive of your computer. The first step is to unscrew and disconnect the HDD from the computer’s CPU. It may sound complicated, but it’s a straightforward process that anyone can do with a little effort.

    To begin, make sure you have turned off the computer and unplugged it from the power source. Locate the hard drive inside the CPU and remove all the screws attaching it to the computer. After removing the screws, gently pull out the hard drive while disconnecting all the cables and wires attached to it.

    This ensures that you don’t damage any other parts of your computer while removing the old hard drive. Remember to handle the hard drive with care and avoid touching the electronic components, as this can cause damage to the drive. Overall, removing the old HDD from your computer is a crucial step that paves the way for the installation of the new hard drive.

    By carefully following the steps, you’ll ensure a smooth and successful upgrade process, leaving you with a faster and more efficient computer.

    Installing SSD

    If you own a Coolmaster Elite 110 and want to boost your computer’s performance, then installing an SSD is the way to go. The good news is that installing an SSD is a relatively easy process, and you don’t need to be a tech whiz to get it done. First, open up the side panel of your Coolmaster Elite 110 and locate the hard drive bay.

    Remove the hard drive from the bay and replace it with your new SSD. Make sure that you connect all the necessary cables, and double-check to ensure that the SSD is firmly in place. Once you’re finished, replace the side panel and turn on your computer.

    Congratulations, you’ve successfully installed a new SSD! Now you can enjoy faster boot times and improved performance. So why wait? Upgrade your Coolmaster Elite 110 today and experience the benefits of an SSD for yourself.

    Attach SSD in HDD Bracket

    If you’re looking to upgrade your computer’s storage and speed, installing an SSD is an excellent choice. However, you might run into the problem of mounting it properly. One solution to this problem is to attach the SSD in an HDD bracket.

    This way, you can easily screw your SSD into the bracket and into the computer’s drive bay. Another benefit of this solution is that it also provides proper grounding for your SSD. Before installing the SSD, make sure to check the bracket’s compatibility with your computer’s case and check what hardware you need to mount the bracket.

    With the proper tools and a little bit of patience, attaching your SSD in an HDD bracket is a straightforward process that will help you boost your computer’s performance.

    Slide Bracket into HDD Slot

    If you’re looking for a way to boost your computer’s performance, installing an SSD could be the solution you need. One of the first steps in this process is slide bracket into HDD slot. Essentially, this involves fitting the SSD into the bay that previously housed your old hard drive.

    It’s important to take the time to properly position the bracket to ensure a secure fit. Once you’ve done that, you can screw it into place to make sure it doesn’t move around or become unset. With this done, you’re one big step closer to enjoying faster load times and a smoother overall computing experience.

    So why not give it a try and see how much of a difference it can make?

    Secure with Screws and Connect Cables

    When it comes to installing an SSD, one of the most important steps is to secure it with screws and connect the necessary cables. This ensures that the drive is properly installed and will function correctly. First, locate the mounting points in your computer case where the SSD will be installed.

    Make sure to use the appropriate screws to secure the drive in place. Next, connect the necessary cables to the SSD and the motherboard, making sure to match the connectors correctly. Once everything is securely in place, power on your computer and make sure the SSD is recognized in the BIOS.

    By following these steps, you can install your SSD with confidence and take advantage of its speed and performance benefits.

    Reassembling and Testing

    So you’ve successfully installed your SSD into your Coolmaster Elite 110, but now it’s time to reassemble and test to make sure everything is running smoothly. First, reattach all screws and cables that you may have removed during the installation process, making sure to double check that everything is securely fastened. Once everything is reconnected, turn on your computer and enter your BIOS to ensure that your computer recognizes the new SSD.

    If it does not, you may need to go back and check your connections or consult your computer’s manual for more troubleshooting tips. You can also run a benchmark test to make sure that your new SSD is performing at the expected speeds, and to identify any potential issues early on. Congratulations, your Coolmaster Elite 110 SSD installation is complete and your computer is now running even faster!

    Put back Side Panel and Cables

    Once you’ve completed your PC build, it is time to reassemble everything and start testing. First, put back the side panel on the case and make sure it is securely fastened. Then, reconnect all the cables to their proper components.

    Make sure the power supply cable is plugged in properly, as well as the graphics card, hard drive, and any other necessary cables. Double-check all connections to make sure they are tight and snug. Once everything is in place, it’s time to test your system.

    Boot up your computer and ensure that everything is functioning properly. Test your graphics card, hard drive, and any other components to make sure they are working as expected. It’s essential to test your system to catch any potential issues early on before they become more significant problems.

    Turn on PC and Verify Installation

    Now the moment of truth has arrived! It’s time to turn on your PC and verify the installation. But before you power up your machine, make sure you have reassembled everything correctly and have connected all the necessary wires, such as the HDMI cable, keyboard, and mouse. Once you have done that, press the power button and wait for your computer to come alive.

    At this stage, you should hear the fan spinning and see the light on your motherboard, indicating that the power supply is working correctly. If you’re not sure whether everything is functioning as it should, don’t panic! You can perform some basic tests to ensure that the installation was successful. For example, you can check that all the ports on your PC are responding correctly, that your graphics card is working correctly, and that all the drivers are up to date.

    Once you have completed these tests, you can safely say that your PC is ready for use. Congratulations, you have just successfully built your very own computer!

    Conclusion

    All in all, installing an SSD in a Coolmaster Elite 110 is a breeze. With a quick setup and a bit of know-how, you’ll have a blazing-fast machine that can handle anything you throw at it. So say goodbye to slow boot times and frustrating load screens, and hello to the lightning-fast speed and performance that only an SSD can provide.

    Happy installing!”

    FAQs

    What size of SSD can fit into the Coolmaster Elite 110 case?
    The case can fit a 2.5-inch SSD.

    Is there a specific slot for the SSD to be installed in the Coolmaster Elite 110 case?
    Yes, there is a specific area designated for the SSD located behind the front panel.

    Do I need any additional hardware to install the SSD in the Coolmaster Elite 110 case?
    No, all necessary hardware is included with the case for SSD installation.

    Can the SSD be hot-swapped in the Coolmaster Elite 110 case?
    No, the SSD cannot be hot-swapped in this case. The system should be powered off before installing or removing the SSD.

    Is it necessary to use screws to secure the SSD in the Coolmaster Elite 110 case?
    Yes, it is recommended to use the included screws to secure the SSD in place to prevent any movement or damage during transportation.

  • The Ultimate Guide: How to Choose the Perfect SSD Size for Windows OS Installation

    If you’re planning on upgrading your computer or building a new one, you might be wondering how big of an SSD you need to install Windows. After all, storage technology has come a long way, and with so many different SSD sizes available, it can be overwhelming to figure out which one is the best fit for you. Fortunately, we’ve got you covered.

    In this blog post, we’ll explore what factors determine the size of the SSD you need for Windows, the benefits of choosing an SSD over an HDD, and which SSD sizes are currently the most popular. So, let’s dive in and answer the age-old question: how big of an SSD do you need for Windows?

    Introduction

    Have you ever wondered how big your SSD needs to be to run Windows? The answer to that question depends on several factors, including your usage habits and storage needs. Generally, 128GB is the minimum size needed to run Windows, but this may not be enough for those who need to install a multitude of applications and store large amounts of data. If you’re a gamer or a content creator, for example, you might want to consider getting a larger SSD.

    You also need to take into account future updates and changes to the operating system. It’s always better to have more storage than less, so it’s recommended to get an SSD with at least 256GB or higher. Keep in mind that the larger the SSD, the more expensive it becomes, so make sure to choose the right balance between size and affordability that suits your needs.

    Explanation of SSD and Windows Compatibility

    SSD and Windows Compatibility. Have you heard about SSDs, but aren’t sure if they are compatible with Windows? Solid State Drives, or SSDs, are a newer type of storage that use flash memory instead of traditional spinning disks. They are faster, quieter, and more reliable than traditional hard drives.

    But Windows compatibility has been a concern for many users. The good news is that SSDs are compatible with Windows, and in fact, many newer computers come with an SSD as standard. However, it’s important to make sure your Windows version is up-to-date and that your computer’s BIOS settings are configured correctly to fully utilize the benefits of your SSD.

    With these simple steps, you can enjoy the speed and reliability of an SSD with your Windows computer.

    how big does ssd need to be to run windows

    Factors to Consider

    If you’re wondering how big your SSD needs to be to run Windows, the answer is that it depends on your specific needs and usage patterns. Some factors to consider when determining the appropriate size SSD include the amount of storage space you require for your operating system and applications, how frequently you plan to store files on your computer, and whether you plan to use your SSD as your primary or secondary storage device. Generally, a 128GB SSD is sufficient for most users, but if you plan on installing multiple large applications or storing large files such as videos or music, you may want to consider a larger SSD (256GB or higher).

    Additionally, if you plan on using your SSD as your primary storage device, you’ll likely need a larger SSD to accommodate your operating system, applications, and frequently accessed files. Ultimately, determining the right SSD size is a personal decision and depends on your specific usage needs.

    Operating System Version and Architecture

    One important factor to consider when choosing an operating system (OS) is its version and architecture. The version of your OS determines its level of security, performance, and compatibility with other software and hardware. Newer OS versions usually come with the latest security patches and updated features that improve performance and enhance user experience.

    On the other hand, older versions may lack critical security updates, making them more vulnerable to cyber threats. The architecture of your OS, whether 32-bit or 64-bit, affects its ability to handle memory-intensive tasks and run larger applications. 64-bit architecture offers better performance and can support higher memory capacities than 32-bit architecture.

    So, when selecting an OS, it’s crucial to consider its version and architecture to ensure it meets your computing needs and is compatible with your hardware and software.

    Installed Programs and Other Data

    When it comes to considering installed programs and other data on your computer, there are a few important factors to keep in mind. Firstly, you’ll want to assess the amount of space that these programs and files are taking up on your hard drive. If you’re running low on storage, it may be time to clean out unnecessary or unused programs.

    Additionally, it’s important to think about the security risks that come with certain types of files, such as executable files or downloaded attachments. It’s always a good idea to have a reliable antivirus program installed to protect your data from potential threats. Finally, think about the impact that certain programs may have on your computer’s overall performance.

    Programs that run in the background or at startup can slow down your system, so be sure to check your settings and disable any unnecessary programs to keep your computer running smoothly. By taking these factors into account, you can better manage the programs and data on your computer for a more efficient and secure experience.

    Future Storage Needs

    As we move towards a more digital world, it’s important to consider our future storage needs. One major factor to keep in mind is the growing amount of data being created each day. We produce more data in two days than we did in all of human history up until 200

    This means that our need for storage capacity is continually increasing. Another factor to consider is the type of data we will be storing. With advances in technology, we will see an increase in video and audio content, which require larger amounts of storage.

    Additionally, we’ll need to consider the longevity of the storage medium. Will it last for decades or even centuries? It’s important to choose a reliable and secure storage system to ensure the safety and integrity of our data. As our digital world continues to evolve, so too must our approach to storage.

    Recommended SSD Size

    When it comes to choosing the right SSD size for your Windows PC, it ultimately depends on your specific needs and usage. However, a 256GB SSD is generally a safe choice for running Windows and storing your essential files and programs. This will give you plenty of space for your operating system, as well as programs and applications without running out of space too quickly.

    Of course, some users may require more storage space, particularly if they work with large files such as video or photo editing, or if they are gaming enthusiasts. In these cases, a 512GB or even a 1TB SSD may be more suitable. Ultimately, it’s important to weigh up your usage demands and choose an SSD size that provides you with the space and performance you need.

    Whatever size you choose, an SSD is an excellent investment for boosting your PC’s speed and performance compared to traditional hard drives.

    Minimum and Maximum Size Based on Factors

    When it comes to selecting an SSD, it’s important to consider the recommended size based on certain factors. First and foremost, the size should be based on your specific needs and usage. For light usage such as browsing the web or basic productivity tasks, a smaller SSD with at least 120GB of storage would suffice.

    However, for more demanding work such as video production or gaming, a larger SSD with at least 500GB of storage is recommended. It’s also important to consider the size of your operating system and frequently used applications. As a rule of thumb, your SSD should have at least 15% free space to maintain optimal performance.

    Additionally, it’s worth noting that some SSDs are built for specific purposes, such as high endurance SSDs for enterprise use. Overall, selecting the right SSD size requires careful consideration of your specific needs, usage, and budget. By taking these factors into account, you can ensure that you choose the best SSD size to meet your requirements and optimize your storage experience.

    Examples of SSD Sizes Needed for Different Windows Versions

    When choosing the size of an SSD for your computer, it’s important to consider the minimum requirements for the version of Windows you plan to use. For Windows 10, Microsoft recommends a minimum of 32GB of storage for the 32-bit version and 64GB for the 64-bit version. However, if you plan to install large applications or store a lot of files, a larger SSD may be necessary.

    For example, if you are a graphic designer or video editor, you may want to consider an SSD with at least 1TB of storage. The size of the SSD needed for Windows 7 and 8 is similar to that of Windows 10, although it’s worth noting that Windows 7 and 1 will require more frequent updates, which can take up additional storage space over time.

    In summary, the recommended SSD size for Windows depends on your individual needs, but a larger capacity SSD is generally a good investment for those who require more storage for their applications and files.

    Conclusion

    In conclusion, the size of your SSD should be like a good pair of shoes – it should fit comfortably and provide enough room for all your personal belongings. For running Windows, a 128GB or 256GB SSD would suffice for most users. However, if you’re a gamer, creative professional, or want to future-proof your system, then a larger capacity SSD may be necessary.

    Ultimately, the choice is yours, but remember, just like with shoes, a bigger size doesn’t necessarily mean better. It’s all about finding the right fit for your needs!”

    Summarize Factors and Recommendations

    After considering the various factors that affect SSD performance, such as workload intensity, capacity, and interface, it is recommended to select an SSD with a size that meets your storage needs while leaving some free space for wear-leveling, caching, and overprovisioning. Generally, SSDs with larger capacities have better performance and endurance than smaller ones due to the parallelism and redundancy inherent in their design. However, the price of SSDs increases significantly with their size, so it is essential to balance performance, capacity, and cost when choosing an SSD.

    A good rule of thumb is to get an SSD that has at least 20% more capacity than the size of your OS and applications to ensure smooth operation. By selecting the appropriate SSD size, you can maximize your system’s performance and lifespan while minimizing your expenses.

    FAQs

    What is the minimum required SSD size to install Windows operating system?
    The minimum required SSD size to install Windows operating system is 32GB.

    Can I install Windows on a smaller SSD than the minimum required size?
    It is not recommended to install Windows on a smaller SSD than the minimum required size as it may affect the performance and stability of the system.

    How much space does Windows take up on an SSD?
    The space taken up by Windows on an SSD varies depending on the version of Windows, but generally, it ranges from 20GB to 40GB.

    Will a larger SSD improve the performance of Windows?
    Yes, a larger SSD can improve the performance of Windows as it allows more space for the operating system and installed programs, resulting in faster load times and smoother overall performance.

    Is it necessary to install all programs on the same SSD that Windows is installed on?
    No, it is not necessary to install all programs on the same SSD that Windows is installed on. However, doing so may improve the performance of the programs and the system as a whole.

  • Maximizing Your SSD: A Comprehensive Guide on How to Get the Most Out of Your Solid State Drive

    If you are a computer enthusiast or an avid gamer, you understand how revolutionary solid-state drives (SSDs) have become in recent years. Not only do they offer faster boot and load times, but they also consume less power and generate less heat when compared to traditional hard disk drives (HDDs). However, to fully reap the benefits of SSDs, maximizing their performance is critical.

    In this blog, we will highlight various tips and techniques to help you optimize your SSD’s performance, ensuring you get the most out of your system. So let’s dive in and discover how to take your SSD’s performance to the next level!

    Understanding SSD Technology

    If you’re using an SSD, it’s important to understand the technology and how best to optimize your usage for maximum performance and longevity. One of the most important things to remember is to avoid filling your SSD to capacity. While traditional hard drives can handle being nearly full without issue, SSDs can experience significant slowdowns if they are filled over 75-80% of their capacity.

    This is because SSDs use blocks of flash memory to write and store data, and when those blocks become fragmented, it can take longer to access and write new data. Other tips for maximizing your SSD’s lifespan include enabling TRIM support, which helps to prevent data fragmentation and optimize performance, as well as ensuring that you are using the latest firmware updates for your SSD. By taking these steps, you can ensure that your SSD performs at its best and lasts for many years.

    Benefits of SSDs

    SSD Technology SSDs or Solid State Drives are becoming increasingly popular in the world of computer storage due to their many benefits. They are faster, more reliable, and are more efficient than traditional hard drives, which use spinning disks to store data. SSDs, on the other hand, use flash memory, similar to the type found in USB drives, to store and access data quickly.

    Since there are no moving parts, an SSD is less fragile than a traditional hard drive and is less likely to be damaged by bumps or drops. Additionally, SSDs use less power, which translates to longer battery life for laptops and lower energy costs for businesses that operate many computers. With improved efficiency and faster processing speeds, SSDs have become the go-to choice for those looking to maximize their computer’s potential.

    how best to use an ssd

    SSD vs. HDD Comparison

    SSD vs. HDD Comparison When it comes to storage options for computers, the two most popular choices are hard disk drives (HDD) and solid-state drives (SSD). While both serve the same purpose of storing data, there are significant differences in their technology.

    SSDs are built on flash memory chips, one of the fastest and most reliable data storage methods available. On the other hand, HDDs use mechanical platters to read and write data, which makes them comparatively slower and prone to mechanical failure. As a result, SSDs offer faster read and write times, improved system responsiveness, and shorter boot-up time compared to HDDs.

    Furthermore, SSDs are more durable, lightweight, and consume less energy. To sum up, if you’re looking for faster performance and reliability, SSDs are the way to go.

    Optimizing SSD Usage

    When it comes to optimizing your SSD usage, there are a few key things you should keep in mind. First and foremost, it’s important to remember that SSDs have a finite lifespan, so you want to make sure you aren’t unnecessarily wearing out your drive. One way to do this is by minimizing how often you write to it – for example, by moving large files like media libraries to a traditional hard drive instead.

    Another tip is to avoid defragmenting your SSD, which can cause unnecessary wear and tear. Instead, focus on optimizing your operating system and application settings to minimize unnecessary writes. By using your SSD carefully and strategically, you can ensure it lasts as long as possible and continues to provide speedy performance for years to come.

    Disk Partitioning

    Disk partitioning is a process of dividing the physical storage space of your hard drive into multiple, smaller sections called partitions. This is especially helpful for optimizing the usage of an SSD. By creating a separate partition for your operating system, you will be able to maximize its performance and reduce the likelihood of running out of space.

    Additionally, you can create another partition dedicated to frequently used software or files to speed up access times. It is important to note, however, that partitioning should be done with caution as it can also lead to fragmentation and reduced performance. Overall, understanding how to properly partition your hard drive can greatly improve the performance and lifespan of your SSD.

    Enabling TRIM

    Enabling TRIM on your SSD is an essential step in optimizing its usage. TRIM is a feature that ensures that ignored data blocks are wiped out from the SSD, making space for new data to be written. Without TRIM, your SSD may suffer slow performance and a shorter lifespan.

    Enabling it is quite simple; all you need to do is ensure that it is supported by your SSD and operating system. To verify that it is enabled on your system, type in the command prompt “fsutil behavior query DisableDeleteNotify.” If the value returned is “0,” then TRIM is enabled.

    However, if it is “1,” you’ll have to manually enable it. TRIM works by commanding the SSD to wipe out unused data blocks, freeing up space that your operating system can write to. In summary, enabling TRIM on your SSD enhances its performance, making it faster and more reliable in the long run.

    Disabling Hibernation

    If you own an SSD, it is important to optimize its usage by disabling hibernation. Hibernation is a feature on Windows that saves your computer’s state to the hard drive so you can pick up where you left off the next time you turn on your computer. However, hibernation can take up a lot of space on your SSD and reduce its lifespan.

    Disabling hibernation will not only free up space but also reduce unnecessary writes on your SSD. This can result in a longer lifespan for your SSD and faster performance overall. To disable hibernation, open the Command Prompt as an administrator and type “powercfg.

    exe /hibernate off” and press enter. This will turn off hibernation and optimize your SSD’s usage.

    Using SSD for Gaming

    When it comes to gaming, using an SSD can make a huge difference in terms of performance and load times. The key to getting the most out of your SSD is to make sure it’s properly configured. First and foremost, make sure your operating system and games are installed on the SSD.

    This will ensure that the most frequently accessed files are stored on the SSD for faster load times. In addition, consider moving any other frequently used programs or files to the SSD as well. It’s also important to enable TRIM support, which helps to maintain the performance of the SSD over time.

    Finally, make sure your SSD is properly maintained and updated, as this can help to improve its overall performance. By following these tips, you can ensure that your SSD is working at its best and providing you with the best possible gaming experience.

    Benefits for Gaming

    Gaming enthusiasts often demand high-speed and reliable performance from their gaming systems. Using SSDs for gaming provides an excellent solution to meet these demands. When compared to traditional hard disk drives, SSDs offer faster load times, reduced in-game lag, and better overall performance.

    This means you can experience smoother gameplay and faster load times, which are vital for competitive gaming. By providing faster read and write speeds, SSDs drastically reduce the time it takes for your computer to process game data. This not only creates a highly responsive system but also improves overall game performance and gameplay experience.

    Therefore, it’s safe to say that using SSDs for gaming is a smart choice, and it will give you the edge you need to take your gaming experience to new heights.

    Optimizing Game Settings

    When it comes to optimizing game settings, using an SSD is one of the best upgrades you can make. An SSD, or solid state drive, has faster read and write speeds than a traditional hard drive, which can greatly improve game load times and reduce in-game stuttering. With an SSD, you’ll be able to boot up your favorite games in a matter of seconds and jump right into the action without waiting for long loading screens.

    Plus, an SSD can also improve overall system performance, making multitasking and other computer tasks much faster and smoother. So if you’re serious about gaming and want to give yourself every advantage possible, investing in an SSD is definitely worth considering.

    SSD Maintenance

    If you’re looking to get the most out of your SSD, there are a few things you can do to keep it running smoothly. First and foremost, make sure you’re not filling it up all the way. SSDs operate best when they have some free space available, so try to keep at least 20% of the drive empty.

    Also, be mindful of the types of files you store on the drive. Large media files, like photos and videos, can take up a lot of space and cause the drive to slow down. Finally, it’s important to keep your firmware up to date.

    Manufacturers often release updates that improve performance and fix bugs, so check for updates every so often to ensure your drive is always running at its best. By following these tips, you can help ensure that your SSD lasts for years to come and continues to perform at its best.

    Firmware and Driver Updates

    Maintaining an SSD requires proper firmware and driver updates. These updates ensure that your SSD is performing at optimal levels and that any potential bugs or issues are resolved. Regular firmware updates help improve the overall performance of your SSD, including faster boot times and faster data transfer rates.

    Driver updates, on the other hand, help your operating system communicate better with your SSD, resulting in improved stability and efficiency. It’s best to check your SSD manufacturer’s website regularly for any available firmware and driver updates. Additionally, make sure to back up all important data before updating to prevent any data loss.

    By keeping your SSD up to date, you can enjoy the full benefits of your SSD’s performance and longevity.

    Avoiding Overuse and Wear

    SSD Maintenance Taking care of your solid-state drive (SSD) is crucial to ensure that it performs optimally and lasts long. Overusing or wearing out your SSD can significantly reduce its lifespan and cause data loss or corruption. To avoid this, you should follow some maintenance practices regularly.

    First, you need to check your SSD’s health and monitor its performance using diagnostic tools. These tools can detect any errors and fix them before they cause damage. Secondly, you should avoid filling up your SSD to its maximum capacity.

    This can cause write amplification and overuse of the flash cells, ultimately leading to wear and tear. Finally, avoid writing or rewriting data frequently on the same blocks; this causes wear and tear too. Instead, optimize your storage by distributing your data efficiently across your drive.

    Regularly backing up your data is also essential in case of any failures or losses. By following these SSD maintenance tips, you can keep your drive performing well for an extended period, reducing the need for costly repairs or replacements.

    Conclusion

    In the race of technology, SSD is undoubtedly the winner when it comes to speed and performance. But just like any tool, it should be used optimally to get the best results. So, to make the most out of an SSD, keep in mind the following: always choose a reliable brand, use its full capacity, avoid filling it to the brim, make regular backups, and keep the firmware updated.

    Treat it like a prized possession, and it will reward you with lightning-fast boot and load times, snappy app launches, and quick data transfers. Remember, an SSD is like a cheetah – fast, sleek, and agile. Use it smartly, and you’ll always outrun the competition!”

    FAQs

    What are the advantages of using an SSD over a traditional hard drive?
    SSDs are faster, more durable, and use less power than traditional hard drives.

    What should I consider when choosing the right SSD for my needs?
    You should consider factors such as capacity, form factor, read and write speeds, and price.

    How should I install an SSD in my computer?
    You should first check if your computer has a SATA III port and then follow the manufacturer’s instructions for installation.

    How can I optimize the performance of my SSD?
    You can optimize your SSD’s performance by disabling disk defragmentation, enabling TRIM, and updating your firmware regularly.

    Are there any downsides to using an SSD?
    SSDs can be more expensive than traditional hard drives, have limited write cycles, and may not be compatible with older computers.

  • Smooth and Swift Data Transfer: A Step-by-Step Guide on Moving Data from SSD to SSD

    Are you planning to upgrade your SSD for better storage and performance? If yes, transferring data from your old SSD to the new one is something that you should consider. The process of transferring data from SSD to SSD may sound a bit daunting, but it’s actually much easier than you might think. In this blog post, we’ll guide you through the step-by-step process of transferring data from SSD to SSD.

    Whether you’re a gamer, a graphic designer, or a casual user, transferring data from one SSD to another will help you maintain your productivity and prevent loss of valuable data. So, let’s dive right in and explore how to transfer data from SSD to SSD.

    Backup Your Data

    If you’ve recently purchased a new SSD and need to transfer your data over from an old SSD, there are a few different methods you can use. One popular option is to simply clone your old SSD onto your new one, which creates an exact replica of your data. To do this, you’ll need a cloning software program and a USB-to-SATA cable to connect your old SSD to your computer.

    Once you have both connected, you can use the cloning software to transfer all of your files, programs, and operating system to your new SSD. Another option is to manually transfer your files by copying them to an external hard drive or USB drive, and then copying them over to your new SSD. This is a bit more time-consuming, but it gives you more control over which files you transfer and also allows you to clean up any unnecessary files in the process.

    Whichever method you choose, it’s important to backup your data beforehand just in case anything goes wrong during the transfer process. By taking the time to properly transfer your data, you’ll ensure a smooth transition to your new system while also keeping all of your important files safe and secure.

    Use an External Drive

    Backing up your data is essential in today’s day and age. One of the easiest and most efficient ways to protect your data is to use an external drive. External drives are portable and can hold large amounts of data.

    They come in various sizes, from small thumb drives to large desktop drives. External drives use different types of connections, such as USB, Thunderbolt, or FireWire, depending on the drive’s age and model. Once you have connected an external drive to your computer, you can use the built-in backup software or a third-party software to start the backup process.

    It is important to keep your external drive in a safe location where it is unlikely to get damaged or stolen. Using an external drive to backup your data is a simple yet effective way to protect your important files and documents from potential disasters. So, don’t wait until it’s too late; take action now and backup your data using an external drive.

    how do i transfer data from ssd to ssd

    Cloud Storage Services

    Backing up your data is essential in today’s world, where data breaches and accidental deletions can occur at any time. Cloud storage services provide a simple and cost-effective way to ensure that your data is always backed up and readily available. These services offer various backup options, including automatic backup, incremental backup, and continuous backup, which allow you to choose the backup frequency and type that suits your needs.

    You can also access your data from anywhere, on any device, making cloud storage services a convenient solution for both personal and business use. With a few clicks, you can upload your files to the cloud and rest easy knowing that your data is safe and secure. Don’t wait until it’s too late – backup your data today with a reliable cloud storage service.

    Cloning Your SSD

    If you’re thinking about upgrading to a new SSD, you might be wondering how to transfer your data from your old SSD to the new one. One solution for transferring data between SSDs is to clone your old SSD onto your new one. Cloning your SSD involves creating a complete copy of all the data on your old SSD and transferring it to your new one.

    This can be a great option if you’re looking to switch to a faster, larger, or more reliable SSD without having to manually transfer all your files and applications. To clone your SSD, you’ll need cloning software and either an external drive enclosure or a cable to connect your new SSD to your computer. Once you have these tools, you can use the cloning software to create a bootable image of your old SSD and transfer it onto your new SSD.

    This process can vary depending on the specific software you’re using, so it’s important to carefully follow the instructions provided by the software. Overall, cloning your SSD can be a quick and easy way to transfer your data and make the most of your new hardware.

    Using a Cloning Software

    Cloning your SSD can be an easy and efficient way to transfer your files, operating system, and settings to a new drive. In order to clone your SSD, you’ll need a cloning software. There are many options available, both paid and free.

    It’s important to choose a software that is compatible with your SSD and has the features you need. Once you have your software installed, connect your new SSD to your computer. Double-check that you’ve selected the correct source and destination drives before beginning the cloning process.

    It’s also a good idea to backup any important files, just in case something goes wrong during the cloning process. After the cloning is complete, you can disconnect your old SSD and enjoy the increased storage and improved performance of your new one. By using a cloning software, you can save time and hassle while ensuring that all of your important data is safely transferred.

    Creating a Disk Image

    Creating a disk image of your SSD can be extremely useful in case you need to replace your current drive or want to create a backup. This process is commonly referred to as cloning. There are several software options available that can help you with this task, such as Macrium Reflect, Clonezilla, and EaseUS ToDo Backup.

    These programs allow you to create a complete copy of your drive, including all the system files, documents, programs, and settings. To begin, you need to connect a second drive to your computer, either through a USB or SATA connection. From there, you can open the cloning software and select the source SSD that you want to copy.

    Next, choose the target drive where the image will be saved. Once you have selected both drives, start the cloning process, which can take anywhere from a few minutes to a few hours, depending on the size of the drive and the speed of your computer. After the cloning process is complete, you can test the new drive by booting from it.

    If everything works correctly, you can then remove the original SSD and replace it with the cloned one. You should now have an exact copy of your original drive, with all your files and settings intact. In summary, cloning your SSD by creating a disk image is an effective way to backup your data and ensure that you can quickly and easily replace your drive if it fails.

    The process is relatively straightforward, and there are several software options available to help you get started. So, take the time now to create a disk image and give yourself peace of mind knowing that your data is safe and secure.

    Clone the Data to the New SSD

    Cloning Your SSD The process of replacing your hard drive with a new SSD involves cloning the data from the old drive to the new one. This ensures that all of your existing files, programs, and settings are transferred over to the new SSD without any data loss. Cloning your SSD may seem like a daunting task, but it can be done easily and quickly using a variety of free cloning software available online.

    One popular tool for cloning is Macrium Reflect. This software allows you to create a complete image of your hard drive and transfer it over to the new SSD. The process is straightforward and easy to follow, with step-by-step instructions provided throughout.

    Another option is EaseUS Todo Backup, which offers both a free and a paid version. The free version allows you to clone your hard drive and transfer all of your data to the new SSD, while the paid version offers additional features such as scheduled backups and cloud storage integration. Regardless of which software you choose, the process of cloning your SSD involves creating a complete copy of your hard drive and transferring it over to the new SSD.

    This ensures that all of your data is preserved and you can continue using your computer as normal without any issues. Overall, cloning your SSD is a vital step in the process of upgrading your hard drive and will ensure a smooth transition to your new and improved storage solution.

    Manual Transfer

    If you’re wondering how to transfer data from SSD to SSD manually, the process can be quite straightforward. Firstly, you’ll need to have both SSDs connected to your computer. Then, using file explorer, you can copy and paste the files from the old SSD to the new one.

    This may take some time depending on the size of the files being transferred. Alternatively, you can use software like EaseUS Todo Backup or Clonezilla to transfer the files. These programs will make a clone of the old drive, which can then be transferred to the new one.

    Whichever method you choose, make sure to securely wipe the old SSD once you’ve transferred all the necessary files over to ensure that no sensitive data remains on the drive. With a bit of patience and some careful file management, you’ll be able to transfer your data to a new SSD with ease.

    Connect the Old and New SSDs

    Now that you have both the old and new SSDs, it’s time to connect them and transfer your data. First, make sure your computer is turned off and unplugged. Then, locate the SATA ports on your motherboard, which are usually located near the bottom.

    Next, connect the old SSD to one of the SATA ports using a SATA data cable and a power cable. Repeat the same step for the new SSD, making sure to use a different SATA port. Once both SSDs are connected, turn on your computer and enter the BIOS setup.

    From there, select the boot order and set the new SSD as the primary boot drive. Now, you can begin transferring your files manually by copying and pasting them from the old SSD to the new SSD. This may take some time depending on the amount of data you have, but it’s a straightforward process that ensures all your data is transferred accurately.

    Don’t forget to double-check that all files have been transferred before disconnecting the old SSD. Overall, by following these steps, you can connect and manually transfer data from your old SSD to your new one seamlessly.

    Transfer Data via File Explorer

    When it comes to transferring data between devices, there are numerous ways to get the job done. One popular method is through manual transfer via File Explorer. This option involves connecting your devices with a cable and accessing the file explorer system to drag and drop files from one device to the other.

    It’s a simple and straightforward process that doesn’t require any additional software or apps, making it an ideal solution for those who prioritize simplicity. However, manual transfer can be a time-consuming task, especially for large files or numerous data sets. Additionally, it requires physical access to both devices, which may not always be convenient.

    Nonetheless, if you’re looking for a quick and accessible way to transfer data, manual transfer via File Explorer is a solid option.

    Copy and Paste Data from Old SSD to New SSD

    If you’re looking to upgrade your Solid State Drive (SSD), you might be unsure of how to go about transferring your data. Luckily, it’s a simple process to copy and paste data from your old SSD to your new one manually. To start, make sure both SSDs are connected to your computer and accessible.

    Then, select the files and folders you want to transfer from your old SSD, right-click, and choose “Copy.” Next, navigate to your new SSD, right-click, and select “Paste.” The transfer may take some time, depending on the amount of data being moved.

    It’s important to remember to back up all of your valuable data before beginning the transfer process to avoid any potential loss. By following these steps, you’ll have all of your important files copied over to your new SSD in no time.

    Conclusion

    Transferring data from one SSD to another may seem like rocket science, but it’s actually quite simple. With a few clicks and the right tools, your data will be zooming over to its new home faster than a SpaceX rocket launch. It’s a no-brainer, really: why waste time manually dragging and dropping files when you could transfer them effortlessly? So don’t fret over your data transfer woes, just sit back and let technology do the heavy lifting.

    FAQs

    What is the fastest way to transfer data from one SSD to another?
    The fastest way to transfer data from one SSD to another is by using a direct SATA to SATA connection or using an external SSD dock.

    Can I transfer my Windows operating system to my new SSD?
    Yes, you can transfer your Windows operating system to your new SSD by cloning your current SSD’s operating system using software like Clonezilla or Macrium.

    Is it possible to transfer data from a larger SSD to a smaller SSD?
    Yes, it is possible to transfer data from a larger SSD to a smaller SSD by manually selecting and transferring the most important files or by compressing the data before transferring.

    Should I format my new SSD before transferring data to it?
    It is recommended to format your new SSD before transferring data to it, as it ensures maximum compatibility and performance with your device. However, make sure to back up all important data before formatting.

  • Clone Your iMac in a Blink: Hassle-Free Transfer from HDD to SSD!

    Do you feel like your iMac is starting to lag behind a bit? Maybe you’re not able to run the latest software updates or your computer just takes a while to start up. Well, fear not, there’s a solution that can speed up your iMac and give it a new lease on life. The answer is to replace your old hard drive with a snappy new SSD (solid-state drive).

    But, you may be wondering, how do you transfer all your data from the old hard drive to the new one without losing anything? That’s where cloning comes in. In this tutorial, we’ll walk you through the process of cloning your iMac’s hard drive onto a new SSD, making your beloved iMac feel like new again.

    Backup Your Data

    If you’re looking to transfer all the data from your iMac’s HDD to an SSD, the best way to do it is by cloning your hard drive. Cloning makes an exact copy of your hard drive, including your operating system, settings, and files. This process is straightforward and will save you a lot of time and hassle of reinstalling everything on your new SSD.

    To clone your iMac’s HDD, you will need a cloning software such as Carbon Copy Cloner or SuperDuper. These programs will guide you through the process of cloning your hard drive and transferring everything to your new SSD. Make sure to back up your data before the cloning process, as it can be risky and potentially delete your files if done incorrectly.

    Cloning your iMac’s HDD to an SSD will significantly improve its performance, so it’s worth the effort if you’re looking to speed up your computer.

    Use Time Machine or a Cloud Backup

    Backing up your data is one of the most important things you can do to protect yourself from data loss. Two great options for backing up your data are time machine and cloud backups. Time machine is a built-in backup software available for Mac users, which automatically creates hourly, daily, and weekly backups of your entire system.

    This means that if you accidentally delete a file or lose important data, you can easily restore it to a previous version. On the other hand, cloud backup services like Google Drive, Dropbox, or iCloud sync your data to their servers, ensuring that a copy of your important files is stored off-site and protected from potential disasters like theft or fire. Additionally, cloud backups make it easy to access your files from anywhere, allowing you to share documents with others or retrieve files when you’re away from your computer.

    So whether you choose to use time machine or a cloud backup, make sure you’re backing up your data regularly to keep it safe and secure.

    how do i clone imac from hdd to ssd

    Prepare Your SSD

    If you’re looking to upgrade your iMac’s speed, you might consider cloning your hard drive to an SSD. An SSD can offer much faster read and write speeds, leading to a significant performance boost in your computer. But before you begin the cloning process, you should prepare your SSD.

    First, make sure your SSD has enough storage space to hold all of your data. Then, connect your SSD to your iMac using a Thunderbolt or USB cable. Next, format your SSD using Disk Utility.

    Finally, make sure to enable TRIM, which helps maintain performance over time, by opening System Preferences, selecting “Security & Privacy,” and then selecting the “Advanced” tab. Once your SSD is prepared, you’re ready to start cloning your hard drive and enjoying a faster computer experience.

    Format Your SSD for macOS

    If you’ve recently purchased a new SSD for your Mac, the first step is to prepare it by formatting it for macOS. This process ensures that the drive is optimized for use with your Mac’s file system and operating system. To begin, connect the SSD to your Mac via a USB cable or an external enclosure.

    Make sure your Mac is powered on and running the latest version of macOS. Then open Disk Utility, which can be found in the Utilities folder within your Applications folder. From here, you’ll be able to select your SSD and choose the macOS Extended (Journaled) format option.

    Give your SSD a name and click “Erase” to begin the formatting process. It’s important to note that all data on the SSD will be permanently erased, so make sure to back up any important files before proceeding. Once the formatting is complete, your SSD will be ready for use with your Mac.

    Create a Bootable Installer Drive

    If you have recently upgraded to an SSD, it’s important to properly prepare it before installing the operating system. One essential step is to create a bootable installer drive to ensure a smooth installation process. The first thing you’ll need to do is download the operating system installer from the official website.

    Once downloaded, you’ll need a USB drive with at least 8GB of space. Connect the USB drive to your computer and open Disk Utility. Select the USB drive and click on the Erase tab.

    Choose the format as “Mac OS Extended (Journaled)” and give it a name. Click on Erase and wait for the process to complete. Now, open Terminal and enter the command “sudo /Applications/Install\ macOS\ Catalina.

    app/Contents/Resources/createinstallmedia –volume /Volumes/USB –nointeraction”. This will create a bootable installer on your USB drive. By properly preparing your SSD with a bootable installer, you’ll have a hassle-free installation process for your operating system.

    Clone Your iMac

    Are you looking to upgrade to a Solid State Drive (SSD) on your iMac but don’t want to lose your data? No worries, you can easily clone your iMac from your current hard disk drive (HDD) to the new SSD! The first step is to gather the necessary equipment, including the new SSD, an external enclosure for your HDD, and a cloning software program. Once you have everything, remove your HDD and install the SSD in its place. Then place your HDD in the external enclosure and connect it to your iMac.

    Finally, use the cloning software to transfer the contents of your HDD to the SSD. This process will ensure that all your data, including your operating system and applications, are transferred seamlessly to your new SSD. With a cloned iMac, you can enjoy faster read/write speeds, increased performance, and more storage space.

    So don’t hesitate to make the switch to an SSD today!

    Connect Your SSD

    If you’re looking to speed up your iMac’s performance, a great way to do it is by cloning your hard drive onto an SSD. Doing this will not only give you faster boot times but also increase the overall speed and responsiveness of your iMac. To start, you’ll need to connect your SSD to your iMac via a USB or Thunderbolt connection.

    Once it’s connected, you’ll need to use cloning software like Carbon Copy Cloner or SuperDuper to clone your hard drive onto the SSD. This process can take several hours to complete, depending on the size of your hard drive. However, once it’s done, you can replace your old hard drive with the newly cloned SSD and enjoy faster performance from your iMac.

    With this simple upgrade, you’ll be able to get more done with your iMac and enjoy a more efficient workflow. So, why not give it a try?

    Access macOS Recovery Mode

    If you want to clone your iMac, then the first step is to access the macOS Recovery Mode. This mode allows you to perform a variety of system-level tasks, including creating a backup of your entire hard drive. To access Recovery Mode, restart your iMac and hold down the Command + R keys until the Apple logo appears.

    Once you’re in Recovery Mode, you can use the Disk Utility app to create a clone of your iMac’s hard drive. This backup will include all of your files, apps, and settings, and it can be used to restore your iMac if anything goes wrong. Just be sure to store your backup on an external hard drive or cloud storage service to ensure that it’s safe and easily accessible.

    With this backup in place, you can rest assured that your iMac is protected in case of any unforeseen issues.

    Use Disk Utility to Clone Your HDD

    If you want to upgrade your iMac’s hard drive or make a backup copy of your files, cloning your hard drive is the perfect solution. Luckily, cloning your iMac’s hard drive is easy using the built-in Disk Utility tool on your Mac. Start by connecting your external hard drive to your iMac, and then launch Disk Utility from the Applications folder.

    Next, select your iMac’s internal hard drive and click on the “Restore” tab. From there, select your external hard drive as the destination and then click on the “Restore” button. Disk Utility will then create a clone of your iMac’s hard drive on the selected external hard drive.

    This process may take some time, depending on the size of your hard drive. Once the cloning process is complete, you can reboot your iMac using the external hard drive to make sure everything works correctly. Overall, cloning your iMac’s hard drive is a great way to upgrade or backup your files, and it’s easy to do using Disk Utility on your Mac.

    Set Your SSD as the Startup Disk

    Are you looking to upgrade your iMac’s speed and storage capacity by cloning the HDD to an SSD? You’re in the right place! One of the most essential steps is to set your SSD as the startup disk since your iMac will not recognize the clone as a startup disk. To do this, simply connect the SSD to your iMac using an external enclosure or adapter, and go to System Preferences> Startup Disk. Select the SSD and click Restart.

    Once your iMac restarts, it will boot from the SSD. To clone your HDD to the SSD, you can use software like Carbon Copy Cloner or SuperDuper. Make sure to back up all your data and files before proceeding with the cloning process.

    The cloning process may take some time depending on the size of your HDD, but after a successful clone, you’ll have a faster and more efficient iMac with a larger storage capacity. Overall, cloning an HDD to an SSD can be a game-changer for your iMac’s performance and is relatively simple to do with the right tools and software.

    Restart Your iMac

    If you’re looking to improve the boot-up time of your iMac, setting your SSD as the startup disk can do wonders. Luckily, it’s a simple process that can be done within minutes. To start, you’ll want to restart your iMac and hold down the Option key as it starts up.

    This will bring up the Startup Manager, where you’ll be able to select the disk you want to use as the startup disk. Select your SSD and hit enter. From here, your iMac will always start up using your SSD, resulting in faster boot times and overall improved performance.

    It’s important to note that you’ll want to keep your old startup disk to avoid losing any important data. With this quick and easy process, you’ll be able to see a noticeable difference in how quickly your iMac boots up.

    Hold Down Option Key to Access Startup Manager

    If you’re using a Mac with an SSD, it’s important to set it as the startup disk to ensure optimal performance. To do this, you’ll need to access the Startup Manager. Hold down the Option key as soon as you turn on your Mac to enter the Startup Manager.

    From there, select your SSD as the startup disk and your Mac will automatically boot from it every time you start up. This will also prevent any unwanted delays, as the SSD is much faster than a traditional hard drive. With the SSD as the startup disk, you’ll notice a significant improvement in your Mac’s overall speed and performance.

    So, give it a try and experience the benefits for yourself!

    Select Your New SSD as the Startup Disk

    When you install a new SSD for your computer, you may need to set it as the startup disk to ensure your system boots up from the newly installed drive. This means your computer will read the operating system and all the necessary files from your SSD, providing faster boot-up times and better overall performance. To set your SSD as the new startup disk, you’ll need to access your computer’s BIOS settings.

    Depending on your computer, you may need to press a specific key during startup to access these settings. Once you’re in the BIOS menu, locate the boot order settings and move your SSD to the top of the list. This ensures your computer will look for the operating system on the SSD first before trying to read it from other drives.

    Don’t forget to save your changes before you exit the BIOS settings. With your new SSD set as the startup disk, you’ll enjoy a much faster and more responsive computer.

    Conclusion

    In conclusion, cloning your iMac from HDD to SSD is like upgrading from a Pinto to a Tesla. You get to experience lightning-fast speeds, smoother performance, and improved overall functionality. And just like a Tesla, the cloning process may seem a bit complicated, but with the right tools and guidance, you can enjoy the ride in no time.

    So put on your driving gloves and let’s get started on cloning your iMac to an SSD!”

    FAQs

    What is the benefit of cloning an iMac from HDD to SSD?
    Cloning an iMac from HDD to SSD can improve its overall performance and speed. SSDs are faster than traditional HDDs, allowing for quicker boot-up times and faster app loading.

    How do I clone my iMac from HDD to SSD?
    You can clone your iMac from HDD to SSD by using software such as Carbon Copy Cloner or SuperDuper. Simply connect your SSD to your iMac, open the cloning software, and follow the step-by-step instructions provided.

    Do I need any additional equipment to clone my iMac from HDD to SSD?
    You will need a USB to SATA adapter to connect your SSD to your iMac. This adapter allows you to connect your SSD to your iMac via USB and transfer the data from your HDD to the SSD.

    Can I clone my iMac from HDD to SSD without losing any data?
    Yes, cloning your iMac from HDD to SSD allows you to transfer all your data, including your operating system, applications, and files, to the new SSD without losing any data.