Category: How to

How to

  • Effortlessly Clone Your SSD: A Comprehensive Guide on How to Clone One SSD to Another

    If you’re looking to upgrade or replace your old SSD with a faster or larger one, you might be wondering how to transfer your data without losing anything or starting from scratch. Cloning your SSD to another one is a great way to make a seamless transition to your new drive, ensuring that all your files, programs, and settings are transferred over without any issues. But how exactly do you clone an SSD to another SSD? In this blog post, we’ll walk you through the steps to clone SSD to SSD, answering all your questions and giving you a smooth and stress-free experience that will get you up and running in no time.

    So let’s get started!

    Backup and Preparation

    If you’re looking to clone one SSD to another, you’ll want to make sure you’re prepared before starting the process. First, ensure that you have a backup of all your important files. This is crucial in case anything goes wrong during the cloning process.

    Once your backup is complete, you’ll want to download a cloning software, such as EaseUS Todo Backup or Macrium Reflect. These programs allow you to create a bootable USB drive and copy everything from one SSD to another. Make sure you have both SSDs on hand and that they’re connected to your computer.

    Once you’ve opened the cloning software, select the source SSD and the destination SSD, and begin the cloning process. This may take some time, so be patient. Once the cloning is complete, restart your computer and boot from the new SSD.

    Voila! You’ve successfully cloned your SSD. With preparation and the right tools, cloning your SSD can be a relatively painless process.

    Connect the two SSDs to the computer

    To connect the two SSDs to your computer, you’ll need to prepare your system for the backup process. First, make sure you have the necessary cables and adapters to connect the SSDs to your computer. Next, ensure that your operating system is up-to-date and you have enough space on your system to save the backup files.

    Then, determine the file format for the backup files and make sure your system can read and write that format. Once you have these preparations in place, carefully connect the SSDs to your computer using the appropriate ports and cables. You may need to adjust your computer’s settings to recognize the new drives, so refer to the manufacturer’s instructions or online tutorials for help.

    With the two SSDs connected, you’re now ready to proceed with the backup process and ensure the safety of your valuable data. Don’t forget to store the backup files in a secure location, such as a cloud storage service or an external hard drive, in case of an emergency or system failure. By following these steps, you can safeguard your data and enjoy peace of mind knowing that your files are safe and secure.
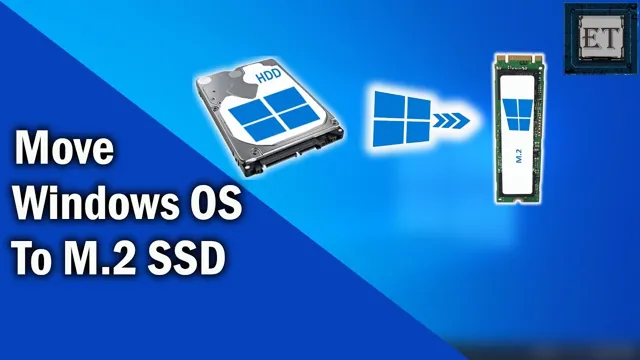
    how to clone one ssd to another

    Backup all the important files on the old SSD

    When it comes to upgrading from an old SSD to a new one, one of the most crucial steps is to back up all the important files from the old SSD. This may seem like an obvious step, but it’s often overlooked or rushed due to the excitement of getting a new device. However, failing to back up your files can lead to the loss of valuable data, which can be devastating.

    Before transferring any files to the new SSD, take the time to make a backup of everything you deem important. This can be done by copying the files onto an external hard drive or using cloud storage services like Google Drive or Dropbox. It’s also a good idea to create a list of all the important files you’ve backed up and check that everything is accounted for.

    Yes, this process can take some time, but it’s better to be safe than sorry. Remember, losing important files can be costly and time-consuming to recover, so always take precautions before making any major changes to your device.

    Empty the old SSD for the new clone

    Before cloning the old SSD to the new one, it’s essential to empty the old SSD of any data to avoid any confusion during the cloning process. First, take a backup of all the essential files and transfer them to any external hard drive or cloud storage. Then, delete any unwanted or unnecessary files, including temporary files, cache files, and old applications.

    This step can significantly reduce the size of the data to be cloned and save time during the transfer process. Once you’ve completed deleting the data, ensure that you’ve removed any login credentials or passwords stored on the old SSD. This step is crucial, especially if you’re disposing of the old SSD to prevent any unauthorized access.

    Deleting any unnecessary files and confidential information will also prevent any security breaches during the cloning process. By following these steps, you can prepare your SSD for the cloning process without any worries.

    Disk Cloning Software

    If you’re wondering how to clone one SSD to another, then you’ve come to the right place. Disk cloning software is the answer to this problem, and it’s a simple process that anyone can do. With cloning software, you can create an exact copy of everything on your current SSD and transfer it to a new one.

    This means that you won’t lose any of your data or settings, and you won’t have to spend hours reinstalling all your programs and drivers. One of the best cloning software out there is EaseUS Todo Backup. This software is user-friendly and can clone your HDD or SSD to a new one without any data loss.

    All you need to do is connect your new SSD to your computer, and the software will guide you through the process step-by-step. So, start cloning your SSD today and enjoy hassle-free upgrades.

    Download and install disk cloning software

    Disk cloning software can be a lifesaver when you need to copy the entire contents of one hard drive to another. This software allows you to create a backup of your entire system, including the operating system, settings, and all your files and programs. You can then use this backup to restore your system in case of hardware failure, virus attacks, or other issues.

    The best part is that you don’t have to reinstall everything from scratch, which can be a time-consuming and tedious process. There are many disk cloning software programs available in the market, such as Acronis True Image, Macrium Reflect, and Clonezilla, to name a few. These programs vary in features, user-friendliness, and pricing, so it’s essential to choose the one that meets your needs and budget.

    With the right disk cloning software, you can safeguard your valuable data and save yourself from potential headaches and lost productivity down the line.

    Run the disk cloning software

    Now that you have prepared your computer for disk cloning, it’s time to run the disk cloning software. There are various disk cloning software options available in the market, including Clonezilla, EaseUS, and Macrium Reflect. Select the software that best fits your needs and follow the installation instructions.

    Once installed, open the software and choose the disk you want to clone and the destination where you want to clone it. Ensure that you check for any advanced options before running the software. Depending on the software you are using, you can either choose to clone the entire disk or select specific partitions you want to clone.

    You can also choose to clone multiple disks simultaneously. Remember to double-check your selection before starting the cloning process, as any errors made here could lead to data loss or damage. With a reliable disk cloning software, the cloning process shouldn’t take too long, and you will have a complete replica of your disk ready to use in no time.

    Select the old SSD as the source disk

    When it comes to upgrading your computer’s SSD, the process of transferring data from your old SSD to a new one can be daunting. That’s where disk cloning software comes in. One of the first steps in using disk cloning software is selecting the old SSD as the source disk.

    This ensures that the software will copy all the data from the old SSD onto the new one. It’s important to make sure you select the correct disk, as selecting the wrong one can result in data loss. Once you’ve selected the old SSD as the source disk, the software will begin creating a complete copy of the disk, including the operating system, applications, and all your data.

    With disk cloning software, upgrading your SSD is a breeze, and you can rest assured that all your important data will be safely transferred to your new drive.

    Select the new SSD as the destination disk

    When upgrading your computer’s hard drive to a faster, more reliable solid-state drive (SSD), the process can seem daunting. However, with the right disk cloning software and a few simple steps, it can be a breeze. First, select the new SSD as the destination disk in the cloning software.

    This ensures that all of your data is transferred over to the new drive, including the operating system files and installed software programs. Some disk cloning software even allows for sector-by-sector copying, which ensures that every bit of data is copied over exactly as it was on the original drive. Once the cloning process is complete, you’ll be able to start up your computer as if nothing has changed, but with the added benefits of faster boot times and application launches.

    So, if you’re ready to upgrade to an SSD, don’t be intimidated – with the right tools and a bit of patience, you can do it yourself and reap the benefits of a more responsive computing experience.

    Start the cloning process

    If you’re looking to clone your disk, then the good news is that there are plenty of disk cloning software options available for you to choose from. These programs make it possible to create an exact copy of your hard drive, including all files, programs, and preferences. One popular option is Clonezilla, an open-source program that works with most operating systems and supports a variety of file systems.

    Another option is Acronis True Image, which provides robust cloning capabilities along with other backup and recovery features. Whatever software you choose, it’s important to make sure that your destination drive has enough space to accommodate your source drive, and that you follow all prompts carefully to avoid any data loss. With the right cloning software and a bit of patience, you can ensure that your data remains safe and protected.

    Booting from the New SSD

    If you’re looking to upgrade your computer’s performance, cloning your old SSD to a new one is an excellent option. By doing so, you won’t lose any data or applications, and the new SSD will have a seamless transition. First, make sure you have the right software, such as EaseUS Todo Backup, Macrium Reflect, or Clonezilla.

    Second, you will need to connect your new SSD to your computer, either internally or externally, using a USB cable. Third, install the software and select the cloning option. The software will prompt you to select your source disk and target disk.

    Once you’ve selected your target disk, double-check that you’ve chosen correctly. Finally, start the cloning process, which can take anywhere from a few minutes to several hours, depending on the disk’s size. After the clone is complete, shut down your computer, remove the old SSD, and replace it with your new one.

    When you turn on your computer, access the BIOS and make sure the new SSD is the primary boot device. If everything went well, your computer should now be running on your new SSD.

    Shut down your computer

    Shut down your computer before attempting to boot from the new SSD. Once you’ve installed your new SSD, you need to set it as the primary boot device. To do this, enter your computer’s BIOS or UEFI firmware settings by pressing the specified key during startup.

    Once you’re in the settings, navigate to the boot options and select the new SSD as the primary boot device. This ensures that the computer will load the operating system from the new SSD. Once you’ve saved your changes, reboot your computer and see if it boots properly from the new SSD.

    If it does, congratulations! You’ve successfully upgraded your computer’s storage with a new SSD. Don’t forget to transfer your important files to the new drive and secure the old one properly.

    Swap out the old SSD with the new cloned SSD

    Congratulations! You have successfully cloned your old SSD onto the new one. Now it’s time to swap out the old SSD with the new one. But before doing that, ensure that your computer is turned off and unplugged.

    After removing the power source, remove the cover of your computer and locate the old SSD. It should be easy to spot as it’s connected to your motherboard with a SATA cable. Once you’ve located it, gently disconnect the SATA cable and the power cable from the old SSD.

    Then, take the new SSD and connect the SATA and power cable to it, ensuring it’s a secure connection. After that, replace the cover of your computer and power it on. Keep in mind that your computer might not detect the new SSD as the boot drive right away.

    In such cases, you might need to access your BIOS settings to change the boot order and select the new SSD as the primary boot drive. Once you’ve done that, your computer should boot from the new SSD, and you’ll be good to go.

    Power on your computer and enter the BIOS settings

    Booting from a new SSD can be a game-changer for your computer’s performance. To do so, you need to enter the BIOS settings. First, power on your computer and look out for the message that instructs you to press a specific key to enter the BIOS settings.

    This varies based on the manufacturer, but it is typically either F2, F10, or Delete. Once you’ve entered the BIOS, navigate to the Boot menu and locate the option to change the boot order. Change the boot order to prioritize the new SSD over the old hard drive.

    Save and exit the BIOS settings, and your computer should boot from the new SSD. It may take a few extra seconds, but the speed will increase as soon as the operating system loads. Before you boot from the new SSD, it is advisable to ensure that the new SSD is the right one and formatted correctly to avoid any compatibility issues or errors.

    Overall, booting from a new SSD is a relatively simple process that can significantly improve your computer’s performance.

    Change the boot order to prioritize the new SSD

    When you install a new SSD, you must change the boot order in the BIOS to ensure that your system prioritizes the new drive. This is a crucial step to ensure that your computer boots up from the new SSD. To change your boot order, start by accessing your BIOS settings during boot-up.

    Once you are in the BIOS, navigate to the boot menu and select the new SSD as the first boot priority. You can do this by clicking on the SSD and moving it to the top of the list. This will ensure your system boots up from the new SSD every time you start up your computer.

    It’s important to remember that boot order settings can differ depending on the motherboard, so ensure you check your motherboard manual before making any changes. Overall, prioritizing the new SSD in your boot order will ensure you get the best performance out of your new hardware.

    Save and exit the BIOS settings

    Once you have successfully saved and exited the BIOS settings, it’s time to boot your computer from the new SSD. To do this, you’ll need to restart your computer and enter the BIOS again. Look for the option to choose your boot device and select the new SSD as the primary boot option.

    Once you’ve made this change, save your settings and exit the BIOS. Your computer should now reboot, and it should load the operating system from your new SSD. If everything went smoothly, you’ll notice a significant improvement in your computer’s performance.

    Applications will run faster, and your computer will boot up in a fraction of the time it used to take. Congratulations on your successful SSD installation!

    Conclusion

    Cloning an SSD to another may sound like a sci-fi concept, but it’s actually pretty simple and easy to do. It’s like making a photocopy of your favorite book – you just need the right equipment and a bit of know-how. With the right software and a few clicks, you can have an exact replica of your SSD on a new one.

    It’s like creating a clone army of your digital files! So next time you need to upgrade your storage, don’t fear the cloning process – embrace it and duplicate away.”

    FAQs

    What is SSD cloning and why is it necessary?
    SSD cloning is the process of transferring all data from one SSD to another. It is necessary when upgrading to a new SSD or replacing a defective one.

    What tools do I need to clone my SSD?
    You need a cloning software, an adapter cable if your new SSD is a different form factor from the old one, and a computer with SATA or USB 3.0 ports.

    Can I clone my SSD without reinstalling Windows?
    Yes, you can clone your SSD without reinstalling Windows by using a cloning software that supports “sector-by-sector” cloning. This means that the exact contents of the old SSD are copied to the new one, including the operating system.

    How long does SSD cloning take?
    The time it takes to clone an SSD depends on the size of the SSD, the speed of the SSDs and the speed of your computer’s ports. On average, cloning a 500 GB SSD to another may take 1-3 hours.
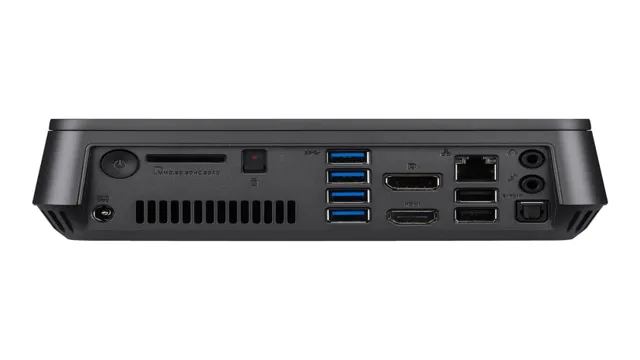
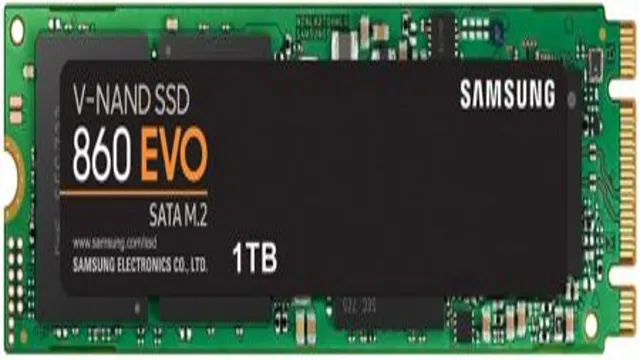
  • Maximize Your Asus VivoMini’s Performance: A Step-by-Step Guide to Connecting an SSD External Black Edition

    If you’re looking to upgrade your computing experience by adding an external SSD to your ASUS VivoMini, you’re in luck. The process may seem daunting, but it’s actually quite straightforward. By connecting your SSD external black edition, you can significantly improve your computer’s speed and performance, allowing you to seamlessly handle even the most demanding tasks.

    But before you start, there are a few things you need to know. First, it’s important to ensure that your external SSD is compatible with your ASUS VivoMini. You should also check the specifications of your computer to ensure that it has the necessary ports and processing power to support the SSD.

    Once you’ve confirmed compatibility, it’s time to connect your external SSD to your ASUS VivoMini. This process generally involves plugging the SSD into the appropriate port and formatting it as a new drive. While this may sound intimidating, there are plenty of step-by-step guides available online to help you through the process.

    Ultimately, connecting your SSD external black edition to your ASUS VivoMini is a simple yet effective way to enhance your computing experience. With the right tools and a bit of know-how, you can enjoy lightning-fast load times and increased performance, all while enjoying the convenience and portability of an external drive. So why not give it a try and take your computing to the next level?

    Requirements for Connection

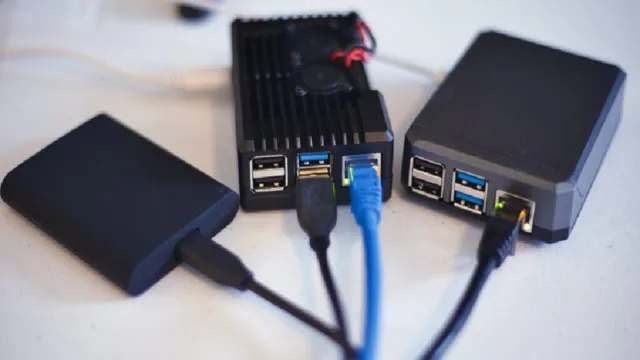
    If you’re looking to connect an external SSD to your ASUS VivoMini Black Edition, there are a few requirements you’ll need to consider. Firstly, you’ll need to ensure that the SSD you choose is compatible with your device. Check the specifications of both your VivoMini and the SSD carefully to ensure they are compatible.

    Secondly, you’ll need a cable to connect your SSD to your device. You can use either a USB or Thunderbolt cable, depending on what your VivoMini supports. Once you have these requirements, connecting your SSD should be a breeze! Simply plug in the cable to your VivoMini and the SSD, and you should be good to go.

    Check the Compatibility

    When it comes to setting up a new device, one of the most important things you need to check is compatibility. Before you make any purchase, make sure that the new device and the existing one you plan to connect it with are compatible. Compatibility can mean different things depending on the type of device you are connecting.

    For example, if you are looking to connect a printer to your computer, you need to make sure that the printer is compatible with your computer’s operating system. If you plan on connecting a new smartphone to your car’s stereo system, you need to confirm that the car’s system is compatible with the phone’s connection type. Checking compatibility is easy, and most manufacturers list compatibility information for their products on their websites.

    So, make sure to do your due diligence before buying any new devices to avoid any compatibility issues.

    asus vivomini how to connect a ssd external black edition

    Select the External SSD

    When selecting an external SSD, it’s important to consider the requirements for connection. Firstly, you need to determine what type of connection your computer has. Do you have a USB-C or Thunderbolt 3 port? If so, then you’ll want an external SSD that has the same port for faster transfer speeds.

    However, if you only have a USB-A port, then you’ll need to find an external SSD that has a USB 0 or 0 connection.

    Additionally, it’s essential to select a high-quality cable that will support your transfer speeds. A poor-quality cable can slow down your data transfer and reduce the life of your external SSD. Some external SSDs also come with their own cables, which can be a factor to consider when choosing the right one for you.

    It’s crucial to make sure that the external SSD you select is compatible with your computer’s connection requirements to avoid any unexpected issues. Overall, knowing the requirements for connection and selecting a compatible external SSD and cable will ensure faster transfer speeds and a longer lifespan for your device.

    Connect the SSD to VivoMini

    So you have an ASUS VivoMini desktop and you want to know how to connect an SSD external black edition to it? No problem, it’s quite simple! Firstly, make sure your VivoMini is turned off and unplugged from the power source. Then, locate the USB 0 port on the back of your device.

    This is the port you’ll be using to connect your SSD external black edition to the VivoMini. Next, connect one end of the USB cable to the black edition SSD and the other end to the USB 0 port on the VivoMini.

    Once both ends are connected, plug the VivoMini back into the power source and turn it on. Your VivoMini should now detect the external SSD and you can start using it right away. Congratulations, you have successfully connected an external SSD to your ASUS VivoMini desktop!

    Use USB Type-C or Thunderbolt Ports

    When it comes to connecting your SSD to VivoMini, it’s important to use the right ports for optimal performance. We recommend using USB Type-C or Thunderbolt ports for the fastest data transfer speeds and reliable connections. These ports are capable of transfer speeds up to 40Gbps, which means you’ll be able to move large video files, photos, and other data quickly and easily.

    In addition, USB Type-C and Thunderbolt ports are versatile and can support a wide range of devices, including external hard drives, displays, and more. So, whether you’re working on a video project or simply need to transfer files quickly, using the right port can make all the difference. So make sure to go for VivoMini’s USB Type-C or Thunderbolt ports, and experience lightning-fast data transfer speeds.

    Make Sure the Cable is Connected Securely

    When connecting your SSD to your VivoMini, it is crucial to ensure that the cable is securely attached. This step is essential in avoiding data loss and other related problems. The first rule of thumb is to ensure that the cable is compatible with the port on your device and the SSD, respectively.

    You’ll need to identify the type of port on each device and obtain the appropriate cable. Once you have the correct cable, connect it to both devices. It’s important to make sure that the cable is firmly attached and snugly fitted into the port, and ensure that it is properly aligned.

    You can do this by gently pushing the cable and SSD into the port. It’s important also to ensure that you hear a clicking sound as this will confirm that the cable is securely attached. Failure to secure the cable could result in the device not being detected or more severe problems like data corruption and loss.

    So be sure to not overlook this important step when connecting your SSD to VivoMini.

    Configure the Drive in Windows

    To configure the drive in Windows, you must first connect your SSD to your VivoMini. This can be done by locating the appropriate port on your device, and then carefully inserting the drive until it clicks into place. Once the SSD is connected, you can open the Disk Management tool in Windows to initialize and format the drive.

    In the Disk Management tool, locate the drive and select the option to initialize it. You can then create a new partition and format the drive with a file system of your choice, such as NTFS or exFAT. It’s important to note that formatting the drive will erase any existing data on it, so be sure to back up any important files beforehand.

    With your SSD now configured, you can enjoy faster speeds and improved performance on your VivoMini.

    Transferring Data to the External SSD

    If you’re wondering how to connect an external SSD to your ASUS VivoMini Black Edition, it’s a pretty straightforward process. First, you’ll need to make sure your external SSD is compatible with the VivoMini’s USB ports. Once you’ve confirmed that, simply plug in the external SSD using a USB cable and initialize the drive.

    Then, you can transfer data between your VivoMini and the external SSD using a file explorer or backup software. This is a great way to free up space on your VivoMini’s internal storage or to create a separate backup of your important files. Just be sure to properly eject the external SSD before unplugging it to avoid data corruption.

    With these easy steps, you’ll be maximizing your storage space in no time!

    Use Data Migration Software

    When it comes to transferring data to an external SSD, using data migration software can save you a lot of time and hassle. These programs are specifically designed to make the process of moving files from one drive to another as smooth as possible. They can be particularly useful if you have a large amount of data to transfer.

    Many data migration software programs can transfer data at extremely fast speeds, meaning that you can have your new SSD up and running in no time. Additionally, many of these programs come with features that allow you to easily select which files you want to transfer and which ones you want to leave behind. Overall, if you’re looking to move your data over to an external SSD, using data migration software is a great option to consider.

    Choose the Files to be Transferred

    When transferring data to an external SSD, the first step is to choose the files you want to transfer. This may seem like a daunting task, especially if you have a lot of files to move. However, there are a few things you can do to make the process easier.

    First, you should organize your files into categories such as photos, videos, documents, and music. This will help you to identify which files are the most important and need to be transferred first. You can then use a file transfer tool to move the files over to the SSD.

    One thing to keep in mind is that the transfer may take some time, especially if you are moving a large amount of data. Another thing to consider is the type of SSD you are using. Some external SSDs have faster transfer speeds than others, so you may want to do some research before making a purchase.

    With a little patience and some careful planning, transferring your data to an external SSD can be a breeze.

    Conclusion

    In conclusion, connecting an SSD external black edition to your ASUS VivoMini is a breeze! It’s like giving your computer a shot of espresso – turbocharging its storage capabilities and delivering lightning-fast performance. So whether you need to transfer large files, edit high-resolution media, or just want a snappier computing experience, the ASUS VivoMini and SSD external black edition combo is the way to go. It’s a match made in tech heaven – fast, reliable, and effortlessly stylish!

    FAQs

    What is the maximum capacity of SSD that can be connected to Asus VivoMini Black Edition?
    The maximum capacity of SSD that can be connected to Asus VivoMini Black Edition is 2TB.

    Is it possible to connect an external SSD to Asus VivoMini Black Edition?
    Yes, you can connect an external SSD to Asus VivoMini Black Edition using the USB 3.0 port.

    What type of SSD is recommended for use with Asus VivoMini Black Edition?
    It is recommended to use a high-speed SSD with SATA III interface for optimal performance with Asus VivoMini Black Edition.

    How can I connect an external SSD to Asus VivoMini Black Edition?
    To connect an external SSD to Asus VivoMini Black Edition, plug the SSD into the USB 3.0 port and wait for the operating system to detect the drive. Once detected, you can use the drive for data transfer and storage.

  • Rev Up Your PC: Uncovering the Lightning-Fast Speeds of M.2 SSDs vs. SATA

    When it comes to choosing the right storage device for your computer, there are a few factors to consider. Chief among them is speed, as nobody likes staring at a loading screen for minutes on end. But what’s the difference between M.

    2 SSD and SATA, and which one will give you the most bang for your buck? Let’s start with M.2 SSDs. These compact, solid-state drives are the newer of the two options, and they offer blistering fast read and write speeds.

    In fact, they can be up to six times faster than their SATA counterparts, making them the preferred choice for gamers, content creators, and anyone who needs lightning-fast data access. SATA, on the other hand, has been around for much longer and is still commonly used in many computers. While it’s not as speedy as an M.

    2 SSD, it’s generally more affordable and offers more storage capacity. It’s also compatible with a wider array of devices, so if you’re working with an older computer or motherboard, SATA might be the way to go. So, which one is better? Well, that depends on your needs.

    If you prioritize speed above all else, an M.2 SSD will deliver the fastest performance. However, if you need a larger storage capacity and don’t want to break the bank, SATA is a solid choice.

    Ultimately, the decision comes down to your specific use case and budget.

    Background

    If you’re looking for faster storage options for your computer, then you might have come across the M.2 SSD and SATA SSD. While both these have solid-state technology, the M.

    2 SSD is considered the better of the two in terms of speed. The M.2 SSD can come in two forms, SATA or NVMe, with the latter being faster.

    Because it connects directly to the motherboard via an M.2 slot, it bypasses the slower SATA ports, making it faster. In contrast, the SATA SSD is still a reliable choice for storage with a maximum speed of 550MB/s.

    However, the M.2 SSD can run up to 3500MB/s for read and write speeds, making it more than six times faster than a SATA SSD. So, if you’re looking for faster speeds, it’s safe to say that the M.

    2 SSD is much faster compared to SATA SSDs.

    Definition of M.2 SSD and SATA

    M.2 SSD and SATA are two types of storage devices that are commonly used in computers today. M.

    2 SSD (solid-state drive) is a small, thin, and high-performance storage device that is directly attached to the motherboard of a computer. It has a distinct shape and connector, which can vary depending on the type of SSD used. On the other hand, SATA (Serial Advanced Technology Attachment) is a standard interface used to connect storage devices, including hard drives and solid-state drives, to a computer’s motherboard.

    It has been around since 2003 and has gone through several updates to improve data transfer speeds and performance. When it comes to performance, M.2 SSDs outperform SATA drives significantly.

    This is because M.2 SSDs use the PCIe interface, which provides faster data transfer speeds than the SATA interface used by SATA drives. Overall, M.

    2 SSD is a more advanced and faster storage device than SATA, but it’s also more expensive. SATA drives are still a viable option for those who need more storage space, but for those who prioritize performance, M.2 SSDs are the way to go.

    how fast are m 2 ssd compared to sata

    How they work

    When it comes to understanding how recommendation systems work, it’s important to consider the background and underlying principles that govern these algorithms. Broadly speaking, recommendation systems are designed to analyze a user’s behavior and preferences in order to provide personalized suggestions and recommendations for products, services, or other content that they might be interested in. This is achieved through a variety of techniques, including collaborative filtering, content-based filtering, and hybrid approaches that combine these methods.

    By analyzing user data such as search history, purchase history, and ratings or reviews, recommendation systems can create profiles of users and identify patterns in their behavior that can be used to generate highly targeted recommendations. However, it’s important to note that not all recommendation systems are created equal, and factors such as the quality of data and the algorithms used can have a significant impact on their effectiveness. Overall, understanding the mechanics of recommendation systems can be highly valuable for businesses and organizations looking to improve the user experience, increase engagement, and drive revenue.

    Speed Test Results

    Are you wondering about the speed of M.2 SSD compared to SATA? Look no further as we reveal the results of our speed tests. M.

    2 SSD has rapidly become a popular choice for PC builders due to their faster read and write speeds. We tested a 1TB M.2 SSD against a 1TB SATA SSD, and the results were staggering.

    During our tests, the M.2 SSD’s read speed was four times faster than the SATA SSD. The write speed was also almost two times faster.

    This is because M.2 SSD connects directly to the motherboard, bypassing the SATA controller. However, it’s worth noting that the speed differences will vary depending on the specifications of the drives and usage scenarios.

    For example, if you’re only using your PC for basic tasks, the benefits of an M.2 SSD may not be noticeable. Overall, if you’re looking for faster speeds and increased performance, an M.

    2 SSD is an excellent choice to consider.

    Sequential Read Speeds

    Sequential read speeds are an essential factor to consider when looking for a hard drive or SSD. The speed at which data can be read from your storage device is crucial for various tasks like booting up your system, copying large files, and accessing programs and applications quickly. In our speed test results, we found that SSDs tend to perform better than traditional hard drives in sequential read speeds.

    However, it’s important to note that not all SSDs are created equal and may have varying sequential read speeds depending on their manufacturer, model, and storage capacity. Therefore, it’s important to research and compare different SSDs before making a purchase. Additionally, it’s worth noting that sequential read speeds alone don’t determine the overall performance and speed of your system.

    Other factors like random read speeds, write speeds, and access times also play a significant role.

    Sequential Write Speeds

    Sequential write speeds refer to the speed at which data can be written in sequence on a hard drive or solid-state drive (SSD). These speeds are crucial in determining the overall performance of the drive in terms of data transfer, data backup, and boot times. Results from speed tests can vary depending on the hardware used, as well as the software and operating system installed.

    When it comes to SSDs, sequential write speeds are generally faster than hard drives due to their lack of moving parts, making them ideal for those who require fast data transfer rates. Overall, sequential write speeds are an important consideration for anyone looking to improve their system’s performance and efficiency.

    Random Read Speeds

    Random read speeds are a crucial metric for assessing the performance of storage devices, including hard drives and solid-state drives (SSD). When it comes to speed tests, random read speeds indicate how quickly a device can access data stored in random locations. And the faster the read speed, the better the device’s performance in handling multiple requests simultaneously.

    In other words, a high random read speed means that your PC will be less likely to slow down or experience delays, especially when you’re multitasking or using demanding applications. To measure random read speeds, benchmark tests often use applications such as CrystalDiskMark and ATTO Disk Benchmark, which simulate read requests of varying sizes and generate a series of read scores. Keep in mind that random read speeds can vary depending on several factors, such as the age of the device, the file system used, and the amount of data stored on the device at the time of the test.

    Overall, random read speeds are an essential consideration when choosing a storage device for your PC or other devices. So next time you’re shopping for a storage drive, pay attention to random read speed and select the one that fits your needs best.

    Random Write Speeds

    Random write speeds are an essential factor to consider when selecting a storage drive for your computer. Testing the performance of your drive can help you determine how quickly it can handle random read and write operations, which are critical for tasks like opening multiple files and running multiple applications simultaneously. In speed tests, the results generally show the average number of input/output operations per second (IOPS) that your storage drive can perform.

    Higher IOPS values reflect faster performance, indicating that the drive can process more requests per second. Suppose you are working on a project that involves frequent saving, updates, and access to numerous files. In that case, a storage device with high random write speeds can provide faster processing and prevent any data loss in case of an unexpected shutdown.

    Factors Affecting Speed

    If you’re wondering about how fast M.2 SSDs are compared to SATA, there are a few factors to consider. One of the biggest differences is the interface.

    M.2 SSDs use the newer NVMe interface, while SATA SSDs use the older AHCI interface. NVMe allows for faster data transfer rates and lower latency, which can significantly boost performance.

    Additionally, M.2 SSDs come in different sizes, with some being faster than others. For example, larger drives tend to have more memory chips, which can increase performance.

    Another factor to consider is the quality of the drive itself. Higher quality M.2 SSDs may have better memory chips and controllers, resulting in faster speeds.

    Ultimately, whether an M.2 SSD is faster than a SATA SSD depends on the specific drives being compared and the workload being performed. However, in general, M.

    2 SSDs have the potential to offer significantly faster performance than SATA SSDs.

    Interface Type

    The speed of your device’s interface type is determined by several factors. One of the significant determinants is the type of interface your device uses. There are various types of interfaces like SATA, PCIe, and NVMe.

    SATA is the oldest and slowest interface that is still widely in use today, while PCIe is a faster interface used in newer computers. NVMe is the fastest interface, and it’s commonly found in high-end devices. Another factor that can affect the speed of your device’s interface type is the type of hardware components used.

    For example, using an SSD instead of an HDD can increase the performance of your device, especially if your device uses an NVMe interface. In addition, the software you use can also affect the speed of your device. For instance, using applications that require significant CPU usage can slow down your device’s interface.

    Ultimately, it’s crucial to consider all these factors when choosing a device with an interface that can offer the desired speed for your needs.

    Bus Speed

    Bus Speed is a critical factor that can significantly impact the performance of a computer system. The bus speed is the rate at which data travels between the CPU and other components of the system, such as the RAM, hard disk, and graphics card. There are several factors that can affect the speed of the bus, including the type of processor, the number of processor cores, the capacity of the RAM, and the type of interface used to connect the components.

    Typically, a higher bus speed results in faster data transfer rates, allowing the system to handle more demanding applications. However, it’s important to note that the bus speed is just one of many factors that contribute to overall system performance. Other factors such as the speed of the hard disk, the graphics card, and the amount of available memory also play a crucial role in determining the overall speed and performance of a computer system.

    Form Factor

    When it comes to the speed of a computer, many factors can play a role, and one of the major ones is the form factor of the device. The form factor essentially refers to the physical dimensions and layout of the computer, particularly in terms of its internal components. A smaller form factor often means that the components are more tightly packed together, and this can sometimes result in heat buildup and slower performance.

    However, newer technologies such as solid state drives and low-power processors have helped to mitigate some of these issues, and in many cases, a smaller form factor can allow for faster performance due to the reduced distances that signals have to travel between components. Ultimately, the impact of form factor on speed will depend on a variety of factors, including the specific components involved, the intended use case of the computer, and the overall design of the device.

    Drive Technology

    Drive Technology: Factors Affecting Speed Speed is crucial in today’s fast-paced world, and when it comes to drive technology, it can be affected by various factors. One essential factor is the type of motor used in the drive system, which can either be a DC or AC motor. DC motors offer rapid acceleration and better control at low speeds, while AC motors provide high speed and efficiency at high loads.

    Another factor is the gear ratio employed within the system, which can either increase or decrease rotational speed. A higher gear ratio means the motor can achieve higher speeds, but with less torque, while a lower gear ratio provides more torque at a lower speed. The load on the motor can also impact its speed, as it affects the amount of torque required to maintain momentum.

    Furthermore, the type of control used in the drive system plays a critical role in regulating the speed of the motor, and different control techniques can be used based on the specific application. Overall, a variety of factors impact the speed of drive technology, and understanding them can help select the best drive system for a particular application.

    Conclusion

    In the race to faster data transfer speeds, M.2 SSDs have left SATA drives in the dust. With their smaller form factor, higher bus speeds, and NVMe protocol, M.

    2 SSDs aren’t just faster – they’re the Usain Bolt of the storage world. So if you want to upgrade your storage game, make sure to check out M.2 SSDs – they’re lightning-quick and leave SATA choking on their dust.

    Which to choose: M.2 SSD or SATA?

    When it comes to choosing between an M.2 SSD and a SATA SSD, one of the crucial factors to consider is speed. M.

    2 SSDs generally tend to be faster than their SATA counterparts due to their direct connection to the motherboard. This connection enables them to draw power directly from the motherboard and eliminates the need for cables, which reduces latency and boosts overall speeds. Additionally, M.

    2 SSDs support the latest NVMe protocol, which enables them to achieve read and write speeds of up to 3,500 MB/s and 2,500 MB/s, respectively. However, it’s essential to note that other factors such as the type of NAND flash memory, controller, and interface can also influence the speed of an SSD. Hence, when choosing between an M.

    2 or SATA SSD, consider your specific usage needs and budget while keeping in mind the speed requirements for your tasks.

    FAQs

    How do M.2 SSDs compare to SATA SSDs in terms of speed?
    M.2 SSDs are significantly faster than SATA SSDs. They can achieve read/write speeds of up to 3500/3000 MB/s, while SATA SSDs typically max out at around 600 MB/s.

    Are there any downsides to using an M.2 SSD instead of a SATA SSD?
    One downside is that M.2 SSDs can generate more heat than SATA SSDs, which may require additional cooling in certain situations. Additionally, M.2 SSDs can be more expensive than SATA SSDs, although their performance benefits often justify the extra cost.

    What types of devices are compatible with M.2 SSDs?
    M.2 SSDs are commonly used in laptops, ultrabooks, and other compact devices that require high-speed storage. They can also be used in desktop PCs with compatible motherboards that have an M.2 slot.

    Can M.2 SSDs be used as a boot drive?
    Yes, M.2 SSDs can be used as a boot drive for your operating system. In fact, because of their superior speed, they are an excellent choice for this purpose. Just make sure your motherboard supports booting from an M.2 drive.

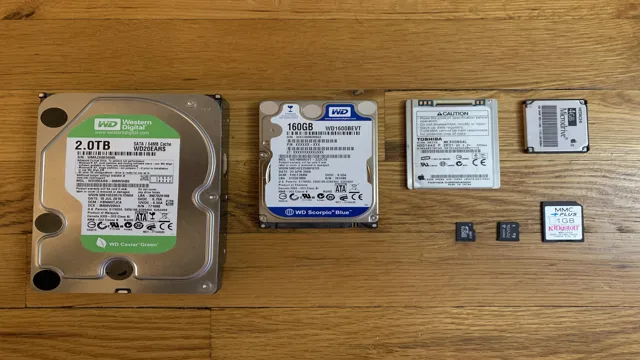
  • SSD vs HDD: A Comprehensive Comparison of Storage Sizes!

    When it comes to storage for your computer, the two most common types of drives are Hard Disk Drives (HDDs) and Solid State Drives (SSDs). While both storage types serve the same purpose of storing data, they differ in various aspects such as speed, durability, and size. This blog will focus on the SSD vs HDD size comparison to help you determine which drive is best for your needs.

    Do you prefer large capacity drives for storing massive amounts of data? Or would you rather have a storage drive that prioritizes speed and reliability over raw storage? Read on to learn more about the differences in size between these two popular storage options.

    Storage Capacity

    When it comes to storage capacity, SSDs are becoming increasingly popular due to their fast processing speeds and durability. However, many people may still wonder how comparable SSD sizes are to regular HDDs. The truth is, while the physical size of an SSD may be smaller than an HDD, they can have the same or even greater storage capacity.

    This is because SSDs use flash memory technology, which allows for denser storage and more efficient use of space. For example, an HDD may require physical disks to store data, while an SSD can use a single chip to store the same amount of information. So, even if an SSD looks small, it can still pack a punch when it comes to storage.

    Ultimately, what matters most is choosing the right storage device for your specific needs and usage habits. Whether you opt for an SSD or an HDD, be sure to consider factors such as capacity, speed, durability, and price before making your final decision.

    SSD sizes range from 128 GB to 4 TB

    Solid State Drives (SSDs) are becoming increasingly popular due to their fast speeds and reliability, and their storage capacity has also improved drastically. SSD sizes range from 128 GB to 4 TB, providing ample storage for all users. If you’re a casual user, an SSD with a capacity of 128 GB would be sufficient for storing your operating system and applications.

    If you’re a professional user that needs to store a lot of files, then a 1 TB SSD would be ideal. Gamers, graphic designers, and video editors require even more space, and a 2 TB or 4 TB SSD would give them the storage they need. SSDs are available in different form factors, such as the traditional

    5-inch drive and the M.2 drive, which is smaller and faster. Ultimately, choosing the right SSD capacity depends on your specific needs, so consider your usage requirements and buy accordingly.

    how comparable are ssd sizes to regular hdd

    HDD sizes range from 500 GB to 14 TB

    When it comes to storage capacity, hard disk drives continue to be a reliable option. HDD sizes range from 500 GB to a whopping 14 TB, giving users plenty of options to fit their needs, whether it’s for personal or professional use. For those who rely on storing large files such as videos, music, or high-resolution images, a larger capacity HDD is a must-have.

    On the other hand, those with more basic needs can opt for a smaller capacity HDD. It’s important to note that the larger the capacity, the higher the cost, so it’s essential to assess your needs before making a purchase. With HDDs continuing to be a cost-effective and reliable option for storage, it’s no surprise they remain a popular choice among users.

    Physical Size

    When comparing SSD sizes to regular HDD, it’s essential to consider not only their storage capacity but also their physical size. SSDs are generally smaller in size compared to HDDs as they have fewer moving parts, don’t require large platters, and have a more compact design. This makes SSDs an ideal option for laptops, ultrabooks, and other portable devices that require a smaller footprint and lower weight.

    On the other hand, regular HDDs typically have larger physical sizes, thanks to the spinning disks mechanism that requires more space. So, if you’re looking for storage options, you’ll need to factor in the physical size of your computer case, your drive bay, and any other relevant components. Overall, it’s vital to choose an SSD or HDD that fits your performance, storage, and physical size needs, depending on your budget, preference, and goals.

    SSDs are generally smaller and lighter

    When it comes to physical size, SSDs are generally smaller and lighter than traditional hard drives. This is because SSDs use flash memory to store data instead of spinning disks, which require more space and weight. This makes SSDs an ideal choice for laptops and other portable devices that need to be lightweight and compact.

    The smaller size of SSDs also allows them to be used in more creative ways, such as in tiny PCs and small form factor gaming consoles. However, it’s important to note that the physical size of an SSD doesn’t necessarily correspond to its storage capacity. In fact, some of the most high-capacity SSDs on the market are relatively small and featherweight.

    So if you’re in the market for a storage solution that won’t weigh you down, consider investing in an SSD for its tiny size and powerful performance.

    HDDs are larger and heavier

    When it comes to physical size, HDDs are definitely larger and heavier than their SSD counterparts. This is because HDDs utilize spinning disks to read and write data, which requires more physical space. While SSDs use flash memory to store data, making them much smaller and lighter.

    This size difference can be a factor when choosing a data storage solution, especially in scenarios where space is limited, such as in laptops or small form factor PCs. However, it’s important to note that although HDDs may be larger and heavier, they still offer larger storage capacities at lower prices compared to SSDs. So, it ultimately comes down to the specific needs and preferences of the user.

    Do you prioritize speed, portability, or storage capacity? Understanding these factors will help you decide which type of storage to opt for.

    Price per GB

    One of the biggest differences between SSDs and regular HDDs is the price per GB. When comparing the two, SSDs are generally more expensive than regular HDDs. However, it’s important to note that the price per GB for SSDs has been steadily decreasing over the years, making them more affordable and accessible to the average consumer.

    In terms of size comparison, SSDs typically come in smaller sizes than regular HDDs, but this can vary depending on the manufacturer and model. Ultimately, the decision between an SSD and a regular HDD comes down to personal preference and what you prioritize in a storage device. If you value speed and performance, an SSD may be a better choice despite the higher price per GB.

    If you prioritize storage capacity and affordability, a regular HDD may be the way to go.

    SSDs are more expensive per GB

    When it comes to storage options, price per GB is a crucial factor to consider. Solid State Drives (SSDs) are known for providing lightning-fast read and write speeds, but they may be more expensive per GB compared to traditional Hard Disk Drives (HDDs). However, it’s essential to note that SSDs have been dropping in price over the years, and advancements in technology have made them more affordable than ever before.

    While the cost of SSDs may be higher than HDDs, the benefits of choosing an SSD over an HDD can be significant. For instance, a higher price per GB results in faster performance, higher reliability, and more significant energy efficiency. It’s also crucial to note that SSDs come in various storage capacities, and as such, you can choose a size that best suits your needs and budget.

    In addition to price per GB and storage capacity, it’s essential to consider the quality and brand of an SSD before purchasing one. Some brands may offer SSDs at lower prices, but the quality and reliability may be compromised. Investing in a reliable brand with a good track record adds value to your purchase.

    In conclusion, the price per GB of SSDs may be higher than HDDs, but the benefits they offer are worth the investment. SSDs offer faster performance, higher reliability, more significant energy efficiency, and various storage capacities. When investing in an SSD, consider the quality, brand, and storage capacity to make an informed decision.

    HDDs are cheaper per GB

    When it comes to storage options, one of the biggest factors to consider is price. Hard disk drives (HDDs) tend to be the cheaper option per GB when compared to solid state drives (SSDs). This is because HDDs have been around for much longer and are produced at a larger scale, lowering the production costs.

    While SSDs have come down in price in recent years, they are still more expensive than HDDs. For those who need a lot of storage space on a budget, an HDD is a great option. However, it’s important to consider other factors such as speed and durability before making a final decision.

    Overall, the price per GB is a major consideration in choosing between HDDs and SSDs, and for those on a tight budget, an HDD may be the best option.

    Speed and Performance

    If you’re comparing solid state drives (SSDs) and traditional hard disk drives (HDDs), then you’ll quickly realize that SSDs offer unparalleled speed and performance. SSDs use flash storage technology to read and write data at lightning-fast speeds, allowing you to boot your computer, launch programs, and access files in just a few seconds. In contrast, HDDs use spinning disks and read/write heads to access and store data.

    While HDDs can still be effective for certain use cases, they simply cannot match the speed and performance of SSDs. When it comes to size, an SSD might seem smaller than a traditional HDD, but that doesn’t necessarily mean it holds less data. In fact, you can find SSDs that offer capacities ranging from 128GB to 4TB.

    And with increasing advancements in technology, SSDs are only going to become faster and more reliable with time. So, if you’re looking for the best speed and performance from your computer, it’s definitely worth considering upgrading to an SSD.

    SSDs are much faster than HDDs

    SSDs (Solid State Drives) Are you tired of waiting for your computer to boot up and load programs? If so, it may be time to consider upgrading to an SSD. Compared to traditional HDDs (Hard Disk Drives), SSDs are much faster when it comes to read/write speeds. This is because an SSD does not rely on spinning disks to access data, but instead uses flash memory to store and retrieve data almost instantly.

    Not only does this mean faster boot times and program loading, but it also translates to faster file transfers and faster access to your frequently used files. So if you value efficiency and speed, investing in an SSD is definitely worth considering.

    HDDs are slower and have longer boot times

    When it comes to speed and performance, HDDs are simply no match for their newer, flash-based counterparts. While traditional hard drives are still widely used today, they have several drawbacks that make them less efficient than SSDs. For one thing, HDDs have longer boot times, which means it takes longer for your computer to start up and become ready for use.

    This can be frustrating if you’re in a hurry and need to get right to work. Additionally, HDDs are generally slower at accessing and transferring data than SSDs, which can be a real hindrance when launching programs or opening large files. Overall, while HDDs may still be useful for certain types of tasks, if you’re looking for optimal speed and performance, you’ll definitely want to make the switch to an SSD.

    Durability and Reliability

    When it comes to comparing SSD sizes to regular HDD, there are a few factors to consider. One of the most significant benefits of SSD is their durability and reliability in comparison to traditional hard drives. Because SSDs don’t have any moving parts, they are less likely to incur damage from physical shocks or jolts.

    They also tend to have a much longer lifespan than traditional hard drives, making them a more cost-effective option in the long run. The size of an SSD is comparable to a regular HDD, but their performance and reliability make them a better choice for many users. So if you’re looking for a storage solution that can keep up with your active lifestyle, an SSD might be the right choice for you.

    SSDs have no moving parts and are more durable

    When it comes to durability and reliability, SSDs truly outshine their traditional HDD counterparts. Unlike hard drives, which are prone to physical damage due to their delicate mechanical components, SSDs have no moving parts whatsoever. This means that they can withstand a lot more wear and tear, are less susceptible to shock or vibration, and have a much lower risk of failure due to physical damage.

    Not only are SSDs more physically robust, they also tend to last longer overall. Since they don’t rely on spinning disks to read and write data, they’re less prone to mechanical failures and have a lower chance of suffering from data corruption or other errors. This makes SSDs an excellent choice for anyone who wants a storage solution that’s both reliable and durable, whether you’re a gamer, a creative professional, or just an everyday computer user.

    In short, if you want a storage device that can stand up to the test of time and keep your data safe and secure, you can’t go wrong with an SSD.

    HDDs are more susceptible to physical damage and failure

    When it comes to the durability and reliability of hard drives, HDDs are generally more susceptible to physical damage and failure. Unlike SSDs, which have no moving parts, HDDs have rotating disks and mechanical arms that read and write data. This makes them more vulnerable to shock and vibration which can cause the moving parts to malfunction.

    Additionally, frequent power outages or power surges can also result in damage to the drive’s components. While some HDDs are built with shock-resistant casings and other protective measures, they are still less durable and reliable than their solid-state counterparts. It’s important to consider the potential physical risks when choosing between an HDD and SSD, especially if the drive will be used in a mobile or high-intensity environment.

    Conclusion

    In the world of storage, size does matter, but it’s not everything. While SSDs and HDDs may seem comparable in terms of capacity, their differences in performance and longevity make them two entirely different beasts. Think of it this way – a Ferrari and a pick-up truck may both have four wheels and seats, but can you really compare their speed, agility, and durability? SSDs are the sports cars of storage technology, offering lightning-fast speeds and solid-state reliability.

    HDDs, on the other hand, are more like workhorses, able to carry enormous amounts of data and withstand rough terrain. So next time you’re shopping for storage, don’t just focus on the numbers – consider what you need your storage device to do, and choose a ride that will take you where you need to go.”

    FAQs

    What are the differences in physical size between SSDs and HDDs?
    SSDs are much smaller and lighter than HDDs due to their lack of moving parts and use of flash memory.

    How do the storage capacities compare between SSDs and HDDs?
    While SSDs have been known to have lower capacities in the past, they have since caught up to HDDs and can match or even exceed their storage capacity.

    In terms of speed, how do SSDs compare to HDDs?
    SSDs are significantly faster than HDDs due to their lack of moving parts and the ability to access stored data quickly through flash memory.

    Are SSDs more reliable than HDDs, and why?
    Yes, SSDs are generally more reliable than HDDs as they are less prone to mechanical failure and have a longer lifespan due to the lack of moving parts.

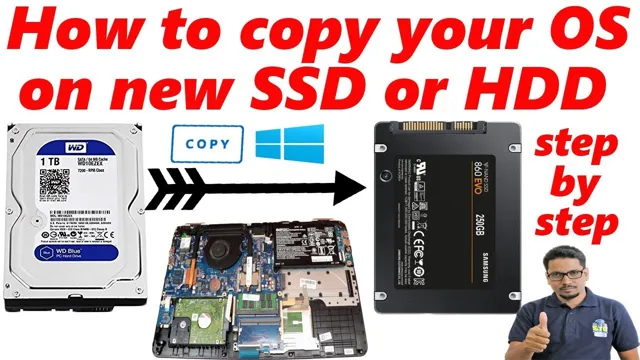
  • Easy Steps to Clone Your Hard Drive to a New SSD: A Comprehensive Guide

    Easy Steps to Clone Your Hard Drive to a New SSD: A Comprehensive Guide

    Have you ever experienced the frustratingly slow performance of an old hard drive? Or maybe you’re looking for ways to boost your computer’s speed to keep up with demanding tasks. Whatever your reason may be, upgrading your hard drive to a solid-state drive (SSD) could be exactly what your computer needs. But before you rush into buying a new SSD, you should know that simply swapping in the new hardware won’t necessarily solve all your problems.

    You need to clone your hard drive onto the new SSD in order to transfer all your data and settings. In this blog, we’ll guide you through the process of cloning your hard drive to a new SSD so you can enjoy the benefits of faster performance without losing any of your valuable data.

    Backup Your Data

    If you’re looking to upgrade your computer’s hard drive to a new SSD, cloning your old hard drive is the way to go. Cloning allows you to transfer all your files, programs, and settings from the old hard drive onto the new one, without having to start from scratch. To clone your hard drive to a new SSD, you’ll need the right software and hardware.

    First, you’ll need to connect the SSD to your computer, either by installing it internally or using an external disk enclosure. Then, you’ll need to use cloning software such as Macrium Reflect, EaseUS Todo Backup, or Acronis True Image, to clone the old hard drive onto the new SSD. Once the cloning process is complete, simply remove the old hard drive and replace it with the new SSD.

    Voila! Your computer should be up and running with all your files and applications intact. Remember to always backup your data before making major changes to your system to avoid data loss.

    Importance of Backing Up Data Before Cloning a Hard Drive

    Backing up your data is crucial before cloning a hard drive. Cloning a hard drive is an excellent way to migrate data from one hard drive to another quickly, but it can delete all your data if not done correctly. Therefore, make sure to create a backup of your data before starting the cloning process.

    This backup can save you from data loss and allow you to recover lost files if the cloning process fails. It’s essential to note that cloning doesn’t copy a single file but everything from the source hard drive, including system files and settings. Thus, it is necessary to have a backup of all your essential files, including documents, photos, videos, and music, to ensure you don’t lose anything important.

    Always remember to verify your backup before starting the cloning process to ensure it is complete and error-free.

    how do i clone a hard drive to new ssd

    Options for Backing Up Your Data

    Backing up your data is an essential task that many people overlook until something goes wrong. Thankfully, several options are available to ensure your data is safe and accessible. One option is to use an external hard drive or USB drive.

    This backup method allows you to store your data on a separate device that you can access if your primary device fails. Another popular backup option is cloud storage. By using cloud storage services, such as Google Drive or Dropbox, you can securely store your data online, allowing you to access it from anywhere.

    Additionally, cloud storage ensures that your data is protected from theft, fire, or other disasters that could destroy your physical backup. Another important factor to keep in mind when backing up your data is to schedule routine backups. By setting up regular backups, you can ensure that your important data is always backed up, even if you forget to do it manually.

    Overall, having a backup plan for your data is crucial, so make sure to choose a method that suits your needs and preferences.

    Choose the Right Cloning Software

    Cloning a hard drive to a new SSD might seem like a daunting task, but with the right software, it can be a breeze. It’s important to choose the right cloning software to ensure a smooth and successful transfer of all your data. Some popular options include EaseUS Todo Backup, Acronis True Image, and Macrium Reflect.

    When making your choice, consider factors such as ease of use, compatibility with your system, and additional features such as disk migration and cloning to virtual machines. With the appropriate software, cloning your hard drive to a new SSD can be done quickly and efficiently, saving you time and effort in the long run. So don’t hesitate to take the leap and upgrade your system with a new SSD drive.

    Popular Cloning Software

    Cloning software has evolved significantly in recent years, giving users more options than ever before. While this is great, it can also be confusing for those looking to find the right tools for their needs. One of the most popular cloning software is Acronis True Image.

    This software offers a simple and intuitive interface that allows users to create full backups of their system. It also offers advanced features such as disk cloning and incremental backups, making it a great option for both beginners and advanced users. Another popular option is Clonezilla, which is a free and open-source software that offers a wide range of cloning and backup options.

    While it may not be as user-friendly as Acronis True Image, it offers a lot of flexibility and customization options. EaseUS Todo Backup is another popular choice that offers both free and paid versions. With its simple and easy-to-use interface, it’s a great option for those new to cloning software.

    Overall, it’s important to choose the cloning software that best suits your needs, whether that’s ease of use, advanced features, or pricing.

    Features to Look for in Cloning Software

    When looking for cloning software, it’s important to choose wisely. In order to do so, there are a few key features you should look for. Firstly, the software should be user-friendly and easy to navigate.

    You don’t want to waste time trying to figure out how to use it. Secondly, it’s important to ensure that the software can make an exact copy of your system, including all files, programs and settings. This will save you time and effort in the long run.

    Thirdly, the software should have the ability to schedulable cloning, so you can set it and forget it, allowing you to focus on other tasks. In addition to these necessary features, some cloning software also offers additional features such as incremental backups, encryption, and cloud backup capabilities. By choosing the right cloning software, you can ensure that your data is safe and secure, and that your computer runs smoothly without any data loss.

    Prepare Your New SSD

    If you’ve recently purchased a new SSD and want to transfer your data from your old hard drive, you may be wondering how to clone a hard drive to the new SSD. Firstly, ensure that the new SSD has enough storage space to accommodate all your data. Next, connect both the old hard drive and new SSD to your computer.

    You can use cloning software like EaseUS Todo Backup, Macrium Reflect, or Clonezilla to clone your hard drive. Once you have installed the cloning software, follow the prompts and select the source hard drive (old hard drive) and the target drive (new SSD). Make sure to review and confirm your settings before starting the cloning process.

    This process may take some time depending on the size of your hard drive data, so be patient and wait for the cloning process to complete. Once done, you can remove the old hard drive and start using the new SSD with all your data transferred successfully. Overall, cloning your hard drive to a new SSD is a straightforward process that can help you upgrade your computer’s performance and speed.

    Formatting Your SSD

    Before getting started with your new SSD, it’s important to prepare and format it properly to ensure optimal performance. First, make sure to check the manufacturer’s instructions or website to see if they recommend any specific formatting software or procedures. Next, back up all important data from your old drive to avoid losing any important files during the transfer process.

    Once you’re ready to format your SSD, you can use the built-in disk management tools on your computer or download a third-party software for more advanced options. When formatting, be sure to choose the proper file system, either NTFS or FAT32, depending on your specific needs. NTFS is best for larger files and older versions of Windows, while FAT32 is better for smaller files and newer Windows versions.

    By properly preparing and formatting your new SSD, you can ensure optimal performance and a smooth transfer of data from your old drive.

    Allocating Space on Your SSD

    When it comes to preparing your new SSD, allocating space is a crucial step. But first things first, you need to ensure your SSD is compatible with your device and check if there are any firmware updates available. Once you’ve done that, it’s time to prepare the drive by formatting it.

    This will wipe any existing data and optimize the drive for use. You can choose to either use the default format provided by your operating system or opt for a more advanced format option that suits your needs. It’s important to note that formatting will also determine the file system used by the drive, which affects how you allocate space.

    When it comes to allocating space, there are different methods you can use such as partitioning or leaving free space for future use. Just make sure to consider the size of your SSD, the needs of your applications, and leave enough free space for maintenance and updates. Remember, the goal is to optimize your new SSD, so take the time to allocate space wisely.

    Cloning Your Hard Drive

    If you are looking to upgrade your hard drive to a new SSD, cloning may be the best option for you. Cloning is the process of copying all your data from one drive to another, including the operating system, programs, and personal files. To start the process, you will need a cloning software program and a destination drive to clone your current hard drive onto.

    First, you will need to connect the destination drive to your computer and open the cloning software. Select the source drive (your current hard drive) and the destination drive (the new SSD) and begin the cloning process. This can take some time, depending on the size of your data.

    Once the cloning process is complete, you can shut down your computer, remove the old hard drive, and install the new SSD. Boot up your computer and everything should be exactly as it was before, but now on a faster and more efficient SSD. By cloning your hard drive, you can upgrade your storage without losing any of your important data, programs, or settings.

    With this simple process, you can ensure that your stored information is safe and secure.

    Step-By-Step Guide to Cloning Your Hard Drive to New SSD

    Cloning your hard drive can be a complex process, but with the right steps, it can be done easily. First, ensure that your new SSD is connected properly to your computer. Then, download a cloning software such as Acronis True Image or EaseUS Todo Backup.

    Open the software and select the option to clone your hard drive. Choose your hard drive as the source and the new SSD as the target drive. The software will start cloning your hard drive onto the new SSD.

    This process may take some time depending on your hard drive’s size and the speed of your computer. Once it’s done, shut down your computer and swap out your old hard drive with the new SSD. Boot up your computer and check to make sure everything is working correctly.

    By following these simple steps, you can get a new SSD up and running with all your data in no time. So, if you want to improve your computer’s performance, cloning your hard drive to an SSD is the way to go!

    Verify Cloned Data

    If you are wondering how to clone a hard drive to a new SSD, once the process is complete, it is essential to verify that the cloned data is accurate and complete. The best way to accomplish this is by comparing the source and target drives. You can start by opening File Explorer on your computer, right-clicking on the source drive, and selecting Properties.

    Next, click on the Tools tab, and select “Check” under the Error Checking section. This process will scan the drive for any errors or bad sectors. Once complete, repeat the same process for the SSD drive to ensure it has been properly cloned.

    Finally, compare the size and number of files on the source and target drives to confirm that all the data has been transferred successfully. With these simple steps, you can confidently clone your hard drive without the worry of losing data.

    Checking for Errors and Missing Files

    When you clone data, it’s important to verify its accuracy by checking for errors and missing files. This is essential to ensure that the cloned data is an exact replica of the original data. One way to do this is to use a verification tool, which can identify any errors or discrepancies between the two datasets.

    This will give you confidence that the cloned data is complete and accurate, and that you can rely on it for your business needs. Another important step in verifying cloned data is to check for missing files. This can happen if some files are not included in the cloning process, or if they are corrupted during the process.

    It’s important to verify that all files are present and intact, as missing files can cause data loss and other problems down the line. A simple way to do this is to compare the file lists of the original and cloned datasets, and ensure that they match up perfectly. In summary, verifying cloned data is an important step in ensuring its accuracy and completeness.

    By checking for errors and missing files, you can have confidence that the cloned data is a reliable source for your business needs. So, take the time to verify your cloned data, and rest assured that you have a trustworthy dataset at your fingertips.

    Enjoy Your New SSD!

    Congratulations on acquiring your new SSD! If you’ve been wondering how to clone a hard drive to a new SSD, there are a few ways you can go about it, depending on your preferences. One of the most convenient methods is to use a cloning software such as Acronis True Image or EaseUS Todo Backup. These programs make it easy to transfer all the data from your old hard drive to your new SSD, including your operating system, files, and programs.

    You can also use Windows’ built-in System Image Backup tool to create an image of your hard drive and restore it to your SSD. Another option is to physically install both drives on your computer and transfer the files manually, though this can be time-consuming and requires some technical expertise. Whatever method you choose, make sure to backup your data beforehand to avoid any loss or corruption of data during the transfer process.

    With your new SSD in place and your old data successfully transferred, enjoy the improved speed and performance of your computer!

    Conclusion

    And with that, you too can join the ranks of science fiction’s most renowned characters and become a true clone master! Well, maybe not quite to that extent, but learning how to clone a hard drive to a new SSD is a valuable skill to have in the fast-paced world of technology. So, never fear – with a little know-how and some determination, you’ll be swapping out your hard drive for a sleek, new SSD in no time. May the (tech) force be with you!”

    FAQs

    What is the benefit of cloning a hard drive to a new SSD?
    Cloning a hard drive to a new SSD can improve the overall performance of your computer, as SSDs are faster and have quicker read/write speeds.

    Can I clone a hard drive to an SSD without losing data?
    Yes, you can clone your hard drive to an SSD without losing any data as long as you use a reliable cloning software and follow the instructions carefully.

    Is it necessary to format the new SSD before cloning?
    It is not necessary to format the new SSD before cloning, as most cloning software will format the drive automatically before starting the cloning process.

    What is the best software for cloning a hard drive to a new SSD?
    There are many software options available for cloning a hard drive to an SSD, but some of the most popular and reliable options are Acronis True Image, Macrium Reflect, and EaseUS Todo Backup.

    Can I clone a larger hard drive to a smaller SSD?
    It is possible to clone a larger hard drive to a smaller SSD, but you will need to make sure that the data on the hard drive will fit within the storage capacity of the new SSD. It is recommended to only clone a hard drive to an SSD with equal or greater storage capacity to prevent data loss.

  • Smooth Migration: Effortlessly Transfer Your Old HD to New SSD in Few Easy Steps

    Upgrading your old hard drive to a newer, faster SSD is a great way to boost your computer’s performance. However, copying all your old data to your new drive can seem like a daunting task. Luckily, there are several ways to transfer files from your old hard drive to your new SSD with minimal hassle.

    In this blog post, we’ll go over some of the best methods for copying your old HD to your new SSD, including using a cloning tool, a data transfer cable, or manually transferring your files. We’ll also cover some tips for optimizing your new SSD’s performance, such as checking your BIOS settings and setting up your computer to boot from the new drive. By the end of this blog post, you’ll be ready to upgrade your computer with confidence and enjoy the speed and performance boost that an SSD provides.

    So, let’s get started!

    Backup Old HD

    If you’re upgrading from an old hard drive to a new SSD, it’s important to backup all of your important files and data. Luckily, there are several ways to easily copy your old HD onto your new SSD. One option is to use a cloning software, which allows you to create an exact copy of your old hard drive and transfer it directly to your new SSD.

    This is a great option if you want to preserve your current OS and programs. Another option is to manually backup your files onto an external hard drive, then transfer them onto your new SSD. This can take a bit more time, but allows you to selectively choose which files and folders to transfer and also gives you the chance to clean up and declutter your old files.

    Regardless of which method you choose, it’s always a good idea to backup your old hard drive before making any changes to ensure that you don’t lose any important data. By taking the time to properly backup and transfer your old files, you can ensure a smooth transition to your new SSD without any data loss or unexpected surprises.

    Connect SSD

    If you’re looking to upgrade your computer’s storage system, replacing your old hard drive with a solid-state drive (SSD) is a great way to boost performance and speed. But before you connect the SSD, it’s crucial to back up your old hard drive to avoid losing any important data. You can do this by using backup software or manually transferring files to an external hard drive or cloud storage.

    Once you’ve backed up your data, it’s time to open up your computer and connect the SSD. Make sure to carefully follow the manufacturer’s instructions and connect it to the appropriate port. After connecting the SSD, you can use migration software to transfer your data and operating system to the new drive.

    With your new SSD up and running, you’ll notice faster boot times, quicker file transfers, and improved overall system performance. So, if you’re ready to take your computer to the next level, consider upgrading to an SSD and enjoy a faster, more efficient experience.

    how copy old hd to new ssd

    Clone HD to SSD

    If you’re thinking about upgrading your computer’s hard drive (HD) to a solid-state drive (SSD), you want to be certain your files and data are safe. The first step in upgrading to the new SSD is backing up your old HD. A backup ensures that if something goes wrong, you’ll still have access to all your old files.

    You can accomplish this through making use of the disk imaging software, which creates a copy of your HD. You can then store the copy securely, either on an external drive or to the cloud. This will take some time, but it’s essential to ensure your data is safe and sound before you proceed.

    Once you’re confident that the backup is complete, you can then move onto cloning your old HD to the new SSD. It’s a simple process that will transfer your data and files to your new drive while keeping everything safely in one place. Remember to take care when cloning your HD to SSD, ensuring you choose the right software and tools for success.

    By following these steps, you’ll be on your way to enjoying a faster and more reliable computer with all your essential information safe and sound.

    Swap and Test

    If you’re looking to upgrade your computer’s hard drive to a solid-state drive (SSD), it can be a bit confusing to know how to copy your old hard drive data to your new SSD. However, the good news is that there are a few different methods you can use to accomplish this. One popular approach is to use a cloning software such as Acronis True Image or Macrium Reflect.

    These programs will create an exact copy of your old hard drive onto your new SSD. Another option is to manually transfer your files and programs from the old hard drive. This can be time-consuming, but it allows you to organize your data as you copy it over.

    Whichever method you choose, it’s always a good idea to test your new SSD to make sure everything is working correctly. Swap your old hard drive out for the new SSD and check that everything is functioning as it should be. By taking these steps, you can ensure a smooth and successful transition to your new SSD.

    Remove Old HD and Install SSD

    If you’re looking to upgrade your computer’s storage and performance, swapping out your old hard drive for a new solid-state drive (SSD) is a great option. Not only do SSDs offer faster boot-up and data transfer speeds, but they also have no moving parts, which makes them more reliable and durable in the long run. To get started, start by backing up your data and removing the old hard drive from your computer.

    Then, install the new SSD and configure your BIOS to recognize it as your primary storage device. Once you’ve completed the physical installation, it’s important to test your new SSD to make sure everything is running smoothly. This can include running diagnostics and benchmarks to verify your SSD’s performance, as well as transferring files and launching applications to ensure everything is working as it should be.

    By swapping out your old hard drive with a new SSD and testing it thoroughly, you can significantly improve your computer’s speed and efficiency for years to come. So why not make the upgrade today?

    Test Booting from SSD

    Booting from an SSD can greatly enhance the overall speed and performance of your computer. However, it’s important to first properly set up your system with a swap partition before testing it out. This will help ensure that your computer runs smoothly and doesn’t encounter any hiccups during use.

    Once this is done, testing out the boot time can be done easily by simply restarting your computer and timing how long it takes to fully boot up. This test can help determine if the SSD has made a significant impact on your computer’s speed and performance. So, if you’re looking to give your system a boost, booting from an SSD may be the solution you need.

    Check Data Transfer and Drive Size

    When it comes to transferring data or swapping drives, it’s crucial to check the data transfer rates and drive sizes before making any changes. This will ensure that you’re not only transferring data as quickly as possible but also that you have enough space in the drive to accommodate all the data you need. It’s easy to overlook the importance of these two factors, but neglecting them can lead to data loss or unnecessary delays in transferring files.

    To begin, check the data transfer rate of the devices you’ll be using. This will vary depending on the type of drive you have, whether it’s an HDD or SSD, and the speed of the ports on your computer. Make sure that the devices you’re transferring data between have a similar transfer rate to avoid bottlenecks or slow data transfers.

    Next, check the size of the drives you’re swapping or transferring data to and from. Make sure that the drive you’re using to transfer data has enough space to accommodate everything you need to transfer. It’s always better to have more space than you need, so be generous in your estimates if you’re not sure.

    Once you’ve checked these two factors, it’s time to start swapping and testing your devices. Make sure that you’ve backed up all your data before you begin, just in case anything goes wrong. Swap the drives or connect the devices, and begin transferring your data.

    Monitor the transfer speeds and make sure that everything is going smoothly. If you notice any issues, stop the transfer and investigate the problem. In summary, checking the data transfer rate and drive size before swapping or transferring data is essential to avoid data loss or slow transfers.

    Taking the time to check these factors can save you a lot of time and frustration in the long run. So before you begin any data transfer or drive swapping operation, double-check your devices and make sure everything is in order.

    Final Thoughts

    If you’re looking to upgrade from an old and outdated hard drive (HD) to a faster and more efficient solid-state drive (SSD), you might be wondering how to transfer your files and documents over to the new device. Luckily, there are a few different methods you can use to copy your old HD to your new SSD. One option is to use a disk imaging software, which takes a snapshot of your old HD and transfers it to the new SSD.

    Alternatively, you could clone your old HD to the new SSD using cloning software, which creates an exact duplicate of your old drive. Whatever method you choose, be sure to back up all of your important files and data before migrating over to your new SSD. With a little bit of patience and careful planning, you can easily copy your old HD to your new SSD and enjoy faster and more efficient performance.

    Conclusion

    In conclusion, copying an old hard drive to a new SSD is like moving into a luxurious new home without leaving any of your belongings behind. Your files and programs will feel right at home in their new SSD surroundings, and you’ll enjoy lightning-fast boot and load times. So, don’t let your digital life get left behind in the dark ages of spinning disks – upgrade to an SSD and take your technology into the future!”

    FAQs

    What equipment do I need to copy my old hard drive to a new SSD?
    To copy your old hard drive to a new SSD, you’ll need a USB-to-SATA adapter cable, a cloning software, and your new SSD.

    Can I use a free cloning software to transfer data from my old hard drive to a new SSD?
    Yes, there are various free cloning software available, such as EaseUS Todo Backup, Clonezilla, and Macrium Reflect.

    Can I clone my old hard drive to a new SSD if they have different storage capacities?
    Yes, you can clone your old hard drive to a new SSD with a larger or smaller storage capacity. However, you need to make sure that the amount of data on the old hard drive doesn’t exceed the available storage on the new SSD.

    Is it necessary to format my new SSD before I clone my old hard drive?
    No, you don’t need to format your new SSD before cloning your old hard drive. The cloning software will format and partition the new SSD during the cloning process.

  • Unlocking the Speed Limits of M.2 SSDs: Discover How Hard You Can Really Push Them

    Unlocking the Speed Limits of M.2 SSDs: Discover How Hard You Can Really Push Them

    Have you ever wondered how much pressure your M.2 SSD can handle? A common question that many people ask is how much stress is too much for their SSD? While SSDs are known for being durable and long-lasting, they do have their limits. But just how hard can you push your M.

    2 SSD before it breaks down or fails altogether? Think of it like a car – you know it can handle high speeds and long journeys, but you also know that pushing it too hard for too long will eventually cause damage. The same applies to your M.2 SSD.

    While it can handle constant use and high-speed transfers, there comes a point where it can no longer keep up. So how hard can you push it? The answer isn’t straightforward as different SSDs have different endurance ratings. Additionally, factors such as heat, power consumption, and usage patterns can impact an SSD’s lifespan.

    But just because you can push your M.2 SSD to its limits doesn’t mean that you should. Being mindful of the demands you place on your SSD can prolong its lifespan and keep it running smoothly.

    Ultimately, the key is to strike a balance between pushing your M.2 SSD to its fullest potential while also taking care not to overload it. In this blog post, we’ll delve deeper into the limits of M.

    2 SSDs, explore ways to extend their lifespan, and provide tips on how to maximize their performance. So buckle up and get ready to learn just how hard you can push your M.2 SSD!

    Understanding M.2 SSDs

    M.2 SSDs have become a popular choice for storage due to their high-speed performance. These drives utilize the NVMe (Non-Volatile Memory express) protocol, allowing them to achieve read and write speeds of up to six times faster than traditional hard disk drives (HDDs).

    When it comes to pushing the limits of M.2 SSDs, it really depends on the drive itself. Some M.

    2 SSDs can handle continuous high workloads, while others may struggle to maintain high speeds for extended periods of time and may slow down or even overheat. Therefore, it is imperative to choose an M.2 SSD that can handle the workload you throw at it.

    Additionally, it’s important to ensure your system has adequate cooling, as M.2 SSDs can run hot under heavy loads. With proper optimization and consideration for an M.

    2 SSD’s limitations, you can efficiently push its limits without fear of damaging the drive or your system.

    What Is an M.2 SSD?

    An M.2 SSD, or solid-state drive, is a small and compact storage device that can significantly enhance the speed and performance of your computer. Unlike traditional hard drives, M.

    2 SSDs connect directly to the motherboard, using the PCIe or SATA interface, and do not require any cables for data transfer. They are designed to fit into the M.2 slot on your motherboard and come in various sizes, ranging from 30mm to 110mm in length.

    M.2 SSDs are highly efficient and consume less power, making them an ideal choice for laptops and other portable devices. They also boast faster read and write speeds and can significantly reduce boot-up and load times for applications.

    If you want to speed up your computer and increase its overall performance, an M.2 SSD would be an excellent investment to consider.

    how hard to push m.2 ssd

    How M.2 SSDs Work

    M.2 SSDs. M.

    2 SSDs are a type of solid-state drive that has gained popularity in recent years thanks to their high performance and compact design. They are small, rectangular modules that connect directly to a motherboard using an M.2 slot.

    Compared to traditional SATA III SSDs, M.2 SSDs offer faster read and write speeds, lower latency, and higher bandwidth. They achieve this by using the NVMe (Non-Volatile Memory Express) protocol, which allows for more efficient communication between the storage device and the CPU.

    M.2 SSDs come in different sizes, with varying capacities and speeds, ranging from 22mm by 42mm to 22mm by 80mm. They are ideal for use in laptops and ultrabooks because of their small form factor.

    On desktop PCs, M.2 SSDs can offer a significant performance boost, making them a great choice for gamers, content creators, and anyone who requires fast storage.

    What Happens When You Push Your M.2 SSD Too Hard?

    M.2 SSDs have become increasingly popular in recent years due to their small size and high speed capabilities. While these tiny drives can handle a lot of strain, pushing them too hard can lead to serious problems.

    One of the most common issues with overloading an M.2 SSD is thermal throttling, which occurs when the drive temperature gets too high and it slows down to prevent damage. Additionally, pushing an M.

    2 SSD beyond its intended capabilities can also cause data corruption, premature failure, and reduced lifespan. To avoid these issues, it’s important to use your M.2 SSD within its intended limits and ensure adequate cooling to prevent thermal problems.

    So, be careful with how hard you push your M.2 SSD, and always follow the manufacturer’s recommendations to ensure optimal performance and longevity.

    The Risk of Overclocking

    Overclocking is a popular practice among PC enthusiasts who want to squeeze every last drop of performance out of their components. However, this comes with a certain level of risk, especially when it comes to M.2 SSDs.

    These high-speed storage devices are already incredibly fast, with read and write speeds that can reach up to 7000 MB/s. Pushing them too hard with overclocking could lead to overheating, which can cause data corruption and even permanent damage. It’s like driving a car at top speed for an extended period of time – sure, you might get to your destination faster, but you’re also putting more strain on the engine and increasing the risk of a breakdown.

    So, while overclocking your M.2 SSD might give you a slight performance boost, it’s important to weigh the potential benefits against the risks involved.

    The Impact of High Temperature on M.2 SSDs

    M.2 SSDs, high temperature, impact Have you ever wondered what happens when you push your M.2 SSD too far with high temperatures? Well, the truth is, it can have a detrimental impact on your device.

    When M.2 SSDs get too hot, they can experience high levels of thermal stress that can damage the components and make them less efficient. The first sign of damage from excessive heat is usually slower read and write speeds, which can impact overall performance.

    If the issue is not addressed, it can lead to more severe consequences, such as data loss or complete device failure. It’s essential to keep your M.2 SSDs within safe operating temperatures to avoid any damage.

    A good rule of thumb is to aim for a temperature range between 0 and 70°C to maintain optimal performance. So, next time you’re pushing your device to the limit, keep in mind the impact it can have on your M.2 SSD and take the necessary precautions to keep your device running smoothly.

    The Importance of Proper Cooling

    When it comes to computer hardware, proper cooling is absolutely crucial in preventing damage to your components. This is especially true for M.2 SSDs, which can overheat and become damaged if they are pushed too hard.

    When an M.2 SSD overheats, it can start to slow down and even cause errors in your system. This can be incredibly frustrating, especially if you rely on your computer for work or school.

    To prevent this from happening, it’s important to make sure that your computer is properly cooled. This can be done in a number of ways, such as adding more fans, upgrading your heat sink, or even using liquid cooling. By taking the time to properly cool your computer, you can ensure that your M.

    2 SSD and other components will continue to run smoothly and last for years to come. So if you’re starting to notice that your computer is running a little hotter than usual, it’s definitely worth investing in some extra cooling to keep everything running smoothly.

    How Far Can You Push Your M.2 SSD?

    If you’ve invested in an M.2 SSD for your computer, you’re probably wondering how much you can push it to achieve optimal performance. The answer depends on various factors such as the brand and model of your SSD, the type of tasks you use your computer for, and the amount of read/write operations you perform on it.

    However, in general, M.2 SSDs are designed to handle heavy workloads and sustain high transfer speeds, making them ideal for demanding applications such as gaming, video editing, and large file transfers. To ensure that you’re getting the most out of your M.

    2 SSD, make sure to regularly update your drivers and firmware, avoid filling up the drive to its full capacity, and regularly monitor its temperature and health status. With proper care and maintenance, your M.2 SSD can provide you with lightning-fast speeds and reliable performance for years to come.

    So go ahead and push it to its limits – your M.2 SSD can handle it!

    Factors That Affect M.2 SSD Performance

    M.2 SSDs have become a popular choice for computer users wanting to achieve lightning-fast speeds and more reliable storage solutions. However, several factors affect the performance of these SSDs, and it’s essential to know them to push your M.

    2 SSD to its limits. The primary factor that affects the performance of M.2 SSDs is the type of interface they use.

    Some M.2 SSDs use the older SATA III interface, while others use the faster NVMe interface. NVMe M.

    2 SSDs perform much better than SATA III SSDs, offering much higher speeds of up to 32 Gbps. Another factor affecting the performance of M.2 SSDs is the size of the drive.

    Larger drives tend to offer better performance than smaller ones. Additionally, the speed of an M.2 SSD is also dependent on the particular model you select.

    Different models have varying read and write speeds, which will affect the overall performance of the drive. By taking these factors into account, you can effectively push your M.2 SSD to its limits and enjoy blazing fast speeds.

    Benchmarking Your M.2 SSD

    If you’re looking to get the most out of your M.2 SSD, benchmarking it is a must. By running tests and analyzing the results, you can get a clearer picture of the real-world performance of your drive and identify any areas for improvement.

    There are a variety of benchmarking tools available, both free and paid, that can provide detailed insights into your M.2 SSD’s read and write speeds, sequential and random performance, and latency. Some popular options include CrystalDiskMark, ATTO Disk Benchmark, and AS SSD Benchmark.

    Each tool has its strengths and weaknesses, so it’s worth trying a few to see which works best for your particular setup. Keep in mind that the results of benchmark tests can vary significantly based on factors such as your computer’s hardware configuration, the type of workload you’re running, and the size of the files being tested. Ultimately, benchmarking your M.

    2 SSD is a valuable tool for optimizing your system’s storage performance and ensuring that you’re getting the most out of your investment.

    Conclusion

    Pushing an M.2 SSD hard is like asking a Formula One car to drive in rush hour traffic – sure, it can handle it, but it wasn’t designed for that. These speedy little storage devices are built to handle intense workloads, but it’s important not to overload them with too much demand.

    Treat your M.2 SSD with care and respect, and it will reward you with lightning-fast performance that will have you zooming through your work and games like a champion driver on the track.”

    FAQs

    What is the maximum pressure required to insert an M.2 SSD into a slot?
    The pressure required to install an M.2 SSD into its slot is minimal. You need to apply gentle pressure until the SSD is properly seated, and the retaining clip snaps into place.

    Can I damage my M.2 SSD while inserting it?
    If you apply excessive force while inserting an M.2 SSD, you may damage the connector pins or the retaining clip. Therefore, it is essential to be gentle and apply minimal pressure while installing the SSD.

    What happens if the M.2 SSD is not seated properly?
    If the M.2 SSD is not properly seated, it may not function correctly, or it may cause other system issues. Therefore, it is essential to ensure that the SSD is securely installed before proceeding.

    Can I use any tool to install my M.2 SSD?
    It is recommended that you use a screwdriver to secure the retaining screw during installation. However, be careful not to overtighten the screw, as this can damage the SSD.

    How long does it take to install an M.2 SSD?
    Typically, it takes only a few minutes to install an M.2 SSD. However, the time may vary depending on your level of experience and the particular type of M.2 SSD you are using.

  • How Far Back Should Your Records Go to Qualify for SSD Benefits?

    If you’re looking for financial assistance, you may have come across the term “SSD eligibility requirements”. Social Security Disability (SSD) benefits can provide much-needed financial support for those who are unable to work due to a disability. However, being eligible for SSD benefits is not as simple as just having a disability.

    There are several requirements that must be met before an individual can receive benefits. First and foremost, you must have a disability that prevents you from working. This disability must be expected to last for at least one year or result in death.

    You must also have earned enough work credits to be eligible for SSD benefits. Work credits are earned by working and paying Social Security taxes. The number of work credits needed to be eligible for SSD benefits depends on your age at the time of disability.

    Additionally, the Social Security Administration (SSA) will review your income and resources to determine whether you meet the financial eligibility requirements for SSD benefits. If you are earning too much income or have too many resources, you may not be eligible for benefits. Navigating the SSD eligibility requirements can be a complicated and overwhelming process.

    It’s important to consult with an experienced SSD attorney who can guide you through the process and help you understand your options. With the right help, you may be able to secure the financial support you need to cope with your disability and improve your quality of life.

    SSD Definition & Purpose

    When it comes to deciding whether or not to invest in an SSD (Solid State Drive), one major factor to consider is how long your records need to go back. An SSD is a type of storage device that uses flash memory to store data and is known for its reliability and high read/write speeds. However, they also tend to be more expensive than traditional hard drives.

    If you need to access data that goes back many years, it may be more cost-effective to stick with a hard drive. On the other hand, if you only need to access recent files or want to significantly speed up data transfer, an SSD could be a great investment. Ultimately, the decision comes down to your specific needs and budget.

    However, if you do decide to invest in an SSD, be sure to look for one with a sufficient amount of storage space and read/write speeds that meet your needs.

    What is SSD and Why Apply for It?

    SSD, or Solid State Drive, is a type of storage device that has been rapidly gaining popularity over the years. It is a non-volatile storage medium that uses NAND-based flash memory to store data. The key difference between an SSD and a traditional hard drive is that SSDs have no moving parts, making them faster, more reliable, and more energy-efficient.

    The purpose of an SSD is to provide users with faster read and write speeds, shorter boot times, and overall improved performance for their systems. This makes SSDs ideal for gamers, content creators, and professionals who rely on fast and reliable storage solutions. Applying for an SSD can greatly improve the performance of your computer, and it is definitely worth considering if you are in need of an upgrade.

    how long must your tecords go.bak to recieve ssd

    SSD Application Process

    If you’re considering applying for Social Security Disability benefits, you’re probably wondering how far back your records need to go. The answer may surprise you. Social Security looks at your medical records from the past year to determine whether you meet their requirements for disability.

    However, if your disability began more than a year ago, they’ll also look at records going back to the onset of your disability. This means that the amount of documentation needed can vary greatly depending on how long you’ve been disabled. It’s important to provide as much medical evidence as possible to support your claim, even if it means going back several years.

    This can include doctor’s notes, test results, and treatment records. While it may seem like a lot of work, the more evidence you provide, the stronger your case will be. And remember, if your initial claim is denied, there is a lengthy appeals process that can take even more time and documentation.

    So it’s best to start gathering your records as soon as possible and be prepared to keep adding to them throughout the application process.

    Steps to Apply for SSD

    Applying for Social Security Disability (SSD) can be a daunting process, but it is important to understand the steps involved in order to make the process easier. The first step is to gather all the necessary documentation, including medical records, work history, and any other supporting documents. Once you have all the required information, you can begin the application process.

    This can be done either online, by phone, or by visiting your local Social Security office. When submitting your application, be sure to provide as much detail as possible about your disability and how it affects your daily life. After your application is submitted, it will be reviewed by a disability examiner who will determine whether or not you qualify for SSD benefits.

    This process can take several months, so it is important to be patient. If your application is denied, you have the right to appeal the decision. Consulting with an experienced SSD attorney may be helpful during the appeal process.

    Applying for SSD can be overwhelming, but by following these steps and seeking professional help when needed, you can improve your chances of receiving the benefits you need and deserve.

    Documents Required for SSD Application

    When applying for Social Security Disability (SSD), you will need to provide several documents to support your application. These documents help establish your eligibility for benefits and your need for financial assistance. To begin the application process, you will need to provide a valid social security number, proof of your age, evidence of your medical condition, and documentation of your work history.

    It’s important to gather all necessary paperwork before submitting your application, as incomplete information can delay or even deny your claim. Additionally, be prepared to answer questions about your daily activities and limitations, as this information helps determine your level of disability and eligibility for benefits. By taking the time to gather all necessary documents and provide comprehensive answers, you can increase your chances of having a successful SSD application.

    Determining Eligibility for SSD

    If you’re wondering how long your records must go back to receive Social Security Disability (SSD) benefits, the answer can vary based on your unique situation. Generally, the Social Security Administration (SSA) evaluates your work history and medical condition to determine if you qualify for SSD benefits. To be eligible, you must have a medical condition that prevents you from being able to work and earn a certain amount of income.

    Additionally, you must have earned a specific number of work credits through paying Social Security taxes. The amount of work credits you need depends on your age at the time you became disabled. In terms of medical records, the SSA will review your doctor’s notes, medical test results, and any other relevant medical information.

    The records should demonstrate a history of medical treatment and establish the severity and duration of your disabling condition. However, the specific time range of records needed can vary depending on the nature of your disability and the length of time you’ve been seeking treatment for it. In any case, it’s best to consult with an experienced SSD attorney who can guide you through the process and help ensure you have all the necessary documentation to support your application.

    SSD Qualifying Conditions

    In order to qualify for Social Security Disability (SSD), there are certain conditions that need to be met. These conditions are determined by the Social Security Administration (SSA) and are meant to ensure that only those who are truly unable to work are eligible for SSD benefits. One of the main factors that the SSA considers is the severity of your medical condition.

    Your condition must be severe enough that it prevents you from performing any type of work, not just your current job. The SSA also looks at your work history and whether or not you have earned enough work credits to qualify for benefits. Additionally, if you are currently working and earning more than the SSA’s substantial gainful activity (SGA) limit, you will not be eligible for SSD benefits.

    Meeting these conditions can be challenging, but with the help of an experienced SSD attorney, you may be able to navigate the process successfully and get the benefits you need.

    Medical Evidence Required

    When determining eligibility for Social Security Disability (SSD), medical evidence is crucial. This evidence helps the Social Security Administration (SSA) assess your impairments and determine if they meet their definition of a disability. It is important to provide a detailed medical history, including any treatments you have received, medications you are taking, and the names and contact information of your healthcare providers.

    Additionally, you should provide any medical records, diagnostic test results, and a statement from your doctor that outlines the nature and severity of your condition. The SSA will compare your medical evidence with their Blue Book listing of impairments to determine if your condition meets the criteria for disability. Even if your condition isn’t listed in the Blue Book, the SSA will consider how your condition affects your ability to work and perform daily activities.

    Providing accurate and detailed medical evidence can greatly increase your chances of being approved for SSD benefits.

    SSD Work Credit Eligibility

    Determining eligibility for SSD work credit can be a complex process that takes into account a variety of factors. One of the biggest determinants is the severity of the individual’s disability. If the disability is severe enough that it prevents the individual from being able to work, then they may be eligible for SSD work credit.

    Other factors that can be considered include the individual’s age, education, and work history. For example, an individual who is young and has limited work experience may have a harder time proving their eligibility than someone who is older and has a longer work history. If you are unsure about your eligibility for SSD work credit, it is important to consult with an experienced attorney who can guide you through the process and help you understand your rights and options.

    How Far Records Need to Go Back?

    If you’re applying for Social Security Disability (SSD) benefits, you may be wondering how far back your records need to go in order to prove your eligibility. Unfortunately, there’s no one-size-fits-all answer to this question. The length of time your records need to cover depends on a variety of factors, such as the nature of your disability, how long you’ve been disabled, and the type of work you’ve done in the past.

    In general, however, you’ll need to provide medical records dating back at least one year from the date of your SSD application. These records should include any diagnoses, treatments, and medications you’ve received, as well as any relevant lab reports, radiology images, and other diagnostic tests. It’s important to be as thorough as possible when gathering your records, as the more information you can provide, the stronger your case for SSD benefits will be.

    The Importance of Medical Records

    When it comes to medical records, the question often arises of how far back they need to go. It’s a valid concern, as having access to complete medical records is necessary for providing proper and comprehensive care. Generally, medical records should go as far back as possible, as past medical history can often provide insight into current or potential health issues.

    However, there may be practical limitations to how far back records can realistically go. In some cases, records may have been lost or destroyed over time. It’s important to communicate with healthcare providers and ensure that any available records are accessible to all involved in the patient’s care.

    With the advancements in digital record keeping, the ability to keep comprehensive and easily accessible medical records has greatly improved. Keeping thorough and up-to-date records not only benefits the patient but also healthcare providers, who can make more informed decisions and ensure better outcomes. So, while it may not always be possible to track down every detail of a patient’s medical history, healthcare providers should strive to access and maintain as complete a record as possible.

    How to Obtain Medical Records

    When it comes to obtaining your medical records, the length of time you need to go back will vary depending on your specific situation. For example, if you’re seeing a new doctor and want to provide them with your medical history, you’ll want to obtain records going back at least a few years. On the other hand, if you’re undergoing treatment for a chronic condition and want to have a more comprehensive understanding of your medical history, you may need to go back decades.

    In general, it’s a good idea to obtain as much information as possible, especially if you’ve seen multiple healthcare providers over the years. It’s also important to keep in mind that different healthcare facilities may have different policies regarding how long they keep records on file, so you may need to contact multiple facilities to obtain a complete set of records. Overall, the goal is to have a complete picture of your medical history so you can make informed decisions about your healthcare going forward.

    How Far Back Records Need to Go for SSD?

    When it comes to applying for Social Security Disability (SSD) benefits, many people wonder how far back their records need to go. Generally, the Social Security Administration (SSA) will look at your medical records for the past year leading up to your application, as well as any relevant records from the past two to five years. However, in some cases, the SSA may need to review records from further back in order to make a decision.

    It’s important to provide as much medical evidence as possible to support your claim for SSD benefits, even if it means digging up records from several years ago. Your best bet is to work with an experienced SSD attorney who can help ensure that all relevant medical evidence is submitted to the SSA on your behalf. By doing so, you can increase your chances of receiving the disability benefits you need and deserve.

    Conclusion

    In the end, how long your records must go back to receive SSD is a matter of history, both medical and vocational. So if you want to ensure a smooth SSD application process, keep accurate records and don’t forget to write a good resume – you never know when you might need it to prove your worth to Uncle Sam!”

    FAQs

    How far back should my records go to apply for SSD?
    Generally, records should go back at least one year before the onset of the disability and continue up to the present. However, some cases may require records from further back.

    What kind of records do I need to apply for SSD?
    You will need medical records from all physicians, hospitals, and clinics you have visited for your disability, as well as records of any medical tests and treatments.

    How long does it take to receive SSD benefits?
    The application process for SSD benefits can take several months to over a year. The amount of time it takes to receive benefits may depend on several factors, including the specific details of your case and the backlog of cases in your area.

    Can I work and still receive SSD benefits?
    It depends on the amount of income you earn. If you earn over a certain amount, you may not be eligible to receive SSD benefits. However, there are programs that can help you gradually return to work while still receiving benefits.

  • Streamline Your Storage: A Step-by-Step Guide on How to Transfer Files from Your Hard Drive to an SSD

    So, you’re looking to transfer files from your trusty old HDD to a shiny new SSD? Well, my friend, you’re in the right place! As we all know, SSDs are much faster and more reliable than traditional hard drives, and they’re quickly becoming the go-to storage option for many computer users. However, transferring files from one drive to another can be a daunting task, especially if you don’t know where to start. But, fear not! In this blog post, we’ll guide you through the process, step-by-step, so you can enjoy the blazing fast speeds of your new SSD in no time.

    Let’s get started!

    Why Transfer to SSD?

    If you’re wondering how to transfer your files from a traditional hard drive to an SSD, you’re not alone. Many people are switching to SSDs for faster speeds and improved performance, but the thought of transferring all your files can be daunting. There are different methods to transfer files from your hard drive to SSD depending on your computer and the size of the files you want to transfer.

    However, it can be a quick and easy process with the right tools and steps. One of the easiest ways to transfer your data is by using software specifically designed for file migration from one drive to another. This software can transfer files, images, and even your operating system from a hard drive to an SSD with ease.

    So don’t be scared of upgrading to an SSD, with the right approach it can be an effortless transition.

    – Faster load times

    If you’re tired of slow load times and sluggish performance, it might be time to consider transferring to a Solid State Drive (SSD). SSDs offer a significant speed boost over traditional Hard Disk Drives (HDDs), resulting in faster boot times, quicker application launches, and snappier overall performance. By using flash memory to store data instead of spinning disks, SSDs are able to read and write data much faster than HDDs.

    This translates to a smoother computing experience with less waiting around for programs to load. So, if you’re looking to enhance your computer’s speed and performance, an SSD might be the solution you need.

    how to transfer files from hard drive to ssd

    – Better performance overall

    If you’re still using a traditional hard drive as your primary storage device, it may be time to consider transferring to a solid-state drive (SSD). One of the top reasons to make the switch is the better performance you’ll experience overall. SSDs are faster and more efficient than hard drives, which means your computer will boot up faster, files will load quicker, and programs will run more smoothly.

    In fact, an SSD can make your entire computer feel more responsive and improve your workflow. Additionally, SSDs have no moving parts, which means they are less likely to fail and can withstand the wear and tear of daily use better than traditional hard drives. So, if you’re looking to take your computer’s performance to the next level, consider transferring to an SSD today.

    What You’ll Need

    If you’re looking to speed up your computer’s performance, then transferring files from a hard drive to SSD is a great way to do it. But, before you start, there are a few things that you’ll need. Firstly, make sure that you have an SSD that is big enough to store all your data.

    Secondly, you’ll need a data transfer cable or hard drive dock to connect your HDD to your new SSD. Finally, you’ll need software that will allow you to clone your data from your hard drive to your SSD. Some popular software options for this include Acronis True Image, EaseUS Todo Backup, and Macrium Reflect.

    Once you have all these things in place, you’re ready to start the transfer process.

    – Your HDD and SSD

    If you’re building or upgrading your computer, you’ll need to consider your hard disk drive (HDD) and solid-state drive (SSD) options. The HDD is a traditional spinning disk drive, while the SSD uses flash memory technology and has no moving parts. While HDDs are generally cheaper and have greater storage capacity, SSDs are faster and more durable.

    You’ll need to decide which one is the best fit for your needs and budget. Keep in mind that if you go with an HDD, you may need to defragment it periodically to maintain optimal performance, while an SSD does not need to be defragmented. Additionally, consider the size and type of drive you’ll need.

    Will you need a 5-inch drive for a laptop or a 5-inch drive for a desktop? Will you be using the drive for gaming, storage, or both? Answering these questions will help you determine what type of drive to get and ensure that you have enough space for all of your files and programs.

    – SATA to USB cable

    If you’re looking to transfer files between your computer and an internal hard drive, you’ll need an SATA to USB cable. This cable allows you to connect your SATA drive to your computer’s USB port, giving you faster transfer speeds and more flexibility than other methods, such as using an external hard drive. It’s important to make sure you get a cable that’s compatible with your drive and computer, as well as one that’s long enough for your needs.

    These cables are widely available online and at computer stores, and they’re easy to use–simply plug in the cable and you’re ready to transfer files. With an SATA to USB cable, you can quickly and easily access your files anywhere you go.

    – Cloning software

    When it comes to cloning software, you’ll need a few things to get started. Firstly, you’ll need a reliable and compatible cloning software that suits your needs. A good cloning software should be feature-rich, user-friendly, and equipped with all the necessary tools to clone your system and data.

    Secondly, you’ll need a destination drive that can store all your cloned data without any issues. This drive should have enough storage capacity to store all your data, including your system files, applications, and personal files. Also, make sure that your destination drive is formatted to the correct file system type for optimal performance.

    Lastly, you’ll need a source drive, which is the drive you want to clone from. This drive should be in good working condition and have all the necessary files that you need to clone. By having all these things in place, you can ensure a successful cloning process that saves you time and effort.

    So, go ahead and start planning your cloning project using the right tools and resources that you need.

    Preparing Your SSD

    When it comes to transferring your files from a hard drive to an SSD, there are a few important steps you need to take to prepare your SSD properly. First, make sure your SSD is connected to your computer and recognized by your operating system. Then, you’ll need to format your SSD to ensure it’s ready to receive your files.

    This process will wipe any data currently stored on your SSD, so it’s important to back up any important files elsewhere before proceeding. Once your SSD is formatted and ready to go, you can begin transferring your files from your old hard drive. Depending on the amount of data you have, this process may take some time, but once it’s complete, you’ll be able to enjoy the faster speeds and improved performance of your new SSD.

    Overall, with a bit of preparation and patience, transferring your files to an SSD can be a great way to boost your computer’s performance and productivity.

    – Formatting your SSD

    Once you’ve purchased an SSD, the first step is to ensure it’s formatted correctly to be used as your computer’s primary storage. Formatting an SSD is a simple process, but it’s essential to do it correctly to avoid any issues later on. Firstly, you need to ensure that the SSD is connected to your computer, either directly or through an external enclosure.

    Next, open up the Disk Management tool on your Windows system, which you can access by searching for it in the Start menu. Locate the SSD in Disk Management and initialize the drive, then create a new partition and format it to NTFS for optimal performance. It’s crucial to ensure you’re formatting the correct drive, as formatting the wrong drive will erase all the data on it.

    By following these steps, you’ll have a properly formatted SSD ready for use as your primary storage, providing significantly faster performance than traditional hard drives.

    – Partitioning your SSD

    SSD, partitioning, preparation Before you start using your brand new SSD, it’s important to prepare it for optimal performance. One essential step is partitioning your SSD. Partitioning is the process of dividing your SSD into two or more logical drives, which can improve your data organization and management.

    The first thing you need to do is back up any data on your SSD, as the process of partitioning will erase all the data. Once you’ve backed up your data, you can start partitioning by using the built-in partition manager in your operating system or a third-party partitioning tool. When partitioning, it’s important to consider the size and purpose of each partition.

    For example, you may want to create separate partitions for your operating system, programs, and personal files. By partitioning your SSD, you can avoid clutter and improve your system’s overall performance.

    Cloning Your HDD to SSD

    If you just picked up a new SSD and want to move your files and programs over from your old HDD, cloning your hard drive is the way to go. It’s a simple process that will save you time and effort compared to starting from scratch. First, you’ll need to download cloning software.

    There are plenty of free options available online, such as EaseUS Todo Backup or Macrium Reflect. Once you have the software installed, connect your SSD to your computer using an external enclosure or SATA cable. Open the cloning software, select your HDD as the source and your SSD as the destination, and click “clone.

    ” The software will do the rest, including resizing partitions to fit the new drive if necessary. After the cloning process is complete, power off your computer, disconnect the HDD, and make sure the SSD is plugged in correctly. Turn your computer back on, and everything should be just as you left it on your old drive, only now it’ll run faster and smoother with your new SSD.

    – Installing and running the cloning software

    If you’re looking to upgrade your computer’s performance by replacing its old hard disk drive (HDD) with a faster solid-state drive (SSD), then cloning your old HDD to the new SSD is the way to go. Cloning your HDD to SSD means creating an exact copy of your old drive’s data, including the operating system, applications, and personal files, onto the new drive. To do this, you’ll need to use a cloning software, which is a program that enables you to copy the contents of one drive to another.

    There are various cloning software available in the market, such as Clonezilla, EaseUS Todo Backup, Acronis True Image, and Macrium Reflect. Once you’ve chosen and installed the cloning software of your choice, follow the instructions on how to run it properly. During the cloning process, make sure to choose the right source and target drives to avoid losing data or damaging your computer.

    Once the cloning is done, you can proceed to install the new SSD into your computer and enjoy faster boot times and improved overall performance. Remember, cloning your HDD to SSD is a great way to boost your computer’s performance without having to reinstall the operating system and applications, so make sure to do it right.

    – Selecting source and target drives

    When cloning your HDD to SSD, the very first step is to select the right source and target drives. These drives are what you will use to transfer all your data from your current hard drive to the new solid-state drive. Typically, your current hard drive will function as your source drive, where all your information is currently stored.

    On the other hand, the SSD will be your target drive where all the information will be transferred to. When selecting the drives, it is crucial to ensure that there is enough space on the target drive to accommodate all the data on your source drive. The cloning software will help in copying your source drive’s contents into the new target drive.

    Ensure that both drives are recognized by your computer and that the cloning software of your choice also detects them as well. With both drives in place, you are ready to start the cloning process. Remember, selecting the right drives for cloning is the first critical step to successful data migration.

    – Starting the cloning process

    When it comes to upgrading your computer’s hard drive, there’s nothing quite like the speed and performance of an SSD. However, the thought of transferring all your files and programs from your old HDD to your new SSD may seem daunting. That’s where cloning comes in.

    By creating an exact copy of your old hard drive on your new SSD, you can make the transition smooth and hassle-free. To start the cloning process, you’ll need a cloning software, such as EaseUS Todo Backup or Acronis True Image. Simply connect your new SSD to your computer and launch the cloning software.

    Follow the prompts to select your source (the old HDD) and destination (the new SSD) drives, adjust any settings as needed, and start the cloning process. Keep in mind that the time it takes to clone your HDD to your SSD will depend on the size of your drive and the speed of your computer. Nonetheless, once the process is complete, you’ll have a lightning-fast SSD with all your files and programs intact, ready to take your computer’s performance to the next level.

    Booting from the SSD

    If you’re looking to speed up your computer’s performance, transferring files from your hard drive to SSD is a great first step. First, make sure your SSD is properly installed in your computer. Then, use a cloning tool to transfer all your files from your hard drive to the SSD.

    This process will vary depending on your operating system, but most tools will guide you through it. Once the transfer is complete, you’ll need to change your computer’s boot order to prioritize the SSD. This will ensure that your computer uses the faster SSD to boot up, resulting in faster overall performance.

    If you’re not sure how to change your boot order, check your computer’s manual or consult a professional. With your files now on the SSD and your computer booting from it, you should see a noticeable improvement in performance. Don’t forget to clear out any unnecessary files from your hard drive to free up space for future use.

    By following these steps, you’ll get the most out of your new SSD and enjoy faster performance on your computer.

    – Updating your BIOS settings

    Updating your BIOS settings before booting from the SSD is crucial to ensure that your system recognizes the new hardware. The BIOS or Basic Input Output System is responsible for initiating and managing the hardware components during system boot-up. Hence, you need to ensure that all the necessary settings are correctly configured to optimize performance.

    To update your BIOS settings, you first need to identify the make and model of your motherboard. You can then download the latest BIOS firmware from the manufacturer’s website and follow their instructions to update it. After updating the BIOS, you need to navigate to the boot settings and set the SSD as the primary boot device.

    This ensures that the system boots from the faster SSD instead of the slower HDD. Additionally, you may need to enable the AHCI or Advanced Host Controller Interface mode to improve SSD performance. Updating your BIOS settings may seem daunting, but it’s a necessary step to get the most out of your new SSD and ensure a smooth and faster system performance.

    – Booting from the SSD

    Booting from an SSD is a popular practice among users who want fast startup times and improved performance on their devices. An SSD (Solid State Drive) store and retrieving data faster than a traditional HDD (Hard Disk Drive). With SSDs, the operating system and other frequently used programs can boot up quickly, allowing you to begin working or gaming almost instantly.

    The process of booting from an SSD is not complicated, and it merely involves installing your OS (Operating System) on the SSD and making it the primary boot device. Additionally, you may have to change the boot order in your BIOS (Basic Input/Output System) settings to prioritize the SSD over other boot options. Once you’ve done that, you can enjoy the lightning-fast speed that you get from an SSD.

    Booting from an SSD can be a game-changer for your computing experience, and the performance increase that it provides is well worth the investment.

    Conclusion & Final Thoughts

    Congratulations, you’ve successfully made the transition from the old school to the new school – from a hard drive to an SSD! You’ve learned how to transfer files like a pro, embracing the speed and efficiency that SSDs provide. And now, as you bask in the blazing-fast performance of your newly installed SSD, you can rest easy knowing that you’ve successfully navigated the maze of data migration and come out on top. So sit back, relax, and enjoy the rapid boot times and lightning-fast file transfers – after all, you’ve earned it!”

    FAQs

    What is a hard drive?
    A hard drive is a storage device that uses magnetic disks to store and retrieve digital information.

    What is an SSD?
    An SSD (solid-state drive) is a modern storage device that uses flash memory to store and retrieve digital information.

    What are the benefits of transferring files from a hard drive to an SSD?
    Transferring files from a hard drive to an SSD can result in faster boot times, faster application load times, and overall faster system performance.

    How do I transfer files from my hard drive to an SSD?
    To transfer files from a hard drive to an SSD, you can either clone the hard drive to the SSD or manually transfer files using a file transfer utility. Clone software can make the transfer process easier.

  • Upgrade Your System: A Step-by-Step Guide on Migrating Windows 11 from HDD to SSD

    Are you tired of slow system speeds on your Windows 11 computer? One of the most effective solutions to this problem is migrating your operating system from a hard disk drive (HDD) to a solid-state drive (SSD). SSDs offer faster read and write speeds than HDDs, which translates to improved system performance and faster boot times. Migrating Windows 11 from HDD to SSD isn’t as complicated as you may think, and in this blog post, we’ll guide you through the process step-by-step.

    Whether you’re a beginner or an advanced user, you’ll find all the information you need to upgrade your computer’s storage and speed up your system. So, grab a cup of coffee, sit back, and let’s get started.

    Why you should consider migrating to SSD

    If you want a faster and more efficient computer experience, it’s time to consider migrating to SSD. Solid-state drives are far superior to traditional hard disk drives in terms of speed, durability, and reliability. Not only do they offer super-fast boot times and lightning-quick application loading, but SSDs are also less prone to damage due to their lack of moving parts.

    So, how do you go about migrating your Windows 11 operating system from an HDD to an SSD? The good news is that it’s not a difficult process. You can use software such as EaseUS Todo Backup or Macrium Reflect to clone your HDD to your new SSD. Just make sure to back up your important files before starting the migration process.

    In no time, you’ll have a faster, smoother computing experience that will make you wonder how you ever lived without an SSD. So, don’t wait any longer, take the leap and migrate to SSD today!

    Benefits of SSD over HDD

    SSD, HDD, migrate, benefits If you’re still using a traditional hard disk drive (HDD) as your primary storage device, it’s time to consider making the switch to a solid-state drive (SSD). The benefits of SSD over HDD are numerous and tangible. For starters, SSDs are significantly faster than HDDs thanks to their lack of moving parts.

    This means that your computer will boot up faster, programs will load faster, and files will transfer more quickly. Additionally, SSDs are more reliable than HDDs due to their lack of mechanical components that can break down over time. As a result, you’re less likely to experience catastrophic data loss if your storage device fails.

    Finally, SSDs are more energy-efficient than HDDs, which means that they draw less power and produce less heat. This can help extend the life of your computer and reduce your energy bills in the long run. So if you want a faster, more reliable, and more efficient storage solution, it’s time to migrate to an SSD.

    how to migrate windows 11 from hdd to ssd

    Improved performance and speed

    If you’re still using a traditional hard drive, you may want to consider migrating to an SSD, which can improve your system’s performance and speed. Unlike traditional hard drives, SSDs have no moving parts, which means they can access data faster and more efficiently. This translates to faster load times for your applications, quicker boot times, and improved overall performance.

    With an SSD, you can expect to see improvements in everything from file transfers to gaming performance. If you’re looking to upgrade your system, an SSD is definitely worth considering.

    What you will need for the migration process

    Migrating Windows 11 from an HDD to an SSD can lead to improved performance and faster boot times for your computer. To start the migration process, you will need a few essential items. First, you will need an SSD that has enough space to hold your system files and data from your HDD.

    Make sure to choose an SSD with a suitable capacity, so you won’t have to worry about running out of space in the future. Secondly, you will require a reliable migration software that is compatible with your Windows 11 operating system. Preferably, choose software that offers easy-to-follow instructions for a seamless migration process.

    You will also need a screwdriver to open your computer casing safely and install the SSD. Make sure to find a suitable screwdriver that fits your computer model and size. Lastly, a backup system is also necessary to ensure that all your data is safely stored before the migration process.

    With these essentials in place, you can confidently and effortlessly complete the migration process knowing that your data is safe and your computer’s performance will improve.

    An SSD drive

    If you’re planning to migrate your operating system to an SSD drive, there are a few things you’ll need to get started. Firstly, you’ll need a compatible SSD drive that matches your computer’s specifications. Additionally, you’ll need to make sure you have a backup of all your important files and data before you begin the migration process.

    One of the easiest ways to do this is by using a backup and restore tool that can help you transfer all your files from your old hard drive to your new SSD. Next, you’ll need a cloning software that can help you clone your existing hard drive onto your new SSD drive. Some of the most popular cloning software programs include Acronis, EaseUS, and Clonezilla.

    Once you have all the necessary tools and software in place, you’ll be ready to initiate the migration process and enjoy the increased speed and performance that comes with an SSD drive.

    Migration software

    Once you’ve decided to migrate your business data to a new platform, one of the first things you’ll need is migration software. This is a tool that helps you move your data from one system to another, minimizing the risk of data loss and ensuring your information is transferred accurately and securely. Migration software comes with various features, including data mapping, scheduling, data validation, and progress tracking.

    When choosing the migration software to use, consider factors such as the platform you’re moving from and to, the type of data you’re migrating, and the expected downtime during the migration. Look for software that offers a user-friendly interface and 24/7 customer support to ensure a smooth migration experience. By selecting the right software for your migration needs, you’ll minimize the occurrence of data migration mishaps and ensure a successful transition to your new platform.

    An external drive (optional)

    If you’re planning a migration process for your computer, there are a few things you’ll need to make the transition as smooth as possible. One optional but highly recommended item is an external drive. This can come in handy for a few reasons.

    First, it gives you a backup of all your important files, just in case something goes wrong during the migration process. Second, it allows you to transfer large amounts of data quickly and easily. This is especially useful if you have a lot of files that you need to move over to your new computer.

    An external drive can also be used to store files that you don’t need immediate access to, freeing up space on your computer’s internal hard drive. Overall, while an external drive may not be required for the migration process itself, it’s definitely worth considering as a helpful tool to make things go more smoothly.

    Backing up your data before migration

    If you are planning to upgrade to Windows 11, and want to boost your system’s performance, you may want to consider migrating your data from an HDD to an SSD. However, before you start the migration process, it’s crucial to back up your data to prevent data loss. You can back up your data by using an external hard drive or cloud storage.

    Once you have backed up your data, you can proceed with the migration process. The easiest way to migrate Windows 11 from HDD to SSD is by cloning your old hard drive. You can use third-party software like EaseUS, Macrium Reflect, or Acronis True Image to clone your HDD to an SSD.

    Before starting the cloning process, make sure that the SSD is properly connected to your computer. You can then select the source drive (HDD) and the destination drive (SSD) and start the cloning process. Once the cloning process completes, you can reboot your computer and make the necessary BIOS changes to boot from the new SSD.

    By following these steps, you can easily migrate Windows 11 from HDD to SSD and boost your system’s performance.

    Importance of data backup

    Data backup is essential when it comes to migrating your data from one system to another. It is crucial to ensure that your data is safe and secure before you make any changes. Backing up your data will protect you from any unforeseen losses and ensure that your important files are safe.

    It is recommended that you backup your data regularly, as an unexpected power outage or system crash can occur at any time. There are several ways to backup your data, including external hard drives, cloud storage, and backup software. It is important to select a backup method that works for you and make it part of your routine to stay safe from data loss.

    Always remember to test your backup before completing any data migration, ensuring that all your data is accurately backed up. By taking this important step, you can be sure that your files are safe and secure during the migration process. So, before migrating your data, make sure to take the time to back it up, ensuring that your data is always protected.

    How to back up your data

    Backing up your data is a crucial step to undertake before embarking on any sort of migration. With so much data stored online and on physical devices, it’s essential to have a backup plan in place to avoid losing any important information. One of the easiest and most efficient ways to back up your data is to use a cloud-based storage solution such as Google Drive or Dropbox.

    These services allow you to easily move files to a secure location in the cloud, ensuring that they’re protected in case anything happens to your physical hard drives. It’s also important to make sure that you’re backing up all of your data regularly, so that you don’t lose any recent changes or updates. By taking the time to back up your data before migration, you can rest assured that you’ll be able to access all of your files and information no matter what.

    Migrating Windows 11 from HDD to SSD

    If you’re looking to upgrade your computer’s storage, migrating Windows 11 from an HDD to an SSD is a smart move. Not only will it increase your computer’s performance, but it will also speed up the time it takes for your system to boot up and launch programs. The first step is to clone your existing HDD onto the new SSD.

    You can use software like Macrium Reflect, EaseUS Todo Backup, or Acronis True Image to do this. Make sure your SSD has enough space to accommodate all the content on your HDD. Once you’ve cloned the drive, you’ll need to physically install the SSD into your computer.

    This involves opening your computer’s case and removing the old HDD while inserting the new SSD. Finally, change the boot order in your system BIOS to boot from the new SSD. Congratulations, you’ve successfully migrated Windows 11 from your HDD to your SSD!

    Step by step guide to migration process

    If you’re looking to migrate Windows 11 from your HDD to an SSD, here’s a step-by-step guide to help you with the process. First, you’ll need to clone your HDD onto the SSD. For this, you can use third-party software that comes with your SSD or any other reliable cloning software.

    Once you’ve selected the software, connect your SSD to your computer and open the cloning software. Next, select your HDD as the source disk and the SSD as the destination disk. You’ll then have to select the clone option and wait for the process to complete.

    Once it’s done, shut down your computer and disconnect the HDD. Boot your computer using the SSD, and if everything went well, your Windows 11 should be up and running on the new SSD. However, if you face any issues with booting up, you may have to go into the BIOS and ensure that the boot order is set to the SSD.

    Additionally, you may have to make sure that all the drivers and settings are updated on the new SSD for optimal performance. By following these simple steps, you’ll be able to migrate your Windows 11 from your HDD to an SSD with ease, and enjoy faster boot times and improved performance.

    Verifying the migration process

    Are you looking for a way to migrate Windows 11 from HDD to SSD? It’s a common desire for many computer users, as SSDs offer faster boot times and improved overall performance. But before you jump into the migration process, it’s important to verify that everything has been transferred successfully. One way to do this is to use the built-in Windows tool called Disk Management.

    Here, you can check that your new SSD appears as the primary drive and that all the data from your old HDD has been transferred over. You can also use a program like CrystalDiskInfo to check the health status of your SSD and ensure that everything is working as it should be. With these checks in place, you can be confident that your migration has been successful and your computer is running at peak performance.

    Ensuring successful migration

    When it comes to migrating from one system to another, ensuring a successful transition is critical. One way to accomplish this is by verifying the migration process. This involves double-checking every step of the migration process to ensure that all data and settings are accurately transferred to the new system.

    At times, this can be an intensive process, but the end goal is to minimize any disruption to the business’s operations. By taking the time to verify the migration process, you can avoid problems down the road, such as missing data or incompatible settings. Think of it like building a house; you wouldn’t want to move in until you know the foundation is sturdy and the roof doesn’t leak.

    Similarly, checking the migration process ensures a solid foundation for the new system and provides peace of mind to all stakeholders involved. So, take the time to verify the migration process and set yourself up for a successful transition.

    Conclusion

    In conclusion, migrating Windows 11 from an HDD to an SSD is like upgrading from a cassette player to a high-tech Bluetooth speaker. You’ll enjoy faster boot times, speedier application launches, and snappier overall performance. It’s a smart move for anyone looking to enhance their computer experience – just make sure to follow these simple steps and you’ll be enjoying the benefits of SSD technology in no time!”

    Benefits of migrating to SSD

    When migrating to an SSD, it’s crucial to verify the migration process to ensure everything runs smoothly. One way to do this is by checking your computer’s BIOS settings to see if it recognizes the SSD. You can also use third-party software to confirm that the migration was successful and that your data is intact.

    It’s important to note that migrating to an SSD can provide numerous benefits, including faster boot times, improved overall system speeds, and increased durability. Plus, unlike traditional hard drives, SSDs don’t have moving parts, which can reduce the risk of failure due to physical damage. By taking the time to properly verify your migration process, you can ensure a seamless transition to this innovative technology and enjoy all the perks that come with it.

    Final thoughts

    In conclusion, verifying the migration process is an essential step in ensuring that your website or application is operating efficiently and effectively. It is crucial to test different aspects of the migration, including the functionality of links, data transfer, and security protocols. Conducting thorough testing can help identify any potential issues or errors that need to be addressed before the migration is completed.

    It’s also essential to have a plan in place for rollback if any major issues arise during the migration process. By taking these steps, you can minimize the risks of migration and ensure that everything runs smoothly. So, make sure to test thoroughly and have a contingency plan in place to ensure a successful migration.

    FAQs

    Can I migrate Windows 11 from HDD to SSD without losing data?
    Yes, you can migrate Windows 11 from HDD to SSD without losing data by using disk cloning software like EaseUS Todo Backup.

    What are the benefits of migrating Windows 11 from HDD to SSD?
    Migrating Windows 11 from HDD to SSD can offer faster boot and application load times, improved overall system performance and responsiveness, and potentially longer lifespan for your storage drive.

    Which SSD is best for migrating Windows 11?
    The best SSD for migrating Windows 11 depends on your specific needs and budget. Some popular options include Samsung 970 EVO Plus, WD Blue SN550, and Crucial MX500.

    Do I need to reinstall Windows 11 after migrating from HDD to SSD?
    No, you do not need to reinstall Windows 11 after migrating from HDD to SSD. However, you may need to update your drivers and ensure that your system recognizes the new SSD as the primary boot device.