Category: How to

How to

  • Step-by-Step Guide: How to Connect Your 2.5 SSD with SATA Cable for Faster Performance!

    Step-by-Step Guide: How to Connect Your 2.5 SSD with SATA Cable for Faster Performance!

    Are you planning to upgrade your computer’s storage capacity by adding a 5 SSD? If you are, then you might want to know the necessary steps in connecting your 5 SSD SATA cable.

    Connecting a SATA cable may sound simplistic, but some individuals might find it quite a task, especially if you’re doing it for the first time. In this blog post, we provide you with a comprehensive step-by-step guide on how to connect your 5 SSD SATA cable seamlessly.

    SSD (Solid-State Drives) is an ideal component for your computer, providing you with faster boot times, improved application loading speeds, and faster data transfer. It is deemed the future of storage technology and supports SATA (Serial ATA) interface topology, which helps transfer data to and from the computer’s motherboard. Knowing how to connect a

    5 SSD SATA cable is necessary when upgrading, assembling, or replacing a hard disk drive. This guide focuses on the crucial aspects of connecting the SSD SATA cable, taking you through the entire process in a step-by-step approach. We start with SSD installation, opening up your computer’s casing, identifying the correct SATA cable, connecting the drive, and finally, powering on your computer system.

    This guide also provides you with helpful tips that will ensure your computer remains functional and keep the data transfer process seamless. Stay tuned for a detailed guide that guarantees you stress-free installation and connectivity of your 5 SSD SATA cable.

    Read on, and let’s get started!

    Gather Your Tools

    When it comes to connecting a 5 SSD via SATA cable, there are a few things you’ll need in order to get the job done right. First and foremost, you’ll need the SSD itself and a SATA cable.

    Make sure the cable is rated for SATA III (6Gbps) for the fastest possible transfer speeds. You’ll also need a Phillips-head screwdriver to remove the cover from your desktop tower or the bottom of your laptop. Additionally, if you’re planning on cloning your existing drive to the new one, you’ll need cloning software such as Macrium Reflect or Acronis True Image.

    Once you have all your tools at the ready, it’s time to get to work on getting your 5 SSD connected via SATA cable.

    Identify Your SSD SATA Cable

    When it comes to upgrading your computer’s storage capabilities, replacing your hard drive with a solid-state drive (SSD) can make a huge difference in terms of speed and overall performance. However, before you start the installation process, it’s important to first identify your SSD SATA cable. This is the cable that connects your SSD to your motherboard, and it’s essential for ensuring that your new drive is recognized by your computer.

    To get started, you’ll need a few basic tools. These may include a screwdriver, a pair of pliers, and an anti-static wristband to prevent damage from static electricity. Once you have your tools in hand, you can begin the process of identifying your SSD SATA cable and preparing for the installation process.

    By taking the time to gather the right tools and familiarize yourself with the process, you can ensure a smooth and successful upgrade to your computer’s storage capabilities.
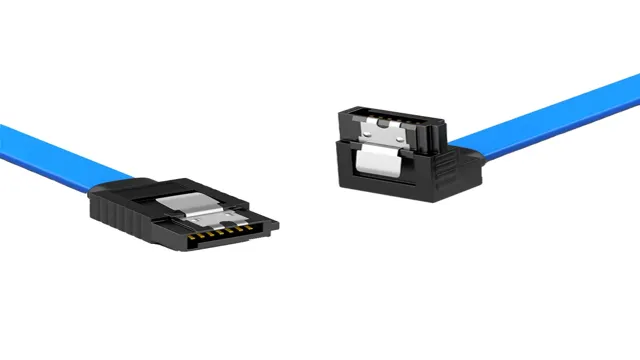
    2.5 ssd sata cable how to connect

    Get a SATA Cable

    If you’re planning to install a new hard drive or replace an old one, you’ll need to gather the tools required. One of the essential items that you’ll need is a SATA cable. SATA cables are used to connect your hard drive to your computer’s motherboard.

    They come in different lengths, so make sure that you get the right size for your needs. Aside from a SATA cable, you’ll also need a screwdriver to remove your computer’s case and install the hard drive. It’s also best to have an anti-static wristband to protect your new hard drive from damage caused by static electricity.

    Additionally, it’s a good idea to have a clean workspace where you can work without any distractions or interruptions. By having all the necessary tools and a tidy workspace, you can ensure that your hard drive installation goes smoothly and without any issues. Overall, getting a SATA cable is just one of the steps you need to take in gathering the necessary tools to install a new hard drive, but it’s an important one to get right.

    Find an Available SATA Port in Your Computer

    Before we embark on finding an available SATA port in your computer, let’s first put together the necessary tools. To do this, you’ll need a screwdriver, any SATA cables you may have, and, most importantly, a flashlight. While some computer cases have lighting, it’s always better to have a trusty flashlight just in case.

    It’s important to note that your computer must be off and unplugged before touching anything inside the case for safety reasons. With that out of the way, let’s proceed to the next step!

    Connect the Cable

    If you have a desktop computer or a laptop that doesn’t have enough storage space, one solution is to add an SSD (solid-state drive) to your system. A 5 SSD SATA cable is the bridge between the SSD and your computer’s motherboard.

    Connecting the cable is easy, and you don’t need any special technical skills to do it. The first step is to locate the SATA ports on your motherboard. These ports are usually located near the bottom of the board, and they’re marked SATA 1, SATA 2, SATA 3, etc.

    Next, plug one end of the SATA cable into the SATA port on the SSD. The cable should snap into place, and you should feel a satisfying click when it’s securely attached. Finally, plug the other end of the SATA cable into an empty SATA port on your motherboard.

    Like before, the cable should snap into place, and you should feel a click. That’s it! Your SSD is now connected to your computer, and you can start using it right away.

    Insert One End of the Cable to Your SSD

    When it comes to installing an SSD, connecting the cable is a crucial step. To begin, you’ll need to find the cable that came with your SSD. One end of the cable will be smaller and will connect to the port on your SSD.

    The other end will have a larger connector that plugs into your computer’s motherboard. Before inserting the cable, ensure that both the SSD and computer are powered off. Once you’ve located the appropriate ports, carefully plug in one end of the cable to the SSD.

    Make sure the connection is secure, but be gentle so that you don’t damage anything. Once the cable is securely connected, you can proceed with mounting the SSD in your computer case. With the cable properly connected, you’re one step closer to enjoying the benefits of a faster storage solution.

    Connect the Other End of the Cable to the SATA Port in Your Computer

    Connecting the SATA cable to your computer is a crucial step in setting up your storage system. Once you’ve connected one end of the cable to your hard drive or solid-state drive, it’s time to connect the other end to the SATA port on your motherboard. The SATA port is usually located near the bottom of your motherboard, and it’s easily identified by its L-shaped design.

    Make sure to align the pins on the SATA cable with the ports on your motherboard, and push the cable in gently until it clicks into place. It’s important to make sure the SATA cable is securely connected to your computer to ensure your storage device works properly. Once you’ve successfully connected the cable, you can proceed to configuring your storage and installing your operating system for optimal performance.

    Secure the SSD and Close Your Computer

    When it comes to adding a 5 SSD to your computer, connecting it through a SATA cable is a common way to go. First, make sure to secure the SSD to your computer case using screws or mounting brackets.

    Then, locate the SATA port on your motherboard and plug the SATA cable into both the SSD and the port. Make sure the cable is securely fastened and not loose. Once everything is connected, it’s important to close your computer to prevent any dust or debris from getting in and potentially causing damage.

    Keep in mind that there are different types of SATA cables, so make sure you have the right one for your SSD and motherboard. By following these steps and taking necessary precautions, you can successfully connect your 5 SSD using a SATA cable and enhance your computer’s storage capabilities.

    Ensure that the SSD is Properly Secured in Your Computer’s Case

    When it comes to installing an SSD in your computer, it’s important to ensure it is properly secured in your computer’s case before closing it up. Firstly, locate the drive bay where the SSD will go and ensure it has a mounting bracket or screws to secure it in place. Once you have installed the SSD on the mounting bracket or using the screws, make sure it is firmly attached to prevent any damage from vibration or movement during use.

    A loose SSD can also cause data transfer errors or even damage the drive. After securing the SSD, proceed to connect the power and data cables to the motherboard. Finally, close your computer case carefully, making sure to secure any screws or clasps that keep the case closed.

    Remember, a well-secured SSD in your computer’s case is essential for maintaining performance and preventing any damage to the drive.

    Close Your Computer and Secure the Casing

    Now that you’ve installed a new SSD in your computer, it’s important to secure it properly and close up the casing. First, make sure the SSD is properly connected to the motherboard and secured in place with any necessary screws or mounting brackets. If your computer has a separate enclosure for the hard drive, be sure to secure the SSD in that as well.

    Once everything is in place, it’s time to close up your computer’s casing. Start by carefully lining up the casing with the ports and connectors on the back of the computer. Then, gently slide the casing back into place, being careful not to force it or bend any of the delicate internal components.

    Finally, secure the casing with the appropriate screws or locking mechanisms. With your SSD properly secured and your computer’s casing back in place, you can rest easy knowing your computer is ready to handle all your storage needs.

    Test Your Connection

    If you’re looking to connect a 5 SSD to your computer using a SATA cable, you’re in the right place. First, make sure that your SSD is compatible with SATA cables.

    Once you’ve confirmed this, you can connect the cable to the SSD and plug the other end into your computer’s SATA port. Keep in mind that your computer may have more than one SATA port, so be sure to select the correct one. It’s essential to test your connection once everything is plugged in.

    You can do this by checking if your computer recognizes the SSD. If it does, congratulations! You’re now ready to use your SSD to its full potential. However, if your computer doesn’t recognize the SSD, double-check your connections and try again.

    Don’t be afraid to ask for help if you’re unsure, and remember that practice makes perfect.

    Power on Your Computer and Check if Your SSD is Readily Detected

    As you power on your computer and prepare to check if your SSD is readily detected, it’s essential to test your connection first. Check if all connections are properly plugged in, and wires are properly twisted. Once this is confirmed, move on to checking your device manager to see if your SSD is visible.

    If you cannot see it, the SSD might not be plugged in properly, or your BIOS needs an update. Consider updating your BIOS system by checking the manufacturer’s website to download the latest files. After this is complete, try checking the device manager again.

    If you can still not find it, try checking if your motherboard supports NVMe SSDs, as this might be the source of the problem. With these simple steps, you can ensure that your computer is up and running and your SSD is readily detected.

    Conclusion

    In conclusion, connecting a 5 SSD via SATA cable may seem daunting at first, but fear not! With a little patience and dexterity, you can easily make the necessary connections and enjoy lightning-fast data transfer speeds. Think of it like a complicated puzzle – once you figure out how all the pieces fit together, you’ll be feeling like a tech-savvy genius in no time.

    So, grab your SATA cable and get ready to unleash the power of your SSD!”

    FAQs

    1. How do I connect a 2.5 SSD to a PC? A: To connect a 2.5 SSD to a PC, you need to use a SATA cable, connect one end of the cable to the SSD and the other end to a SATA port on the motherboard. 2. Can I use any SATA cable to connect my 2.5 SSD? A: Yes, you can use any standard SATA cable to connect your 2.5 SSD to a PC. 3. Do I need any special tools to connect my 2.5 SSD to the PC? A: No, you do not need any special tools to connect your 2.5 SSD to a PC. You only need a SATA cable and a motherboard with a SATA port. 4. What is the maximum transfer speed using a 2.5 SSD SATA cable? A: The maximum transfer speed is determined by the SATA specification version. The latest SATA III specification supports a maximum transfer speed of up to 6 Gbps.

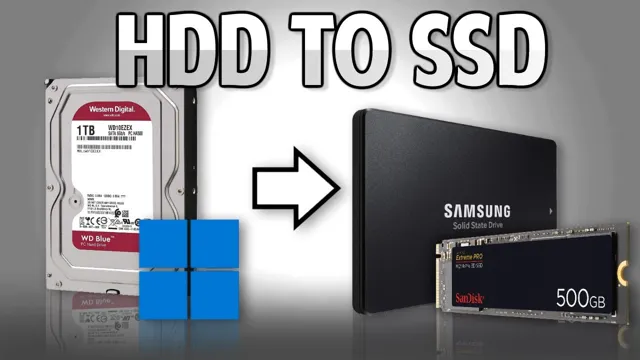
  • Maximizing Your PC Speed: Step-by-Step Guide on How to Move Windows to an SSD!

    Solid-state drives (SSDs) have become increasingly popular over the years due to their fast boot times, improved performance, and durability compared to traditional hard disk drives (HDDs). If you’re still using an HDD, moving your Windows operating system to an SSD could drastically improve your computer’s speed and responsiveness. However, the process of transferring your OS can seem daunting.

    Fear not! In this guide, we’ll break down the process into simple steps, ensuring a smooth transition to your new SSD. So, if you’re ready to boost your computer’s performance and step up your tech game, let’s dive in!

    Why move Windows to an SSD?

    If you’re wondering how to move Windows to an SSD, it’s important to understand why you might want to do so in the first place. SSDs, or solid-state drives, are a type of storage that are faster, more reliable, and more energy efficient than traditional hard disk drives (HDDs). By moving Windows to an SSD, you can greatly improve your computer’s performance, reducing boot times and speeding up application launches.

    Additionally, SSDs are less prone to failure and data corruption, making them a more secure option for storing important files. To move Windows to an SSD, you’ll need to clone your current system partition using specialized software and then install the cloned OS onto your new drive. With a little bit of careful planning and some patience, the process is relatively straightforward and can provide a significant boost to your computer’s overall speed and reliability.

    Improved boot and load times

    Moving Windows to an SSD can drastically improve your boot and load times. An SSD (solid-state drive) is a type of storage device that uses flash memory to store data. This means that there are no moving parts, resulting in faster read and write speeds.

    The process of booting up and loading programs requires reading data from the storage device, which can be slowed down by a traditional hard drive’s spinning disks. On the other hand, an SSD can access data faster due to its lack of moving parts, resulting in near-instantaneous boot times and reduced load times across all applications. By upgrading to an SSD, you’ll enjoy faster load times for everything from video games to productivity applications.

    The keyword used organically is SSD.

    how do i move windows to a ssd

    Faster file transfer and data access

    If you’re looking to speed up file transfers and data access on your Windows PC, it’s time to consider moving to an SSD. Solid-state drives use flash memory to store data, resulting in faster read and write speeds compared to traditional hard drives. This means that transferring a large file or opening a demanding application will take far less time, and you’ll experience a snappier overall performance.

    Plus, SSDs are generally more durable and reliable than mechanical hard drives, so you can count on your data being safe. Whether you’re a gamer, content creator, or just looking to improve your productivity, upgrading to an SSD is a smart move that can make a big impact on your daily computing experience. So why wait? Make the switch to an SSD and start enjoying faster file transfers and better data access today.

    Extended lifespan of your computer

    If you’re looking to extend the lifespan of your computer, one of the best things you can do is move Windows to an SSD. Solid-state drives are significantly faster than traditional hard drives, resulting in snappier performance, faster boot times, and quicker application launches. Not only that, but SSDs don’t have any moving parts, making them more durable and less prone to failure.

    By using an SSD, you’ll be able to enjoy a much more responsive computing experience, and you won’t have to worry about replacing your computer as often. Whether you’re using a desktop or laptop computer, upgrading to an SSD is an investment that’s sure to pay off in the long run. So, if you’re tired of waiting for your computer to catch up with you, consider moving Windows to an SSD and watch your productivity soar!

    Backup your data

    If you’re looking to move your Windows operating system to a new SSD, there are a few steps you need to follow. First, it’s important to back up all of your data, including personal files and any programs that you’ve installed. This will ensure that you don’t lose any important information during the transfer process.

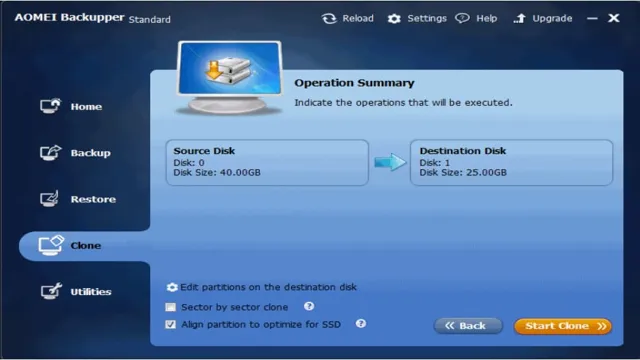
    Once you’ve backed up your data, you’ll need to clone your current hard drive onto the new SSD. There are a variety of software programs available that can help with this process, such as Macrium Reflect or Acronis True Image. Within these programs, you’ll typically select the option to clone your drive, choose the new SSD as the destination drive, and follow the prompts to complete the transfer.

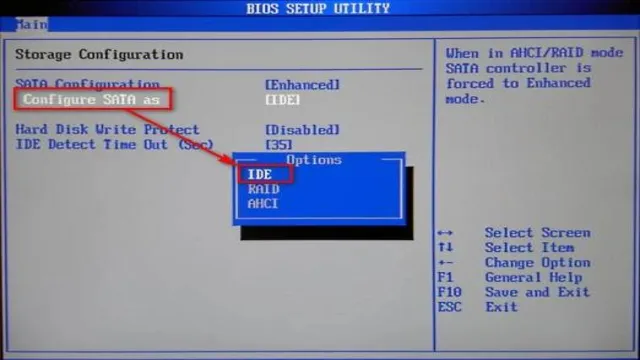
    Once the transfer is complete, you’ll want to ensure that your computer is set to boot from the SSD by going into your BIOS settings and selecting the new drive as the primary boot device. With these steps, you can easily move your Windows operating system to a new SSD and enjoy faster performance on your computer.

    Create a backup of all important files and documents

    Backing up your data is crucial to ensure that all your important files and documents are safe and secure. Losing data can be devastating, especially if it contains valuable information and memories. That’s why creating a backup of your data can be a lifesaver.

    There are many ways you can do this, such as using an external hard drive or cloud-based storage. External hard drives are affordable and offer a reliable way to store your data offline, while cloud-based storage can be accessed from anywhere with an internet connection. However, it’s important to choose a reputable provider with robust security measures to prevent unauthorized access to your data.

    Remember, backing up your data should be part of your regular routine to ensure that you are always prepared for the unexpected.

    Transfer the backup to an external drive or cloud storage

    If you want to protect your valuable data from potential losses due to system crashes, virus attacks, or human errors, regularly backing up your files is crucial. One of the best ways to ensure data safety is to transfer your backup to an external drive or cloud storage. External drives provide you with a physical copy of your data that can be easily accessed anytime, even in offline mode.

    However, external drives can be damaged or lost, so it’s always a good idea to make a copy of your backup and store it in the cloud. Cloud storage offers a more reliable solution as it allows you to access your data from anywhere with an internet connection. Moreover, cloud storage providers often have multiple backups of your data, ensuring data redundancy, and higher security.

    In any case, make sure you choose a reliable backup method that meets your needs and budget. Don’t forget to check the backup status regularly and keep your backup up-to-date. With the right backup strategy, you can avoid data disasters and feel secure knowing that all your vital information is safe and sound.

    Clone your existing drive

    If you’re looking to upgrade to an SSD from a traditional hard drive, you might be wondering how to move your Windows operating system to the new drive. One option is to clone your existing drive onto the SSD. This involves copying everything on your current drive, including the operating system, applications, and files, and transferring it to the SSD.

    This ensures that all your settings and programs are exactly the same on the new drive, making the transition seamless. To do this, you’ll need cloning software, which can be either free or paid. Some SSD manufacturers provide their own software, but there are also many third-party options available.

    Before starting, make sure that the capacity of your SSD is equal to or greater than that of your current drive. Once the cloning is complete, you can replace your old hard drive with the new SSD and boot up your computer as normal. With a little bit of planning and some simple software, moving your Windows operating system to an SSD is an easy and effective way to improve your computer’s speed and performance.

    Download and install a drive cloning software

    If you’re considering upgrading your computer’s hard drive or just want to make a backup of your data to protect against a possible crash, cloning your existing drive is a great solution. To get started, you need to download and install a drive cloning software that can make an exact replica of your current hard drive onto a new one. There are various options available in the market, but you need to choose a reliable and compatible software that matches your requirements.

    Once you have the software installed, you can begin the cloning process by selecting your source and destination drives. The process may take some time depending on the size of your drive and the speed of your computer, but once complete, you’ll have an exact copy of your existing hard drive. This will save you from the hassle of reinstalling all your software, apps, and settings on a new drive and makes the up-gradation or backup process much smoother and easier.

    So, download a reliable cloning software today and safeguard your crucial data!

    Connect your SSD via a SATA to USB adapter

    If you’re looking to upgrade your computer’s storage and make it faster, it’s a good idea to switch from a traditional hard drive to a solid-state drive (SSD). One way to do this is by using a SATA to USB adapter to clone your existing drive onto the new SSD. This process will copy everything from your old hard drive, including your operating system, documents, pictures, and applications.

    Once the clone is complete, you can remove the old hard drive and install the new SSD in its place. The benefit of doing this is that your computer will boot up faster, and programs and files will load quicker than they did on the old hard drive. The process is straightforward but may take some time depending on the size of your current hard drive and the speed of your computer.

    Overall, it is a worthwhile investment to make your computer faster and improve its overall performance.

    Clone your existing drive to the SSD

    If you’ve decided to upgrade your computer’s storage by installing an SSD, you’ll want to transfer all of your data over from the old hard drive as well. One convenient way to do this is to clone your existing drive onto the new SSD. This essentially creates an exact copy of everything that’s stored on your old drive, allowing you to seamlessly migrate your data over without having to spend hours manually transferring files.

    By cloning your drive, you can ensure that everything is set up just the way you had it on your old computer, including your operating system, installed applications, and personal files. Plus, the process is usually quite fast, since you’re copying data from one storage device to another instead of having to download files from the internet. As long as your new SSD has enough space to fit all of the data on your old drive, cloning is a great option for streamlining your upgrade process.

    Replace your hard drive with the SSD

    If you’re looking to speed up your computer and improve its performance, swapping out your old hard drive for a solid-state drive (SSD) can be a game-changer. However, one question that often comes up is how to move your Windows operating system from the old hard drive to the new SSD. First, you’ll need to clone the contents of your old hard drive onto the new SSD using cloning software.

    There are some free options available, such as Clonezilla or Macrium Reflect, or you can opt to purchase software like Acronis True Image. Once you’ve cloned your hard drive, you can remove it and install the new SSD in its place. Then, you’ll need to configure your BIOS settings to boot from the new SSD.

    Finally, you can format your old hard drive and use it for additional storage. With these simple steps, you’ll have successfully moved your Windows operating system over to your new SSD and can start enjoying faster boot times and improved system performance.

    Power off your computer and disconnect all cables

    If you’re looking to speed up your computer’s performance, one of the easiest ways to do so is by swapping out your traditional hard drive for a solid-state drive (SSD). Before you start the process, make sure to power off your computer and disconnect all cables. Once this is done, it’s time to replace your hard drive with the SSD.

    This can be a bit tricky, as SSDs typically come in different shapes and sizes compared to traditional hard drives. However, with a little research, you should be able to find the right size and form factor for your computer. In most cases, you’ll need to remove the old hard drive from its mount and then install the SSD in its place.

    Make sure to securely fasten the SSD in the mount to prevent any movement or vibration. With the SSD in place, you’ll need to reconnect any cables you disconnected earlier and power on your computer. With the new SSD installed, you should see a noticeable improvement in your computer’s startup and load times.

    So, if you’re looking to boost your machine’s performance, consider replacing your hard drive with an SSD today.

    Open the laptop or computer case

    If you want to improve the speed and performance of your computer, swapping out your old hard drive for a solid-state drive (SSD) is a great place to start. The first step is to open up the case of your laptop or computer. Make sure to turn off and unplug your computer before doing so.

    Take off the screws on the side of the case and gently pry the case open. Once the case is open, locate the hard drive. You can easily identify it by its rectangular shape and the wires that connect it to the motherboard.

    To remove it, gently lift up the clips that hold it in place and slide it out. Then, slide in your new SSD and reattach the clips. Put the case back on, replace the screws, and voila! Your computer will be running faster and smoother than ever before.

    With this simple swap, you can enjoy faster boot times, quicker application launches, and improved overall performance. So, what are you waiting for? Make the switch to an SSD today and experience the difference for yourself.

    Remove the existing hard drive

    Replacing your hard drive with an SSD can significantly increase your computer’s performance. To begin the process, you first need to remove the existing hard drive. Start by shutting down your computer and unplugging it from any power sources.

    Next, locate the hard drive bay and remove any screws or clips holding it in place. Carefully disconnect the power and data cables from the hard drive and gently slide it out of the bay. Be sure to handle the hard drive with care and avoid touching any of its delicate components.

    Once the old hard drive is removed, you can install the new SSD in its place. This simple upgrade can breathe new life into your computer and provide faster load times, improved efficiency, and an overall better computing experience. Don’t hesitate to make the switch to an SSD today and feel the difference for yourself.

    Insert the SSD into the same slot

    If you’re looking to improve the speed and performance of your computer, replacing your hard drive with a solid-state drive (SSD) is a great option. The process of installing an SSD is relatively simple and requires just a few steps. One of the most important steps is inserting the SSD into the same slot as your hard drive.

    This will ensure that the SSD is properly connected to your computer and can be recognized by the system. To begin the process, you’ll need to open up your computer and locate the hard drive. You’ll need to disconnect the cables that connect the hard drive to the motherboard and power supply before removing it from the computer.

    Once you’ve removed the hard drive, you can insert the SSD into the same slot. Make sure that it’s properly aligned and securely fastened in place before reattaching the cables. Once you’ve completed this step, you’ll need to install the operating system and any necessary drivers onto the SSD.

    This will ensure that your computer recognizes the new drive and can use it effectively. You can do this by using a USB drive to install the operating system onto the SSD. Overall, replacing your hard drive with an SSD is a great way to improve the speed and performance of your computer.

    By inserting the SSD into the same slot as your hard drive, you can ensure that it’s properly connected and recognized by your system. With a little bit of effort and some basic troubleshooting, you can have your computer running faster and more efficiently in no time.

    Transfer Windows to SSD

    If you’re looking to upgrade your computer’s speed and performance, one of the first things you can do is transfer Windows to an SSD. Doing so can improve your computer’s boot-up speed, program loading times, and overall system responsiveness. Fortunately, it’s relatively easy to do.

    The first step is to clone your existing Windows installation onto the new SSD. There are several software tools available to help with this, such as EaseUS Todo Backup and Macrium Reflect. Once you’ve cloned your installation, you’ll need to change the boot order in your computer’s BIOS settings so that it boots from the SSD by default.

    Finally, you can wipe your old hard drive and use it for storage or to create a backup of your new SSD. With these simple steps, you can significantly improve your computer’s performance, all without having to start from scratch with a fresh Windows installation.

    Boot up the computer or laptop

    If you’re looking to boost the speed and performance of your computer or laptop, one of the best ways to do so is by transferring Windows to an SSD. SSDs (Solid State Drives) offer much faster read and write speeds than traditional hard drives, which means your computer will boot up faster, programs will load quickly, and your overall experience will be smoother. The first step in transferring Windows to an SSD is to boot up your computer or laptop and ensure that the SSD is properly connected to your device.

    Once you’ve done that, you’ll then need to clone your existing Windows installation to the SSD using a reliable software tool. This process can take some time but once it’s finished, you’ll have a lightning-fast system that’s ready to take on any task you throw at it. So if you’re tired of slow boot times, unresponsive programs, and sluggish performance, consider upgrading to an SSD and transferring Windows today.

    Your computer will thank you!

    Press the key for BIOS options

    If you’re looking to give your computer a speed boost, transferring windows to an SSD could be the perfect option for you. Before you start, you’ll need to make sure that your computer’s BIOS is set up correctly. When you turn your computer on, you should see a message prompting you to press a key to access the BIOS options.

    Once you’re in the BIOS, you’ll need to check that your computer supports booting from an SSD and that it’s enabled. Once you’ve checked this, you’ll be able to proceed with transferring Windows to your SSD. This process involves cloning your existing Windows installation onto the new drive.

    There are several tools available that can help you with this, and it’s always a good idea to back up your data before you start. Once you’ve successfully transferred Windows to your SSD, you should notice a significant improvement in your computer’s boot time and overall performance. So, if you’re looking to speed up your computer, transferring Windows to an SSD could be just what you need.

    Select the SSD as the boot option

    When you’ve installed a new SSD in your PC, you’ll need to transfer Windows to the SSD as the primary boot drive. First, you’ll need to enter the BIOS and select the SSD as the boot option. This ensures that your system will boot from the SSD instead of the old hard drive.

    Once you’ve selected the SSD as the boot option, you can begin transferring Windows. There are several software options available for this process, including third-party software and Microsoft’s built-in tools. It’s important to note that the transfer process can take some time, depending on the size of your hard drive and the speed of your SSD.

    However, once the transfer is complete, you’ll enjoy faster boot times and overall system performance. So, take the time to transfer Windows to your SSD – your PC (and your patience) will thank you.

    Follow the prompts to install Windows on the SSD

    If you’re running Windows on an HDD and looking to upgrade to an SSD, then transferring your operating system (OS) to the new drive is a necessary step. Thankfully, the process is relatively straightforward, and you can follow a few prompts to get the job done. Before proceeding, make sure that your SSD has enough storage space to accommodate Windows and other applications.

    Once you have everything ready, connect your SSD to your computer and back up all critical data to avoid data loss. Now, open your computer’s BIOS settings by pressing the F2 or Del key during startup, select the boot device, and choose your SSD as the primary boot drive. This will ensure that your computer will start from your SSD instead of the old HDD.

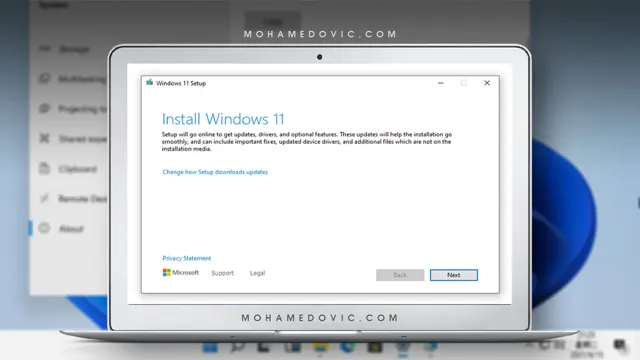
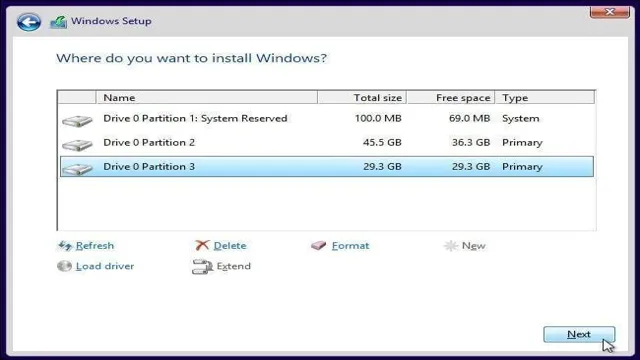
    Once you’re in the Windows installation screen, choose the custom installation option and select your SSD as the destination drive. Follow the prompts to install Windows on the SSD, and within a few minutes, you’ll have Windows up and running on your new SSD with all your essential files and applications intact. By following these steps, you can significantly improve your Windows’ speed and performance while also enjoying faster boot times and quicker application launches.

    With a few simple steps, transferring Windows to an SSD is the best upgrade you can give to your PC.

    Conclusion

    In conclusion, moving Windows to an SSD is the equivalent of teaching your computer how to fly first class. No longer will your operating system be burdened by slow loading times and sluggish performance. With a few simple steps, you can take your system to new heights and experience the speed and efficiency you deserve.

    So, don’t wait any longer, it’s time to give your computer the upgrade it deserves and watch it soar!”

    Enjoy the faster and smoother performance of your computer with an SSD.

    If you’re looking to enjoy faster and smoother performance from your computer, it’s time to consider an SSD. With solid-state drives becoming more affordable and widely available, upgrading from a traditional hard drive can give your machine a serious boost. In fact, one of the best ways to improve your computer’s speed and performance is to transfer Windows to an SSD.

    Doing so can significantly reduce boot times, improve overall system responsiveness, and cut down on program loading times. By making this simple upgrade, you’ll be able to breeze through everyday tasks and enjoy a much more satisfying computing experience. So why wait? Make the switch to an SSD today and bring new life to your trusty old computer!

    FAQs

    What is an SSD?
    An SSD (Solid State Drive) is a type of storage device that uses flash memory to store data.

    Why should I move Windows to an SSD?
    Moving Windows to an SSD can greatly improve your computer’s speed and performance, as SSDs are faster and more efficient than traditional hard drives.

    How do I clone my Windows operating system to an SSD?
    You can use software like Clonezilla or Macrium Reflect to clone your Windows operating system to an SSD, or use the built-in Windows Backup and Restore feature.

    Do I need to reinstall Windows on my new SSD?
    If you clone your Windows operating system to your new SSD, you should not need to reinstall it. However, if you are doing a fresh install on a new SSD, you will need to reinstall Windows.

  • How to Easily Change Your M.2 SSD with Configuration Jumper: Step-by-Step Guide

    Are you looking to change the M.2 SSD configuration jumper but don’t know where to start? Don’t worry, you’re not alone! Many people find this task confusing and complicated. If you’re wondering what the M.

    2 SSD configuration jumper is, it’s a small plastic clip or switch located near the M.2 slot on your computer’s motherboard. It changes how your M.

    2 drive communicates with your system, allowing you to configure it for compatibility with different types of hardware. Changing the M.2 SSD configuration jumper can be a bit tricky, but with some basic knowledge and a few simple steps, you’ll be able to successfully change it in no time.

    In this blog post, we’ll walk you through how to change the M.2 SSD configuration jumper. We’ll explain what the different jumper settings mean, and give you a step-by-step guide on how to change it yourself.

    So, whether you’re a tech-savvy professional or a novice computer user, this guide will help you change your M.2 SSD configuration jumper with ease. So, let’s dive in and learn how to change the M.

    2 SSD configuration jumper.

    What is an M.2 SSD Configuration Jumper?

    Have you ever heard of an M.2 SSD configuration jumper? You may be wondering what it is and how it can affect your SSD. Well, a configuration jumper is a small piece of hardware that sets different parameters for your M.

    2 SSD. It can be used to enable or disable different features of your SSD such as thermal throttling or power management. Additionally, it can also be used to change the interface of your M.

    2 SSD from SATA to NVMe or vice versa. Changing the interface can have a significant impact on the performance of your SSD, so it’s important to ensure that you have the correct jumper setting for your specific needs. If you’re not familiar with the configuration jumper, it’s best to consult with your motherboard or SSD manufacturer to verify the correct settings and avoid any potential issues.

    Overall, the configuration jumper is a useful tool for M.2 SSD users who want to fine-tune their SSD’s performance and tailor it to their specific needs.

    Explanation of M.2 SSD jumper and its purpose

    An M.2 SSD configuration jumper is an electronic component that can be found on some M.2 SSDs.

    It is a small switch that can be used to switch between different modes of operation, such as SATA or PCIe mode, depending on the type of motherboard or system they are installed on. The purpose of this jumper is to allow system builders and end-users to configure M.2 SSDs to work optimally with their specific systems, ensuring that they can take full advantage of their storage performance and capabilities.

    This jumper is a valuable tool for those that need to configure M.2 SSDs on different systems, as it eliminates the need to worry about compatibility issues and ensures that the SSD is working as intended. For example, if an M.

    2 SSD is operating in SATA mode, it may not be able to reach its full potential in terms of data transfer rates and performance, which can be an issue for those relying on their SSD for fast data access. However, by switching the configuration jumper to PCIe mode, users can unlock the full potential of their M.2 SSD.

    Overall, the M.2 SSD configuration jumper is a simple yet effective tool that can make a big difference in the performance and usability of an M.2 SSD.

    By allowing users to switch between different modes of operation, this jumper can ensure that their M.2 SSD is working optimally with their system, resulting in faster data transfers and improved performance. So, if you are looking to optimize the performance of your M.

    configuration jumper how to change m.2 ssd

    Benefits of changing your M.2 SSD configuration jumper

    An M.2 SSD configuration jumper is a small device that allows you to change the way your M.2 SSD works.

    By changing the jumper settings, you can enable or disable various features such as RAID and boot order. There are many benefits to changing your M.2 SSD configuration jumper, including improved performance, increased stability, and better compatibility with other hardware.

    One of the main benefits of changing your M.2 SSD configuration jumper is improved performance. By enabling features like RAID, you can increase the speed and responsiveness of your system.

    This is especially important for gamers and other power users who require fast and reliable performance from their computers. Another benefit of changing your M.2 SSD configuration jumper is increased stability.

    By disabling unnecessary features, you can reduce the risk of crashes, freezes, and other system errors. This is particularly important for users who rely on their computers for business or other critical applications. Finally, changing your M.

    2 SSD configuration jumper can improve compatibility with other hardware. By enabling or disabling certain features, you can ensure that your M.2 SSD works seamlessly with other components in your system.

    Step-by-Step Process to Change M.2 SSD Configuration Jumper

    Changing the configuration jumper on an M.2 SSD can seem like a daunting task, but with a step-by-step process, it can be easily accomplished. First, you must locate the configuration jumper on the SSD, which is typically located near the M.

    2 slot. Next, carefully remove the jumper using a pair of tweezers or a small tool. Once the jumper has been removed, you can then change the configuration settings as needed.

    After modifying the settings, carefully replace the jumper in its original position, ensuring that it is properly seated. Finally, test the M.2 SSD to confirm that the changes have been successfully implemented.

    By following this process, you can change the configuration of an M.2 SSD without causing any damage, and achieve optimal performance for your system. So, next time you need to change the configuration jumper, don’t worry – it’s simpler than you may think!

    Tools required to change M.2 SSD jumper settings

    If you are experiencing slow boot or read/write speeds on your M.2 SSD, you might need to change its configuration jumper. Luckily, it is a quick and easy process that requires only a few tools.

    To begin, you will need a screwdriver, an anti-static wristband, and the new jumper settings that correspond to your desired configuration. Before you start, make sure to power down your computer and disconnect all cables. Then, ground yourself with the wristband to avoid any static electricity that could damage your hardware.

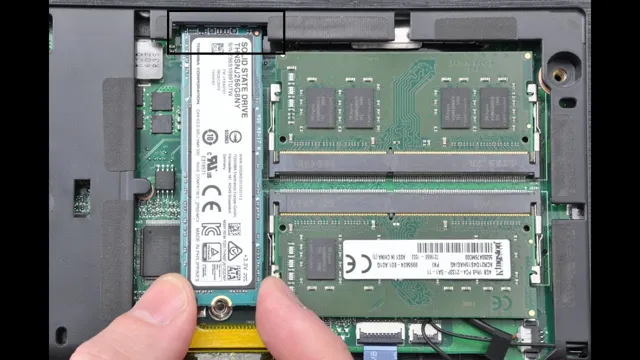
    Locate your M.2 SSD and gently remove it from its slot. On the underside, you will see the small jumper pins that control the configuration.

    Carefully remove the existing jumper and replace it with the new one, making sure to match the pins correctly. Reinsert the M.2 SSD into its slot, screw it back in place, and reconnect all cables.

    Power up your computer and verify that the new configuration has been applied. With these simple steps and tools, you can optimize your M.2 SSD for better performance.

    Locating your M.2 SSD on your motherboard

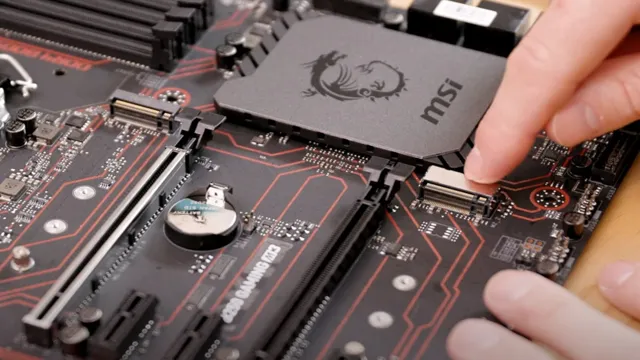
    If you want to upgrade your computer’s storage by installing an M.2 SSD, the first step is to locate the M.2 slot on your motherboard.

    Typically, M.2 slots are located near the PCI-Express slots or near the RAM slots. Once you locate the M.

    2 slot, you need to check the configuration jumper settings. The configuration jumper determines whether you are using an NVMe SSD or a SATA SSD. You can change the configuration jumper easily by sliding it to the correct position.

    It’s important to note that some motherboards have multiple M.2 slots, so you need to make sure you’re changing the configuration jumper for the correct slot. By following these simple steps, you’ll be able to easily locate your M.

    2 SSD slot and configure the jumper correctly for optimal performance.

    Changing M.2 SSD configuration jumper settings

    If you need to change the M.2 SSD configuration jumper settings of your SSD, it might sound like a daunting task. However, it is actually a straightforward process that you can do on your own.

    The jumper is a small plastic piece that connects two pins on a circuit board, which controls the operation mode of your SSD. Changing the jumper settings can improve the performance of your SSD, or allow it to work with different systems. To begin, you will need to locate the jumper pins on your SSD and determine which position you need to set it to.

    Then, you can use a pair of tweezers or a small plastic tool to gently move the jumper to the desired position. It’s important to handle the jumper with care and make sure it is in the correct position before replacing the cover of your device. Overall, the process is relatively simple, and with some patience and attention to detail, you can successfully change the M.

    2 SSD configuration jumper settings on your own.

    Precautions to Take While Changing M.2 SSD Jumper Settings

    Changing the M.2 SSD jumper settings may seem like a simple task, but precautions must be taken to avoid any damage or data loss. Before making any changes, it’s essential to first shut down your computer and disconnect all cables.

    Take note of the location of the current jumper and the position it’s set to, so you can return it to the same setting if necessary. When handling the jumper, use an anti-static bracelet or mat to prevent electrostatic discharge from damaging the SSD. Depending on your computer’s manufacturer, the jumper may be in different positions, so it’s important to refer to the user manual or online resources for correct information.

    Lastly, double-check the setting before reassembling your computer and turning it back on. By following these steps, you can safely change the configuration jumper on your M.2 SSD without any issues.

    How to handle M.2 SSD components properly

    M.2 SSD, jumper settings If you’ve been working with computer storage devices for a while, then you’re probably familiar with the M.2 SSD.

    This type of storage device is popular due to its small size and high-speed access. However, when it comes to changing the jumper settings on an M.2 SSD, there are a few precautions you need to take.

    First, ensure that the device is powered off and that you’re grounded before touching any internal components. Second, be very careful when handling the M.2 SSD as they can be easily damaged if bent or dropped.

    It’s best to handle the device by the edges and avoid touching the connectors. Third, make sure you have a clear understanding of the jumper settings you’re changing as incorrectly adjusting these can lead to data loss or device malfunction. With these precautions in mind, you can safely adjust the jumper settings on your M.

    2 SSD and enjoy faster and more efficient storage access.

    Avoiding damage to your M.2 SSD while changing jumper settings

    If you’re planning to change the jumper settings on your M.2 SSD, it’s important to take a few precautions to avoid damaging the drive. First and foremost, make sure you’re grounded while handling the drive.

    This can be as simple as touching a grounded metal object before handling the drive or wearing an anti-static wristband. Additionally, be careful when removing and reinserting the drive to avoid damaging the connector pins. It’s also a good idea to consult the manufacturer’s instructions before making any changes to the jumper settings to ensure you’re taking the correct steps.

    By taking these precautions, you can avoid potentially costly damage to your M.2 SSD while adjusting its settings to your preferences.

    Conclusion

    In conclusion, changing your M.2 SSD is as easy as flipping a switch thanks to the configuration jumper. Think of it like a superhero cape that allows your computer to soar to new heights of performance and storage capacity.

    So don’t be afraid to take control of your hardware and make the upgrade – with this simple tool, you’ll be soaring in no time.”

    FAQs

    What is a configuration jumper and how does it relate to changing an M.2 SSD?
    A configuration jumper is typically a small plastic piece that is placed over two pins on a circuit board to change or reset certain settings. In the case of changing an M.2 SSD, a configuration jumper may need to be moved to disable the SATA interface before installing the new SSD.

    Is it necessary to change any BIOS settings when swapping out an M.2 SSD?
    It may be necessary to change BIOS settings to properly recognize and configure the new M.2 SSD. This can include changing the boot order to prioritize the new SSD or enabling/disabling certain interface options.

    What are some common reasons to change an M.2 SSD in a computer?
    Some common reasons include upgrading to a faster or larger storage capacity, replacing a faulty SSD, or simply to match the needs of changing workloads or software requirements.

    What precautions should be taken when handling an M.2 SSD during installation or removal?
    It is important to handle the SSD with care to avoid damaging the circuit board or exposing it to static electricity. Additionally, it is important to properly ground yourself before handling the SSD and to follow any specific instructions provided by the manufacturer.

  • Step-by-Step Guide: How to Clone Your SSD to Another SSD Easily

    If you’re looking to upgrade your SSD, you might be wondering how to go about transferring all your files, apps, and operating system to your new drive. Luckily, cloning your SSD to another SSD is easier than you might think. In this step-by-step guide, we’ll show you exactly how to do it, so you can enjoy a faster computer without losing any data.

    First, make sure you have a second SSD that is the same size or larger than your current SSD. Next, you’ll need to decide which software to use for the cloning process. There are free options like Clonezilla and Macrium Reflect, or you can opt for paid software like Acronis True Image.

    Once you have your software of choice, it’s time to connect your new SSD to your computer. Depending on your computer model, you may need to use a USB adapter or an enclosure to connect the SSD externally. After your new SSD is connected, launch your cloning software and follow the prompts to clone your current SSD to the new one.

    This may take some time, depending on the size of your current SSD and the speed of your computer. Once the cloning process is complete, you can remove your old SSD and replace it with the new one. Boot up your computer, and you should be up and running with all your files and apps intact on your new, faster SSD.

    In summary, cloning your SSD to another SSD is a simple process that can save you the hassle of reinstalling all your apps and files on a new drive. Just remember to make sure your new SSD is the same size or larger than your current SSD, and choose a reliable software to perform the cloning process. With these tips in mind, you can enjoy the benefits of a faster drive without sacrificing any data.

    What You’ll Need

    If you’re looking to clone your SSD to another SSD, there are a few things you’ll need to get started. First and foremost, you’ll need both the original SSD and the new SSD that you’ll be cloning to. You’ll also need a computer with a free SATA port and SATA cable, as well as software that can handle SSD cloning, such as Acronis True Image or EaseUS Todo Backup.

    It’s important to note that some SSD manufacturers also offer their own cloning software specific to their products. You’ll also need a way to connect the new SSD to your computer, such as a USB to SATA adapter or a docking station. Once you have all of these materials, you can begin the process of cloning your SSD and transferring all of your data to the new drive.

    It’s important to be careful and follow the instructions closely to ensure a successful transfer without any data loss. Overall, with the right tools and a bit of patience, cloning your SSD to another drive is an achievable task that can help improve your system’s performance and increase its storage capacity.

    Two SSDs with Enough Room for Cloning

    If you’re looking to clone your SSD to a new drive, you’ll need two SSDs with enough room to accommodate all your data. You’ll also need cloning software, which can usually be downloaded for free from the manufacturer’s website. Some popular options include Clonezilla, EaseUS Todo, and Macrium Reflect.

    Once you have your software and your drives, the process is fairly simple. First, you’ll connect both drives to your computer, making sure that the new SSD is empty and formatted. Next, you’ll run the cloning software, which will guide you through the process of selecting the source and destination drives and configuring any additional settings.

    After that, the software will handle the cloning itself, copying all your data from the old SSD to the new one. Depending on the amount of data involved, this process can take anywhere from a few minutes to several hours. But once it’s complete, you’ll have a perfect copy of your old drive, ready to boot up and use just like the original.

    So, if you need to upgrade your SSD or simply want to create a backup of your data, cloning is a great solution that’s easy to implement and requires only a few basic tools.

    how do i clone my ssd to another ssd

    Cloning Software

    When it comes to cloning software, there are a few things you’ll need to make sure everything runs smoothly. First and foremost, you’ll need a reliable hard drive where you’ll store the cloned data. A hard drive with plenty of space, at least the same size as the drive you want to clone, is essential.

    Additionally, you’ll need cloning software such as Acronis True Image or EaseUS Todo Backup. These software programs will create a complete copy of your hard drive, allowing you to transfer your operating system, settings, and files to a new hard drive or computer. To start cloning, you’ll also need to make sure your hardware and software are compatible with the cloning software.

    When considering which software to use, make sure to check its compatibility with both your operating system and the specific hard drive you want to clone. Once you have all the necessary tools, cloning your hard drive will be a breeze. Just make sure to follow the instructions carefully and keep backups of all your important files in case anything goes wrong.

    In conclusion, cloning software requires a few essential things to ensure success. A reliable hard drive, compatible hardware and software, and cloning software are all necessary for the process. By having these things in place, you can easily and efficiently transfer your data to a new drive or computer without losing any files or settings.

    A USB-to-SATA Adapter

    If you’re looking to connect an old hard drive to your computer, a USB-to-SATA adapter is a great solution. But what exactly do you need to get started? First, you’ll need the adapter itself – these can be found online or at tech stores for relatively affordable prices. You’ll also need a spare SATA cable to connect the adapter to your hard drive, as well as a power source for the adapter itself.

    Many USB-to-SATA adapters come with their own power supply, while others can be powered through your computer’s USB port. Once you have all of these components, you’ll be able to easily connect your old hard drive to your computer and access all of its contents. So if you’re ready to give new life to an old hard drive, round up the necessary supplies and get started today!

    Preparation

    If you’re planning on upgrading your SSD, cloning it to a new drive should be your go-to solution so you can easily transfer all your files without losing anything. Before you begin, it’s essential to prepare for the process by making sure all your files are backed up. Back up everything to an external hard drive or use a cloud storage service so you can easily access and transfer your files after the cloning process.

    You’ll also need software to clone your drive such as Macrium Reflect or Acronis True Image. Make sure to download and install this software onto your computer before you start. Finally, make sure you have the right equipment to complete the cloning process.

    You’ll need a USB to SATA adapter to connect your new SSD to your computer. These can easily be purchased online or at your local electronics store. With proper preparation, cloning your SSD can be a smooth and easy process.

    Back Up Your Data

    When it comes to data backup, preparation is key. Before you can begin the process of safeguarding your valuable information, you need to make some critical decisions. Firstly, you need to decide which data is critical to your business functioning.

    This could include crucial client data, financial records, and important communication logs, among other things. Secondly, you need to determine the frequency at which you need to back up your data. Depending on the frequency of new data creation, the size of your database, and the amount of storage space available, this may be daily, weekly, or monthly.

    Once you have these two pieces of information sorted, you can choose the backup method that will work best for you. Some options include cloud storage, external hard drives, or tape backup systems. It’s essential that you choose a backup method that is secure, reliable, and easily retrievable in case of an emergency.

    By taking these initial steps, you can give yourself peace of mind that your data is safe, and your business can continue to run smoothly.

    Make Sure Both SSDs Are Connected

    When it comes to upgrading your computer with a new SSD, it’s important to make sure that both SSDs are connected properly. First, gather all necessary tools and equipment, including your new SSD, screwdriver, and SATA cables. Next, disconnect all power sources and cables from your computer, and open up the case to access the motherboard.

    Locate the SATA ports and connect your new SSD to an available port. Once both SSDs are connected, you’ll need to configure your computer’s BIOS settings to recognize both drives. This can usually be done by pressing a key during boot-up to access the BIOS menu and selecting the “Storage” or “SATA Configuration” option.

    Finally, save your changes and exit the BIOS, and your computer should recognize both SSDs. By taking the time to properly prepare and connect your new SSD, you can ensure a smooth and efficient upgrade process. Remember to always handle your hardware with care and caution to avoid static electricity and other damages.

    Cloning Your SSD

    If you’re looking to upgrade your computer’s storage capacity or want to switch to a faster SSD, the easiest way is to clone your current SSD to the new one. Cloning your SSD means copying everything on it, including your operating system, applications, and data, to another SSD. The process is relatively simple and can be done using free cloning software like Macrium Reflect or Clonezilla.

    First, connect both SSDs to your computer and open the cloning software. Select the source SSD (the one you want to clone) and the destination SSD (the empty one). Follow the prompts to start the cloning process.

    Once the cloning is complete, shut down your computer and replace the old SSD with the new one. When you power up your computer, it should boot up from the new SSD as if nothing changed. Cloning your SSD is an excellent way to save time and hassle when upgrading or switching to a new SSD.

    Open the Cloning Software

    Once you have acquired the cloning software, it’s time to open it up and get started. Make sure your computer is turned on, and the SSD you want to clone is connected and recognized. Open the cloning software on your computer and follow the instructions provided.

    It’s important to make sure you have selected the correct source and destination drives before proceeding. Once you have chosen the correct drives, you’ll be prompted to begin the cloning process. Depending on the size of your SSD, this process can take anywhere from a few minutes to several hours.

    During this time, it’s important not to interrupt the cloning process, as this can lead to errors or data loss. Once the cloning is complete, you’re ready to transfer your data onto your new SSD and enjoy faster speeds and improved performance.

    Select Your Source and Destination SSDs

    When it comes to upgrading your computer’s SSD, the process of cloning the existing drive onto the new SSD may seem daunting at first, but it’s actually quite simple. The first step is to select your source SSD and your destination SSD. It’s important to make sure that the destination SSD has enough capacity to hold all the data from the source drive.

    Once you have your SSDs selected, the next step is to download and install a cloning software. There are many different cloning software options available, but make sure to choose one that is compatible with both your source and destination SSDs. Once you’ve selected and installed the cloning software, follow the prompts to clone your source SSD onto the new destination SSD.

    It’s important to note that the process can take some time depending on the size of your SSD and the speed of your computer, but once completed, you’ll have a brand new SSD with all of your data intact. Don’t forget to properly dispose of your old SSD to ensure the security of your personal data.

    Choose the Cloning Method

    Cloning your SSD can be an essential process, especially when upgrading to a new and more powerful drive. It’s important to choose the cloning method that best suits your needs and capabilities. The most popular cloning method used is the disk cloning software, which allows you to create an exact copy of your existing SSD onto the new one.

    This method is straightforward and efficient, and you can even clone your drive without connecting to the internet. However, it requires some technical knowledge and may not be the best option if you’re not comfortable with software installation and configuration. Another cloning method is the hardware cloning method, which involves using a physical device to make a copy of your drive.

    This method is user-friendly, but it does require an additional hardware purchase. Ultimately, whichever cloning method you choose, make sure to back up your data beforehand, and follow the instructions carefully to avoid any potential errors.

    Post-Cloning Steps

    “Cloning your SSD to another SSD can be a great way to upgrade your system without having to reinstall all of your programs and settings from scratch. Once you’ve completed the cloning process, there are a few important steps you should take to ensure your new SSD is working properly. First and foremost, you’ll want to make sure your new SSD is set as the primary boot drive in your computer’s BIOS settings.

    This will ensure that your system is booting up from the new drive instead of the old one. Additionally, you may want to run a disk check or other diagnostic tool to make sure there are no errors or issues with your new drive. Finally, you may want to consider enabling TRIM or other SSD-specific optimizations to help prolong the lifespan of your new drive.

    With these simple steps, you can ensure that your cloned SSD is working as smoothly and efficiently as possible, giving you a speedy, reliable system for years to come.”

    Remove Your Old SSD and Install the New One

    Now that you’ve successfully cloned your old SSD and everything has gone smoothly so far, it’s time to replace the old SSD with the new one. Before getting started, make sure you power off your computer and unplug it from the wall outlet to avoid any potential electrical hazards. Once you’re ready, locate the old SSD and disconnect it from the motherboard, carefully removing any mounting screws or brackets that may be in the way.

    Then, take the new SSD and secure it in the same location using any necessary screws or brackets. Once that’s done, connect the SATA and power cables to the new SSD, double-checking that they’re firmly in place. Finally, power on your computer and check that the new SSD is recognized by your system, and you’re good to go! With this simple post-cloning step completed, your computer should be running faster and more efficiently than ever before.

    Check If Your New SSD Works Properly

    One essential step after cloning your hard drive to a new SSD is to ensure that your new storage device works correctly. There are a few simple steps you can follow to ensure everything is functioning as it should. Firstly, check the BIOS settings to ensure that the motherboard recognizes the new SSD as the primary boot drive.

    Secondly, run a diagnostic test to ensure that all areas of the SSD are accessible and not damaged. Lastly, run some speed tests to see the data’s read and write speeds to ensure that your system’s performance is not compromised. By performing these post-cloning steps, you can rest assured that your new SSD is functioning correctly and will deliver high performance.

    Conclusion

    Cloning your SSD to another SSD is like making an exact replica of your prized possession. It’s as simple as pressing a few buttons, and voila! You have a twin. But unlike identical twins, there won’t be any sibling rivalry – both SSDs will happily coexist in harmony.

    So, go ahead and make a clone of your SSD, because who wouldn’t want their favorite gadget to have its doppelganger? After all, two is always better than one!”

    FAQs

    What is SSD cloning?
    SSD cloning is the process of copying all the data stored on one SSD to another. This is done to transfer the data to a new SSD, upgrade the existing SSD, or create a backup of the SSD.

    Why do I need to clone my SSD to another SSD?
    You may need to clone your SSD to another SSD to transfer data to a new computer or upgrade your existing computer. Cloning also helps in creating a backup of your SSD, which can be useful in case of data loss or system failure.

    How do I clone my SSD to another SSD using software?
    To clone your SSD to another SSD, you can use software like EaseUS Todo Backup, Clonezilla, or Macrium Reflect. These software programs can help you create a copy of your SSD, including the operating system, all installed applications, and personal data.

    Can I clone my SSD to a larger capacity SSD?
    Yes, you can clone your SSD to a larger capacity SSD, but you will also need to adjust the partition size during the cloning process. Most cloning software comes with an option to adjust the partition size during cloning, or you can use partition management software to resize the partitions after cloning.

  • Unlock the Full Potential of Your SSD: Mastering the Art of Slaving Your Drive

    If you’re looking to make the most out of your computer’s performance, one way to do so is by slaving an SSD drive. This step-by-step guide will explain everything you need to know about this process, from why you should do it to how to get it done. First things first, why should you consider slaving an SSD drive? An SSD (solid-state drive) is faster and more reliable than a traditional hard drive, and slaving it means setting it up as a secondary drive on your computer.

    This allows you to use it for storage purposes, such as storing files, documents, and media, while keeping your primary drive free for the operating system and applications. To begin slaving your SSD drive, you’ll need to physically install it into your computer. This may involve opening up the case, unscrewing components, and connecting cables, so be sure to follow proper safety precautions and instructions.

    Once your SSD drive is installed, the next step is to initialize it and partition it. This involves creating a logical storage unit on the drive, which can be done through your computer’s disk management tool. You’ll need to specify the size of the storage unit, formatting options, and assign it a drive letter for easy access.

    Finally, you’ll need to transfer the files you want to store on your SSD drive over. This can be done through a simple drag and drop method, or by using a data transfer software. Once your files are on your SSD drive, you’ll be able to enjoy faster access times and increased performance.

    In conclusion, slaving an SSD drive can significantly improve your computer’s performance and storage capacity. With this step-by-step guide, you’ll be able to get it done in no time. So what are you waiting for? Give it a try and see the difference for yourself!

    Understanding the Basics of Slaving

    When it comes to improving the storage capacity and performance of your computer, slaving an SSD drive is a great option. Slaving is the process of connecting an additional SSD drive to your computer to share resources and improve performance. The first step in slaving an SSD drive is to physically install it in your computer, making sure to properly connect the cables.

    Once installed, you will need to access the Disk Management tool in your computer’s operating system to initialize and format the new drive. From there, you can partition the drive and assign a drive letter. Slaving an SSD drive can offer many benefits, including increased storage capacity and faster performance for tasks like booting up your computer and accessing files.

    With the right tools and techniques, slaving an SSD drive can be an easy and effective way to enhance your computer’s capabilities.

    What is a Secondary Drive/Slave Drive?

    A secondary drive, also known as a slave drive, is an additional storage device that is connected to a primary drive on a computer. The primary drive, or master drive, is usually the main hard drive where the operating system and important files are installed. The secondary drive can be either an internal or external drive that is used for storing extra files and programs.

    By slaving the secondary drive to the primary drive, the computer can access both drives simultaneously, allowing for more efficient storage and organization of data. Think of it like having two bookshelves – one for your most frequently used books and another for the books you don’t need as often. By slaving the secondary drive to the primary drive, you can easily access and organize your files in a way that suits your needs.

    how to slave ssd drive

    Why Slave an SSD Drive?

    Slaving an SSD drive is a common practice that involves using one drive to boot from (the master drive) and another to store data (the slave drive). But why would you want to slave an SSD drive? Essentially, it allows you to extend the storage capacity of your computer without having to replace the existing drive. It’s also a good way to separate your operating system and applications from your personal files, making it easier to back up and organize your data.

    Additionally, if you’re dealing with particularly large files such as videos or RAW photos, you may find that your main drive is quickly running out of space. Slaving another drive can help alleviate this issue, giving you more room to work with. Whatever the reason, slaving an SSD drive is a useful technique that can help boost your computer’s capabilities and make life a lot easier.

    Preparing for the Process

    If you’re looking to boost your computer’s storage capacity, slaving an SSD drive may be the way to go. Before you start, make sure your computer has an open power and data connector on the motherboard. Once that is confirmed, identify the correct bay to insert your SSD drive and ensure that you have the necessary cables to connect it.

    Then, you’ll need to configure the BIOS settings to recognize the new drive. This involves navigating to your computer’s BIOS screen, selecting the drive boot sequence, and choosing the new SSD as the primary boot drive. Finally, you’ll need to format the drive and create a new partition to start using it.

    With these steps completed, your computer should recognize and utilize the newly slaved SSD drive for faster computing speeds.

    Check Compatibility and Capacity

    Before you start with the process of upgrading and installing new hardware components on your computer, it’s important to check for compatibility and capacity. Compatibility refers to whether the new component will work well with the existing hardware and software. For example, if you’re planning to upgrade your RAM, you need to check if the new RAM module is compatible with your motherboard and processor.

    On the other hand, capacity refers to the maximum amount of data that a hardware component can handle. For instance, if you’re planning to install a new hard drive, ensure that it has enough capacity to store all your files and documents. By checking compatibility and capacity beforehand, you can avoid any issues that may arise during the installation process and ensure that your computer runs smoothly with the new components in place.

    Check for Dual Ports and Cables

    When it comes to preparing for the process of charging your devices, it is important to check for dual ports and cables. Having dual ports will allow you to charge multiple devices simultaneously, saving you time and hassle. Make sure to also have the appropriate cables for each of your devices, as using incompatible cables can damage your devices and even pose a safety risk.

    It’s important to remember that not all charging cables are created equal. Some low-quality cables may not provide the necessary power output, which can result in slow charging or no charging at all. Invest in high-quality cables that are compatible with your devices for optimal performance.

    By being prepared with dual ports and the right cables, you can ensure that your devices are always charged and ready to go when you need them.

    Setting Up Your Slave SSD Drive

    If you’re looking to set up a slave SSD drive, it’s a fairly straightforward process that can save you a lot of hassle down the line. Before you begin, make sure your computer is turned off and unplugged, and that you have the necessary tools to work with your hardware. Identify the location of your slave drive, and remove any existing connections or mounting hardware.

    Next, carefully insert your SSD into the slave drive bay, securing it with screws or other fasteners as needed. Once the drive is securely in place, reconnect any necessary cables or connections, making sure everything is firmly attached. Finally, power up your computer and double-check that your SSD is detected and configured correctly in your system settings.

    With your new slave drive installed, you can enjoy faster boot and load times, improved system responsiveness, and better overall performance for all your computing needs.

    Connect the Slave Drive

    Setting up your slave SSD drive can be intimidating, but it’s actually a lot easier than you might think. Once you have your SSD drive in hand, it’s time to connect it to your computer. First, turn off your computer and unplug it from the wall.

    Then, open the computer case and locate the SATA ports on the motherboard. The SATA ports are usually grouped together and labeled, so you should be able to find them easily. Next, locate the SATA cable that came with your SSD drive and connect one end of the cable to the SSD drive and the other end to an available SATA port on the motherboard.

    It’s important to note that SATA cables can only plug in one way, so make sure you’re plugging it in the correct orientation. Once you’ve connected the SSD drive to the motherboard, secure the drive to the computer case using screws. Finally, close up your computer case, plug it back in, and power it on.

    Congratulations, you’ve successfully connected your slave SSD drive!

    Set the Jumper to Slave Mode

    When adding a new SSD drive to your computer, it’s essential to set the jumper to slave mode. This process is crucial to ensure that your computer recognizes the drive as a secondary storage device. To set up your slave SSD drive, start by locating the jumper pins on the drive.

    These pins are usually located near the power and data connectors. Once you’ve found them, refer to your SSD’s user manual to determine which jumper settings you need to use. Typically, your manual will provide a diagram of the jumper settings you need to configure to enable slave mode.

    Adjust the jumpers as indicated in the manual, and double-check that the jumper is tightly in place. Afterward, connect the SSD drive to your computer and try booting it up to see if it recognizes the slave drive. Now that you have your slave SSD drive set up, you’ll have additional storage space without having to replace your primary drive, making it a worthwhile investment.

    Configuring the Slave Drive in BIOS

    If you’re looking to add a new SSD drive to your computer, you may want to configure it as a slave drive to avoid overwriting your existing system files. Configuring a slave SSD drive is a straightforward process that requires a few steps in your computer’s BIOS settings. To begin, restart your computer and enter the BIOS by pressing either F2, F10, or Delete when prompted.

    Navigate to the BIOS menu and locate the SATA Configuration or similar section. Choose the SATA port where the slave drive will connect, and select the IDE or AHCI mode if available. Save the changes and exit the BIOS, then power off your computer and connect the SSD drive to the chosen SATA port.

    Restart your computer, and you should be able to access your new slave drive in Windows or another operating system. With this simple process, you can utilize your new SSD drive without worrying about disrupting your existing operating system.

    Accessing BIOS Settings

    When configuring a slave drive in BIOS, accessing the BIOS settings is the first step. Depending on the computer’s make and model, the process of accessing the BIOS settings can vary. Typically, pressing a specific key, such as F2, Delete, or Enter during the boot process will bring up the BIOS menu.

    Once in the BIOS, navigate to the “Drives” or “Boot Options” section to see the available drives. Select the slave drive and set it as the secondary or slave device. Additionally, make sure the primary device, usually the master drive, is still set as the primary boot device.

    This ensures that the computer boots from the master drive and uses the slave drive as a secondary storage option. With a few simple steps, configuring a slave drive in BIOS can be done quickly and easily, expanding the available storage options for the user.

    Configuring and Saving Changes in BIOS

    When configuring a slave drive in BIOS, the process can be a bit confusing for beginners. To get started, you’ll want to access the BIOS menu by pressing the corresponding key during boot-up (usually F2, F10, or DEL). From there, navigate to the “Storage” or “Boot” tab to find the option for configuring your slave drive.

    You may need to change the boot order to prioritize it over your primary drive. Be careful not to make any other changes to the BIOS settings unless you know exactly what they do. Once you’ve made the necessary adjustments, be sure to save your changes before exiting the BIOS menu.

    Otherwise, your changes will not take effect. With some patience and a bit of practice, configuring a slave drive in BIOS can be a relatively simple process that can greatly expand the storage capacity and capabilities of your computer system.

    Formatting and Partitioning the Slave Drive

    If you’ve recently purchased a new SSD drive and are looking to use your old drive as a slave drive, you’ll first need to format and partition it. This process involves wiping all of the data from the drive and setting up new partitions to separate your files. To begin, connect the old drive to your computer and open the Disk Management tool.

    Select the old drive and choose to delete all existing partitions. Next, create a new partition and assign it a drive letter. You can repeat this process to create multiple partitions if needed.

    Once you’ve set up your partitions, format the drive using the NTFS file system. This will ensure compatibility with your operating system and provide reliable performance. With your slave drive formatted and partitioned, you can now begin transferring files and storing data.

    Remember to backup important files to ensure they aren’t lost during the formatting process. With a little bit of effort, you’ll have a fully functional slave drive to supplement your new SSD and expand your storage capacity.

    Formatting in Windows

    When it comes to setting up your Windows PC, formatting and partitioning the slave drive can be a daunting task. However, it is an essential process that allows you to organize and manage your files effectively. First, you need to decide which file system you want to use, such as NTFS or FAT3

    NTFS is the recommended option for Windows 10, as it offers improved security features and can handle larger files. Once you have chosen your file system, you can begin formatting and partitioning the drive. This involves wiping all the old data and setting up new partitions, which divide the drive into separate areas.

    By creating different partitions, you can store different types of data on the same drive, such as operating system files and personal files. With a little bit of patience and attention to detail, formatting and partitioning your slave drive can help you keep your files organized and easily accessible.

    Partitioning in Windows

    When it comes to setting up a secondary hard drive on a Windows computer, formatting and partitioning are essential steps that need to be taken. Formatting the drive erases any existing data and sets it up for use, while partitioning divides the drive into multiple sections, each with its own file system. This allows you to organize your data into different areas of the drive and can also improve performance by separating frequently accessed files from others.

    To format and partition the slave drive, you can use the built-in Disk Management tool in Windows. Once you’ve located the drive you want to format, right-click on it and select “New Simple Volume.” From there, you can follow the prompts to allocate space and choose a file system type.

    With proper formatting and partitioning, your secondary hard drive can become a valuable asset for storing files and improving your computer’s performance.

    Conclusion

    Well, it turns out that slaving an SSD drive isn’t about making it do your bidding (despite what the name might suggest). Rather, it’s all about harnessing the power of two drives working together in harmony. By setting up a slave drive, you can enjoy faster speeds, more storage capacity, and better overall performance.

    And while it might sound like a complicated process, with the right tools and a little bit of know-how, you too can become a master of slaving SSD drives. So go forth and unleash the full potential of your computer!”

    FAQs

    What does it mean to slave an SSD drive?
    Slaving an SSD drive refers to using it as a secondary drive alongside the primary drive in a computer.

    How do I slave an SSD drive?
    To slave an SSD drive, connect it to the second SATA port on your motherboard and configure it appropriately in the BIOS.

    Can I use an SSD drive as a boot drive and slave drive simultaneously?
    Yes, it’s possible to use an SSD as both a boot drive and slave drive, but it depends on your computer’s hardware configuration and the operating system installed.

    How do I transfer data from my primary drive to a slaved SSD drive?
    You can transfer data from your primary drive to a slaved SSD drive by copying or transferring files using file explorer or a backup software program.

  • Upgrade Your PC with Ease: A Step-by-Step Guide on Installing Windows 11 on a Brand New SSD

    Are you looking to upgrade your computer’s storage and switch to the latest operating system? Well, you’re in luck because Windows 11 is here! However, installing a new operating system on a new SSD can be an intimidating task, especially if you’re new to computer upgrades. But don’t worry, we’ve got you covered! In this blog post, we’ll walk you through the steps you need to follow to install Windows 11 on a new SSD. We’ll cover all the essential aspects, including how to create a bootable USB drive, how to enter the BIOS setup, and how to partition your new SSD.

    By the end of this article, you’ll be able to upgrade your computer’s storage and install the latest operating system with ease. So, why should you upgrade to Windows 11? Well, besides the visually stunning interface, this operating system brings a lot of new features and improvements, including enhanced security, better gaming performance, and improved touch screen compatibility. And let’s not forget that Windows 10 will soon reach its end of life, which means it’s time to move on to the latest technology.

    Installing Windows 11 on a new SSD can seem daunting, but it doesn’t have to be. So, grab your coffee and let’s dive into this step-by-step guide together.

    Prepare Your PC for Installation

    Installing a new operating system can be daunting, but with the right preparation, it can be a seamless transition. If you’re planning to install Windows 11 on a new SSD, there are a few things you need to do first. Firstly, make sure your PC meets the minimum system requirements for the OS.

    Next, backup all your important files and data to an external drive or cloud storage since the installation process will wipe out everything on your current drive. You should also create a bootable USB drive with the Windows 11 installation media, which you can easily do by downloading the Media Creation Tool from the Microsoft website. Once you’ve completed these steps, you can shut down your PC, insert the new SSD, and boot the computer from the USB drive to start the installation process.

    By taking these necessary steps, you can ensure a smooth installation without any hiccups along the way.

    Create a Windows 11 Installation Media

    When it comes to installing Windows 11 on your PC, the first thing you need to do is create an installation media. This is a handy tool that contains all the necessary files and drivers to install the operating system on your computer. To get started, you’ll need a USB flash drive with at least 8GB of storage space.

    Once you have that, download the Media Creation Tool from Microsoft’s website and follow the on-screen instructions. The tool will download the Windows 11 setup files and create an installation media for you. But before you start the installation process, it’s essential to ensure that your PC meets the minimum system requirements for running Windows 1

    This includes a compatible processor, 4GB of RAM, and 64GB of storage space. You can check your PC’s compatibility by using Microsoft’s PC Health Check app or by checking the system requirements on their website. Preparing your PC for installation ensures a smooth and successful installation process without any errors or issues.

    So make sure to double-check everything before proceeding with the installation.

    how to install windows 11 on new ssd

    Insert Installation Media and Boot from It

    Installing a new operating system can be a daunting task for many people. However, preparing your PC for installation doesn’t have to be a complicated process. One of the first steps in preparing your PC for installation is to insert the installation media and boot from it.

    This can be done by either inserting a DVD or USB drive with the OS installation file. Once inserted, restart your PC and enter the system BIOS by pressing the designated key during boot-up. From there, you can change the boot priority to the installation media device, allowing you to boot from it.

    Once your PC has booted from the installation media, you can begin the installation process. It’s important to follow the instructions carefully and select the appropriate options to ensure a successful installation. Remember, by properly preparing your PC for installation, you can avoid unnecessary errors and ensure a smooth installation process.

    Begin Windows 11 Installation

    If you’ve got a brand new SSD and want to install Windows 11 on it, you’ve come to the right place! Installing a new operating system can seem daunting, but it’s a straightforward process that anyone can do. First things first: make sure your computer meets the minimum system requirements for Windows 1 Once you’ve done that, create a bootable USB drive with the Windows 11 installation files on it.

    You’ll need to insert the USB drive into your computer and restart it, then boot from the USB drive. From there, follow the prompts onscreen to install Windows 11 on your new SSD. It’s important to note that this will erase any data on your new drive, so make sure you’ve backed up everything important beforehand.

    With a little patience and know-how, you’ll have Windows 11 up and running on your new SSD in no time!

    Select Language and Other Preferences

    When beginning the installation process for Windows 11, it is important to select your preferred language and any other preferences before proceeding. This will ensure that your operating system is set up exactly how you want it from the get-go. Whether you prefer English, Spanish, or any other language, the first step is to choose your preferred language.

    Additionally, you may have other preferences such as setting up a specific time zone, keyboard layout, or even choosing what type of internet connection you have. Once you have these settings in place, you can confidently begin the Windows 11 installation process. By taking these small steps to personalize your installation, you can ensure a smoother and more enjoyable experience with your new operating system.

    So be sure to take the time to make these selections and get started with Windows 11 today!

    Enter the Product Key

    As you prepare to install Windows 11 on your computer, one of the essential steps is entering the product key. The product key is a unique code that Microsoft provides to authenticate your copy of Windows. It is a combination of letters and numbers and usually comes with a new Windows 11 purchase.

    To begin the installation process, you need to enter the product key when prompted. Without this key, you won’t be able to activate your copy of Windows, and it may not function correctly. The good news is that the product key is easy to find and enter, and it only takes a few minutes.

    Once you enter the key, you can sit back and relax as the installation process begins, taking you one step closer to experiencing the improved user interface, performance, security, and features that Windows 11 offers.

    Choose Custom Installation

    When beginning the installation process for Windows 11, it’s important to choose the custom installation option. Although the express installation may seem tempting as it’s a quicker process, it can also install unwanted software that can slow down your computer or even compromise your security. By choosing custom installation, you have more control over what is installed on your computer, allowing you to deselect any unnecessary features or programs.

    It’s like choosing the toppings for your pizza – you have the power to customize it to your liking. Plus, by taking the time to review and select only the necessary components, you can ensure the best performance and security for your computer. So before clicking “yes” to an express installation, take a few extra minutes to go through the custom installation process – your computer will thank you for it.

    Set Up and Optimize Windows 11

    Are you ready to install Windows 11 on a new SSD? The first step is to make sure your computer meets the system requirements. Once you’ve confirmed that, you can download the Windows 11 ISO file from Microsoft’s website. Next, you’ll need to create a bootable USB drive with the ISO file.

    You can use the built-in tools in Windows or a third-party software like Rufus to accomplish this task. After creating the bootable USB drive, insert it into your computer and restart your system. Make the necessary changes to the boot order in your BIOS to boot from the USB drive.

    Follow the on-screen instructions to perform a clean install of Windows 11 on your new SSD. Once Windows 11 is installed, optimize your system by updating drivers, disabling unnecessary startup programs, and enabling system protection. These steps will help ensure that your system is running smoothly and optimized for performance.

    With these steps, you’ll have your new SSD running smoothly with Windows 11 in no time.

    Complete Initial Set Up

    Setting up and optimizing Windows 11 is essential to enhance your computer’s performance and ensure a smooth user experience. The initial set up steps include choosing the language, keyboard layout, and time zone. Once these options are selected, it’s vital to customize the privacy settings to ensure your data is protected.

    Windows 11 also offers the ability to create multiple user accounts, making it easier to share your computer with family or colleagues. In terms of optimization, you can remove unnecessary software and disable start-up programs to improve boot time. It’s also recommended to update your drivers and optimize power settings to increase battery life.

    Overall, taking the time to fully set up and optimize Windows 11 can make a significant impact on your computer’s performance and longevity.

    Install Drivers and Updates

    Installing drivers and updates is crucial in optimizing your Windows 11 experience. Drivers are essential for your hardware components, such as your graphics card or sound card, to communicate with the operating system properly. Without the correct drivers, you may experience performance and stability issues.

    Updating your drivers and software can also prevent security vulnerabilities, as manufacturers frequently release updates to patch potential security threats. To ensure that you have the latest drivers and updates, you can check for them manually or set up automatic updates. It’s essential to keep your PC up to date to avoid problems in the future.

    An outdated system can result in slow performance, errors, and even system crashes. So, take the time to install the latest drivers and updates on your Windows 11 machine, and you’ll enjoy a smooth and efficient computing experience.

    Conclusion

    Congratulations, you have successfully taken the first step towards a faster, better and more efficient computing experience by installing Windows 11 on a new SSD. Now, sit back, relax and let your computer do all the heavy lifting for you. Just remember, if at any point you feel lost or overwhelmed, don’t hesitate to reach out for help.

    After all, the beauty of technology is that there is always someone out there who knows more than you do. Happy computing!”

    FAQs

    What are the minimum hardware requirements for installing Windows 11 on a new SSD?
    The minimum hardware requirements for installing Windows 11 on a new SSD include a 64-bit processor with a clock speed of at least 1 GHz, 4 GB of RAM, 64 GB of storage, a DirectX 12 compatible graphics card or integrated GPU with a WDDM 2.0 driver, and a display with at least a 720p resolution.

    Can I install Windows 11 on a new SSD without a product key?
    Yes, you can install Windows 11 on a new SSD without a product key, but the operating system will not be activated until a valid product key is entered. However, you can still use most of the features of Windows 11 without activation.

    How do I create a bootable USB drive for installing Windows 11 on a new SSD?
    To create a bootable USB drive for installing Windows 11 on a new SSD, you need to download the Windows 11 ISO file and use a tool like Rufus or the Windows USB/DVD Download Tool to create a bootable USB drive. You can then use this USB drive to boot your computer and install Windows 11 on your new SSD.

    How do I migrate my data and programs from my old hard drive to a new SSD after installing Windows 11?
    After installing Windows 11 on your new SSD, you can use a data migration tool like EaseUS Todo Backup or Macrium Reflect to migrate your data and programs from your old hard drive to your new SSD. Alternatively, you can manually copy your files and reinstall your programs on the new SSD.

  • Boost Your PC’s Speed: Step-by-Step Guide on How to Set Up a New SSD on Windows 11

    Are you ready to upgrade your computer’s performance? One way to boost your PC’s speed is by upgrading your storage to a Solid State Drive (SSD). But what happens once you have your new SSD in hand and are ready to set it up? In this blog post, we’ll walk you through the steps on how to set up your new SSD on Windows 11, making the process easier and smoother. Setting up a new SSD on Windows 11 may seem like a daunting task, but with the right instructions, it can be a quick and painless experience.

    By following a few simple steps, you’ll be up and running in no time. We’ll walk you through the process step-by-step, so you can easily migrate your operating system and data to the new drive without losing any files or data. Don’t let the thought of upgrading your PC intimidate you.

    With the help of this post, you’ll be well on your way to a faster and better-performing computer. So with that said, let’s dive into the details of setting up your new SSD on Windows 1

    Requirements for the Installation

    Installing a new SSD on Windows 11 can be a great way to boost your computer’s performance and speed. However, there are a few requirements you should consider before diving into the installation process. Firstly, ensure that your computer has the necessary ports to connect the SSD.

    You may need to purchase an adapter or cable if your computer’s ports are not compatible. Additionally, you will need to have a copy of Windows 11 operating system, which you can download online or purchase from a physical store. You should also have a backup of your important files and data, just in case anything goes wrong during the installation process.

    Finally, make sure you have the necessary tools, such as a screwdriver, to open your computer case and install the new SSD. By following these requirements, you can set up your new SSD on Windows 11 confidently and seamlessly, and enjoy its many benefits.

    Check computer specifications

    Before installing any software or program on your computer, it’s important to check the computer specifications to ensure that it meets the requirements for installation. The specific requirements for each program can vary, so it’s important to check the official website or documentation for the software you want to install. Typically, the requirements will include the operating system and version, processor type and speed, RAM, and available storage space.

    It’s important to note that installing software that doesn’t meet the recommended requirements can result in slow performance, errors, crashes, or other issues. By taking the time to check your computer’s specifications before installation, you can avoid these problems and ensure a smooth experience with your new software. So, if you want to install a program on your computer, be sure to check its requirements first to avoid any potential issues later on.

    how to set up a new ssd windows 11

    Prepare a bootable Windows 11 USB drive

    Preparing a bootable Windows 11 USB drive requires a few things to get started, and it’s essential to follow each step correctly. Firstly, make sure you have a USB flash drive with at least 8GB of storage space. You’ll also need a working computer running Windows 7, 8, or

    Plus, download the Windows 11 ISO file from the official Microsoft website and install a free tool like Rufus. Once you have all these elements, connect your USB to your computer, launch Rufus, and select your USB drive from the Device dropdown menu. Choose your Windows 11 ISO file by clicking the Select button and browsing to your file.

    Verify that all the chosen options are correct, then click Start to begin the process of creating a bootable Windows 11 USB drive. Within minutes, you’ll have a newly formatted USB that can be used to install Windows 1

    Removing Old Hard Drive

    If you’re looking to set up a new SSD with Windows 11, one of the first steps is to remove your old hard drive. This can be a bit intimidating for those who haven’t done it before, but it’s actually quite straightforward. First, shut down your computer and unplug any cables.

    Then, open your computer case and locate your old hard drive. It should be connected to your motherboard with a SATA cable and a power cable. Carefully disconnect both of these cables from the hard drive.

    Once you’ve removed the old hard drive, you’ll need to install your new SSD. This process varies depending on the type of SSD you have, but typically involves connecting it to the SATA port on your motherboard and attaching a power cable. With your new SSD installed, you can then proceed with setting up Windows 11 and transferring your data.

    With a little bit of patience and attention to detail, you can successfully set up your new SSD and enjoy faster performance and improved reliability.

    Unplug power cable, open computer case

    When it’s time to upgrade your hard drive, you’ll need to remove the old one first. To begin, unplug the power cable and open up the computer case. You should see your current hard drive somewhere inside.

    Before you unplug it, it’s important to note that removing the old drive will mean you’ll lose all the data stored on it. If there’s anything you want to keep, make sure to back it up on an external drive or cloud storage beforehand. Once you’ve done that, carefully remove the old drive from its slot by disconnecting the cables and screws holding it in place.

    Be sure to handle it with care so you don’t damage it or any other components inside the computer. With the old hard drive out of the way, you can now install your new one and begin the process of copying your data over. It sounds easy enough, but always double-check the manual and take your time to avoid any mistakes.

    With just a little patience and care, you’ll be up and running with your new hard drive in no time!

    Disconnect old hard drive from motherboard

    If you’re looking to upgrade your computer’s storage or just replace a faulty hard drive, disconnecting the old hard drive from the motherboard is a crucial step. This process is relatively straightforward and can be done with just a few tools. First, make sure to shut down your computer and unplug it from the wall to avoid any electrical shocks.

    Locate the SATA data and power cables that connect the old hard drive to the motherboard and the power supply, respectively. Gently pull the cables out of their sockets by pulling the tab, and make sure not to force them. Once the cables are disconnected, you can remove the old hard drive from its housing.

    This step may require additional tools, depending on your computer’s setup. Remember, always handle your computer’s components with care to avoid damaging any parts. By following these steps, you can safely remove your old hard drive and replace it with a new one.

    Remove old hard drive from the computer case

    If you’re upgrading to a new hard drive, the first step is to remove the old one from your computer case. This may sound daunting, but it’s actually quite simple. Start by unplugging your computer and opening up the case.

    Look for the hard drive – it’s usually large and rectangular, with a bunch of cords coming out of it. Detach the cords from your hard drive by gently pulling them out of their ports. Depending on the type of computer case you have, you may need to use screws or latches to release the hard drive from its bay.

    Once the hard drive is loose, pull it out of the case. Congratulations – you’ve successfully removed your old hard drive! Now, you’re ready to install your new one and start enjoying increased storage capacity and faster performance. Remember to dispose of your old hard drive safely and responsibly to protect your personal data.

    Installing the New SSD

    Upgrading to an SSD is one of the best ways to give your computer a boost in responsiveness and speed. Installing a new SSD on Windows 11 is a fairly straightforward process that can be easily accomplished in just a few steps. First, make sure to back up your data to an external drive or cloud storage service.

    Then, power off your computer and open up the case. Locate the existing hard drive and unplug it. Carefully remove it from its bay and then insert your new SSD in its place.

    Reconnect any necessary cables and close up the case. Once your computer is powered on, you’ll need to install the OS. Simply insert your Windows 11 installation disc or USB drive and follow the prompts on the screen.

    Before you know it, you will be up and running with your new super-fast SSD!

    Connect new SSD to motherboard

    Installing a new SSD is a great way to boost your computer’s performance, and it’s a relatively simple task to complete. First, make sure you have all the necessary tools and components, including the new SSD and a screwdriver. Once you have everything you need, shut down your computer and unplug it from the wall.

    Carefully open the case and locate the SATA port on the motherboard. Gently connect the new SSD to the motherboard using the SATA cable, making sure it’s securely connected. Attach the SSD to the case using the screwdriver and close the case.

    Finally, plug your computer back in and turn it on to ensure it recognizes the new SSD. With just a few simple steps, you can connect your new SSD to the motherboard and take full advantage of its benefits, including faster boot times and improved overall performance.

    Secure SSD to case with screws

    Once you’ve purchased your new SSD, it’s time to install it properly. The first step is to secure the SSD to the case using screws. This might sound simple, but it’s an important step in making sure your new hardware stays in place and functions properly.

    To do this, locate the mounting holes on your SSD and line them up with the appropriate holes on the case. Then, carefully insert the screws and tighten them until the SSD is snugly and securely in place. It’s important to use the correct type of screw and to not over-tighten, as this could damage your hardware.

    Once you’ve secured the SSD, you’re ready to move on to the next step in upgrading your system and enjoying faster, more reliable performance.

    Connect the power cable back in

    To successfully install a new SSD in your computer, you’ll need to connect the power cable back in. This step is crucial in ensuring that power is supplied to the SSD, allowing it to function properly. Before proceeding, make sure you have properly shut down your computer and unplugged all cords.

    Once you have opened your computer case and located the SSD slot, gently insert the SSD and secure it in place with screws. Then, connect the power cable back in by attaching it to the power supply and the SSD. Once the power cable is securely connected, you can proceed with putting the computer case back together and powering on your system.

    It’s important to note that if you encounter any issues during this process, you may want to seek the assistance of a professional to avoid causing further damage. By following these steps, you can successfully install a new SSD and ensure that your computer is running at optimal performance.

    Installing Windows 11 on the New SSD

    So, you’ve just gotten your new SSD and want to install Windows 11 on it? Well, the good news is that it’s not as complicated as it may seem. The first step is to create a Windows 11 installation media, which can be done by downloading the official media creation tool from Microsoft’s website. Just make sure to select the correct version of Windows 11 that matches your system architecture.

    Once you have the installation media ready, you need to go into your system BIOS and make sure that your new SSD is recognized as the boot device. From there, you can proceed with the Windows 11 installation process, which involves agreeing to the license terms, selecting the installation type, and formatting your new SSD. After that, you just need to wait for the installation to complete, and voila! You now have a freshly installed Windows 11 system on your new SSD, ready to be used.

    Just remember to transfer all your important files and programs from your old drive to your new one before starting to use it to avoid losing data. Overall, setting up a new SSD with Windows 11 is a fairly straightforward process that anyone can do with a little bit of patience and knowledge.

    Change Boot Order in BIOS

    If you’re looking to install Windows 11 on a new SSD, then you’ll need to change the boot order in your BIOS. The BIOS is the basic input/output system that controls the startup process of your computer. By default, your computer is set to boot from the hard drive first, so you’ll need to change the boot order to prioritize the new SSD.

    To do this, you’ll need to enter the BIOS by pressing a specific key during startup (usually F2, F10, or Del). Once you’re in the BIOS, you’ll need to navigate to the boot options and change the boot order to prioritize the new SSD. This will ensure that your computer boots up from the SSD and you can proceed with installing Windows 1

    It’s a simple process, but it’s important to ensure that you follow the correct steps to avoid any hiccups during the installation process.

    Boot from the USB drive

    If you’re looking to install Windows 11 onto a new SSD, you’ll need to boot from a USB drive first. This means you’ll need to create a bootable USB drive with Windows 11 installed, which can be done easily with Microsoft’s Media Creation Tool. Once you have your bootable USB drive ready, you’ll need to insert it into your computer and restart your computer.

    From there, you’ll need to enter the BIOS and change the boot order to prioritize the USB drive. This will ensure that your computer boots from the USB drive instead of your old hard drive. Then, you can follow the prompts to install Windows 11 onto your new SSD.

    It’s important to note that this process may vary depending on your specific computer and BIOS settings, but the general steps should be similar. Overall, booting from a USB drive is an essential step in installing Windows 11 onto a new SSD and can pave the way for a faster and more efficient computer experience.

    Follow Windows 11 installation process

    If you’ve recently installed a new SSD and are looking to upgrade to Windows 11, the installation process is fairly straightforward. To start, you’ll need to download the Windows 11 ISO file from the Microsoft website and create a bootable USB drive with it. Once you’ve done that, you’ll need to restart your computer and boot from the USB drive.

    From there, the on-screen prompts will guide you through the installation process. It’s important to note that during the installation, you’ll have the option to choose the drive where Windows 11 will be installed. Be sure to select your new SSD at this step.

    Once the installation is complete, make sure all of your drivers are up to date and enjoy your new operating system. Remember to backup your important files before starting the installation process. Happy computing!

    Finalize and Optimize your New SSD and Windows 11 Installation

    Setting up a new SSD drive to run Windows 11 can improve your computer’s performance and speed significantly, but you need to optimize it properly for the best results. First, you should update your firmware to ensure that your SSD is running at its top speed. Second, you should disable Windows services that you don’t need, which can use up your SSD’s resources and slow it down.

    Third, consider using a specialist software tool to optimize your drive, such as the Windows 11 built-in disk optimization feature or a third-party application. This can ensure that your SSD is working efficiently and allowing your computer to operate without any lag. Lastly, be sure to move frequently accessed files to your SSD’s storage to boost loading times and improve access performance.

    By following these steps, you can make the most out of your new SSD and get the best performance from your Windows 11 installation, optimizing both for a smooth and seamless experience.

    Install device drivers

    Once you have installed your new SSD and Windows 11, you will want to make sure that your device drivers are up to date. It is important to keep these drivers current to ensure that your system functions at its best. You can easily check for updates by going into your device manager and selecting the specific driver.

    Updating drivers can often fix bugs, improve performance, and add new features. Additionally, some devices such as graphics cards or sound cards may require specific drivers to function properly. Take the time to research and download these drivers for optimal functionality.

    Keeping your drivers current is a simple step that can make a big difference in the speed and efficiency of your new Windows 11 installation.

    Tweak Windows 11 settings

    Congratulations on getting your new SSD and installing Windows 11! To get the best performance possible, there are a few tweaks you can make to optimize your new setup. Firstly, make sure you have the latest drivers installed for your hardware. This will ensure that everything is working correctly and efficiently.

    Next, adjust your power settings to prioritize performance over energy-saving. This will allow your system to use more power to run at its highest capacity. Additionally, disabling any unnecessary startup programs and services that you don’t need will free up system resources.

    Finally, consider enabling Windows 11’s Game Mode if you plan on using your system for gaming. This will allow the operating system to prioritize game performance above everything else. With these simple tweaks, you can get the most out of your new SSD and Windows 11 installation.

    Install apps and transfer data

    Now that you have successfully installed your new SSD and Windows 11, the next step is to finalize and optimize your system. Start by installing and transferring your essential apps and data. This will ensure you have everything you need on your new device and can continue working without any interruption.

    You can easily transfer your data from your old hard drive or backup using an external drive or cloud-based service. Once you have all your necessary files, you can start installing your apps. It’s crucial to only install what you need to avoid clutter and ensure the smooth running of your system.

    Make sure to update your apps to their latest versions to avoid any security vulnerabilities. Additionally, ensure your system drivers are updated to their latest versions to ensure optimal performance. Optimizing your system will make a significant difference in its speed and efficiency, ensuring a seamless experience overall.

    Optimize SSD for better performance

    If you want to get the best performance out of your new SSD and Windows 11 installation, it’s important to take some time to optimize your settings. One important step is to ensure that your SSD is properly aligned. This means that the partitions on your drive should start at the beginning of a physical block rather than in the middle of one.

    Another key way to optimize your SSD is to enable TRIM. This feature allows your operating system to tell your SSD which sectors are no longer in use, freeing up space for new data to be written. It’s also important to disable any defragmentation software, as it’s not necessary with SSDs and can actually reduce performance.

    Finally, make sure that you have the latest drivers for your SSD and that you’ve configured your power settings to be optimized for performance rather than battery life. By following these steps, you can ensure that your new SSD and Windows 11 installation are running at peak performance.

    Conclusion

    In conclusion, setting up a new SSD on Windows 11 is as easy as 1, 2, ..

    and a few more steps! But fear not, with a little patience and a lot of coffee, you’ll be up and running in no time. Remember to back up your data, migrate your operating system, and optimize your new drive for peak performance. And don’t forget to give yourself a pat on the back for successfully tackling this tech challenge.

    You’re officially a SSD guru, congratulations!”

    FAQs

    What are the basic requirements for setting up a new SSD on Windows 11?
    To set up a new SSD on Windows 11, you’ll need a compatible system, a screwdriver, an SSD, and a Windows 11 installation media.

    Can I add a new SSD to an existing Windows 11 system?
    Yes, you can add a new SSD to an existing Windows 11 system as a secondary storage drive. You can then use it to store your files and programs separately from your primary drive.

    How do I format a new SSD on Windows 11?
    You can format a new SSD on Windows 11 by opening the Disk Management tool, selecting the unallocated space on the SSD, right-clicking on it, and choosing the “New Simple Volume” option. Follow the prompts to format the SSD.

    How do I transfer my Windows 11 operating system to a new SSD?
    You can transfer your Windows 11 operating system to a new SSD using free tools like EaseUS Todo Backup or paid software like Acronis True Image. These tools will clone your existing OS installation to the new SSD so that you can boot from it.

  • Unlocking the Mystery: How Long Does it Really Take to Receive SSD Benefits?

    Are you tired of waiting for your ordered SSD to arrive? Undoubtedly, delayed delivery is frustrating, especially when you need the product urgently. You might be wondering why it takes so long to receive your SSD. Is it the store’s fault or does shipping take longer than expected? Understanding the truth about SSD delivery times can help you cope with delayed orders and make better purchasing decisions in the future.

    The popularity of SSDs has increased tenfold in recent years. Their faster data transfer speeds and improved storage capacity have made them a favorite among tech enthusiasts and gamers alike. With more people ordering SSDs online than ever before, it’s essential to know what affects delivery times.

    Several factors influence delivery times, including the location of the store, the shipping method used, and the time of year. For example, SSDs ordered from a store located in a different continent will surely take longer to arrive than one located in the same city as you. Likewise, using a slower shipping method can result in a delay in the delivery of your product.

    In conclusion, SSD delivery times vary depending on where you order them from, the shipping method used, and the time of the year. By understanding these factors, you can avoid unnecessary stress and inconvenience when ordering SSDs online. Be patient, keep track of your order, and plan ahead if you need your SSD urgently.

    With these tips in mind, you can be sure to receive your SSD on time and enjoy the benefits they offer.

    Factors Affecting SSD Delivery Time

    If you’re considering purchasing an SSD, you’re probably wondering how long it will take to receive your order. There are several factors that can affect SSD delivery times, including the shipping method, order processing time, and availability of the item. Typically, standard shipping takes 3-5 business days, while expedited shipping can arrive in 1-2 business days.

    However, it’s important to note that some retailers may have delays in processing orders, which can add a few extra days to your delivery time. Additionally, if the SSD you’re looking for is out of stock or on backorder, this can also impact delivery times. To ensure that you receive your SSD as quickly as possible, it’s a good idea to check with the retailer for availability and shipping times before placing your order.

    Overall, while delivery times may vary, with some careful planning, you can have your SSD in your hands in no time.

    Your Location and Shipping Method

    When ordering an SSD, there are a few factors that could affect the delivery time. One of the most important is your location. If you live in a remote area, your delivery time could be slightly longer compared to those living in a big city with good connectivity.

    Another factor to consider is the shipping method you choose. Most SSD deliveries offer a range of shipping options with varying delivery times. For instance, standard shipping usually takes longer than express shipping.

    It is also worth considering the demand for the SSD. Sometimes, popular products experience high volumes of orders causing a surge in traffic and delivery delays. Therefore, it is essential to be patient and considerate of unforeseen times that could affect your delivery date.

    Ultimately, you can expect the SSD to arrive within a reasonable timeframe, usually within two or three days for express shipping or within ten days for standard shipping. In conclusion, by considering these factors, you can plan for a more efficient delivery of your SSD while managing your expectations of when it will arrive.

    how long to receive ssd

    Stock Availability

    When it comes to purchasing an SSD, stock availability can play a big role in how long it takes for your order to arrive. Factors influencing the availability of SSDs include the manufacturer’s supply chain, distribution channels, and demand from consumers. For popular brands and models, there may be a higher demand which can lead to delays in shipping and restocking.

    On the flip side, lesser-known brands or older models may have a lower demand and thus be readily available. Another factor to consider is the region in which you are purchasing from, as some regions may have less stock or longer shipping times. It’s important to keep these factors in mind when shopping for an SSD, to ensure that you are getting the best deal possible while also factoring in delivery time.

    SSD Delivery Timeframes by Retailer

    If you’re in the market for a new SSD and wondering how long it will take to receive it, delivery timeframes can vary depending on the retailer you choose. Popular online retailers like Amazon and Newegg typically offer two-day or even same-day shipping options for their SSDs, while smaller online retailers or brick-and-mortar stores may take several days to a week to process and ship your order. Additionally, if you opt for free or standard shipping, expect to wait anywhere from several days to a couple of weeks for your SSD to arrive.

    Keep in mind that delivery times may also be impacted by factors such as inventory availability and shipping carrier delays. Overall, it’s important to check the estimated delivery timeframe before placing your order, and if you need your SSD in a hurry, consider opting for expedited shipping.

    Amazon

    Amazon If you’re in the market for a solid-state drive (SSD), it’s important to consider not just the specs and price tag but also the delivery timeframes of various retailers. When it comes to Amazon, SSD delivery timeframes can vary depending on the seller and shipping method. Some sellers may offer free shipping with longer delivery times, while others may offer expedited shipping for a fee.

    It’s important to read the product description carefully and choose a seller and shipping method that suits your needs. Additionally, Amazon Prime members may be eligible for free two-day shipping on certain SSDs. Keep in mind that delivery timeframes can also be affected by factors outside of the retailer’s control, such as weather or transportation delays.

    Overall, if you’re flexible with timing or have a specific deadline in mind, Amazon may be a good option for purchasing an SSD. Just be sure to do your research and choose a reputable seller with a reliable shipping method.

    Best Buy

    When it comes to purchasing solid-state drives (SSD), there are several retailers to choose from, each with different delivery timeframes. Best Buy, one of the largest electronics retailers in the US, typically offers fast delivery times, especially if you opt for their free standard shipping option. However, if you’re in a rush, they also offer expedited and express shipping for an additional fee.

    Best Buy also has a handy option to select “store pickup” during checkout, which allows you to pick up your SSD from a nearby Best Buy location instead of waiting for it to be shipped to you. While delivery times may vary based on your location and the availability of the product, Best Buy is a reliable option for getting your solid-state drive quickly and efficiently.

    Newegg

    Delivery Timeframes for SSDs vary depending on the retailer. However, if you’re in a hurry to get your hands on a new SSD for your computer or laptop, Newegg may be a great option for you. This popular online retailer offers various delivery options with varying speeds, including same-day delivery in select areas.

    You can also take advantage of their Premier membership, which offers free expedited delivery on select items, among other benefits. Although delivery times may be affected by factors such as availability, location, and shipping carrier, Newegg’s efficient delivery services can help ensure that your new SSD arrives promptly and in good condition. So, if you need your new SSD fast, considering purchasing from Newegg could be a smart choice.

    How to Get Your SSD Faster

    If you’re wondering how long it will take to receive your SSD, the answer depends on a few factors. First and foremost, it depends on where you’re ordering from and the shipping method you choose. Some retailers offer free standard shipping, which may take up to a week or two to arrive.

    Others may offer expedited shipping, which can often arrive within a few days. It’s also important to keep in mind that certain SSD models may be in high demand and out of stock, which can lead to longer wait times. But there are a few things you can do to help speed up the process.

    One is to do your research ahead of time and find a reliable retailer with a good reputation for quick shipping and customer service. Another is to consider signing up for a retailer’s email newsletter or following them on social media, as they may offer exclusive deals or early access to stock. Finally, if you’re in a hurry, be sure to double-check shipping times and choose the fastest method that fits within your budget.

    By following these tips, you can help make sure your SSD arrives as quickly as possible.

    Sign up for Prime or ShopRunner

    If you’re looking to speed up your SSD, one simple solution is to sign up for a service like Amazon Prime or ShopRunner. These subscription services offer free two-day shipping on millions of items, which means you can get the components you need for your SSD upgrade quickly and easily. Additionally, both Prime and ShopRunner offer other benefits such as free streaming of movies, TV shows, and music, so you can enjoy some downtime while you wait for your packages to arrive.

    By taking advantage of these services, you can save both time and money on your SSD upgrade, and have your computer running faster in no time. So why not give it a try and see how much of a difference it can make?

    Choose Expedited Shipping

    “expedited shipping” If you’re anxious to get your new SSD up and running, choosing expedited shipping might be a worthwhile investment. Often, expedited shipping options cost a bit more, but they can save you time and potential frustration. Depending on your location and the shipping provider you choose, expedited shipping may shave off a day or two from your estimated delivery date.

    It’s also possible that you’ll receive your package within the same week you ordered it. Keep in mind that other factors, like product availability and processing times, can also impact delivery estimates. However, choosing expedited shipping can increase your chances of receiving your SSD as soon as possible.

    Conclusion

    Well, dear reader, the answer to the age-old question of “how long does it take to receive SSD” can be summed up in one word: patience. Just like a perfectly brewed cup of tea or a slow-cooked meal, the process of receiving SSD benefits takes time. While it may feel frustrating to wait for that monthly payment to come through, it’s important to remember that the Social Security Administration is diligently working to process claims and ensure that every eligible individual receives the support they need.

    So sit back, relax, and trust that your SSD benefits will make their way to you in due time. After all, good things come to those who wait (and fill out the paperwork correctly).

    FAQs

    What is SSD?
    SSD stands for Solid State Drive, which is a type of data storage device used in computers and laptops.

    How long does it take to receive SSD benefits after being approved?
    After being approved for SSD benefits, it typically takes 30-90 days to receive your first payment.

    What is the difference between SSDI and SSI?
    SSDI (Social Security Disability Insurance) is for people who have worked and paid into the Social Security system, while SSI (Supplemental Security Income) is for people who have not worked enough to qualify for SSDI and have limited income and resources.

    How do I apply for SSD benefits?
    You can apply for SSD benefits online, over the phone, or in-person at your local Social Security office. You will need to provide medical and work history information.

  • Step-by-Step Guide: Adding an SSD to Your PC for Lightning-Fast Speeds

    Adding an SSD to your PC can be a game-changer. If you’re someone who’s been struggling with slow loading times, sluggish performance, and overall frustration when using your computer, adding an SSD (solid-state drive) is a simple way to upgrade your system and experience a significant improvement in speed and responsiveness. Think of an SSD like giving your PC a turbo boost – everything opens faster, applications launch in seconds, and multitasking becomes a breeze.

    In this blog post, we’ll break down the benefits of adding an SSD to your PC, guide you through the installation process, and provide some tips for optimizing your system after the upgrade is complete. So, let’s get ready to take your computer to the next level!

    Check Your Compatibility

    If you’re looking to upgrade your PC’s storage to add an SSD, it’s important to first check your compatibility. Not all computers are equipped to handle an SSD, so it’s important to check your motherboard’s specifications and ensure that it has an available SATA port. Additionally, it’s important to ensure that there is enough physical space in your computer’s case to accommodate the SSD.

    You’ll also need to make sure that your operating system is compatible with an SSD, and that you have the necessary tools to install the SSD and migrate your data. It’s important to research your specific PC model and the SSD you plan to install to ensure that they are compatible with each other. With the right preparation and research, adding an SSD to your PC can significantly improve your storage capacity and performance.

    Ensure Your Motherboard Supports SATA III

    If you want to upgrade your computer’s storage to a faster SATA III hard drive or solid-state drive, it’s important to check whether your motherboard supports this standard. SATA III or SATA 6Gbps is the latest version of the SATA interface that allows for faster data transfer rates and better performance than its predecessors. To ensure compatibility, you can check your motherboard’s specifications either online or in the manual that came with it.

    Look for the SATA version number or the maximum transfer rate of SATA ports. If it doesn’t support SATA III, you won’t be able to fully utilize the speed of your new drive. It’s also worth noting that some older motherboards may only have a limited number of SATA III ports, so you may need to use a SATA III add-on card or upgrade your motherboard altogether.

    Don’t overlook this important step in the upgrade process, or you may end up with slower-than-expected performance.

    how do i add an ssd to my pc

    Check for Space inside Your PC

    When it comes to upgrading your PC, the first thing you need to check is compatibility. It’s important to make sure that your new hardware is compatible with your existing hardware and operating system. This will ensure that you don’t run into any issues down the line.

    But there’s also another important factor to consider – space. Before you purchase any new hardware, you need to make sure that you have enough space inside your PC to accommodate it. This means checking the physical dimensions of the new component and comparing it to the available space inside your case.

    You also need to make sure that you have enough power to run the new hardware. This can be a bit tricky, as you need to make sure that your power supply is compatible with the new component and can handle its power requirements. So, before you go out and buy new hardware, take the time to do your research and make sure that everything is compatible and will fit inside your PC.

    Choose Your SSD

    Adding an SSD to your PC can vastly improve its performance, but choosing the right one can be a daunting task. When looking for an SSD, the most important factors to consider are storage capacity, speed, and durability. The storage capacity should be determined by your needs, and generally, a minimum of 256GB is recommended.

    Speed is usually measured in read and write speeds, with higher speeds indicating faster performance. Durability can be assessed through the amount of data that can be written onto the SSD, known as the Terabytes Written (TBW) value. Remember, an SSD is an investment, so choose wisely!

    Consider the Capacity You Need

    When it comes to choosing your SSD, it’s important to consider the capacity you need. SSDs come in a variety of sizes ranging from 128GB to 4TB or more. The right capacity for you will depend on what you plan to use your SSD for.

    If you’re a gamer, you’ll likely need a larger capacity to store all your games. If you’re a photographer or videographer, a larger capacity will allow you to store all your high-resolution files. It’s important to note that while SSDs used to be much more expensive than traditional hard drives, the price gap has narrowed significantly in recent years.

    So, even if you don’t think you need a large capacity now, it may be worth investing in a larger SSD for future use. Ultimately, choosing an SSD with the right capacity will ensure that you have enough storage for your needs without overspending on unnecessary storage space.

    Decide Between SATA and NVMe

    When it comes to choosing an SSD for your computer, one of the crucial decisions is to determine whether you should go for the common SATA interface or the faster NVMe interface. SATA has been around for quite a while, and it is still prevalent because of its affordability and reliability. On the other hand, NVMe is the latest technology that offers lightning-fast transfer speeds and low latency, making it ideal for high-performance computing tasks.

    If you are on a tight budget and using your computer for general purposes like web browsing and word processing, SATA SSDs should be sufficient for your needs. They offer good performance and reliability, and they are much cheaper than NVMe SSDs. However, if you are a gamer, a content creator, or want to do some heavy-duty computing, then an NVMe SSD is a better option.

    The faster transfer speeds of NVMe can significantly reduce the loading times of your games, videos, and other multimedia files. It can also improve the responsiveness of your computer and boost its overall performance. In conclusion, choosing between SATA and NVMe comes down to your specific needs and budget.

    If you want a budget-friendly option that provides reliable performance, SATA is the way to go. If you want faster speeds and low latency for high-performance computing tasks, NVMe is the better option. Whichever option you choose, upgrading to an SSD can dramatically improve the performance and responsiveness of your computer.

    Install Your SSD

    If you’re looking to speed up your computer’s performance, one of the best things you can do is add an SSD. “How do I add an SSD to my PC?”, you might ask. Well, it’s actually much easier than you might think.

    First, you’ll need to make sure you have an available slot on your motherboard and a compatible cable to connect your SSD. Once you’ve confirmed that, it’s just a matter of physically installing the SSD into your computer case. Next, you’ll need to connect the cable to the SSD and plug it into the motherboard.

    From there, you’ll need to format and partition your new drive, which will allow your computer to correctly recognize and utilize your newly installed SSD. Once that’s done, you’ll be able to enjoy all the benefits of a faster, more efficient computer. So, don’t be intimidated by the process – adding an SSD is one upgrade that’s definitely worth the effort.

    Shut Down Your PC and Disconnect Cables

    Installing an SSD is a great way to give your computer a speed boost, but before you start the process, it’s important to shut down your PC and disconnect all cables. This will ensure that you don’t accidentally damage any components while you’re working on your computer. Once your computer is safely powered down, you can begin the installation process.

    The first step is to locate an available drive bay in your computer and secure the SSD in place, using screws or brackets. Next, you’ll need to connect the power cable and data cable to the SSD. It’s important to ensure that these cables are securely fastened to avoid any connection issues down the line.

    Once all of the cables are connected, you can close the case and power up your computer. With your new SSD installed, you should see a significant increase in speed and performance!

    Insert the SSD into an Available Bay

    Installing an SSD into your computer can significantly boost its performance. The first step is to insert the SSD into an available bay. Most computers have multiple bays, so you’ll need to choose an empty one.

    Before inserting the SSD, make sure your computer is turned off and unplugged, and ground yourself to prevent static electricity from damaging the drive. Then, locate the bay and remove any screws or brackets that may be blocking it. Gently slide the SSD into the bay, making sure it’s properly aligned with the connectors.

    Once it’s securely in place, you can replace any screws or brackets you removed, and then you’re ready to move on to the next step in the installation process. With this simple step, you’re well on your way to improving your computer’s speed and performance with your new SSD.

    Connect the SSD to Your Motherboard and Power Supply

    To install your SSD, the first step is to connect it to your motherboard and power supply. Before doing so, ensure that your computer is switched off and unplugged from the power source. Locate an available SATA port on your motherboard and insert the SATA data cable into it.

    Connect the other end of the cable to the SSD. If your SSD has an M.2 slot, locate the corresponding M.

    2 port on your motherboard and insert the SSD into it. Finally, connect the power cable from your power supply to the SSD. You’re now ready to turn your computer on and see if the SSD is recognized by your system.

    By installing an SSD, you’ll significantly increase the speed and performance of your computer, giving you a seamless and enjoyable computing experience. So, why wait? Get your hands on an SSD and experience the difference for yourself.

    Configure the SSD and Transfer Data

    Adding an SSD to your PC is a great way to upgrade your computer’s performance. After installing the SSD in your PC, you need to configure it and transfer data from your old hard drive to the new one. First, you’ll need to configure the SSD by formatting it.

    You can do this easily using Windows Disk Management tool or a third-party partition management software. Once you’ve formatted the SSD, you can install your operating system and other essential software on it. To transfer data, you can use Windows built-in File Explorer or a third-party program, such as EaseUS Todo Backup or Acronis True Image.

    You can also copy files and folders manually to the SSD. Don’t forget to change your boot order in the BIOS to boot from the new SSD, which will enable you to quickly start-up your PC. Overall, adding an SSD can significantly improve your PC’s speed, and the process is relatively straightforward, even for beginners.

    Enter Your BIOS and Configure the SSD

    If you’ve recently installed an SSD on your computer, one of the critical steps you need to complete is configuring it through your BIOS. By accessing the BIOS, you can confirm that your computer recognizes the newly installed SSD. Then, you can configure it to boot as the primary drive, which will help improve your computer’s performance.

    To access the BIOS, you’ll need to follow the manufacturer’s instructions, which may involve pressing a particular key during start-up. Once you’re in the BIOS, navigate to the boot option, select the SSD as the primary drive, and save your changes. After configuring the SSD, it’s time to transfer your data onto it.

    You can do this in several ways, such as using a cloning tool or manually copying files to the SSD. Either way, ensure that all your essential files, documents, and software are on the SSD to improve your computer’s overall performance. By configuring your SSD in the BIOS and transferring your data, you’ll enjoy faster boot times, application launches, and file transfers.

    Clone Your Old Hard Drive to the New SSD

    When transitioning to a new SSD, one of the most efficient ways to transfer data is by cloning your old hard drive onto the new one. However, it’s important to properly configure the SSD before initiating the transfer process to ensure optimal performance. First and foremost, you’ll want to make sure that the SSD is correctly installed and connected to your computer.

    Once that’s taken care of, it’s recommended that you perform a fresh install of your operating system onto the SSD. This will eliminate any unnecessary bloatware or system files that could slow down performance. Next, you’ll need to obtain a cloning software that is compatible with your specific operating system and SSD.

    The software will walk you through the steps of transferring your data from the old hard drive to the new SSD. By taking these initial steps, you can ensure that your new SSD is operating at the highest level of performance and is configured properly for the smoothest transfer of data possible.

    Enjoy the Speed and Efficiency of Your New SSD

    Are you tired of waiting for your computer to load applications or files? Adding an SSD to your PC can drastically improve its performance. But how do you add an SSD to your PC? First, you need to check if your computer’s motherboard has an available SATA port. If it does, you can purchase an SSD and connect it to the SATA port using a SATA cable.

    However, if your motherboard doesn’t have an available port, you can purchase a PCIe adapter card that allows you to connect the SSD to a PCIe slot. Once you have connected the SSD, you can start transferring your operating system and important files from your old hard drive to the new SSD. After the transfer process is complete, you can enjoy the speed and efficiency of your new SSD, allowing for faster boot times and application loading.

    So why wait any longer? Adding an SSD to your PC can breathe new life into your computer and improve your overall computing experience.

    Conclusion

    In conclusion, adding an SSD to your PC is like giving a turbo boost to your computer. It’s a simple and effective way to upgrade your machine and give it new life. Whether your PC is lagging or you’re just looking to take it to the next level, adding an SSD is the answer.

    So, don’t be afraid to take the plunge and increase your computer’s speed and performance. Your PC (and your sanity) will thank you for it!”

    FAQs

    What are the benefits of adding an SSD to my PC?
    Adding an SSD to your PC can significantly improve its performance, including faster boot and load times, better multitasking, and quicker file transfers.

    Can I add an SSD to my existing PC without replacing my current hard drive?
    Yes, you can add an SSD to your existing PC without replacing your current hard drive. You can install the SSD as a secondary storage device and use it to store your operating system and frequently used programs.

    How do I choose the right SSD for my PC?
    When choosing an SSD for your PC, consider factors such as the form factor, capacity, read/write speeds, and interface. It’s also important to check your computer’s specifications to ensure compatibility.

    Do I need to transfer my operating system to the SSD after installation?
    Yes, to fully benefit from the improved performance of an SSD, you should transfer your operating system to the SSD after installation. You can use software like Acronis True Image or Macrium Reflect to clone your existing hard drive to the SSD.

  • Effortlessly Boost Your Computer Speed: Your Guide to Connect a Small SSD Like a Pro

    Effortlessly Boost Your Computer Speed: Your Guide to Connect a Small SSD Like a Pro

    So, you just got a small SSD and you’re ready to connect it to your computer. Great! But, where do you start? Connecting a small SSD to a computer may seem daunting at first, especially if you’re not tech-savvy. But, don’t worry, it’s actually quite simple.

    In this blog post, we’ll go over the steps you need to take to connect your small SSD to your computer. Whether you’re looking to upgrade your storage or you just want to transfer files, we’ve got you covered. So, let’s get started!

    Check Compatibility

    When it comes to connecting a small SSD to your computer, the first step you need to take is to check compatibility. You’ll want to make sure that the SSD you have chosen is compatible with your computer’s hardware and operating system. To do this, you can check the manufacturer’s website or consult the product specifications.

    Once you’ve confirmed compatibility, the next step is to physically connect the SSD to your computer. This can be done by opening up your computer’s case and connecting the SSD to an available SATA port on the motherboard. If you’re not comfortable doing this yourself, it’s always best to seek the help of a professional.

    Overall, connecting a small SSD to your computer can be a great way to expand your storage capabilities and improve your computer’s performance, as long as you take the time to ensure compatibility and follow proper installation procedures.

    Confirm Port Type and Size

    When selecting a port type and size for your device, it’s important to ensure compatibility with your existing equipment. The first step is to confirm what type of port you need. Some of the most common types include USB, HDMI, DisplayPort, Thunderbolt, and Ethernet.

    Each type has unique features and capabilities, so it’s important to choose the right one for your needs. Once you’ve identified the type of port you need, you’ll need to choose the size. Common sizes for these ports include Mini, Micro, and Standard.

    It’s important to double-check the size of the port on your existing device to ensure compatibility with the new equipment. If you’re not sure what size you need, try using a ruler or measuring tape to determine the size of the existing port. Taking the time to confirm port type and size before making a purchase can save you time and money in the long run.

    how do i connect a small ssd to my computer

    Ensure Sufficient Power

    When it comes to ensuring sufficient power, one of the critical considerations is compatibility. Ensure that the power supply unit (PSU) you select is compatible with your computer’s motherboard. Otherwise, it may not function correctly or even damage your components.

    The key factor to focus on is the PSU’s output, measured in watts. A PSU with insufficient wattage cannot adequately power your system, leading to instability or even crashes. On the other hand, a PSU with too much wattage can be inefficient, leading to higher power consumption and more heat generation.

    Consider the components that you plan to install, such as the CPU, GPU, and RAM, and choose a PSU that can handle their power requirements. A reliable and efficient PSU compatible with your system ensures smooth operations and longevity of your computer.

    Hardware Connection

    Are you looking to connect a small SSD to your computer? Fortunately, it’s a relatively simple process, and you don’t need any specialized knowledge or tools. The most common way to connect an SSD to your computer is by using SATA (Serial Advanced Technology Attachment) cables. First, locate an empty SATA port on your motherboard, and plug one end of the cable into the port.

    Then, plug the other end of the cable into the corresponding port on the SSD. Once that’s done, you’ll need to connect a power cable to the SSD. This is typically a four-pin Molex or a SATA power cable.

    Finally, turn on your computer, and you should be able to use the new SSD. If you’re building a new computer or upgrading an existing one, you may want to consider using an M.2 SSD instead of a traditional SATA SSD.

    M.2 SSDs offer faster read and write speeds and are usually smaller and easier to install. Whether you choose an M.

    2 SSD or a traditional SATA SSD, connecting it to your computer is simple and straightforward!

    Turn off Computer

    If you’re wondering how to turn off your computer, it’s not as complicated as you might think! First, you’ll want to ensure that all of your hardware connections are in order. This means making sure that your keyboard, mouse, and any other peripherals are properly plugged in and functioning. Once you’ve done that, you can then turn your attention to actually shutting down your computer.

    Many people simply hit the power button or unplug their computer, but this can damage your files and potentially harm your hardware. Instead, simply navigate to the “Start” menu and select “Shut Down.” From there, you can choose whether to hibernate, sleep, or completely shut down your computer.

    By following these simple steps, you can keep your computer running smoothly and avoid any unnecessary damage or data loss.

    Locate Available Port

    When it comes to hardware connections and locating available ports, it may seem overwhelming at first, especially for those who are not tech-savvy. However, with a little bit of guidance, it’s actually quite manageable. One of the first things you can do is examine the ports on your computer or device.

    This will give you a sense of what types of connections are available and where they are located. Some common types of ports include USB, HDMI, Ethernet, and audio jacks. Once you know what you’re working with, you can then connect your hardware and begin the process of locating available ports.

    There are also various online resources and tutorials available to help you navigate this process. By taking the time to familiarize yourself with your hardware and the available ports, you’ll be able to effectively connect your devices and optimize your performance.

    Connect SSD and Securely Fasten

    When it comes to hardware connection, securely fastening your SSD is one of the most crucial steps to ensure that it works efficiently. SSDs are smaller and lighter than traditional hard drives, making them prone to vibration, which may eventually cause issues. The process of connecting an SSD involves inserting it into the appropriate slot on the motherboard and firmly securing it using screws.

    You must ensure that you use the correct screw size since an inappropriate one can damage the SSD. Connecting an SSD is a simple process, but it is essential to keep it secure, particularly if you intend to transport or move your computer frequently. By taking the time to safely install your SSD, you can avoid any potential data loss due to an insecure connection.

    So, always opt for quality screws and secure your SSD in place to ensure it functions smoothly.

    Software Configuration

    So you want to connect a small SSD to your computer? No problem, it’s actually a fairly simple process. First, you’ll need to disconnect your computer from its power source and remove the panel on the side of the tower. Once you’ve done that, you’ll want to locate the SATA port on your motherboard.

    This is typically a small, rectangular slot that’s located near the edge of the board. You’ll then need to connect the SATA cable from your SSD to the motherboard and then attach the power connector to the SSD itself. Once you’ve done that, you can put the side panel back onto your tower and reconnect the power source.

    Then, when you restart your computer, it should automatically detect the new SSD and you can proceed with setting it up and installing any necessary software or drivers. Overall, connecting a small SSD to your computer is a relatively straightforward process as long as you take the necessary precautions and follow the steps carefully. With a little bit of effort and a few minutes of your time, you can significantly improve your computer’s storage capabilities and potentially boost its performance as well.

    So what are you waiting for? Go ahead and give it a try – your computer will thank you for it!

    Access BIOS/UEFI Settings

    Accessing BIOS/UEFI settings is an essential step for anyone who needs to make changes to their computer. These settings can be accessed by rebooting your computer and pressing a specific key during the boot-up process. Many computer manufacturers use different keys to access the BIOS/UEFI settings.

    For example, some manufacturers use F2, while others use F10 or F1 It’s always best to check your computer’s manual or manufacturer’s website to find out which key to press for your specific computer. Once you’ve accessed BIOS/UEFI settings, you can configure your computer’s hardware and software settings.

    You can change the boot order, enable or disable hardware devices, and configure security settings. These settings are critical for anyone who wants to optimize their computer’s performance and ensure that it’s running smoothly.

    Verify SSD Detection and Boot Order

    If you’ve just installed a new SSD into your computer, it’s essential to verify that the SSD is being detected and that the boot order is set correctly. This will ensure that your computer can use the new drive and that it’s being used as your primary boot drive. One way to verify that your computer is detecting the SSD is by opening the BIOS or UEFI settings and checking if the SSD is listed there.

    You can also check if the boot order is set correctly and prioritize the SSD to ensure that your computer boots from it. Setting the SSD as the primary boot drive can significantly improve your system’s performance and speed up the boot time. Overall, it’s crucial to check these settings to ensure that your computer is utilizing the new SSD effectively.

    Final Step

    Connecting a small SSD to your computer may seem like an intimidating task, but it is actually quite simple. The final step involves connecting the SSD to your computer through the appropriate interface, which can vary depending on the model of the SSD and your computer. Most modern SSDs will require a SATA connection, which can be found on the motherboard of your computer.

    To connect the SSD, locate the SATA port on your computer and connect the SATA cable from the SSD to the port. Be sure to secure the connection by tightening the screws on both ends of the cable. Once the connection is secure, boot up your computer and ensure that the SSD is recognized in your BIOS settings.

    Congratulations, you have successfully connected your small SSD to your computer and can now begin enjoying its benefits!

    Save Settings and Restart Computer

    The final step in configuring your computer’s settings is to save your changes and restart the system. Saving your settings is crucial to ensure that all your customization choices have been retained and applied successfully. Once you save your settings, it’s essential to restart your computer to implement the changes effectively.

    Restarting the system helps clear out any background processes and updates your computer’s software to ensure that your customized settings take effect. It’s always a good idea to save your work and close any open programs before restarting your computer. Remember, simple solutions like saving your settings and restarting your computer can make a big difference in improving your computer’s performance and addressing any issues you may be experiencing.

    Conclusion

    Connecting a small SSD to your computer may seem daunting, but fear not! With the right tools and a bit of know-how, you can easily boost your system’s speed and storage capacity. It’s like giving your computer a turbo boost – just make sure to buckle up and enjoy the ride. Happy computing!”

    FAQs

    What kind of cable do I need to connect a small SSD to my computer?
    You will need a SATA III cable to connect a small SSD to your computer.

    My computer doesn’t have a spare SATA port. How can I connect a small SSD to it?
    You can use an external enclosure that supports the type of SSD you have and connects to your computer via USB.

    Do I need any special software to connect a small SSD to my computer?
    No, as long as your computer supports the type of SSD you have, you should be able to connect it without any special software.

    Can I connect a small SSD to my laptop?
    Yes, as long as your laptop has a spare SATA port or you use an external enclosure that connects via USB.

    How do I format and partition a small SSD once it’s connected to my computer?
    You can use the built-in disk management tool in Windows, or a third-party partitioning software, to format and partition your small SSD. Just be sure to carefully follow the instructions to avoid data loss or other issues.