Category: How to

How to

  • Boost Your Gaming Performance: The Ultimate Guide on How to Move Games to Your SSD

    Ready to give your gaming rig a boost with lightning-fast load times and improved performance? Moving your games to an SSD could be just what you need. But if you’re not sure how to get started, don’t worry! We’ve got you covered with this step-by-step guide. First things first: make sure you have the right tools for the job.

    You’ll need an SSD with enough space to hold your games, as well as a cloning software such as Macrium Reflect or EaseUS Todo Backup. Once you have those in hand, it’s time to get started. The first step is to back up all your important files and data.

    This is an important step, so don’t skip it! Make sure you’ve backed up everything you need before you move on to the next step. Next, connect your SSD to your computer. You can do this by using an external enclosure or by installing it internally if you have an available slot.

    Once your SSD is connected, open your cloning software and follow the on-screen instructions to clone your existing hard drive onto the SSD. Once the cloning process is complete, you’ll need to change your boot order to prioritize your new SSD. You’ll also need to update your system’s firmware to support the new drive.

    Again, your cloning software should provide step-by-step instructions for these processes. Finally, move your games over to your new SSD. This can be done by either reinstalling them from scratch or by copying and pasting them from your old hard drive.

    Just make sure you have enough space on your SSD to hold all your games! And there you have it – a simple, step-by-step guide to moving your games to an SSD. With faster load times and improved performance, you’ll wonder how you ever lived without it!

    Check available space on your SSD

    If you’re looking to move games to your SSD, the first thing you’ll want to do is check the amount of available space on your SSD. SSDs can offer much faster loading times than traditional HDDs, but they also tend to have less storage space. To see how much space is available on your SSD, simply right-click on the drive in File Explorer and select “Properties.

    ” From there, you’ll be able to see the total capacity of the drive, how much space you have free, and how much space is being used. If you find that you don’t have enough space for your games on your SSD, you might consider uninstalling games or other programs that you don’t use as often. Additionally, you could try moving some files to an external hard drive or cloud storage to make more space on your SSD.

    By freeing up space on your SSD, you’ll be able to move your games and enjoy faster load times and smoother gameplay.

    Using Windows Explorer (PC)

    If you’re using a PC with an SSD, it’s important to keep an eye on how much space you have available. Thankfully, checking your available space is easy using Windows Explorer. Simply open up Explorer and navigate to your drive (usually listed as “Local Disk (C:)”).

    Right-click on the drive and select “Properties.” You should see a pie chart that shows how much space is used and how much is still available. If you’re running low on space, it may be time to consider deleting some files or upgrading to a larger SSD.

    Keeping track of your available space can ensure that your computer runs smoothly and prevent any potential data loss.
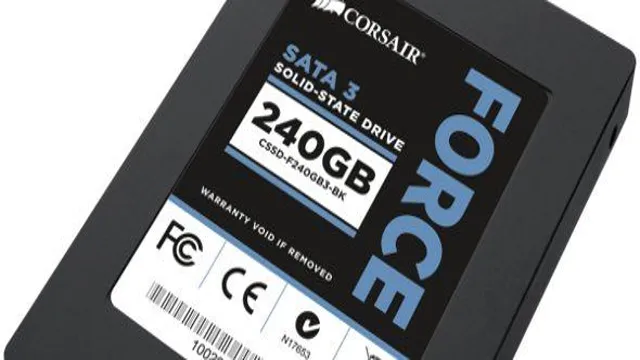
    how do i move games to my ssd

    Using Finder (Mac)

    If you’re using a Mac and you want to check the available space on your SSD, you can use Finder. It’s a built-in tool that comes with your Mac and it’s very easy to use. All you need to do is open a Finder window and click on your Mac’s hard drive.

    Then, click “File” in the menu bar and select “Get Info.” This will give you all the details about your hard drive, including the available space. It’s important to keep track of how much space you have left on your SSD, as it can affect the performance of your Mac.

    You should ideally have at least 10-15% of the total space free, as this gives your SSD the room it needs to perform at its best. So, make sure to check your SSD’s available space from time to time using Finder to ensure that you’re not running out of space.

    Locate the game you want to move

    If you want to move games to your SSD, the first step is to locate the game you want to move. This can be done by opening the file explorer and navigating to your current installation directory. Once you have located the game, you will need to copy and paste or drag and drop it to your new SSD location.

    Alternatively, you can use a third-party software like Steam Mover or CloneApp to transfer your games to your SSD hassle-free. It’s worth noting that moving games to an SSD can significantly improve load times and overall performance, making it a worthwhile investment for passionate gamers. Overall, the process of moving games to your SSD is relatively straightforward, but it’s important to make sure you have enough space on your SSD before attempting to do so.

    Using Steam (PC)

    If you’re looking to free up space on your PC’s hard drive, you might want to consider moving some of your Steam games to another location. The good news is that it’s a relatively easy process. To get started, open the Steam client on your PC and navigate to the Library tab.

    From there, find the game you want to move and right-click on it. Select Properties from the ensuing context menu, and then click on the Local Files tab. Here, you’ll see an option to “Move Install Folder”.

    Click on this and choose where you want your game to be moved to. You can select any drive on your PC or an external hard drive if you have one. Steam will then move all the files and folders associated with your game to the location you specified.

    It’s as simple as that! Just note that depending on the size of the game, the transfer could take a while, so be patient.

    Using Origin (PC)

    Origin is a popular platform for gamers to buy and play their favorite games. If you’re looking to move a game on Origin to a new location on your PC, it’s actually a pretty simple process. The first step is to locate the game you want to move within the Origin client.

    Once you’ve found the game, right-click on it and select “Move game.” You’ll then be prompted to choose a new location for the game. It’s important to note that the new location must be on the same hard drive as the existing location, so if you’re looking to move the game to an entirely different hard drive, you’ll need to first copy it to the new location and then delete the original.

    With these steps, you’ll be able to easily move your games around as needed within the Origin client.

    Using the Mac App Store (Mac)

    When looking for a specific game on the Mac App Store, it can be daunting to navigate through the vast collection of options. To make things easier, you can use the search bar located in the top right corner of the app store and type in the name of the game you are looking for. Once you have located the game, you can click on its icon to view more information about it, such as screenshots, reviews, and system requirements.

    Make sure to check the game’s compatibility with your Mac before purchasing to ensure a smooth and enjoyable gaming experience. With just a few clicks, you can easily locate the game you want to move and start playing in no time. Happy gaming!

    Move the game to the SSD

    Looking to transfer your games to your SSD? You’re not the only one! Many gamers find that moving their games to the SSD can result in faster loading times and a smoother gaming experience overall. Fortunately, the process is relatively straightforward. First, ensure that your SSD has enough space for the game you want to move.

    Next, locate the game’s installation folder on your hard drive. This will typically be in the “Program Files” folder. Once you’ve found the folder, simply copy it to your SSD using Windows Explorer.

    Finally, open up your game client (e.g., Steam), right-click on the game you’ve moved, and select “Properties.

    ” Under the “Local Files” tab, click “Move Install Folder” and select the location of your copied game folder on the SSD. Voila! Now your game is on your SSD and should load much faster.

    Using Windows Explorer (PC)

    If you want to boost your gaming performance, you might want to consider moving your game files to your SSD. To do this using Windows Explorer on a PC, you’ll first need to locate the game files on your current hard drive. Once you’ve found them, you can copy and paste them to the new destination on the SSD.

    This will transfer the game files to the faster drive, which should improve the game’s loading times and overall performance. Just be sure to double-check that you’ve copied all the necessary files and that the game is still functioning correctly after the move. By taking this step, you’ll be able to enhance your gaming experience and enjoy smoother, faster gameplay.

    Using Finder (Mac)

    If you have recently upgraded your Mac to include a speedy SSD, you may want to move some of your frequently used applications and games onto it to take advantage of its improved performance. Moving a game to the SSD using Finder is a relatively straightforward process. First, open Finder and locate the game you wish to move.

    Next, right-click on the game and select “Copy” from the dropdown menu. Then navigate over to the SSD drive in Finder and right-click anywhere in the open space. Select “Paste Item” from the dropdown menu to transfer the game over to the SSD.

    This process may take some time depending on the size of the game and the speed of your Mac’s transfer rate. Once the transfer is complete, you can double-click on the game from within the SSD to launch it and experience the improved speeds for yourself. By moving your games to the SSD, you can shave off valuable seconds from load times, making your gaming experience that much smoother and enjoyable.

    Configure your game settings

    Moving games to your SSD can greatly improve game performance and reduce loading times. First, ensure that your SSD has enough space to accommodate your games. Then, to move them over, simply locate the game files in your current installation folder and copy them to the new SSD location.

    Next, open the game’s settings and change the installation directory to the new SSD location. This will ensure that any future updates and downloads will be stored there as well. Finally, delete the original game files from the old location to free up space on your primary drive.

    By configuring your game settings to utilize your SSD, you’ll notice faster load times and smoother gameplay. So why wait? Make the switch today!

    Updating game paths in Steam or Origin (PC)

    Updating game paths in Steam or Origin on PC is an essential step for gamers who want to keep their game settings up-to-date. Configuring game paths not only saves a lot of time but also simplifies the entire gaming process. It allows gamers to locate their games easily and swiftly, without having to search for them manually.

    Plus, when you update your game paths, you’ll also improve your gaming performance by freeing up space on your hard drive. In simple terms, updating your game paths is just like organizing your wardrobe, where you put all your clothes in the right place, making them accessible in a hurry. So, if you’re a hardcore gamer, updating your game paths is a crucial thing to do.

    Updating game paths in the Mac App Store (Mac)

    When it comes to updating game paths in the Mac App Store, you’ll need to configure your game settings properly to ensure everything runs smoothly. First and foremost, make sure your game is capable of running on the most recent macOS version and is 64-bit compatible. Then, navigate to your game’s code signing identity and ensure it matches the one you used to submit the app to the Mac App Store.

    Additionally, check your app’s entitlements and ensure they’re properly configured for the App Sandbox environment. Finally, verify that your game’s file paths are set up correctly and that any changes to these paths are reflected in your code. By taking these steps, you can ensure that your game remains updated and functional for players on the Mac platform.

    Conclusion

    In conclusion, moving games to your SSD is like giving your trusty old bicycle a new set of wheels. You’ll experience faster load times and smoother gameplay, making your gaming experience all the more enjoyable. So, if you’re looking to level up your gaming setup, don’t hesitate to give your games a new home on your SSD.

    FAQs

    Why should I move my games to my SSD?
    Moving games to your SSD will help improve game load times, reduce stuttering, and overall create a faster and smoother gaming experience.

    How do I check if my game is already installed on my SSD?
    Open your game launcher or steam library, right-click on the game you want to check, select “properties”, then click on the “local files” tab. This will show you the game’s installation path, indicating whether it is installed on your SSD or not.

    Will moving my games to my SSD affect my game progress and saves?
    No, moving games to your SSD does not affect game progress or saved game data. It only moves the game files from the original location to the new location on your SSD.

    Can I move my games from my HDD to my SSD without re-downloading them?
    Yes, you can move your games from your HDD to your SSD without re-downloading them. Use a third-party software to transfer the game files from the HDD to the SSD. Alternatively, you can manually copy and paste the files to the new location on your SSD.
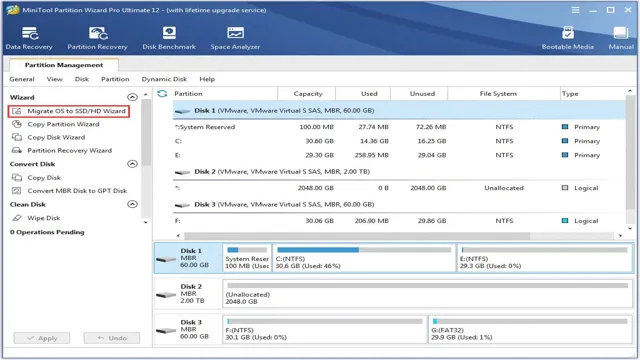
  • Quick and Easy Guide: Transferring Your OS to an M.2 SSD

    If you’re looking to upgrade your computer’s speed and performance, transferring your operating system (OS) to an M.2 SSD is a great option. But how do you go about doing it? In this step-by-step guide, we’ll walk you through the process so you can enjoy quicker boot-up times, faster application launches, and improved overall responsiveness.

    By the end of this article, you’ll be able to confidently transfer your OS to an M.2 SSD without any hassle. So let’s jump right in!

    Preparation

    So, you’ve just upgraded to a new M.2 SSD and now you want to transfer your operating system to it, but you’re not sure how to go about it. Well, the good news is that it’s easier than you might think.

    The first step is to ensure that your new M.2 SSD is properly installed and recognized by your system. Once that’s done, you’ll need to clone your existing operating system to the new drive.

    There are a number of tools that can help with this, such as Macrium Reflect or Acronis True Image. Simply choose the tool you prefer, follow the instructions, and let the software do its thing. Once the cloning process is complete, you may need to adjust your BIOS settings to ensure that your system boots from the new SSD.

    And that’s it! With these simple steps, you can easily transfer your OS to your new M.2 SSD and enjoy all the benefits of faster speeds and improved performance.

    Check M.2 SSD compatibility

    When upgrading to an M.2 SSD, compatibility is a crucial factor to consider. Firstly, you need to make sure your motherboard supports the NVMe SSD protocol, which is required for M.

    2 SSDs. Check your motherboard manual or manufacturer’s website to see if it supports NVMe. Additionally, you need to ensure that your motherboard has an M.

    2 slot that is compatible with the SSD you want to install. M.2 SSDs come in different lengths and widths, so you need to check if your motherboard has the corresponding size slot.

    It’s worth noting that some M.2 SSDs use PCIe lanes that may share bandwidth with other components like your GPU or PCIe storage, so you also need to consider that when choosing your SSD and upgrading your system. Overall, it’s crucial to do your research and ensure that your motherboard is compatible with your chosen M.

    2 SSD before making any purchases. By doing so, you can avoid compatibility issues and ensure optimal performance from your SSD.

    how do i transfer my os to m 2 ssd

    Confirm Windows version and architecture

    Before beginning any software installation, it is important to confirm your Windows version and architecture. This will ensure that you download and install the correct software compatible with your system. To check your Windows version, simply click on the Start button and type in “About your PC”.

    From here, a screen will pop up displaying your Windows version and edition. To confirm your architecture, again click on the Start button and type in “System Information”. Once opened, look for the “System Type” entry under the System Summary.

    It will display either 32-bit or 64-bit option. It is essential to note that some software applications may not be compatible with certain versions or architectures, so it is best to double-check before proceeding with the installation. Taking precautions to confirm your Windows version and architecture can save you a lot of time and effort in the long run and ensure a smooth installation process.

    Gather necessary tools (screwdriver & cloning software)

    Preparing to clone a hard drive is a critical step towards a successful transfer of data. You will need a screwdriver to access the hard drive in your computer or laptop and cloning software to start the process. Before beginning, make sure to gather these tools and have them organized and ready to use.

    It is also important to research and select a quality cloning software that will provide the necessary support to transfer all of your data accurately. Once you have these tools and software in place, you can proceed with confidence and ensure that your files, software, and settings will be safely and securely transferred to your new hard drive. So, take the time to gather the necessary tools, and do your research to make the process smooth and worry-free.

    Backup & Cloning

    If you’re upgrading to a new M.2 SSD or simply want to transfer your OS to it, you have a few options. One way is to use third-party software such as Acronis True Image or EaseUS Todo Backup to clone your existing operating system to the new SSD.

    Simply install the software, connect your new SSD, and follow the instructions to transfer your operating system. Another option is to do a fresh installation of your operating system onto the new SSD. This option requires a bit more work but ensures a clean installation.

    However, keep in mind that you will need to reinstall all your programs and transfer your files manually if you choose this option. Regardless of which method you choose, it’s always important to backup your data and make sure you have a reliable backup before making any changes to your system.

    Backup important data

    Backing up and cloning your important data is essential for protecting it from accidental loss or damage. A backup creates a duplicate copy of your data that can be easily retrieved if the original files are lost or corrupted, while a clone creates an exact replica of your entire system, including settings, preferences, and applications. Both methods provide an added layer of security and peace of mind, ensuring that your data is safe and easily recoverable in case of any disaster.

    It’s important to regularly schedule backup and cloning routines, preferably to multiple locations, such as local external drives or cloud-based storage services. And remember, don’t forget to test your backups periodically to ensure that they’re working properly and accurately reflecting all current data. Investing in backup and cloning solutions is a wise choice, making recovering from potential disasters a much smoother process.

    Install cloning software

    Installing cloning software can be a lifesaver when it comes to backing up your important data. It’s always better to be safe than sorry, and cloning software is a great way to ensure that your files are never lost, damaged, or accidentally deleted. There are many different types of cloning software available, but most of them function in a similar way.

    Essentially, the software creates an exact copy of all data on your hard drive, including the operating system, applications, and settings. This cloned version can then be stored securely on an external hard drive, cloud service, or other backup options. One great benefit of cloning software is that it allows for quicker recovery of any lost data or systems.

    Additionally, it’s a great way to transfer all of your content to a new computer or hard drive. Many cloning software programs are user-friendly and easy to use, even for individuals with limited technical skills. Investing in cloning software is a simple way to give yourself peace of mind and ensure the safety of your digital content.

    So why not give it a try?

    Create a clone of current OS drive to M.2 SSD

    If you’re looking to upgrade your computer’s performance, one of the best things you can do is to clone your current OS drive to an M.2 SSD. This will ensure that your computer boots up quickly and runs smoothly, without any lag or delays.

    To do this, you’ll need some backup and cloning software. There are many different options available, but some of the most popular include Acronis True Image, EaseUS Todo Backup, and Macrium Reflect. Once you have your software selected, you’ll need to connect your M.

    2 SSD and select it as your target drive. Then, simply follow the prompts to create a clone of your current OS drive. It’s important to note that this process may take some time, especially if you have a large amount of data to transfer.

    However, once it’s finished, you should notice a significant improvement in your computer’s performance. Overall, cloning your current OS drive to an M.2 SSD is a great way to upgrade your computer’s speed and performance, and it’s definitely worth considering if you’re looking to take your computer to the next level.

    Change Boot Priority

    If you’re looking to transfer your OS to an M.2 SSD, the first step is to change the boot priority in your computer’s BIOS settings. This ensures that your computer boots from the M.

    2 SSD instead of the old hard drive. To do this, you’ll need to access your BIOS settings by restarting your computer and pressing the designated key (usually Delete or F2) during the startup process. Once you enter the BIOS, navigate to the Boot tab and select the M.

    2 SSD as the primary boot device. Save and exit the BIOS, and your computer will now boot from the M.2 SSD.

    Keep in mind that transferring your OS to a new SSD can greatly speed up your computer’s performance, but it’s important to back up your important data beforehand to avoid losing any files. With this simple change in the boot priority, you can easily transfer your OS to an M.2 SSD and enjoy faster and more efficient system performance.

    Access BIOS setup

    Accessing the BIOS setup is an essential task for anyone who wants to customize their system’s settings. In most cases, it is necessary to change the boot priority to either boot from a CD/DVD or USB drive. To access the BIOS, all you need to do is press a specific key, which depends on the manufacturer’s hardware settings.

    Restart your computer and look for the key to enter the BIOS setup. The most commonly used keys are F2, F10, or DEL. Once you’re in the BIOS setup, you’ll need to navigate to the Boot tab to adjust the boot priority.

    Make sure your preferred boot device is at the top of the list here. Save your changes and exit the BIOS setup, and your system will boot from the selected device. It’s crucial to remember to save your changes before exiting the BIOS setup, or you’ll lose the custom settings you’ve made.

    It’s always a good idea to read the manufacturer’s manual or check their website for more specific instructions on accessing the BIOS. With a little patience and practice, you can easily change your system’s boot priority and customize its settings whenever you need to.

    Change boot order to M.2 SSD

    Changing the boot priority of your computer to your M.2 SSD can greatly improve your system’s speed and performance. First, access your computer’s BIOS settings by pressing the designated key during start-up.

    Once in the BIOS, navigate to the Boot menu and locate the option to change the boot order. Here, you can select your M.2 SSD as the first boot device, ensuring that your system loads from this drive first.

    This process may vary depending on your computer’s manufacturer and model, but a simple internet search can provide specific instructions. Keep in mind that changing the boot order may also affect other settings, so be sure to save any changes before exiting the BIOS. By prioritizing your M.

    2 SSD as the boot device, you’ll experience faster start-up times and improved overall system performance.

    Final Steps

    If you’re wondering how to transfer your OS to an M.2 SSD, don’t worry, the process is relatively simple. First, you’ll need to purchase a compatible M.

    2 SSD and connect it to your motherboard. Next, download a disk cloning software such as Acronis True Image or Macrium Reflect. Once the software is installed, select your current hard drive as the source and the M.

    2 SSD as the destination. Follow the prompts to clone the drive, which may take a few hours depending on the size of your OS and current HDD. When the cloning process is complete, restart your computer and enter the BIOS.

    Change the boot order to prioritize the M.2 SSD as the primary boot device, save changes, and exit. Your computer should now boot from the M.

    2 SSD, effectively transferring your OS to a faster, more efficient drive. Overall, transferring your OS to an M.2 SSD can significantly improve the performance of your computer, and the process is simple enough for most users to complete on their own.

    Ensure all necessary drivers are installed

    Now that you’ve completed the bulk of your driver installations, it’s time to ensure that all necessary drivers are installed. This is a crucial step that cannot be overlooked if you want your computer to function properly and smoothly. It’s recommended that you visit your motherboard manufacturer’s website to download the latest drivers for your motherboard.

    This includes drivers for audio, network adapters, and other peripherals that are integrated on the motherboard. You should also check for any missing drivers in the Device Manager and download them from their respective vendors’ websites. It’s important to keep your drivers up-to-date to ensure optimal performance and avoid potential compatibility issues.

    By following these final steps, you can rest easy knowing that your computer is fully optimized and ready to go.

    Remove old OS drive and reformat (optional)

    The final step in upgrading your computer’s OS is optional, but it’s a good idea for those looking to free up space and improve overall system performance. This step involves removing the old OS drive and reformatting it. By doing this, you can ensure that any leftover system files and settings from the previous operating system are erased and won’t interfere with the new OS’s installation.

    Reformatting the old drive also gives you the opportunity to repurpose it for extra storage or use it as a backup drive. Just make sure to back up any important data before reformatting. With this final step complete, your new OS should be up and running smoothly, ready for you to explore all its features and capabilities.

    Enjoy faster boot times and improved overall system performance

    If you want to enjoy faster boot times and improved overall system performance, there are a few final steps you can take. One of the most important is to make sure your computer is free of junk files and unnecessary programs. These can take up valuable space on your hard drive and slow down your system.

    Use a program like CCleaner or CleanMyPC to scan for and remove any unwanted files. You should also make sure your drivers are up to date. Outdated drivers can cause performance issues and even lead to system crashes.

    Check your device manager and download the latest drivers for each component of your computer, including your graphics card, network adapter, and sound card. Another important step is to disable any startup programs that you don’t need. These programs can consume resources and slow down your boot time.

    To disable them, open the Task Manager and go to the startup tab. Here you can see all the programs that are set to run at startup and disable any that you don’t need. Finally, consider upgrading your hardware if your computer is still running slow.

    Adding more RAM or upgrading to a solid-state drive (SSD) can have a huge impact on your system performance. An SSD can greatly improve your boot time and overall system responsiveness. By taking these final steps, you can enjoy a faster, more efficient computer that’s better equipped to handle all your needs.

    So what are you waiting for? Give your computer the boost it deserves and enjoy improved performance today!

    Conclusion

    In summary, transferring your operating system to an M.2 SSD is like giving your computer a one-way ticket to a faster, more efficient life. With a little bit of technical know-how and the right tools, you can make this upgrade just as smooth and satisfying as a swan dive into a pool of chocolate pudding.

    So go ahead, take the plunge and enjoy the sweet rewards of lightning-fast boot times, lightning-quick load times, and lightning-bolt levels of productivity.”

    FAQs

    What is an M.2 SSD and how does it differ from a traditional hard drive or SSD?
    An M.2 SSD is a solid-state drive that uses the M.2 form factor, which allows it to be installed directly on a motherboard, making it faster and more efficient than traditional hard drives and SSDs that connect via a cable.

    Can I transfer my operating system from my current hard drive or SSD to an M.2 SSD?
    Yes, you can transfer your operating system to an M.2 SSD using cloning software such as Acronis True Image or Macrium Reflect.

    What are the benefits of transferring my operating system to an M.2 SSD?
    Transferring your operating system to an M.2 SSD can significantly improve boot times, file transfer speeds, and overall system performance. M.2 SSDs are also more energy efficient and produce less heat than traditional hard drives and SSDs.

    Do I need to reinstall my operating system after transferring it to an M.2 SSD?
    No, you do not need to reinstall your operating system after transferring it to an M.2 SSD. However, it is recommended to perform a fresh installation of your operating system on the new drive for optimal performance.

  • A Comprehensive Guide to Upgrading Your Hard Drive to an SSD: Step-by-Step Instructions for a Faster and Smoother Experience

    Upgrading your computer’s hard drive to an SSD can be a game-changer when it comes to the speed and performance of your device. Not only will it help you save time, but it can also boost your productivity and enhance your overall user experience. But are you unsure where to begin? Don’t worry, we’ve got you covered with this step-by-step guide on changing your hard drive to an SSD.

    Think of it as upgrading from a bicycle to a sports car – you’ll feel the difference in speed and power instantly! So grab your patience, get ready to learn a few essential tech skills, and let’s dive into the world of SSDs.

    Why Upgrade to SSD?

    If you’re wondering “how do I change my hard drive to SSD?” you’re not alone. Upgrading to an SSD is one of the best things you can do to improve the performance of your computer. Unlike a traditional hard drive, which uses spinning disks to store data, SSDs use flash memory chips, which can access data quickly and efficiently.

    This means that your computer will boot up faster, applications will load quicker, and your files will be saved and retrieved more quickly. Plus, SSDs are more durable than traditional hard drives, which means they’re less likely to fail. So, if you’re looking to increase the speed and reliability of your computer, upgrading to an SSD is definitely worth considering.

    Faster Boot and Load Times

    Are you tired of waiting for your computer to boot up or for programs to load? Upgrading to an SSD (solid-state drive) might just be the solution you’re looking for. Unlike traditional hard disk drives, SSDs have no moving parts, which means they can access data much faster. This translates into quicker boot and load times for your computer.

    SSDs also have faster read and write speeds, making file transfers and multi-tasking more efficient. Plus, with no mechanical parts, SSDs are less prone to damage from drops and vibrations. So why not give your computer an upgrade and enjoy faster performance with an SSD?

    how do i change hardrive to ssd

    Improved Performance

    Upgrading to an SSD can remarkably improve your computer’s performance. SSDs are faster than traditional hard drives in terms of reading and writing data. The reason for this is that SSDs use flash memory to store data whereas traditional hard drives store data on spinning disks.

    This allows SSDs to access data much quicker and use less power than traditional hard drives. The result is that your computer will boot up faster, transfer files faster, and launch applications quicker. It can be a game-changer for anyone who wants their computer to perform at its best.

    Don’t you want to upgrade your computer’s performance and make it lightning-fast? Upgrade to an SSD today and see the boost for yourself!

    Increased Reliability

    SSD, reliability Upgrading to an SSD is a wise decision as it significantly enhances the reliability of your system. Unlike traditional hard drives, SSDs have no moving parts, making them less prone to wear and tear. SSDs use flash memory, a technology that doesn’t require any mechanical components to retrieve data.

    As a result, an SSD can access data faster and with far less effort than an HDD. Since there are no moving parts, SSDs can also handle vibrations and shocks better, thus reducing the odds of a catastrophic failure. Furthermore, SSDs are less susceptible to power outages and data corruption as they don’t rely on spinning disks to read and write information.

    In summary, an SSD provides a reliable storage solution that ensures minimal downtime and fewer data loss incidents. So, opt for an SSD upgrade and enjoy unparalleled levels of speed and reliability for your system.

    Energy Efficient

    Upgrading to a solid-state drive (SSD) from a traditional hard disk drive (HDD) is a smart choice if you want to improve your computer’s energy efficiency. One of the biggest advantages of SSDs is that they use significantly less power than their HDD counterparts due to the lack of moving parts. Because SSDs don’t have to spin up a disk and move a read/write head to access information, they consume less energy and produce less heat.

    Plus, SSDs tend to have shorter boot-up and loading times, meaning that your computer doesn’t have to work as hard to access and process data. This can translate into lower electricity bills and a reduced carbon footprint. So, if you’re looking to make your computer more energy-efficient while also enjoying faster performance and better overall reliability, upgrading to an SSD is definitely worth considering.

    Choosing the Right SSD

    If you’re wondering how to change your hard drive to an SSD, you first need to choose the right SSD for your needs. There are a few key factors to consider when selecting an SSD, including capacity, performance, and budget. In terms of capacity, you’ll want to evaluate how much storage space you need, whether that’s 256GB, 500GB, 1TB or more.

    Performance-wise, you’ll want to consider factors such as read and write speeds, as well as the type of interface (NVMe, SATA, etc.). Budget is also an important consideration, as SSDs can range from very affordable to quite expensive depending on the features and performance you require.

    Ultimately, finding the right SSD for you comes down to weighing these factors against your own needs and preferences, and doing thorough research to ensure you’re making an informed decision.

    Size and Compatibility

    When it comes to choosing the right SSD, size and compatibility are important factors to consider. The size of the SSD should be appropriate for your needs and budget. If you primarily use your computer for basic tasks such as browsing the internet and word processing, a smaller capacity SSD may suffice.

    However, if you use intensive applications such as video editing or gaming, you may want to opt for a larger capacity SSD. Additionally, compatibility is crucial. You need to ensure that the SSD is compatible with your computer’s hardware and operating system.

    It’s essential to do your research and check the manufacturer’s website for compatibility information before purchasing an SSD. Overall, when choosing the right SSD, make sure to consider both size and compatibility to ensure optimal performance and longevity.

    Speed and Durability

    When it comes to choosing the right SSD, factors such as speed and durability play a crucial role. Opting for an SSD that offers high read and write speeds can greatly improve the performance of your system. Solid State Drives that use NVMe protocol are ideal for gamers, graphic designers, and anyone who uses resource-intensive applications frequently.

    Another important factor to consider is durability. You want an SSD that can withstand physical shocks, vibrations, and temperature changes. An ideal SSD should also have a high terabytes written (TBW) rating, which gives you an estimate of how long the SSD will last.

    Ultimately, investing in a high-quality SSD ensures that your system runs smoothly without crashes or lag, and that your data is safe and secure.

    Budget

    If you’re on a budget but still want to upgrade your computer’s storage, choosing the right SSD can be a game-changer. It’s important to consider the capacity and speed of the drive. A smaller capacity may be more affordable, but a slower speed may not give you the performance boost you’re looking for.

    On the other hand, a larger capacity may be tempting, but it may not fit within your budget. One option to consider is getting a mid-range capacity SSD with a higher speed. This will give you both enough storage space and faster read and write speeds.

    Additionally, consider looking for sales and promotions on popular brands, as they can often make SSDs more accessible and affordable. Overall, with the right research and shopping strategy, you can find an affordable SSD that will significantly improve the performance of your computer.

    Backing Up Your Data

    Are you looking to upgrade your computer’s performance by swapping your hard drive for a solid-state drive (SSD)? While it’s undoubtedly a great idea, it’s crucial to back up your data first to avoid losing any files or important documents. Before removing your hard drive, it’s necessary to create a complete backup of your drive, including programs, files, and any settings such as user preferences or bookmarks. You can use cloud storage solutions or an external hard drive to store your data.

    Once everything is backed up, you can clone your hard drive’s content onto the new SSD using free software such as Macrium Reflect or Clonezilla. After you’re done, you can enjoy the faster boot times, quicker file access, and overall improved performance that an SSD provides compared to a traditional hard drive.

    Choosing the Right Backup Option

    Backing up your data is an essential practice for anyone who values their digital information. One important aspect to consider when choosing a backup option is the level of security it provides. Depending on the sensitivity of your data, you may want to opt for a more secure backup solution that ensures your information is encrypted and protected from potential threats.

    Another factor to consider is the accessibility of your backup, as well as the frequency of backup updates. If you need quick and easy access to your files, a cloud-based backup service may be best. However, if you require more control over when and how often your data is backed up, an external hard drive may be a more suitable option.

    Ultimately, the right backup solution for you will depend on your specific needs and preferences. But the most important thing is that you have a backup plan in place to avoid data loss and protect your digital assets.

    Transferring Your Data to the New Drive

    Backing up your data is an essential step before transferring it to a new drive. You don’t want to lose any important files in the process, so make sure you have a backup copy of everything. Depending on the amount of data you need to transfer, you can decide on the method of backup.

    If it’s a small amount, you can use a USB drive or cloud storage solutions like Dropbox or Google Drive. However, if you have a large amount of data, an external hard drive would be a more suitable option. Additionally, ensure that your backup is up-to-date and includes all the necessary files and folders.

    This way, you can avoid any data loss due to hardware failures or accidental deletion. So, make sure to back up your data before transferring it to the new drive to ensure everything goes smoothly.

    Installing the SSD

    If you’re looking to upgrade your computer’s performance, changing your hard drive to an SSD is a great way to do it. The process isn’t too difficult, but it requires a bit of patience. First, you’ll need to make sure you have the right tools for the job.

    Generally, you’ll need a screwdriver and an enclosure to hold your old hard drive. Once you have these, you can start by removing the back panel of your computer. From there, you’ll need to locate the hard drive and unscrew any brackets holding it in place.

    Then, carefully unplug the cables from the hard drive and remove it from the computer. Now, it’s time to install the SSD. The process is essentially the same as removing the old hard drive, but in reverse.

    Once the SSD is installed, you’ll just need to reinstall any necessary software and copy over your old files. With a little bit of time and patience, you can easily change your hard drive to an SSD and enjoy a big improvement in performance!

    Preparing Your Computer

    Installing the SSD is a crucial step in upgrading your computer’s performance. Before starting the installation process, make sure to shut down your computer and unplug all cables to ensure safety. Once you’ve opened your computer case, locate the hard drive bay and check its compatibility with your new SSD.

    Some computer cases may require additional mounting hardware to secure the SSD in place. Next, gently insert the SSD into the bay and secure it with screws or clips. Ensure that all cables, including the power and data cables, are properly connected to the SSD.

    Once the SSD is securely installed, reattach the computer case and plug in all cables. Power up your computer and check that the SSD is detected by the system. Congratulations, you’re now ready to enjoy the benefits of increased speed and performance with your newly installed SSD!

    Physical Installation of the Drive

    Installing an SSD involves physically installing the drive into your computer’s case. First, power off your PC and unplug it. Open up your computer’s case and locate an available drive bay.

    If you are replacing an existing drive, remove it carefully from its bay. Next, place the SSD into the bay and screw it in securely. Make sure all cables are connected properly and reassemble your computer’s case.

    After reconnecting power, turn on your PC and check it detects the new SSD. In no time, you’ll be up and running with increased storage and faster speeds thanks to your newly installed SSD! Remember to keep your old drive connected long enough to transfer your data from it to your new SSD.

    Final Steps and Testing

    When it comes to upgrading your computer, installing an SSD can significantly improve its speed and performance. Before you start the installation process, it’s important to make sure that your computer can accommodate the SSD you’ve purchased. Once you have confirmed compatibility, the next step is to physically install the SSD drive.

    First, you’ll need to open up your computer case and locate the hard drive bay. Then, remove the screws that secure the existing hard drive and gently pull it out. Next, insert the SSD into the bay and screw it in place.

    Once you have successfully installed the SSD, you will need to boot up your computer and make sure it recognizes the new drive. You can do this by entering into the BIOS settings and selecting the SSD as the primary boot device. Congratulations, you have successfully installed your new SSD and your computer should now be running faster and smoother than ever before.

    Conclusion

    In conclusion, swapping out your hard drive for an SSD may seem like a daunting task, but fear not – it’s an upgrade that’s well worth your time and effort. Not only will it give your computer newfound speed and responsiveness, but it’ll also save you from the incessant whirring and buzzing of your old hard drive. So, put on your tech-savvy cap and give your computer the gift of a shiny new SSD.

    Trust us, it’s worth it!”

    FAQs

    What are the benefits of changing from a hard drive to an SSD?
    Upgrading to an SSD can significantly improve the speed and performance of your computer. SSDs have faster data transfer rates, quicker boot times, and generally improve overall system responsiveness.

    Can I transfer all of my data from my old hard drive to my new SSD?
    Yes, you can clone your old hard drive to your new SSD using cloning software. This will copy all of your data, files, and settings to the new drive, so you don’t have to reinstall and set up everything from scratch.

    Do I need to buy a new SSD bracket or mounting kit to replace my hard drive?
    It depends on your computer model. Some laptops and desktops require a specific bracket or adapter to securely mount the new SSD in place. Check the manufacturer’s website or manual for compatible parts.

    How much storage space do I need for an SSD?
    The amount of storage space you need depends on your usage and needs. If you only use your computer for basic tasks like browsing the web and using office applications, a 250GB SSD should suffice. However, if you use your computer for multimedia purposes or gaming, you may want to consider a larger capacity SSD of 500GB or more.

  • Effortlessly Upgrade Your PC: A Step-by-Step Guide on How to Transfer Windows to a New SSD

    Upgrading to a solid-state drive (SSD) means you get to enjoy faster boot-up times and faster data transfer rates. But moving Windows to a new SSD can be intimidating for some. Don’t fret, though, as we’ve got you covered with this step-by-step guide to help you through the process.

    Imagine a house move where you have to effectively pack up everything in your old house and move it to your new one, but with the added benefit of not having to worry about breaking anything. That’s what moving Windows to your new SSD is like! So, grab a cup of coffee, sit back, and let’s get started.

    Backup Your Data

    Moving Windows to a new SSD can be a bit tricky, but it’s definitely possible with the right tools and knowledge. One of the most important things you need to do before starting the process is to backup your data. This is because moving your operating system to a new drive can result in data loss if not done correctly.

    The good news is that there are many backup tools available, such as Windows backup software, that you can use to create a backup of your data. Once you’ve backed up everything, you can then start the process of moving Windows to your new SSD. You can use a cloning tool like Clonezilla or Acronis True Image to clone your existing drive onto the new SSD.

    This will ensure that all your data, applications, and settings are transferred over seamlessly. After the clone is complete, you can swap out the old drive with the new SSD, and you should be good to go. It’s important to note that the exact steps involved may vary depending on the tool you use, so be sure to follow the instructions carefully.

    With a bit of patience and a good backup plan, you can successfully move Windows to a new SSD and enjoy faster speeds and better performance.

    Use external drive or online backup service

    Backing up your essential data is a critical aspect of protecting it against possible losses. There are two types of backups you can create: local and online. Local backups involve saving your files on an external drive, which you can then store safely offsite.

    This type of backup is convenient because you’ll have physical access to all your files, and it has a fast transfer speed. On the other hand, online backup services use cloud storage to store your data and offer remote access options. This means that even if some disaster strikes your location and you lose all your physical backups, your online backup will still be secure.

    The best backup plan is combining both types of backups. With redundancy, you’re assured that your data won’t be lost in any unfortunate events. Therefore, always create a local backup of your critical files and then use one or more online backup services to save them remotely.

    In this way, you’ll be sure of not losing your data and will be able to restore it at any time quickly.

    how do i move windows to a new ssd

    Choose a Cloning Software

    When it comes to moving Windows to a new SSD, the process can seem daunting. However, with the help of cloning software, it can be quite simple. The first step is to choose the right software for the job.

    There are a variety of options available, including Acronis True Image, EaseUS Todo Backup, and Macrium Reflect. Each has its own unique features and advantages, so it’s important to do some research before deciding which one to use. Once you’ve chosen your software, the next step is to connect your old SSD and new SSD to your computer.

    From there, you can use the cloning software to copy all of the data from your old SSD to the new one. This includes your operating system, settings, and all of your files. Once the cloning process is complete, you can remove your old SSD and start enjoying the faster speeds of your new one.

    With the right cloning software and a bit of patience, moving Windows to a new SSD is a breeze.

    Popular options include Acronis True Image, EaseUS Todo Backup, and Macrium Reflect

    As you prepare to clone your hard drive or transfer data to a new device, you’ll need reliable cloning software to ensure that the process is executed flawlessly. There are several options available on the market today, but three of the most popular include Acronis True Image, EaseUS Todo Backup, and Macrium Reflect. Acronis True Image provides a user-friendly interface and comprehensive backup options, while EaseUS Todo Backup offers several versatile backup tools and advanced features.

    Macrium Reflect stands out as a top option for its intuitive interface and sector-by-sector cloning capabilities. Ultimately, your choice of cloning software will depend on your specific needs, such as the type and amount of data you need to transfer. Whether you opt for one of these preferred options or explore others on the market, investing in a reliable cloning software can save you valuable time and effort in the long run.

    Connect the New SSD

    Moving Windows to a new SSD is a great way to improve your computer’s performance. Once you have installed the SSD, it’s time to connect it to your computer. First, you need to open your computer case and locate the SATA cable that connects your old hard drive to the motherboard.

    Disconnect the old cable from your motherboard and plug it into your new SSD. Then, plug the other end of the cable into the SATA port on your motherboard. If your motherboard has multiple SATA ports, make sure to plug the SSD into the one marked as SATA-0, as this is usually the primary drive.

    Finally, secure the SSD in your computer case using screws or other fasteners. Once your new SSD is connected, you’re ready to start the process of moving Windows to your new drive.

    Use a USB-to-SATA adapter or install it directly

    When it comes to connecting your new SSD, you have two main options: using a USB-to-SATA adapter or installing it directly. If you choose to use the adapter, you’ll need to plug it into an open USB port on your computer and connect the SSD to the adapter using a SATA cable. This option is great if you don’t want to open up your computer case, but keep in mind that it may be slower than installing the SSD directly.

    On the other hand, if you’re comfortable opening up your computer, installing the SSD directly is the faster option. First, turn off your computer and unplug it from the wall to avoid any electrical discharge. Then, locate the hard drive bay and unscrew it from the case.

    Carefully attach the SSD to an empty bay, making sure it’s secured in place. Next, connect the SATA and power cables to the SSD and the motherboard. Before turning your computer back on, make sure to double-check your connections and ensure everything is securely in place.

    Once you’re ready, plug your computer back in and turn it on. If everything went smoothly, your computer should recognize the new SSD and you’ll be able to start using it to store your files. Just remember to back up your data before making any significant changes to your computer!

    Clone Your Hard Drive to the New SSD

    If you’ve upgraded to a brand-new SSD and want to move Windows to it, don’t worry, it’s easy to clone your hard drive. The first step is to connect both the old hard drive and the new SSD to your PC. You’ll need a cloning tool, like Macrium Reflect or Clonezilla, to create a bootable clone.

    Once you have your cloning software, launch it and follow the prompts to select your old hard drive as the source and your new SSD as the destination. Once you start the cloning process, it may take a while to complete, depending on the size of your hard drive and the transfer speed of your system. After the cloning is finished, you’ll need to change your boot order in BIOS to boot from the new SSD instead of the old hard drive.

    After that, you’re good to go — your new SSD will have a direct copy of everything on the old hard drive, including your operating system. With this method, you can enjoy faster boot and load times, and a significant boost in overall system performance, thanks to your new speedy SSD.

    Follow the instructions provided by the cloning software

    When it comes to upgrading your computer’s hard drive to a solid-state drive (SSD), one of the crucial steps is to clone your current hard drive to the new SSD. This ensures that all of your files, programs, and settings are transferred over to the new drive without any data loss or corruption. To get started, you’ll need to use cloning software such as EaseUS Todo Backup, Acronis True Image, or Carbon Copy Cloner.

    Once you have installed and opened the software, follow the instructions provided by the program. This will involve selecting the source drive (your current hard drive) and the destination drive (the new SSD), choosing the cloning method, and then letting the software do its work. Keep in mind that the time it takes to complete the cloning process will depend on the size of the hard drive and the speed of your computer.

    Once the cloning is complete, you can remove the old hard drive and replace it with the new SSD, and your computer will now be faster and more efficient. So why wait? Take your computer to the next level and get cloning today!

    Install the New SSD and Boot Up

    If you’re wondering how to move Windows to a new SSD, the first step is to physically install the new drive into your computer. To do this, shut down the computer and remove the old hard drive. Open up the computer case and locate the hard drive bay.

    Insert the new SSD into the bay and connect it to the computer’s power supply and SATA data cable. Once the drive is physically installed, turn on the computer and enter the BIOS menu. Make sure that the new SSD is recognized as the primary boot option.

    You can also clone your old Windows installation to the new SSD using software such as Acronis True Image or Macrium Reflect. This will ensure that all of your files, settings, and programs are transferred seamlessly. Once the cloning process is complete, you can disconnect the old hard drive and boot up your computer from the new SSD.

    With a new and faster SSD, your computer will boot up in no time.

    Replace old hard drive with new SSD, connect cables, and turn on computer

    If you’re looking to give your old computer a new lease on life, replacing the old hard drive with an SSD is an easy and effective way to do so. First, you’ll need to physically install the new SSD into your computer. This will typically involve removing the back panel of your computer, locating the old hard drive, and swapping it out for the new SSD.

    Make sure to connect any necessary cables securely, taking care not to damage any delicate components in the process. Once the new SSD is installed, it’s time to boot up your computer and see if it worked. With any luck, you should be greeted by a faster, more responsive operating system that can handle modern applications with ease.

    So if you’re tired of waiting around for your old hard drive to load, consider switching to an SSD – it’s a small investment that can make a big difference in your computer’s performance.

    Check Your System and Files

    So, you’ve decided to upgrade to a new SSD, but now you’re wondering how to move everything over without losing any data or causing any damage to your system. The first step in moving Windows to a new SSD is to check your current system and files to make sure there are no errors or issues that could cause problems during the transfer. This means running a disk check to ensure there are no bad sectors on your current hard drive, running a full system scan for viruses and malware, and backing up any important files to an external storage device.

    Once you’ve checked your system and files, you can then proceed with transferring your Windows operating system to your new SSD using a cloning tool or by performing a fresh install. By taking the time to check your system and files beforehand, you can ensure a smooth and successful transition to your new SSD without any hiccups along the way.

    Confirm that your system and programs are running properly, and all files are intact

    When it comes to your computer system’s stability and proper functionality, it’s essential to ensure everything is in check. One crucial aspect of this is checking your system and files’ health regularly. You don’t want to find yourself in the middle of an important task and suddenly encounter an error that stops everything.

    Fortunately, you can avoid such scenarios by running regular system checks and verifying your files’ integrity. One of the easiest ways to do this is by using built-in system utilities, such as the Disk Cleanup and Disk Defragmenter tools on Windows operating systems. These applications help remove unnecessary files and rearrange data fragments for improved performance, respectively.

    Additionally, make a habit of running system diagnostics, scanning for viruses, and backing up your files to ensure nothing gets lost. By taking these simple steps, you can enjoy uninterrupted computing and know that your system and files are in good shape.

    Enjoy the Speed of Your New SSD!

    As the demand for faster and more reliable storage increases, switching to an SSD has become a popular choice for many computer users. If you’re planning to invest in a new SSD but wondering how to move Windows to the new drive, the good news is that you can do it yourself with a few simple steps. Firstly, you will need to clone your existing hard drive to the new SSD to transfer all your data.

    This can be done using a cloning tool like Clonezilla or Macrium Reflect. Once the cloning process is complete, you will need to change the boot order in your BIOS to set the SSD as the primary boot device. Finally, you can wipe your old hard drive clean to free up space and enjoy the lightning-fast speed of your new SSD.

    So go ahead and upgrade to an SSD, and say goodbye to slow load times and sluggish performance.

    Conclusion

    Moving windows to a new SSD is like giving your computer a new pair of sneakers; it runs faster, smoother, and with a bit of added spring in its step. Whether you’re replacing an old hard drive or upgrading your storage capacity, this process might seem daunting at first, but with the right tools and a bit of patience, it’s a breeze. So, say goodbye to the clunky and slow boots of the past, and hello to a leaner, faster, and all-around better computing experience!”

    FAQs

    Can I just copy and paste my Windows files to the new SSD?
    No, you can’t just copy and paste the files. You need to clone your old SSD to the new one using a cloning software.

    How long does it take to clone my SSD?
    The time it takes to clone your SSD depends on the amount of data on your old SSD and the speed of your computer. On average, it takes around 1-2 hours.

    What cloning software should I use to move my Windows to a new SSD?
    There are many cloning software options available such as EaseUS Todo Backup, Acronis True Image, and Macrium Reflect. Choose the one that suits your needs and preferences.

    Do I need to change anything in my BIOS when moving Windows to a new SSD?
    Depending on your BIOS settings, you might need to change the boot order so the new SSD becomes the primary boot device. Make sure to check your motherboard’s manual and follow the instructions carefully.

  • Unlocking the Secrets: Here’s How to Find the Manufacture Date of Your ADATA SSD

    Are you struggling to find the manufacture date of your SSD? Don’t worry, you’re not alone. Many people find it difficult to locate this information, especially if they have lost the original packaging or documentation. However, it’s important to know the manufacture date of your SSD because it can affect its performance and lifespan.

    In this blog post, we will explore different ways to find the manufacture date of your SSD. So, grab a cup of coffee, sit back, and let’s dive into the world of SSDs.

    Check the Label

    If you’re wondering how to find the manufacture date of your ADATA SSD, it’s actually quite simple. All you need to do is check the label of the drive. The manufacture date is usually printed on the label along with other important information like the model number, serial number, and capacity.

    It’s important to note that the format of the manufacture date may vary depending on the manufacturer, but it’s usually in the form of a code or a date stamp. If you’re having trouble figuring out the manufacture date from the label, you can always contact the manufacturer’s customer support for assistance. By knowing the manufacture date of your SSD, you can determine its age and potential lifespan, which can help you make informed decisions about storage upgrades in the future.

    Look for a Manufacturing Code

    When it comes to buying products, it’s always crucial to check the label for information about what the item is made of, how it was made, and where it was made. If you’re purchasing a product that is manufactured, you’ll want to look for a manufacturing code. This code can tell you a lot about the product, including what factory it was made in and when it was produced.

    This information can be helpful if you ever need to file a warranty claim or need to follow up with the manufacturer about a problem with the product. By checking the label for a manufacturing code, you can ensure that you know as much as possible about the product you’re purchasing. So, next time you’re shopping for something, don’t forget to check the label!

    adata how to find manufacture date ssd

    Decode the Code Using Manufacturer’s Website

    When it comes to buying products, it’s important to know exactly what you’re getting. One way to do this is to check the label for information about the product, including the manufacturer. Then, you can visit the manufacturer’s website to decode the code and learn more about the product.

    This information might include the product’s ingredients, usage instructions, and any warnings or precautions to keep in mind. By decoding the code using the manufacturer’s website, you can also learn about the company’s values and ethics, making it easier to decide whether to support their products in the future. Additionally, you can find out if the product has any certifications or has been independently tested, giving you peace of mind about its safety and quality.

    So don’t just rely on the label or marketing materials to make a decision about a product. Take the time to do some research and visit the manufacturer’s website to decode the code and learn everything you need to know. Your health, safety, and satisfaction are worth the extra effort.

    Try Command Prompt or Powershell

    If you’re looking to find the manufacture date of your ADATA SSD, the Command Prompt or Powershell can come in handy. Follow these simple steps to get started. First, open the Command Prompt or Powershell on your Windows computer.

    Then, type in “wmic diskdrive get model” and hit enter. This will display a list of all the disk drives on your computer, including your ADATA SSD. Look for your ADATA SSD model name in the list and make note of the number next to it.

    Next, type in “wmic diskdrive get serialnumber” followed by the number next to your ADATA SSD model name. This will display the serial number of your SSD. Finally, visit the ADATA website and enter your serial number to find the manufacture date of your SSD.

    It’s a simple and convenient way to find out when your SSD was made.

    Access Command Prompt or Powershell

    If you’re looking to access Command Prompt or Powershell, then you’re in luck because these tools are readily available on most Windows systems. Command Prompt is a command-line interface that allows users to run a variety of commands and scripts, while Powershell is a more advanced command-line tool that incorporates scripting capabilities and object-oriented programming. To access either tool, simply press the Windows key + R to open the Run dialog box, type in “cmd” for Command Prompt or “powershell” for Powershell, and hit enter.

    Once open, you can enter commands or scripts to execute a variety of tasks from opening programs, managing files, and configuring system settings. So, if you’re looking to take your Windows experience to the next level, try accessing Command Prompt or Powershell today and start experimenting with their many features and capabilities.

    Enter Specific Command to Retrieve SSD Information

    When it comes to retrieving information about your SSD, there are a few different routes you can take. One option is to use either Command Prompt or Powershell to enter specific commands that will provide you with the desired information. These tools are built into Windows and can give you a wealth of information about your system.

    To start, open Command Prompt or Powershell and type in “wmic diskdrive list brief”. This will give you a list of all the disk drives on your system, including your SSD. Look for the name of your SSD and note the model number.

    Next, you can enter a command to retrieve more detailed information about your SSD, such as its firmware version, interface type, and capacity. For example, type in “wmic diskdrive where model='[your SSD model number]’ get firmwareversion, interfacetype, size”. This will give you the information you need to know about your SSD.

    Overall, using Command Prompt or Powershell to retrieve SSD information is a quick and easy way to get the details you need. With just a few simple commands, you can get a better understanding of your system and ensure that your SSD is working properly.

    Check for the Manufacture Date Information

    If you are curious about the manufacturing date of your computer’s hardware, there is an easy way to check it using your Command Prompt or Powershell. To do this, simply open either of these applications and type in the command “wmic bios get manufacturer, name, version, serialnumber, releasedate.” This command will display useful information about your computer’s BIOS, including the manufacturer, version, and the date it was released.

    The date listed under “ReleaseDate” is the manufacturing date of your computer’s BIOS. It is important to note that this date may not necessarily be the same as the manufacturing date of your computer’s hardware.

    Use Third-Party Software

    Looking for the manufacture date of your ADATA SSD can be a tricky task, but luckily, there are third-party software options available to make the process much simpler. One such software is CrystalDiskInfo, which provides a comprehensive overview of your SSD’s health and performance, including the all-important manufacture date. Simply download and install the software, then launch it to see a detailed report on your SSD’s various attributes.

    The manufacture date should be listed under the “Device Information” section, so you can easily determine when your SSD was made. It’s important to keep track of this date to ensure you know how long your SSD has been in use, and whether it is nearing the end of its useful life. By using third-party software like CrystalDiskInfo, you can quickly and easily access this information and make informed decisions about your SSD’s maintenance and replacement.

    Download and Install Third-Party SSD Information Retrieval Software

    If you want to retrieve information from your SSD, using third-party software can be a great option. These programs are designed to help you access data that may have been lost due to hardware failure, accidental deletion, or other issues. They can also provide valuable diagnostic information about your SSD’s health and performance.

    Some popular third-party SSD information retrieval software options include EaseUS Data Recovery, Recuva, and Stellar Data Recovery. Each program has its own strengths and weaknesses, so it’s important to research and read reviews before choosing one. With the right software, you can quickly and easily recover the data you need from your SSD.

    Retrieve SSD Information Including Manufacturing Date

    If you’re curious about the manufacturing date of your SSD, using third-party software is your best bet. There are a number of different tools available to retrieve information about your SSD, including its production date. For example, SSD Life is a popular piece of software that provides users with a wealth of information about their SSD, including its age and how many it has been turned on and off.

    Other software options, like CrystalDiskInfo, can also provide similar insights into your SSD’s hardware and performance. While retrieving this information may require a bit of technical knowledge, it can help you better understand the lifespan and performance of your SSD. So, if you’re curious about your SSD’s manufacturing date, consider using third-party software to access this information and gain a deeper understanding of your device.

    Final Thoughts

    If you’re looking to find the manufacture date of your ADATA SSD, it’s a relatively simple process. The first step is to download and install ADATA’s SSD Toolbox software onto your computer. Once you have the software up and running, you can select your SSD from the list of connected drives.

    From there, navigate to the “S.M.A.

    R.T. Info” tab, and you should be able to see the “Manufacture Date” listed under the “Device Statistics” section.

    If you’re having trouble locating the information, you can also try using a third-party software tool like CrystalDiskInfo. With just a few clicks, you can easily find out when your ADATA SSD was manufactured and ensure that it’s still functioning optimally. Remember to regularly monitor your SSD’s health and performance for maximum longevity.

    Conclusion

    When it comes to finding the manufacture date of your SSD, it’s important to delve into the data to get the answer you’re looking for. With the right tools and a little bit of know-how, you’ll be able to uncover the SSD’s secret timeline and reveal its true age. Remember, just like a fine wine, a good SSD only gets better with age, so wear that manufacture date with pride!”

    FAQs

    How can I find the manufacture date of my ADATA SSD?
    You can find the manufacture date of your ADATA SSD by checking the serial number of your drive. The first four digits of the serial number represent the year and week of production. For example, if the first four digits are 1819, then the SSD was manufactured in the 19th week of 2018.

    Is it possible to determine the warranty status of my ADATA SSD using the manufacture date?
    No, the manufacture date of your ADATA SSD does not determine the warranty status. ADATA provides a separate warranty period based on the date of purchase and the type of product. You can check the warranty status of your SSD on the ADATA website using the product serial number.

    Can the manufacture date of my ADATA SSD affect its performance or lifespan?
    The manufacture date of your ADATA SSD does not directly affect its performance or lifespan. However, newer SSD models may have improved technology and features that can improve performance compared to older models. ADATA recommends keeping your firmware updated to ensure optimal performance and longevity.

    Does ADATA provide any software or tools to check the manufacture date of my SSD?
    ADATA does not provide any specific software or tools to check the manufacture date of your SSD. However, you can use third-party software such as CrystalDiskInfo or HWiNFO to check the SSD’s serial number and identify the manufacture date based on the first four digits.

  • Streamline Your Experience: A Step-by-Step Guide to Migrating Data to Your New Acer SSD

    Looking to migrate your data to a new SSD on your Acer laptop? Upgrading to a Solid State Drive (SSD) is a cost-effective way to give your computer a performance boost. But, transferring your data from an old hard drive to a new SSD can be quite a daunting task, especially if you’re unfamiliar with the process. Luckily, there are a few different methods you can try to successfully migrate your data.

    From using built-in Windows tools to third-party software, we’ve got you covered with our straightforward guide. In this blog post, we will walk you through how to migrate data to new SSD on Acer step-by-step, so you can enjoy faster boot times and increased overall system performance. So, buckle up and let’s get started!

    Check SSD Compatibility

    If you’re looking to upgrade your Acer laptop’s hard drive to a faster SSD, one of the first steps you need to take is to check for SSD compatibility. Not all Acer laptops are compatible with all SSDs, so it’s important to do your research before making a purchase. You’ll need to find out what type of SSD your laptop can handle and what size it can support.

    You can often find this information on your laptop’s manufacturer website or in your user manual. Once you’ve confirmed compatibility, you’ll need to purchase the SSD and install it in your laptop. Once installed, you’ll also need to migrate your data from your old hard drive to your new SSD before you can start using it.

    However, with a little bit of research and some careful installation and data migration, you’ll enjoy the benefits of a faster, more responsive laptop in no time.

    Ensure the new SSD is compatible with your Acer computer

    When it comes to upgrading your Acer computer’s storage with a new SSD, it is crucial to ensure that the model you choose is compatible with your device. Not all SSDs are created equal, just like not all computers are designed to work with every type of storage device out there. Therefore, to check SSD compatibility with your Acer computer, you need to pay attention to the specific requirements of your device and the SSD’s specifications.

    Some of the factors that determine whether an SSD is compatible with your Acer computer include the form factor, interface type, and performance specifications. You can check your device’s manual or specifications online to see which type of SSD it supports. Additionally, you can consult with a professional technician or a customer support representative of the SSD manufacturer to ensure that you get the right SSD for your Acer computer.

    By choosing a compatible SSD, you can enjoy faster boot-up, data transfer speeds, and overall system performance.

    acer how to migrate data to new ssd

    Check Acer’s website for SSD recommendations

    When it comes to upgrading the storage on your Acer PC, it’s important to ensure compatibility with your device before making any purchases. Fortunately, Acer has made it easy to find the right SSD for your needs by providing recommendations on their website. By checking out their resources, you can ensure that you choose a compatible and reliable SSD that will enhance your computing experience.

    Keep in mind that the right SSD will depend on your model and specifications, so take the time to carefully review Acer’s recommendations and confirm compatibility before making your purchase. With an SSD upgrade, you can enjoy faster load times, improved performance, and more storage space for your files and applications. Don’t hesitate to take advantage of Acer’s resources to choose the best SSD for your device and enjoy all the benefits of upgraded storage.

    Backup Data

    If you’re looking to upgrade your Acer’s SSD and migrate your data to the new drive, it’s important to make sure you backup all your important files beforehand. Before starting the migration process, make sure you have an external hard drive or a cloud storage service to save your files. To backup your data, you can use the built-in Windows Backup and Restore feature or third-party backup software.

    Once you’ve backed up your data, you can proceed with the migration process and use software like Acer’s SSD Kit or a cloning software like Acronis True Image to transfer your data to the new drive. After the migration is complete, you can then transfer your files back to your new SSD from the backup location. By taking the necessary steps to backup your data and following a proper migration process, you can ensure a smooth transition to your new SSD and keep all your important files safe and secure.

    Save important data on external drive

    Backing up your important data is absolutely essential in today’s digital age. With so many devices and platforms at our disposal, it’s easy to lose files or have them corrupted in an instant. That’s why it’s important to always have a reliable backup system in place.

    One of the best ways to ensure the safety of your data is to save it on an external hard drive. This is a physical device that you can connect to your computer or laptop, allowing you to store your files in a secure and accessible location. Using an external hard drive is a tried-and-true method of backing up your data, and it’s incredibly easy to do.

    Simply connect the device to your computer and copy over the files you want to save. In no time, you’ll have a backup of your important data that you can rely on in case of an emergency. Don’t wait until it’s too late – start backing up your data today!

    Check for data backup options on Acer website

    If you want to make sure that your important data is safe and secure, it’s essential to have a backup plan in place. Thankfully, Acer makes it easy to backup your data with its range of user-friendly options. To get started, head over to the Acer website and check out their data backup solutions.

    Whether you’re looking for an automatic backup system that will keep your data synced across all your devices, or you want a more manual approach that lets you choose which files to backup and when, Acer has got you covered. One of their most popular options is Acer Backup Manager, which allows you to schedule backups to run at regular intervals or perform instant backups whenever you need them. With Acer’s backup options, you can rest easy knowing that your important files are protected no matter what happens.

    So don’t take any chances with your data – check out Acer’s backup solutions today!

    Acquire Cloning Software

    If you’re looking to upgrade your Acer laptop’s hard drive to a fast and efficient SSD, you’ll want to transfer all your important files, Windows settings, and applications to your new drive. The easiest way to do that is by cloning your old hard drive to your new SSD. To clone your drive, you’ll need cloning software like Acronis True Image, Norton Ghost, or Clonezilla.

    Acronis and Norton Ghost are paid software, while Clonezilla is a free and open-source option. These software enable you to create a copy of your existing hard drive and transfer it to your new SSD. Cloning your hard drive helps you save time and ensures that you don’t lose any data during the transfer.

    It’s a great way to make your Acer laptop perform faster and more efficiently than ever before. So start by acquiring cloning software that suits your needs, and let the cloning process do the rest of the job!

    Download cloning software from reliable sources

    When it comes to cloning software, it’s important to download it from reliable sources only. There are plenty of options available, but it’s important to choose one that you can trust. You don’t want to end up with a virus on your computer or with a program that doesn’t work as expected.

    There are many reputable sites that offer cloning software for free or at a low cost. Before downloading, read reviews and check for any red flags that might indicate the file is not trustworthy. It’s better to be safe than sorry! A trustworthy cloning software will ensure that you can create an exact copy of your hard drive quickly and efficiently.

    With the right program, you can easily backup your data and even transfer it to a new computer. So, take some time to research and find a trustworthy cloning software that suits your needs.

    Create bootable USB or CD with cloning software

    Creating a bootable USB or CD with cloning software is a straightforward process that can be completed in a few easy steps. The first step is to acquire cloning software, which can be downloaded from the internet or bought from a software store. It is essential to ensure that the software is compatible with your operating system, as this will ensure that the cloning process goes smoothly.

    Some of the popular cloning software options include Clonezilla, EaseUS, Macrium Reflect, and Acronis True Image. Once you have acquired the cloning software, the next step is to create a bootable USB or CD. This will allow you to boot your computer from the USB or CD, enabling you to clone your hard drive.

    Creating a bootable USB can be done using software like Rufus or Win32diskimager. Alternatively, you can use the built-in disk utility on your operating system to burn an ISO image of the cloning software to a CD. In conclusion, acquiring cloning software and creating a bootable USB or CD can be done in a few easy steps.

    These steps are crucial in ensuring that your cloning process is successful, and you have an exact copy of your hard drive. Remember to choose compatible cloning software, and be careful when creating a bootable USB or CD.

    Clone Hard Drive to SSD

    If you’re looking to upgrade your Acer computer by replacing your traditional hard drive with a faster and more efficient SSD, you may be wondering how to transfer your data over. Fortunately, the process is quite simple if you know how to clone your hard drive. Essentially, this involves creating a backup image of your entire hard drive and transferring it to your new SSD.

    You can use a variety of tools and software programs to perform this process, including built-in Windows utilities or third-party cloning software. The most important thing is to ensure that your new SSD has enough space to accommodate all of your existing data. With a successful clone, you’ll be able to enjoy faster speeds and improved performance on your Acer computer without losing any of your precious files and documents.

    Connect new SSD to Acer computer

    Connecting a new SSD to your Acer computer can enhance your system’s performance and speed. Once you have your new SSD, the next step is to clone your hard drive to it. This process will transfer all the files and data from your current hard drive to the new SSD, making it a carbon copy of the previous drive.

    To clone the drive, you can use software like Acronis or Macrium Reflect, which will make the cloning process fast and straightforward. You can then replace your old hard drive with the new SSD, and your computer will boot up like it did before. With an upgraded SSD, you can enjoy faster boot-up times, quicker file transfers, and improved overall system performance.

    So, don’t hesitate to upgrade your Acer computer with a new SSD and start enjoying a faster, smoother computing experience!

    Follow prompts and instructions on cloning software

    Cloning a hard drive to an SSD can seem like a daunting task, but with the right cloning software and some guidance, it can be a smooth and beneficial process. The first step is to choose the appropriate cloning software. Some popular options include EaseUS Todo Backup, Acronis True Image, and Clonezilla.

    Once you have installed the software, follow the prompts and instructions provided to initiate the cloning process. It is essential to select the correct source drive and destination drive during this step. It is also recommended to check for any additional settings or options, such as partition size and alignment, to optimize the cloned SSD’s performance.

    Once you have reviewed the settings and initiated the cloning process, let the software do its job, which could take some time depending on the amount of data on the hard drive. After the cloning process is complete, remove the old hard drive and replace it with the new SSD, and you should be good to go. Remember, cloning your hard drive to an SSD can significantly improve your system’s performance, so don’t hesitate to take this step!

    Monitor cloning process

    When cloning a hard drive to an SSD, it’s crucial to monitor the cloning process to ensure everything goes smoothly. This involves checking the progress of the clone and being ready to troubleshoot any errors that may occur. One effective way to monitor the process is by using clone software that provides a progress bar and estimated time remaining.

    This way, you can keep an eye on the transfer and estimate how long it will take to complete. Additionally, it’s helpful to have backup plans in case anything goes wrong, such as having a spare hard drive handy or creating a system image beforehand. By monitoring the cloning process and having backup plans in place, you can ensure a successful transfer to your new SSD.

    So, if you’re planning to clone your hard drive to an SSD, make sure to keep a close eye on the process and be prepared for any hiccups along the way.

    Replace Hard Drive with SSD

    If you have an Acer laptop that you’ve been using for a long time, you might start to notice that it’s running slower than it used to. One easy way to give it a speed boost is to replace the hard drive with a solid-state drive (SSD). But what happens to all of your data and files when you make the switch? Fortunately, migrating your data from the old hard drive to the new SSD is a fairly simple process.

    You can use a cloning software to copy everything from the old drive to the new one. This way, you won’t lose any of your important files or have to start from scratch on a fresh installation of Windows. Once you’ve copied everything over, you can swap out the old drive for the new one and start enjoying faster speeds on your Acer laptop.

    Just remember to back up all of your important data before you start the cloning process, just in case something goes wrong. With this process, you can breathe new life into your old Acer laptop and enjoy faster load times and better performance.

    Disconnect hard drive from Acer computer

    If you’re looking to upgrade your Acer computer’s hard drive with a new SSD, the first step is to disconnect the old hard drive. This may seem daunting, but it’s actually quite simple. First, turn off the computer and unplug all cables.

    Next, locate the hard drive compartment which is usually at the bottom of the computer and secured with screws. Unscrew the compartment and gently remove the old hard drive. Be sure to ground yourself before touching any sensitive components.

    Once the old hard drive is out, carefully insert the new SSD in its place and ensure it’s properly connected. Secure the compartment screws and plug all cables back in. Finally, power on the computer and enjoy the faster speeds and improved performance of your new SSD.

    With this simple upgrade, you can breathe new life into your Acer computer.

    Install new SSD in the same location as the old hard drive

    Replacing your old hard drive with a new, faster SSD is a great way to give your computer a performance boost. To do this, you’ll need to open up your computer and physically replace the old hard drive with the new SSD. But don’t worry, it’s not as complicated as it may sound.

    In fact, if you’re comfortable with basic tools and following instructions, it should be a breeze. One thing to keep in mind is that you’ll want to install the SSD in the same location as the old hard drive, as most computers are designed to only have one hard drive bay. This means you’ll need to remove the old hard drive from its mount and replace it with the SSD, making sure to connect it securely to any cables or other hardware.

    Once you’ve done this, close up your computer and turn it on to start enjoying the benefits of your new SSD. Happy computing!

    Follow Acer’s manual for replacing drive

    Replace Hard Drive with SSD If you are looking to upgrade your Acer computer by replacing your hard drive with a Solid State Drive (SSD), it is imperative to follow Acer’s manual for replacing the drive. That means you should first understand the technical specifications of your Acer computer and the SSD you are planning to install. Make sure the SSD you choose matches the size and interface of your computer’s hard drive and that it’s compatible with your operating system.

    Once you have the proper SSD, follow the manual’s instructions to install it. It generally involves removing the old hard drive, connecting the new SSD, and reinstalling your operating system and other files. Switching to an SSD will improve your computer’s performance and speed, allowing you to work more efficiently and save valuable time.

    When the upgrade is done, you’ll wonder how you ever got by without it. Upgrading your hard drive to an SSD will significantly improve your computer’s performance. The benefits of an SSD include faster boot and load times, improved application speed, and overall faster performance compared to a traditional hard drive.

    For example, a computer using an SSD can boot in as little as 10 seconds compared to the 30-40 seconds for a computer with a standard hard drive. Plus, data transfer rates can be up to 10 times faster with an SSD. By following Acer’s manual for replacing the drive, you can easily and quickly upgrade your computer and reap the benefits of improved speed and performance.

    Boot from SSD

    If you’re looking to upgrade your Acer laptop by replacing your hard drive with an SSD, then you’ll want to migrate your data to your new drive so you can boot from it. The first step is to connect your SSD to your laptop, using an adapter or enclosure if necessary. Then, use imaging software to transfer all of your data from the old hard drive to the new SSD.

    You can use software like Macrium Reflect or EaseUS Todo Backup to make the transfer process easy and seamless. Once you’ve migrated all of your data, you can set your new SSD as the boot drive in your laptop’s BIOS settings. With your new SSD as your boot drive, you’ll enjoy improved speed and performance compared to your old hard drive, making it a worthwhile upgrade.

    So go ahead and make the switch to an SSD and give your Acer laptop the boost it deserves!

    Turn on Acer computer

    If you’ve recently purchased an SSD and want to boot your Acer computer from it, the process is quite simple. First, turn on your Acer computer and enter the BIOS settings by pressing the appropriate key. Once in the BIOS, navigate to the boot order settings and make sure that the SSD is set as the primary boot device.

    Save your changes and exit the BIOS. Your computer should now automatically boot from the SSD. However, if you encounter any issues with the boot process, double-check the BIOS settings and make sure that the SSD is properly connected to the computer.

    With a faster boot time and improved performance, switching to an SSD is a great choice for any computer user. So what are you waiting for? Upgrade your system and start enjoying the benefits of faster loading times and improved performance today!

    Access BIOS settings and set new SSD as the primary boot drive

    Once you have installed your new SSD, you’ll need to configure your BIOS settings to ensure your computer boots from the new drive. To access the BIOS, you will need to press a specific key during startup. This key varies depending on your computer’s manufacturer, but it is usually F2, Delete, or ESC.

    Once you are in the BIOS menu, look for the Boot Order or Boot Options settings. Locate your new SSD in the list of drives and move it to the top of the boot order. This way, your computer will check the SSD first for an operating system before moving on to any other drives.

    Save your changes, and you’re all set to boot from your new SSD. Keep in mind that this process can vary slightly depending on your computer’s make and model, but locating the Boot Order settings should be similar across different brands. With your SSD set as the primary boot drive, you’ll enjoy faster load times and improved overall performance.

    Reboot Acer computer and ensure that it boots from the new SSD

    When you’ve installed a new SSD in your Acer computer, you’ll want to ensure that it boots from the new disk instead of the old one. To do this, you’ll need to enter the BIOS settings, which can usually be done by pressing a key like F2 or Delete when the computer starts up. Once you’re in the BIOS, look for the Boot menu and set the new SSD as the primary boot device.

    You can also disable the old hard drive or move it down the list of boot devices so that the computer won’t try to boot from it by default. After saving your changes and exiting the BIOS, your Acer computer should now boot from the new SSD and you can enjoy faster read and write speeds for your operating system and programs. Remember, if you’re not sure about any of these steps, it’s always best to consult the manual or seek help from a trusted technician.

    Conclusion

    In conclusion, migrating data to a new SSD from Acer might seem like a daunting task, but with the right guidance, it’s as easy as pie! With a little bit of patience and some technical know-how, you can bring new life to your Acer machine and enjoy lightning-fast speeds. So don’t be intimidated by the process; embrace the challenge and join the ranks of the tech-savvy! Happy migrating!”

    FAQs

    What are the best tools to use for migrating data to a new SSD on Acer laptops?
    There are a few tools that can be used for migrating data to a new SSD on Acer laptops, including Acer’s own Data Migration Utility, third-party software such as EaseUS Todo Backup, and cloud-based services like Dropbox or Google Drive.

    Can I migrate my entire operating system to the new SSD, or just my personal files?
    Yes, it is possible to migrate your entire operating system to the new SSD with tools like Acer’s Data Migration Utility or EaseUS Todo Backup. Just be sure to back up all important files before beginning the migration process.

    What steps should I take to prepare my Acer laptop for data migration to a new SSD?
    Before migrating your data to a new SSD on your Acer laptop, be sure to back up all important data and files, check for any firmware or software updates, and disable any antivirus or firewall software that may interfere with the process.

    Can I migrate data from an old hard drive to a new SSD on my Acer laptop, even if they have different operating systems?
    Yes, it is possible to migrate data from an old hard drive with a different operating system to a new SSD on your Acer laptop, but it may require additional steps or software to ensure compatibility and avoid data loss. It’s recommended to consult with a professional or review the manufacturer’s instructions before attempting this process.

  • Boost Your Gaming Performance: A Beginner’s Guide to Installing an Additional SSD in Your Alienware

    Boost Your Gaming Performance: A Beginner’s Guide to Installing an Additional SSD in Your Alienware

    Are you an avid gamer who needs more storage space for your Alienware laptop? If so, have you considered adding an additional SSD to your device? Not only will it increase your storage capacity, but it will also improve your system’s overall performance. Upgrading your Alienware laptop with an additional solid-state drive (SSD) is a relatively straightforward process. With a few simple steps, you can increase your storage capacity and eliminate the frustration of running out of space.

    And, as the popularity of gaming continues to grow, having more storage space is essential. Don’t let limited storage space keep you from immersing yourself in your favorite games. Take advantage of the benefits an additional SSD can bring to your Alienware laptop.

    In this blog post, we will guide you through the process of installing an additional SSD and provide some useful tips to help you choose the right one for your needs. Let’s get started!

    Check Compatibility with Your PC

    If you’re looking to install an additional hard drive or SSD on your Alienware PC, the first step is to check compatibility. Not all Alienware models support the installation of additional storage devices, and even those that do may have certain limitations or requirements. To start, check the specs of your specific model on the Alienware website or user manual.

    You’ll want to confirm things like the type and size of the drive you can install, as well as the number of available drive bays. It’s also important to ensure you have the necessary connectors and cables, as well as any additional hardware or software necessary for installation. Taking the time to do this research and preparation upfront can save you a lot of frustration down the line and ensure a successful installation.

    Determine SSD Type and Size

    When it comes to upgrading your PC with an SSD, it’s important to first check the compatibility with your system. The type and size of SSD you choose should match the specifications of your computer and its motherboard. It’s recommended to consult your manufacturer’s manual or website to see the compatible SSD types and sizes.

    Generally, desktop computers can accommodate standard 5-inch and 5-inch SSDs, while laptops may require smaller

    8-inch or M.2 SSDs. Additionally, you should also consider the interface type of your motherboard, such as SATA or NVMe, to ensure seamless connectivity with your SSD.

    Overall, choosing the right SSD type and size that is compatible with your PC will help optimize its performance and enhance your overall computing experience.

    alienware how to install additional harddrive ssd

    Check Free Drive Bays

    When it comes to adding a new hard drive to your computer, you might be wondering how to check if you have any free drive bays available. The first step is to check the compatibility of the hard drive with your PC. Make sure that the drive you are planning to install is compatible with your computer’s motherboard and the BIOS.

    Once you have confirmed compatibility, you can open up your computer case and take a look inside to see if there are any empty drive bays available. A drive bay typically consists of a metal bracket that holds the hard drive securely in place, and a data cable and power cable that plug into the back of the drive. An empty drive bay will have the bracket, but no hard drive installed.

    If all of your drive bays are filled, you may need to remove one of the existing drives to make room for the new one. Keep in mind that adding a new hard drive will also require you to format and partition it before you can start using it. With these steps in mind, you can confidently add a new hard drive to your computer and expand its storage capacity.

    Gather Necessary Tools and Materials

    If you’re looking to upgrade your Alienware computer with an additional hard drive or SSD, the first step is to gather the necessary tools and materials for the job. You’ll need a static-free work area, a screwdriver set with various sizes of Phillips and flathead bits, and the new hard drive or SSD that you’ll be installing. It’s also a good idea to have an external hard drive or cloud storage solution set up to back up any important files before you begin.

    It’s important to take your time and be careful, as the inside of a computer can be delicate and easily damaged. With the right tools and preparation, however, you should be able to successfully install your new hard drive or SSD and enjoy the added storage and improved performance.

    Screwdriver and Screws

    When it comes to a DIY project that involves fixing or building something, the first thing you need to do is gather all the necessary tools and materials. If you’re planning to use screws, you’ll need a screwdriver as well. A screwdriver is a tool that is used to insert or remove screws.

    It comes in different sizes and types, so make sure you have the right one for the job. There are Phillips head screwdrivers, flat-head screwdrivers, as well as screwdrivers with interchangeable tips. Once you have your screwdriver, it’s time to get the screws you need for your project.

    Screws come in various sizes, shapes, and materials, so again, make sure you have the right ones for your project. You wouldn’t want to use the wrong screws and end up with a weak or unstable structure. Before starting the actual work, take some time to familiarize yourself with your tools and materials.

    This will ensure that you are prepared and confident in your ability to complete the project successfully.

    SSD and SATA Cable

    If you’re planning to upgrade your computer’s hard drive, then you’ll need to gather a few tools and materials beforehand to ensure a smooth installation process. One of the essential components needed for this task is an SSD and SATA cable. These two components work together to provide faster data transfer speeds, improved performance, and increased storage capacity.

    To start, you’ll need a screwdriver to open up your computer’s casing. It’s also recommended to have an anti-static wristband to prevent any damage caused by electrostatic discharge. Additionally, you might need a small flashlight to see inside your computer’s case and locate the SATA ports.

    Once you’ve gathered the necessary tools, you can then install the SSD into your device and connect it to the SATA cable. This process is relatively straightforward and can be completed in a matter of minutes. By upgrading your hard drive with an SSD and SATA cable, you can significantly improve your computer’s overall performance and speed.

    Anti-Static Wristband

    When working on electronic devices, an anti-static wristband is an essential tool that ensures you don’t damage them. To make your own, you’ll need some tools and materials. Firstly, you will need a length of ribbon elastic that can fit around your wrist comfortably.

    It’s essential that it’s elastic because it needs to stretch around your wrist and maintain contact with your skin. You will also need a piece of wire, which will act as a conductor for any static electricity that builds up in your body. You’ll also need a small alligator clip to connect the wire to the elastic ribbon, and a small piece of heat-shrink tubing to secure the wire to the clip.

    Finally, you will need a pair of wire cutters and a heat gun to shrink the tubing. With all these materials in hand, making your anti-static wristband should be relatively straightforward. Just follow the instructions carefully and make sure you test your wristband before using it to work on any electronics.

    With this tool at your disposal, you can safely handle any electronic device without fear of damaging it due to static electricity.

    Mount the SSD in Your PC

    Are you looking to upgrade your Alienware PC with an additional hard drive SSD? Mounting the SSD is a crucial step in the process. First, open up your PC’s case and identify an unused drive bay where you can install the SSD. Before you start, make sure to turn off your computer and disconnect all cables.

    Once you’ve identified the drive bay, remove the screws that secure the bay cover and remove the cover. Next, attach the SSD to the bay using the screws provided in the installation kit, and ensure the connections are properly aligned. Once you’re done, screw the bay cover back into place and re-attach all cables.

    Finally, close your computer’s case and turn on the power. Your PC should now recognize the new SSD and you’re ready to go. With just a few simple steps, you can significantly increase your PC’s storage capacity and enhance overall performance.

    Remove Side Panel

    If you’re looking to upgrade the storage in your PC, installing an SSD is the perfect solution. But before you can get to that, you’ll need to remove the side panel of your computer case. This can vary depending on the case you have, but most cases have screws that need to be loosened or removed in order to take off the panel.

    Once the panel is off, you’ll be able to access the inside of your PC and find a suitable spot to mount the SSD. It’s important to make sure you have the proper mounting brackets or screws to ensure a secure and stable installation. With the SSD securely mounted in your case, you’ll be able to enjoy faster boot times and improved overall performance.

    So go ahead and remove that side panel, and get ready to take your PC to the next level with an SSD upgrade.

    Choose a Free Drive Bay

    If you’re looking to improve the performance of your PC, one simple step you can take is to mount an SSD in one of the free drive bays. But before diving in, it’s important to choose the right drive bay to avoid any potential compatibility issues. Most modern PCs have multiple drive bays, but some may be better suited for traditional hard drives, while others are designed for SSDs.

    Check your PC’s manual or online specifications to determine which bays are available and which are optimal for SSD installation. Once you’ve identified your preferred bay, mounting the SSD is a straightforward process. Simply slide the drive into the bay, secure it with screws or brackets provided by your PC’s manufacturer, and connect the SATA and power cables.

    With the SSD installed, you can enjoy faster boot times, app launches, and file transfers, all with minimal effort.

    Insert SSD in Bay and Secure It

    If you’re looking to upgrade your computer’s storage capabilities, one simple option is to add a solid state drive (SSD). Mounting an SSD in your PC is a straightforward process that can be done with a few basic tools. First, you’ll need to locate an empty bay where the SSD can be installed.

    Most modern desktop computers have at least one extra bay for additional storage devices. Next, secure the SSD in the bay using the screws provided. Be sure to tighten the screws enough so that the SSD is firmly in place but not so much that they damage the drive or the bay.

    Once your SSD is securely mounted, you can connect it to your computer’s power supply and motherboard using the proper cables. It’s important to ensure that all cables are securely connected to prevent any potential damage or data loss. With your new SSD successfully installed, you can enjoy faster boot times, quicker application launches, and smoother overall performance.

    So why wait? Add that extra bit of storage and improve your PC’s functionality today!

    Connect and Configure Your SSD

    If you own an Alienware computer and want to install an additional hard drive SSD, it’s a straightforward process. The first step is to connect and configure your SSD properly. Make sure you have all the necessary tools, such as a screwdriver and an SATA cable.

    Next, open your computer case and locate the empty drive bay. Place your SSD in the bay and secure it with screws. Connect the power cable and SATA cable to the SSD, ensuring that they are firmly attached.

    Once you’ve connected the SSD, you’ll need to configure it in Windows. Go to the disk management tool and format the drive. Finally, you can transfer files and data onto your new SSD.

    By adding an extra SSD to your Alienware computer, you can increase its storage capacity and improve its overall performance. So don’t hesitate to try it out!

    Connect SATA Cable to SSD and Motherboard

    When connecting and configuring your SSD, one important step is to connect the SATA cable to both the SSD and motherboard. Your SSD likely has a SATA connector, which is where you’ll insert one end of the cable. The other end of the cable should be inserted into a SATA port on your motherboard.

    It’s important to make sure that the cable is securely fastened on both ends to ensure proper data transfer. Depending on your computer’s configuration, you may need to configure your BIOS settings to recognize the new drive. Once connected and configured, your SSD will provide faster read and write speeds compared to traditional hard drives, resulting in improved performance for your computer.

    So make sure to connect your SATA cable properly and take advantage of the benefits of an SSD!

    Configure SSD in BIOS Settings

    SSD Before you can benefit from the fast read and write speeds of your newly installed SSD, you’ll need to configure it within your BIOS settings. The first step is to connect the SSD to your computer through SATA cables. Next, restart your computer and enter BIOS by pressing a specific function key during startup (usually F2 or Del).

    Once inside BIOS, navigate to the storage configuration settings and select the option to enable the SSD. You may also need to set the boot order to prioritize the SSD as the primary boot device. Once you have made all the necessary changes, save and exit BIOS, and your computer should now recognize and utilize the full potential of your SSD.

    By configuring your SSD in BIOS, you can expect a significant improvement in your computer’s speed and overall performance. So, don’t wait any longer, follow these simple steps, and start enjoying the benefits of your new SSD today!

    Test and Verify the Installation

    To make sure that your Alienware desktop is running seamlessly with the new additional hard drive or SSD, it’s crucial to test and verify the installation. Even with a straightforward installation process, it’s still important to ensure that everything is working the way it should be. One way to check is to restart your computer and check that the drive has been detected.

    From there, you can head to the Disk Management utility to format the drive and assign a drive letter, if necessary. You can also test the new drive by transferring files over, making sure they’re saved to the right location and not the pre-existing drive. By taking the time to test and verify the installation, you can ensure that all your files and applications are running as expected while utilizing the new hard drive.

    With the proper installation confirmation, you’re now ready to use your updated Alienware desktop with the new additional hard drive or SSD, enjoying a seamless performance boost.

    Conclusion

    So there you have it, folks! Installing an additional SSD hard drive into your Alienware just got easier than deciphering an extraterrestrial language. With the right tools and a bit of know-how, you’ll be able to upgrade your storage and fly through the universe of gaming faster than an alien spaceship. So don’t be afraid to boldly go where no gamer has gone before, and embrace this simple modification to your Alienware setup.

    Happy gaming!”

    FAQs

    What type of additional hard drive or SSD is compatible with Alienware?
    Alienware is compatible with both 2.5″ and 3.5″ hard drives and SSDs. However, it is recommended to check the specifications of your specific Alienware model to ensure compatibility.

    Can I install an additional hard drive or SSD on my own or should I seek professional help?
    You can install an additional hard drive or SSD on your own if you have experience with hardware installation. However, if you are not confident in your abilities, it is recommended to seek professional help to avoid any damage to your Alienware.

    Are there any specific tools or equipment required for installing an additional hard drive or SSD on an Alienware?
    Yes, you will need a screwdriver (usually a Phillips-head), and depending on your Alienware model, you may also need brackets or adapters to mount the hard drive or SSD properly.

    Can I clone my existing hard drive onto the new SSD or do I need to reinstall my operating system?
    It is recommended to clone your existing hard drive onto the new SSD, which will save you time and effort in reinstalling your operating system and all your programs. There are many free and paid cloning software available online that you can use for this process. However, it is always recommended to back up your data before making any major changes to your system.

  • Step-by-Step Guide: How to Transfer Your OS to a New SSD in Just Minutes

    Are you looking to upgrade your computer with a new SSD? Transfer your operating system to the new SSD for a faster and more efficient performance. An SSD, or solid-state drive, allows for faster access to files and applications than a traditional hard disk drive. However, transferring your operating system and data can be a daunting task, especially if you’re not tech-savvy.

    In this blog, we’ll guide you step-by-step on how to transfer your OS to a new SSD, so you can enjoy faster boot times and improved efficiency on your computer. So let’s dive in and learn how to make the switch to a new, faster SSD.

    Check Your Current OS

    Before transferring your OS to a new SSD, it’s important to check your current operating system. You’ll want to make sure that it’s compatible with the new SSD and that the new SSD has enough storage capacity for your OS. The easiest way to check your current operating system is to go to your computer’s settings and view the system information.

    This will give you all the information you need, such as the version and edition of your current OS. Once you have this information, you can then look up the requirements for the new SSD and ensure that your current OS meets the requirements. This is an important step in the process to ensure a seamless transition to your new SSD.

    Check Windows Version & Bit

    As a Windows user, it’s important to know which version and bit you are running on your computer. Checking your current OS is easy and can be done in just a few clicks. First, click on the “Start” button and then click on the “Settings” icon.

    From there, click on the “System” option and then select “About” from the left-hand menu. Here, you can see which version and edition of Windows you are running, as well as the bit version. The bit version indicates how much memory your operating system can handle.

    For example, a 32-bit operating system can handle up to 4GB of RAM, while a 64-bit operating system can handle much more. Knowing your current OS can also help ensure that you are downloading and installing software that is compatible with your system. Don’t neglect to check your Windows version and bit—doing so can save you time and ensure that you are getting the most out of your computer.

    how do i transfer my os to a new ssd

    Check Current OS Storage Details

    Are you running out of space on your computer? Before you start deleting files, it’s important to check your current operating system (OS) storage details. Knowing how much space your OS is using can help you determine which files and programs to get rid of. To check your current OS storage details on a Windows computer, go to the Settings app and select System.

    From there, click on Storage and you’ll see a breakdown of how much space is being used by different types of files such as apps, documents, and pictures. On a Mac, click on the Apple icon in the top-left corner and select About This Mac. Then click on the Storage tab and you’ll see a similar breakdown of how much space is being used.

    By taking the time to check your current OS storage details, you can make informed decisions about how to manage your computer’s space and avoid running into storage issues down the line.

    Select an SSD for Your OS

    If you’re looking to transfer your operating system to a new SSD, there are a few important things to consider. First, you’ll need to make sure that your new SSD is compatible with your system and has enough storage space for your OS. Once you’ve selected a suitable SSD, there are a few different methods you can use to transfer your OS.

    One common approach is to use cloning software, which creates a copy of your existing hard drive and transfers it to the new SSD. Another option is to perform a fresh installation of your operating system onto the new SSD, which can be a bit more time-consuming but may be preferable if you’re looking to start fresh. Before making any changes, be sure to back up all important files and data to ensure that you don’t lose any important information.

    With a little preparation and patience, it’s possible to transfer your OS to a new SSD and enjoy faster performance and improved system responsiveness.

    Choose SSD Capacity & Type

    When it comes to selecting an SSD for your operating system, there are a few things to consider. First, you’ll want to choose the right SSD capacity. This will largely depend on what you plan on using your computer for.

    For general use and casual gaming, a 128GB SSD should suffice. However, if you plan on storing a lot of files or running resource-intensive applications, you’ll want to opt for a larger capacity SSD, such as a 512GB or even a 1TB. Next, you’ll want to choose the right type of SSD.

    There are two main types: SATA and NVMe. SATA SSDs are typically cheaper and offer good performance for everyday use. NVMe SSDs, on the other hand, offer lightning-fast performance and are ideal for gaming, video editing, and other demanding tasks.

    However, they can be more expensive than SATA SSDs. So which one should you choose? It all depends on your budget and your specific needs. If you’re looking for a budget-friendly option and you don’t need lightning-fast speeds, a SATA SSD should do the trick.

    If you’re willing to spend a little more and you need faster speeds for gaming or other intensive tasks, an NVMe SSD is the way to go. Ultimately, the choice is yours!

    Check Compatibility with Your System

    When selecting an SSD for your operating system, one of the essential things to consider is compatibility with your system. You don’t want to purchase an SSD that isn’t compatible with your computer as it will not work correctly. The process of checking compatibility depends on your system, but generally, it involves checking the interface and form factor of the SSD.

    An SSD’s interface refers to how it connects to the motherboard, while its form factor is its physical size. The most common SSD interface is SATA, but if your computer supports it, it’s recommended to go for the faster NVMe interface. You must also check the storage capacity that your system can handle, as some older computers may not support modern high-capacity SSDs.

    By ensuring compatibility with your system, you can be guaranteed smooth and speedy performance.

    Backup Data Before Transfer

    If you want to transfer your operating system to a new SSD, it’s crucial to back up your data beforehand. This will ensure that you don’t lose any important files or information during the transfer process. Thankfully, backing up your data is relatively simple.

    You can either use an external hard drive to create a complete system backup, or manually transfer your files using cloud storage or a USB drive. Once your data is safely backed up, you can begin the transfer process. This involves cloning your current drive onto the new SSD using software such as Clonezilla or Macrium Reflect.

    Simply follow the step-by-step instructions provided by your chosen software and soon your system will be running faster than ever on your new SSD. Remember to always back up your data before making any major changes to your system, including transferring your operating system to a new drive.

    Choose Backup Method

    When transferring your data from one system to another, it’s crucial to back up all your files first. This process ensures that even if something goes wrong during the transfer, you won’t lose your precious data. However, choosing the right backup method can be overwhelming, especially if you don’t have a technical background.

    The ideal backup method depends on your computer’s operating system and the type of data you want to transfer. For Windows users, the built-in File History feature is an excellent option. It automatically backs up your files in real-time, making it easy and convenient.

    Mac users, on the other hand, can use the Time Machine feature to back up their data. Other methods like cloud storage and external hard drives are also viable options. Whatever method you choose, make sure to double-check that your backup files are intact and accessible before starting the transfer process.

    By taking the time to back up your data correctly, you can avoid losing files, photos, and other vital information.

    Verify Backed Up Data

    When transferring data from one device to another, it’s essential to backup your data beforehand. This helps to ensure that no data is lost during the transfer process. Once you’ve backed up your data, it’s important to verify that the backup has been successful before proceeding with the transfer.

    This can be done by checking the backup file’s size and contents to ensure that all the necessary files and folders have been included. It’s also a good idea to open a few files from the backup folder to make sure that they can be accessed without any issues. Additionally, you can verify your data by running a checksum on the files to confirm that they haven’t been altered during the backup process.

    Taking the time to verify your backups can save you a lot of time and frustration in the long run should anything go wrong during the transfer process.

    Migrate Your OS to the New SSD

    If you’ve recently upgraded your computer by installing a brand new SSD and wondering how to transfer your OS to the new drive, then there are a few ways to get the job done. One of the most popular methods is to use a third-party cloning tool that can create an exact copy of your operating system along with all of your personal files, programs, and settings. One such tool is Acronis True Image, which lets you clone your entire HDD or SSD without any data loss.

    Alternatively, you can also use the built-in Windows tool called “System Image Backup” to create a backup of your current system and then restore it on the new SSD. However, keep in mind that this method can be a bit time-consuming and complex, especially if you’re not familiar with the Windows operating system. Whatever method you choose, remember to backup your important files and data before attempting any kind of system migration to ensure a smooth and successful transfer.

    Option 1: Clone OS with Software

    If you’re planning to upgrade your computer’s storage by adding an SSD, then you’ll probably want to migrate your operating system too. The most effective way to do this is by cloning your OS using software. This involves creating an exact copy of your existing OS and transferring it to the new SSD.

    One of the most popular software for this task is called EaseUS Todo Backup. With this software, you can clone your OS with just a few clicks. The process is relatively straightforward and will not take too much of your time.

    In addition, once your OS has been cloned, you don’t need to reinstall any applications or reconfigure any settings. Everything will work exactly the same as before, but with the added benefits of a faster storage drive. So, if you’re considering adding an SSD to your computer, cloning your OS is an excellent way to do it.

    Option 2: Fresh Install of OS on SSD

    If you want to upgrade your computer’s storage with a new SSD, you can either clone your existing OS or perform a fresh install. To migrate your OS to the new SSD, you can use a cloning software like EaseUS Todo Backup, Acronis True Image, or Macrium Reflect. These tools can create an exact copy of your OS drive and transfer it to the new SSD.

    However, if your source drive is bigger than your target drive, you may need to shrink your partitions or delete some files before cloning. Another approach is to perform a fresh install of your OS on the new SSD. This method involves formatting your old drive and installing your OS from scratch.

    While it takes more time and effort, a fresh install can help eliminate any performance issues or software conflicts you may have encountered on your old drive. Just make sure to back up your data and create a bootable USB drive or disc with your OS installer beforehand. Whether you choose to clone or fresh install your OS on the new SSD, the result can give you faster boot times, smoother system performance, and more storage space for your files and applications.

    Activate Your New OS on the SSD

    If you want to transfer your operating system (OS) to a new SSD, the first step is to activate it on the new drive. This process can vary slightly depending on the OS you are using, but the general steps involve creating a bootable USB drive or CD/DVD, booting your computer from that drive, and using the OS installer to set up your new SSD as the primary drive. Once the installation process is complete, you will likely need to activate your OS by entering a product key or linking it to your Microsoft account.

    This step is important to ensure that your OS is properly licensed and that you can receive any necessary updates or support. If you have any trouble with the activation process, you can contact Microsoft or your computer manufacturer for assistance. Overall, transferring your OS to a new SSD can help improve the performance and reliability of your computer, and it’s a fairly straightforward process as long as you follow the proper steps.

    Activate Windows License on New Drive

    Looking to activate your Windows license on a new drive? Well, the process is not as complicated as it may sound. If you’ve upgraded your PC’s storage and you want to transfer your OS over to your new SSD, then you’ll need to reactivate your license to keep your Windows installation genuine. First, you’ll need to make sure that your new drive is properly installed and recognized by your computer.

    Then, simply go to the Activation settings in your Windows Settings and click on the “Change Product Key” option. Enter your product key and follow the on-screen instructions to activate your new license. This will not only ensure that your newly installed OS is genuine, but it will also allow you to access all the features and benefits of Windows that come with having an activated license.

    So, don’t waste any more time, activate your new OS on the SSD and experience the full power of Windows!

    Optimize Your New SSD

    “Optimize Your New SSD: How Do I Transfer My OS to a New SSD?” So, you’ve decided to upgrade your computer by installing a new SSD. Great choice! SSDs offer faster read and write speeds, which can significantly improve your computer’s performance. But, you might be wondering, “How do I transfer my OS to a new SSD?” Well, the process isn’t too complicated, but it does require some technical knowledge.

    First, you will need cloning software, which is readily available online. Once you have the software, connect your new SSD to your computer and launch the cloning software. Select your old hard drive as the source and your new SSD as the destination.

    The software will then copy everything from your old drive to the new one, including your operating system, applications, and files. Once the cloning process is complete, restart your computer and go into the BIOS to change the boot order to your new SSD. Congratulations! You have successfully transferred your OS to your new SSD.

    However, there are a few more steps to optimize your new SSD, such as disabling unnecessary services and indexing, enabling TRIM, and updating drivers. With these optimizations, you can ensure your SSD is running at peak performance.

    Enable AHCI Mode

    If you want to get the best performance from your new SSD, enabling AHCI mode is a must. AHCI stands for Advanced Host Controller Interface, and it’s a setting in your computer’s BIOS that allows your SSD to communicate with the rest of your system more efficiently. When AHCI mode is turned on, your SSD can take advantage of features like NCQ (Native Command Queueing) and hot-swapping, which can greatly improve its speed and responsiveness.

    To enable AHCI mode, you’ll need to enter your computer’s BIOS and find the appropriate setting. Depending on your computer’s make and model, this could be located in a variety of places, so it’s best to consult your user manual or do a quick Google search to find the exact steps for your system. Once you’ve found the AHCI setting, simply enable it and save your changes.

    Your computer will then reboot, and you should notice a significant improvement in the performance of your SSD. So if you want to get the most out of your new solid-state drive, be sure to enable AHCI mode today!

    Disable Defragmentation

    If you’re the proud owner of a brand new SSD, it’s important to optimize it to ensure the best possible performance. One important step in this process is disabling defragmentation. Unlike traditional HDDs, SSDs don’t need to be defragmented, and doing so can actually be harmful to their lifespan.

    That’s because defragging involves moving data to different parts of the disk, which can cause unnecessary wear and tear on the SSD’s flash memory cells. To disable defragmentation, simply open the “Disk Defragmenter” tool in Windows and click “Configure schedule.” Then, uncheck the box next to “Run on a schedule” and click “OK.

    ” By taking this step, you’ll help ensure that your SSD stays in great condition for years to come.

    Adjust Pagefile & SSD Settings

    One of the best ways to optimize your new SSD is to adjust your pagefile and SSD settings. Your pagefile is a hidden file in your Windows operating system that acts as a virtual memory. It helps your computer manage the amount of physical RAM it has available by creating a virtualized piece for your files.

    By default, Windows sets the pagefile to be the size of your physical RAM. However, this setting can be adjusted to match your SSD’s size and speed. This ensures that your computer can run faster and smoother.

    Additionally, it is important to take advantage of your SSD’s settings. This may include enabling TRIM, which helps keep your SSD running at its optimal performance levels, or turning off defragmentation. These simple adjustments can significantly improve your SSD’s performance and overall lifespan.

    Conclusion

    So, there you have it folks – transferring your operating system to a new solid-state drive is easier than you think! With the right tools and a bit of patience, you can be up and running on your new, speedy SSD in no time. It’s like giving your computer a shiny new pair of sneakers – it’ll be faster, more agile, and ready for whatever challenges come its way. Don’t let a sluggish hard drive hold you back – take the plunge and upgrade to a solid-state drive today!”

    FAQs

    What tools do I need to transfer my OS to a new SSD?
    To transfer your OS to a new SSD, you will need a cloning software such as Clonezilla, EaseUS Todo Backup, or Macrium Reflect. You will also need a USB drive and the new SSD.

    Can I transfer my OS to a new SSD without reinstalling Windows?
    Yes, you can transfer your OS to a new SSD without reinstalling Windows using a cloning software. This process copies your entire operating system, including all your files, settings, and applications from the old drive to the new SSD.

    What are the benefits of transferring my OS to a new SSD?
    Transferring your OS to a new SSD can significantly improve your computer’s performance, speed, and overall responsiveness. SSDs are faster and more efficient than traditional hard drives, which means your operating system and applications will load much faster.

    What should I consider when transferring my OS to a new SSD?
    When transferring your OS to a new SSD, you should consider the size of your current drive and the new SSD, the type of cloning software you’re using, and the amount of time it will take to complete the process. You should also make sure to backup all your important files before starting the transfer.

  • Ultimate Guide on How to Recover Data from M.2 SSD Quickly and Easily

    Did you accidentally delete your important files from your M.2 SSD? Or is your SSD showing signs of failure, and you need to recover your valuable data before it’s too late? Don’t worry, there’s still hope! In this blog, we’ll guide you on how to recover data from an M.2 SSD, step by step.

    M.2 SSDs are becoming increasingly popular due to their faster speeds and more compact size. These solid-state drives are commonly found in laptops and desktops, and they provide faster boot times, faster application loading times, and faster read and write speeds.

    However, like all other data storage devices, M.2 SSDs are not foolproof and can fail or lose data due to human error or system failure. If you’ve lost your valuable data from your M.

    2 SSD, don’t panic. There are several methods you can use to recover your lost files. You can try using data recovery software, which can scan your M.

    2 SSD and retrieve almost any type of deleted or lost files. Another option is to take your M.2 SSD to a data recovery specialist, who can use advanced techniques and equipment to retrieve your lost data.

    Recovering data from an M.2 SSD may seem like a daunting task, but with the right tools and techniques, it can be done successfully. In this blog, we’ll guide you step by step on how to recover your lost data from an M.

    Understanding M.2 SSDs

    M.2 SSDs are becoming increasingly popular due to their compact size and fast read/write speeds. However, like any other storage device, M.

    2 SSDs can also fail and result in data loss. If you are facing data loss from an M.2 SSD, then the first thing to do is to avoid any further writes to the device.

    This is because any additional writes can overwrite the lost data, making it unrecoverable. Next, you can try using data recovery software designed explicitly for M.2 SSDs.

    These programs can scan the SSD’s memory and recover lost files, including photos, videos, documents, and other file formats. If data recovery software does not work, the other option is to seek the help of a professional data recovery service. These experts have specialized tools and expertise to recover data from failed M.

    2 SSDs. In any case, it is crucial to act fast and follow the correct procedures to avoid permanent data loss.

    What is an M.2 SSD?

    M.2 SSD If you’re looking to upgrade your computer’s storage options for increased speed and performance, one of the options you may come across is an M.2 SSD.

    But what exactly is an M.2 SSD? Well, to put it simply, it’s a newer type of solid-state drive that is more compact than traditional SSDs and connects directly to your motherboard. Instead of using cables, an M.

    2 SSD simply slots into your motherboard’s M.2 slot, which offers faster transfer speeds than a regular SATA connection. M.

    2 SSDs come in different lengths and types, so it’s important to make sure you get one that is compatible with your system. Overall, M.2 SSDs are a great option for anyone looking to upgrade their computer’s storage capacity and speed, especially those who want a more compact and streamlined option.

    how to recover data from m 2 ssd

    How Do M.2 SSDs Work?

    M.2 SSDs, Understanding M.2 SSDs M.

    2 SSDs are a type of solid-state drive (SSD) that offer faster read and write speeds than traditional hard disk drives (HDD). They are small, rectangular, and connect directly to your motherboard through the M.2 slot.

    M.2 SSDs use high-speed PCIe (Peripheral Component Interconnect Express) or NVMe (Non-Volatile Memory express) interfaces to provide faster access to stored data. They also require less power than traditional drives, making them more energy-efficient.

    One of the main benefits of M.2 SSDs is their small size, which makes them ideal for ultra-thin laptops and compact desktops. They also come in different lengths and widths, which can affect their compatibility with different devices.

    Before purchasing an M.2 SSD, it’s important to check the specifications of your device to ensure compatibility. In summary, understanding M.

    2 SSDs involves knowing their small size, fast read and write speeds, PCIe or NVMe interfaces, and compatibility considerations. If you’re looking for a faster and more efficient storage solution for your device, an M.2 SSD might be just what you need.

    Identifying the Cause of Data Loss

    When it comes to identifying the cause of data loss on an M.2 SSD, there are a few things to consider. First, it’s important to determine whether the issue is related to hardware or software.

    Hardware problems can include things like a faulty drive, damaged firmware, or physical damage to the SSD. On the other hand, software issues could stem from a corrupted operating system, a virus or malware, or simply a configuration error. Once you’ve identified the cause of the problem, you can take steps to recover your data from the M.

    2 SSD. Depending on the situation, you may need to seek the help of a professional or use specialized data recovery software. However, with persistence and the right tools, it’s often possible to retrieve your lost data and get back to work without too much trouble.

    Common Reasons for Data Loss on M.2 SSDs

    Data loss is a major concern for users of M.2 SSDs. Understanding common causes of data loss can help prevent it from happening in the future.

    In some cases, physical damage to the drive can occur, such as from overheating or dropping the device. Firmware or software issues can also lead to data loss. This can include corruption of the boot sector or partition table, file system errors, or viruses and malware.

    Additionally, accidental deletion or formatting of the drive can result in the loss of important files and data. It is important to regularly back up data and use reliable antivirus software to help prevent data loss on M.2 SSDs.

    Working with a professional data recovery service may be necessary if data is lost due to physical damage or software issues beyond one’s control. With diligence and prevention, data loss can be minimized on M.2 SSDs.

    Symptoms of Data Loss on M.2 SSDs

    M.2 SSDs, data loss If you’re using an M.2 SSD, it’s important to be aware of the symptoms of data loss.

    Identifying the cause of data loss is crucial in order to prevent it from happening again in the future. Some common symptoms of data loss on M.2 SSDs include missing or corrupted files, sluggish performance, and frequent crashes or freezes while using your computer.

    Additionally, if you see any error messages or have trouble accessing certain files, it may be a sign of data loss. It’s important to take steps to prevent data loss, such as backing up your files regularly and running regular maintenance checks on your M.2 SSD.

    By being aware of these symptoms and taking proactive steps to prevent data loss, you can avoid the frustration of losing important files and ensure that your M.2 SSD continues to run smoothly.

    Recovering Data from an M.2 SSD

    If you find yourself in the unfortunate situation of needing to recover data from an M.2 SSD, don’t fret – there are several ways to do so. The first step is to ensure you have the necessary tools and equipment, such as a SATA to USB adapter or an external hard drive enclosure.

    Once you have these, you can remove the M.2 SSD from your computer and connect it to another working computer using the adapter or enclosure. From there, you can use data recovery software to scan the drive and locate any lost or corrupted files.

    It’s important to note that if the M.2 SSD has physical damage, it may be more difficult to recover the data and you may need to seek the help of a professional data recovery specialist. However, in many cases, simply connecting the drive to a working computer and using data recovery software can successfully retrieve your lost files.

    So, if you’re wondering how to recover data from an M.2 SSD, don’t panic – with the right tools and know-how, you can often retrieve your important information.

    Using Data Recovery Software

    If you’ve accidentally deleted or lost important data from your M.2 SSD, you may think it’s lost forever. However, using data recovery software can help you retrieve your lost files.

    One of the most important things to do is to stop using your SSD as soon as possible to prevent overwriting the data. There are many reliable data recovery software options available, such as EaseUS Data Recovery Wizard, which is easy to use and compatible with M.2 SSDs.

    Once installed, the software scans your SSD and provides a list of recoverable files. You can then select the files you want to recover and save them to another drive. With a little bit of patience and the right software, you can recover your important data from your M.

    2 SSD and restore peace of mind.

    Consulting with a Professional Data Recovery Service

    M.2 SSD data recovery, professional data recovery service Losing data on your M.2 SSD can be a frustrating experience, but all hope is not lost.

    Unlike traditional hard drives, M.2 SSDs are smaller and more delicate, making data recovery a complicated process. Attempting to recover the data yourself can potentially cause further damage to the drive, making the situation even worse.

    This is where a professional data recovery service can help. By utilizing specialized tools and expertise, they can safely recover lost data from your M.2 SSD.

    It’s important to choose a reputable service with a history of successful recoveries, as the process can be costly. But the peace of mind and the ability to retrieve precious data makes it worth the investment. Don’t let a damaged M.

    2 SSD cause you to lose important files forever- consult a professional data recovery service for help.

    Preventing Data Loss on M.2 SSDs

    M.2 SSDs are known for their high-speed performance and compact design, which make them a popular choice for storing important data. However, unexpected system crashes, file corruption, and accidental deletion can lead to data loss.

    The good news is that it’s possible to recover data from an M.2 SSD, but prevention is always better than cure. To prevent data loss, it’s essential to back up your data regularly and to avoid exposing your SSD to physical damage.

    Additionally, you can also use data recovery software that is specifically designed for M.2 SSDs to retrieve lost or deleted files. Overall, being proactive about protecting your data from potential damage or loss will save you a lot of time and stress down the line.

    Back Up Your Data Regularly

    Backing up your data is crucial, especially when using M.2 SSDs. These storage devices are more vulnerable to data loss due to physical damage, malware, or firmware crashes.

    Unlike traditional hard drives, M.2 SSDs do not provide a lot of warning signs before they fail, making data backup even more critical. Investing in a reliable backup solution that fits your needs, be it cloud-based or on-premises, can save you from major headaches in the event of data loss.

    Remember, prevention is always better than cure, and regular data backups can provide you with peace of mind and minimize the risk of data loss. So, don’t wait until it’s too late – start backing up your data today!

    Use Anti-Malware and Anti-Virus Software

    Preventing Data Loss on M.2 SSDs by Using Anti-Malware and Anti-Virus Software M.2 SSDs are the latest storage devices, which are very fast and efficient in reading and writing data.

    However, there is a risk of data loss due to viruses, malware, and other malicious software, which can cause damage to the SSD and permanently erase the data stored on it. Therefore, to protect your data, it is essential to use anti-malware and anti-virus software. These programs can detect and remove any malicious software and prevent them from infecting your SSD.

    They can also scan the SSD periodically, detect any new virus or malware and remove it before it can cause any harm. Using anti-malware and anti-virus software also helps to secure your computer’s operating system, making it harder for hackers and cybercriminals to access and steal your data. Always keep the anti-malware and anti-virus software updated and scan the SSD regularly to prevent any data loss.

    Remember that prevention is always better than cure, and using anti-malware and anti-virus software is an excellent way to prevent data loss on M.2 SSDs.

    Avoid Physical Damage to Your M.2 SSD

    M.2 SSD, data loss, physical damage, prevent M.2 SSDs are known for their speed and compact size, making them ideal for high-performance applications.

    However, since M.2 SSDs have no casing to protect them, it’s critical to avoid physical damage that could lead to data loss. Keeping your M.

    2 SSD safe can prevent the potential for unnecessary data loss. You can start by securing the M.2 drive onto a flat surface or ensuring that it fits snugly in the slot.

    Avoid flexing or bending the motherboard as this could damage the SSD’s contacts and result in data loss. Additionally, protect your M.2 SSD from static electricity and be cautious when handling it.

    Always ensure that your computer is turned off before removing or installing an M.2 SSD, and handle it carefully to avoid dropping or knocking it accidentally. By taking extra precautions, you can help prevent data loss on your M.

    2 SSD and keep your files safe and secure.

    Conclusion

    In summary, recovering data from an M.2 SSD can be a daunting task, but with the right tools and techniques, it is definitely possible. Remember to always make a backup of your data, be careful when handling your SSD, and seek professional help if needed.

    And just like Superman, always have a hero handy in case things go south!”

    FAQs

    What are the common causes of data loss in M.2 SSDs?
    The common causes of data loss in M.2 SSDs are physical damage, firmware corruption, human error, malware or virus, and power failure.

    Can deleted data be recovered from M.2 SSDs?
    Yes, deleted data can be recovered from M.2 SSDs using specialized data recovery software or services, provided the space was not overwritten by new data.

    How do I recover data from a corrupted M.2 SSD?
    You can try to recover data from a corrupted M.2 SSD using data recovery software or services. You may also need to repair the firmware or seek help from a professional data recovery service.

    What should I do if my M.2 SSD is not recognized by my computer?
    If your M.2 SSD is not recognized by your computer, you can try to reseat the SSD, update the drivers or BIOS, or check for any physical damage. If the issue persists, you may need to seek help from a professional technician.

  • Boost Your Acer Nitro 5’s Performance with this Simple Guide on How to Add an SSD!

    If you’re looking for a way to give your Acer Nitro 5 a performance boost, adding an SSD is a great option to consider. An SSD, or solid-state drive, can significantly improve the speed and responsiveness of your laptop. Not only that, but it can also provide extra storage space for all your files and programs.

    In this blog post, we’ll guide you through the steps to add an SSD to your Acer Nitro Whether you’re a tech whiz or a beginner, our easy-to-follow instructions will make it a breeze. So, let’s dive in and see how you can boost your laptop’s performance with an SSD!

    Check Compatibility

    If you’re looking to upgrade the storage on your Acer Nitro 5, adding an SSD can be a great way to improve its performance. However, before you go out and purchase just any SSD, it’s important to check compatibility with your laptop’s hardware. The Acer Nitro 5 typically comes with a standard

    5-inch hard drive, so you’ll need to make sure that the SSD you choose has the same form factor. Additionally, you’ll want to check the interface of your laptop’s hard drive to ensure that the SSD you select is compatible. The most common interface types are SATA and PCIe, and you’ll want to make sure the SSD matches your laptop’s interface for optimal performance.

    Before making a purchase, it’s always a good idea to consult the manufacturer’s website or user manual to ensure compatibility and avoid any potential issues.

    Make sure the SSD is compatible with your Acer Nitro 5 model.

    When you’re looking to upgrade the SSD on your Acer Nitro 5, make sure that you check the compatibility first to avoid any issues. Not all SSDs are created equal and not all are compatible with every model. Check your laptop’s manual or visit Acer’s website to see which types of SSDs are compatible with your specific Acer Nitro 5 model.

    This will save you time, money, and frustration in the long run. You don’t want to end up with an SSD that doesn’t work and have to return or exchange it. It’s important to choose an SSD that matches your laptop’s specifications and requirements.

    By doing so, you’ll ensure that you get the best possible performance and longevity out of your SSD and your Acer Nitro

    acer nitro 5 how to add ssd

    Choose an SSD Type

    When choosing an SSD type for your computer or laptop, it’s crucial to ensure that it’s compatible with your system. Different SSD types have varying specifications, which can affect their compatibility with different systems. For instance, SATA SSDs are compatible with systems that have SATA ports, while NVMe SSDs require NVMe/PCIe ports to function optimally.

    It’s essential to check your system’s specifications and compare them with the SSDs’ requirements to ensure compatibility. It’s also worth noting that some systems may require additional configurations or drivers to support certain SSD types. Therefore, before making your final decision, do your research, consult with experts, and test your selected SSD to ensure it’s the right fit for your system.

    This ensures that you not only get the best performance but also avoid compatibility issues that may result in poor performance or even damage to your system.

    Decide between a SATA or NVME SSD based on your budget and performance needs.

    When choosing between a SATA and NVME SSD, it’s crucial to check compatibility with your system. Both types of SSD connect to your computer in different ways, therefore not all motherboards or laptops may support NVME SSDs. It’s essential to check if your motherboard or laptop is compatible with NVME SSDs before investing in one, as it may not function properly or at all.

    Additionally, some systems may require a BIOS update to support NVME SSDs, so it’s best to do your research before making a purchase. However, if your system supports NVME SSDs, it’s worth investing in one for faster read and write speeds, resulting in quicker boot times and overall performance. If your budget is tight, SATA SSDs are still a good option and can provide faster speeds than traditional hard disk drives.

    It all comes down to your performance needs and budget, so be sure to research and choose the best option to optimize your computer’s performance.

    Gather Necessary Tools

    If you’re looking to breathe new life into your Acer Nitro 5 laptop, adding an SSD (Solid State Drive) is a great way to do it. To get started, gather the tools you’ll need. Firstly, make sure you have an appropriate screwdriver for removing and installing hardware from your laptop.

    You’ll also need an M.2 SSD that’s compatible with your laptop’s specifications. Most newer models will accept M.

    2 SATA and NVMe SSDs. Additionally, you might want to consider a SATA to USB adapter to clone your existing hard drive to the new SSD before installation. Lastly, a grounding wrist strap and an anti-static mat are recommended to prevent any damage to your laptop through electrostatic discharge (ESD).

    By having these tools at the ready, the process of adding an SSD will be much smoother and less stressful.

    Prepare a screwdriver, pry tool, and anti-static wrist strap.

    As you gear up to tackle your next electronics repair job, it’s important to make sure you have all the necessary tools at your disposal before getting started. One of the first things to consider is the screwdriver – don’t assume that any old screwdriver will do, as different types of screws may require specific types of screwdrivers to properly remove and reinstall. Additionally, a pry tool can come in handy when carefully prying open delicate electronics without causing damage.

    Finally, investing in an anti-static wrist strap can protect both you and your electronics from the risks posed by electrostatic discharge. With these tools in hand, you can approach your repair job with confidence, knowing that you have everything you need to safely and effectively get the job done.

    Open the Laptop Chassis

    Opening the laptop chassis of your Acer Nitro 5 is a straightforward process, and it’s the first step to installing an SSD drive. Before you start, make sure you’re working on a flat surface in a clean and well-lit area. Begin by shutting down your laptop, unplugging all cables and removing the battery.

    Then, use a screwdriver to remove the screws on the bottom cover of your laptop. Most Acer Nitro 5 models have around ten screws, so make sure you keep them in a safe place. Once you remove the screws, gently pry the bottom cover using a plastic tool until it pops off.

    Congratulations! You’ve now opened the laptop chassis and can proceed with installing your new SSD drive.

    Disconnect the battery, remove screws, and carefully pry open the bottom chassis cover.

    So, you want to open the bottom chassis cover of your laptop? Well, the first thing you need to do is disconnect the battery. This is important because, if you don’t, you risk damaging your laptop’s components, which could lead to costly repairs or even a new laptop altogether. Once the battery is disconnected, you can start removing the screws that hold the bottom chassis cover in place.

    Make sure to keep these screws safe, as you’ll need them to put the cover back on later. After the screws are removed, it’s time to carefully pry open the bottom chassis cover. This can be a bit tricky, as you don’t want to apply too much force and risk breaking the cover or damaging any of the internal components.

    Start at one corner and gently work your way around, using a small pry tool or even just your fingertips to slowly pry the cover open. Once the cover is open, you’ll have access to the internal components of your laptop. This is where you can do things like upgrade your RAM or replace your hard drive.

    Be careful when handling these components, as they are delicate and sensitive to static electricity. And remember, when you’re finished with your upgrades or repairs, make sure to carefully put everything back together and secure the bottom chassis cover with the screws you removed earlier. Overall, opening the bottom chassis cover of your laptop requires a bit of patience and care, but it’s not as daunting as it may seem.

    Just remember to disconnect the battery, remove the screws, and carefully pry open the cover to access the internal components.

    Install the SSD

    If you’re wondering how to upgrade your Acer Nitro 5 by adding an SSD, don’t worry, it’s not too difficult! First, you’ll need to purchase an SSD that is compatible with your laptop. Once you have it, shut down your computer and unplug all cables and peripherals. Flip your laptop over and remove the screws from the bottom cover.

    Take the cover off and locate the hard drive. Unscrew the bracket holding the hard drive in place, then gently remove the drive from its connector. Now, insert the SSD in the same way as the old hard drive, securing it with the bracket and screws.

    Finally, replace the bottom cover and screw it back into place. It’s important to note that installing an SSD will require a fresh install of your operating system, so be sure to back up any important files before starting this process. With your new SSD installed, you’ll enjoy faster boot-up times and improved system performance!

    Insert the SSD into the designated slot and secure it with screws.

    If you’re looking to upgrade your computer’s storage with a new SSD, the installation process is fairly simple. The first step is to locate the designated slot for the SSD on your motherboard. Most modern motherboards have a specific slot for M.

    2 or SATA SSDs, which can be easily identified in the manual. Once you have located the slot, gently insert the SSD into the slot, making sure it aligns with the connector pins. You should feel a slight resistance when inserting the SSD, but be careful not to apply too much pressure.

    Once you have inserted the SSD, use the provided screws to secure it in place. These screws are usually included with the motherboard or the SSD itself. Tighten the screws gently, making sure not to overtighten them.

    And that’s it! Your new SSD is now installed and ready to use. With faster read and write speeds, you can now enjoy faster boot times and improved performance when using your computer.

    Reassemble the Laptop

    Once you have installed your new SSD, it’s time to reassemble your Acer Nitro 5 laptop. Begin by carefully lining up the bottom panel with the bottom of the laptop and gently pushing it back into place. Ensure that it is secure by tightening all the screws back in.

    Then, you can reattach any cables or connectors that were removed earlier, including the battery connector. Make sure all connections are tightly secured and in the correct position. Finally, replace the cover plate, reinsert the screws and tighten them firmly with your screwdriver.

    That’s it! You have successfully added an SSD to your Acer Nitro 5 and reassembled it to its original form, ready to enjoy all the benefits of speedy performance.

    Carefully reattach the bottom chassis cover and reconnect the battery.

    If you’ve successfully replaced or upgraded some components in your laptop, it’s time to reassemble the device. It can be a tedious process, and you need to be careful with every step to avoid damaging any of the parts. The first step is to reattach the bottom chassis cover, ensuring that it snaps into place.

    Make sure that you align the screw holes correctly. Afterward, you need to connect the battery carefully. You have to be very cautious not to damage the battery or any of the related connectors.

    Once it’s completely connected, it’s time to power on the laptop and check if everything is working correctly. It’s worth performing some basic functions like checking the screen, running some programs, and ensuring that the keyboard and touchpad are working correctly. Remember always to take this process slowly and double-check every step.

    One misstep could cause damage to your device, and you could end up back where you started. By following these steps, you can save money by upgrading or fixing your laptop on your own.

    Configure the SSD

    If you’re looking to upgrade your Acer Nitro 5 by adding an SSD, you’ll need to configure it properly to ensure optimal performance. The first step is to open up your laptop and locate the slot for the SSD. Once you have inserted the SSD, you’ll need to go into your BIOS settings and ensure that the SSD is recognized.

    You can then install the operating system onto your new SSD as the primary boot drive. It’s important to note that not all SSDs are created equal, so it’s worth doing some research to find one that meets your needs – both in terms of compatibility and performance. By taking the time to properly configure your new SSD, you should notice a significant boost in your laptop’s speed and overall performance.

    So go ahead and take the plunge – your Acer Nitro 5 will thank you!

    Boot up the Acer Nitro 5 and initialize the new SSD through disk management.

    When you first turn on your Acer Nitro 5 after installing a new SSD, you’ll need to configure it through disk management. This process can seem overwhelming at first, but it’s actually quite simple. First, you’ll want to make sure that your computer recognizes the new SSD.

    Go into the disk management program, which you can find by right-clicking on the Windows start menu and selecting “disk management.” The new SSD should appear as unallocated space. Right-click on it and select “new simple volume.

    ” From here, you can choose how much of the SSD you want to allocate to this partition, assign a drive letter, and format the drive. Once you’ve gone through these steps, your new SSD will be ready to use! By configuring your new SSD properly, you’ll be able to get the most out of its speed and storage capacity. So go ahead and give it a try!

    Conclusion

    With the easy-to-follow steps in this guide, adding an SSD to your Acer Nitro 5 is a breeze. Say goodbye to slow load times and hello to lightning-fast performance. Your Nitro 5 will now be the envy of all your gaming friends.

    So go ahead, add that SSD, and get ready to take your gaming experience to the next level!”

    FAQs

    Can an Acer Nitro 5 laptop add an SSD?
    Yes, you can add an SSD to your Acer Nitro 5 laptop by opening the back panel and installing it in the available SSD slot.

    What type of SSD should I buy for my Acer Nitro 5?
    We suggest looking for a 2.5-inch SATA III internal SSD, which is compatible with the Acer Nitro 5. Some popular options include Samsung 860 EVO and Crucial MX500.

    How much storage space can I add with an extra SSD on my Acer Nitro 5?
    The amount of storage capacity depends on the SSD you choose. However, Acer Nitro 5 has one M.2 slot and one 2.5-inch slot, which can support up to 2TB storage for each slot.

    Does adding an SSD to my Acer Nitro 5 laptop void the warranty?
    No, adding an SSD to your Acer Nitro 5 laptop does not void the warranty. However, if any damage occurs during installation, it may not be covered under the warranty. It is always advisable to have a professional install the SSD to avoid any further damage.