Category: How to

How to

  • 5 Simple Steps to Transfer Windows 10 to Your SSD Hassle-Free: A Comprehensive Guide

    Ready to turbo-charge your computer’s performance? Upgrading to a solid-state drive (SSD) can take your PC from sluggish to lightning-fast speeds. Not only will your Windows 10 boot time be reduced drastically, but your applications and files will also load in a snap. While purchasing an SSD may seem daunting at first, the real challenge lies in transferring your Windows operating system from your existing hard drive to the SSD.

    In this guide, we’ll provide you with the step-by-step instructions to seamlessly transfer Windows 10 to an SSD without losing any data or settings. Whether you’re a beginner or an advanced user, we’ve got you covered. Let’s dive in and make the switch to an SSD!

    Check SSD Compatibility

    If you’re looking to upgrade your computer’s storage and wondering how do I transfer windows 10 to my SSD, the first step is to check SSD compatibility. Not all SSDs are compatible with all computers, so it’s important to research which types of SSDs will work with your specific system. One way to do this is to look up your computer’s specifications, which should include information on the type of storage it supports.

    You can also consult with the manufacturer of your computer or the SSD you want to use to ensure compatibility. Once you’ve confirmed compatibility, you can then follow the steps to transfer your Windows 10 operating system to your new SSD. This can typically be done using software such as Clonezilla or Acronis True Image, or through built-in tools in Windows 10 like the Create a Recovery Drive feature.

    By taking the time to check SSD compatibility before upgrading, you can ensure a smooth transition and avoid any potential issues down the road.

    Confirm SSD is supported by your current system

    If you are considering upgrading to an SSD, the first thing you should confirm is whether your current system is compatible with it. Some older computers might not support SSD technology, so it’s worth verifying before you invest in one. Check your computer’s documentation or manufacturer’s website to see if it supports SATA III or NVMe interfaces, which are required for most modern SSDs.

    If your computer has an older interface like SATA II, you might still be able to use an SSD, but it will not perform as optimally. Checking SSD compatibility upfront can save you a lot of frustration down the road, so take the time to research your system’s capabilities before making a purchase.

    how do i transfer windows 10 to my ssd

    Create Windows 10 Installation Media

    If you’re looking to transfer Windows 10 to your SSD, one of the first steps you’ll need to take is creating installation media. This is essentially a bootable USB or DVD that you can use to install the operating system on your new drive. The good news is that Microsoft makes it easy to create installation media through their website.

    All you need is a USB flash drive with at least 8GB of storage space, and a reliable internet connection. From there, it’s just a matter of following the prompts on the website and downloading the necessary files to your USB drive. Once you have the installation media, you can use it to transfer Windows 10 to your SSD and enjoy faster speeds and improved performance.

    It’s worth noting that you may need to adjust your BIOS settings to ensure that your computer boots from the USB drive instead of your old hard drive, but this is a relatively simple process that can be done through your computer’s startup settings. Overall, with a little bit of time and patience, transferring Windows 10 to your SSD is a task that’s well within reach for most users.

    Download Windows 10 ISO and create a bootable USB drive

    Creating a bootable USB drive is a convenient way to install Windows 10, especially if you are working on a device that does not have an optical drive. To do this, you will need to download the Windows 10 ISO file and create a bootable USB drive. Firstly, visit the official Microsoft website and click on the ‘Download tool now’ button.

    Once the tool has downloaded, open it and select the option to create installation media for another PC. Then, choose your language, edition, and architecture, and click next. After selecting the USB drive you want to use, click on ‘Next’ and wait for the files to download.

    Once the process is complete, you will have a bootable USB drive that you can use to install Windows 10 on your device. It is important to note that this process will erase all the data on your USB drive, so be sure to back it up before starting. With this method, you are able to create your own installation media, ensuring you have the latest version of Windows 10 and can customize it to your liking.

    Insert the bootable USB into the target computer

    Now that you have created your Windows 10 installation media on a bootable USB drive, it’s time to start the installation process on your target computer. The first step is to insert the USB drive into the computer’s USB port. Be sure to choose the correct port, as there may be multiple options.

    Once inserted, power on your computer and enter the BIOS settings. This is typically done by pressing a specific key during the boot-up process. The exact key varies depending on the computer manufacturer, so be sure to check the documentation or search the web for instructions.

    Once in the BIOS settings, change the boot order so that the USB drive is the first option. This will ensure that the installation process starts from the USB drive rather than the computer’s hard drive. Once the changes are saved, exit the BIOS settings and restart the computer.

    The installation process should now begin automatically, and you’ll be on your way to enjoying all the new features and improvements of Windows

    Clone Windows 10 to SSD

    Are you wondering how to transfer Windows 10 to your newly purchased SSD? Well, you’re in luck! As replacing your hard drive with an SSD is one of the most effective ways to speed up your computer, it’s essential to have your operating system installed on the faster drive for optimal performance. Thankfully, there are several methods to clone Windows 10 to an SSD. One practical approach is to use the built-in utility called Windows System Image Backup.

    This tool enables you to create a copy of your entire system on an external drive and then restore it on your SSD. Alternatively, you can use third-party software like Macrium Reflect or EaseUS Todo Backup to clone your system effortlessly. The process involves creating a disk image of your operating system, which you can then transfer to your SSD.

    Whichever method you choose, be sure to back up your critical files before starting the process. That way, you won’t lose any data during the transfer. With these simple steps, you’ll have a faster and more efficient computer in no time!

    Use a cloning software like EaseUS Todo Backup to clone your Windows 10 to SSD

    EaseUS Todo Backup, clone Windows 10 to SSD If you’re looking for a way to speed up your computer’s performance, cloning your Windows 10 to an SSD may be a great solution. By transferring your operating system from a hard drive to a solid-state drive, you can significantly reduce boot times and improve your computer’s overall speed. Luckily, with a cloning software like EaseUS Todo Backup, the process is relatively straightforward.

    First, you’ll need to install the software and connect your SSD to your computer. Next, launch the software and select the option to clone your disk. From there, select your hard drive as the source disk and your SSD as the destination disk.

    Finally, review your settings and click “Proceed” to start the cloning process. The software will take care of the rest, and you’ll be up and running on your new SSD in no time. The best part is that you won’t lose any of your important files or applications in the process.

    So give it a try and see how much faster your computer can be with a cloned Windows 10 on an SSD!

    Choose the old system disk as the source and the SSD as the Destination

    If you’re looking to upgrade your computer’s storage system, one of the best choices you can make is to clone your Windows 10 operating system to an SSD. Doing this will give you faster boot times and overall better performance with your system. To start, you’ll need to choose the old system disk as the source and the SSD as the destination.

    This means that you’ll be copying your current operating system over to the new SSD drive. This can be done with various software programs, some of which are free and others that require purchase. Once you have your software set up, you can begin the cloning process.

    The software will guide you through the steps needed to successfully clone your Windows 10 operating system to your new SSD drive. Overall, cloning your system is a great way to upgrade your computer’s performance without having to completely reinstall everything from scratch. So, if you’re looking to speed things up, cloning your Windows 10 operating system to an SSD is the way to go.

    Set SSD as the Boot Drive

    If you’re wondering how to transfer Windows 10 to your SSD, the process is relatively straightforward. Your first step will be to clone your current Windows 10 installation to your SSD. There are several cloning software options available that can help you do this, such as EaseUS Todo Backup, Acronis True Image, or Macrium Reflect.

    Once you’ve cloned your Windows installation, you’ll need to set your SSD as the boot drive in your BIOS settings. This will ensure that your computer boots from the SSD instead of the old hard drive. It’s important to note that before you begin this process, you should back up any important files and ensure that your SSD has enough storage space to accommodate your operating system, applications, and files.

    With the right tools and a bit of patience, you’ll soon be able to enjoy the benefits of a faster, more efficient system with your new SSD as the boot drive.

    Power off the PC and remove the old system disk

    After shutting down your computer, the first step in setting your SSD as the boot drive is to remove the old system disk. This is crucial because you don’t want your computer to try to boot from the wrong drive, which could cause errors and slow performance. Once you’ve located the old system disk, carefully remove it from its slot.

    Depending on the type of computer you have, you may need a screwdriver or other tools to complete this step. Be sure to handle the old system disk carefully, as it may contain important files or data you need to save or transfer. With the old system disk removed, it’s time to install the new SSD.

    Carefully slide the SSD into the slot where the old system disk was located, making sure it fits snugly. Then, double-check all connections to ensure everything is secure before powering up your computer. With the SSD properly installed, you’re now ready to proceed to the next steps in the process of setting it up as your boot drive.

    By following these steps, you can improve your computer’s performance and enjoy faster boot times and overall responsiveness.

    Install the SSD into your computer

    Now that you have installed your SSD into your computer, it’s time to set it as the boot drive. Setting your SSD as the boot drive will ensure that your computer will boot up quickly and operate at faster speeds. The first step in setting your SSD as the boot drive is to enter the BIOS settings on your computer.

    To do this, restart your computer and press the appropriate key (usually F2, F10, or DEL) to enter the BIOS. Once you are in the BIOS, navigate to the Boot tab and select your SSD as the primary boot drive. Save your changes and exit the BIOS.

    Your computer should now automatically boot from your SSD. One thing to keep in mind is that if you had an operating system installed on your old hard drive, you will need to transfer it over to your SSD or install a fresh copy of the operating system onto your SSD. This will ensure that your computer runs smoothly and takes full advantage of the increased speeds and performance offered by your new SSD.

    So, go ahead and make the most of your new SSD by setting it as the boot drive and enjoy smoother and faster computer performance!

    Power on the PC, go to BIOS and set SSD as the primary boot drive

    When you install a new SSD in your PC, it’s important to set it as the primary boot drive so that your system can start up quickly. To do this, you’ll need to enter your PC’s BIOS setup. The BIOS (Basic Input/Output System) is a program that’s stored on a chip on your motherboard, and it contains the instructions your computer needs to boot up.

    Usually, you can access the BIOS by pressing a specific key (such as F2 or Delete) when your computer starts up. Once you’re in the BIOS, you can navigate to the boot options and select your SSD as the primary boot drive. This means that the BIOS will look for an operating system on the SSD first, before checking any other drives.

    Setting your SSD as the primary boot drive will ensure that your PC boots up quickly and efficiently. So, power on your PC and head to the BIOS to set your newly installed SSD as the primary boot drive.

    Conclusion

    In conclusion, transferring Windows 10 to your SSD is like giving your computer a luxurious upgrade. It’s like moving into a penthouse suite with only the best amenities. Your computer will boot faster, load programs quicker, and have an overall smoother performance.

    So don’t let your old hard drive hold you back – make the switch to an SSD and experience the ultimate computing experience!”

    FAQs

    What is the benefit of transferring Windows 10 to an SSD?
    The benefit of transferring Windows 10 to an SSD is that it can significantly improve your computer’s performance and boot-up time.

    Can I transfer Windows 10 to an SSD without reinstalling all of my programs?
    Yes, you can use migration software such as EaseUS Todo Backup or Macrium Reflect to transfer Windows 10 to an SSD without reinstalling all of your programs.

    How much space do I need on my SSD to transfer Windows 10?
    You will need a minimum of 16 GB of free space on your SSD to transfer Windows 10.

    How long does it take to transfer Windows 10 to an SSD?
    The transfer time depends on the size of your data and the speed of your SSD. It can take anywhere from 30 minutes to a few hours.
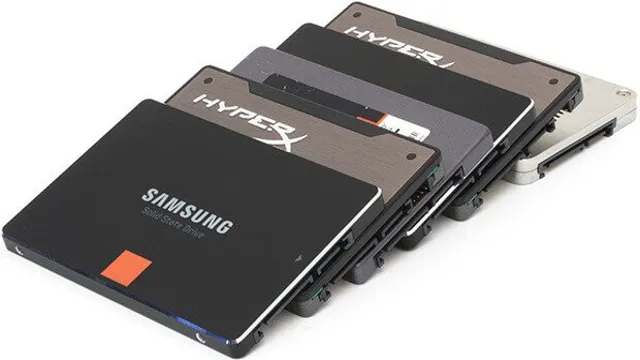
  • Unlocking the Power of Windows 10: Choosing the Perfect SSD Size for Your PC

    If you’re planning on upgrading your PC or building a new one, one of the most important components to consider is the SSD. A solid-state drive (SSD) can have a huge impact on the performance of your system, but with so many size options available, it can be difficult to know how big an SSD you need for Windows Well, the answer to that question is not exactly straightforward as it depends on your usage and storage requirements.

    If you only plan on installing Windows 10 and a handful of programs, then a 128GB SSD would suffice. However, if you’re a power user who will be running multiple applications, storing large files and gaming, then you might want to consider a larger SSD. The good news is that SSD prices have dropped significantly over the years, allowing you to get more storage for your money.

    Whether you’re a light or heavy user, investing in an SSD is definitely worth considering as it can greatly improve your system’s performance.

    Understanding SSD Storage

    If you’re wondering how big of an SSD you need to run Windows 10, it ultimately depends on your usage. However, a 250GB SSD would be a great place to start. This should be able to accommodate Windows 10 with room for some essential applications and files.

    Still, if you’re a heavy user or tend to store a lot of multimedia files, you might want to consider upgrading to a larger SSD. A 500GB or even 1TB SSD would provide ample storage for all your needs. SSDs are faster and more reliable than traditional hard drives and can significantly enhance the performance of your computer.

    So, if you’re looking for a speedy and efficient system, upgrading to an SSD could be just what you need.

    What is an SSD?

    If you’re familiar with the concept of computer storage, you’ve likely heard the term SSD thrown around at some point. But what exactly is an SSD? Well, simply put, it stands for Solid State Drive. Instead of using traditional spinning disks to store data, SSDs rely on flash memory to operate.

    This means they have no moving parts, which results in faster transfer speeds, more reliable storage, and lower power consumption. In the grand scheme of things, upgrading to an SSD can make a huge difference in the performance of your computer. Think of it like upgrading from a bicycle to a motorcycle – you’ll still get to your destination, but with much greater speed and efficiency.

    So, if you’re in need of a storage upgrade, consider investing in an SSD to take your computing experience to the next level.

    how big an ssd to run windows 10

    Benefits of using SSDs

    SSDs, Storage SSDs, or Solid State Drives, are increasingly becoming the preferred storage choice for those who want fast and reliable storage. SSDs are designed with no moving parts and use flash memory to store data, which makes them more reliable and less prone to failure. Compared to traditional hard drives, SSDs offer much faster read and write speeds, making them ideal for demanding applications like video editing and gaming.

    Moreover, SSDs consume less power and generate less heat, which makes them perfect for use in laptops, tablets and other mobile devices. Overall, the benefits of using SSD storage are numerous, and it’s no wonder why they are gaining so much popularity. So, if you want high performance and reliability, consider upgrading to an SSD storage solution today.

    Different types of SSDs

    If you’re in the market for a new SSD, you might be wondering what the different types are. There are several types of SSDs available on the market, each with its own set of advantages and disadvantages. The most common type is the SATA SSD, which uses the same interface as traditional hard drives and is the easiest to install.

    PCIe SSDs, on the other hand, are faster than SATA SSDs, but are more expensive and require a compatible motherboard. NVMe SSDs are the fastest option, but also the most expensive and require a compatible motherboard with NVMe support. It’s important to assess your storage needs and budget before choosing the type of SSD that’s right for you.

    It’s also worth noting that SSDs come in different sizes, so make sure you choose one that fits your system.

    Minimum SSD size for Windows 10

    Are you wondering how big an SSD you need to run Windows 10? Well, it depends on your intended use of the operating system. If you’re a casual user who only needs to check emails and surf the web, a 120GB SSD could suffice. However, if you plan on installing multiple applications or games, a 240GB SSD or bigger is recommended.

    This will give you enough space to store your operating system, programs, and files. Plus, a larger SSD generally means faster performance. If you’re a power user, you may even want to consider a 1TB SSD.

    This will provide plenty of space for all your files, applications, and games. Remember, having a larger SSD also means less reliance on external storage options such as USB drives or cloud storage. So, invest in a quality SSD that fits your needs, and enjoy a smoother Windows 10 experience.

    Factors to consider

    When determining the minimum SSD size for Windows 10, there are a few factors to consider. The operating system itself requires at least 20GB of space, but additional space is needed for updates, applications, and personal files. The recommended minimum SSD size for Windows 10 is 128GB, which allows for plenty of storage space and ensures smooth system performance.

    However, if you plan on using your computer for more demanding tasks such as gaming or video editing, you may want to consider a larger SSD size. A larger SSD not only allows for more storage space but also can improve overall system performance and speed. So, depending on your usage needs, consider upgrading to a larger SSD for the best experience.

    Windows 10 storage requirements

    When it comes to storage requirements for Windows 10, the minimum SSD size required can vary depending on your usage. For instance, if you’re simply using your computer for browsing the web and basic office tasks like word processing, then a 64GB SSD should suffice. However, if you’re a gamer or you use software that requires a lot of storage space, such as video editing software or graphic design programs, then you may need a larger SSD size, such as 256GB or 512GB.

    It’s important to note that Windows 10 requires at least 20GB of storage space, so keep that in mind when choosing an SSD size. Additionally, it’s always a good idea to leave some extra space for future updates and new software installations. So, whether it’s a 64GB SSD or a larger one, make sure to choose the one that best suits your needs and budget.

    Recommended SSD size for Windows 10

    When it comes to choosing the perfect SSD size for running Windows 10, there are a few factors to consider. Generally, the minimum recommended size for a Windows 10 installation is at least 20GB, but this doesn’t account for any additional software or programs you may want to install. For a more comfortable experience, most users prefer an SSD with at least 128GB of storage.

    This should give you enough room for the operating system, commonly used applications, and some extra files without worrying about running out of space. If you’re a power user or gamer, then you might want to go for a larger SSD to store more games and applications. In summary, if you want to enjoy the fast boot time and speedy application loading that SSDs offer, then we recommend going for a 128GB or larger SSD for your Windows 10 installation.

    Factors to consider

    When considering the right SSD size for Windows 10, there are a few factors to take into account. Firstly, the amount of storage you require will depend on how you plan to use your computer. If you’re a gamer or a content creator, you may need a larger SSD for storing large files and applications.

    On the other hand, if you only use your computer for basic tasks like browsing the internet and checking emails, a smaller SSD may suffice. Another factor to consider is your budget. Larger SSDs can be significantly more expensive, so it’s important to think about how much you’re willing to spend.

    Ultimately, it’s recommended to opt for an SSD with a minimum of 256GB for Windows This will provide enough space for the operating system, important files, and some applications. However, if you plan on using your computer for more demanding tasks, a larger SSD may be necessary to ensure optimal performance.

    Additional storage needs

    When it comes to additional storage needs for your Windows 10 system, an SSD is a great choice for boosting your computer’s performance. But what size should you choose? The recommended SSD size for Windows 10 depends on your specific needs and usage habits. For basic users, a 128GB SSD may suffice, allowing for the operating system and a few applications to be installed.

    However, if you’re a heavy user or need to store large files, a 256GB or even a 500GB SSD may be a better choice. It’s important to consider not only the current storage needs but also potential future storage needs. So, take some time to assess how you intend to use your computer, and choose an SSD size that will meet your needs both now and in the future.

    Conclusion

    When it comes to the question of how big of an SSD you need to run Windows 10, there is no one-size-fits-all answer. It really depends on your personal usage and needs. However, if you’re looking for a witty and clever conclusion, we say go big or go home! Because as technology advances and new updates are released, you’ll never regret having more storage space and faster performance.

    So let’s raise a toast to the big SSDs, because as they say, size does matter!”

    FAQs

    What is the minimum SSD size required to run Windows 10?
    The minimum SSD size required to run Windows 10 is 16GB for the 32-bit version and 20GB for the 64-bit version.

    Can I run Windows 10 on a 128GB SSD?
    Yes, you can easily run Windows 10 on a 128GB SSD. However, it is recommended to have at least 256GB of storage for better performance.

    What factors should I consider when selecting an SSD for Windows 10?
    When selecting an SSD for Windows 10, you should consider factors such as the storage capacity, read/write speeds, durability, and price.

    Is it worth upgrading to an SSD for Windows 10?
    Yes, upgrading to an SSD for Windows 10 can significantly improve the overall performance of your system. It will help in faster boot times, quicker application launches, and smoother workflow.

  • Effortlessly Upgrade to SSD: A Step-by-Step Guide on How to Clone HDD to SSD on Windows 10

    If you’re thinking of upgrading your computer’s storage with an SSD, the thought of moving all your data over can seem quite daunting. However, the process of cloning your HDD to an SSD on Windows 10 is actually quite simple. In fact, if done correctly, it can even save you time in the long run.

    When you first buy a computer or laptop, it usually comes with a hard disk drive (HDD) pre-installed. While HDDs are reliable and affordable, they can be slower and have less capacity than the newer solid-state drives (SSDs). Upgrading to an SSD can make a huge difference in terms of speed and performance.

    Cloning your HDD to your new SSD can be a great way to make the transition to the new drive while keeping all your data, settings, and programs intact. Your computer will run faster, be more responsive, and have more space for files, applications, and games. In this blog post, we’ll walk you through the steps to clone your HDD to your new SSD on Windows

    We’ll cover the tools you’ll need, the preparation needed before cloning, and the actual cloning process step-by-step. So sit back, relax, and get ready to upgrade your computer’s storage like a pro!

    Create a Backup

    If you’re looking to upgrade your computer’s hard drive, it’s essential to create a backup before beginning the process of cloning your HDD to an SSD. There are several methods to backup your data, including using an external hard drive, cloud-based storage, or a data backup software. It’s crucial to ensure your backup is complete before proceeding with the cloning process.

    Once your backup is complete, you can start the cloning process by using software designed for HDD to SSD cloning. A popular choice is the EaseUS Todo Backup software, which is user-friendly and efficient. Follow the instructions carefully, and you’ll successfully clone your HDD to an SSD without losing any data.

    Overall, creating and ensuring your backup is complete is the key to a smooth transition to a faster SSD.

    Back Up Important Data to External Drive

    Backing up important data is crucial, and one of the best ways to do this is by creating a backup on an external drive. Whether you have important documents, cherished photos, or a vast music library, storing them on just one device puts them at risk of loss or damage. That’s where backups come in handy.

    By having the data saved on multiple devices, you reduce the risk significantly. Creating a backup on an external drive is effortless and doesn’t require technical expertise. Just connect the drive to your device, select the data you’d like to backup, and drag and drop the files into the external drive.

    You can also use cloud-based backup services, but it is essential to note that cloud-based backups require an internet connection, which may not be available all the time. By creating a backup on an external drive, you have offline access to your data at all times and can be assured that your important files are secure.

    how do i clone a hdd to ssd wondows 10

    Create a System Image Using Built-in Tool

    If you want to ensure that your important files and data are always safe in case of a disaster or system failure, creating a system image backup is an essential step. Luckily, Windows provides a built-in tool that allows you to create a backup of your entire system, including your installed programs, settings, and personal files. To create a system image backup, all you have to do is open the Control Panel, go to the Backup and Restore option, and select “Create a system image.

    ” Windows will prompt you to choose a location to save the backup, such as an external hard drive or network location. Once you’ve chosen your backup location, Windows will start creating the backup. This process may take some time, depending on the size of your system and the speed of your computer.

    But in the end, you’ll have peace of mind knowing that you can easily restore your system to its previous state in case of an unexpected event. So, don’t delay creating a system image backup today and keep your important files and data safe and secure.

    Prepare the SSD

    If you’re wondering how to clone a HDD to SSD in Windows 10, one important step is to prepare the SSD properly. First, make sure your SSD is properly installed and recognized by your computer. You can do this by opening the Disk Management tool and checking if your SSD is listed.

    If not, you may need to update your drivers or check your BIOS settings. Next, you should format the SSD to remove any existing data and prepare it for cloning. This can also be done through the Disk Management tool.

    Finally, you may want to adjust your computer’s settings to optimize your SSD’s performance. Some recommended adjustments include disabling disk defragmentation and enabling TRIM. By properly preparing your SSD, you can ensure a smooth and successful cloning process.

    Connect the SSD to Your Computer

    Before you can connect your new SSD to your computer, you’ll need to make sure it’s properly prepared. Start by shutting down your computer and disconnecting all cables. Open up your computer case and locate an empty drive bay where the SSD can be mounted.

    Some cases may require additional mounting brackets which can generally be purchased separately. Attach the bracket to the SSD before mounting it in the drive bay. Once the SSD is securely in place, reconnect any necessary cables such as power and data cables.

    Now you’re ready to move on to the next step in the process of connecting your SSD to your computer and getting it set up for use. Don’t forget to keep your anti-static wrist strap on to prevent any damage during the installation process. By following these steps, you can ensure that your new SSD is properly prepared and ready to go.

    Initialize the SSD

    Initializing an SSD is an important step to ensure proper functioning of your solid state drive. Before initializing the SSD, make sure it is connected to your system. Next, access the Disk Management tool in Windows by right clicking the Windows key and selecting Disk Management.

    Once there, you should see your SSD listed as unallocated space. Right click on the unallocated space and select New Simple Volume. Follow the prompts on the screen to create a partition and format the drive to your desired file system, such as NTFS or exFAT.

    Keep in mind that the initialization process will erase all data on the SSD, so be sure to back up any important files beforehand. After the initialization is complete, your SSD is ready to be used for storing and accessing data quickly and efficiently.

    Partition and Format the SSD

    When you get a new SSD, it is important to prepare it for use by partitioning and formatting it. Partitioning means dividing the SSD into separate sections that can be used for different purposes. Formatting, on the other hand, involves setting up the file system that will be used to organize and store data on the drive.

    Both of these steps are necessary to ensure that your SSD is ready to use and will function properly. One of the main benefits of using an SSD is its superior speed and performance, but this can only be realized if the drive is properly prepared. To partition and format the SSD, you can use built-in tools in your operating system or third-party software.

    This process should be done before installing any operating system or data on the drive to avoid data loss or corruption. By taking the time to prepare your new SSD, you can ensure that it will function optimally and provide reliable performance for years to come.

    Clone the HDD to SSD

    If you’re looking to upgrade your computer’s storage, there’s no better option than cloning your hard disk drive (HDD) to a solid state drive (SSD) in Windows Cloning is essentially transferring all the contents from one drive to another, making an exact copy of your data and settings. First, you’ll need to purchase an SSD that has enough space to hold all your data.

    After that, download a cloning software like Macrium Reflect to start the process. Once the software is installed, connect your new SSD to your computer using a USB adapter, and run the cloning software. Select your HDD as the source drive and your SSD as the destination drive, and let the software do its job.

    Once the cloning is complete, shut down your computer and replace the HDD with the SSD, and you’re good to go. Enjoy your faster system and improved storage capacity with ease!

    Download and Install Disk Cloning Software

    Cloning your HDD to an SSD is a smart move that can significantly improve your computer’s performance. To get started, you’ll need to download and install disk cloning software. There are several great options available, including Clonezilla, Acronis True Image, and Macrium Reflect.

    Once you’ve chosen your preferred software, follow the instructions to install it on your computer. With your software installed and ready to go, you can start the cloning process. This involves copying all the data from your HDD over to your SSD, so be prepared to wait a little while as the process can take some time.

    When the cloning is complete, you’ll have a perfect replica of your old HDD on your new SSD, and your computer will be faster and more responsive than ever before. So, why wait? Get started today and give your computer the boost it deserves!

    Select Source Disk

    When it comes to upgrading your computer, cloning your old HDD onto a new SSD can make a world of difference in terms of speed and performance. However, before you can begin the cloning process, you’ll need to select your source disk. This is essentially the hard drive that you’ll be transferring all of your data from.

    When choosing a source disk, it’s important to take a few factors into consideration. First and foremost, you’ll want to ensure that the drive has enough space to accommodate all of your data. You’ll also want to make sure that the drive is in good working condition, as any errors or issues on the source disk can result in issues during the cloning process.

    Additionally, it’s a good idea to consider the speed of your source disk, as this can impact the overall speed of the cloning process. By taking these factors into account, you can ensure that you select the right source disk for your SSD cloning needs.

    Select Destination Disk

    When cloning your HDD to SSD, the first step is to select your destination disk. This disk will receive a copy of all the data on your original HDD, so it’s important to make the right choice. Generally speaking, you’ll want to choose an SSD with enough storage space to accommodate all your data and applications.

    You should also ensure that the SSD is compatible with your computer’s hardware and operating system. When making your selection, keep in mind that not all SSDs are created equal – some offer faster read and write speeds, while others have better durability or a longer warranty. Make sure to do your research and choose a reputable brand that suits your specific needs.

    With the right destination disk, cloning your HDD to SSD can be a quick and seamless process. So, take your time to select the best option for you, and enjoy the speed and efficiency of your new SSD.

    Start Cloning Process

    If you’re looking to transfer your files from your old HDD to a new SSD, cloning is a great option. Cloning is an exact copy of your old drive, meaning you won’t have to reinstall your operating system or transfer files manually. To begin the cloning process, you’ll need a cloning software program.

    There are plenty of free and paid options available online. Once you have your software downloaded and installed, connect your SSD to your computer. Then, use the cloning software to copy the contents of your old drive to your new SSD.

    The process may take a few hours, depending on the size of your old drive, so be patient. Once the cloning process is complete, you’ll have a fully functioning copy of your old drive on your new SSD. Just make sure to remove your old HDD and set your new SSD as your primary drive in your BIOS settings.

    This will ensure that your computer boots up from the new drive and you can begin using it immediately. Cloning your HDD to an SSD is a simple process that can improve the performance of your computer and make transferring files a breeze.

    Verify and Boot from SSD

    If you’re looking to upgrade from a traditional hard drive to a faster solid state drive (SSD), cloning your HDD to your new SSD can be a great option. Not only can you keep all of your files and settings intact, but your computer will boot up and run programs much faster. Fortunately, Windows 10 has built-in tools to make this process easy.

    First, you’ll need to verify that your SSD is properly connected and recognized by your computer. Once that’s done, you can use the built-in Disk Management tool to clone your HDD to your SSD. After that, you’ll want to double-check that your computer is set to boot from the SSD so you can fully take advantage of the increased speed.

    With a bit of patience and attention to detail, you’ll be up and running with your new SSD in no time.

    Perform a Verification Check

    It is important to perform a verification check when installing or upgrading an SSD in your computer. One crucial step is verifying and booting your system from the SSD. To do this, you must first enter the BIOS setup utility by pressing the correct key during startup (usually F2, F10, or Delete).

    Navigate to the boot order settings and ensure that the SSD appears as the first boot device. Once verified, save and exit the BIOS settings and wait for your system to boot up. If successful, your computer will now run faster and more efficiently with the new SSD as its primary storage device.

    Remember to always back up your data before making any changes to avoid losing important files. By verifying and booting from your SSD correctly, you will be able to fully benefit from its improved speed and performance.

    Switch to Boot from the SSD Drive

    After successfully cloning your old hard drive to the new SSD drive, the next important step is to verify if your computer has booted from the correct drive. Before changing the boot drive order in the BIOS settings, make sure that your computer recognizes the new SSD drive in the system. To verify this, restart your computer, and enter the BIOS settings by pressing the designated key (usually F2, F10, or Del) during the boot process.

    Once you’re in the BIOS settings, locate the boot options, and check if the SSD is listed as the primary boot device. If not, change the boot order by moving the SSD drive to the top of the list. Save the changes, and exit the BIOS settings.

    Your computer will restart automatically, and this time it should boot from the SSD drive. After successfully booting from the SSD, you’ll notice a significant improvement in the overall performance and speed of your computer. The read and write speeds of the SSD are much faster than the conventional hard drives, which means that your computer will now be able to open programs and files faster than before.

    Congratulations, you have successfully switched to boot from the SSD drive, and now you can enjoy the benefits of increased speed and performance on your computer.

    Conclusion

    Congratulations, you have now learned how to give your old HDD a facelift with a new and improved SSD! Cloning your HDD to SSD in Windows 10 may sound like a daunting task, but with the right tools and a little bit of know-how, it’s actually quite simple. Just remember to back up your data, choose the right software, and follow the steps carefully. And just like that, your computer will have a spring in its step and you’ll be whizzing through tasks like never before.

    It’s like your computer went to the gym and just did a serious workout!”

    FAQs

    What is the difference between cloning and copying a hard drive?
    Cloning creates an exact copy of the entire hard drive, including the operating system and all the installed programs and files. Copying only copies the data files, but not the operating system or programs.

    Can I clone a larger HDD to a smaller SSD?
    Yes, but only if the data on the HDD will fit onto the smaller SSD. You can use software that automatically adjusts the partition sizes during the cloning process.

    How long does it take to clone a hard drive to an SSD?
    The time it takes depends on the size of the hard drive, the amount of data being cloned, and the transfer speed of the drive connections. On average, it can take anywhere from 30 minutes to a few hours.
    Do I need any additional software to clone a hard drive to an SSD on Windows 10?
    Windows 10 comes with its own built-in cloning software called “System Image Backup” that you can use to clone a hard drive. However, many people prefer to use third-party software like Macrium Reflect or Acronis True Image for more advanced options.

    Do I need to format the SSD before cloning a hard drive to it?
    No, formatting the SSD is not necessary before cloning. The cloning process will erase any existing data on the SSD and replace it with a copy of the hard drive.

  • Step-by-Step Guide: Installing PNY SSD on your Mac like a Pro!

    If you’re looking to breathe new life into your Mac, upgrading to an SSD is a fantastic way to do it. An SSD can make even an older Mac feel brand new again, increasing its speed and performance. However, to enjoy these benefits, you need to install the SSD correctly.

    If you’re new to the process, don’t worry, we’ve got you covered. In this article, we’ll take you through the straightforward process of installing a PNY SSD on your Mac. By the end, you’ll be able to enjoy the speed and performance boost of your new SSD.

    So, let’s dive in!

    Check Mac Compatibility

    If you’re looking to upgrade your Mac with a PNY SSD, the first step is to ensure compatibility. Not all PNY SSDs are compatible with all Mac models, so it’s crucial to check before making a purchase. You’ll need to consider factors such as the interface, capacity, and form factor of the SSD, as well as the specific model of your Mac.

    Once you’ve determined compatibility, the actual installation process is fairly straightforward. You’ll need to remove the back panel of your Mac, locate the existing hard drive, and replace it with the PNY SSD. Make sure to securely fasten the SSD and reattach the back panel before powering on your Mac.

    Once your Mac is up and running, you’ll need to format the PNY SSD and transfer over your files and data. With a compatible PNY SSD properly installed, you’ll enjoy faster boot and application load times and improved overall performance.

    Verify your Mac’s Compatibility with PNY SSD

    If you’re planning to swap your old hard disk drive (HDD) for a new PNY solid state drive (SSD) on your Mac, it is crucial to verify your Mac’s compatibility with the chosen SSD model. Upgrading your Mac is a smart move, and SSDs offer faster data access times and improved performance. However, you must ensure compatibility before making the purchase.

    Various factors like form factor and interface can affect compatibility. For instance, only Macs launched from 2013 are equipped with PCIe SSDs, but those before 2013 have SATA-based SSDs. Therefore, it’s essential to check your Mac’s model and determine which SSD would work best with it.

    Failing to verify compatibility can result in data corruption, hardware malfunction, and worsened system performance. The good news is that most PNY SSD models are Mac compatible, and researching beforehand ensures that your upgrade process is seamless.

    how do you install a pny ssd to a mac

    Prepare your Mac for Installation

    Are you wondering how to install a PNY SSD to your Mac? Don’t worry, the process is simple and can significantly increase the speed and performance of your device. Before you begin, make sure to prepare your Mac by creating a backup of all your important files and data. This can be done through Time Machine or any other backup software of your choice.

    Next, ensure that your Mac is turned off and unplugged from any power source. Open up your Mac and locate the hard drive bay. Remove the old hard drive and replace it with the new PNY SSD.

    Secure it in place with the screws provided. Finally, turn on your Mac and follow the instructions for installing the operating system onto your new SSD. With your new PNY SSD, you’ll notice faster speeds and improved performance on your Mac.

    Back up your Mac Data

    Backing up your Mac data is extremely important before preparing for installation. You don’t want to lose any important files or programs in the process. To begin, make sure you have an external hard drive that can support all of your data.

    Next, use Time Machine to create a full backup of your Mac onto the external hard drive. This will include all of your files, applications, settings, and preferences. Once the backup is complete, you can then proceed with the installation process without fear of losing any important data.

    Using Time Machine is an easy and effective way to backup your data and ensure that your Mac is properly prepared for installation. With this simple step, you can have peace of mind knowing that your important information is safe and secure.

    Shutdown your Mac

    When it’s time to upgrade your Mac operating system, it’s important to prepare your computer for a smooth installation. One key step is to shut down your Mac properly before beginning the installation process. Make sure all apps are closed and any important files are saved before proceeding.

    This will help ensure that your Mac’s memory is clear and ready to receive the new operating system. Additionally, be sure to have a solid internet connection and enough power to sustain the installation process. By taking these preparatory steps, you can help ensure that your Mac is ready for a successful upgrade.

    Physical Installation of PNY SSD

    If you’re looking to increase the speed and performance of your Mac, installing a PNY SSD is a great option. The physical installation process is fairly simple and can be done with just a few tools. First, shut down your Mac and disconnect all cables.

    Next, open up the case using a screwdriver and locate the SSD bay. Carefully install the PNY SSD into the bay and secure it with screws. Connect the cables to the SSD and reassemble the case.

    Once everything is in place, turn on your Mac and follow the prompts to initialize the SSD. Now you’re ready to enjoy the benefits of faster data transfer speeds and improved overall performance. With this easy process, it’s no wonder more and more people are choosing to upgrade their Mac with a PNY SSD.

    Remove Mac’s Back Cover

    If you’re looking to upgrade your Mac’s internal storage capacity with a new PNY SSD, the first step is to remove the back cover of your computer. This process may vary slightly depending on the model and year of your Mac, but generally involves unscrewing the screws on the bottom panel and gently prying it off with a tool or your hands. It’s important to be cautious and gentle during this step, as you don’t want to damage any internal components or cables.

    Once the back cover is removed, you’ll have access to the internal components of your Mac and can begin the process of installing your new PNY SSD. Remember to consult your Mac’s user manual or online resources for specific instructions on how to remove the back cover and install your new SSD safely and effectively. Overall, upgrading your Mac’s internal storage capacity with a PNY SSD can greatly improve its performance and storage capabilities, making it a worthwhile investment for any Mac user.

    Attach PNY SSD to the Connector

    To physically install your PNY SSD, the first step is to attach it to the connector on your motherboard. Make sure to locate the appropriate SATA or M.2 connector that is available on your motherboard and connect the SSD to it.

    You can use the screws that come with your SSD to firmly attach it to the motherboard. Once you have connected your PNY SSD, it is recommended that you check the BIOS settings to ensure your computer recognizes the new drive. You may need to enable SATA or M.

    2 devices in your BIOS settings to guarantee your system identifies the new drive. Overall, connecting your PNY SSD to the connector on your motherboard is a simple and straightforward process that you can easily complete in a matter of minutes. Remember to take your time and follow the manufacturer’s instructions so that you don’t damage either the SSD or your motherboard.

    With a successfully installed PNY SSD, your computer’s performance will significantly improve, with faster boot time and quicker access to your apps and files.

    Secure SSD with Screws

    When it comes to securing an SSD, screws may seem like a simple solution, but they can provide a reliable and practical method of physical installation for your PNY SSD. Not only do they prevent the SSD from accidentally disconnecting, but they also add an extra layer of protection against unauthorized tampering. The screws are easy to install and remove, providing the flexibility to switch or replace the SSD if needed.

    Additionally, the added benefit of using screws is that it eliminates the need for adhesives or tape, which can damage the SSD or leave a sticky residue behind. Therefore, when considering security measures for your PNY SSD, using screws is an effective and practical way to ensure that your data stays safe and secure.

    Booting and Configuration

    Installing a PNY SSD to a Mac is a pretty straightforward process. First, you’ll need to turn off your Mac and unplug it. Then, locate the drive bay and unscrew it.

    Carefully remove the old drive and insert the PNY SSD into the empty slot. Once the SSD is securely in place, screw the drive bay back in and reattach any cables. Boot up your Mac and navigate to the Disk Utility app to format the SSD.

    After that, you’re ready to configure your new drive and start using it. Overall, installing a PNY SSD is a quick and easy way to improve your Mac’s performance, so don’t hesitate to give it a try.

    Boot into Recovery Mode

    Booting into recovery mode is an essential troubleshooting step when your computer encounters any issues. Whether it’s a virus, a software glitch, or a hardware problem, recovery mode can help you diagnose and fix the problem. To boot into recovery mode, you first need to shut down your computer.

    Then, press the power button to turn it back on, and as soon as you see the manufacturer’s logo appear, press the designated key to enter the boot menu. From there, select the recovery mode option and follow the prompts to troubleshoot and repair your system. Keep in mind that the key to access boot menu may vary depending on your computer’s manufacturer, so it’s best to refer to the documentation or search online to find the correct key.

    By using recovery mode, you can avoid costly repairs and get your computer back to working order in no time.

    Initialize and Format New PNY SSD

    So, you’ve just gotten your hands on a brand new PNY SSD. Congrats! Now, it’s time to get it up and running. First things first, you’ll need to connect it to your computer.

    Once that’s done, go ahead and power on your machine. Your computer should recognize the new SSD, but you’ll need to head into the BIOS to ensure it’s properly formatted and ready for use. The process for doing this will vary based on your specific computer and BIOS setup, so it’s important to refer to your computer’s manual or online resources for instructions.

    Once you’re in the BIOS, locate the section for storage settings. From here, you should see the new SSD listed alongside any other storage devices connected to your computer. Make sure the SSD is set to be the boot drive and then format it with your preferred file system.

    Congratulations, you’re now all set to start using your new PNY SSD!

    Restore Backup Data

    Booting and Configuration Once you have successfully restored your backup data, the next step is to configure your system. This involves booting up your device and adjusting the settings to your desired preferences. The booting process may vary depending on the device you are using, but it generally involves pressing a specific key or combination of keys to access the boot menu.

    From there, you can choose the device you want to boot from, such as your hard drive or USB drive. Once your device has booted up, you can begin configuring your settings. This may include adjusting your display resolution, setting up your network connection, and installing any necessary drivers.

    It’s important to take the time to ensure everything is set up correctly so that your system runs smoothly. With proper booting and configuration, you’ll be back up and running in no time!

    Conclusion

    In conclusion, installing a PNY SSD to a Mac is as easy as sliding a piece of butter on a hot toast! With a few simple steps, you can transform your snail-paced Mac into a lightning-fast machine. So, what are you waiting for? Grab your PNY SSD and upgrade your Mac like a pro!”

    FAQs

    Is a PNY SSD compatible with a Mac?
    Yes, PNY SSDs are compatible with Macs.

    What tools do I need to install a PNY SSD on a Mac?
    You will need a screwdriver and a SATA-to-USB cable to clone your existing drive.

    Can I install a PNY SSD into a MacBook Air?
    It depends on your specific model of MacBook Air, but most can have their SSDs upgraded.

    What software do I need to clone my existing drive to a PNY SSD?
    You can use software like Carbon Copy Cloner or SuperDuper! to clone your existing drive onto the PNY SSD.

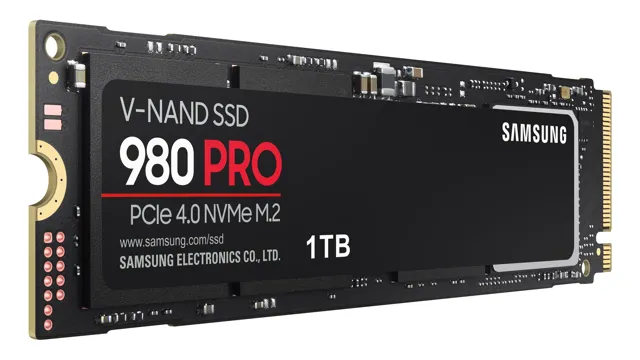
  • Boost Your System Speed: Step-by-Step Guide on How to Install 980 Pro SSD

    Are you tired of slow boot times, sluggish program launches, and endless file transfers? If so, it may be time to upgrade your computer’s storage to an SSD drive. And not just any SSD, but rather the cutting-edge 980 Pro SSD from Samsung. This high-performance drive boasts lightning-fast read and write speeds of up to 7,000 and 5,000 MB/s, respectively, making it ideal for power users and gamers.

    But how do you install it? Don’t worry, we’ve got you covered with this step-by-step guide on how to install the 980 Pro SSD in your computer. So grab a cup of coffee and let’s get started!

    Preparation

    So you just received your Samsung 980 Pro SSD and you’re excited to install it, but before you start, there are a few things you need to prepare. First and foremost, make sure your computer is turned off and unplugged. If you’re replacing your current SSD or hard drive, be sure to back up all your important files to an external drive or cloud storage before proceeding.

    You’ll also need a screwdriver to open up your computer and secure the new SSD in place. Take note of the type of connection your computer uses for storage – SATA or PCIe – as that will determine how you’ll install the 980 Pro SSD. Lastly, ensure that you have all of the necessary drivers and software downloaded onto your computer before turning it back on.

    With these preparations done, you’re ready to begin the installation process and start enjoying the lightning-fast speeds of your new Samsung SSD.

    Check Compatibility with Your System

    When it comes to checking compatibility with your system, there are a few key steps you can take to ensure a smooth installation experience. Firstly, make sure you have all the necessary system requirements listed by the developer or manufacturer of the software you want to install. This typically includes details like the operating system version, processor type and speed, RAM, and storage space.

    Next, it’s important to perform any necessary system updates or upgrades to ensure your computer is running the most recent software versions. This will not only help with overall system stability, but may also include new drivers or other components that are required for your software. By being prepared beforehand, you can save yourself a lot of frustration and potential errors during the installation process.

    Remember, it’s always better to double check compatibility before investing your time and money in a software program that may not work on your computer.

    how to install 980 pro ssd

    Gather Necessary Tools

    When it comes to starting a new project, gathering the necessary tools should be the first step. Preparation is key to achieving success, and having the right equipment can save you time and frustration. Depending on the project, different tools may be required.

    For example, if you’re planning on doing some woodworking, you’ll need saws, chisels, and sandpaper. On the other hand, if you want to start a vegetable garden, you’ll need shovels, rakes, and hoes. It’s essential to evaluate the scope of your project and gather all the tools you’ll need beforehand.

    This way, you’ll be ready to start working when inspiration strikes. Don’t forget to consider the quality of your tools. Investing in high-quality equipment may seem expensive at first, but it can save you money in the long run by reducing the risk of accidents and allowing you to complete tasks efficiently.

    By taking the time to gather the necessary tools, you’ll ensure that you’re well-prepared for any project that comes your way.

    Installation

    For those looking to upgrade their computer’s storage with the blazing speed of the Samsung 980 Pro SSD, installation is a breeze. Firstly, ensure that your motherboard supports either PCIe 0 or at the very least PCIe

    0 to fully take advantage of the drive’s speed. If so, simply locate the M.2 slot on your motherboard, gently insert the drive and screw it into place.

    If your computer does not support PCIe 0, head into your BIOS settings and ensure that your boot mode is set to UEFI rather than legacy. From there, your computer should recognize the drive and allow you to format and partition it.

    With the 980 Pro’s read and write speeds going up to 7,000MB/s and 5,000MB/s respectively, you’ll instantly notice a difference in your computer’s performance. So don’t be intimidated – upgrading your computer’s storage has never been easier with the Samsung 980 Pro SSD.

    Shut Down and Unplug Your Computer

    When it comes to installing new hardware or software on your computer, it’s important to shut down and unplug your computer before beginning the installation process. This might seem like an obvious step, but it’s one that many people overlook in their eagerness to get started. Shutting down your computer ensures that no programs or processes are running that could interfere with the installation process, while unplugging it helps to prevent any potential power surges or other electrical issues that could cause damage to your hardware.

    Think of it like performing surgery on your computer. Just like a surgeon prepares the patient by putting them under anesthesia and making sure they’re stable, you need to prepare your computer by shutting it down and unplugging it before you begin any installation. This step takes just a few seconds but can save you a lot of headaches down the road.

    And, of course, don’t forget to plug your computer back in and turn it on once the installation is complete! By taking these simple precautions, you can ensure a smooth and successful installation process, without any unexpected interruptions or technical difficulties.

    Open Up Your Computer Case

    When installing new hardware to your desktop computer, the most crucial step is opening up your computer case. This can seem intimidating at first, but it’s a simple process that only requires a few tools and careful attention. First, locate the screws that secure the case in place and use a screwdriver to remove them.

    Once the case is open, carefully lay it down and assess the internal components to determine where you’ll need to make your hardware installation. Remember to handle all parts with care, as they are delicate and can be easily damaged. By opening up your computer case and properly installing new hardware, you can improve the performance of your computer and enhance your overall computing experience.

    Install the 980 Pro SSD

    If you’re looking for a faster and more efficient storage solution, you might want to consider installing the 980 Pro SSD from Samsung. This solid-state drive boasts read and write speeds of up to 7,000 and 5,000 MB/s, respectively, making it one of the fastest SSDs available in the market. However, before you can start enjoying its blazing-fast performance, you’ll need to install it properly on your computer or laptop.

    The installation process may vary depending on your device, so it’s essential to consult the manual or look for online resources that can guide you through the process. Generally, though, you’ll need to open up your computer, locate the PCIe NVMe slot, and firmly insert the SSD into it until it clicks into place. After that, you’ll need to secure the SSD using the screws provided and reconnect any cables that you’ve detached.

    Once you’ve successfully installed the 980 Pro SSD, you’ll want to initialize it and transfer your data to it. With its outstanding speed and reliability, you can expect a significant improvement in your computer’s overall performance, whether you’re gaming, editing, or just browsing the web. So, go ahead and give it a try!

    Close Up Your Computer Case

    When it comes to building your own computer, closing up the computer case is an important step in the installation process. Before sealing the case, it’s important to ensure that all components are properly installed, including the motherboard, power supply, and any additional components such as a graphics card or storage devices. Taking the time to double-check connections and make any necessary adjustments will prevent any potential issues down the line.

    Once you’re satisfied that everything is in place, it’s time to close up the case. This will help protect your components from dust and other potential hazards, as well as give your computer a clean and polished appearance. So, while it may seem like a small step, closing up your computer case is actually a crucial part of the installation process that shouldn’t be overlooked.

    Configuration

    Installing a 980 Pro SSD is a great way to boost the performance of your computer. To get started, first you need to ensure that your motherboard is compatible with PCIe 0.

    If it’s not, unfortunately this SSD won’t work with your system. Once you’ve confirmed compatibility, you can begin installation. First, locate the M.

    2 slot on your motherboard, then insert the SSD at an angle, gently pushing it down until it clicks into place. Next, use the provided screw to secure the SSD in place. After installation, you’ll need to configure the SSD in your computer’s BIOS settings.

    Make sure that the SSD is recognized and set as your boot drive. This will ensure that your computer boots up quickly and your software runs smoothly. With these steps, you’ll have your 980 Pro SSD up and running in no time, delivering faster load times and better overall performance for your machine.

    Check BIOS/UEFI Settings

    When it comes to your computer’s BIOS/UEFI settings, it’s important to check that everything is configured correctly. This is because any wrong settings can lead to system instability, slow performance, and even boot failures. One of the first things you should do is check the boot order to make sure the correct boot device is selected.

    If you have multiple hard drives or SSDs, make sure the one with your operating system is set as the boot device. You should also check the RAM settings to ensure they are set to their recommended speed and timings. If the RAM settings are too high or too low, this can cause crashes or other issues.

    Additionally, it’s important to check the CPU settings and make sure they are set to the correct values for your processor. By taking the time to check your BIOS/UEFI settings, you can ensure your computer is running at its best and avoid any potential problems.

    Initialize Your 980 Pro SSD

    Initializing your 980 Pro SSD is an important part of maximizing its performance. The first step is to configure it properly. To do this, you will need to access your computer’s BIOS settings.

    Once you are in the BIOS, navigate to the storage configuration section. Here, you can set the 980 Pro SSD as the primary boot drive and configure it to run at full speed. You can also tweak additional settings, such as enabling AHCI mode for faster data transfer rates.

    It is important to note that improper configuration can lead to slower speeds and even data corruption. So, it is important to follow the manufacturer’s instructions carefully and make sure you understand what each setting does before changing it. With proper configuration, your 980 Pro SSD can provide lightning-fast speeds and reliable performance for years to come.

    Conclusion

    Congratulations! You’ve successfully navigated the SSD-installation maze and emerged victorious. By following these simple steps, you’ve managed to upgrade your rig with Samsung’s lightning-fast 980 Pro SSD, making it faster and more efficient than ever before. Now sit back, relax, and soak up all that blazing speed and top-of-the-line performance.

    With your new SSD installed, there’s no limit to how much you can achieve. Just remember, patience and care are key to a successful installation. Whether you’re a seasoned pro or a tech newbie, know that with the right tools and information, you can accomplish anything.

    So go forth, and let your Samsung 980 Pro SSD take you on a wild ride of ultra-fast storage performance!”

    FAQs

    What kind of PCIe slot do I need to install the 980 Pro SSD?
    You will need a PCIe 4.0-compatible slot for optimal performance. However, the 980 Pro is backward compatible with PCIe 3.0 slots.

    Do I need to install any drivers for the 980 Pro SSD?
    No, the 980 Pro SSD uses standard NVMe drivers that are included in most modern operating systems.

    Can I use the 980 Pro SSD as a boot drive?
    Yes, you can install your operating system on the 980 Pro SSD and use it as your primary boot drive.

    Is it difficult to install the 980 Pro SSD?
    Installing the 980 Pro SSD is relatively easy if you have some experience with computer hardware. However, if you are not comfortable with opening up your computer and installing hardware components, it may be best to seek professional assistance.

  • Unlock the Power of SSD: A Comprehensive Guide to Making Your Laptop Recognize the Upgrade

    If you have recently purchased a new laptop or are planning to do so, you may be wondering if it has a Solid State Drive (SSD) or not. SSDs have become increasingly popular in recent years due to their superior performance and faster data retrieval times. They are a significant upgrade from traditional Hard Disk Drives (HDDs) and will dramatically improve your overall computing experience.

    In this blog, we will look at some simple ways to identify if your laptop has an SSD. By the end of this article, you will be able to get a sense of whether your laptop is equipped with an SSD or not.

    Check Your BIOS Settings

    If you’re struggling to get your laptop to recognize your new SSD, don’t worry! There is a simple fix that you might have overlooked. You need to check your BIOS settings. BIOS stands for Basic Input/Output System and it is responsible for managing the communication between different parts of your computer.

    This includes the hard drive and the SSD. Sometimes, the BIOS settings can be set to only recognize the hard drive and not the new SSD. To change this, you need to restart your laptop and enter the BIOS settings.

    The process might be slightly different depending on your laptop model, but you should be able to find the instructions on the manufacturer’s website or a quick Google search. Once you’re in the BIOS settings, look for the option to change the boot order. This should allow you to select the SSD as the primary boot device.

    Save the changes and restart your laptop. Your computer should now recognize the SSD and you’ll be good to go!

    Enter BIOS Setup Menu

    Entering the BIOS setup menu can be an intimidating task for some people, but it is a crucial step towards optimizing your computer’s performance. The BIOS, which stands for Basic Input/Output System, is essentially the software that controls your computer’s hardware. To access the BIOS setup menu, you need to restart your computer and press the designated key when the manufacturer’s logo appears.

    The key to enter the BIOS can vary depending on the computer, so it’s best to refer to the manufacturer’s documentation or try pressing F2, F10, or Delete key. Once you’re in the BIOS setup menu, you can customize various settings related to your computer’s hardware, such as the boot order, CPU frequency, and memory timings. However, it is important to be cautious when adjusting these settings since some of them can cause your computer to malfunction if set improperly.

    Always make sure to take note of the default settings before changing anything and consult with a professional if you’re not sure about what you’re doing. By checking and adjusting your BIOS settings, you can ensure that your computer is running at its optimal performance.

    how do i get my laptop to recognize ssd

    Navigate to SATA Configuration

    When it comes to optimizing your computer’s performance, checking your BIOS settings is a crucial first step. One important setting to pay attention to is the SATA Configuration. This determines how your hard drives communicate with the rest of your system and can have a significant impact on overall speed and efficiency.

    To navigate to this setting, you can usually access your BIOS by pressing a key like F2 or Del during boot-up. Once in the BIOS menu, look for a section labeled “Advanced” or “Storage” and then locate the SATA Configuration option. From there, you can make any necessary adjustments, such as enabling AHCI mode or disabling unused ports.

    By taking the time to properly configure your SATA settings, you can ensure that your computer is running at its best capacity.

    Switch to AHCI Mode

    “Switch to AHCI mode” The BIOS settings play an essential role in ensuring that your computer runs efficiently. One particular setting you might want to check is the AHCI (Advanced Host Controller Interface) mode. This feature is particularly recommended for solid-state drives (SSDs) as it allows for faster data transfer and enables features like hot-swapping.

    Checking if your computer is set to AHCI mode is simple, but the steps might differ depending on your motherboard’s manufacturer. To access your BIOS, restart your computer, and press the appropriate key, usually F2, F10, or Delete, depending on your device’s manufacturer. Once you’re in the BIOS, look for the SATA mode, storage configuration or disk controller.

    If the option is set on IDE or RAID, you need to switch it to AHCI mode. Changing this setting may impact your computer’s stability, so it’s recommended that you back up your data before making any changes. After making the switch, you should notice an improvement in the speed and performance of your computer.

    So if you’re using an SSD, and you haven’t checked your BIOS settings, taking the time to switch to AHCI mode could significantly improve your computer’s overall performance.

    Initialize Your SSD

    If you’ve just installed an SSD in your laptop but it’s not being recognized, don’t worry! It’s a common issue that is easily fixable. The first thing you need to do is initialize your SSD. This means that you need to prepare your SSD for use by creating a partition and formatting it.

    You can do this by going to Disk Management in Windows and locating your SSD. Right-click on it and select “New Simple Volume.” Follow the prompts to create the partition and assign a drive letter.

    Once you have created the partition, right-click on it and select “Format.” Choose the file system and allocation size, and then click “Start.” This may take a few minutes to complete, but once it’s done, your SSD should be recognized by your laptop.

    Don’t forget to transfer your operating system and files over to your new SSD to fully benefit from its faster speeds. Overall, initializing your SSD is a crucial step in getting it recognized by your laptop and optimizing its performance.

    Format Your SSD Drive

    Formatting and initializing an SSD drive is essential for optimizing its performance and increasing its lifespan. When you buy a new SSD, it comes unformatted and uninitialized, meaning that it isn’t set up for use yet. The first step is to format it, which means erasing everything on the drive, setting up a file system, and partitioning it into logical drives or volumes.

    You can use Windows’ built-in Disk Management tool or third-party software to format your SSD, but make sure to choose the right file system as it affects the SSD’s speed and compatibility. After formatting, you need to initialize your SSD, which involves setting up a master boot record or GUID partition table to enable the OS to recognize the drive and access its data. Initializing an SSD is a one-time process, and you can do it through the Disk Management tool as well.

    Simply right-click on the unallocated space of the SSD and choose “Initialize Disk” to start the process. In summary, formatting and initializing an SSD is a crucial step in setting it up for daily use, so make sure to follow the proper guidelines and choose the suitable settings for your needs.

    Assign Drive Letter

    When initializing your SSD, one important step is to assign it a drive letter. This allows you to access the drive and its contents through your file explorer. To assign a drive letter, simply right-click on the start menu and select “Disk Management”.

    Here, you should see your SSD listed alongside any other drives you have connected to your computer. Right-click on the SSD and select “Change Drive Letter and Paths”. From here, you can select an available letter and assign it to your SSD.

    Once this is done, you should be able to access your SSD as you would any other drive on your computer. It’s important to note that assigning a drive letter is a crucial step in initializing your SSD and should not be skipped. Doing so could result in difficulty accessing your drive or even data loss.

    By following these simple steps, you can ensure that your SSD is properly initialized and ready to use for all your storage needs.

    Initialize Disk

    “So, you’ve got a brand new SSD and you’re ready to get it up and running. Before you can start using it, though, you’ll need to initialize the disk. Essentially, this means setting it up so that your computer can recognize it and use it as a storage device.

    Luckily, it’s a pretty simple process. First, you’ll need to open up Disk Management (you can do this by searching for it in the Start menu). From there, you should see your new SSD listed as an unallocated space.

    Right-click on it and select “New Simple Volume.” This will launch a wizard that will guide you through the process of formatting the drive and assigning it a drive letter. Once you’ve completed the wizard, your new SSD will be ready to use.

    Congratulations on expanding your storage capabilities!” Keyword: initialize disk

    Update Your Drivers

    One of the reasons why your laptop might not recognize an SSD is because it needs updated drivers. When you plug in your new SSD, your laptop may not understand the drivers for that specific product. Updating drivers is a simple process that can be completed in just a few easy steps.

    First, go to the manufacturer’s website and search for your laptop’s model. Download the latest drivers from there and install them on your laptop. This will ensure that your laptop recognizes your SSD and all its features.

    It is crucial to have updated drivers to avoid compatibility issues and ensure peak performance. So, if you are having issues with your laptop recognizing your SSD, take some time to update your drivers and enjoy the benefits of a smooth and efficient computing experience.

    Open Device Manager

    Updating your drivers can help improve the performance and stability of your computer system. One of the ways to update drivers is through the Device Manager. To open the Device Manager, click on the Start menu and search for “Device Manager.

    ” Alternatively, you can press the Windows key + X on your keyboard and select “Device Manager” from the list that appears. Once you’ve opened the Device Manager, you’ll see a list of all the devices and drivers installed on your computer. From here, you can update drivers for specific devices by right-clicking on the device and selecting “Update driver” from the options.

    This will prompt you to either search for updated drivers online or choose a specific location on your computer where the updated driver is located. Keep in mind that not all devices will have updates available, but it’s always a good idea to check regularly to ensure your system is running smoothly.

    Check for Hardware Changes

    Updating your drivers is an essential step towards fixing hardware issues on your computer. As your computer’s hardware evolves over time, so must the software that controls it. Outdated drivers can lead to malfunctions, slowdowns, and sometimes even complete system crashes.

    Fortunately, updating your drivers is a straightforward process, and there are several tools available to help you do it. Some of these tools will detect outdated drivers and automatically download and install the latest versions for you, while others require you to manually search for and download them yourself. Whichever method you choose, the important thing is to ensure that your drivers are up to date.

    So the next time you experience hardware issues on your computer, be sure to check for updates to your drivers – it just might solve the problem!

    Conclusion

    In conclusion, getting your laptop to recognize an SSD is like teaching an old dog new tricks. It may take some patience and trial-and-error, but with the right guidance, you can show your laptop that SSDs are the way of the future. So make sure to check your BIOS settings, update your drivers, and give your laptop a little TLC – before you know it, your SSD will be recognized and you’ll be living in the fast lane.

    FAQs

    What are the possible reasons why my laptop is not recognizing my SSD?
    There could be multiple reasons for this, including driver issues, outdated BIOS, physical connection issues, or a faulty SSD.

    How can I check if my laptop’s BIOS is updated to recognize my SSD?
    You can check the laptop manual or manufacturer’s website to see if a BIOS update is available. If yes, download the update and follow the installation instructions carefully.

    Is it possible that my laptop is not recognizing my SSD because of a physical connection issue?
    Yes, it is possible. Try unplugging and re-plugging the SSD from its port. If this doesn’t work, try using a different cable or port to connect the SSD.

    My laptop is still not recognizing my SSD. What else can I do?
    You can try updating the SSD’s drivers, checking for any conflicts in the Device Manager, or even trying the SSD on a different computer to see if it’s a hardware issue. If all else fails, it might be time to replace the SSD.

  • Unveiling the Differences: SDRAM vs. SSD – Which Performs Better?

    Are you trying to decide between SDRAM and SSD for your computer? If so, you’re not alone! Both technologies play a crucial role in the performance and storage of modern computers. But what are the differences between SDRAM and SSD, and how do they affect your computing experience? In this article, we’ll compare and contrast these two technologies, exploring their benefits and limitations. By the end, you’ll have a better understanding of which one is right for your needs.

    So, let’s dive in and explore the world of SDRAM and SSD!

    What is SDRAM?

    When it comes to computer memory, two terms that are frequently mentioned are SDRAM and SSD. Synchronous Dynamic Random Access Memory (SDRAM) is a type of memory that is commonly used in desktop computers, laptops, and servers. SSD, on the other hand, stands for Solid State Drive and is a newer technology.

    But how does SDRAM compare to SSD? While both are used for memory storage, they have different functions. SDRAM is volatile memory, meaning that it requires power to hold data. SSD, on the other hand, is non-volatile and retains data even when powered off.

    Additionally, SDRAM is faster in terms of data transfer, but SSDs have better storage capacity and are more durable. Ultimately, the choice between SDRAM and SSD depends on individual needs and preferences.

    Definition and Functionality

    SDRAM, also known as Synchronous Dynamic Random Access Memory, is a type of random-access memory used in computers and other electronic devices. It is called synchronous because it is synchronized with the system bus clock, which means it can transfer data at a faster rate compared to asynchronous DRAM. SDRAM is used to store and transfer data quickly, making it integral to the performance of electronic devices.

    It operates by synchronizing with the system clock and transferring data on every clock cycle. With its high bandwidth and low latency, SDRAM is widely used in applications such as gaming, video editing, and other memory-intensive tasks. In a nutshell, SDRAM plays a crucial role in the efficient functioning of computers and other electronic devices, and its significance is only set to grow further with the evolution of technology.

    how does sdram compare to ssd

    Performance and Speed

    SDRAM, performance, speed Have you ever wondered how your computer manages to execute tasks so quickly? That’s where SDRAM comes into play. SDRAM or Synchronous Dynamic Random Access Memory is a type of memory module that is used to store and retrieve data at a high speed. Unlike its predecessor, DRAM (Dynamic Random Access Memory), SDRAM is synchronized with the computer’s clock speed, providing a higher performance and greater speed to the system.

    With SDRAM, you can access data quickly, allowing your computer to handle multiple tasks simultaneously. So, if you are looking to boost your computer’s performance and speed, then upgrading the DRAM to SDRAM may be the perfect solution. With its synchronous operation, SDRAM ensures that data is transferred at a faster rate, providing a smooth and efficient computing experience.

    So say goodbye to sluggishness and hello to a faster, more efficient computing experience with SDRAM.

    What is SSD?

    When it comes to comparing SDRAM and SSD, it’s important to understand that they serve different functions. SDRAM, or synchronous dynamic random-access memory, is commonly used as temporary storage for running applications and managing tasks on a computer. SSD, or solid-state drive, is a type of storage device that uses flash memory to permanently store data.

    While both SDRAM and SSD contribute to the efficient operation of a computer, SSDs provide faster access to data and overall system performance. In terms of speed, SDRAM excels in burstiness and provides quick access to small amounts of data, while SSDs have higher sequential read speeds best suited for larger data requests. Ultimately, the choice between SDRAM and SSD depends on your specific computing needs, but the combination of both can deliver a seamless and high-performing system.

    Definition and Functionality

    SSD or Solid State Drive is a type of mass storage device that has no moving mechanical parts, unlike traditional hard disk drives (HDD). Instead, it uses electronic circuits, which make it more reliable, faster, and energy-efficient. SSDs come in different form factors and capacities, making them suitable for various applications, from personal computers to data centers.

    They use NAND flash memory to store data and have higher read and write speeds than HDDs, resulting in faster boot times and application loading times. Additionally, SSDs are more durable and shock-resistant compared to HDDs, making them ideal for portable devices like laptops and tablets. Overall, SSDs have transformed the storage industry by providing faster, reliable, and efficient storage solutions.

    Performance and Speed

    When it comes to having a fast and efficient computer, one of the most important components that you should consider is SSD. SSD stands for Solid State Drive, and it’s a type of storage device that uses flash memory to store data. Unlike traditional hard disk drives, SSDs have no moving parts, which means they can access data much faster and more reliably.

    This results in faster boot times, faster application launch times, and overall better performance for your computer. SSDs come in a range of storage capacities, from a few hundred gigabytes to several terabytes, and they can be used in desktops, laptops, and even servers. If you’re looking to upgrade your computer’s performance and speed, investing in an SSD is definitely worth considering.

    Comparison: SDRAM vs SSD

    When it comes to comparing SDRAM and SSD, the first thing to note is that they are two very different types of memory. SDRAM or Synchronous Dynamic Random Access Memory is the type of memory found in your computer’s RAM. It is volatile memory, which means that it can only hold data temporarily, and it needs to be constantly refreshed to maintain the data stored in it.

    On the other hand, SSD or Solid State Drive is a type of non-volatile memory that is used for long-term storage of data. SSDs are much faster than traditional hard drives, and they are more reliable. When comparing SDRAM and SSD, it’s important to note that they serve two different purposes.

    SDRAM is used for quick access to data that is frequently used, while SSDs are used for long-term storage of data. So, while SDRAM is faster when it comes to accessing frequently-used data, SSDs are better when it comes to storing large amounts of data over a long period of time. Ultimately, the choice between SDRAM and SSD comes down to your specific needs, and the type of computer you have.

    Speed and Performance

    When it comes to speed and performance, two key technologies usually come to mind: SDRAM and SSD. SDRAM stands for synchronous dynamic random-access memory, while SSD stands for solid-state drive. Both have their unique features and benefits, but how do they compare in terms of speed and performance? SDRAM is a type of computer memory that allows for high-speed data access.

    It is used as the main memory in computers and other digital devices. It is faster than traditional memory such as DRAM and delivers data at a higher bandwidth. On the other hand, SSD is a type of storage device that stores data on interconnected flash memory chips.

    It uses no moving parts, which means it is faster than traditional hard drives that use spinning disks. When comparing SDRAM vs SSD, SSD has the upper hand when it comes to speed and performance. SSDs can deliver faster read and write speeds and respond more quickly to commands than SDRAM.

    This is because SSDs have a faster data transfer rate and access time than SDRAM. However, SDRAM still has its advantages, particularly when it comes to random access to data. In conclusion, both SDRAM and SSD have their unique advantages and disadvantages when it comes to speed and performance.

    SSDs are generally faster and more efficient, but SDRAM is still an essential component in modern computers and digital devices. Ultimately, the choice between SDRAM vs SSD depends on your specific needs and budget.

    Durability and Reliability

    When it comes to durability and reliability, there is a significant difference between SDRAM and SSD. SDRAM, or synchronous dynamic random-access memory, is a type of volatile memory that can only retain data when power is supplied to it. This means that it is not practical for long-term storage use, and frequent power failures can lead to data loss.

    On the other hand, SSD, or solid-state drive, is a non-volatile, flash-based storage device that uses NAND-based flash memory for long-term data storage. It has no moving parts, making it more durable and reliable than SDRAM. In terms of durability, SDRAM is sensitive to any physical shock, and if not properly seated in the socket, it can break easily.

    Also, since it relies on a capacitor to keep the data, any disturbance in the power supply or sudden power loss can cause data loss. Meanwhile, SSD does not have any moving parts, making them more resistant to physical shocks and vibrations. Additionally, SSD uses power-efficient technology which helps extend the battery life of the device.

    Regarding reliability, SSDs offer higher endurance due to its improved stability of NAND-based flash memory. It has no head actuator, which is often a cause of failure in traditional hard drives. In contrast, frequent memory upgrade and replacement in SDRAM increases the likelihood of failure.

    In conclusion, while SDRAM may be useful in specific situations, it is much less durable and reliable than SSD. For a long-term, reliable storage device that can withstand shock and power supply issues, SSD is the better option.

    Storage Capacity

    When it comes to storage capacity, there’s no doubt that SSDs are the clear winner over SDRAM. SSDs can store much more data than SDRAM and provide faster access times. SDRAM, on the other hand, is primarily used as temporary storage for data that’s being actively used by the computer’s processor.

    This means that SDRAM can’t store as much data as an SSD and is much slower to access. Additionally, SDRAM requires constant power in order to keep the stored data intact, while SSDs can retain data without power. So, if you’re looking for a storage solution that can store large amounts of data and provide fast access times, an SSD is definitely the way to go.

    If you need temporary storage for data that’s being actively used by your computer, then SDRAM might be a better option.

    Conclusion

    In short, comparing SDRAM to SSD is like comparing a racecar to a luxury sedan. While SDRAM may be the faster option designed for quick data processing, SSD offers a more reliable and long-lasting storage solution. So, it ultimately boils down to the specific needs and priorities of the user.

    Are you looking for speed, or do you value endurance and versatility? Either way, both SDRAM and SSD have their own unique strengths and can be essential components in building a high-performance system.”

    FAQs

    What is SDRAM?
    SDRAM (Synchronous Dynamic Random Access Memory) is a type of computer memory that operates at a synchronized pace with the CPU clock. It is typically used in desktops and servers as the main system memory.

    How does SDRAM compare to SSD?
    SDRAM and SSD (Solid State Drive) are two completely different types of computer memory. SDRAM is volatile, meaning it loses its data when power is lost, while SSD is non-volatile, meaning it retains its data even without power. SDRAM is used as a temporary data storage, while SSD is used as a permanent storage device.

    What are the advantages of SDRAM over other types of memory?
    SDRAM is faster and more efficient than earlier types of DRAM memory, such as EDO and FPM. It can transfer data at higher clock speeds and in sync with the system clock, minimizing delays and improving performance.

    Can SDRAM be upgraded in a computer?
    Yes, SDRAM can be upgraded in most desktop computers. However, the type of SDRAM used needs to be compatible with the motherboard and other system components. It’s important to check the system specifications before upgrading the memory.

    Are there any limitations to using SDRAM?
    Yes, there are some limitations to using SDRAM. It requires a stable power supply and can only operate within certain temperature ranges. SDRAM is also relatively expensive compared to other types of memory like DDR (Double Data Rate) SDRAM or DDR2 and DDR3.

  • Master the Art of Cloning M.2 SSD with Single Slot: Your Ultimate Guide

    If you’re looking to upgrade your computer’s storage capacity, you may be wondering how to clone your M.2 SSD when you only have one slot available. Thankfully, there is a solution, and it’s easier than you might think.

    But first, let’s go over why you might want to clone your SSD in the first place. Cloning your SSD allows you to transfer all of your data, including your operating system and programs, to a new and larger SSD without having to reinstall everything. This means you can upgrade to a larger SSD without having to start from scratch.

    And while cloning your SSD may seem daunting, it’s actually quite simple, even if you only have one slot available. So, how do you clone your M.2 SSD with only one slot? The answer is to use an external enclosure.

    An external enclosure is a case that allows you to connect your SSD to your computer via USB. You can use it to clone your existing SSD to a new one without having to take apart your computer. Once you have your external enclosure, you’ll need to clone your SSD using cloning software.

    There are many different options available, both free and paid. Some popular options include Samsung Data Migration, Acronis TrueImage, and EaseUS Partition Master. Once you’ve cloned your SSD, you can install your new and larger SSD in your computer and start using it right away.

    And, because you cloned your old SSD, you won’t have to worry about reinstalling your programs or setting up your operating system all over again. In conclusion, cloning your M.2 SSD with only one slot is not as difficult as it may seem.

    Choose the Right Cloning Software

    If you’ve found yourself in the tricky situation of having an M.2 SSD with only one slot, don’t worry – there’s still a way to clone it! The first step is to choose the right cloning software. Look for a program that supports M.

    2 SSDs and can handle the cloning process from start to finish. Some popular options include EaseUS Todo Backup, Acronis True Image, and Clonezilla. Once you’ve chosen your software, make sure to read the instructions carefully and follow them closely.

    Depending on the software you’ve chosen, you may need to create a bootable USB or CD, connect an external hard drive, or adjust some settings to ensure a successful clone. Keep in mind that the cloning process may take some time, so be patient and don’t interrupt it once it’s started. With the right software and a bit of patience, you can easily clone your M.

    2 SSD even if you only have one slot.

    Research and Compare Options

    When it comes to choosing the right cloning software, it’s essential to conduct thorough research and compare your options. There are numerous software providers in the market, and each has its unique features and benefits. The first step is to determine your cloning needs, such as the source and destination disks, file formats, and compatibility with your operating system.

    After that, you can research the top software providers and read reviews from verified customers. You may also want to consider other factors, such as customer support, pricing, and ease of use. In summary, choosing the right cloning software requires careful consideration to ensure compatibility and effectiveness.

    how to clone m.2 ssd with only one slot

    Pick a User-Friendly Program

    When it comes to cloning software, it is important to choose a user-friendly program that can effectively address your specific cloning needs. There are several options available, but not all software are created equal. It is important to evaluate the features and capabilities of each program before making your choice.

    By choosing a program that is easy to use and navigate, you can save time and ensure a successful cloning process. One of the most important factors to consider is compatibility with your computer operating system. Additionally, look for a program that offers a simple and intuitive interface, as well as clear instructions and support resources.

    Overall, selecting the right cloning software can make a big difference in your ability to effectively clone your hard drive or other storage devices.

    Create a System Image Backup

    Are you looking for a way to clone your M.2 SSD, but only have one slot available? Don’t worry, there’s a simple solution – create a system image backup! This process involves creating a copy of your entire drive, including the operating system and all data, onto an external storage device. Once the backup is created, you can then restore it onto the new SSD.

    This method works for both Windows and Mac operating systems. To create a system image backup on Windows, go to the Control Panel and select Backup and Restore. From there, select Create a system image and follow the prompts to choose your external storage device and begin the backup.

    On a Mac, you can use the built-in utility called Disk Utility to create an image of your drive. Simply select your drive, click on the File menu, and choose New Image from “Name of Drive”. Then you can select your backup location and begin the process.

    Once your backup is complete, you’re ready to switch out your SSD and restore the backup onto the new drive. By following these simple steps, you can easily clone your M.2 SSD with only one slot available.

    Connect an External Drive

    If you’re looking to create a backup of your system, using an external drive is a convenient and reliable option. By connecting an external drive, you can easily create a system image backup of your entire system, including operating system, installed software, settings, and personal files. This backup can be used to restore your system to its previous state in case of any unexpected data loss, system failure, or malware attack.

    The process of creating a system image backup is straightforward. Firstly, connect your external drive to your system and open the backup and restore option from the Control Panel. Then, select the “Create a system image” option and choose the location where you want to save the backup.

    The backup process may take some time depending on the size of your system, but once it’s done, you can rest assured knowing that your system is backed up and secure. Overall, using an external drive to create a system image backup is an easy and effective way to protect your system and data.

    Use Windows Built-In Functionality

    Creating a system image backup is an essential step for ensuring the safety of your Windows computer. Fortunately, Windows has a built-in functionality that allows you to easily create a system image backup. This backup will contain everything on your computer, including the operating system, installed programs, settings, and files.

    To create a system image backup, open the Control Panel and select the “Backup and Restore” option. Then, choose “Create a system image” and select the location where you want to save the backup. It’s important to store the backup on an external hard drive or USB drive, rather than on your computer’s internal hard drive.

    This way, if your computer crashes, you’ll be able to restore everything from the backup. By regularly creating system image backups, you can protect your important documents and data from loss due to unforeseen circumstances.

    Select the Image Location

    When it comes to creating a system image backup, one important step is selecting the image location. This means choosing where to save the backup of your entire system, including all the settings, files, and programs. The best location will depend on your needs and available options.

    For example, if you have an external hard drive or USB stick with enough free space, you can use it to store the image. Alternatively, you might want to upload the backup to a cloud storage service, such as Google Drive or Dropbox. One important thing to keep in mind is that the image location should be secure and stable, meaning that it won’t get accidentally deleted or corrupted.

    With proper image location selection, you can feel confident that your important data is protected and easily recoverable in case of any issues or disasters. So take the time to choose the best option for your needs and rest easy knowing your data is safe and secure.

    Copy System Image to New M.2 SSD

    If you only have one slot for your M.2 SSD, cloning it to a new drive can seem like a daunting task. However, it’s possible to copy your system image to a new M.

    2 SSD with only one slot by using cloning software. First, you’ll need to select a cloning program that supports disk-to-disk cloning. Once you have the software, install the new M.

    2 SSD into a USB enclosure or adapter and connect it to your computer. Then, run the cloning program and select your original M.2 SSD as the source drive and the new one as the destination.

    Follow the prompts to complete the cloning process, which may take some time depending on the size of your system image and the speed of your drives. Once the cloning is finished, shut down your computer and replace your old M.2 SSD with the cloned one.

    With a bit of patience and the right tools, you can easily copy your system image to a new M.2 SSD, even with only one slot available.

    Connect New SSD using an Enclosure

    If you’re looking to upgrade your computer’s storage capacity, one way to do this is by adding a new M.2 SSD. However, transferring your operating system and files to a new SSD can be a daunting task if you’re not familiar with the process.

    One option is to connect your new SSD to your computer using an enclosure, which creates an external connection between your computer and the drive. Once connected, you can copy your system image to the new drive, which will transfer all of your files and operating system settings. This process can take some time, but it’s a great way to ensure that your new drive has everything you need to make a seamless transition.

    By following the steps and using the right tools, you can easily upgrade your computer’s storage without losing any important data or settings.

    Follow the Cloning Software Instructions

    If you’re upgrading to a new M.2 SSD, it’s important to clone your system image to the new drive, so you don’t lose any data and can seamlessly transition to the new drive without having to reinstall the operating system. The first step is to follow the cloning software instructions carefully, as each software can have slight differences in the process.

    Make sure to select the correct source and destination drives, as well as any necessary options like copying boot sector or alignment settings. It’s also recommended to close any open programs and disable antivirus software while running the cloning process to avoid any interference. Once the cloning is complete, you should be able to verify that all files and programs have been successfully transferred to the new M.

    2 SSD. With this, you can enjoy faster boot times, quicker application launches, and overall improved performance from your upgraded system. Remember to keep your old SSD or create a backup of it in case you need to access any old files or data in the future.

    Verify Successful Cloning Process

    After successfully cloning your system image to a new M.2 SSD, it’s essential to verify the process to ensure everything went smoothly and your new SSD functions correctly. One of the easiest ways to validate this is by restarting your computer and booting it from the new SSD.

    If your system starts up without any issues, you can be confident that the cloning process was successful. You can also verify that all of your files and applications have been copied to the new SSD by checking the drive’s storage capacity. Additionally, you can run a benchmark tool to compare the performance of the new SSD with the older one.

    This will help you to notice any differences in the read and write speed, and if it’s satisfactory, you can continue using your new SSD with peace of mind. Remember to backup your files and create a system restore point when you complete this process.

    Install Cloned SSD and Boot from It

    If you only have one slot for an M.2 SSD, you can still clone your existing drive and switch to a new one. First, you’ll need to connect an external dock or adapter to your computer for the new SSD.

    After that, download cloning software like AOMEI Backupper or Acronis True Image, and use it to create a bootable drive for the new SSD. Once that’s done, install the new SSD in the dock or adapter and start up your computer. Press the key to access the boot menu, and choose the new SSD as the boot device.

    From there, the computer should start up from the new SSD just like it did with the old one. Don’t forget to transfer any important files or programs from the old SSD to the new one before removing the old one for good. With these simple steps, you can easily clone your M.

    2 SSD and boot from it without any hassle, even with only one slot available.

    Swap out M.2 SSDs on Your Device

    If you’re looking to upgrade the storage on your device, swapping out M.2 SSDs is a great option to consider. By installing a cloned SSD and booting from it, you can quickly and easily transfer all your data from your old drive without losing any important files or data.

    Simply remove the old SSD, install the new one, and use a cloning software to transfer all your data over. Once you’ve cloned your old drive onto the new SSD, you can boot from it and start using your device right away. This process is straightforward and can significantly increase your device’s performance, making it feel like new again.

    With M.2 SSDs, you can look forward to faster boot times, shorter load times and improved overall system performance. So, if you’re looking for an upgrade, swapping out your old SSD for a new cloned M.

    2 SSD is definitely worth considering!

    Power on and Boot Device

    If you’re upgrading your computer’s hard drive or adding a new one, cloning the existing OS and files onto the new drive is a smart way to get up and running quickly. Once you’ve completed the cloning process, it’s time to install the new SSD and boot your computer from it. First, power off your computer and remove the old hard drive.

    Next, connect the new SSD to your computer and power it on. You should see a prompt to press a key to enter the BIOS or boot menu. Press the key indicated and select the new SSD as your boot device.

    Once you’ve saved your changes and exited the BIOS, your computer should boot up from the new drive. It’s a straightforward process, but if you’re new to computer upgrades, take your time and follow the instructions carefully. With a little patience, you’ll be enjoying faster boot and load times on your newly upgraded computer in no time.

    Confirm Everything is Working Properly

    Once you’ve successfully cloned your SSD, it’s time to install it and ensure everything is working properly. The first step is to shut down your computer and remove the old SSD. Next, install the cloned SSD, making sure it is properly connected.

    Once you’ve done that, turn on your computer and access the BIOS or UEFI firmware. Make sure that the computer recognizes the new SSD and that it is set as the primary boot device. Once the system has booted from the new SSD, you’ll want to test it out and make sure everything is running smoothly.

    Check to see if all your files are accessible, launch a few applications and test for any issues or errors. If everything looks good, you’re all set with your new SSD and can enjoy the improved speed and performance it provides.

    Conclusion

    So, there you have it folks – the ultimate guide on how to clone your m.2 SSD with just one slot. No need to panic or worry about not having enough slots on your motherboard.

    With the right tools and some careful planning, you too can successfully duplicate your precious data onto a new SSD. It’s like creating a mini-me of your current drive, but without the expensive equipment or morally questionable experiments. Just be sure to follow each step carefully, and always remember to back up your files beforehand, because let’s face it, clones can be just as unpredictable as the real thing.

    FAQs

    Can I clone my M.2 SSD with only one slot?
    Yes, you can use an external M.2 SSD enclosure to clone your existing SSD to a new SSD.

    Is it possible to clone M.2 SSD without an external enclosure?
    Yes, you can use a USB adapter to connect the target SSD to your computer and use a cloning software to clone your existing SSD to a new SSD.

    What type of software can I use to clone my M.2 SSD?
    There are many cloning software available online such as Macrium Reflect, Acronis True Image, and MiniTool Partition Wizard.

    How do I check if my M.2 SSD is compatible with the cloning software?
    Check the manufacturer’s website for the specific model and its compatibility with the cloning software. You can also check the cloning software’s website for a list of compatible hardware.

  • Maximize Your Storage Space: A Comprehensive Guide on How to Install a 2nd M.2 SSD

    Have you run out of storage space on your computer and are looking for a solution? Well, installing a second M.2 SSD could be your answer! Not only does it provide additional storage, but it also offers faster data transfer speeds and improved performance. Think of it like adding an extra room to your house – you now have more space to store your belongings and move around freely without clutter.

    The same goes for your computer – with an additional SSD, you will have more space to store your files, photos, and videos without slowing down your system’s overall performance. In this blog post, we will guide you through the process of installing a second M.2 SSD, step by step.

    Don’t worry, even if you’re not tech-savvy, we will explain everything in a simple and easy-to-understand way. So, let’s get started and upgrade your computer’s storage capacity!

    Check Your Motherboard Compatibility

    If you’re thinking of installing a second M.2 SSD in your computer, it’s essential to check your motherboard compatibility first. Different motherboards support different types of M.

    2 SSDs, and it’s crucial to ensure that the slot on your motherboard is compatible with the drive you plan on installing. To find out, check the specifications of your motherboard to see if it has an available M.2 slot and what type it supports.

    You can also check the documentation that came with your motherboard or look it up online. Installing the wrong type of M.2 SSD can cause damage to your system or result in it not functioning correctly.

    By taking the time to check compatibility, you can avoid these issues and ensure that your new SSD works seamlessly with your existing system.

    Check your Motherboard Manual

    Motherboard Compatibility When it comes to building or upgrading your PC, compatibility is crucial. One of the most important things to consider is whether your motherboard is compatible with the parts you want to use. Fortunately, the information you need can be found in your motherboard manual.

    It may seem like a daunting task, but taking the time to read through your manual can save you a lot of headache down the road. Most manuals will have a section dedicated to listing compatible components, such as CPUs, RAM, and GPUs. You’ll want to make sure that the components you’ve chosen aren’t just compatible with your motherboard, but also with each other.

    This can often be a more complicated task, but it’s worth taking the time to do it right. In addition to checking for compatibility, your motherboard manual will also have instructions on how to install and configure your hardware. This can be especially helpful if you’re new to building PCs or if you’re using newer technologies that you may not be familiar with.

    Make sure to take the time to read through the manual thoroughly and to follow any instructions carefully. Skipping steps or assuming that you know what you’re doing can lead to costly mistakes. Overall, checking your motherboard manual for compatibility is an essential step in building or upgrading a PC.

    It may not be the most exciting part of the process, but it’s important to get it right. Doing so will ensure that your PC runs smoothly and that you get the performance you’re looking for. So, grab your manual and get to reading!

    how to install 2nd m.2 ssd

    Determine Type of M.2 Slot

    When it comes to upgrading your PC with an M.2 SSD, the first step is to determine whether your motherboard is compatible. To do this, you need to check the type of M.

    2 slot your motherboard has. There are two types of M.2 slots: SATA and NVMe.

    SATA M.2 slots support only SATA-based SSDs, while NVMe M.2 slots support NVMe-based SSDs, which are faster and more powerful.

    To determine the type of M.2 slot on your motherboard, check your motherboard’s manual or visit the manufacturer’s website. You can also physically inspect the M.

    2 slot on your motherboard to see if it has a single notch (SATA) or two notches (NVMe). Keep in mind that even if your motherboard has an M.2 slot, it may not be compatible with all M.

    2 SSDs. It’s essential to ensure compatibility and avoid any potential issues before making any purchases. By following these simple steps, you can determine whether your motherboard is compatible and choose the right M.

    Prepare Your Workstation

    If you’re looking to install a 2nd M.2 SSD on your workstation, there are a few things you’ll need to do to prepare. First and foremost, make sure your existing M.

    2 slot is not already occupied. If it is, you’ll need to remove the existing SSD before installing your new one. Next, check your motherboard manual to see if it supports multiple M.

    2 drives. If it does, identify the correct slot for the new SSD. Some motherboards may require you to enable the M.

    2 slot in the BIOS before installation. Additionally, make sure you have the necessary tools on hand, such as a screwdriver. Installing a 2nd M.

    2 SSD can significantly improve your workstation’s performance, but it’s important to do it correctly to avoid damaging your hardware.

    Turn off your Computer and Unplug Cords

    “workstation setup” Before you start working on your computer, it’s crucial to prepare your workstation properly. One of the essential steps is turning off your computer and unplugging cords. It’s important to avoid electricity from running through the unit while you’re setting it up.

    Unplugging cords ensures that you’re safe from any electrical mishaps that could happen during the process. Another reason why you should turn off your computer and unplug cords is to clean it thoroughly. When the unit is shut down and unplugged, you can easily remove dust and debris from the keyboard, mouse, and other parts of your workstation without damaging any circuits.

    Cleaning your workstation helps increase its lifespan, reduces the chances of getting sick from accumulated bacteria, and ultimately helps you work more efficiently. In summary, preparing your workstation by turning off your computer and unplugging cords is an essential step before starting work. It ensures your safety and makes it easier to clean your workstation.

    So, whether you’re working from home or in an office, always remember to prepare your workstation appropriately before starting any work.

    Wear ESD Protection and Antistatic Gloves

    When working with sensitive electronics or components, it’s essential to take precautions and prevent Electrostatic Discharge (ESD). One of the simplest ways to minimize the risk of ESD is to wear ESD protection. ESD protection is readily available in various forms, including mats, wristbands, and gloves.

    Antistatic gloves are an excellent solution as they offer reliable protection for both the user and the equipment. These gloves are made with a conductive carbon fiber that helps to discharge any static build-up on the user’s hands, minimizing the risk of ESD. It’s essential to wear ESD protection, especially when working with electronics, as internal damage can occur with even the slightest spark.

    Having a balanced workstation environment with ESD protection, especially antistatic gloves, will safeguard both the user and the components being operated on. By doing so, you can achieve a higher level of efficiency, productivity, and reduce the risk of having to replace costly electronics due to damage from ESD.

    Prepare the M.2 Screw

    Before you start installing your M.2 SSD, it’s important to prepare your workstation properly. The first step is to ensure that you have all the necessary components, including the M.

    2 screw. This may seem like a small detail, but it’s essential for properly securing your SSD in place. If your M.

    2 SSD didn’t come with a screw, you can typically find them online or at a local hardware store. Once you have your screw, it’s a good idea to gather any other tools you may need, such as a screwdriver. It’s also important to work in a well-lit and organized environment, as losing small components during installation can be frustrating and time-consuming.

    By taking a few minutes to prepare your workstation, you can ensure a smooth and successful M.2 SSD installation process.

    Install the Second M.2 SSD

    If you’re in need of additional storage space on your computer or laptop, installing a second M.2 SSD can be an easy and effective solution. To begin, make sure your motherboard supports multiple M.

    2 slots and check the manufacturer’s instructions on how to install the drive. First, locate the second M.2 slot on your motherboard and remove any protective covers or screws.

    Gently insert the M.2 SSD at an angle and press down until it clicks into place. Once it’s secure, replace any screws or covers you removed earlier.

    Depending on your operating system, you may need to format and partition the new drive before use. This can usually be done through your computer’s disk management tool. With your new M.

    2 SSD installed and ready to go, you’ll have plenty of extra storage space for all your files, programs, and media.

    Insert the M.2 SSD into the Slot

    Now that you have installed the first M.2 SSD into your PC, it’s time to install the second one. First, find the second M.

    2 slot on your motherboard and remove the screw that holds down the cover. Be careful not to lose the screw as you will need it later to secure the SSD in place. Next, gently insert the SSD into the slot at an angle, making sure that the notched end of the SSD lines up with the key in the slot.

    Once it is in place, push down until it clicks into position. Finally, replace the screw that you removed earlier to secure the cover and the SSD. Congratulations! You have successfully installed two M.

    2 SSDs into your PC, giving you additional storage space and faster performance. Make sure to check your motherboard’s manual to ensure that you’re using the correct M.2 slots and to see the maximum speeds and capabilities of your M.

    2 SSD.

    Fasten the M.2 SSD with the Screw

    When it comes to installing a second M.2 SSD, one of the most important steps is fastening the SSD with a screw. This ensures that the SSD is securely in place and won’t move around inside the computer case.

    To do this, you’ll need to locate the screw hole on the motherboard and align the SSD in the proper slot. Once you’ve got it in position, gently screw in the screw to hold it securely in place. It’s important to be careful not to overtighten the screw, as this could damage the motherboard or the SSD itself.

    With the second M.2 SSD installed properly, you’ll be able to enjoy faster data transfer speeds and improved overall performance. So if you’re looking to upgrade your system, adding a second M.

    2 SSD can be a great way to get more speed and storage for your computer.

    Close Your Computer and Power It On

    Adding a 2nd M.2 SSD to your computer is a fantastic way to boost your storage capacity and enhance your system’s overall performance. But, before you begin, make sure that your computer is turned off and disconnected from all power sources.

    Next, locate the M.2 SSD slot on your motherboard and remove the screw that holds the cover plate in place. Carefully slide your M.

    2 SSD into the slot and secure it with the provided screw. Replace the cover plate, screw it back in, and close up your computer. Once you have confirmed that everything is in place and secured, plug in your computer and power it on.

    Once your system is up and running, you can format and partition your new drive, and you’re ready to go! By following these simple steps, you can easily install a 2nd M.2 SSD and enjoy the benefits of increased storage and faster performance.

    Conclusion

    So there you have it, folks: installing a second M.2 SSD is like adding an extra slice of cheese to your hamburger. It requires some careful handling and a bit of maneuvering, but with the right tools and a little bit of patience, you’ll be enjoying enhanced storage and speed in no time.

    And don’t forget to pat yourself on the back for taking the initiative to upgrade your system. You’re officially a tech-savvy superstar!”

    FAQs

    What type of M.2 SSD is compatible with my computer for installation?
    You should check your computer’s manual or specifications to see what type of M.2 SSD it supports. Some common types are NVMe and SATA.

    Is it possible to install a second M.2 SSD if my computer only has one slot?
    If your computer only has one M.2 slot, you would need to check if you have any other available storage slots, such as an extra 2.5-inch drive bay. Alternatively, you can use an external M.2 enclosure.

    What tools do I need to install a second M.2 SSD?
    You will likely need a screwdriver and possibly a spudger to gently remove any existing components and access the M.2 slot. Specific tools needed may vary depending on your computer model.

    How do I clone my existing drive to the new M.2 SSD after installation?
    You can use third-party software like Acronis True Image or EaseUS Todo Backup to clone your existing drive to the new M.2 SSD. It’s important to follow the software instructions carefully to avoid any data loss.

  • Unlocking the Power of Your SSD: A Step-by-Step Guide to Formatting to NTFS

    Have you ever bought a new SSD and wondered how to format it to NTFS? It can be confusing for those who are not familiar with computer terminologies and language. However, worry not, because it is not as difficult as it may seem. Formatting an SSD to NTFS can improve its performance and optimize the storage capacity.

    NTFS stands for New Technology File System and is the default file system for Windows operating systems. In simple terms, it is the language the computer uses to communicate with the SSD. In this blog, we will walk you through how to format your SSD to NTFS step-by-step.

    So, grab a cup of coffee and let’s get started!

    Step 1: Connect the SSD

    If you’re wondering how to format an SSD to NTFS, the first step is to connect the SSD to your computer. This can be done by either connecting it through a USB port or installing it into the computer’s internal drive bay. Once it’s properly connected, you can begin the process of formatting it to NTFS using your computer’s built-in formatting tool or a third-party formatting software.

    Before proceeding with the formatting process, make sure to back up any important data on the SSD to avoid losing it during the formatting process. Also, be aware that formatting the SSD to NTFS will erase all the data on it, so it’s important to create a backup beforehand. Overall, formatting an SSD to NTFS is a relatively straightforward process, and with a little bit of patience and attention to detail, you’ll be able to successfully complete the process in no time.

    Insert the SSD into the appropriate port on your computer

    If you’ve decided to upgrade your computer with a new SSD, the first step is to connect it to your computer’s motherboard. Most modern computer motherboards have SATA ports designed for this purpose. After opening up your computer and identifying the available SATA ports, carefully insert the SSD into an empty one.

    Be sure to securely attach any screws or mounting brackets that may be required to keep the SSD firmly in place. Once the new SSD is securely installed, connect one end of the SATA cable to the SSD and the other end to the motherboard port. Make sure the cable is securely connected to both the SSD and the motherboard.

    With the SSD connected and safely installed, you can now move on to the next step of setting up your new hard drive. By following these simple steps, you can easily connect your new SSD and get the most out of your computer’s performance.

    how do i format a ssd to ntfs

    Step 2: Open Disk Management

    If you want to format your SSD to NTFS, the first thing you need to do is open Disk Management. This can be done by pressing the Windows key + X on your keyboard and then clicking on “Disk Management” in the menu that pops up. Once you’re in Disk Management, you should be able to see your SSD listed alongside any other storage devices you have connected to your computer.

    Right-click on the SSD and select “Format” from the drop-down menu. This will bring up a new window where you can choose the file system you want to format the drive to (in this case, NTFS). You can also choose a volume label and allocation unit size if you want, although these are optional.

    Once you’ve made your selections, click on “OK” to start the formatting process. It may take a few minutes, depending on the size of the SSD, but once it’s done, your drive will be formatted to NTFS and ready to use.

    Type ‘Disk Management’ in the Windows search box and open the program

    If you need to manage your computer’s hard drives on Windows, the Disk Management tool is where you’ll want to go. To open it, simply type ‘Disk Management’ into the search box on your Windows taskbar, and open the program when it appears. This tool will give you a detailed overview of how your disks are partitioned and what data is stored on each one.

    You’ll also be able to see how much space is available on each partition and whether any errors or warnings exist on your disks. Disk Management is a powerful tool that can help you keep your computer organized and running smoothly, so it’s important to know how to use it properly. With the straightforward instructions above, you’ll be able to open Disk Management with ease and start managing your hard drives like a pro.

    Step 3: Select the SSD

    Once you have verified that your SSD is connected and detected by the computer, the next step is to select the SSD and format it to the NTFS file system. To do this, open the Disk Management tool by right-clicking the Start menu and selecting Disk Management. In the list of disks, you should see your SSD identified by its capacity.

    Right-click on it and select the option to format it. When prompted, ensure that you select the NTFS file system and allocate a drive letter to the SSD. You can also choose to enable quick format option if you want to save time.

    Once you’ve completed the format process, your SSD will be ready to use and you can start transferring files onto it. Remember to safely eject the SSD before disconnecting it to avoid data loss or corruption. With these simple steps, you can easily format your SSD to the NTFS file system and start enjoying its benefits such as improved speed and reliability.

    Locate the SSD in the list of available disks and select it

    When ready to install a new SSD into your computer, the third step is to locate and select the SSD in the list of available disks. This can be done by accessing the Disk Management tool in Windows and looking for the disk labeled as “Unallocated.” Once you find this disk, right-click on it and select “New Simple Volume.

    ” You’ll be guided through a few prompts until you come to the option to select the disk and assign a drive letter. This is where you want to make sure you choose the correct disk. Look for the disk size and manufacturer information to confirm you have the right one.

    Once you’ve confirmed it’s the correct SSD, select it and assign a drive letter that makes sense to you. This is the final step in preparing your new SSD for use in your computer!

    Step 4: Format the SSD

    If you want to use a new SSD, you have to format it first before you can use it. Formatting an SSD is probably one of the most important steps to perform to ensure it is set up properly. The most popular file system for SSDs is NTFS, and to format it with this file system, you can follow a few simple steps.

    First, ensure that the SSD is connected to your computer. Second, press the “Windows Key” and “X” button simultaneously to open the Power User Menu. Third, click on “Disk Management.

    ” Fourth, right-click on your SSD and select “Format.” In the format window, select “NTFS” from the file system dropdown, choose default under allocation unit size and don’t enable compression. Click “OK” and then “OK” again to begin the format process.

    It typically takes a few minutes, and once finished, your SSD will be ready to use. It’s that easy to format an SSD with NTFS, and if you follow these simple steps, you’ll be up and running in no time at all.

    Right-click the SSD and select ‘Format’ from the dropdown menu

    Once you’ve installed your new SSD, it’s time to format it. This step is crucial because it allows your computer to recognize the drive and begin using it. To format your SSD, right-click on the drive and select ‘Format’ from the dropdown menu.

    You’ll then be prompted to choose a file system, such as NTFS or FAT3 NTFS is generally the better option for most users as it allows for larger file sizes and better security features. You’ll also want to choose the ‘Quick Format’ option, which will speed up the process significantly.

    Keep in mind that formatting your SSD will erase all of the data on the drive, so be sure to back up any important files before proceeding. Once the format is complete, your SSD will be ready to use and you can start transferring files and enjoying faster speeds.

    Step 5: Choose NTFS

    Choosing the right file system is crucial when formatting a SSD. NTFS, or New Technology File System, is the preferred file system for Windows operating systems. It can handle larger file sizes and provide better security features than other file systems.

    To format your SSD to NTFS, simply select NTFS as the file system type during the formatting process. It’s important to note that switching from one file system to another will erase all data on the SSD, so be sure to backup any important files before formatting. Once you have formatted your SSD to NTFS, you can enjoy faster data access speeds and increased security for your important files.

    So, if you’re wondering, “how do I format a SSD to NTFS?” it’s as simple as selecting the right file system during the formatting process.

    Select ‘NTFS’ as the file system type and allocate the desired space

    When allocating space for your new drive, it’s important to choose the right file system type. In Windows, the most commonly used file system type is NTFS, which stands for New Technology File System. NTFS provides better security features and supports larger file sizes than its predecessor, FAT3

    To choose NTFS, simply select it from the list of available file system types. Keep in mind that once you’ve made your choice, you won’t be able to switch to a different file system type without reformatting the drive. It’s also important to allocate the desired amount of space to the drive.

    If you allocate too little space, you may run out of room for your files. On the other hand, if you allocate too much space, you’re essentially wasting storage that could be used for something else. So be sure to choose a size that meets your needs without going overboard.

    With these tips in mind, you’ll be able to choose the right file system type and allocate the perfect amount of space for your new drive.

    Step 6: Format the SSD

    To format your SSD to the NTFS file system, you can follow these simple steps. First, connect your SSD to your computer and ensure that it is properly recognized by your system. Then, go to your computer’s “File Explorer” and right-click on your SSD’s icon.

    From the drop-down menu, select “Format” and a new window will open. In that window, you can choose NTFS as the file system and modify other settings, such as the allocation unit size. After that, you can click “Start” to initiate the formatting process.

    Keep in mind that formatting will erase all data on the SSD, so remember to backup any important files before proceeding with the format. By following these steps, you can easily format your SSD to NTFS, allowing for better compatibility with modern operating systems and improved performance.

    Click ‘OK’ and wait for the formatting process to complete

    After preparing your SSD and allocating the space, the next step is to format it. Click the ‘OK’ button after selecting your preferred file system. Windows offers two file systems- NTFS and exFAT.

    NTFS is recommended for most use cases as it is faster and more reliable, however, exFAT is ideal for portable storage devices that are frequently transferred between systems. Once you’ve selected your file system, click ‘Start’ and wait for the formatting process to be completed. It may take several minutes depending on the size of your SSD.

    It is important not to interrupt the formatting process to avoid corrupting your SSD’s file system. Formatting an SSD is essential as it prepares it for use by the operating system and allows it to store data in an organized manner. With a properly formatted SSD, your computer’s storage performance will be significantly improved.

    Now, go ahead and format those SSDs for a better computing experience!

    Conclusion

    In conclusion, formatting an SSD to NTFS is a process that requires a bit of technical knowledge, but with the right tools and a steady hand, anyone can do it. Just remember to backup your important data, and don’t be afraid to ask for help if you need it. And always remember, a well-formatted SSD is a happy SSD!”

    Following these steps will enable you to format your SSD to NTFS file system

    Now that you have created a partition on your SSD, it’s time to format it to the NTFS file system. NTFS is a modern file system that offers higher security, faster performance, and better data compression. To format your SSD, right-click on the partition you want to format and select the “Format” option from the drop-down menu.

    In the “File System” drop-down menu, select the “NTFS” option. You can also customize the name of the volume, allocation unit size, and enable compression if needed. We recommend leaving the allocation unit size to default, as it offers the best performance.

    Finally, click on the “Start” button to begin the formatting process. This may take several minutes depending on the size of your SSD. Once the process is completed, your SSD will be ready to use with the NTFS file system.

    Remember to back up any important data before formatting your SSD, as the process will erase all the data on the partition.

    FAQs

    FAQ 1: What is an SSD and why would I want to format it to NTFS? Answer: An SSD (solid state drive) is a type of storage device that uses flash memory instead of spinning disks to store data. Formatting an SSD to NTFS is a common way to prepare it for use as a primary drive in a Windows computer, as NTFS is the default file system used by Windows. FAQ 2: Can I format an SSD to NTFS using Windows’ built-in tools? Answer: Yes, Windows includes a built-in utility called Disk Management that you can use to format an SSD to NTFS. Simply open Disk Management, select the SSD, and choose the “Format” option to format it. FAQ 3: Do I need to do anything special to optimize an SSD formatted to NTFS? Answer: Yes, there are a few optimizations you can make to ensure your SSD is performing as well as possible. For example, you may want to disable certain Windows features like disk defragmentation and indexing, which can cause unnecessary wear and tear on your SSD. FAQ 4: How long does it take to format an SSD to NTFS? Answer: The time it takes to format an SSD to NTFS can vary depending on the size of the drive and the speed of your computer, but in general, it should only take a few minutes to complete the process. However, keep in mind that formatting will erase any data on the drive, so make sure to back up any important files before proceeding.